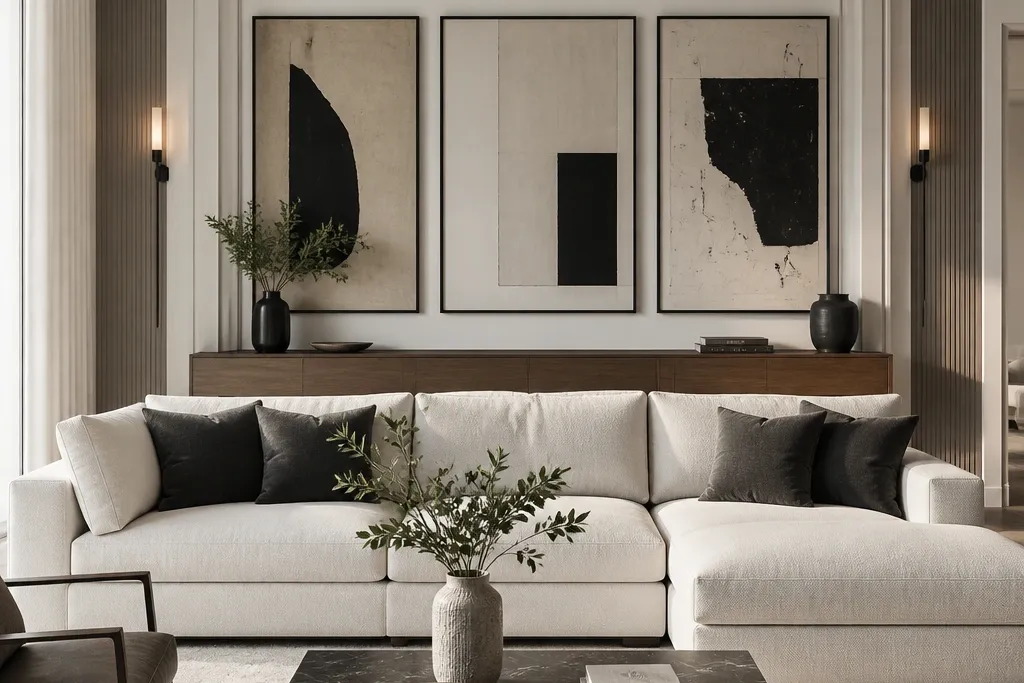

1. Warm White Fluted Panels with Brass Sconces
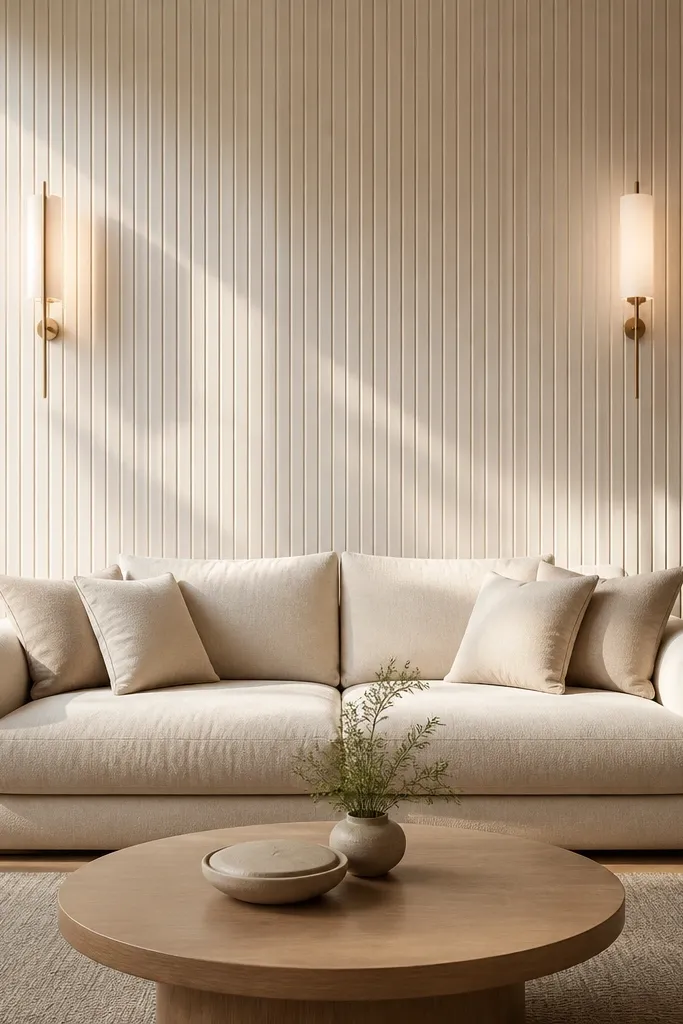
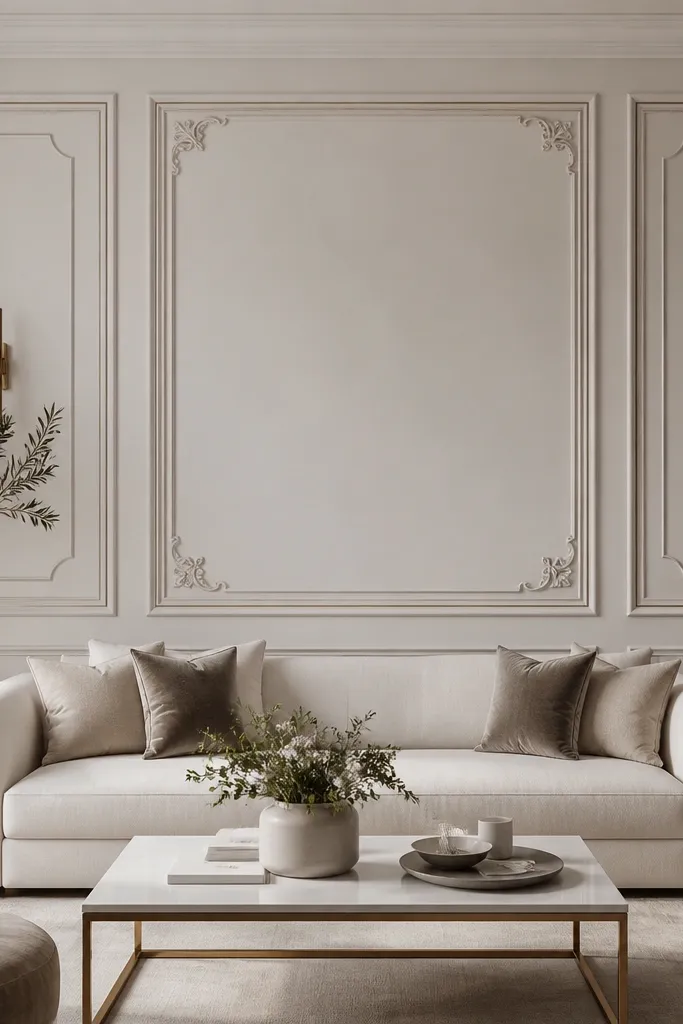
This look works because fluting gives you shadow lines, and shadow lines are what make a wall feel expensive even when the color stays simple. I’ve done this in rooms with off-white walls and it immediately makes the sofa look more tailored. Keep the panel finish in a warm white or creamy ivory, not bright optical white, so it flatters warm undertones in skin and wood furniture. The brass sconces add a small amount of “warm metal” that ties into coffee tables, picture frames, or lamp bases. It’s also forgiving if your wall has minor imperfections because the ridges visually break up unevenness.
Start by marking a center line on the wall and dry-fit the panel sections so the outer edges land about 6 to 10 inches beyond each sofa arm. Install flat backing boards first if your wall is bumpy, then attach fluted panel strips with construction adhesive plus small finish nails. Paint or seal the panels in a warm white matte so the ridges hold shadows. Mount sconces so their bottom edge sits roughly 64 to 68 inches from the floor, then place the framed art between them with the bottom of each frame about 10 to 12 inches above the sofa seat line. Finish by adding two matching lamps or accessories with brass accents so the metal doesn’t feel random.
Good to knowUse a dimmer with warm bulbs around 2700K; the ridges look dramatic at low light.
AvoidAvoid glossy paint on the fluted panels — it kills the shadow effect and makes the wall look plastic.
2. Walnut Slat Wall with Hidden Cable Groove
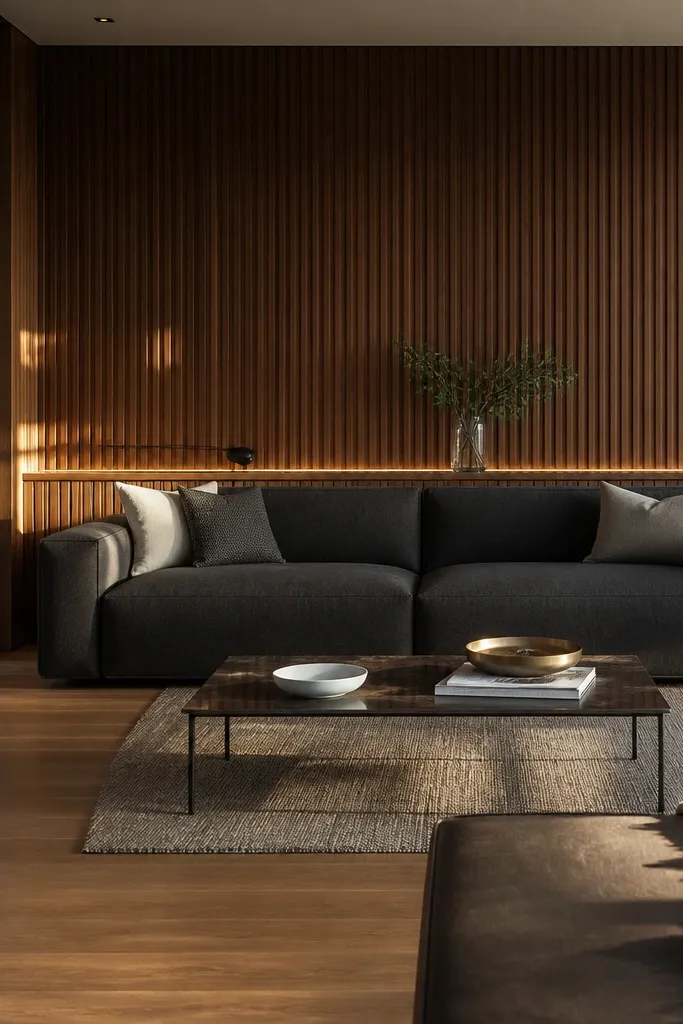
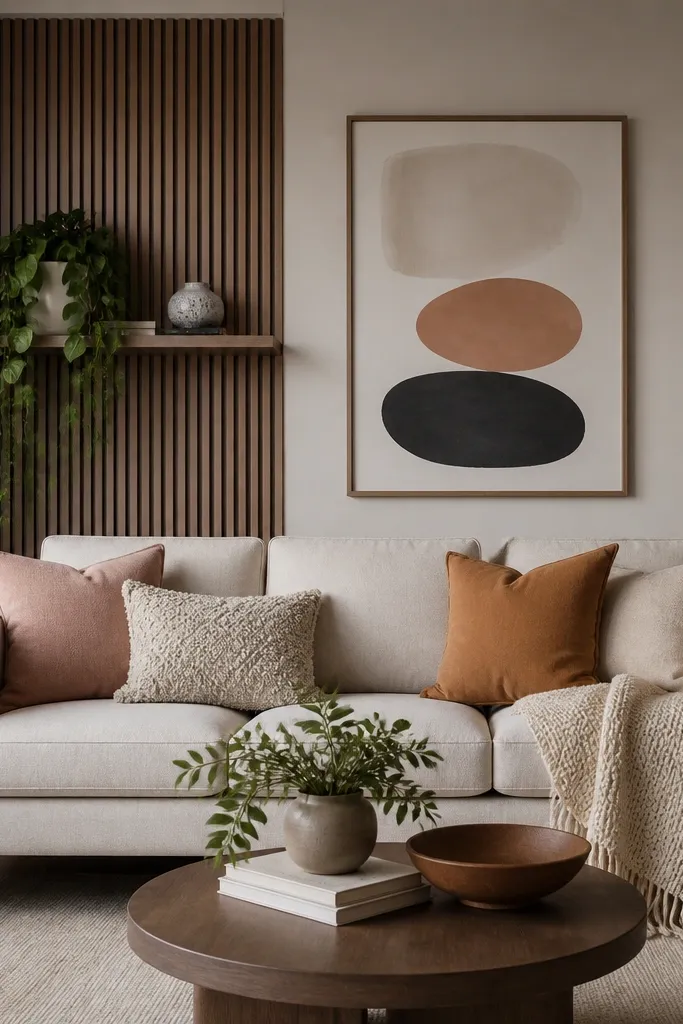
Walnut slats look modern luxury because they create a calm grid and add warmth without needing pattern overload. I like them when a room already has some wood pieces, because the back wall ties the whole space together. The slats also hide visual noise from cords, outlets, or patchy paint touch-ups. For people with cooler skin undertones, walnut can still work — choose a slightly browner walnut tone rather than very red. The grid behind the sofa gives structure to the eye, which is why your throw pillows look more intentional.
Start by choosing slat width and spacing that matches your wall size. For most living rooms, 1.5-inch slats with 0.5-inch gaps look balanced; measure the wall width and calculate how many full slats fit with a 6 to 10 inch margin beyond the sofa arms. Build a simple backing frame with 1x2 furring strips, then attach slats after you plan where your outlet or cable will run. Create a hidden cable groove by routing the cable inside the backing and leaving a small recessed channel near the bottom. Finish by staining the slats in a medium walnut and sealing with a matte clear. Mount the large art centered so its bottom edge sits about level with the sofa cushion top.
If your slats feel too “busy,” reduce gap size slightly; the wall reads cleaner from across the room.
Don’t skip a level check on the first slat — one crooked line shows up for years.
3. Oversized Linen Wall Panels with Nailhead Trim
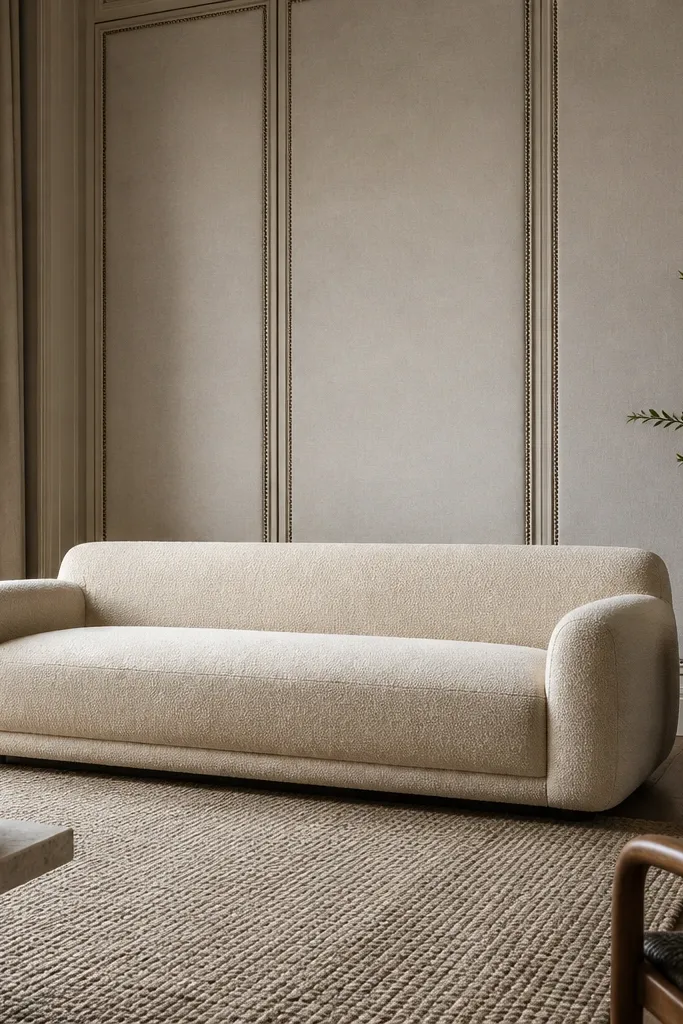
Upholstered panels are the fastest way to make a modern sofa look softer and more expensive, especially in rooms with hard floors or lots of glass. Linen in a light greige or oatmeal tone flatters both warm and neutral palettes, and it makes skin tones look less washed out under bright overheads. The nailhead trim gives you that tailored finish without going full “classic.” This is a great choice if you want a back wall that feels calm, not architectural. It also hides wall texture and minor dents, which saves time and money.
Start by buying or making panel frames that are slightly taller than your sofa back — aim for panels that end about 2 to 4 inches above the top of the sofa. Cover the frames in linen (or linen blend) and stretch tight so you don’t get wrinkles. Add nailhead trim around the outer perimeter only, not inside the panel, to keep the look modern. Mount the panels to the wall studs with French cleats or heavy-duty anchors, centering the main panel behind the sofa. Hang a mirror or art centered above, leaving about 8 to 12 inches between the top of the sofa back and the bottom of the mirror frame. Style with two larger pillows instead of four small ones so the upholstered wall stays the hero.
Good to knowChoose linen with a tight weave; it reads luxe and doesn’t show dust as quickly as looser weaves.
AvoidAvoid shiny satin fabric — it reflects light in a way that makes the whole wall look cheap.
4. 3D Plaster Look Panels in Cement Gray
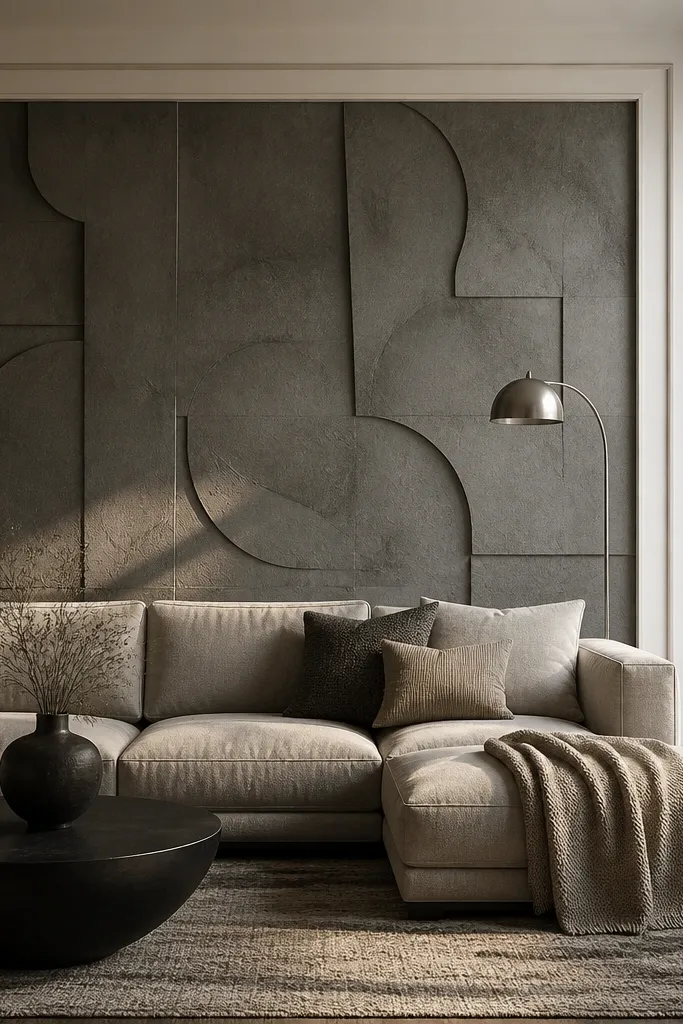
Plaster relief gives you depth without obvious pattern, which is exactly what modern luxury needs. Cement gray is a smart pick when you want a dramatic look but don’t want to commit to black. I’ve used this in rooms with white trim and it makes the trim look crisp instead of harsh. The matte finish also reduces glare from windows, so the wall stays classy in daylight and at night. If your sofa is light-colored, the gray adds contrast; if your sofa is dark, the relief still keeps things from feeling flat.
Start by selecting plaster-relief panels or a mold-ready plaster system, then test a small square on scrap drywall so you see the real tone in your lighting. Plan a centered grid that’s about 6 to 10 inches wider than the sofa arms. Install a smooth base coat first if you’re using plaster, then press or apply relief sections and let them cure fully. Paint in a cement gray matte and seal with a low-sheen clear if the product requires it. Mount art centered above the sofa, then add one console piece in a stone or ceramic finish that matches the gray undertone.
Good to knowUse a raking light from one side, like a floor lamp aimed at the wall, so the relief reads even in bright rooms.
AvoidSkip glossy sealers — they create hotspots and make the texture look plastic.
5. Black Framed Gallery with Silk-Blend Backdrop
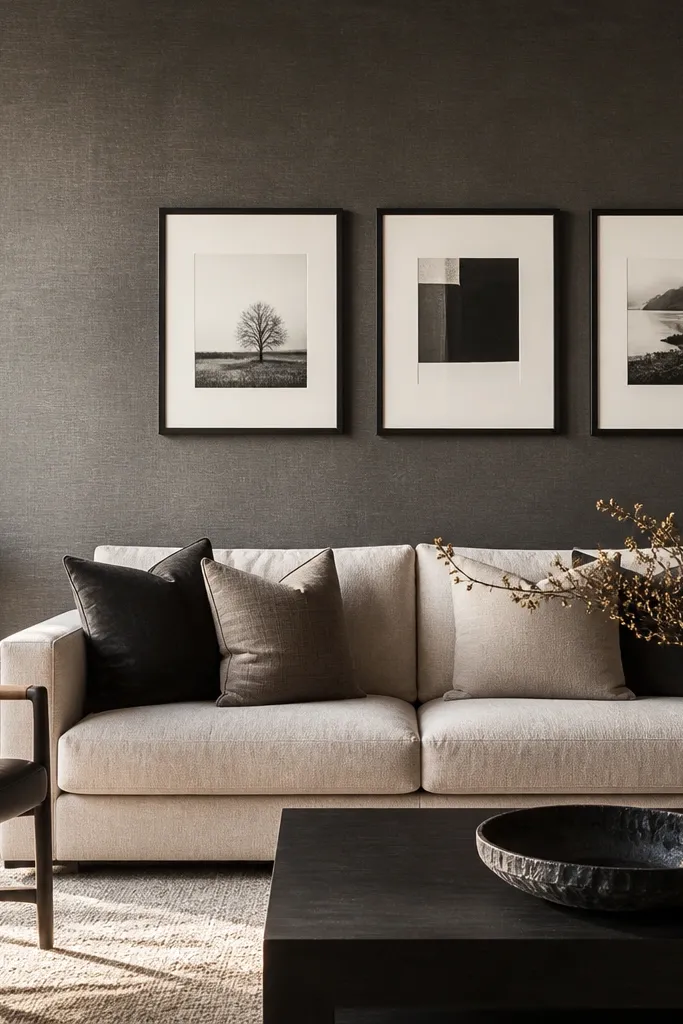
A dark backdrop plus crisp black frames is one of my favorite modern luxury tricks because it creates a “curated” look without clutter. Charcoal wallpaper with a silk-blend sheen adds light movement, which makes the wall feel high-end even when your art is simple. I’ve done this when people have a neutral sofa and want more drama — the dark wall makes the sofa look brighter and cleaner. Black frames also flatter cooler palettes like gray, white, and navy. Keep the art cohesive by using one color family or one type of print paper.
Start by choosing a wallpaper or paint finish in deep charcoal with subtle sheen, then test a sample panel so you see how it reflects at night. Paint or apply the backdrop on the entire wall behind the sofa, not just the center, so the edges don’t look patched. Mark a grid centered on the wall and plan a rectangle of frames about the width of your sofa plus 10 to 12 inches. Use black frames with matting in warm white for contrast. Hang the bottom of the lowest frame about 10 inches above the sofa seat line, then space frames so the gaps match across the grid. Finish with one large plant leaf or sculptural object on a console to echo the dark tone.
Good to knowUse frames with 1 to 2 inches of mat; thin mats look bargain-store beside a dark wall.
AvoidDon’t mix frame finishes like chrome and black — it breaks the luxury feel fast.
6. Oversized Marble Look Tile Rectangle
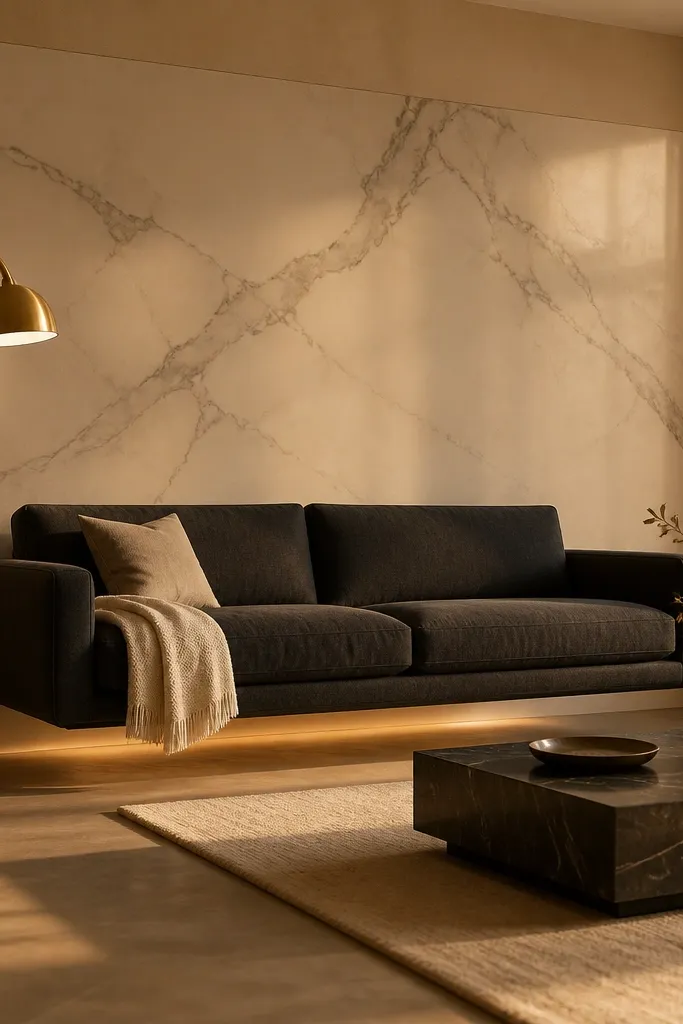
Tile is the most “real material” upgrade you can do behind a sofa, and the luxury comes from scale. A single large honed marble-look rectangle gives you the look of high-end stone without the upkeep of real marble. I like this when your room has warm lighting and a lot of fabric, because the tile adds a clean, grounded surface. It also flatters both light and dark sofas, since the veining gives movement but stays mostly neutral. The key is keeping the tile area centered and proportional so it reads like a design element, not a backsplash.
Start by deciding the tile rectangle size: aim for the rectangle to extend 6 to 10 inches beyond each sofa arm and roughly 2 to 4 inches above the sofa back height. Use a honed marble-look porcelain for easier maintenance. Dry-lay a few tiles on the floor and check the veining direction so it doesn’t look random when viewed from the couch. Install on a flat backer board or suitable substrate, using thinset and spacers for consistent grout lines. Choose grout in warm light gray and keep joints clean. Paint the surrounding wall warm white, then mount a single piece of art or a mirror centered above the tile rectangle.
Stand where you sit and check tile veining alignment — adjust before the mortar sets.
Avoid glossy tile behind a sofa — reflections make the wall look like a showroom fixture.
7. Floating Media Shelf + Hidden Back Lighting
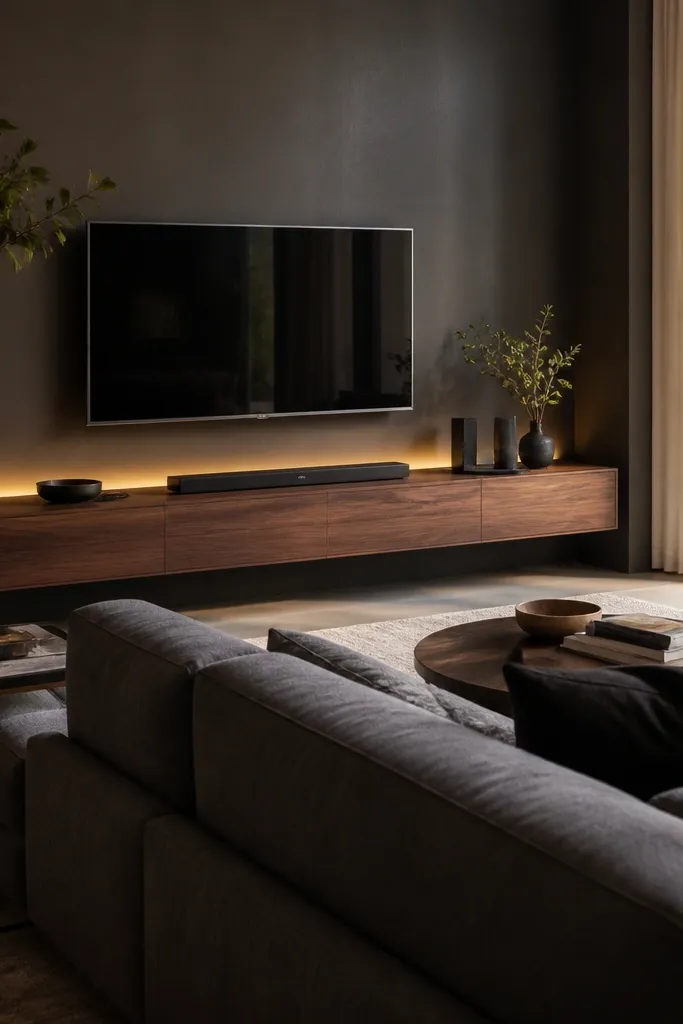
If your living room has a TV or you want practical storage, this back wall plan looks modern luxury because it’s built around function. The warm LED glow behind the shelf makes the sofa area feel layered without adding heavy decor. I’ve used this with both light and dark sofas; the trick is using warm white paint so the LED glow looks intentional, not blue. Oak or oak-look shelf finishes add warmth and keep the look from feeling too techy. The shelf also gives you a place to repeat materials like black frames, ceramic vases, or linen books.
Start by marking shelf height so it sits just above the sofa back — leave about 2 to 4 inches between the top of the sofa and the shelf bottom. Install a level ledger board or use a stud finder to mount heavy brackets into studs. Use a shelf depth around 8 to 10 inches for a modern look that doesn’t crowd the sofa. Add an LED strip inside a recessed channel under the shelf lip and set it to a warm 2700K. Mount the LED driver in a reachable spot. Style the shelf with decor that matches your room palette: two tall pieces on the ends and three smaller items centered, spaced with 1 to 2 inches of breathing room.
Use a dimmer switch so the glow matches the time of day, not just the install setting.
Don’t place decor too close to the LED — it creates sharp shadows and looks messy.
8. Tall Vertical Wood Slats with Off-Center Mirror
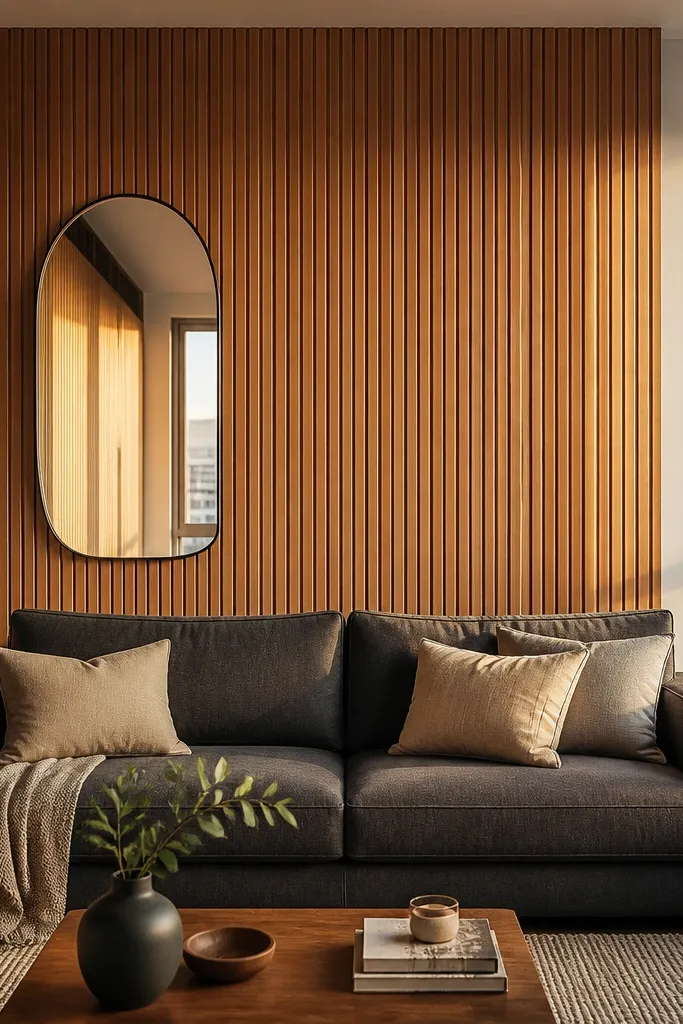
Vertical slats make a room feel taller, and the off-center mirror adds a modern editorial vibe. This is a great choice if your ceilings are under 8 feet and your wall feels short. Light oak keeps it airy, and the mirror adds brightness without adding another heavy texture. I like this look when the sofa is a solid color with clean lines because the wall treatment does the styling work. The off-center placement keeps it from looking like a showroom symmetry kit.
Start by installing slats vertically with a clean 1/2-inch gap between them. Use a light oak stain or clear matte finish so the slats don’t turn orange. Center the slat panel zone behind the sofa with 6 to 10 inches of extra width on both ends. Hang the mirror so its bottom sits about 6 to 10 inches above the sofa back top; place it slightly to the right or left of center by about 3 to 6 inches. Add one framed print on the opposite side at a smaller scale to balance the composition. Keep pillow colors simple: one warm neutral and one deeper accent pulled from the mirror frame or wood tone.
Good to knowUse a laser level for the mirror — a tiny tilt shows up immediately in a mirror.
AvoidAvoid mixing different wood tones in the slats and your coffee table — it makes the wall look accidental.
9. Large Oversized Wall Clock in Textured Stone Gray
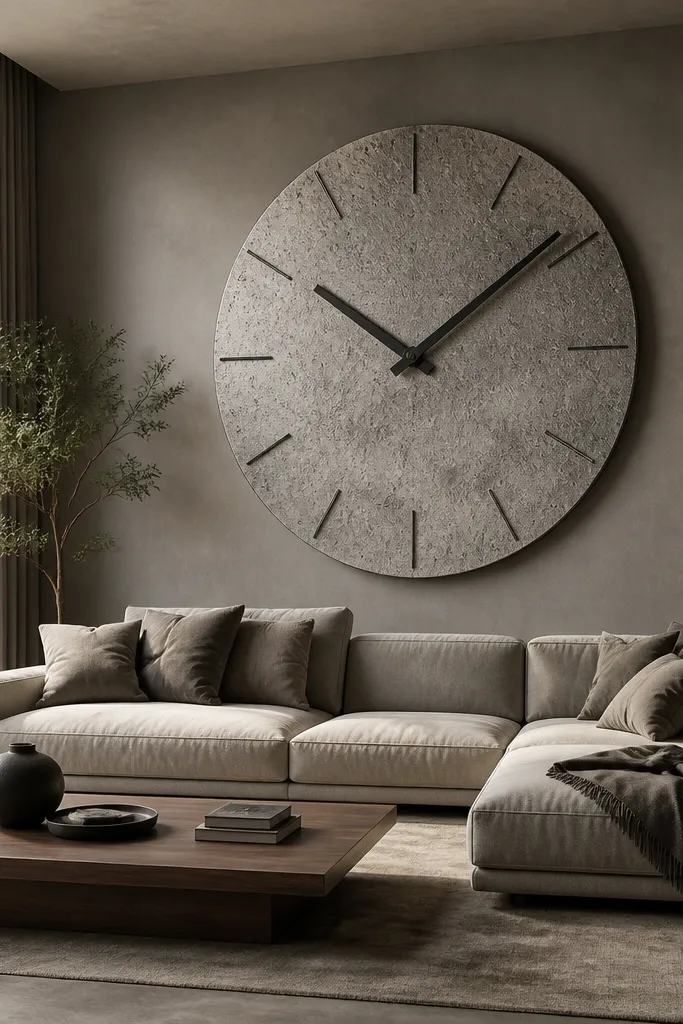
This is a modern luxury move because it turns a functional item into the focal art. A large textured clock face creates dimension, and the raised surface catches light in a soft way. I’ve done this when clients don’t want wallpaper or paneling but still want a “wow” wall. Stone gray works with both warm and cool rooms, and the minimal frame keeps the whole thing from looking busy. It also flatters people who sit with their sofa facing the wall clock side — the raised texture reads from across the room.
Start by choosing a clock size that’s about 24 to 34 inches wide for most sofas. Measure the sofa width and aim for the clock to be roughly 60 to 80 percent of that width. Paint the wall warm white matte and let it cure fully. Mount a centered bracket or use the clock’s included mounting hardware into a stud. Position the clock so its center sits around the top third of the sofa back height plus 6 to 10 inches. Style the area with two matching floor lamps or sconces that cast soft light onto the clock face.
If the clock has moving hands, choose a second hand color that matches your room metal, like black or brass.
Avoid glossy clock finishes — the glare makes the texture look like cheap plastic.
10. Two-Panel Oversized Diptych with Linen Texture
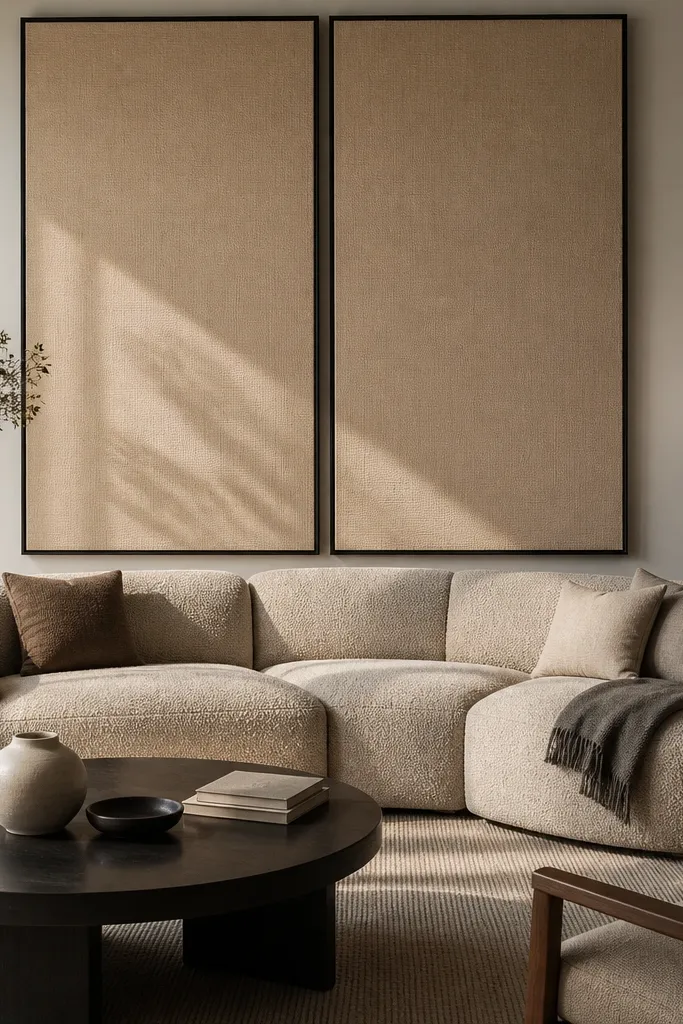
A diptych works because it fills the wall without forcing you into hardware-heavy installs. Linen-textured panels read like art, but they also act like a soft architectural element. I’ve used this in rooms where people want modern luxury but hate clutter — the two large panels keep the look clean and intentional. Sand and ivory tones are forgiving and flattering under warm lighting, which makes the sofa look more inviting. The key is scale: if the panels are too small, they look like leftover decor instead of a wall design.
Start by measuring the wall width behind the sofa and choose a diptych total width about 70 to 90 percent of that space. Hang the panels so the combined height extends 2 to 5 inches above the sofa back top. Use a level and mark mounting points for both panels so the seam sits centered behind the sofa centerline. Add a slim matte black or natural wood console below, keeping the console depth under 10 inches. Style with one tall vase and one low object, not a stack of small items. Finish by placing pillows that pull one color from the diptych, like sand or ivory, plus one deeper accent.
Good to knowIf your sofa is dark, add one light throw blanket draped over the arm so the wall art and sofa soften each other.
AvoidDon’t hang a diptych too low — the seam ends up at shoulder height and looks awkward.
11. Matte Black Metal Grid with Warm White Backdrop
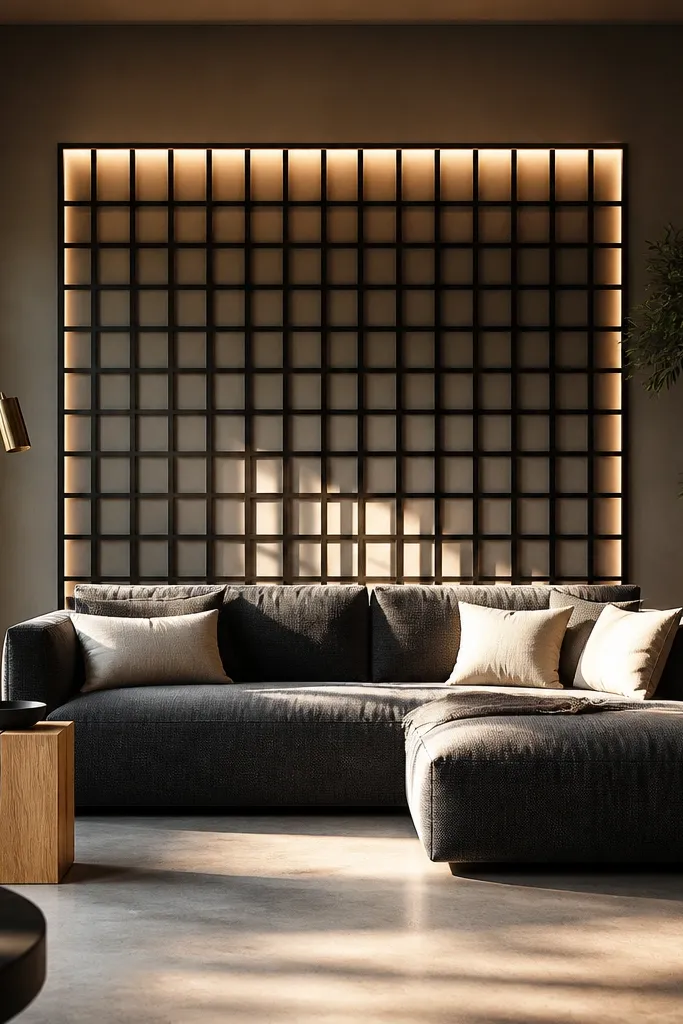
A metal grid behind a sofa looks modern because it’s structured, and it looks luxury because it’s deliberate. The matte black finish creates a contrast edge that frames your sofa visually. I like this in rooms with lots of straight lines — it matches the geometry and makes the whole space feel designed rather than decorated. Warm white behind the grid keeps the black from feeling heavy. It also gives you a built-in layout for art so you don’t end up with random spacing.
Start by selecting a grid panel size that’s about the width of your sofa plus 10 inches total. Install the grid into studs and keep it centered, with the bottom edge about 6 to 10 inches above the sofa seat line. Paint the wall warm white matte if it isn’t already, so the grid floats. Add art inside the grid openings with matching frame thicknesses, like 1-inch black frames. Keep the number of frames low: three to five pieces looks best. Style the console with one black object and one warm wood object so the grid doesn’t feel isolated.
Use picture wire and measure from the sofa seat to the art bottom so every change stays consistent.
Avoid thin, shiny black metal — it reads cheap next to warm lighting.
12. Stone-Finish Wallpaper with Curved Sconces
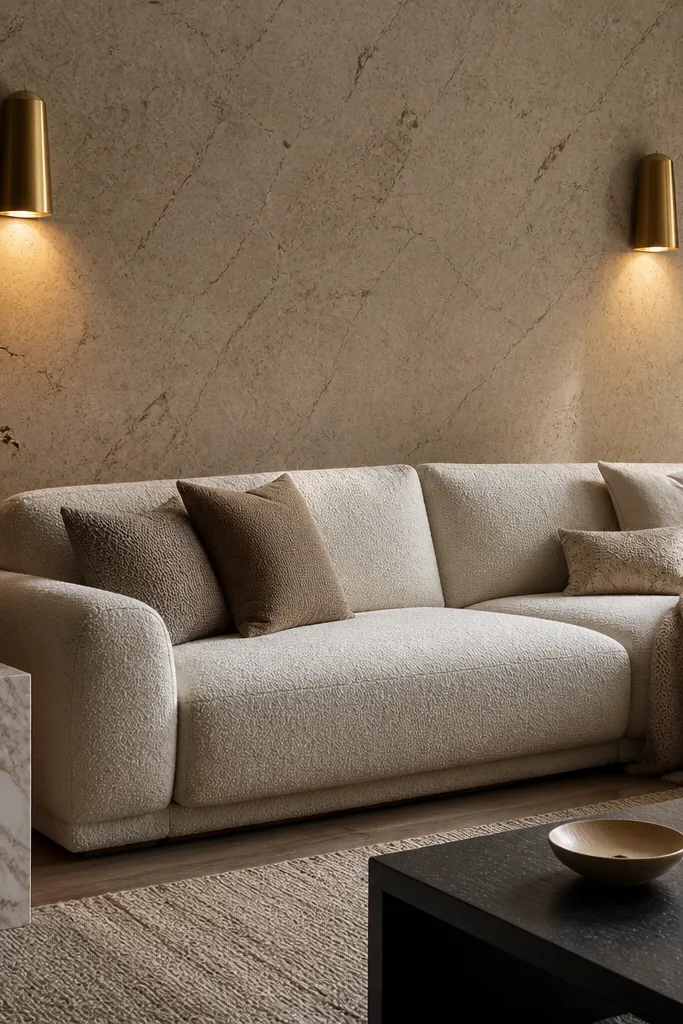
Stone-finish wallpaper gives the luxury effect of natural stone without the weight or installation mess of real tile. The speckling hides small wall imperfections, which matters more than people think. I’ve used this when a room has a lot of beige fabrics and the wall needs texture but not a loud pattern. Brushed brass sconces keep the warmth consistent, and the curved shape adds a softer modern touch. Round mirror placement breaks the rectangle shape of the wall and makes the space feel less rigid.
Start by choosing wallpaper with a matte finish and stone speckle pattern in beige-gray. Measure your wall height and plan for a straight roll match if you want the pattern to line up cleanly. Apply wallpaper carefully with a smoothing tool, focusing on the seam area behind the sofa center. Mount sconces symmetrically so their light hits the wall at an angle; aim for sconces around 60 to 66 inches from the floor. Hang a round mirror centered, with the bottom of the mirror about 8 to 12 inches above the sofa back top. Style with a console in light wood and a ceramic vase in taupe or ivory.
Turn on your lights before trimming the last strip — you’ll see seam lines more clearly in the final lighting.
Avoid wallpapers with heavy gloss — they look like printed plastic when the sconces turn on.
13. Offset Picture Ledge with Stacked Books and Art
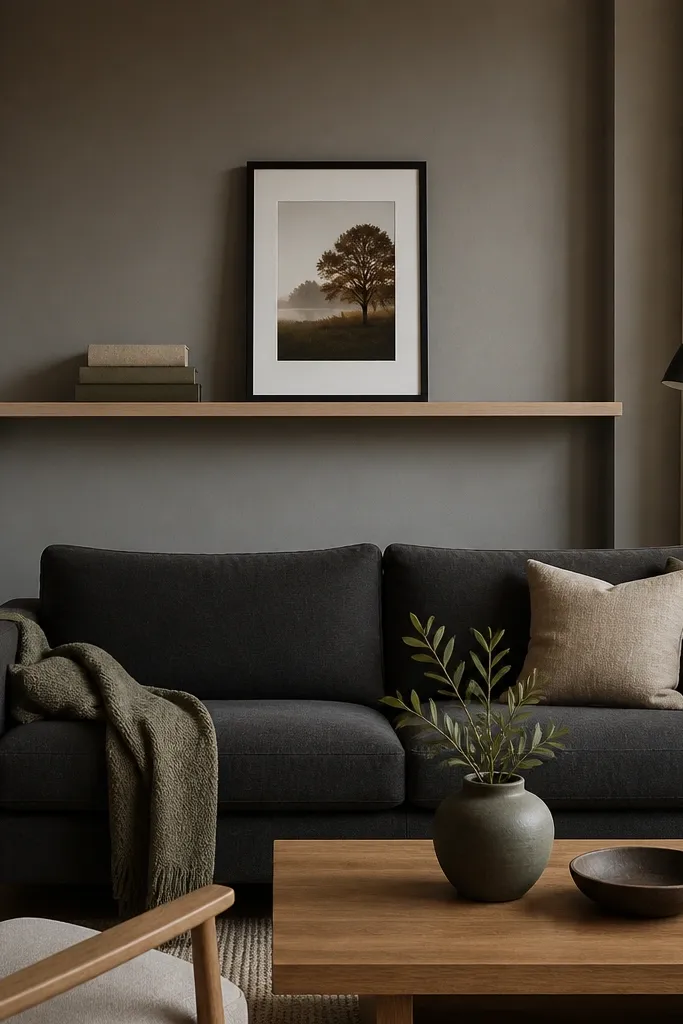
This is modern luxury for people who like visible styling but hate clutter. A picture ledge creates a clean line and gives you height control, so the wall doesn’t feel flat behind the sofa. When you stack books and add one framed piece, you get intentional vertical rhythm. I’ve done this in rentals where you can’t permanently mount heavy panels, because the ledge anchors are small. The key is keeping the palette tight: cream, sand, and one deep accent like espresso or black.
Start by choosing a ledge depth around 4 to 6 inches so it doesn’t block the sofa line. Place the ledge so its top edge sits about level with the top of the sofa back or slightly above. Mount it into studs and keep it level across the main length. Style with two stacks of books at the ends (3 to 5 books each) and one taller object at center, like a slim frame or a small sculpture. Add a framed print on the wall above with the bottom edge about 6 inches above the ledge. Use book spines that match in tone; you can mix sizes but keep colors consistent.
Dust the ledge before styling — the matte surfaces show lint more than you think.
Avoid mixing too many bright colors in book spines — it turns the wall into a bookstore instead of luxury decor.
14. Large Accent Mirror with Textured Frame and Plaster Wall
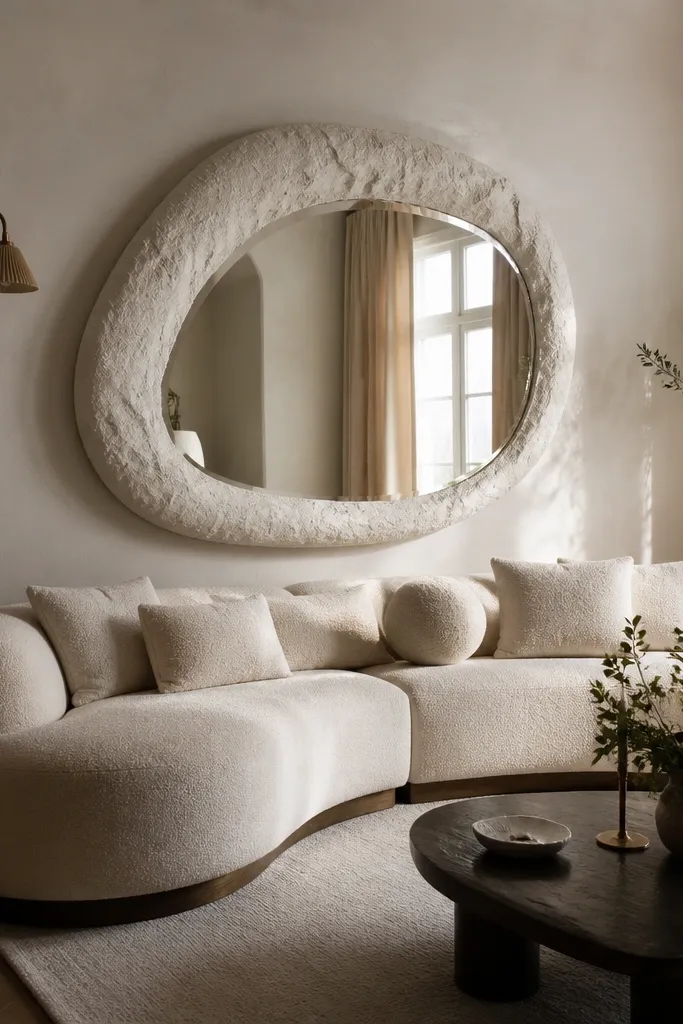
Mirror-on-plaster is a strong modern luxury combination because it adds light and texture in one install. The plaster wall keeps things soft and tactile, and the textured mirror frame adds a sculptural edge without needing wood slats or tiles. This setup works especially well in rooms that feel dim from the sofa — the mirror bounces daylight and makes the wall feel deeper. For warm undertones, choose plaster in warm off-white rather than cool gray. The textured frame makes the mirror look custom even if the mirror shape is simple.
Start by painting or applying a plaster finish in warm off-white matte across the full wall behind the sofa. Choose a mirror with a textured frame and mount it centered so its bottom edge lands about 10 to 14 inches above the sofa back top. Use a stud finder and mount with appropriate brackets — don’t rely on drywall anchors for a heavy mirror. Add a single art piece or small sconce only if the mirror doesn’t already dominate the wall. Style the sofa area with two pillows that match the plaster warmth and one accent pillow pulled from the mirror frame tone. Place a floor lamp on the side opposite the nearest window to add depth to the reflection.
Good to knowAngle the mirror slightly if your wall is uneven — a few degrees reduces the “wavy” look from the couch.
AvoidAvoid a mirror frame that’s too shiny — it competes with the plaster texture and looks less expensive.
15. Oversized Rattan Screen Mounted Behind Sofa
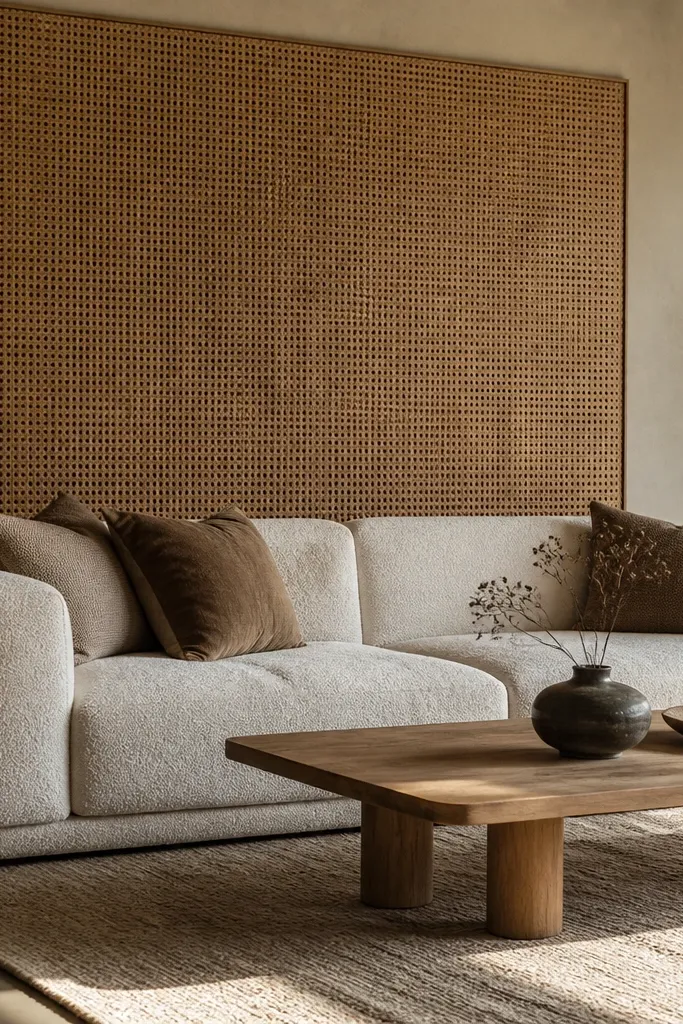
A rattan screen behind a sofa reads modern luxury when it’s oversized and mounted flat, not leaning like a beach house accessory. The weave adds pattern without looking loud, and it softens hard lines from the sofa legs and coffee table edges. I like this in rooms with neutral walls and a lot of fabric because the rattan gives texture that feels warm under lamplight. It flatters light skin tones by adding gentle warmth, and it looks great with both black and brass accents. The luxury part is the scale — the screen should cover most of the wall behind the sofa, not just a corner.
Start by measuring the wall area behind the sofa and choose a rattan screen that covers at least 80 percent of that width. Mount it using a French cleat or strong wall anchors so it sits flush and doesn’t bow. Keep the top edge about 2 to 4 inches above the sofa back top, and center it on the wall. If the screen has an uneven weave, rotate it so the densest pattern sits at the sides for a balanced look. Add two linen-shade floor lamps and keep the lamp bases either black or brass to match the room metal. Style pillows with one solid neutral and one woven or textured fabric so the rattan doesn’t feel like a separate element.
Good to knowVacuum the screen gently with a soft brush attachment once a week — dust collects in the weave fast.
AvoidAvoid tiny screens — small rattan looks like a prop, not a design.
16. Dark Walnut Veneer Feature Wall with Vertical Lines
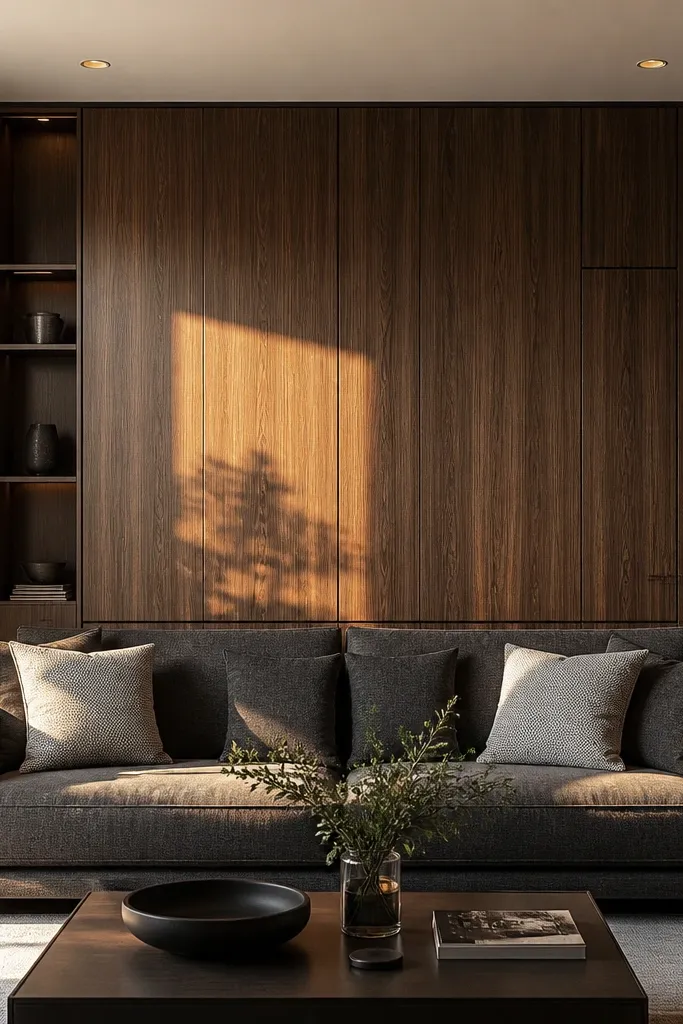
Dark walnut veneer looks like real furniture because the surface mimics cabinetry, not decor. When you use vertical grain and frame the feature area, the sofa instantly looks like part of a built-in system. I’ve done this in living rooms where the couch was a simple beige or gray — the dark wall gives it contrast and makes the throw pillows pop. It also flatters warm skin tones because walnut reads golden-brown under warm lighting. The black trim keeps it modern and prevents the wood from looking too traditional.
Start by choosing a veneer sheet or pre-made veneer panels and plan a framed perimeter with thin black trim. Measure the wall zone behind the sofa and keep the feature area about 6 to 10 inches wider than the sofa arms. Install a backing board first, then apply veneer or panels with adhesive and clamp if needed. Align the vertical grain so it reads straight from the couch. Add thin black trim around the edges for a clean, built-in look. Install a narrow console beneath with a brass tray and black vase; keep decor minimal so the wood grain stays the star.
Use warm bulbs at 2700K — dark walnut looks flat under cool white light.
Avoid overly thick trim — chunky framing makes veneer look like a DIY craft project.
17. White Shiplap with Black Corner Brackets
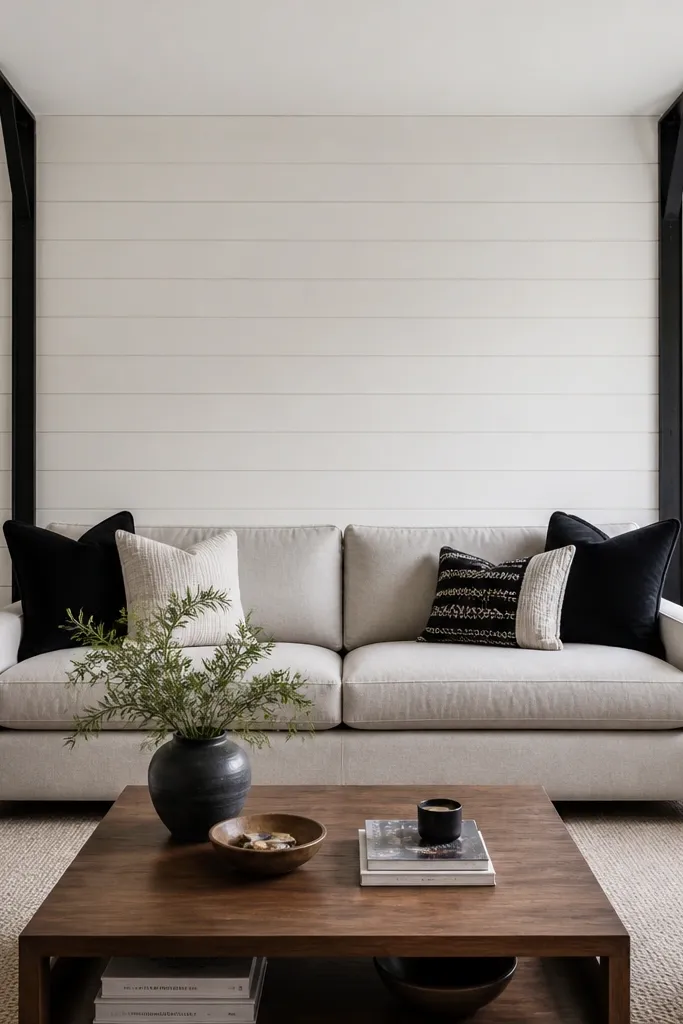
Shiplap can look modern luxury when you keep it crisp and pair it with black hardware. The horizontal lines create calm structure behind the sofa, and the white keeps the space bright. I like this look in rooms that feel too formal, because the black brackets add a modern edge. It also works well if you already have a farmhouse-adjacent element like a wood mantel, since you’re updating it with cleaner lines and fewer accessories. The luxury comes from restraint: one shelf, one art piece, and a consistent color palette.
Start by installing shiplap boards horizontally with consistent spacing and a tight seam. Use a paint in soft white matte, then caulk the seams for a smooth finish. Mark where your shelf will go and install corner brackets into studs at a height that places the shelf about 4 to 8 inches above the sofa back top. Mount the floating shelf and make sure it’s level — shiplap hides small errors, but shelf level shows everything. Style the shelf with one tall neutral vase and two small objects spaced evenly. Hang a single large framed print centered above the sofa, keeping it wider than the shelf so the wall looks balanced.
Caulk the shiplap seam lines — it makes the wall look professionally finished instead of board-by-board.
Avoid high-gloss shiplap paint — it emphasizes board lines and looks cheap.
18. Matte Black and Stone Plaster Hybrid Frame
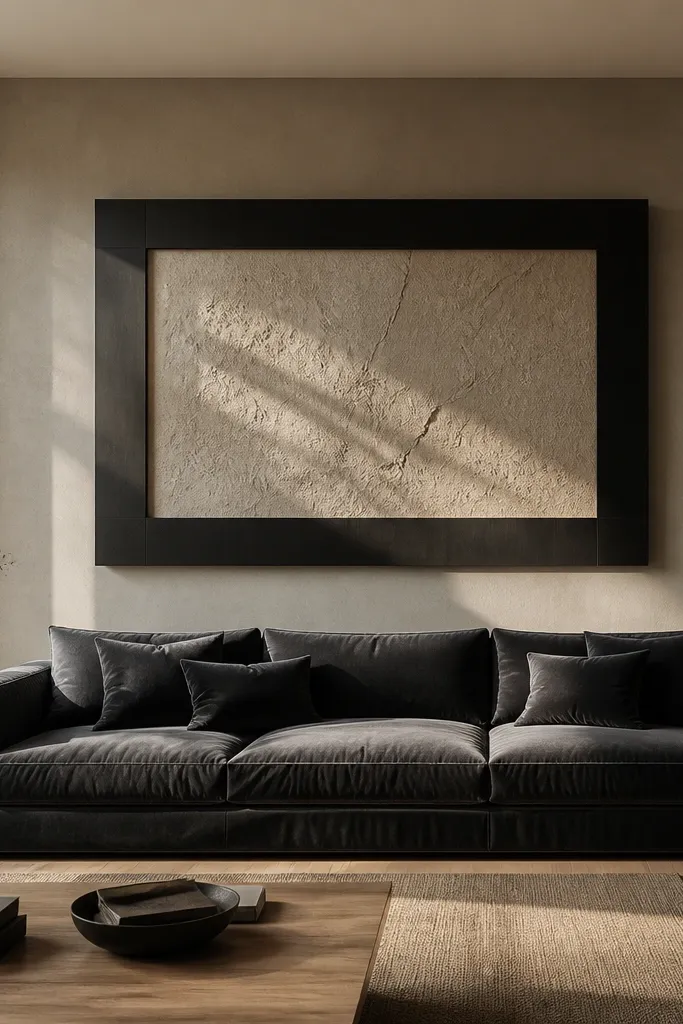
This is modern luxury for people who want a sculpted wall without committing to full tile or heavy panels. The stone-plaster rectangle gives texture and depth, and the matte black frame creates the “designed” boundary the eye needs behind a sofa. I’ve used this when the wall is large and blank — the frame makes the space feel intentional instead of empty. The combination flatters both warm and cool palettes because plaster reads neutral, while black adds crisp contrast. It also photographs well because the matte finishes reduce glare.
Start by applying stone-plaster texture to a centered rectangle on the wall. Keep the rectangle width about 6 to 10 inches wider than the sofa arms, and let it extend 2 to 4 inches above the sofa back top. Create a clean edge by masking off the perimeter before texture application. After curing, paint the plaster area in a warm stone gray matte. Install thin matte black trim around the rectangle using mitered corners for a sharp frame. Mount a mirror or art centered inside the frame, with the bottom edge about 8 to 12 inches above the sofa back top. Style with pillows in one light tone and one deep tone pulled from the black trim.
Good to knowUse painter’s tape to mask the frame edges and remove tape while the paint is still slightly tacky for crisp lines.
AvoidDon’t make the frame too thick — thick trim turns it into a TV-wall look.
19. Gallery Wall Only on the Bottom Third with Oversized Art
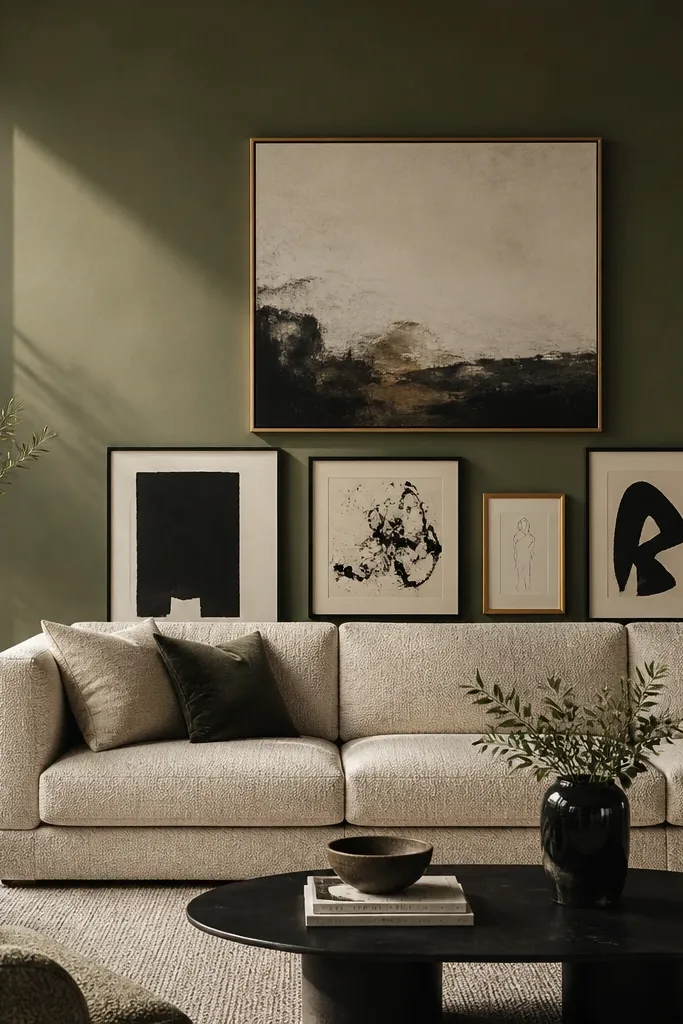
This look is a lifesaver when you have a beautiful wall color already and don’t want to cover it. Putting the gallery only on the bottom third keeps the wall from becoming chaotic, while the oversized piece gives you the luxury focal point. I like it when the sofa back is tall, because a full-height gallery can crowd the area visually. Warm white paint makes the art look crisp, and the spacing between the big art and smaller frames reads intentional. This works for different art styles as long as you keep frame finishes consistent.
Start by painting the wall warm white matte if needed, then choose an oversized art piece that spans about 60 to 75 percent of the sofa width. Hang the large art centered, with its bottom edge about 6 to 10 inches above the sofa back top. Add only two or three smaller frames below it, keeping them aligned as a tight cluster near the console height. Use the same frame color and mat color across all pieces. Keep the gallery’s total width about the same as the lower half of the sofa, so it doesn’t spill outward. Style the console with one object that matches the dominant color in the artwork.
Measure the distance from the sofa seat to every frame bottom — it keeps your eye-line consistent from the couch.
Avoid sprinkling small frames across the whole wall — it makes the wall look like last-minute decoration.
20. Color-Blocked Back Wall in Warm Off-White and Clay
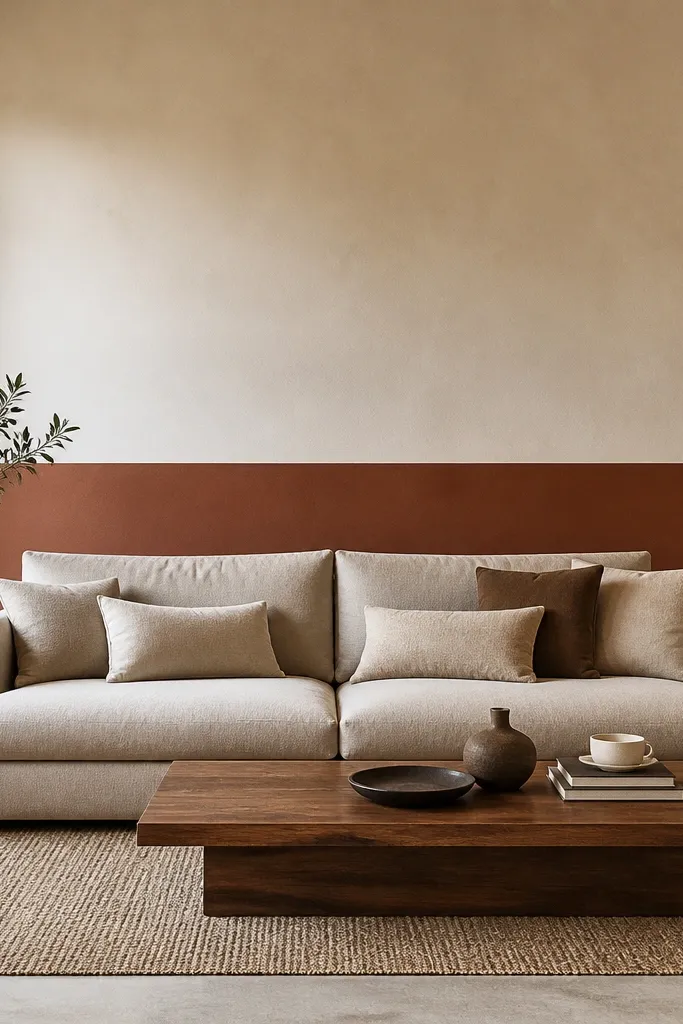
Color-blocking looks modern luxury when the blocks are calm and proportioned. Warm off-white on top keeps the room bright, and a clay band adds depth without turning the wall into a busy pattern. I’ve used this with neutral sofas because the clay gives warmth and makes the sofa look more “finished.” It also works for rooms with warm wood floors since clay sits naturally with oak and walnut tones. The mirror placement matters: it should live mostly in the lighter area so it reflects light instead of absorbing it. This approach is also friendly if you want a dramatic look but don’t want to install anything.
Start by choosing two paint colors: warm off-white matte and clay terracotta matte. Use painter’s tape to mark a horizontal band across the wall behind the sofa. I like the clay band to sit with its centerline about level with the sofa back midpoint, leaving about 8 to 12 inches of off-white above the top of the sofa back. Paint the off-white first, then tape and paint the clay band. Peel tape while paint is slightly tacky for clean edges. Hang a large rectangular mirror centered on the off-white area above the sofa, and keep the mirror frame either black or warm wood. Add pillows that pull one color from the clay band and one neutral from the off-white.
Use matte paint on both colors; sheen differences make color blocks look patchy.
Don’t pick a clay that’s too red — it can clash with warm metals and make the room feel loud.