1. Corner bed with a floating book ledge
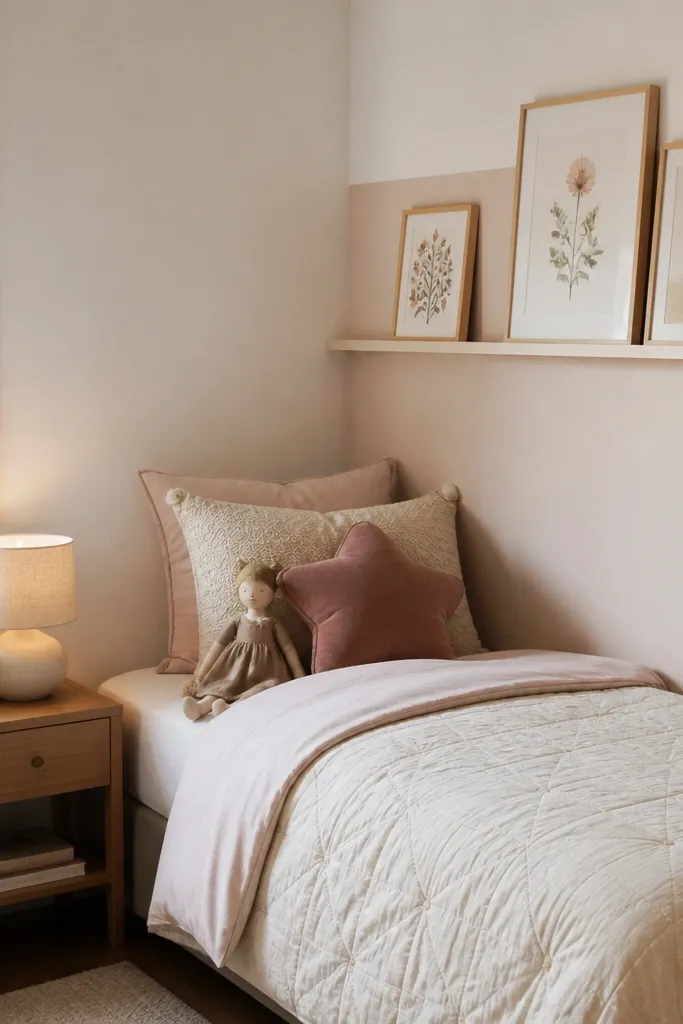
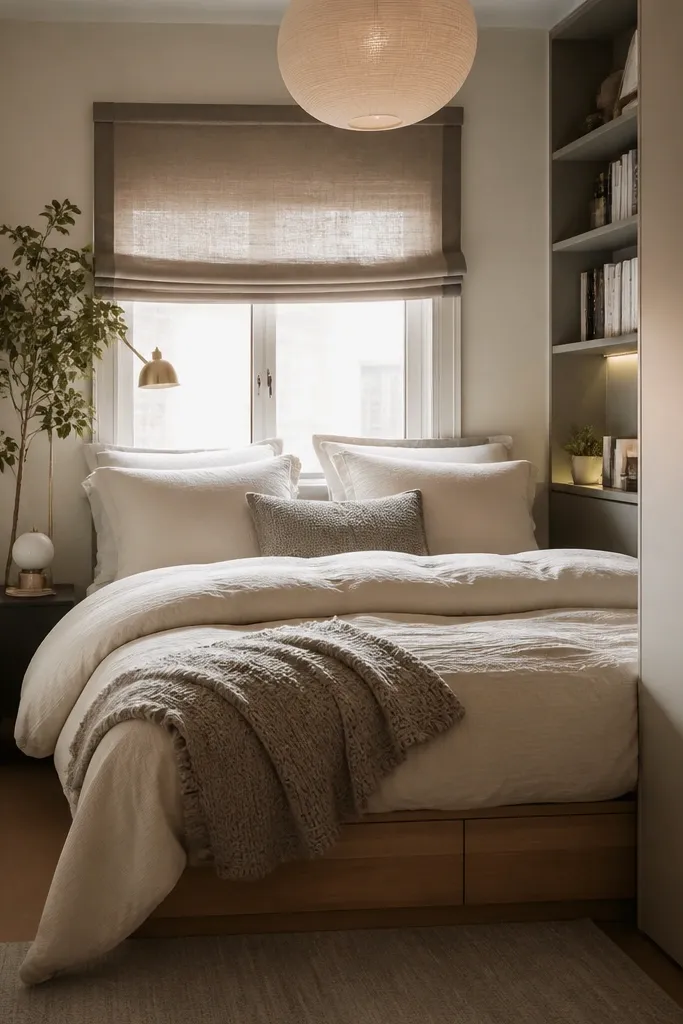
Start by measuring the bed side length and mark the ledge so you leave at least 4 inches of wall margin on both ends. Install the ledge so the bottom edge sits about 50-54 inches from the floor, which puts books in a comfortable reach for most kids. Paint or choose a ledge finish in a light wood or matte white so it blends, then add 2-3 book stacks in different heights instead of lining everything up. Finally, place a slim nightstand that is no wider than the bed rail thickness, and keep the lamp cord tucked behind the nightstand so the corner stays tidy.
I like the corner-bed setup because it clears a long wall for storage, but only if you fill the wall with something useful. A floating book ledge above the bed side keeps books at eye level so your kid can grab them without climbing or dumping a bin. Use a warm white wall so the ledge doesn’t look heavy, then add a blush or muted terracotta accent strip behind the lamp area to create depth. This works best for kids who read in bed, and it also flatters small rooms because the ledge sits high enough to keep the floor feeling open. Keep the ledge color close to the wall paint, and the room looks calmer instead of crowded.
AvoidAvoid putting bins under the ledge if they spill onto the floor — it kills the whole “open corner” effect.
Good to knowUse bookends that match the ledge finish and keep only the current 8-12 books on display.
2. Single-color wall + low dresser upgrade
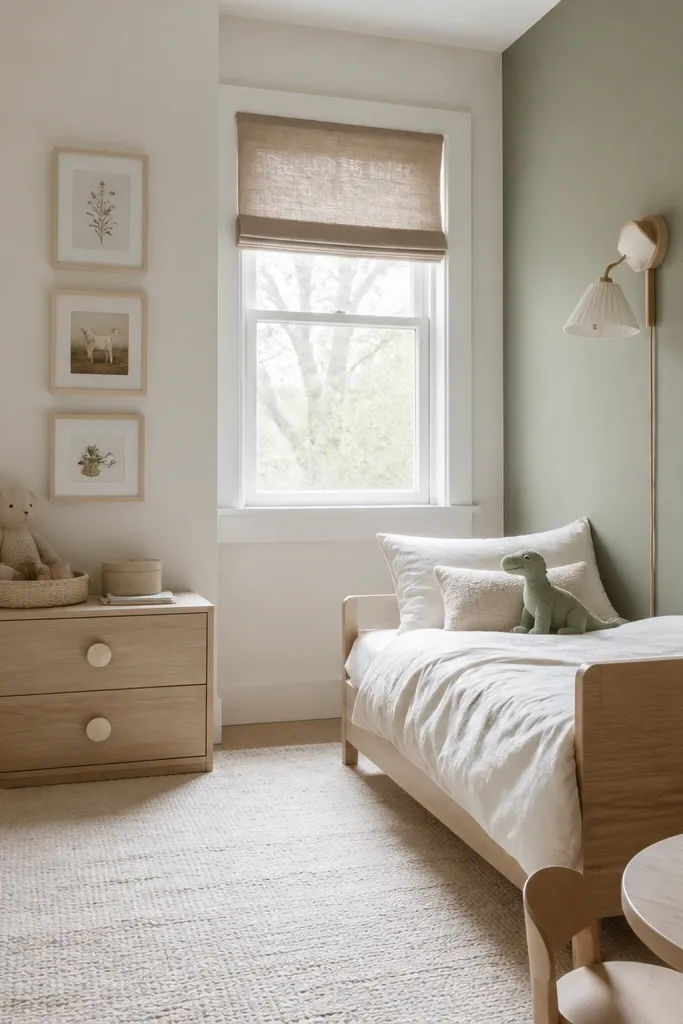
Start by painting your “feature wall” only, using two coats of a washable interior paint and a roller for a smooth finish. Sand the dresser lightly, wipe it clean, then spray or brush on a matte furniture paint in cream or white. Replace knobs with the same finish across all drawers, then add a shallow tray on top for a watch, lotion, or bedtime items. Hang your frames so their bottom edge sits around 60 inches from the floor, centered over the dresser, not too high.
In very small bedrooms, one strong choice beats lots of competing patterns. I paint one main wall in a soft sage or dusty blue and keep the other walls warm white, then I upgrade the lowest furniture piece — usually the dresser. A low dresser makes the room feel wider because the eye stays near the floor line. Choose a matte finish in white, cream, or natural wood, and keep the hardware consistent in brushed nickel or black. This setup flatters kids because it gives them a clear spot for daily items without making the room look busy. It also makes it easier to match bedding later since the wall color does the heavy lifting.
AvoidSkip busy wallpaper in a tiny room unless you’re doing it on a single panel wall — it makes the walls visually closer.
Good to knowLabel only the drawers your kid uses daily — the rest can stay unlabeled to keep the look neat.
3. Under-bed rolling bins with a clear front rule
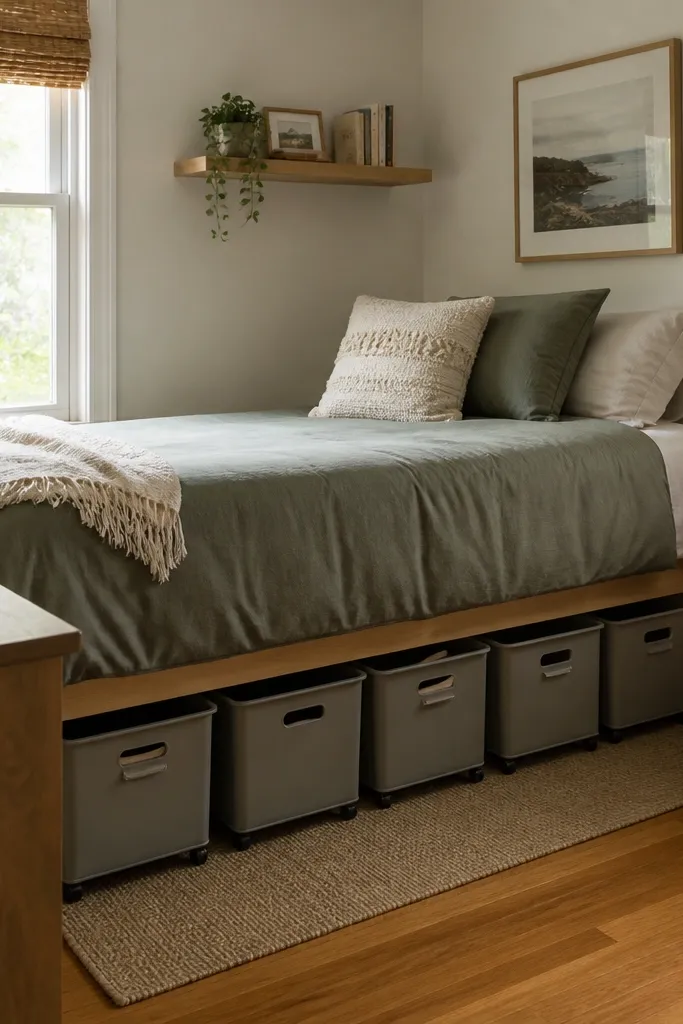
Under-bed storage works when you treat it like a system, not a dumping ground. Rolling bins keep items accessible, but the real trick is alignment — when bin fronts line up, the room looks tidy even if the contents change. Use clear-lid bins or fabric bins with a clear organizer pocket on the front so kids can find things without pulling everything out. I like keeping toys and clothes separate by bin type, which reduces morning chaos. This is a great fit for kids who have lots of small pieces like Lego, art supplies, or stuffed animals. The clear front rule also keeps the room from looking messy to guests because the visible surfaces stay organized.
Start by measuring the under-bed opening height and width, then buy bins that leave 1-2 inches of clearance on each side so wheels roll smoothly. Place the bins on a thin non-slip mat so they don’t slide when kids pull them out. Label each bin with a simple category like “Blocks” or “Stuffies” using a label maker or painter’s tape. Finally, set a rule: only one bin per toy category goes under the bed, and everything else goes on shelves or hooks so the floor stays clean.
Add a low curb of painter’s tape on the floor under the bed so bins always return to the same spot.
Don’t use mixed-size bins that force uneven spacing — it makes the under-bed area look chaotic.
4. Over-the-door organizer for school chaos
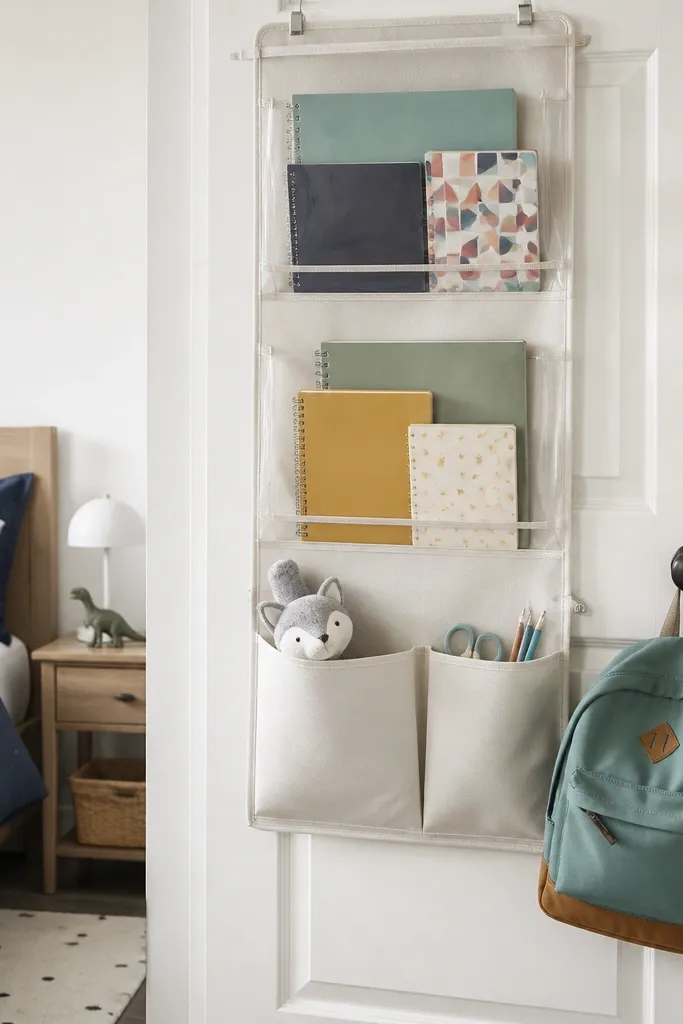
Start by choosing an organizer width that fits the door without touching the wall trim when the door closes. Install it so the bottom row of pockets sits about 10-12 inches above the floor, not low enough to drag on shoes. Put notebooks and folders in the clear pockets, then add two fabric pockets for small daily items like a water bottle strap and a hairbrush. Hang the backpack on a sturdy hook on the inside of the door so it doesn’t topple.
If your kid’s room gets messy fast, you need a “landing zone” that’s close to where they drop things. An over-the-door organizer is one of the cheapest ways to create that zone without taking up wall space. I use organizers with clear pockets for school items because kids can see what’s inside and stop asking you to search. Keep the top pockets for “today” items, and the lower pockets for backups like spare socks or a small hand towel. This works especially well for kids in elementary school who need quick access to homework and supplies. It also helps the room stay visually calm because backpacks and loose papers stop migrating across the floor.
AvoidSkip organizers with fully opaque pockets — they turn into a second closet kids forget exists.
Good to knowUse painter’s tape to mark pocket labels first, then replace with permanent labels once your kid agrees with the system.
5. Peg rail + fabric art bins
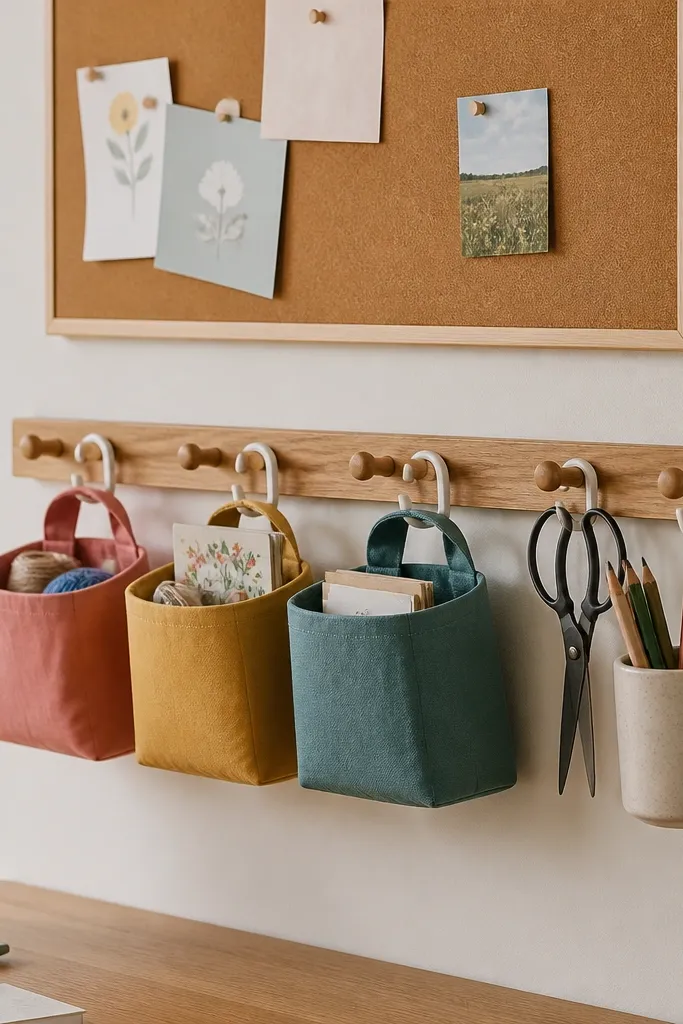
Art supplies are the fastest way to make a small room look cluttered, so I treat them like equipment. A peg rail lets you hang tools at kid height and keep the mess off the floor. Use fabric bins that tuck close to the wall so they don’t swing, and add a simple cork panel for drawings and reminders. This setup is best for kids who draw daily or do crafts at a desk, because it keeps supplies within reach without spreading them across surfaces. I also like it for sensory kids who get overwhelmed by visual chaos — everything has a hook and a home. The peg rail looks tidy because the hardware is consistent and the bins are all the same shape.
Start by mounting the peg rail into studs if possible, or use heavy-duty anchors rated for the weight you’ll hang. Place it so the lowest hook is around 30 inches from the floor, which keeps scissors and markers safe but reachable. Hang fabric bins first, then add hooks for tools like a cup for brushes and a hook for a roll of paper. Mount the cork panel above the peg rail so you can pin finished work without using random tape all over the wall.
Group supplies by activity: one bin for drawing, one for painting, one for paper — it reduces rummaging.
Don’t hang heavy bins on drywall alone — it leads to sagging and a messy look.
6. Ladder shelf beside the desk
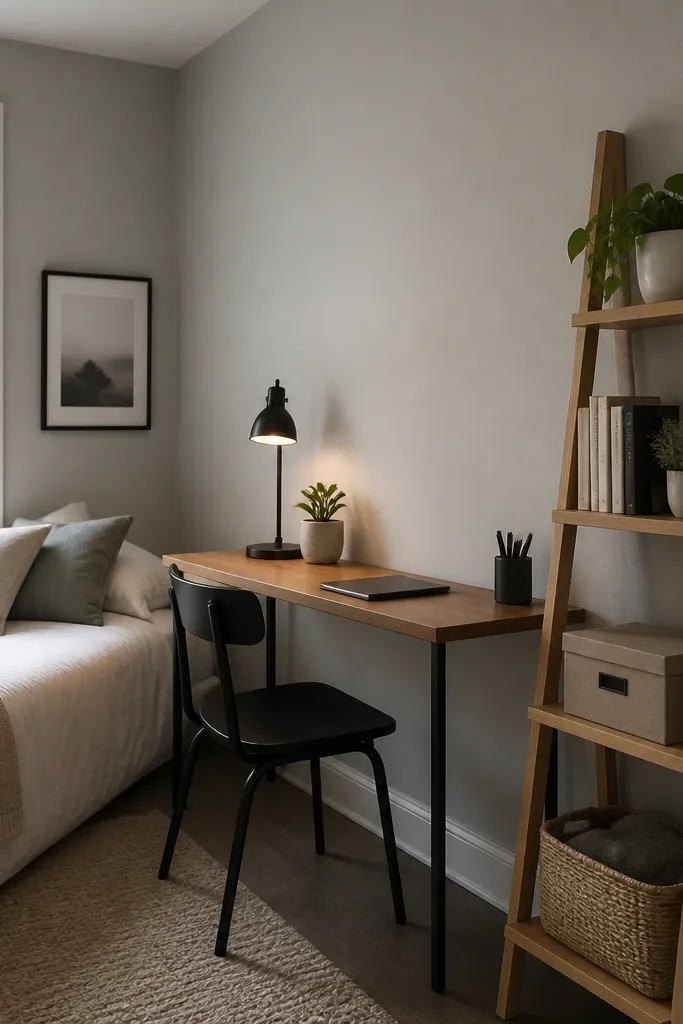
Start by placing the desk so you have a clear path to the bed or closet, then slide the ladder shelf into the narrow gap beside the desk. Choose a shelf width under 20 inches so it doesn’t block movement. Style the bottom shelf with supplies your kid uses daily, like pencils and paper, then keep the top shelf for items you rotate weekly. Anchor the shelf to the wall with a small anti-tip strap if it can lean, and keep the heaviest items on the bottom rungs.
In a small kids room, a desk needs storage that doesn’t steal floor space. A ladder shelf does that because it’s narrow and vertical, and it gives you multiple “zones” for different items. I like ladder shelves with 4-5 rungs, not tall ones, because tall ones feel top-heavy in tiny rooms. Keep the shelves styled with a light touch: books stacked upright, a small tray for chargers, and one framed photo. This works well for kids who have a homework routine and need a dedicated place for supplies. It also makes the room feel intentional, because the shelf shape adds a little structure next to the desk.
AvoidSkip overstuffing every rung — empty space reads as calm in small rooms.
Good to knowUse matching storage boxes on the ladder shelf so the shelf looks clean even when school weeks get hectic.
7. Bunk-style loft with a curtain privacy rail
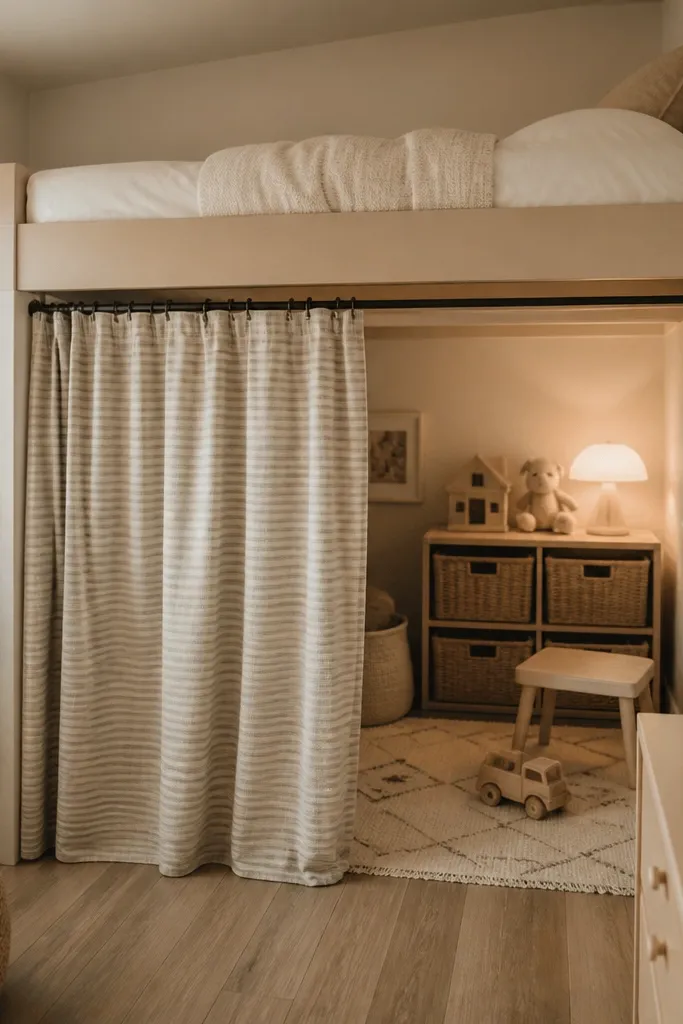
Lofts look cool, but the real win in tiny rooms is creating a “separate zone” without building walls. A low loft bed with a curtain rail under the bed edge makes a private reading or play corner. Choose a curtain fabric that drapes, like medium-weight cotton or linen blend, in a color pulled from the bedding. This works for kids who need a calm spot to wind down, and it also makes the room feel bigger because the curtain creates a visual boundary. I’ve used this in rooms where the bed is close to the desk, and the curtain stops the visual clutter from spreading.
Start by measuring clearance under the loft so the curtain doesn’t brush the floor when kids move. Install a simple tension rod or a small curtain rod anchored to wall studs right under the loft lip. Hang the curtain so it touches the rug lightly, then add a small rug under the curtain zone to define the area. Store toys in a low bin right at the edge of the curtain so the play zone stays contained.
Use a curtain color that matches the underside of the loft or the bed frame finish — it looks intentional instead of accidental.
Avoid thin plastic sheers — they don’t create privacy and they look cheap fast.
8. Narrow bookcase as a room divider
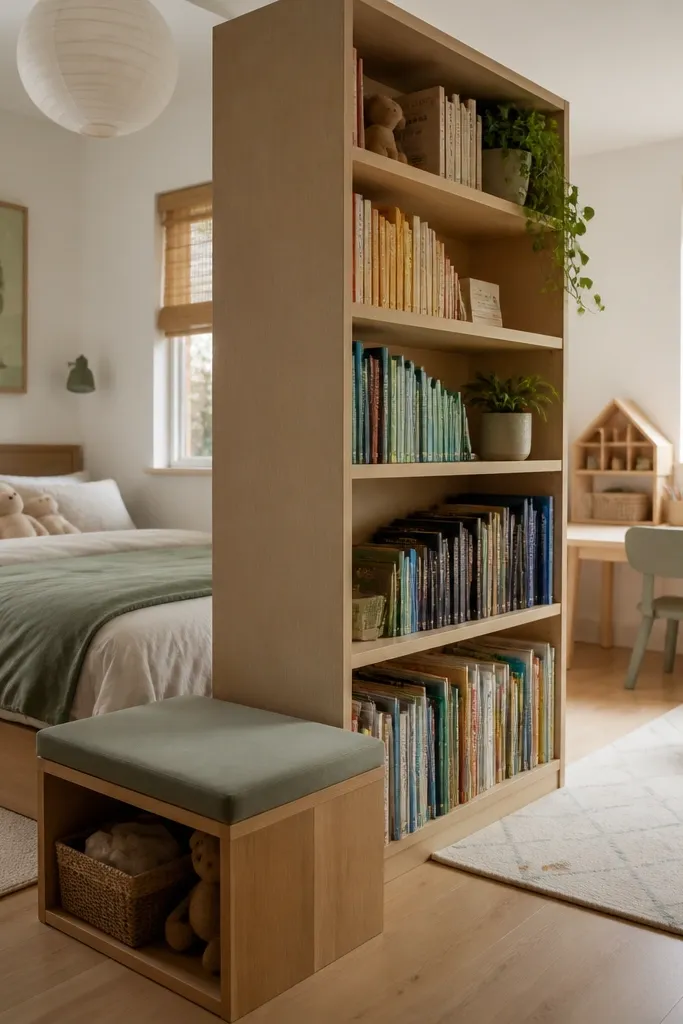
In a very small bedroom, you can’t always have separate rooms for sleep and play, so you fake it with furniture. A narrow bookcase divider gives you storage and also breaks up the space so it feels more organized. I like bookcases with open shelves on top and closed cabinets or drawers on the bottom so toys don’t become visual noise. Keep book colors mostly in the same family — beige, white, and a few pops of primary color — so the divider doesn’t look chaotic. This works best for kids who need both a reading corner and a place to stash toys. The divider also lets you place the desk on the “quiet side” away from the bed.
Start by choosing a divider width under 12-14 inches so it doesn’t block walking space. Place it perpendicular to the bed with a gap of at least 2 inches from walls so it isn’t scraping trim. Style top shelves with books and one small plant, then fill bottom cabinets with bins that match the cabinet color. Add a small floor lamp or wall sconce on the play side to create a natural “activity feel” without adding more furniture.
Use book covers with solid colors, not busy patterns, for the top shelves where the divider is most visible.
Don’t put the divider right in the doorway path — it makes the room feel cramped instantly.
9. Magnetic strip for metal art tools
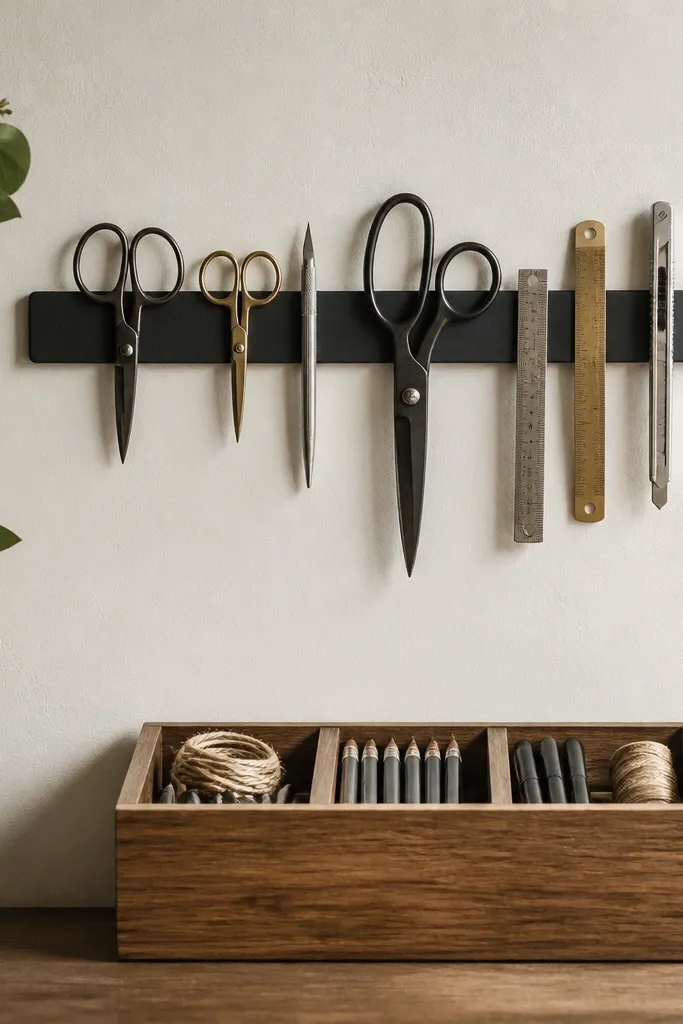
If your kid uses metal tools like scissors, craft knives, or metal rulers, a magnetic strip keeps them visible and prevents the “where is it?” spiral. I like this in tiny rooms because it uses wall space that would otherwise be empty. Choose a magnetic strip with a clean metal finish and mount it level, then add a small labeled box below for non-metal supplies. This setup is best for kids who do crafts frequently and for parents who want a quick reset after messy sessions. It also looks tidy because the tools line up in one thin strip instead of spreading across a desk. For color, pair the metal strip with a neutral wall so the tools become the only high-contrast element.
Start by picking a strip length that covers your tool set with a little gap at each end, usually 12-24 inches. Mount it into studs if you can; if not, use anchors rated for the strip’s total load. Place the strip at about 36 inches from the floor so smaller hands can reach safely with supervision. Add a small tray or box directly below for items like tape, glue sticks, and pencil grips so everything stays in the same zone.
Keep magnets for small items like paper clips out of the strip and use a labeled cup instead — it prevents clutter.
Avoid mounting too high — kids will shove tools into drawers and the wall system stops working.
10. Under-desk pull-out shelf for crafts
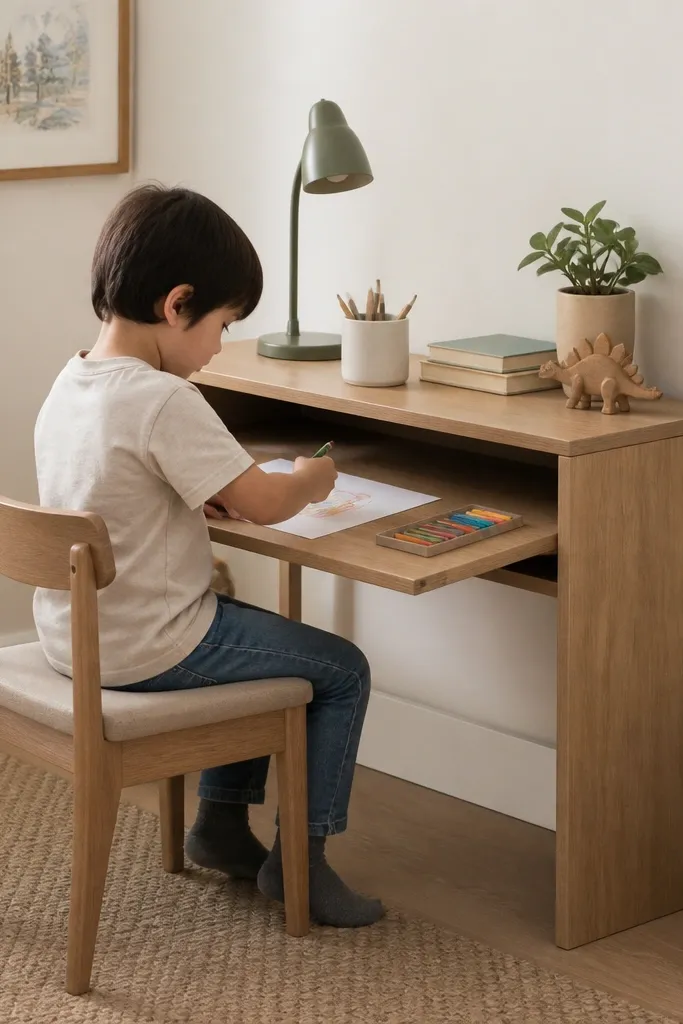
A desk is a magnet for small mess, so I like adding a pull-out shelf under it. It gives you a hidden “work tray” where kids can store active projects without spreading them across the tabletop. The pull-out shelf is especially helpful for kids who do crafts but don’t have a separate craft table. Use a simple plywood shelf painted to match the desk, and add a lip so paper doesn’t slide off. This works in tiny rooms because it increases usable workspace without adding a second surface. The visual effect is big — the desk looks cleaner because the clutter disappears when the shelf slides in.
Start by measuring the space under the desk apron and choose a shelf size that fits with 1-2 inches of clearance. Install drawer slides or sturdy metal rails so the shelf pulls smoothly and doesn’t wobble. Paint the shelf with a durable matte paint and attach a small lip using a thin wood strip at the front edge. Finally, set a shallow organizer tray on top of the shelf for crayons, markers, and scissors, and keep paper in a vertical folder upright so it stays flat.
Put the “currently working” supplies on the pull-out shelf only, and store backups in bins under the bed or on wall shelves.
Skip a shelf with no front lip — paper corners catch and you’ll see it become a mess fast.
11. Bedding color block to make the room feel bigger
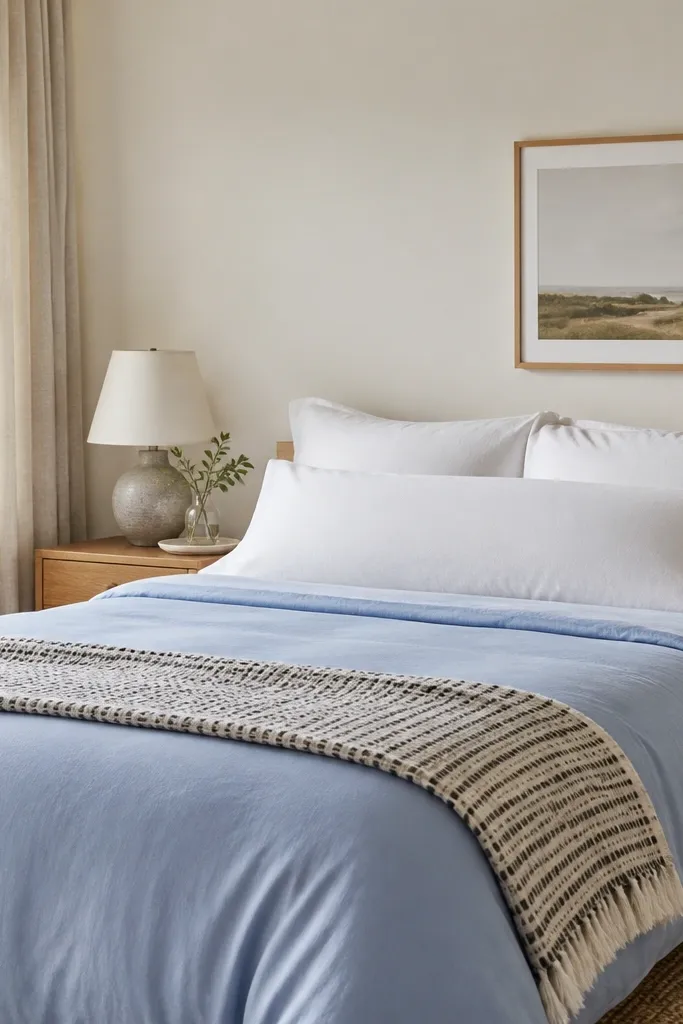
Start by choosing a duvet cover in a light, cool tone like powder blue or pale seafoam, and keep the fitted sheet in a matching neutral. Add two standard pillows with white or cream pillowcases, then one small throw pillow with a simple texture like cotton waffle. Fold the patterned throw at the foot so it reads as an accent, not a second bed. Style the bed with a single nightstand surface cleared except for a lamp and one book, and keep wall art above the bed minimal.
Small rooms feel bigger when bedding creates a calm, uninterrupted shape. I use solid or near-solid bedding in a light color, then add one pattern element only at the foot or on one pillow. This reduces visual noise and makes the bed look larger without adding more stuff. For a Very Small Bedroom Ideas budget, solid bedding is easier to find in sales, and it’s cheaper than building a full set of patterned decor. This works best for kids because it’s forgiving — stains happen and you can replace one cover instead of repainting everything. The key is to keep patterns minimal so the bed doesn’t look like a cluttered pile.
AvoidAvoid mixing three different patterns on a tiny bed — it makes the room look visually smaller.
Good to knowWash and iron the duvet cover before first use — crisp edges make the whole bed look more expensive.
12. Pegboard behind the door for backpacks and helmets
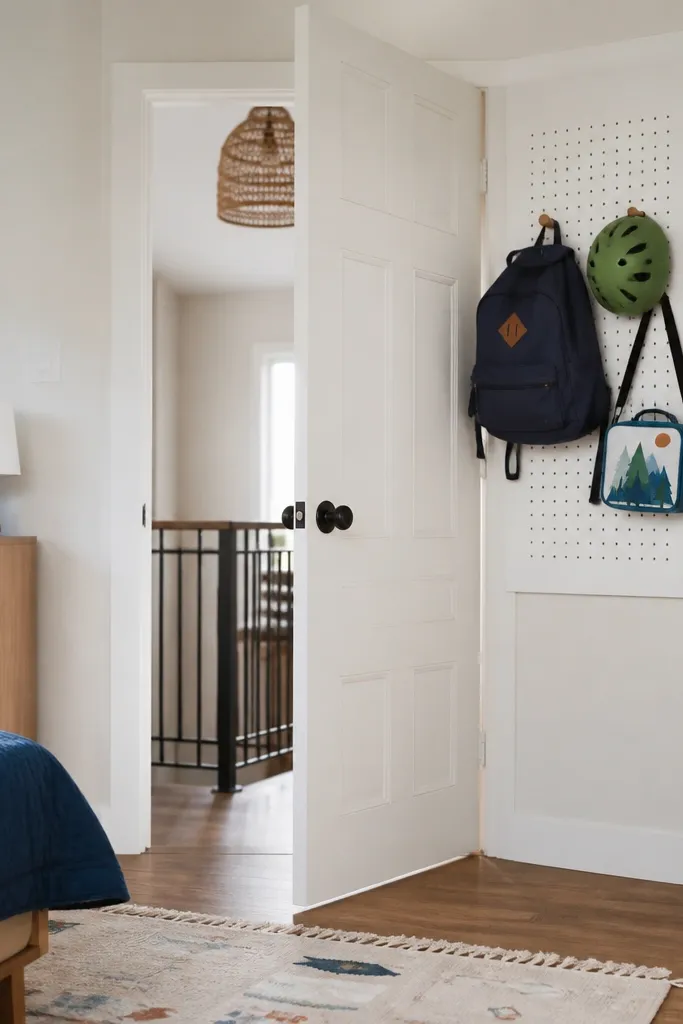
Backpacks and helmets are always in the wrong place in kids rooms. If you mount a pegboard behind the door, you create a dedicated drop spot that doesn’t steal wall space from shelves and art. I paint the pegboard white so it disappears into the trim, and the hooks become the only visible hardware. This setup works for active kids who have sports gear or bikes and need a place to hang items quickly after school. It also keeps the floor clear, which is a big deal in tiny rooms. When the gear has one home, the room stays tidy without constant nagging.
Start by taking the door off if needed or work carefully with the door in place to measure the available clearance. Install a small pegboard panel sized so it doesn’t hit the door handle or swing into the wall. Mark stud locations if you can, then mount with screws, not picture hooks. Add 2-3 sturdy hooks for backpacks and a couple of smaller hooks for helmets or hats, and attach a small basket on the lower pegboard row for gloves. Keep the heaviest items on the strongest hooks closest to the center of the pegboard.
Use S-hooks for helmets so they don’t scrape the shell and the helmet hangs at a consistent angle.
Skip flimsy pegboard hooks — they bend under backpack weight and the whole system gets messy.
13. Slim wardrobe with fabric hanging organizer
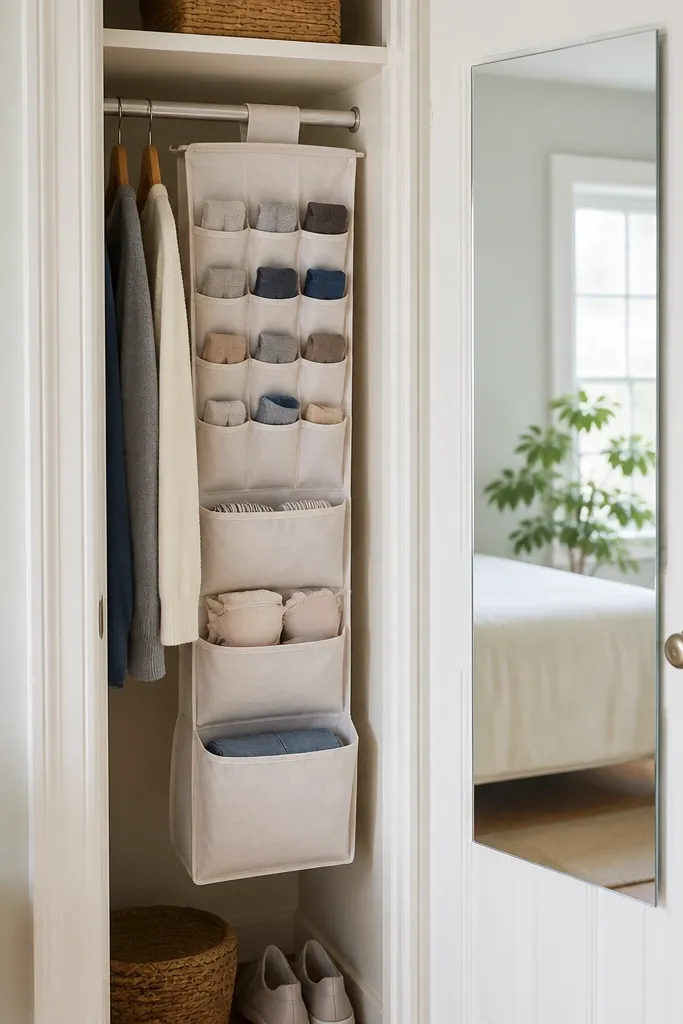
Tiny rooms need clothing storage that’s organized but not bulky. A slim wardrobe plus a fabric hanging organizer lets you store small items vertically without adding extra drawers. I like hanging organizers with clear labels or contrasting fabric so kids can see categories quickly. Pair it with a mirror on the closet door to make the space feel bigger and help kids check outfits without extra furniture. This works best for kids whose closets overflow because they have too many small items like socks, tights, and dress-up clothes. The mirror also makes the room look brighter if you place it so it reflects a light source rather than a dark corner.
Start by measuring the closet width so you pick a wardrobe that leaves a walking path of at least 24 inches to the bed. Install the fabric organizer inside using the built-in loops, and hang it so the bottom pockets sit about 6 inches above the floor. Fold clothes into neat stacks for the pocket areas, and use one pocket per category. Mount a simple full-length mirror on the inside of the closet door or on the outside wall if the door space is too tight, keeping it away from where the door hits trim.
Use color-coded bins for dress-up items so they never mix with everyday clothes.
Avoid stuffing the hanging organizer — if pockets bulge, it looks messy and stops working.
14. Play rug boundary + wall-mounted storage
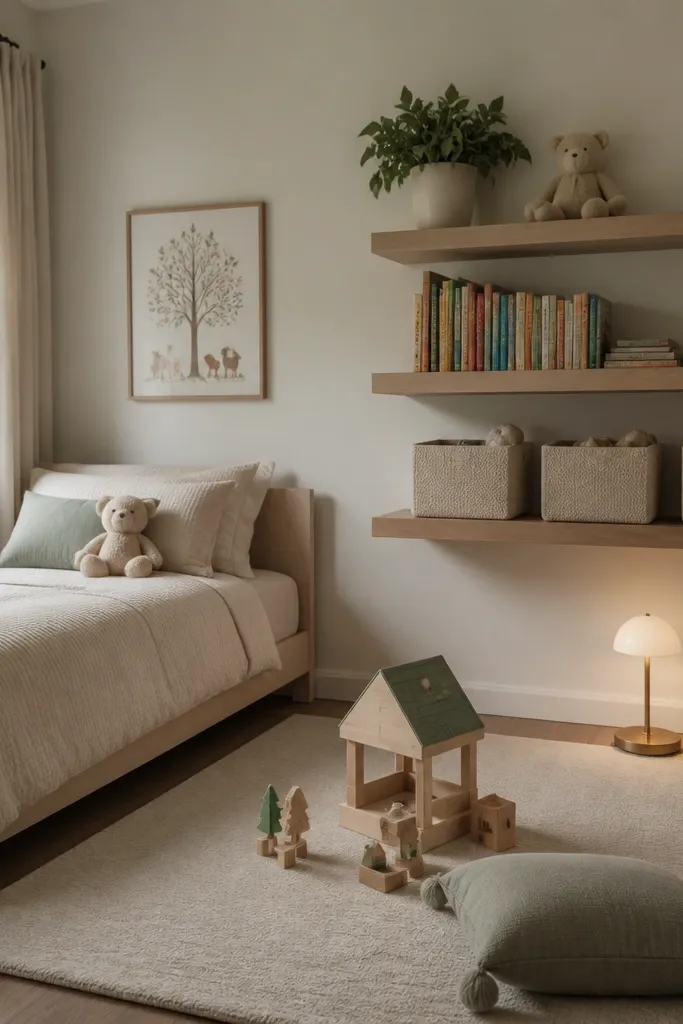
In a small bedroom, the floor gets messy because toys have no boundary. A rug creates a boundary kids can understand, and wall-mounted storage keeps toys from migrating outside the play zone. I use a low-pile rug in a pattern that hides small scuffs and crumbs, like navy with light speckles. Then I put bins on shelves at kid eye level so “cleanup” is a simple return to the wall. This works for kids who do floor play and for parents who want fewer toy piles in corners. The visual effect is immediate: the room looks bigger because the floor outside the rug stays mostly empty.
Start by choosing a rug size that fits the play area while leaving a clear walkway to the bed, usually 4x6 for very small rooms. Place the rug so its front edge sits about 10-14 inches from the bed or desk, then anchor it with a non-slip pad. Mount shelves above the rug line, not above the bed, so the storage visually supports the play zone. Add labeled bins and keep only 2-3 toy categories on shelves at once, rotating the rest into top storage.
Use one “open bin” for active toys on the rug, and keep everything else in lidded bins on shelves.
Don’t choose a bright solid rug — it shows every crumb and makes the room feel dirty faster.
15. Tiny gallery wall with 1-inch frames
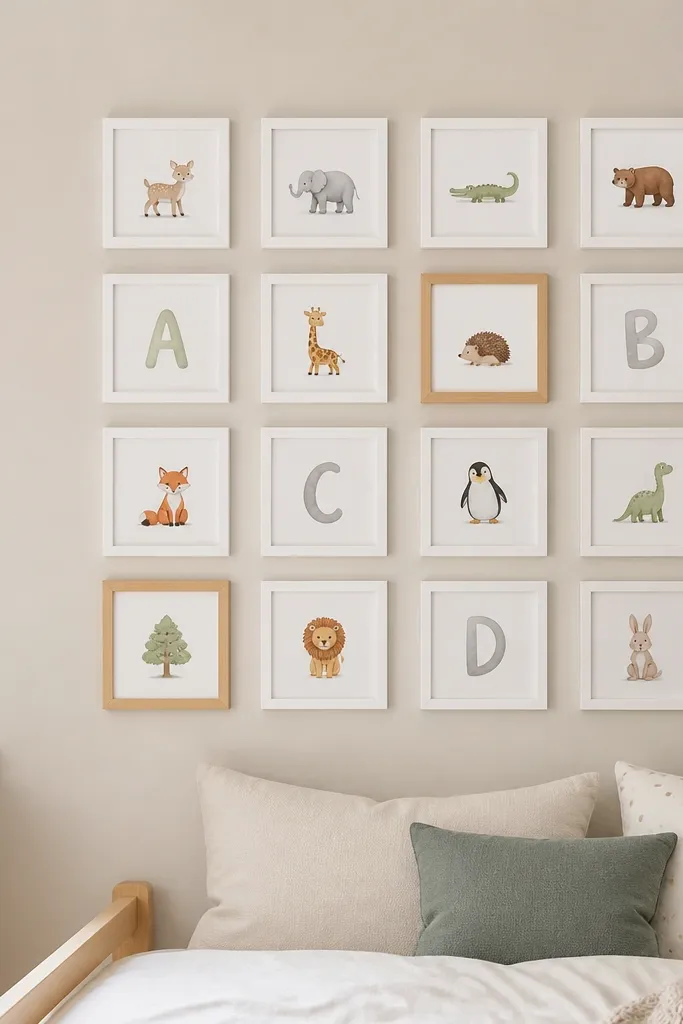
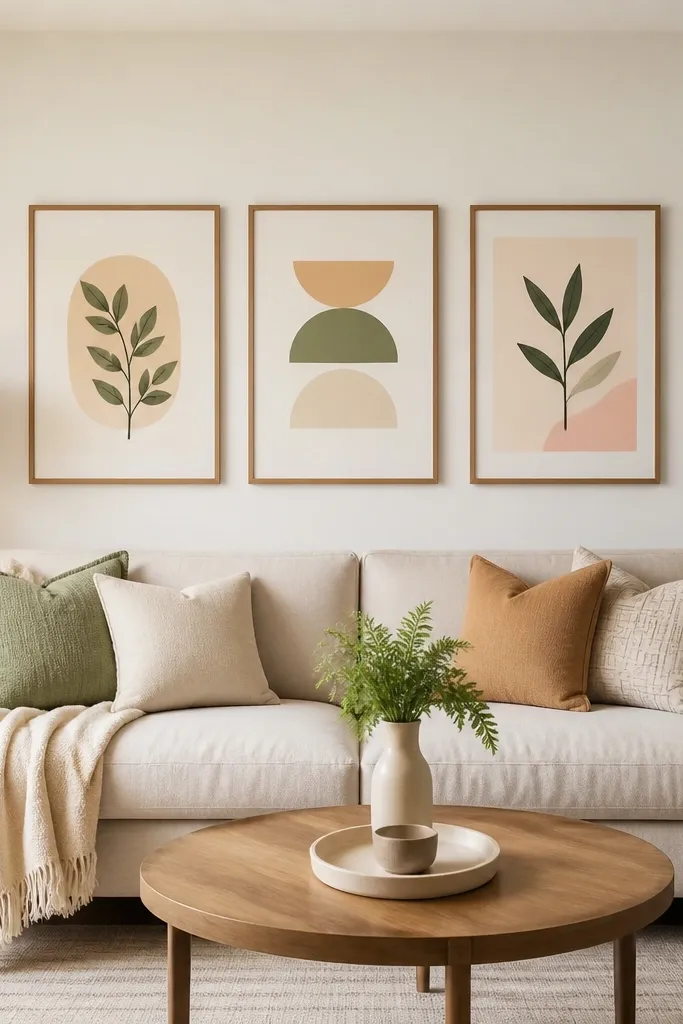
Start by laying frames out on the floor in the exact arrangement you want, using painter’s tape to tape them to the wall as a grid. Keep consistent spacing of about 2 inches between frames so the wall reads clean. Mount the center of the grid around 58-60 inches from the floor so it’s visible from standing and sitting. Use picture hanging strips if you’re in a rental, otherwise use nails and a level. Finally, add a single larger frame at eye level to anchor the set, then keep the rest smaller.
Gallery walls look expensive, but they’re easy on a budget if you control the frame size and spacing. I stick to 1-inch-thick frames in white or natural wood so the wall looks designed instead of random. For kids rooms, I use prints with simple shapes — animals, stars, letters — and I keep the color palette to two neutrals plus one accent color from the bedding. This works for very small rooms because the frames are small and consistent, so they don’t overwhelm the walls. It also gives kids a way to rotate art without changing the whole look. The spacing is what makes it feel neat, not the art itself.
AvoidSkip mixed frame widths — that mismatch is what makes a gallery wall look cheap.
Good to knowChoose one print theme for the whole wall and repeat the same accent color in at least 3 frames.
16. Two-tone closet door paint for instant order
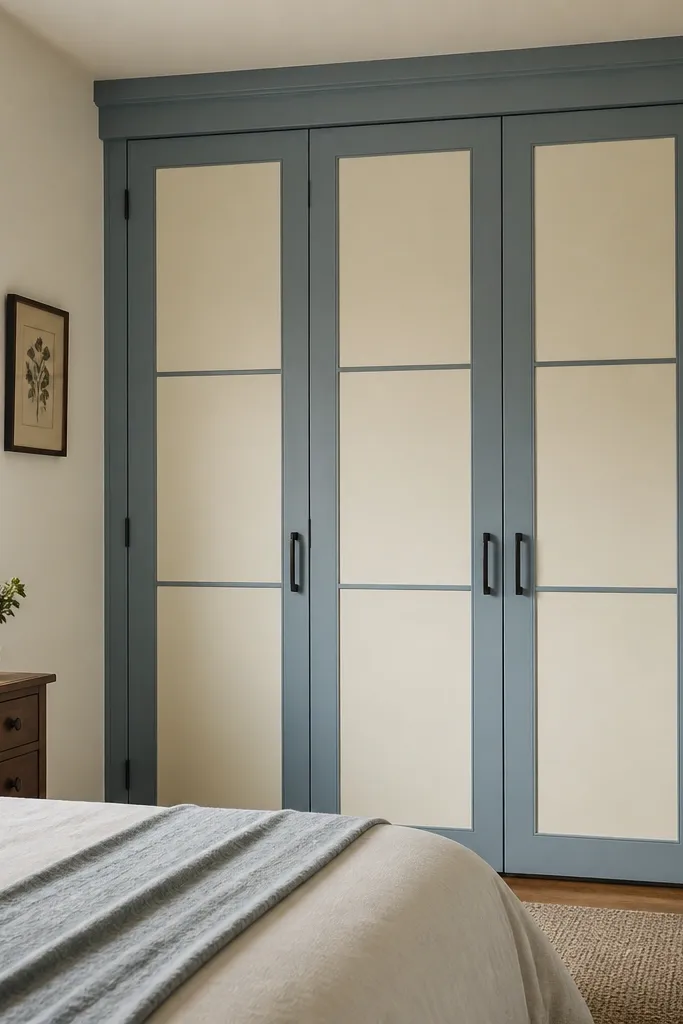
Start by removing the door if you can or carefully taping around the trim lines with painter’s tape cut cleanly. Paint the panels first, let them cure, then paint the trim in your accent color using a small angled brush for sharp edges. Replace hardware with simple knobs in matte black or brushed nickel if you want a more grown-up look. Let everything dry fully before closing the door so it doesn’t stick. Style the surrounding area minimally: one small basket on the floor and one framed print nearby, nothing extra.
Paint is the fastest way to make a budget bedroom look finished, and closet doors are where you see the room most. I do two-tone paint on the closet door: cream panels with a muted blue trim, or the reverse. This creates a clean “architectural” look without adding furniture. It works for kids because the doors hide stains and wear better than bright white, and it keeps the room looking intentional even when the closet is messy inside. Choose colors that match the bedding so the room feels cohesive. The visual effect is stronger than adding another decorative item because it changes the structure of what you see.
AvoidAvoid painting over old glossy trim without sanding or primer — the finish will peel and look rough.
Good to knowUse a satin finish for closet doors — it wipes clean and holds up to kid hands.
17. Slim desk with a wall shelf backsplash
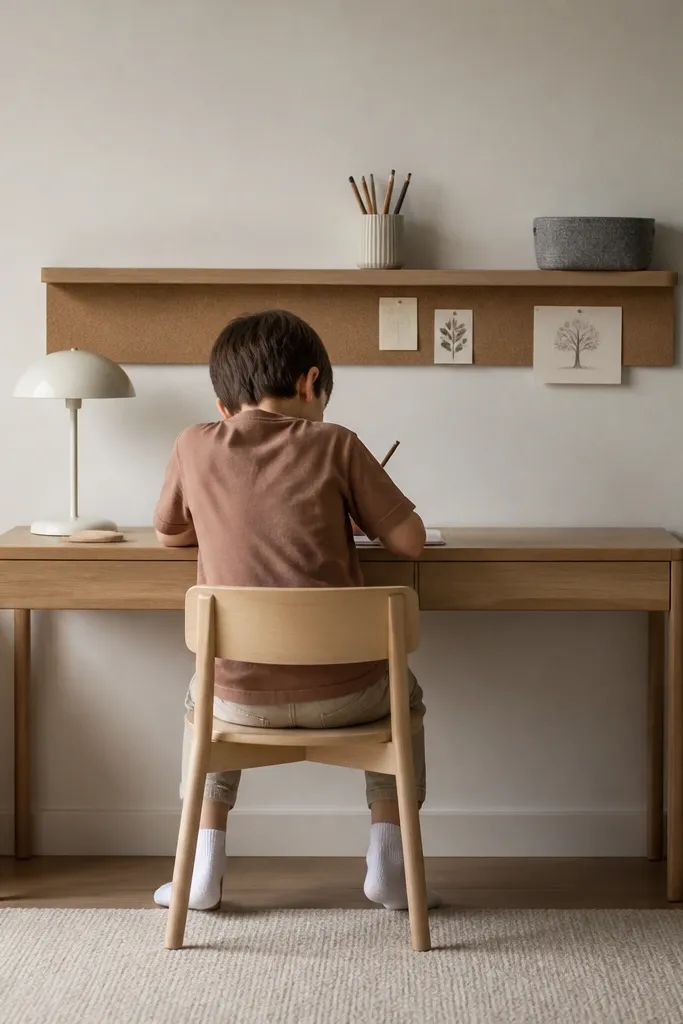
Start by putting the desk against the longest wall you have, leaving enough clearance to open the door and move to the bed. Install a wall shelf behind the desk so it sits about 10-12 inches above the desktop, which keeps supplies within reach without leaning too far. Add a cork strip or magnetic strip under the shelf for notes and small reminders. Choose a pencil cup and one paper tray only, and keep everything else in drawers or bins. Finally, place a small rug under the chair so the area feels defined and easier to clean.
Small kids bedrooms need study space that doesn’t swallow the room. A slim desk plus a wall shelf behind the desk creates a “backstop” for supplies so they don’t clutter the tabletop. I like desks that are 24-30 inches wide and 18-20 inches deep, because kids can work without the desk feeling like a block in the room. The shelf behind the desk is the secret: it holds the stuff they reach for most, like pencils, erasers, and a small organizer for papers. This works best for kids who do homework at a desk and for parents who want less mess on surfaces. It also keeps the room looking organized even when the desk is in use.
AvoidDon’t hang the shelf too low — it forces kids to bump it and they stop using it.
Good to knowUse a small book ledge on the shelf for reading while studying — it cuts down on scattered books.
18. Bedside wall sconces with battery bulbs
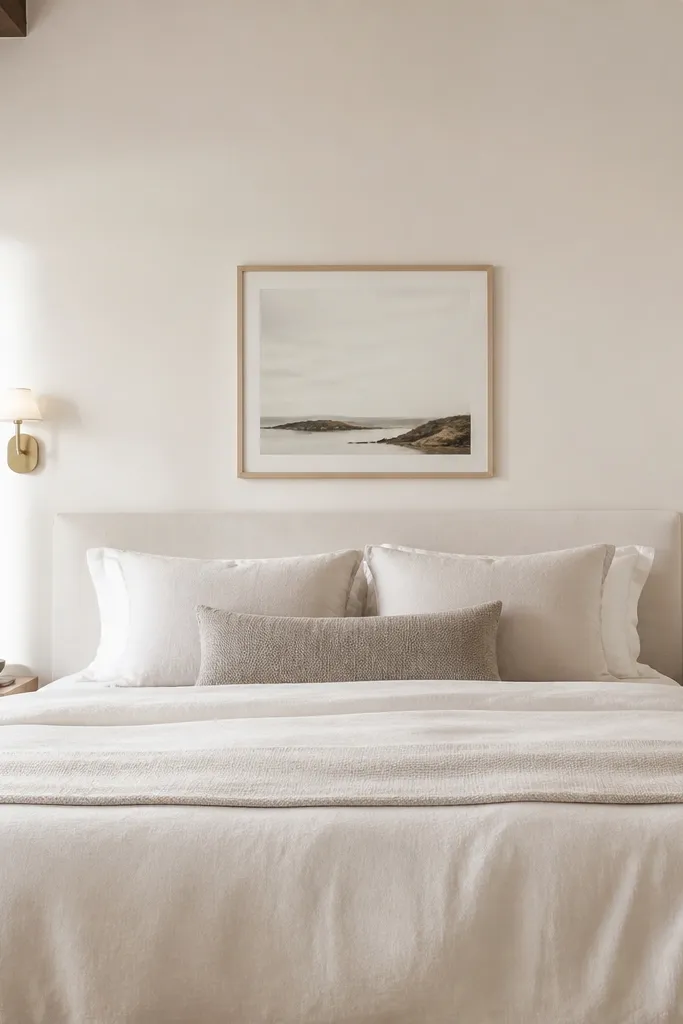
Lighting changes how big a room feels, and you don’t need fancy wiring to get the effect. Battery-style wall sconces give you bedside light without taking up a nightstand, which is huge in very small bedrooms. I like simple plug-in sconces with an outlet near the bed or battery LED sconces when outlets are limited. Use warm 2700K bulbs so the room feels cozy and kids can wind down. This works for kids who need a night light for bedtime reading, and it makes the room feel more “adult” without adding clutter. The best part is the floor stays clear because there’s no lamp base to trip around.
Start by measuring the wall height near the bed and place each sconce so the center of the light sits about 54-60 inches from the floor. If you use plug-in sconces, position them so the cord can run behind the bed frame or along the wall trim. Choose warm LED bulbs and test brightness before you commit to the final placement. Remove any bulky nightstand items so the sconces can do their job. Keep one small book stack under each sconce so the light has a purpose.
Use a remote-controlled LED bulb set for bedtime — kids can turn it off without getting out of bed.
Avoid cool white 4000K lighting — it makes the room feel harsh and smaller.
19. Clothing rail above a low toy cabinet
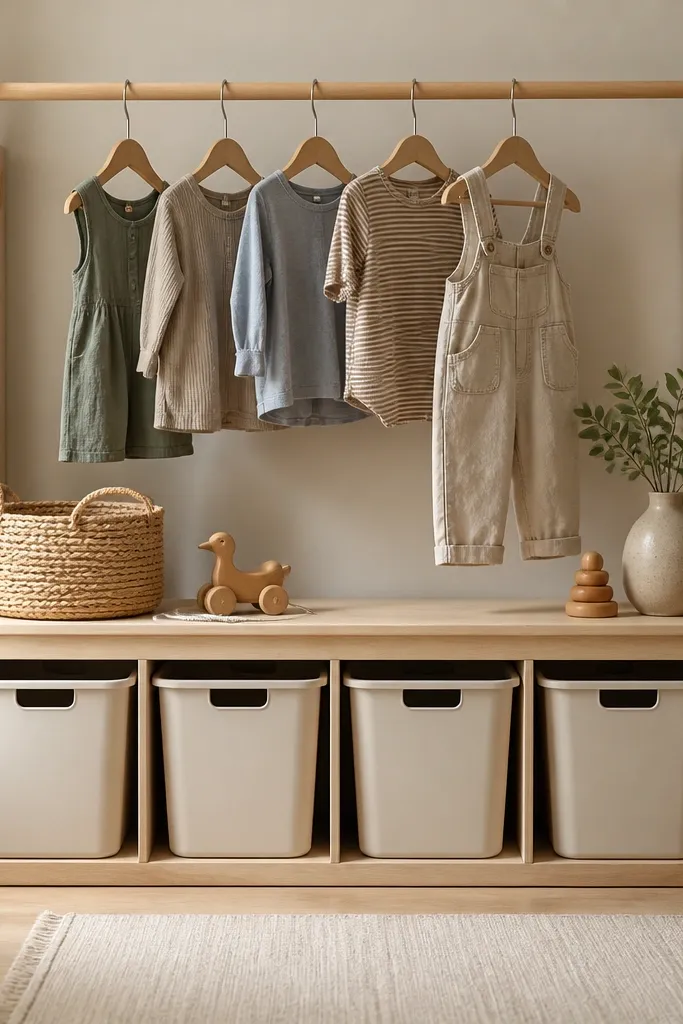
When kids can see their clothes, mornings get easier and the room stays tidier. A clothing rail mounted above a low toy cabinet creates a simple “choose and go” zone without needing a tall dresser. I keep only 3-5 outfits on hangers at once, and everything else goes into bins or shelves. This setup is great for kids who pick outfits the night before or who get dressed independently. The rail also uses vertical space, which matters in tiny rooms. If you match the rail finish to the drawer hardware or light fixtures, the whole room looks more cohesive.
Start by finding a low cabinet height so the rail ends up around 48-52 inches from the floor, which is reachable for most kids. Mount the rail into studs if possible, or use heavy-duty anchors with the kit rated for the rail’s load. Hang only daily clothes on lightweight hangers, then store seasonal items in labeled bins inside the cabinet. Add a small basket on top of the cabinet for belts or hair accessories so nothing ends up on the floor. Finally, keep the cabinet doors closed most of the time for a cleaner visual line.
Use matching hangers and remove everything that doesn’t fit or doesn’t get worn — it’s the cheapest way to keep the rail looking neat.
Don’t hang bulky winter coats on this rail unless you have strong wall support — it will sag and look messy.
20. Stair-step shadow boxes for trophies and medals
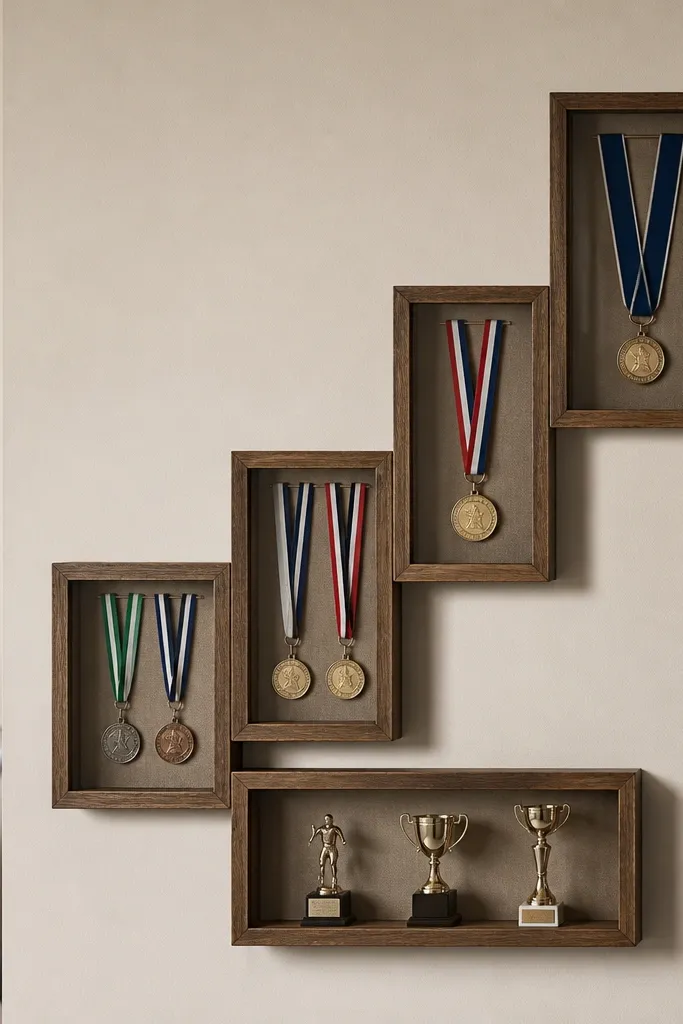
Start by gathering a few items and measuring their width so you pick shadow box sizes that fit without crowding. Arrange the boxes on the floor in a stair-step pattern, then mark mounting points with painter’s tape. Mount the lowest box so its bottom edge sits around 50 inches from the floor, and keep the next boxes about 6-8 inches higher. Add one small label card inside each box so the kid remembers what the medal is for. Finally, keep the rest of the wall around the shadow boxes minimal to avoid visual overload in a small room.
Kids love to display their wins, but trophy piles eat space fast. Shadow boxes let you collect medals and small trophies in a flat, wall-mounted way. I like a stair-step arrangement because it guides the eye upward and feels dynamic without adding furniture. Use clear acrylic and a neutral backing so the medals stand out, then choose a frame color like white or black to match the rest of the room. This works for sports kids and for craft kids who have ribbons, certificates, or small awards. The room stays clean because you’re not stacking trophies on the dresser or on the floor. It also makes the display easy to update when new items come in.
AvoidAvoid mixing too many frame colors — it makes the wall look like a random collection.
Good to knowUse museum putty or small removable hooks inside the shadow box to secure medals so they don’t slide behind the acrylic.