1. Shallow vanity swap with a rounded mirror
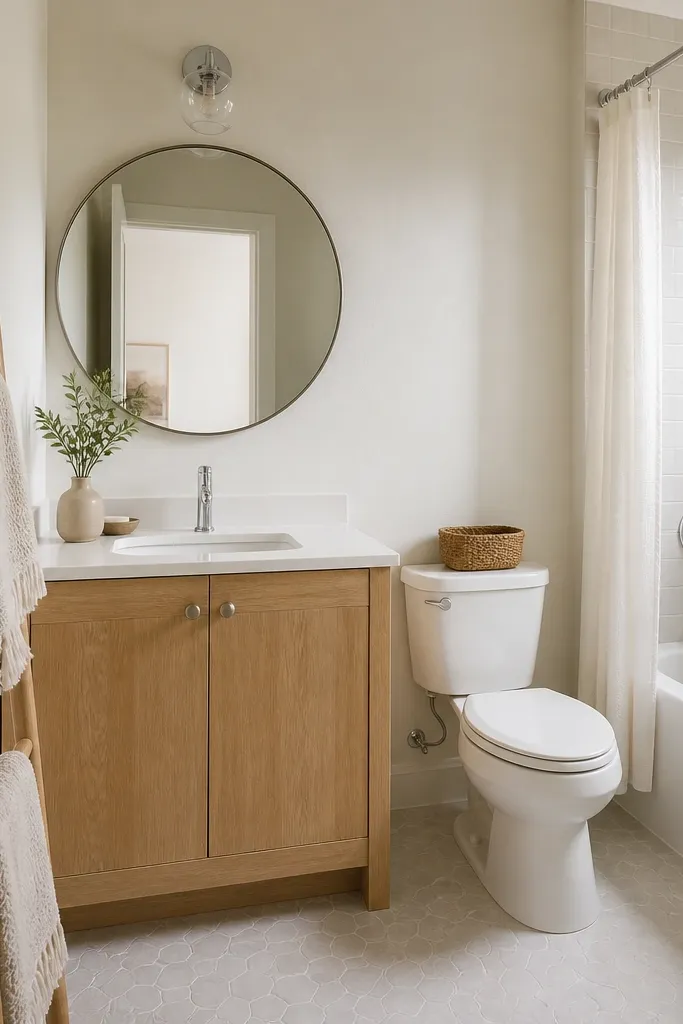
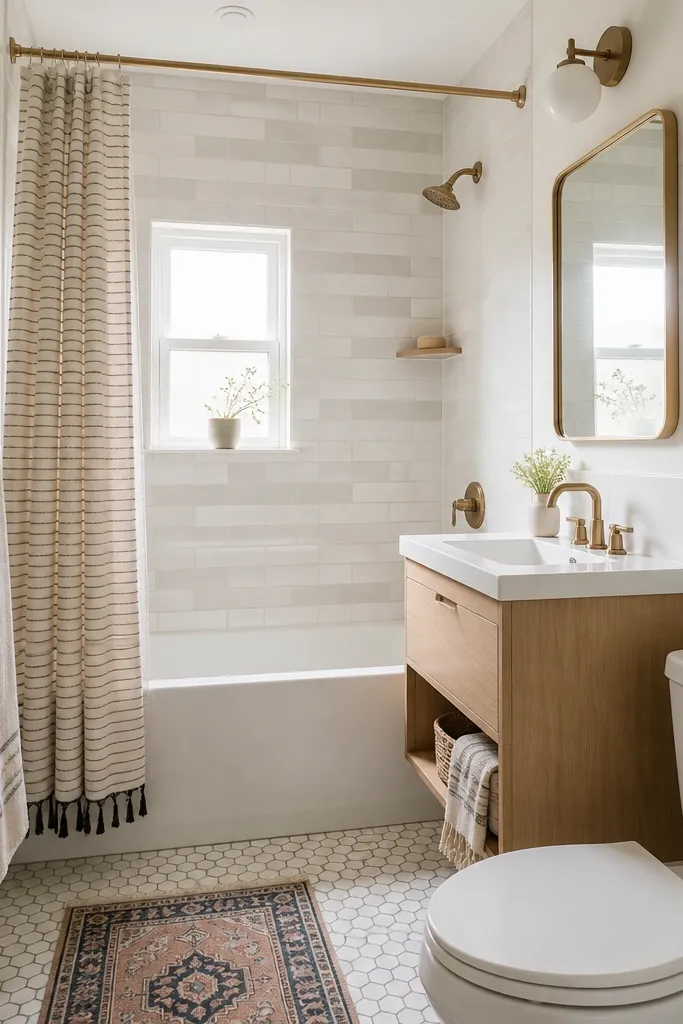
This setup works because depth is where small bathrooms get squeezed. A shallow vanity (around 16-18 inches deep) keeps your walking path open while still holding daily essentials in drawers. Pair it with a rounded mirror so the room gets softer curves — I’ve seen this look especially good on narrow spaces because corners don’t feel as harsh. Choose a light oak or whitewashed wood tone if your floors are warm; it keeps the bath from looking cold. Hardware matters too — brushed nickel or chrome on white stone looks clean and bright without turning the space into a showroom.
Measure the wall space above the vanity opening, then subtract 1 inch for clearance on each side. Buy a vanity that’s 16-18 inches deep and install it so the mirror’s bottom edge sits about 1 inch above the faucet splash line. Hang the mirror centered over the sink and use a frame color that matches your trim or faucet finish. Add one narrow towel ladder or wall hook to the side wall so towels don’t spill into the main traffic area. Finish with a small tray on the vanity top for soap and a single candle — keep the rest inside the drawers.
If your door hits the counter when it opens, shorten the vanity top by choosing a smaller sink bowl rather than forcing a deeper cabinet.
Skip a bulky 21-24 inch deep vanity — it steals floor space and makes the room feel cramped even with good paint.
2. Floor-to-ceiling tile half wall with a glass shelf corner
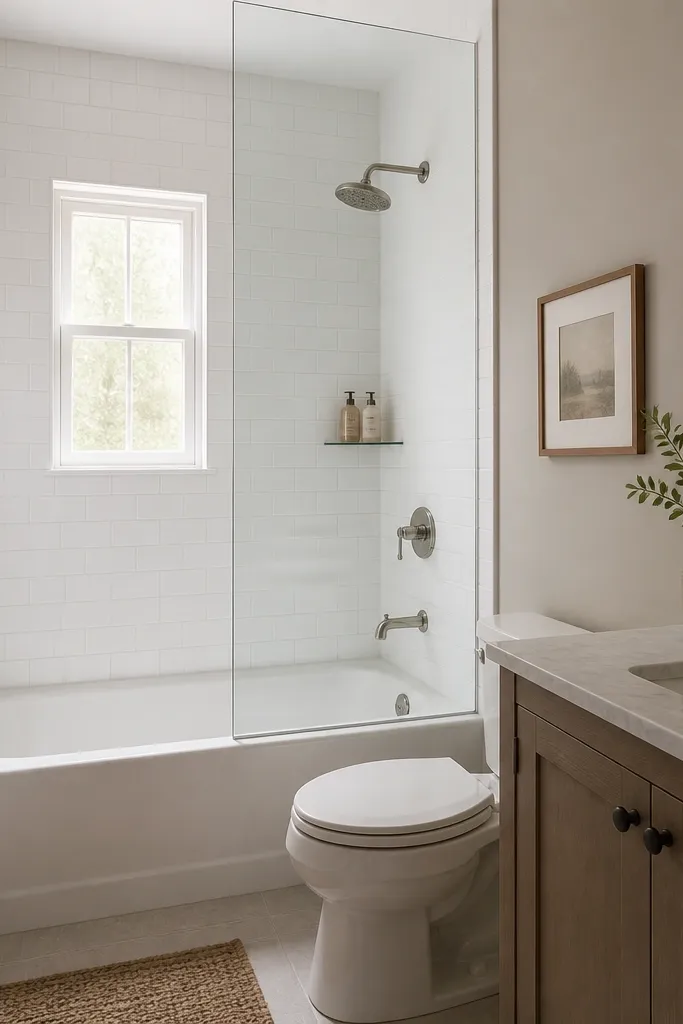
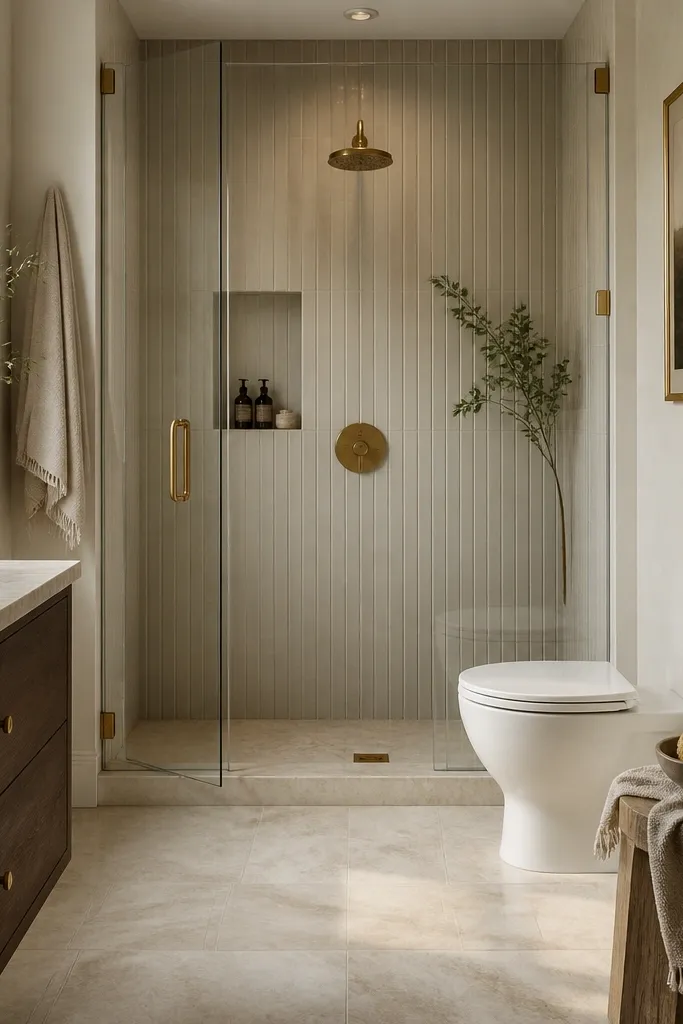
A floor-to-ceiling tile half wall style makes a small bathroom look finished because the eye reads the wet zone as one clean block. Matte white subway tiles hide water spots better than glossy surfaces, especially in real households where you’re not polishing daily. The clear glass shelf keeps shampoo from looking like clutter while still giving you a place to set bottles. This combo flatters almost every bathroom color palette — it’s neutral and it doesn’t compete with wood tones or black fixtures. If your skin tone leans warm, pair with brass or warm chrome so the whole space feels cozy, not sterile.
Choose a matte subway tile in white or soft ivory and run it from shower floor to ceiling. Keep grout light (light gray or warm white) so the tile lines don’t look too busy. Install a single glass corner shelf at about 40 inches from the floor for easy reach standing. Add a frameless glass panel or simple clear shower curtain if you can’t do glass — keep the opening wide. Finish the non-wet walls with a warm greige paint and match the faucet finish to any hardware on the vanity.
Use a grout sealer and wipe the tile with a squeegee after showers; matte tile still shows soap scum without quick maintenance.
Don’t mix three tile sizes in one wet zone — it makes the space look louder than it is.
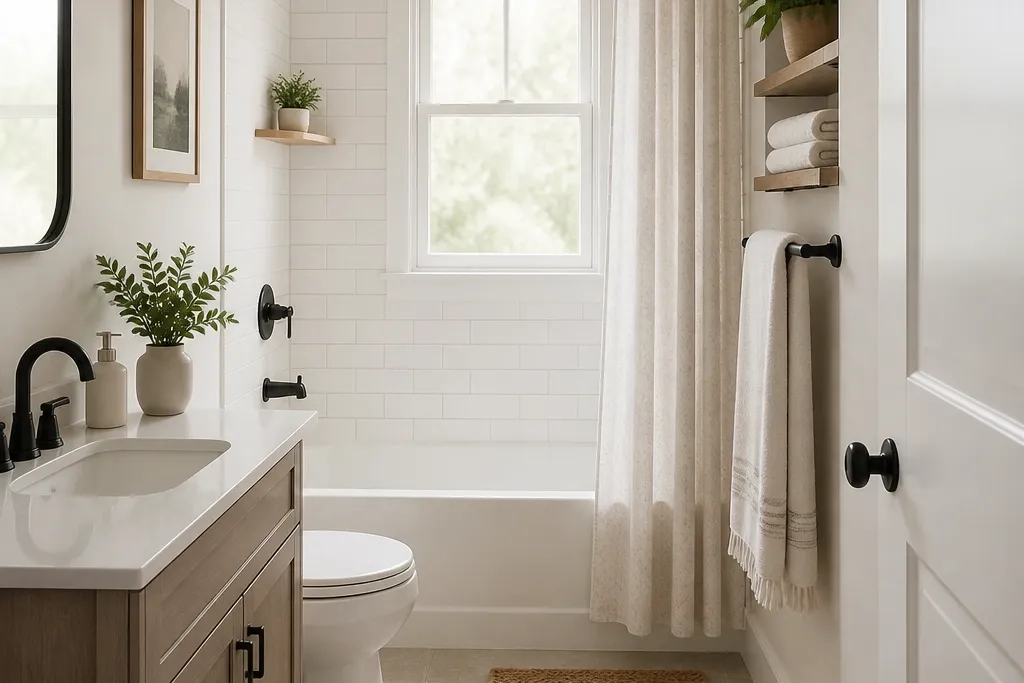
3. Black hardware and a light wood vanity with hidden trash
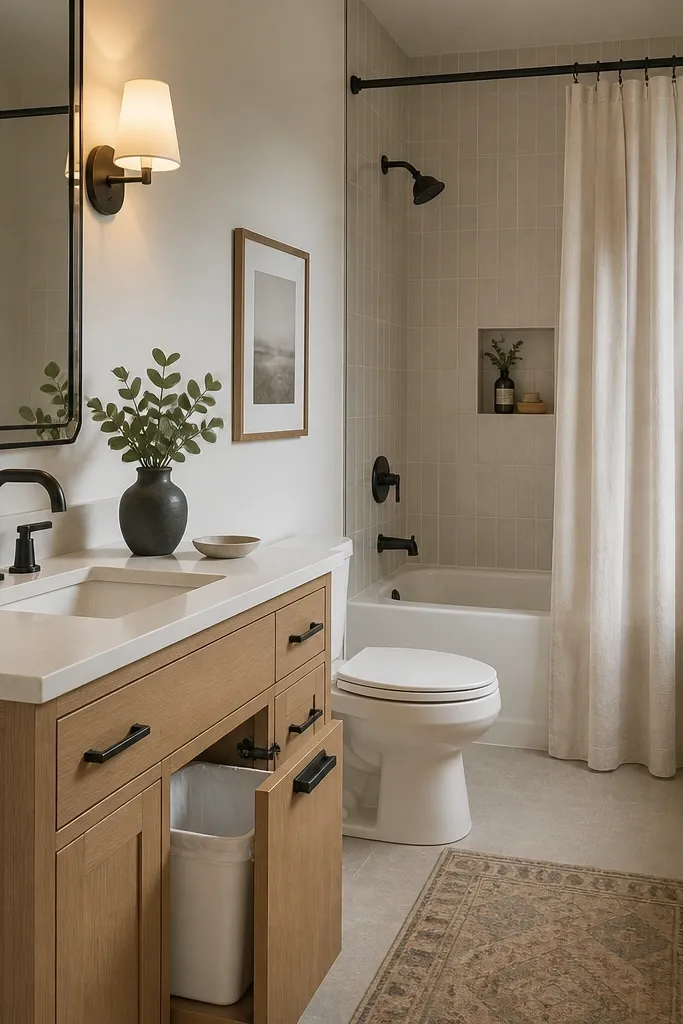
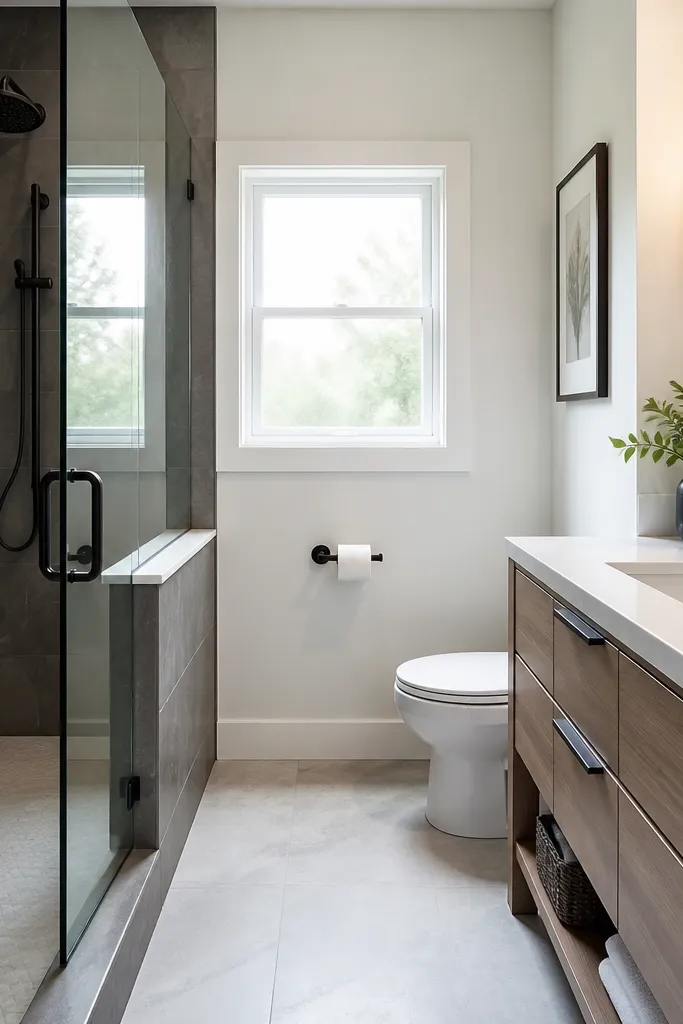
This look is about contrast without visual mess. Matte black hardware gives crisp lines that look intentional in small spaces, especially when paired with light wood and white countertops. The hidden trash trick matters more than decor — it stops “quick trash” from living on the counter. I’ve used this in rentals and it still photographs well because everything stays behind doors. It flatters people who like a slightly modern bathroom but still want warmth from natural wood grain. If your towels are white or cream, black fixtures make them look cleaner and less dingy.
Pick a vanity with at least one full-height cabinet door so you can install a slim pull-out bin. Choose a black faucet and match the mirror frame trim to that finish, not the drawer pulls only. Hang the mirror so it’s centered over the sink and leaves about 2-3 inches of space above the faucet. Add one wall sconce at about eye level (around 60 inches from the floor) to reduce harsh shadows on the face. Keep the counter minimal — a soap dispenser and one toothbrush holder set inside a tray.
Good to knowBring your trash bin measurement with you when shopping vanities; many “small” cabinets still fit the bin better than you’d expect.
AvoidAvoid leaving a trash can outside the vanity — it visually anchors the room and makes it look smaller.
4. Narrow floating shelf with a vertical towel stack
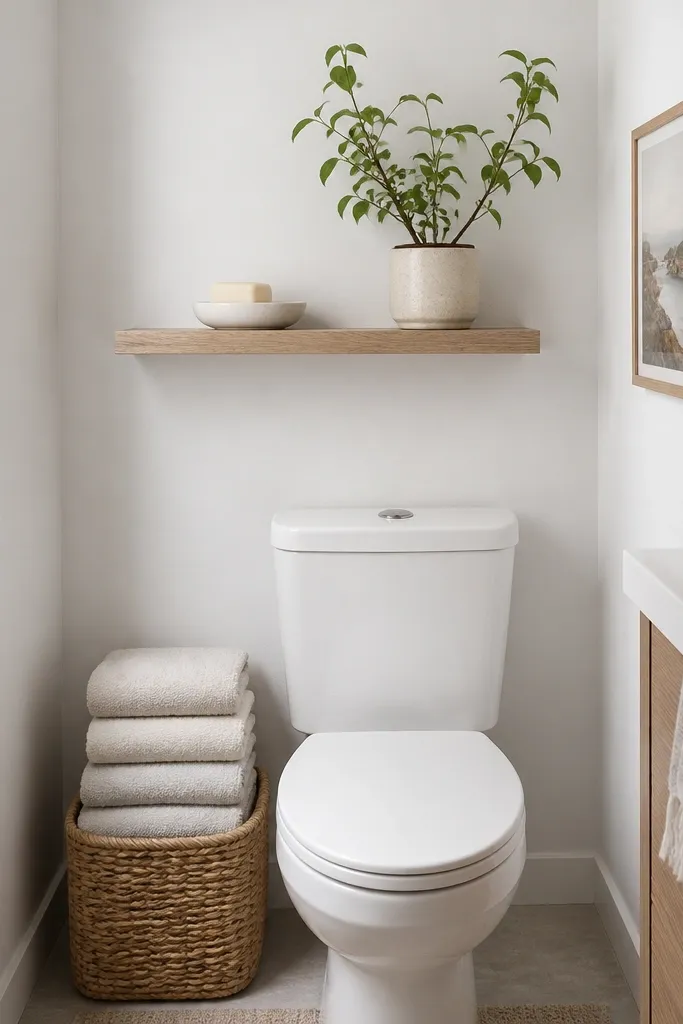
This is the simplest way to add storage without stealing floor space. A narrow floating shelf above the toilet uses the “dead” area that most people ignore, and it looks cleaner than a bulky cabinet. The key is height and spacing: keep items small and flat so you don’t create a cluttered shelf edge. I like this for beginners because it’s easy to install and easy to change later. It works well if your bathroom is mostly white or light gray and you want a soft, lived-in feel. If your hair and skin are darker, warm wall paint makes the whole room look more flattering in daylight.
Find the toilet tank top height, then plan the shelf so it sits 6-8 inches above the tank lid. Use a shelf depth of 5-6 inches so it doesn’t stick out into your movement path. Place two items max on the shelf: a soap dish and one small tray or candle holder. Fold towels and stack them vertically in a slim basket or organizer that fits the space beside or below the toilet. Add a small framed print or mirror on the side wall so the shelf doesn’t become your only focal point.
Use a level and mount into studs if you can; a shelf that’s slightly crooked makes the whole bathroom look unfinished.
Skip a shelf full of bottles — in a small bath, open storage reads as visual noise fast.
5. Mirrored medicine cabinet with a fog-free look
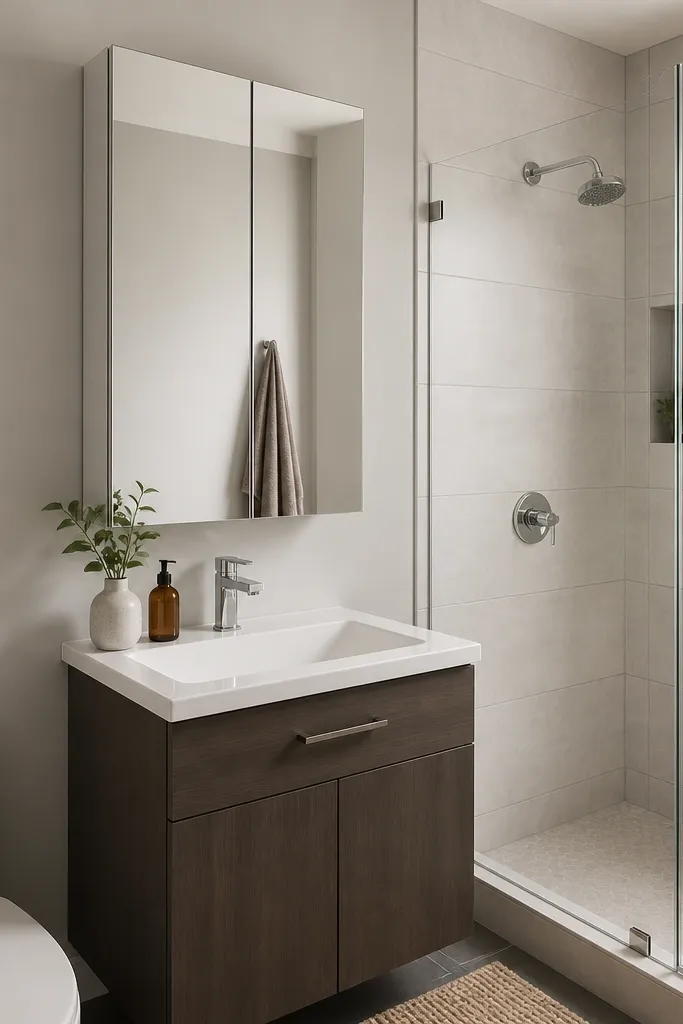
A mirrored medicine cabinet is one of the best beginner small full bathroom ideas because it combines function and optical expansion. The mirror doubles your light, and the cabinet hides daily items like skincare, razors, and hair ties. If you pick a model with an internal shelf layout, you can organize without bins taking up counter space. I’ve found this looks especially good in bathrooms with one window or bright overhead lighting — the reflection makes the room feel less boxed in. It flatters any style because you can choose brushed nickel, chrome, or black hardware around it. The fog-free style keeps the mirror usable immediately after a shower.
Choose a cabinet width that’s close to your sink width, then center it so the cabinet edges align with the vanity sides. Install at a height where you can reach the top shelf comfortably — typically the bottom shelf sits around 42 inches from the floor. Use a single wall sconce or overhead light so the mirror doesn’t cast harsh shadows. Inside the cabinet, group items by category: shave/skin on one shelf, hair accessories in a small caddy on the lower shelf. Keep the countertop to one item — usually a soap dispenser.
If you have hard water, wipe the mirror with a microfiber cloth after showers to keep spots from building up.
Don’t mount it too low — if the bottom edge sits below eye level, the mirror feels cramped and awkward.
6. Tub with a ceiling-height curtain and a wall niche
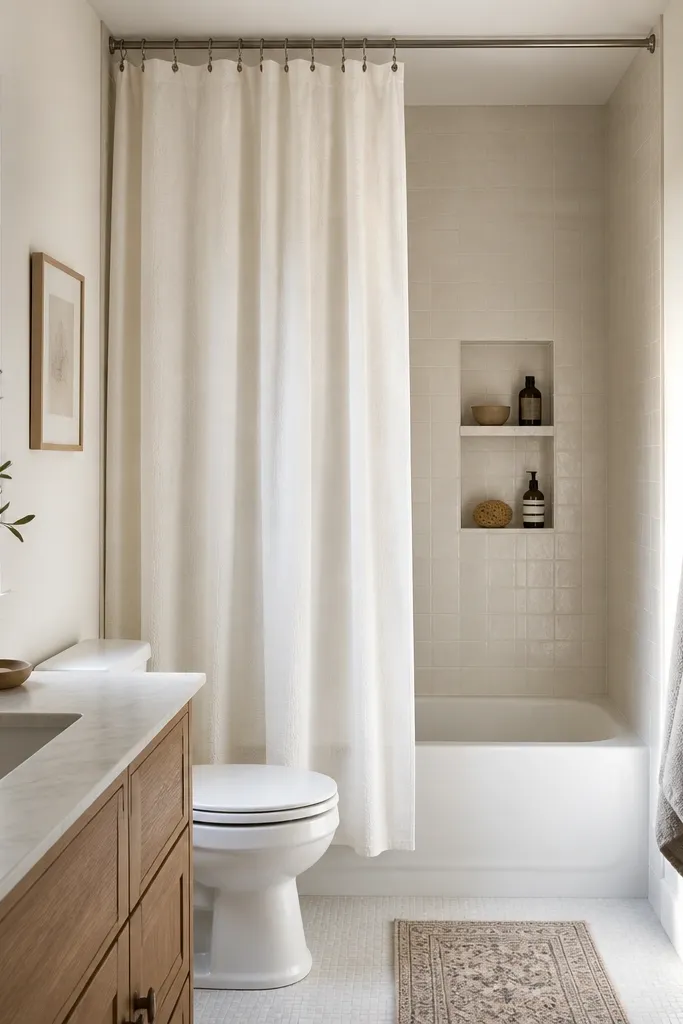
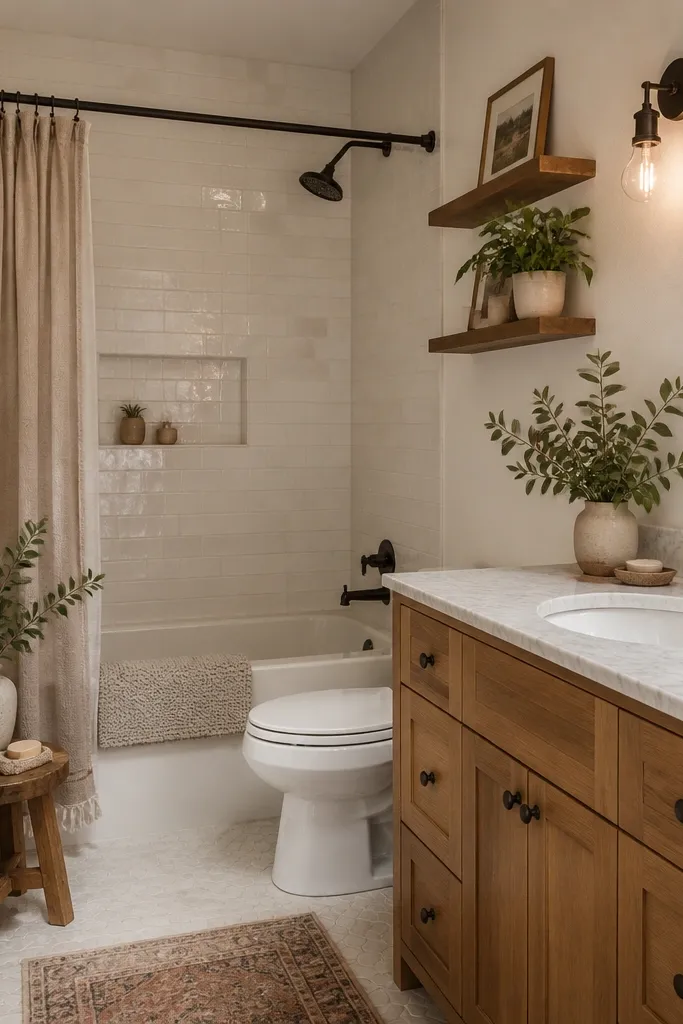
A ceiling-height curtain rod makes the ceiling feel taller and helps the room feel less chopped up. In a small bath, you want the shower area to look intentional, not like a fabric pulled across a tub. Pair that with a tiled wall niche so bottles have a permanent home. This works for beginners because you can get the “custom” look without building a whole remodel — the niche is the only tile work, and the curtain is easy to swap. It flatters people who hate clutter on shower ledges and want a calm, spa-like feel. If your towels are light-colored, the texture in the curtain hides wrinkles better than shiny plastic.
Install the rod close to the ceiling, leaving about 2-3 inches of gap so the curtain doesn’t sag. Choose a weighted curtain so it hangs straight — look for sewn-in weights near the hem. Place the niche about waist height for easy reach when standing — around 40 inches from the floor. Use the same tile in the niche as the surround so it reads as one unit. Keep the rest of the bath walls simple with one paint color and avoid extra shelves near the tub.
Good to knowUse a liner that’s clear or white and swap it every 6-12 months; a tired liner makes the whole setup look dated.
AvoidAvoid a rod that’s only a few inches above the tub rim — it makes the shower area visually smaller.
7. One-wall sink with a slim runner and matching rug pattern
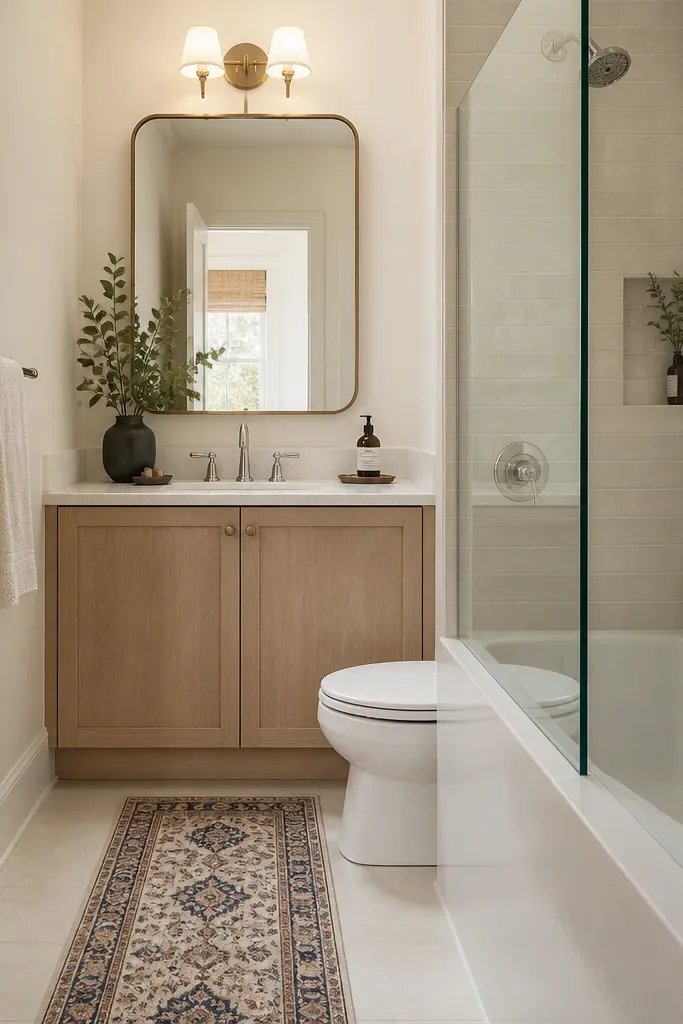
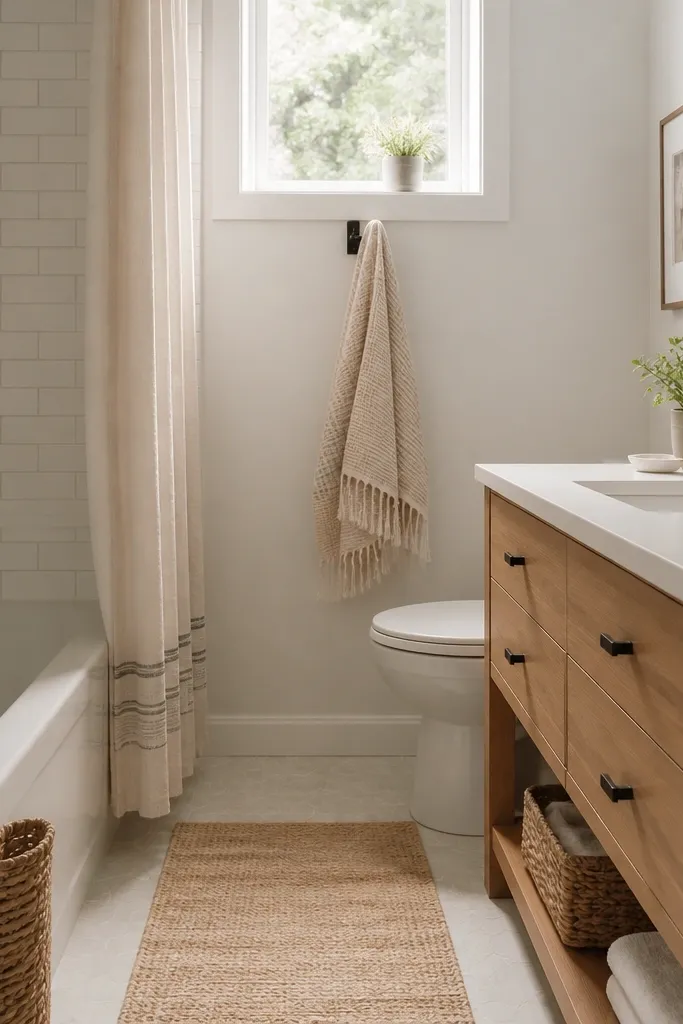
Rugs are risky in bathrooms, but when you choose the right pile and pattern scale, they make a small space look designed instead of temporary. A slim runner guides your eye and creates a “path” from the door to the sink, which helps the room feel longer and less cramped. Match the runner pattern to something small — like the tile grout tone or the shower hardware finish — so it looks cohesive. This is a good option for beginners who want style without major construction. It flatters lighter wood floors because the runner adds warmth without covering everything. If you’re worried about slips, pick a rug with a grippy backing and keep it short enough to dry fast.
Measure the open floor space and choose a runner that leaves at least 6 inches clear from the toilet base and shower edge. Pick a short pile rug that’s easy to rinse and has a non-slip backing. Keep the pattern scale small (tiny geometric or micro stripe) so it doesn’t overwhelm the room. Place a towel bar near the door and keep the vanity top clear so the rug doesn’t become the only “busy” element. If you have a window, aim the runner so it doesn’t block natural light on the floor.
Rinse and dry the runner on a schedule — I do a quick shake-out weekly and a deeper clean monthly depending on humidity.
Skip shag rugs; they hold water and make small bathrooms smell off fast.
8. Peel-and-stick backsplash behind the vanity
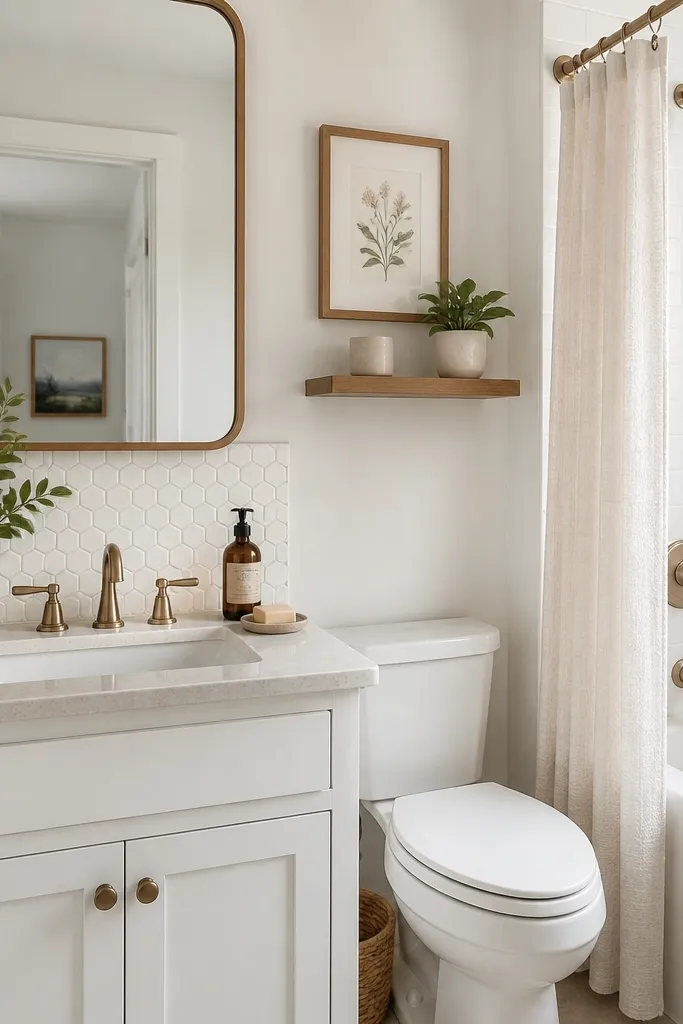
This is a budget move that looks expensive when you get the details right. A peel-and-stick backsplash gives you a defined “zone” behind the sink, which makes the whole bathroom feel more styled. Choose a tile pattern with small grout lines so it doesn’t look like a sticker sheet — I’ve had best results with hex or small subway-style patterns. It works for beginners because it’s low-risk and changes the bathroom’s vibe without touching plumbing. It also flatters any color scheme since most peel-and-stick designs are neutral whites and grays. If your lighting is warm, pick tiles with a soft ivory tone rather than icy white.
Clean the wall thoroughly with a degreaser so the adhesive sticks. Dry it completely, then start with the bottom row aligned to the counter edge. Use a level to keep each row straight — press firmly with a plastic squeegee. Cut around outlets with a sharp blade and test-fit each piece before sticking fully. Seal the edges lightly with clear caulk where the backsplash meets trim and wipe away any excess.
Good to knowTurn off the bathroom fan during installation so dust doesn’t settle on the adhesive.
AvoidDon’t install over glossy paint or flaking surfaces — the tiles lift and look messy within months.
9. Matte white paint with satin trim and a single black accent
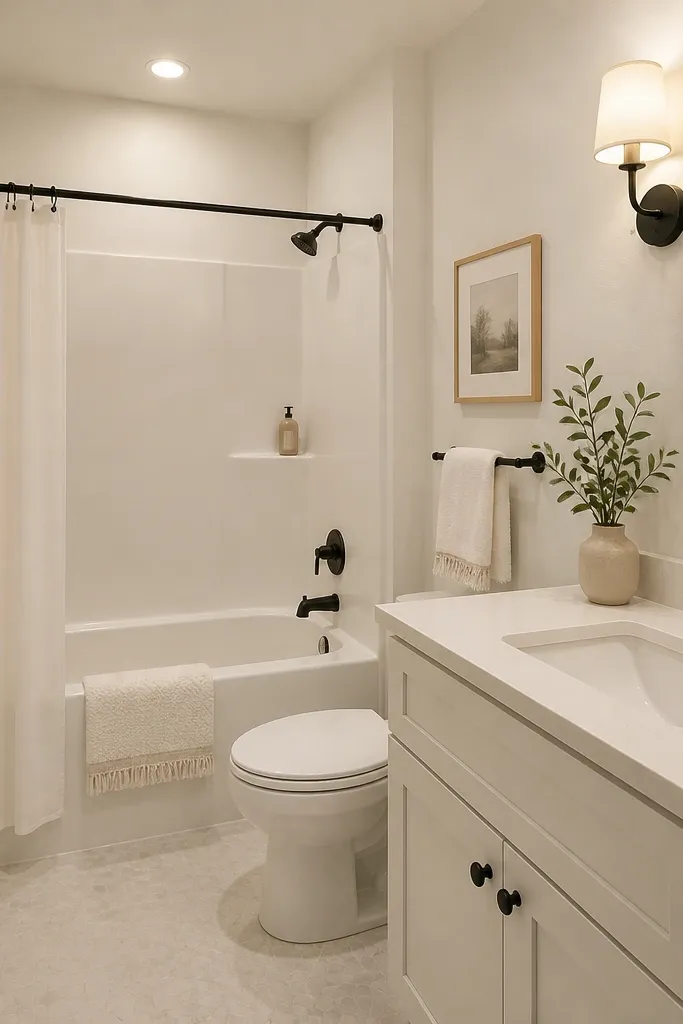
Small bathrooms look bigger when you remove visual contrast on the walls. Matte white walls hide tiny imperfections, and satin trim keeps the edges crisp. Then you introduce one black accent (faucet and one hardware set) so the room isn’t flat. I’ve done this in rentals where the tiles were already dated — the paint and hardware trick made the whole bath feel cleaner fast. It flatters most skin tones because warm lighting and white walls brighten faces. If you want a calm, spa-ish mood, this palette delivers without needing many objects.
Paint walls in a true wash-friendly matte or eggshell (not glossy). Use satin on trim and door casing so it wipes clean. Choose one hardware finish and stick to it: black in this case for faucet, towel bar, and mirror frame. Keep the shower curtain or glass simple and light-colored. Add only one decor item near the sink — a small ceramic toothbrush holder or soap dispenser in black or white.
Use painter’s tape to mask the trim edges cleanly; crisp lines make matte walls look intentional instead of patchy.
Avoid mixing multiple accent metals (brass, chrome, black) — it makes a small bathroom look chaotic.
10. Corner shower caddy made from a single matching material
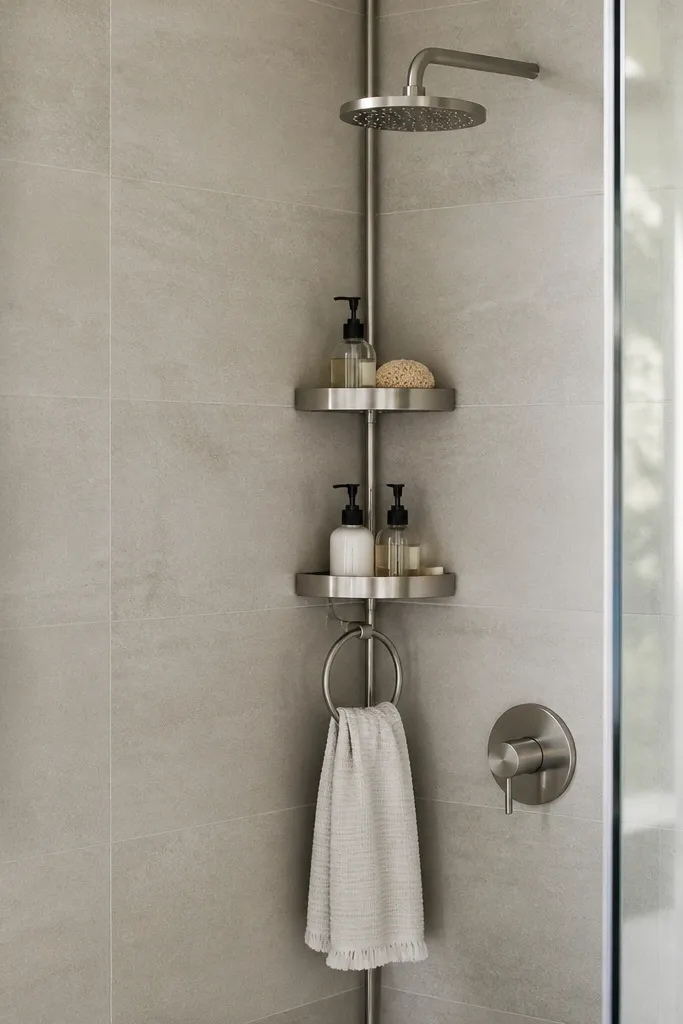
A corner caddy sounds boring, but in small full bathrooms it’s actually the difference between “tidy” and “messy.” When the caddy matches the shower finish and tile color, it disappears visually and keeps bottles off the floor. I’ve installed caddies in chrome, brushed nickel, and black finishes; the best-looking ones have smooth edges and a tight fit to the corner. Choose one that has drain holes so water doesn’t pool in the bottom shelf. This is beginner-friendly because it doesn’t require tile work, and it’s immediately functional. It flatters anyone who hates reaching around bottles while shaving or washing hair.
Pick a caddy size that fits the corner without blocking the shower door swing. Dry-fit it first and check that the top shelf is reachable from standing — around 48-52 inches from the floor. Use a matching finish to your faucet and towel bar so it looks like part of the bathroom. If it’s a suction caddy, clean the tile with rubbing alcohol and press for the full hold time on the label. Arrange bottles by height: taller items go on the top shelf, pumps and conditioner go on the middle.
Use one refill system (same bottle shape) so the caddy always looks neat even when you’re out of your usual products.
Skip multi-color bottles standing loose on the shelf; it looks cluttered even with a good caddy.
11. Slim linen cabinet beside the toilet with closed doors
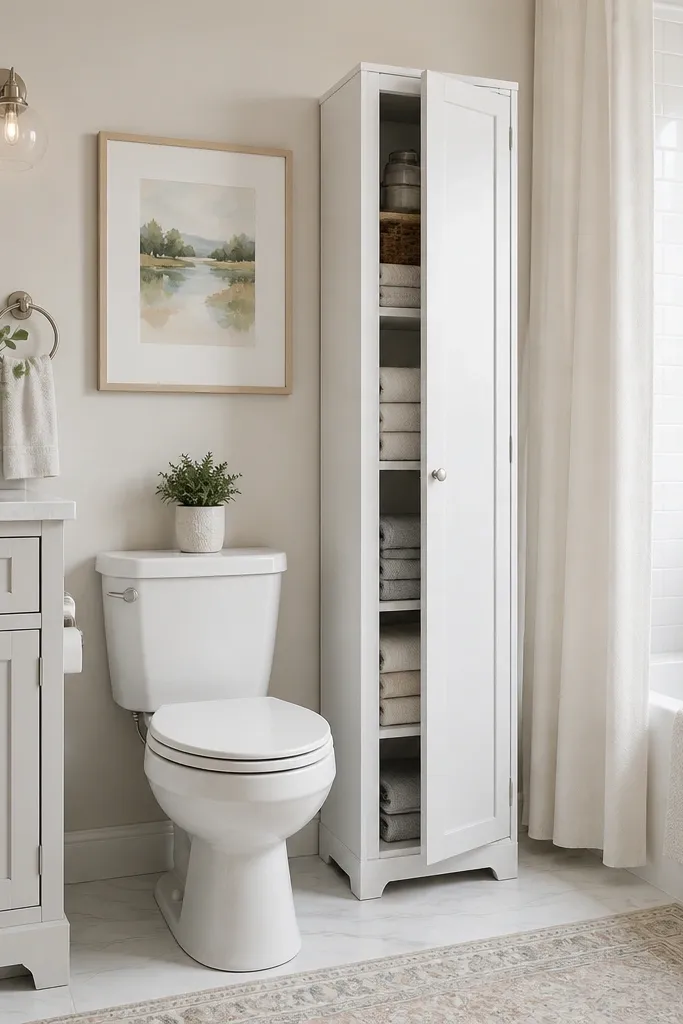
Closed-door linen storage is the fastest way I know to make a small bathroom look calmer. A slim cabinet beside the toilet uses a narrow strip of space that would otherwise hold nothing but clutter. I like this option when your vanity is small and you still need towels, extra toilet paper, and cleaning supplies. It flatters a clean, modern look because doors keep visual noise down. If your bathroom is small and you hate seeing folded towels, this is the answer. It also helps you keep one “landing zone” for supplies instead of spreading them across the counter.
Measure the side wall gap next to the toilet tank and leave at least 1 inch clearance for door swing or trim. Choose a cabinet width around 12-15 inches so it fits without making the toilet feel tight. Install it with the bottom shelf about 6 inches above the floor so you can clean underneath. Keep the top two shelves for towels and the lower shelf for toilet paper and backups. Style the top shelf inside with a small basket for extra hygiene items so you’re not hunting when you need something.
Good to knowStore cleaning spray in a sealed bin inside the cabinet; it prevents leaks from staining shelves.
AvoidAvoid open shelving for towels in a small bath; folded fabric still reads as clutter when the room is tiny.
12. Black-framed glass shower panel with light tile
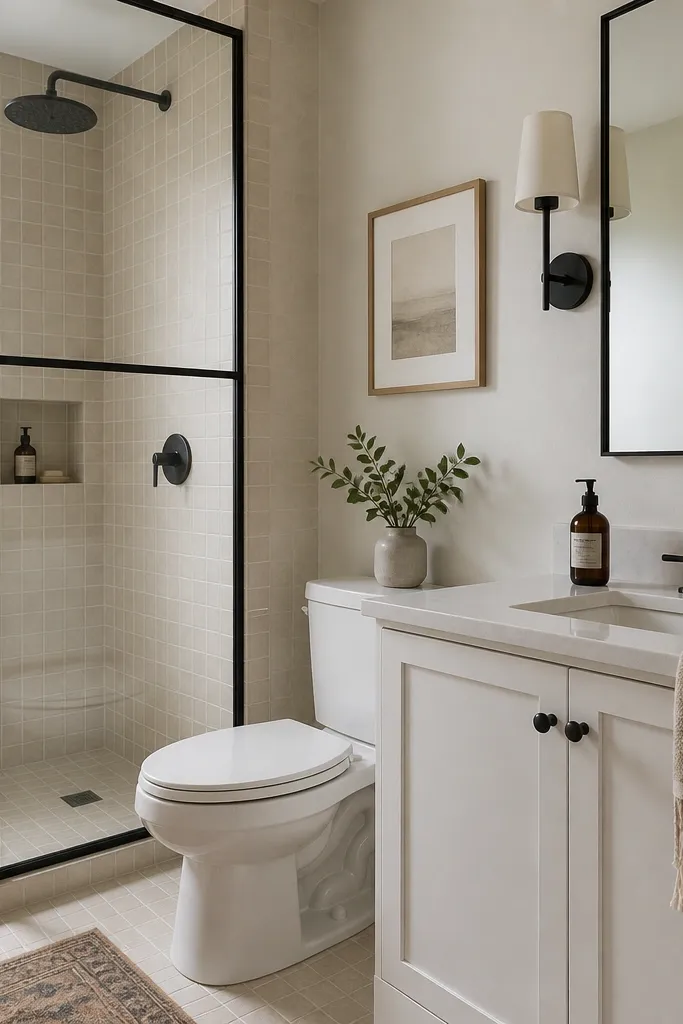
Framed glass gives you structure in a small bath, and black frames add a sharp line that makes the shower zone feel intentional. Pair it with light tile so the glass doesn’t darken the room. I’ve used this combo in baths that lacked windows, and it still looks brighter because the tile stays pale while the frame gives definition. It flatters modern decor and also works with farmhouse elements if you keep wood tones light. The key is keeping other finishes simple — no extra patterns fighting the frame. If your towels are white or cream, black framing makes them look crisp rather than dingy.
Choose light tile (pale beige, ivory, or very light gray) and keep grout light so the shower doesn’t look like a grid. Install the black framed glass panel so the door opens smoothly without hitting the towel bar or vanity. Use a black mirror frame and a matching towel bar to connect the visual lines. Keep the shower shelves minimal — one corner caddy or one niche. Add a squeegee to the glass edge so water spots don’t build up and make the black frame look gray.
Clean the black frame with a gentle bathroom cleaner and microfiber — harsh scrubbing leaves streaks that show on camera.
Skip dark tile walls with black framing in a windowless bathroom; it makes the room feel smaller the moment you walk in.
13. Textured wallpaper behind the toilet in a wet-safe way
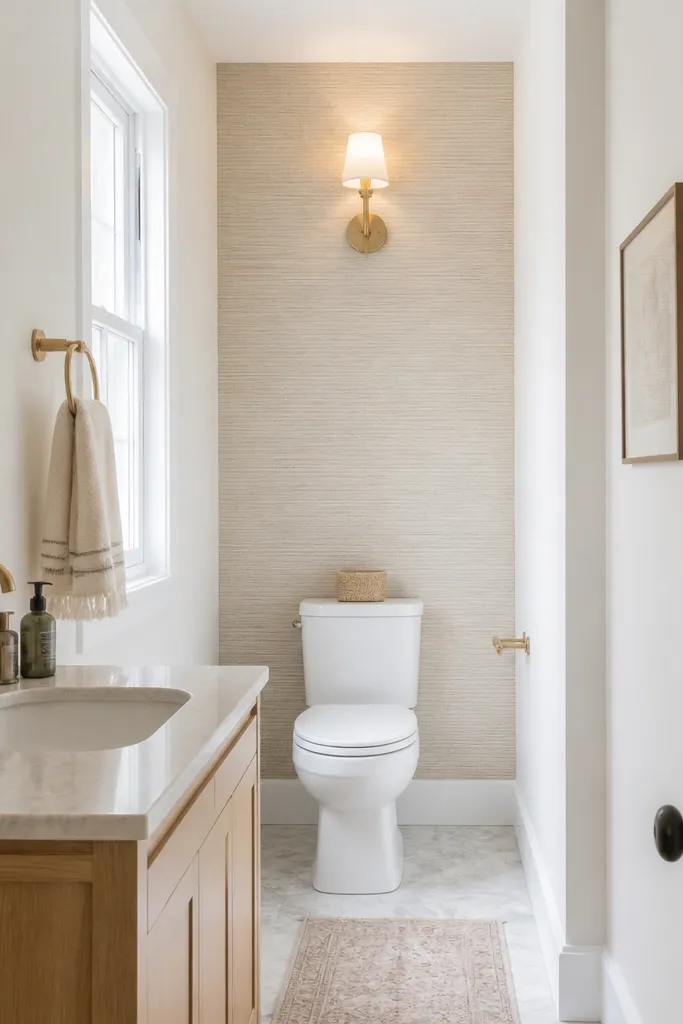
Accent wallpaper behind the toilet is a sneaky way to add style without covering the whole room. The toilet area is set back from the wet zone, so you can use wet-safe wallpaper and still keep it practical. Textured patterns — like grasscloth-style or subtle striations — hide minor wall imperfections and look expensive in small spaces. It flatters neutral palettes and makes warm lighting look cozy. I like this for beginners because it gives you a clear focal point while you keep the vanity and shower simple. Choose a muted tone so it doesn’t overpower the compact layout.
Pick a wallpaper labeled for bathrooms or wet areas and plan to apply it only to the dry side of the toilet wall. Clean and prime the wall first so edges don’t lift. Apply the pattern so it lines up with the toilet centerline, then trim carefully around the flush tank edges. Add a wall sconce above at about 65 inches from the floor so light hits the texture. Keep the rest of the bathroom paint to a soft white to balance the accent.
Use a clear silicone caulk at the wallpaper edge where it meets trim so moisture doesn’t sneak under seams.
Avoid placing wallpaper in the splash zone behind the sink or directly next to the shower.
14. One large artwork instead of multiple small prints
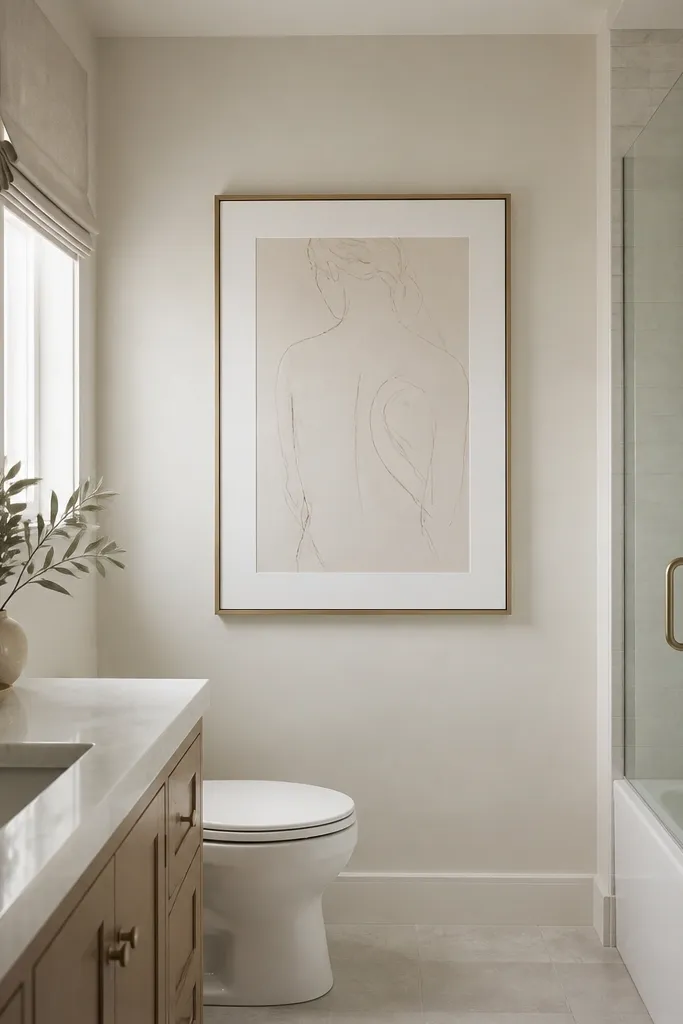
In tiny bathrooms, small art looks like clutter. One large piece gives a calmer visual block and makes the wall feel planned. I’ve used a single 24x36 inch print in narrow baths and it instantly fixes the “blank wall” problem without crowding the floor. Choose a frame finish that matches your mirror or faucet so the whole bathroom reads as one set. This works for beginners because you can buy one affordable print and swap it later without redoing anything else. It flatters bathrooms with simple tile — the art brings personality. Keep colors muted so it doesn’t fight the tile grout lines.
Measure the wall space above the toilet or beside the vanity and choose art that takes up about 60-70% of that width. Center the frame and hang it so the middle of the art sits around eye level — roughly 60 inches from the floor. Use a thin frame in chrome, black, or warm wood depending on your hardware. Keep the sink counter bare except for one item, so the art becomes the only “display.” If you use a towel bar on the same wall, place it below the art and leave a clear vertical gap.
Good to knowUse museum gel or a non-slip backing so the frame stays flat and doesn’t shift with humidity.
AvoidSkip a gallery wall of tiny prints; it makes the bathroom feel busy and smaller.
15. Over-the-toilet organizer with a color-matched towel bar
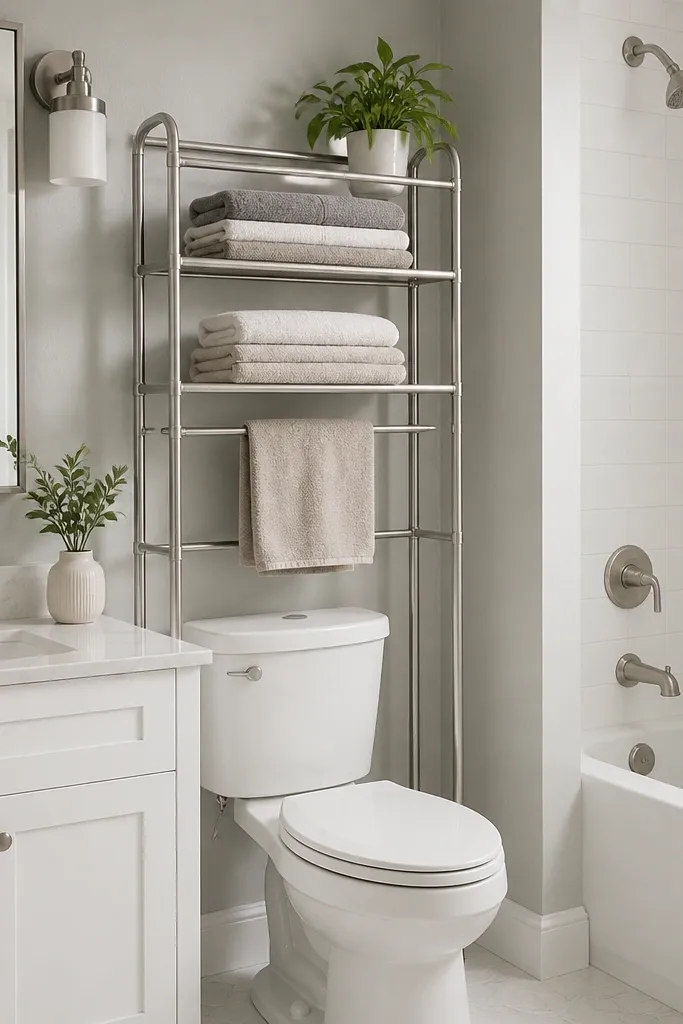
An over-the-toilet organizer works when the room lacks wall space for shelving. The trick is to match the finish and avoid overloading the shelves with bottles. This keeps the look cohesive and gives you practical storage for extra paper, spare toiletries, and backups. In my experience, brushed nickel reads warmer than chrome in small spaces, especially under warm bulbs. It flatters people who need organization but don’t want a full cabinet remodel. The organizer also helps keep towels off the floor, which makes the bathroom feel cleaner instantly.
Choose an organizer width that fits between the toilet edges and leaves at least 1 inch clearance from the wall. Install it so the bottom shelf sits above the toilet tank and doesn’t hit when you open the bathroom door. Add a towel bar or use the built-in rod so towels hang vertically and dry properly. Style the top shelf with one basket for backups and one small tray for everyday items. Keep the middle shelf for folded towels or spare rolls, not a mix of random items.
Good to knowUse matching towel folds: I do a simple tri-fold so everything looks uniform when you open the bathroom door.
AvoidAvoid leaving the shelves half-filled with mismatched bottles; it looks like storage, not design.
16. Compact vanity with open shelf and closed lower cabinet
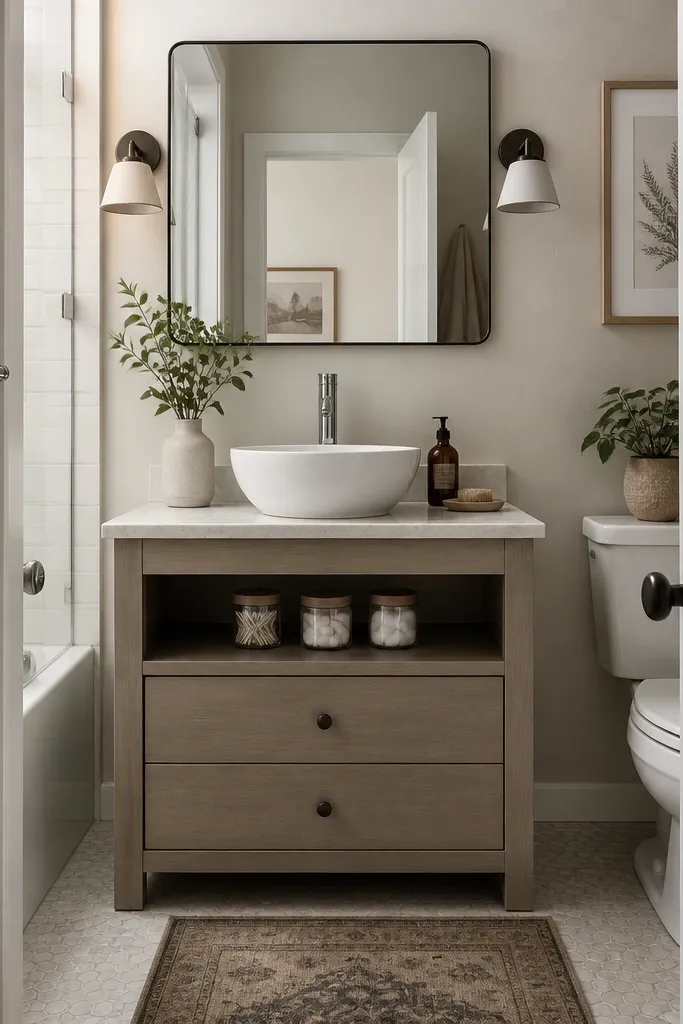
This layout gives you the best of both worlds: closed storage hides clutter and the open shelf lets you style a few items. In small full bathrooms, that open shelf is where you control the look, so you need to keep it curated. I like matching jars in clear glass or frosted white because they look clean even when you’re using them daily. The mirror being wider than the vanity adds a “frame” effect and makes the room feel larger. This works for beginners who want function without going fully minimalist. It flatters bathrooms with patterned floors because the vanity visually anchors the space.
Pick a vanity width slightly smaller than your sink wall space so you can leave wiggle room for installation. Install it so the faucet is centered and the mirror covers the same width as the vanity doors and open shelf. Style the open shelf with three items max: a soap dispenser, one jar for cotton rounds, and one small plant or candle. Keep the countertop clear except for a tray. Use a slim toothbrush holder and avoid tall items that reach toward the mirror.
Use clear labeling on refill jars so you can swap products quickly without breaking the visual style.
Don’t put cleaning bottles on the open shelf; they ruin the look even when everything else is neat.
17. Matte black sconces flanking a wide mirror
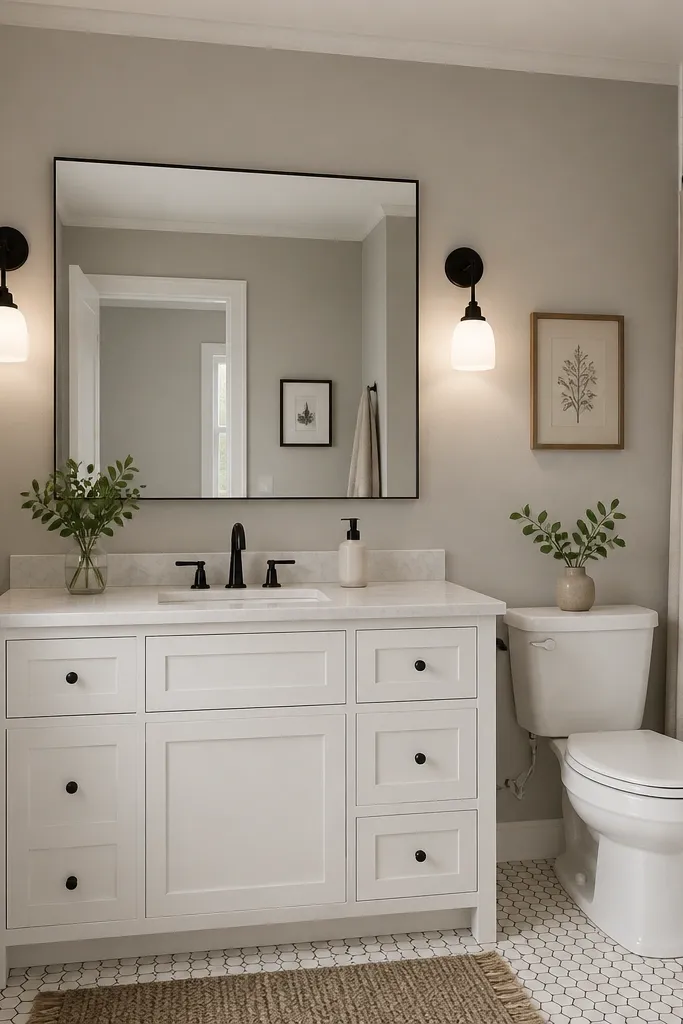
Lighting changes how big a small bathroom feels more than most decor does. Flanking sconces reduce shadows under your eyes and make the mirror area brighter, which matters for daily routines. Matte black fixtures add contrast and make the mirror feel more “designed” without extra clutter. I like this setup for beginners because it’s a clear upgrade you can do even if you keep the existing vanity. It flatters people with glasses because it reduces side glare. Keep the sconces symmetrical so your eye reads order, not chaos.
Choose a mirror wider than the vanity — about 2-4 inches wider on each side. Mount sconces at roughly 65 inches from the floor to the center of the light fixture. Ensure both sconces match in height and spacing so the mirror looks centered. Use bulbs that read warm (2700K or similar) so the bathroom doesn’t look blue. Tie the black finish into one other item — faucet, towel bar, or cabinet pulls — but not all at once.
Good to knowIf you can, use dimmable bulbs; a lower brightness makes small bathrooms feel cozy instead of harsh.
AvoidSkip one overhead light centered above the mirror — it leaves under-face shadows and makes the space look smaller.
18. Small full bath with a pocket door and an all-white wet wall
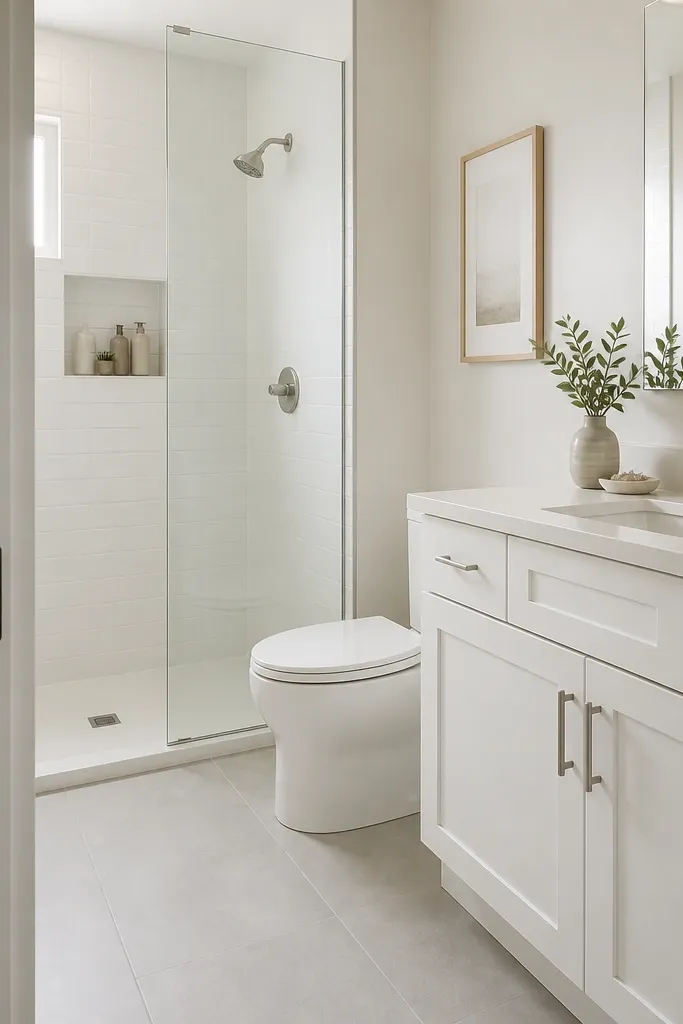
A pocket door is one of those upgrades that doesn’t look glamorous until you try it. It frees up the wall where a swinging door would block towels, a towel bar, or part of the vanity. In a small full bathroom, that extra clearance makes the room feel more usable, not just prettier. Pair it with an all-white wet wall so the shower area blends into the space and doesn’t create visual boundaries. This flatters almost any tile floor color because white reflects light well. If you have a compact shower, the all-white surround also hides minor stains better than dark surfaces.
If you can’t change the door, use the same principle by relocating towel bars and storage so they’re not in the door swing path. For the wet wall, pick a consistent white tile or surround and keep grout light. Install a clear glass panel to prevent water spread while keeping sight lines open. Keep the vanity and mirror simple and centered so the eye doesn’t have to work around extra shapes. Add one small textured element like a cotton shower mat in light gray so it doesn’t feel sterile.
Good to knowHang towels on the back of the door or on a wall hook that stays clear of the shower spray zone.
AvoidAvoid placing open shelves where the pocket door or door swing will hit — it makes everything feel cramped fast.
19. Shower niche with matching grout and two-tone shelf styling
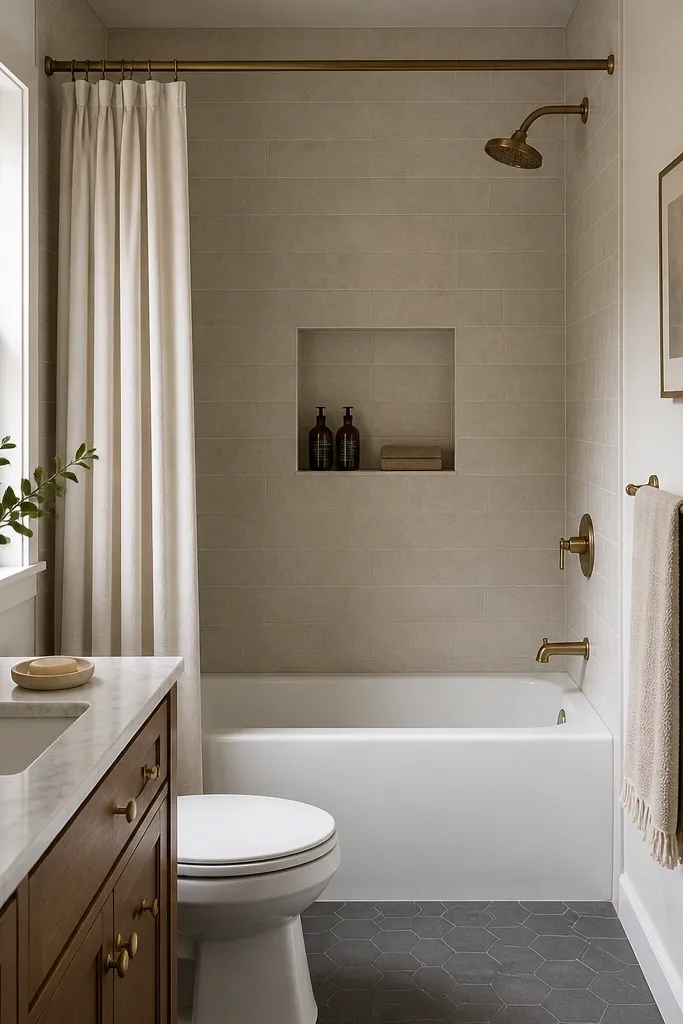
A niche is the cleanest solution for bottle clutter in a small shower. When the niche tile and grout match the rest of the surround, it looks like it was always part of the wall instead of an add-on. The styling matters too — I use two-tone products (white and clear or light beige and white) so the niche looks calm even when bottles are present. This works best for beginners who want a spa look without building a complicated shelf system. It flatters people who take quick showers but still need hair products in reach. Also, because everything is off the floor, your bathroom feels more hygienic.
Choose niche dimensions that fit real bottles: a niche around 10-12 inches wide and 18-20 inches tall holds most pump bottles without crowding. Install it centered on the shower wall at about 40-45 inches from the floor for easy reach standing. Match grout color to the surround so the niche blends in visually. Style with one soap bottle, one shampoo/conditioner pair, and one folded washcloth — keep the rest out of sight. Add a small squeegee or wipe-down routine so the niche stays clean and doesn’t show residue.
Good to knowUse refill bottles with the same pump height; it makes the niche look organized even when you switch products.
AvoidDon’t put tall, mismatched bottles in a niche; the visual clutter is still there, even if it’s off the floor.
20. Warm brass mirror and a simple shelf for daily items only
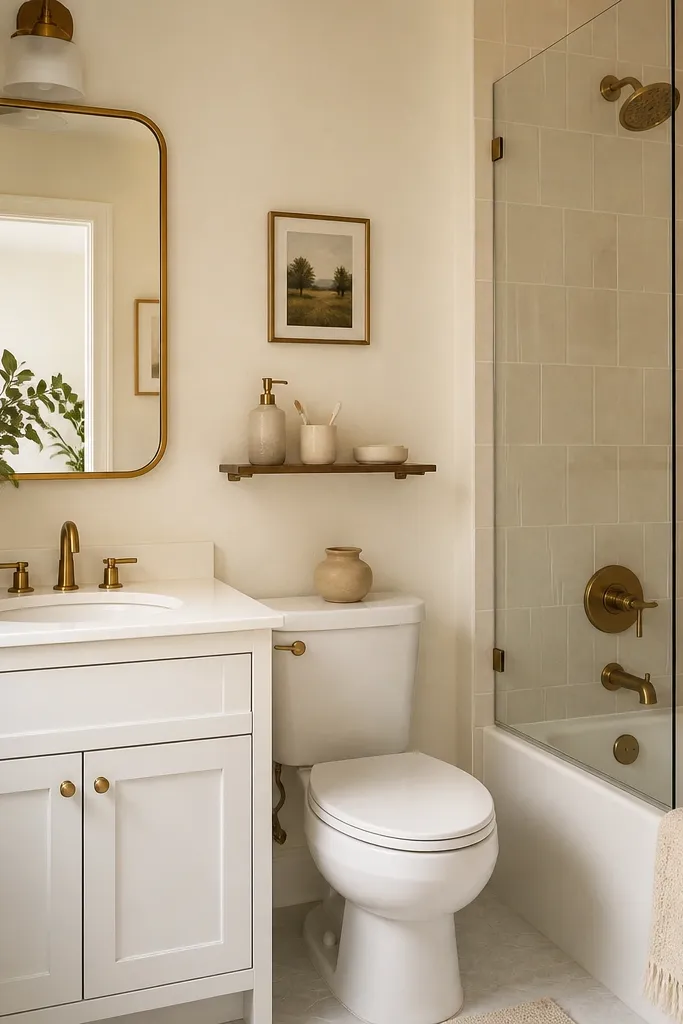
Warm brass reads softer than black in small spaces and makes the room feel inviting. I like it with warm cream walls and light neutral tile because it lifts the whole bathroom without looking flashy. The shelf is only for daily items — everything else stays hidden in drawers or a cabinet. This is beginner-friendly because you’re not trying to style every surface; you’re controlling one spot. It flatters most lighting conditions and makes skin tones look warmer in morning light. If your bathroom feels a little gray, brass and cream paint fix that fast.
Pick a brass mirror frame and match your towel bar or faucet finish to it. Install the mirror so it’s centered over the sink and its bottom edge sits about 2-3 inches above the faucet. Mount a small shelf near the sink at around 72-74 inches from the floor, not too high. Place only three items on the shelf: soap dispenser, toothbrush holder, and a small tray for cotton pads. Use a neutral soap color — white or cream — so it doesn’t clash with the tile or countertop.
Good to knowChoose one scent and keep the bottle labels consistent; mismatched labels make the shelf look messy instantly.
AvoidAvoid filling the shelf with backups and spare bottles; a small shelf turns into storage clutter fast.