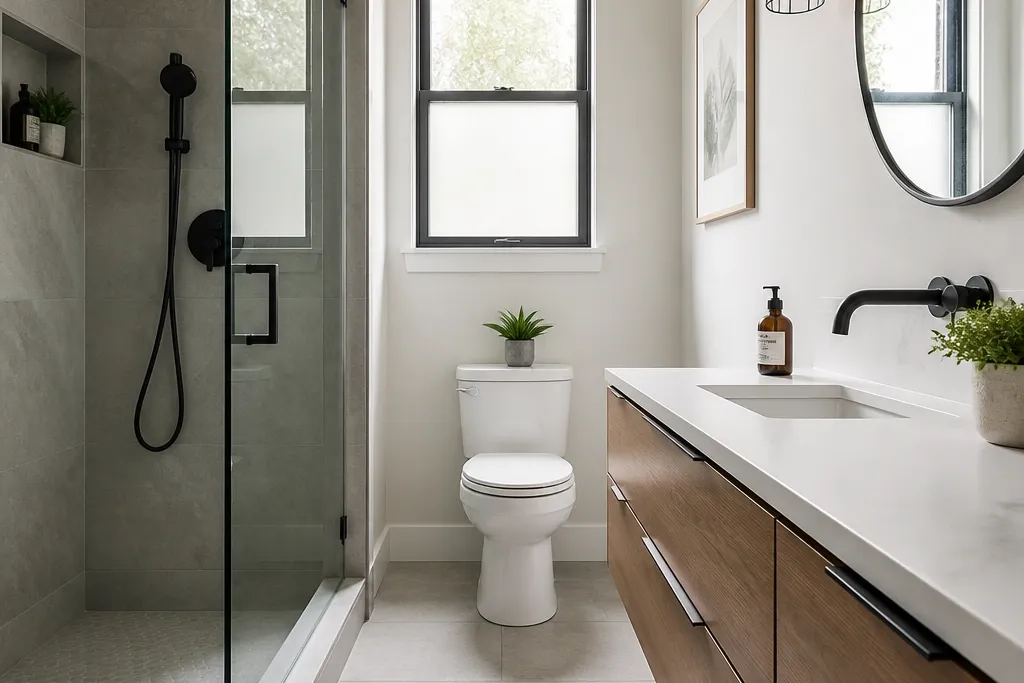
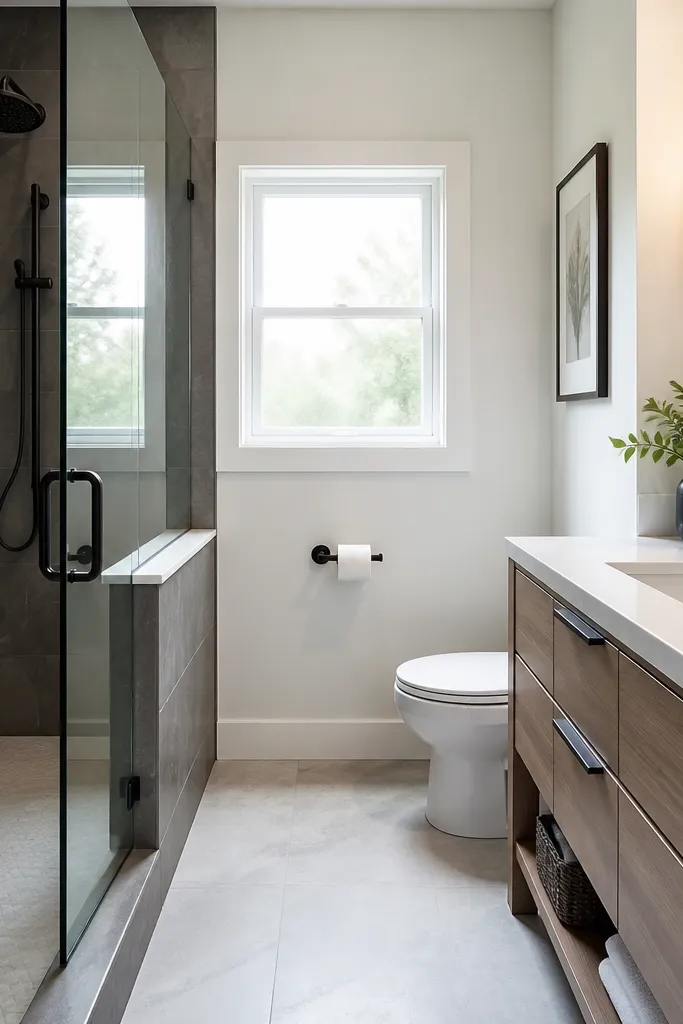
1. 36-Inch Linear Drain Walk-In in Matte White Tile
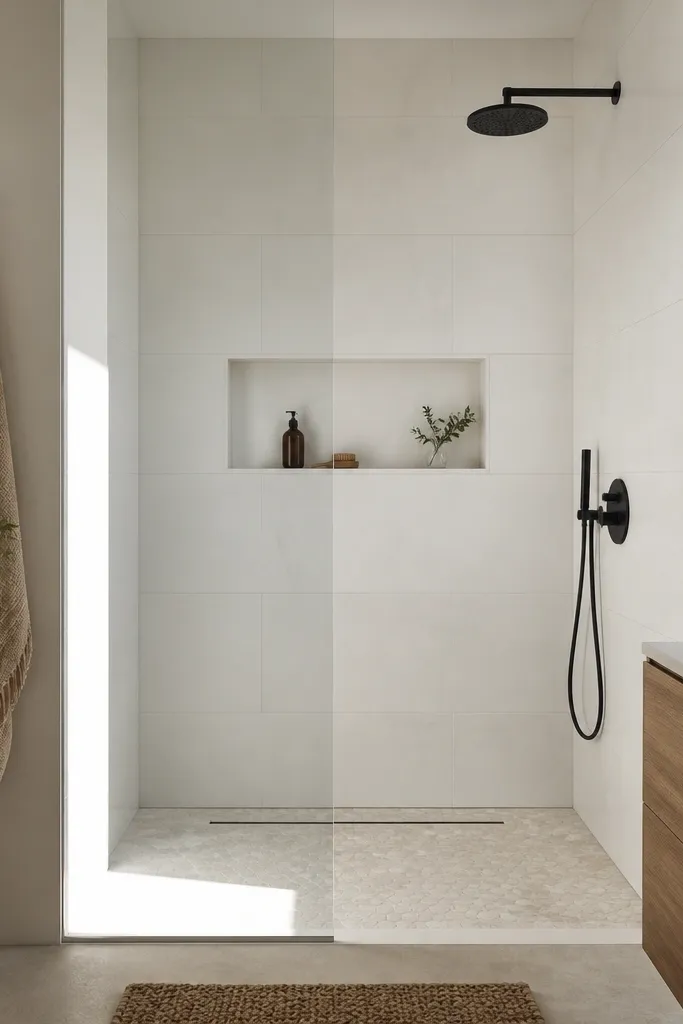
This layout works because the linear drain pulls the eye into a single clean line. White tile with a matte finish hides water spots better than glossy tile, which matters when the bathroom is small and splashes linger longer. I’ve used this in narrow 5x8 bathrooms where the shower sits on the back wall and the vanity is right outside the wet zone. The matte black control adds contrast without adding clutter, especially when you keep the glass hardware slim and brushed the same way. It’s flattering for most skin tones because the lighting reads neutral on the body — no harsh glare like high-gloss tile.
Start by planning a shower opening around 36 inches clear space, not counting the glass edge. Tile the walls with large-format matte white rectangles, and run them vertically so the shower reads taller. Install a linear drain on the floor and keep the floor tile grid tight so the drain line stays straight. Add a recessed niche at about chest height (around 40 to 48 inches from the shower floor) and line it with the same tile for a built-in look. Finish with a single frameless glass panel and matte black hardware that matches the drain trim.
Good to knowOrder the glass panel with a slim edge profile — the thicker the frame, the more the shower looks boxed in.
AvoidAvoid mixing glossy wall tile with matte floor tile; the shine mismatch makes the space look unfinished.
2. Low-Threshold Shower with Floor Tile in a Running Bond
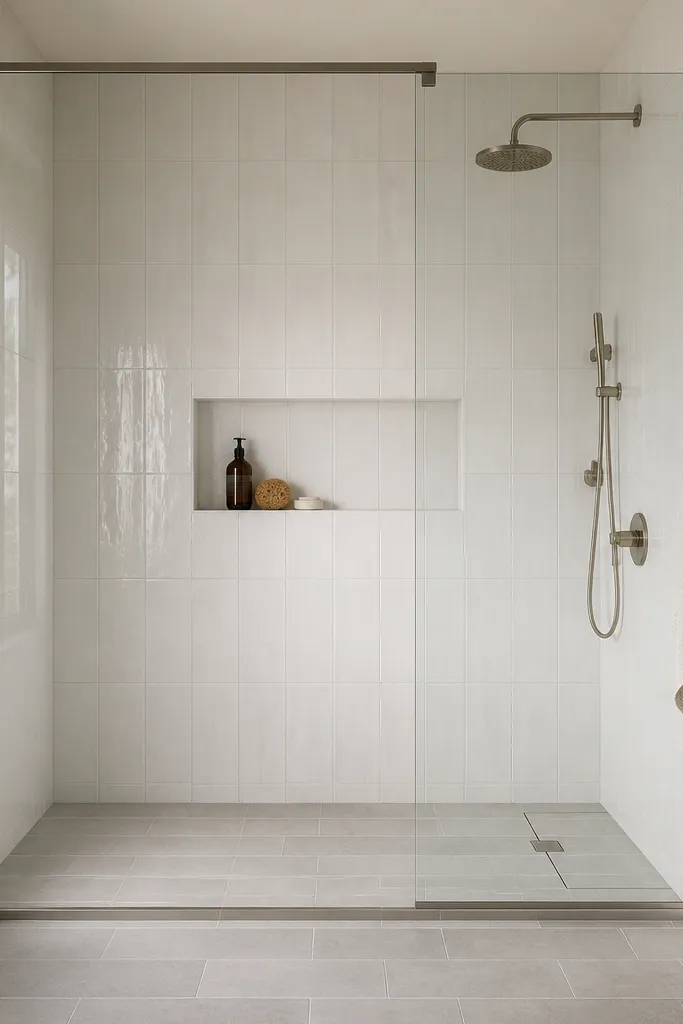
A low-threshold shower looks modern because the transition from bathroom floor to shower floor stays visually thin. The running bond pattern on the floor adds movement without breaking the clean lines on the walls. In smaller bathrooms, that subtle pattern helps the room feel less flat, especially if the rest of the room has plain flooring. I like pairing light gray floors with soft white walls because the combo keeps the bathroom bright even when there’s only one window. This design also works well for older adults or anyone who hates stepping over a curb — you get the sleek look with less ramping.
Start by choosing a low-threshold system or build-up that keeps the shower floor only slightly higher than the main bathroom floor. Tile the walls in soft white large rectangles and keep grout lines consistent and straight. Lay the floor tile in a running bond so the joints don’t look like a checkerboard from the doorway. Put the niche on the back wall, centered so shampoo bottles don’t block the control area. Finish with a frameless glass panel and a brushed stainless or brushed nickel drain cover so it blends with the bathroom hardware.
Use a grout color that’s 1 shade darker than the tile — it makes the tile lines read crisp instead of dusty.
Don’t place the niche too high; if the shelf is above shoulder height, bottles slide and the niche looks empty and awkward.
3. Herringbone Accent Only on the Back Wall
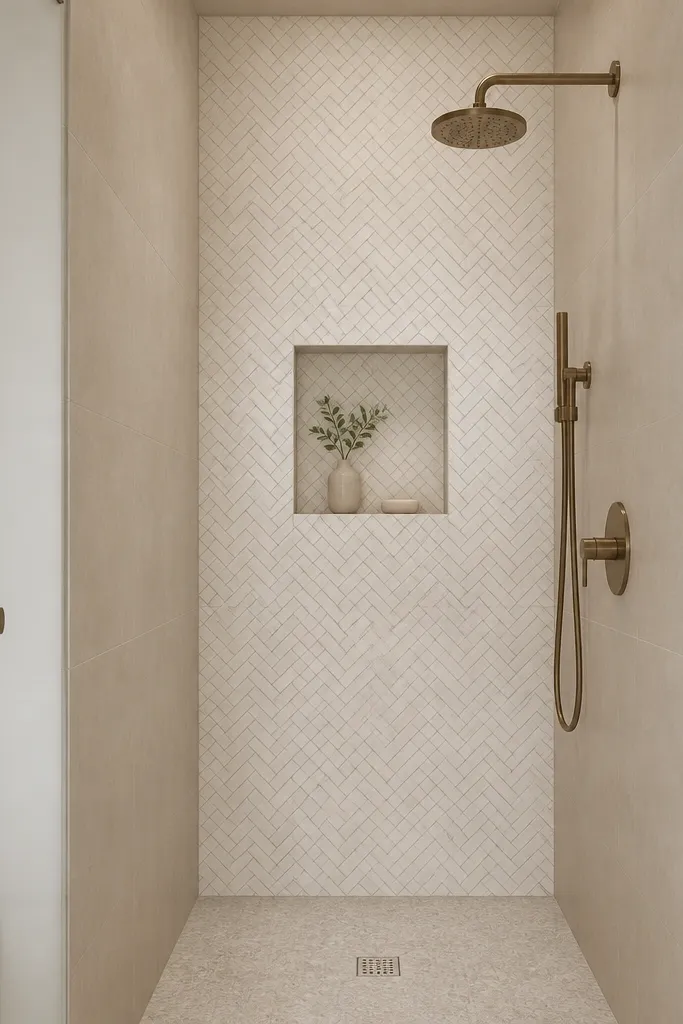
This is my favorite trick for modern small full bathroom ideas when you want personality without turning the whole room busy. Keeping herringbone only on the back wall gives you a focal point straight ahead when you step in, while the side walls stay calm. Warm white herringbone also plays nicely with brushed brass hardware because it adds softness instead of stark contrast. I’ve installed this in bathrooms with limited natural light and it still reads bright because the accent is concentrated where your eye lands. It’s flattering for people who want a spa vibe but still like clean, modern lines.
Start by tiling the side walls and shower jambs with large, smooth light beige rectangles and keep those grout lines straight. Choose a small-format herringbone mosaic or cut tile for the back wall only, and align the pattern so it centers behind the shower controls. Place the niche on the back wall within the herringbone area, sized so a standard 10 to 12 oz bottle stands without tipping. Tile the shower floor with a subtle stone-look tile in neutral taupe or greige, laid in a simple grid. Install frameless glass and pick hardware in brushed brass or warm champagne metal.
Good to knowDry-fit the herringbone starting row before you set thinset — one crooked line makes the whole accent look sloppy.
AvoidAvoid running herringbone on the floor or the side walls; too much pattern makes a small bathroom feel crowded.
4. Matte Black Hardware with Marble-Look Porcelain Panels
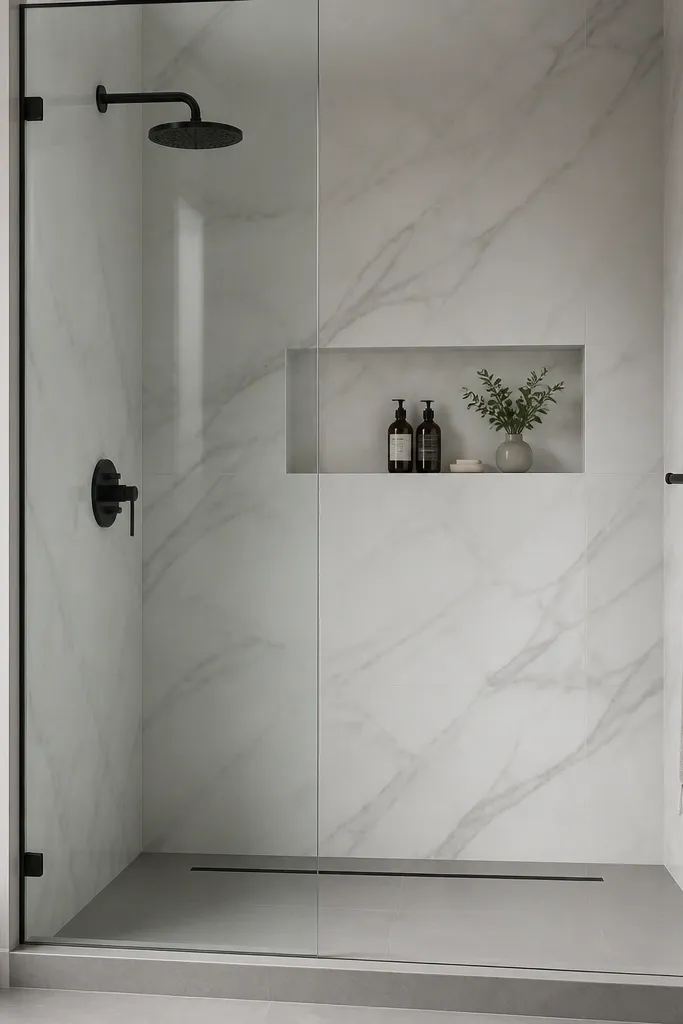
Marble-look porcelain plus matte black is one of the cleanest modern combos I’ve done in small spaces. The porcelain panels create big, uninterrupted surfaces, so the bathroom looks taller and less busy than small mosaic tile. Veining that’s mostly gray and soft white keeps the room from going too warm or too cold. Matte black hardware pulls everything together, and the contrast is strong enough that you don’t need extra decor. This style looks best when the bathroom lighting is neutral — overhead LEDs that are too blue can make the veining look harsh.
Start by selecting porcelain wall slabs or large panels with consistent veining direction, then plan the seam placement so the pattern doesn’t jump at the corners. Install the panels vertically so the shower walls read sleek and tall. Choose a matching marble-look floor tile in a smaller size and keep it in a straight set pattern. Add a recessed niche and line it with the same marble-look tile so it reads like part of the feature wall. Finish with matte black linear drain trim, a wall-mounted shower head, and frameless glass with minimal metal.
Use black silicone at the glass edges and niche seams so the modern look stays crisp after years of caulk shrinkage.
Don’t use a glossy marble-look tile with matte black hardware; the shine makes water spots look louder.
5. Two-Tone Shower: Soft Gray Walls, White Niche Frame
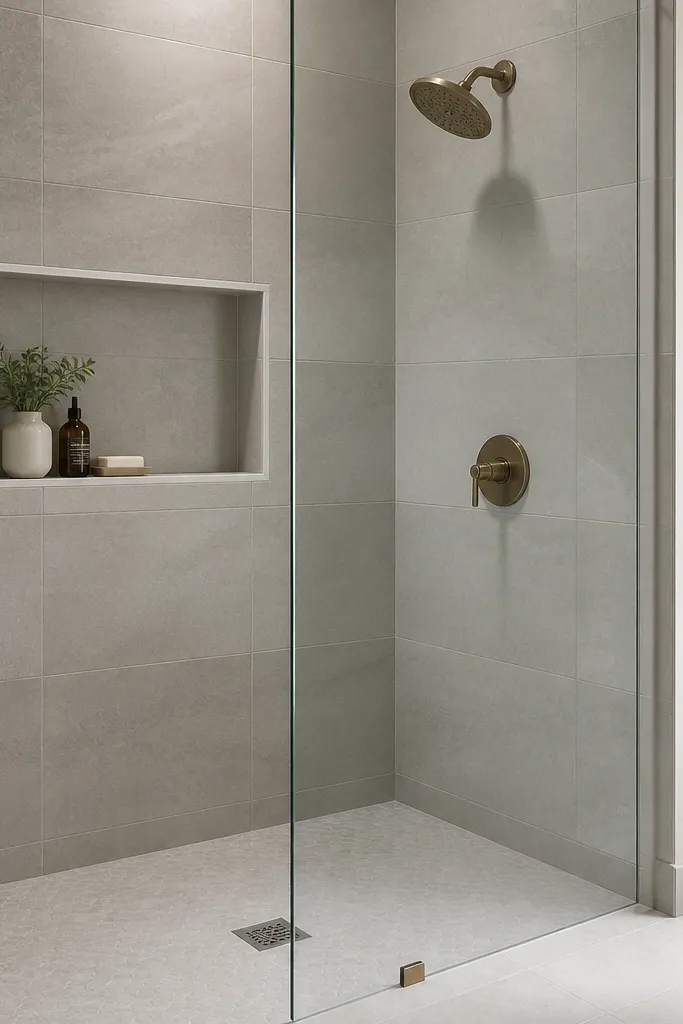
Two-tone works in small full bathrooms when the contrast is small and intentional. Soft gray walls keep the space calm and modern, while a white niche frame creates a clean architectural moment without adding extra patterns. I like this for households where someone wants a modern look but doesn’t want the whole room to feel stark. The niche frame also makes it easier to spot toiletries at a glance, which matters in tight bathrooms where you don’t have counter space. It’s flattering for almost everyone because the gray sits neutral and the white frame brightens the center of the shower.
Start by tiling the main shower walls in soft gray large rectangles and keep grout a matching medium gray, not pure white. Build the niche into the back wall and line the niche interior with the same gray tile. Add a narrow white border strip around the niche opening using a tile that matches the grout tone of the border. For the floor, use a light gray textured tile so it doesn’t look slippery and it hides minor water spots. Install frameless glass and choose shower hardware in brushed nickel or satin chrome for a clean, modern match.
Good to knowKeep the niche frame thickness consistent — if one side is 1/16 inch thicker, it looks DIY fast.
AvoidAvoid bold contrasting colors like black-on-gray; it can make the niche look like a hole instead of a feature.
6. Corner Walk-In with a Narrow 28-Inch Door Line
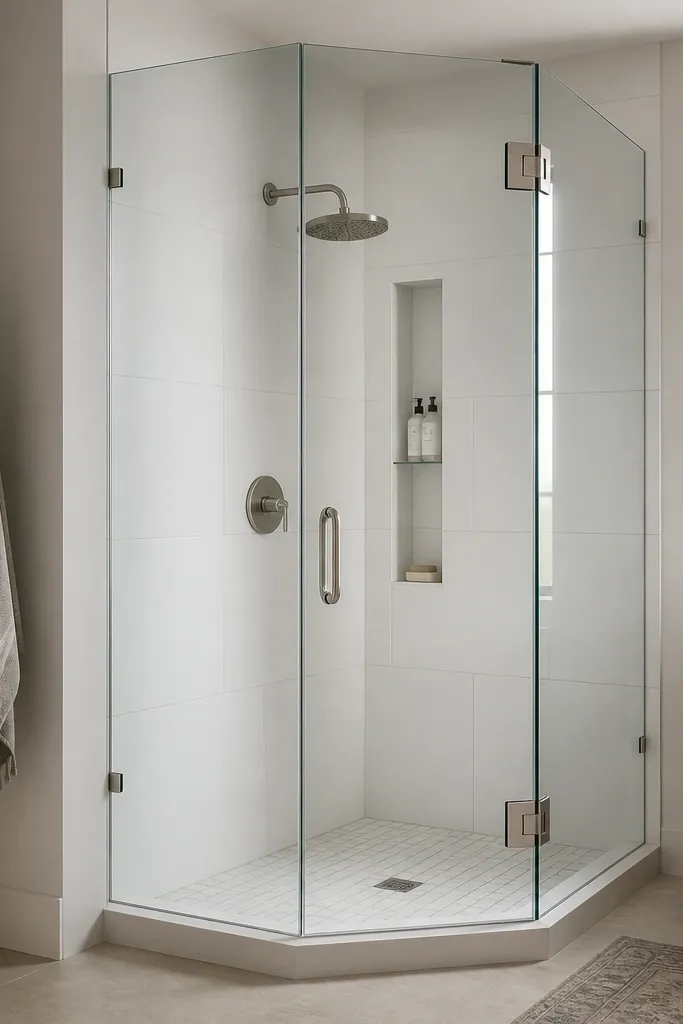
A corner walk-in is a lifesaver when the bathroom has a weird door swing or the vanity is close to the shower wall. The key to making it modern is keeping the glass lines straight and using tile sizes that don’t fight the corner. With a narrow opening around 28 inches, you need a shower layout that still lets you reach the controls without twisting. A slim vertical niche works because it stores bottles without eating floor space. This design flatters smaller bathrooms by making the shower feel like a built-in unit, not a separate tub replacement.
Start by measuring the corner and picking a glass plan that gives you one clean opening line — I usually aim for 28 inches clear at the door. Tile both corner walls in the same large white rectangles to reduce visual seams. Set the floor tile in a straight grid so it looks intentional from the doorway. Install a vertical niche on the corner wall at about 36 to 42 inches from the floor. Use a frameless door with minimal hardware and choose a shower head that mounts high so you don’t lose clearance.
Ask your glass installer for a panel layout that keeps the hinge side on the dry side of the bathroom floor.
Don’t add a thick glass header or decorative trim; on narrow openings it makes the shower look tighter.
7. Niche-First Design with a Bench-Like Shelf
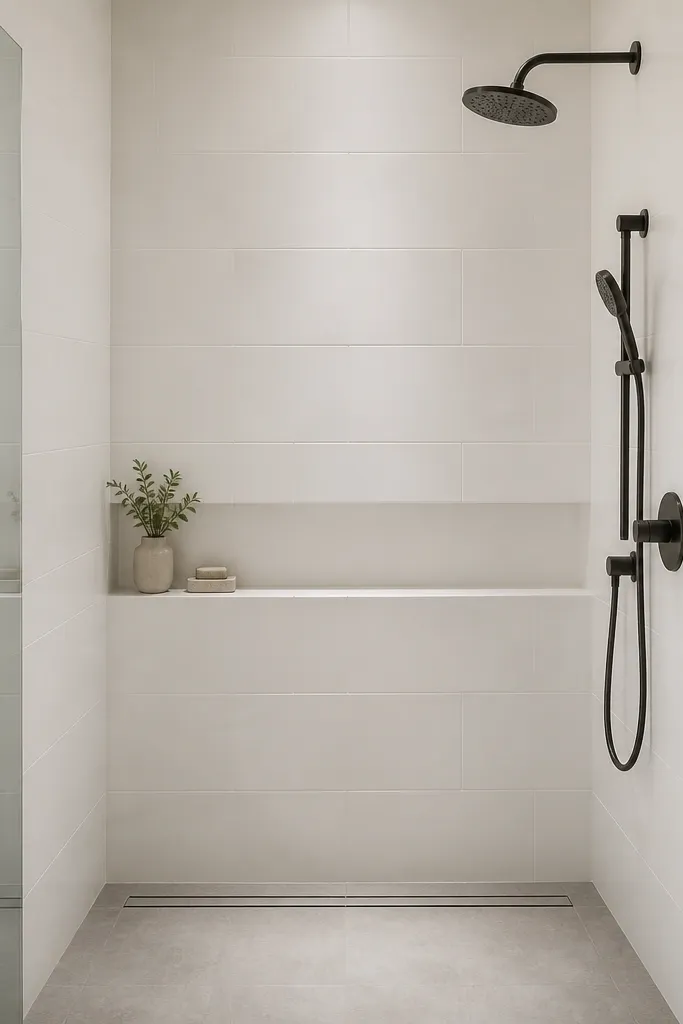
When a bathroom is small, you lose storage fast. This idea fixes that by making the niche do more than hold shampoo — it creates a bench-like space for soap and smaller bottles. I like it because it looks architectural and modern, not like a random cutout. The slight slope inside the shelf keeps water from pooling, which I learned the hard way on an earlier install where soaps sat wet. The linear drain keeps the floor tidy and visually matches the shelf’s straight lines. It’s great for people who shower standing and want everything within arm reach without a cluttered caddy.
Start by marking the niche location before you tile anything, aiming for the shelf to sit around 28 to 32 inches off the floor so elbows land comfortably. Use waterproof board and build the shelf with a slight pitch toward the back wall. Tile the niche and walls in matching large white rectangles so the shelf reads like part of the wall. Install a linear drain and keep the floor tile layout straight toward the drain line. Finish with frameless glass and a handheld shower or compact rain head so you don’t need extra clearance.
Good to knowUse a niche shelf width that fits a standard bar soap without tipping — around 6 to 8 inches deep is a good target.
AvoidDon’t make the shelf flat; pooling water makes the niche look grimy even when you clean it.
8. Matte Porcelain "Concrete" Floor with White Walls
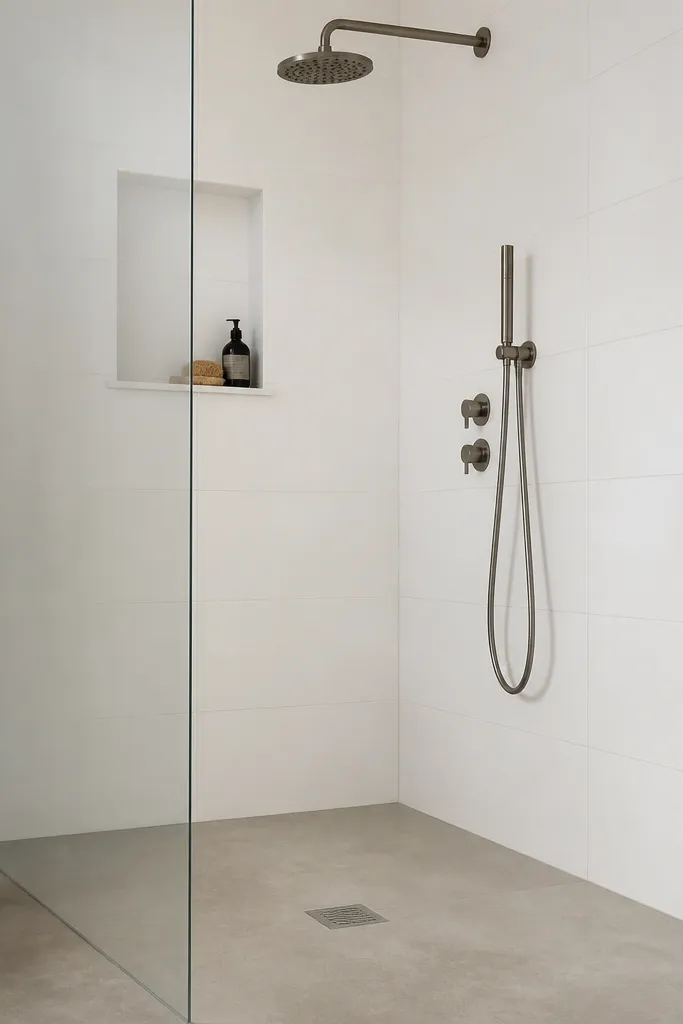
Concrete-look surfaces are modern without trying too hard, and they hide wear better than light glossy floors. Pairing a matte concrete-look floor with crisp white walls keeps the shower bright and makes the floor feel grounded. In small bathrooms, grounding matters because you don’t want the whole room to float — the eye needs one stable base. I’ve used this in rental homes where the bathroom got heavy foot traffic, and the floor still looked clean because the finish isn’t shiny. It also works well with cool-to-neutral skin undertones because the lighting stays balanced.
Start by choosing a concrete-look porcelain floor tile with a matte finish and subtle variation, then lay it in a straight grid so it feels controlled. Tile the walls in large white rectangles with minimal grout contrast. Place the niche on the back wall and line it with the white tile for a clean focal point. Install a shower drain that matches the hardware finish, either brushed nickel or stainless. Add a frameless glass panel with a simple trackless look if your budget allows.
Pick grout that matches the floor tone, not the wall — it keeps the floor surface looking unified.
Avoid high-contrast grout on concrete-look floors; it makes the tile look like separate stickers.
9. Slim Vertical Tile Strips to Make the Shower Look Taller
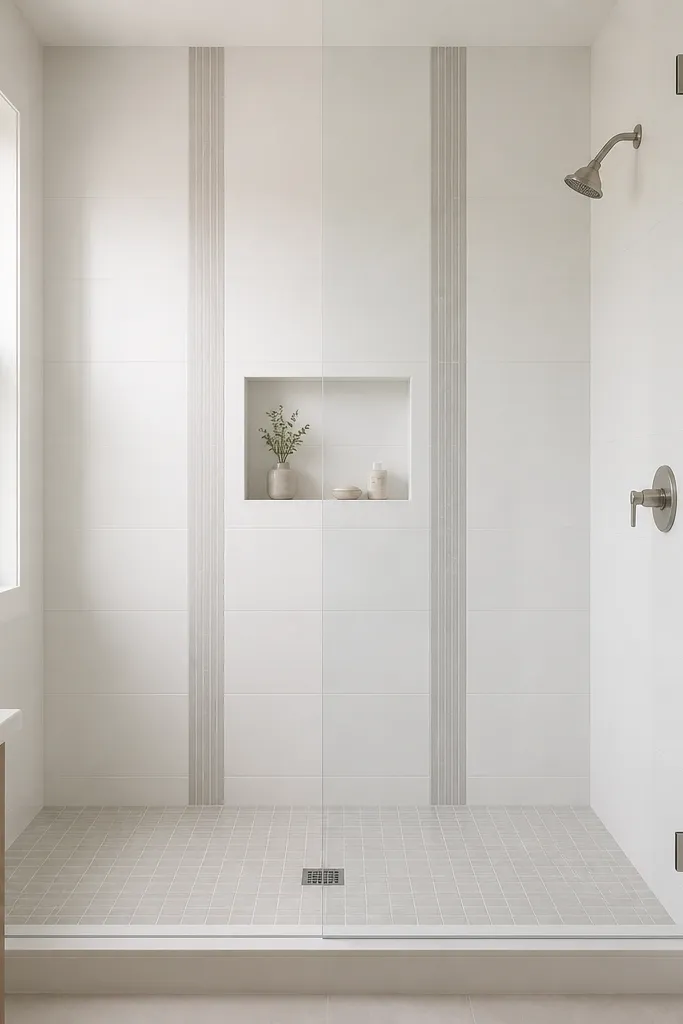
If your bathroom ceiling feels low, vertical lines fix that fast. The trick here is using slim vertical tile strips that run full height, while keeping the rest of the wall simple. In my installs, the difference is obvious when you stand in the doorway — the shower walls look taller and the room reads more open. The strips also help visually align the niche and controls so everything looks intentional. This style is especially flattering if you have a longer torso on the shower side because the vertical lines pull attention upward.
Start by tiling the main wall in large white rectangles with thin, consistent grout lines. Add slim vertical accent strips in soft gray, placing them so they frame the niche and shower control area. Keep the niche centered between the strips and set its opening to about 12 to 16 inches wide. Tile the floor with smaller rectified rectangles in a straight grid so the vertical wall lines stay the focus. Use frameless glass and keep hardware minimal — a slim rail or bar looks cleaner than a thick shower system.
Dry-check the spacing from the shower opening to the first accent strip — if it’s off by even 1/2 inch, it looks off.
Don’t use wide accent tiles; wide stripes in a small space make it feel narrower.
10. Warm Wood Vanity + Cool Tile Shower Combo
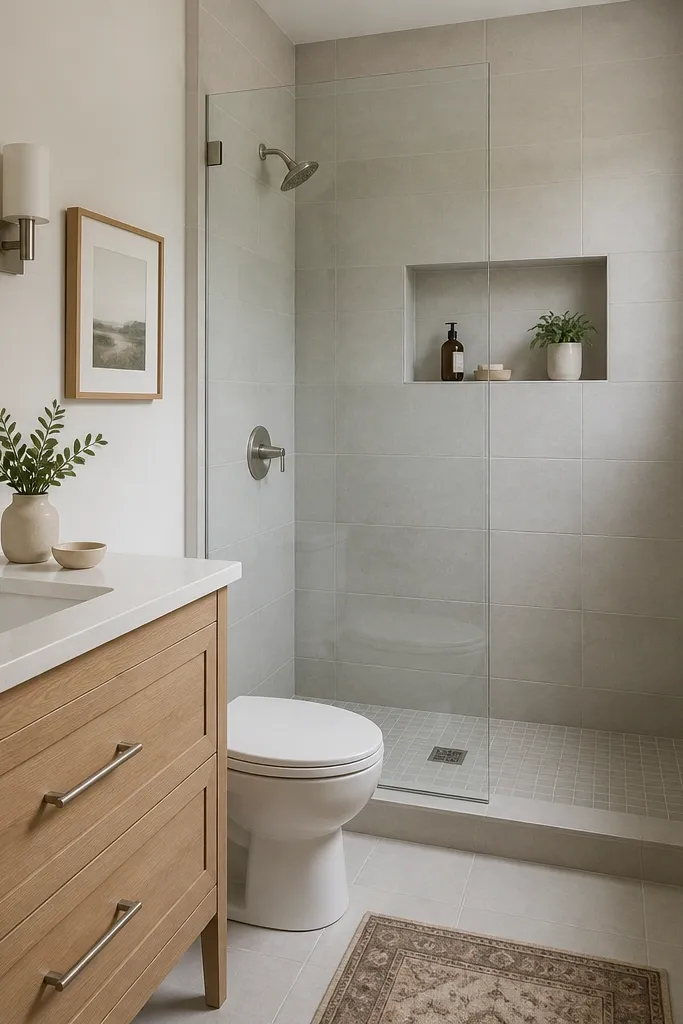
This is one of the few modern small full bathroom ideas that looks expensive without needing fancy stone everywhere. The shower stays cool and clean with light gray tile, while the warm wood vanity adds softness so the room doesn’t feel like a showroom bathroom. I’ve done this pairing when clients worry their bathroom will feel too cold with all-white tile. The niche blends into the gray, so the wood becomes the warm visual anchor. It flatters almost everyone because the warmth looks natural against skin in bathroom lighting, especially in the morning.
Start by choosing cool-toned tile for the shower walls, like light gray or greige with a matte finish, and keep the grout close in color. Install a recessed niche on the back wall, sized for a pump bottle and conditioner bottle. Use a frameless glass panel and a brushed nickel drain cover so it matches the vanity faucet. Then pick a vanity with visible grain in light oak or ash, and keep the countertop simple — white quartz or a light solid surface. Add one towel bar and one mirror frame in brushed nickel to tie the shower to the vanity.
Good to knowMatch the shower hardware finish to the vanity faucet, then repeat it on the mirror clips or towel bar so it looks planned.
AvoidAvoid pairing warm brass shower hardware with cool gray tile plus a chrome faucet — the mixed metals make the room look cluttered.
11. Round Niche and Curved Drain Trim
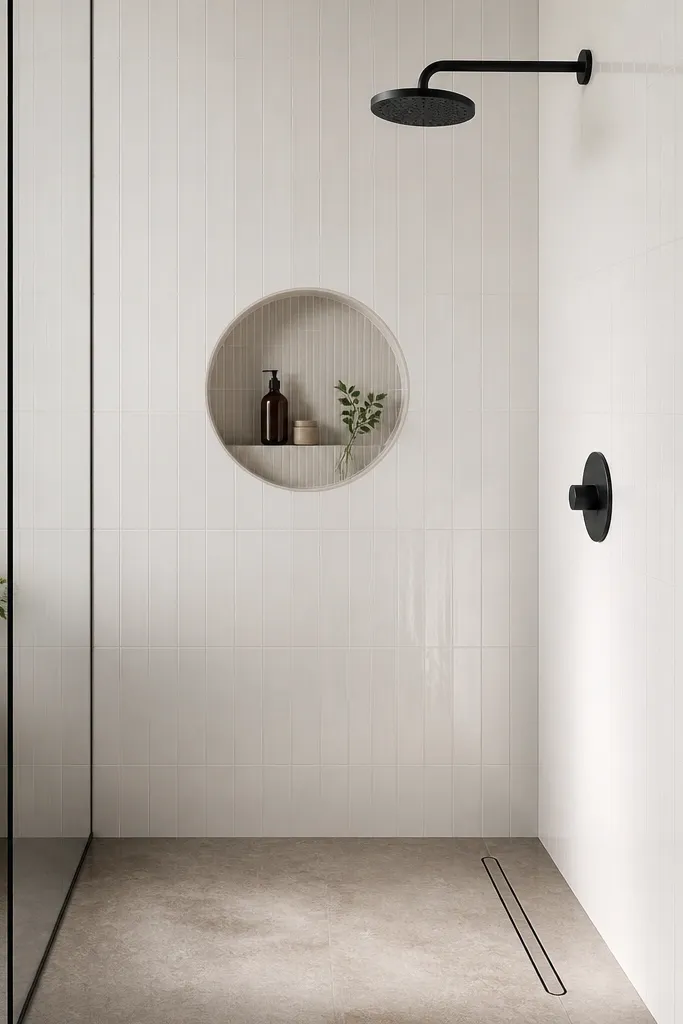
Rounded details make a small bathroom feel softer while still reading modern. The round niche breaks up the straight lines of the tile, but it’s still clean because it’s one intentional shape. I like this when the bathroom has lots of corners — like a tight hallway layout — because the round feature reduces the harsh geometry. Matte black around the niche and control adds contrast without clutter. This style is flattering if you want a modern spa look but don’t want everything to be sharp and angular.
Start by tiling the shower walls in large white rectangles and keep grout lines straight. Cut and install a round niche on the back wall at about 42 inches from the floor, so it sits within easy reach. Line the niche with the same tile and keep the niche interior grout tight. Use a linear drain with a trim that has a subtle curve, and match the finish to the matte black control. Install frameless glass and keep the shower head minimal — a simple round rain head looks best here.
Good to knowWhen you plan the niche, mark the tile layout first; rounding the cut after tile is set is where people mess up.
AvoidDon’t choose a round niche that’s too small; it should fit a typical bottle without looking like a decorative hole.
12. Black Framed Glass with White Tile for a Crisp Contrast
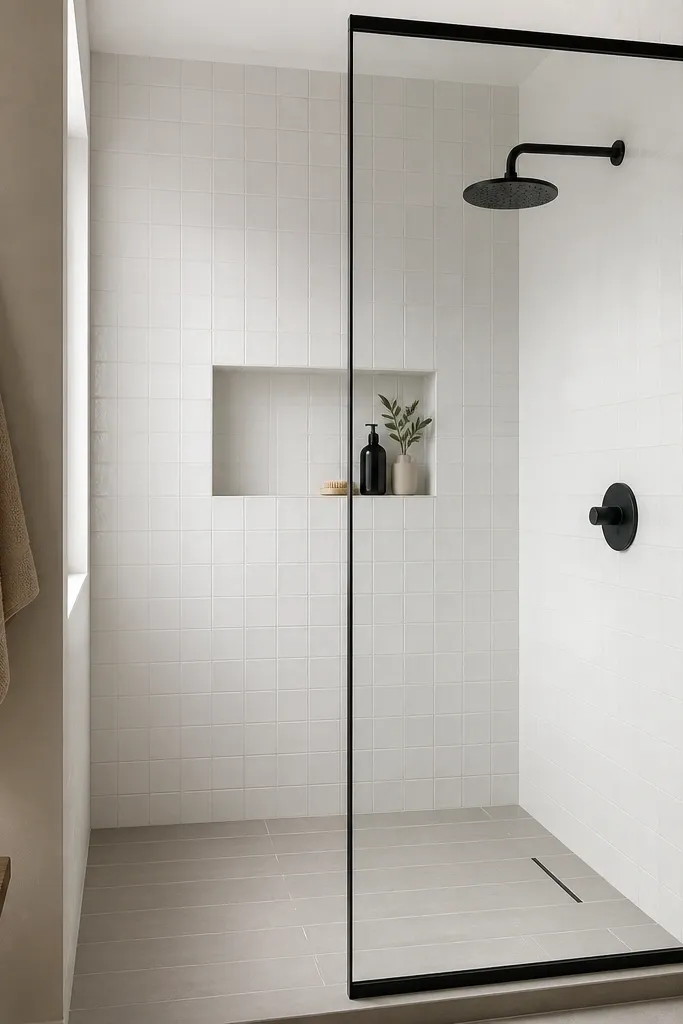
Most people think frameless is the only modern option, but black-framed glass can look just as sleek when the lines are thin. The contrast between white tile and black framing gives you a crisp, graphic look that reads modern even in a small bathroom. I used this in a 5x8 bathroom with a dark vanity and it tied the whole room together. The key is keeping the frame slim, not chunky, and using simple tile — no busy mosaics. This also helps visually hide water lines on glass because the black frame makes the edges less noticeable.
Start by choosing white wall tile in a large format and set it with straight grout lines for that clean grid look. Use light gray floor tile with a matte finish so it doesn’t compete with the black frame. Install a rectangular niche on the back wall, and keep the niche tile and grout matching the wall tile. Pick black-framed glass with slim profiles and ensure the door opens without hitting the toilet or vanity. Match matte black hardware — shower head, control, and drain trim — so the look stays cohesive.
Good to knowUse black silicone where the glass meets tile; clear silicone makes the edges look messy fast.
AvoidAvoid thick black frames — they make a small shower feel like an aquarium.
13. Patterned Floor Tile Only Inside the Shower
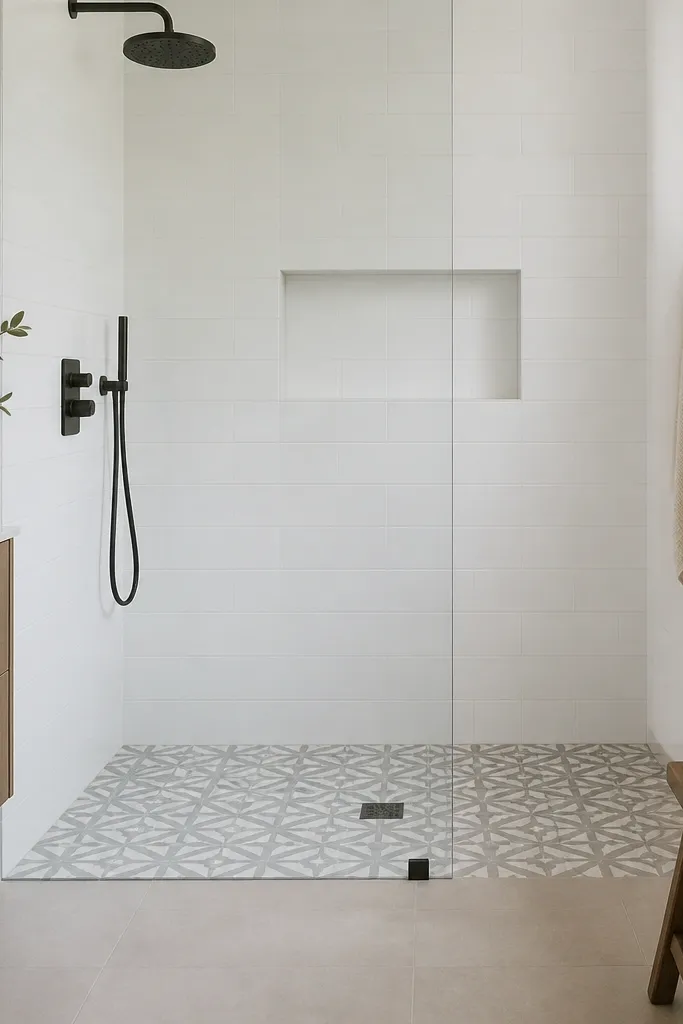
This is how you add a pattern without breaking the modern, clean look. Keeping the pattern only on the shower floor gives visual interest where you’re already focused, while the walls stay calm. I’ve done this in small full bathrooms where the vanity area needed to look airy, and the patterned floor became the only “statement.” Choose a geometric tile in two neutrals — like white and light gray — so it doesn’t overpower the room. It’s flattering because it creates contrast at foot level and makes the body area above look clearer and brighter.
Start by tiling the shower walls in large white rectangles with minimal grout contrast. Choose a geometric patterned floor tile that has a limited palette and lay it so the pattern aligns with the shower entrance line. Keep the niche simple and square, and tile it with plain white so it doesn’t compete with the floor design. Install frameless glass and use a drain trim that matches the hardware finish, like brushed nickel. Outside the shower, keep the bathroom floor plain and neutral so the pattern reads intentional.
Before you set tile, dry-lay 1 square foot of the pattern and stand at the doorway to see if it feels busy or balanced.
Don’t carry the pattern onto the walls; once the walls pattern too, the shower starts to look dated.
14. Large Format "Ceiling Height" Tile with a Thin Grout Line
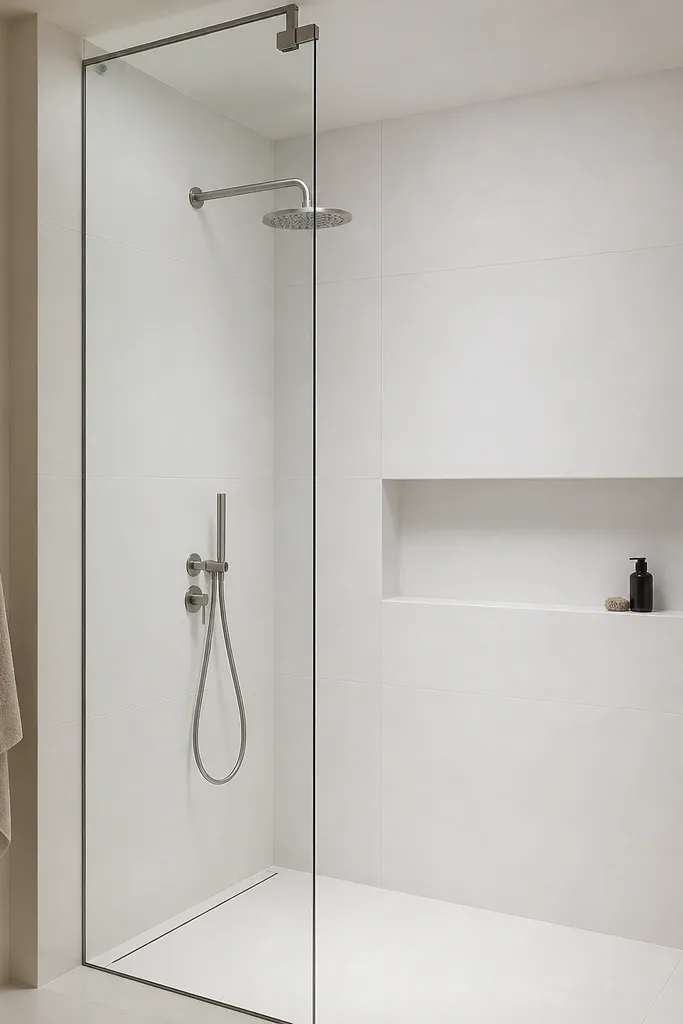
When you take tile all the way up, the shower reads like one continuous wall instead of a box. Large format tile with a thin grout line makes the room feel bigger because it reduces visual stops. In small bathrooms, I’ve seen people skip full-height tile and end up with a “tall backsplash” look that feels unfinished. This version looks modern because it’s disciplined: straight lines, no trim clutter, and the niche is integrated. It’s also forgiving — if you have slightly imperfect walls, large tile hides it better than tiny mosaics.
Start by planning full-height tile up to just below the ceiling trim or vent, usually 1/2 to 1 inch gap for finishing. Use large format panels and keep grout consistent, then dry-fit around the niche opening so you don’t end up with tiny slivers. Set the niche at about 40 inches from the floor and line it with the same tile so it matches seamlessly. Install the glass panel so the edge sits on a clean grout line, not across a tile cut. Finish with minimal hardware and a drain trim that matches the shower controls.
Use spacers that keep grout lines uniform — thin grout can still look messy if the lines wander.
Avoid decorative trim bands; in small bathrooms they cut the space into chunks.
15. Steam-Room Style Showerhead Wall with a Single Niche
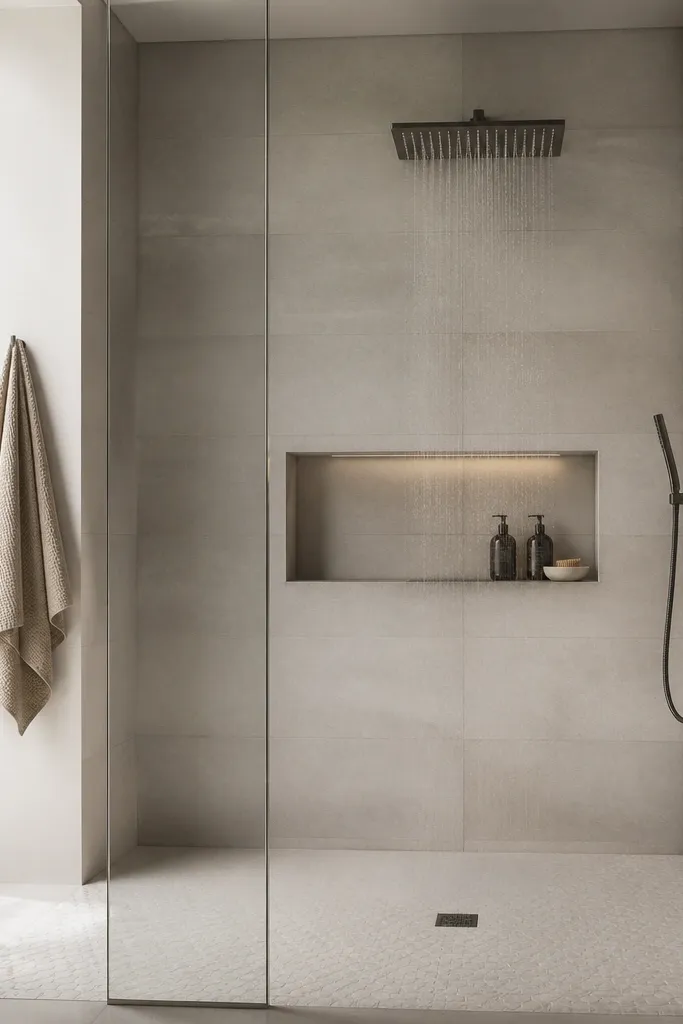
This is modern small full bathroom ideas with a spa feel, minus the steam-box complexity. A wide rain showerhead centered on the back wall turns the shower into a focal point, and a single niche keeps the wall from looking cluttered. Light gray tile is a good choice because it stays neutral in different lighting — warm bulbs or daylight both look fine. I like centering the showerhead and niche so the bathroom feels organized even when the space is tiny. This setup is great for taller people because the rainhead can be mounted high without blocking eye level when you stand at the door.
Start by selecting a rain showerhead with a centered wall mount and plan the height so it lands about 78 to 82 inches from the floor. Tile the back wall in light gray large rectangles and keep side walls simpler, or also gray for a clean monochrome look. Install one niche on the same wall, centered but offset slightly below the showerhead so bottles don’t block the spray. Use a subtle textured floor tile to reduce slip risk and keep the look cohesive. Finish with frameless glass and a matte black or brushed nickel shower control.
Good to knowPut a small squeegee hook on the outside edge of the glass so you actually use it — that keeps the modern look from getting cloudy.
AvoidAvoid multiple niches or soap shelves on this style; it ruins the spa-clean wall.
16. Micro-Textured Tile That Hides Water Spots
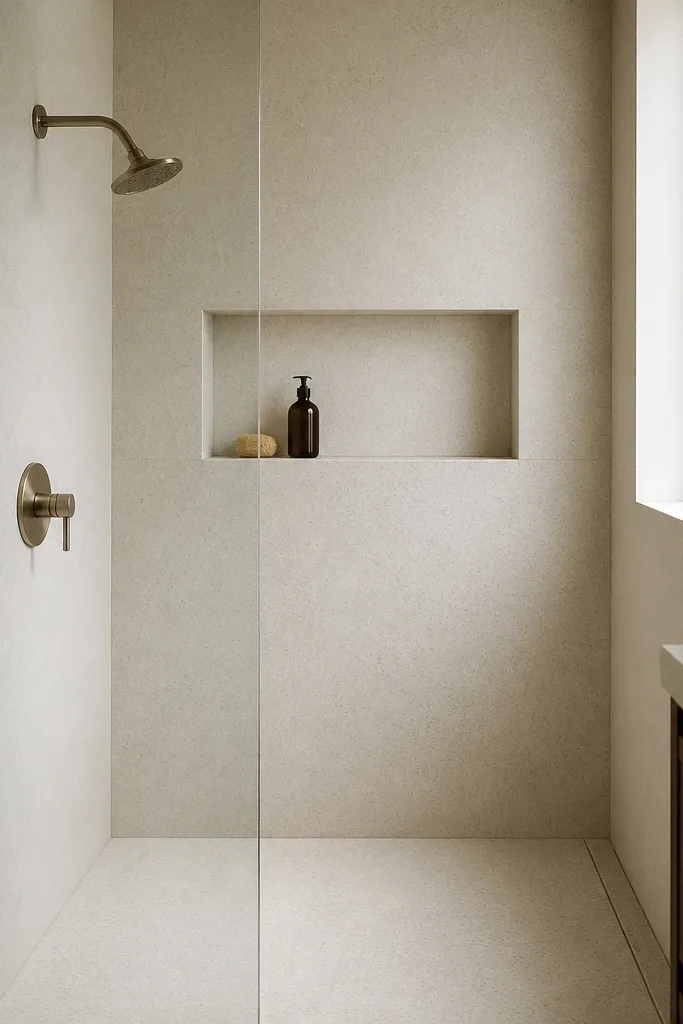
If you hate cleaning and your water leaves spots, micro-textured tile is the quiet hero. It’s not shiny, and the tiny surface variation breaks up the look of dried water. In small bathrooms, that matters because you see the shower every time you walk past the doorway. I’ve used this in homes with hard water where polished tile looked stained within a month. The off-white tone keeps it modern and bright, and the niche blends in so the wall looks seamless. It’s a great pick if you want modern without the constant wiping.
Start by choosing off-white micro-textured wall tile in a large enough size to keep the grout lines minimal. Tile the walls and niche with the same material so the niche doesn’t stand out as a different texture. Use matching textured floor tile so the slip resistance feels safe. Install frameless glass and keep the hardware finish matte — matte black or brushed nickel both look right. Keep grout color close to the tile tone; a stark white grout will show every spot and smudge.
Good to knowUse a grout sealer rated for wet showers if you go with lighter grout — it slows staining more than people expect.
AvoidAvoid glossy high-shine tiles in hard water homes; they show spots in the first week.
17. Shower with a Built-In Shelf Instead of a Niche
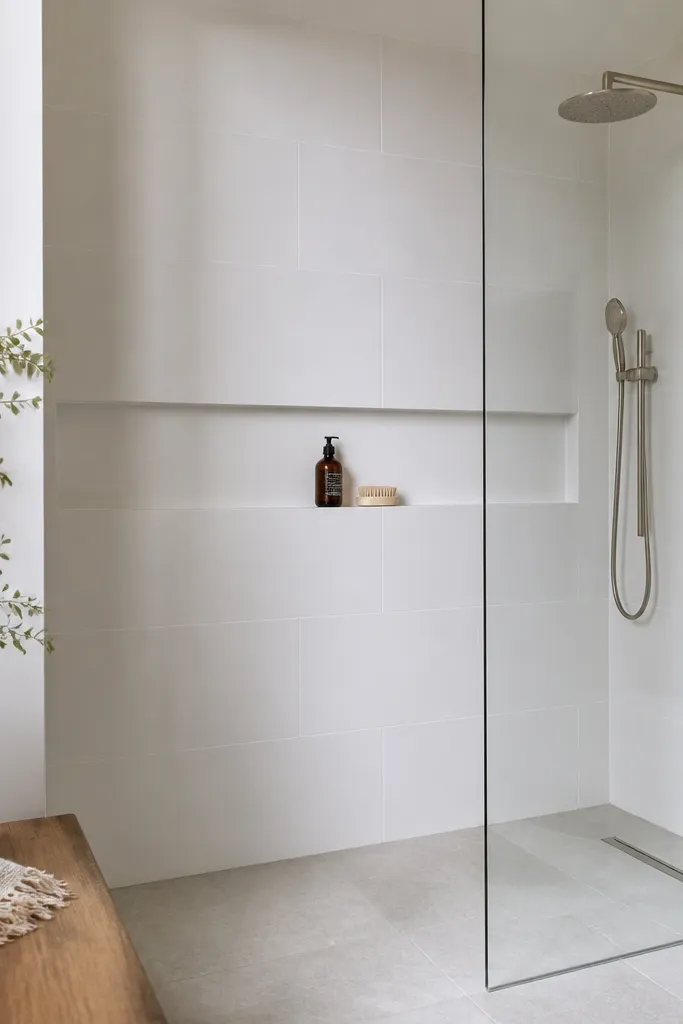
A shelf can look modern in a small shower if it’s shallow and clean-lined. The difference is that it’s easier to load and easier to wipe down because you can reach the edges. I’ve done this in small full bathrooms where the homeowner keeps running out of room for bottles and wants a simple place for soap. White walls keep it bright, and the shelf acts like a mini counter without turning the shower into a cluttered caddy zone. It’s flattering because it keeps the eye at mid-height, which is where people naturally look.
Start by planning the shelf height around 30 to 36 inches from the floor so bottles sit comfortably. Build the shelf with a slight slope so water runs back into the shower, not onto the shelf surface. Tile the shelf and wall with matching white large rectangles and keep the grout line thin and straight. Use a frameless glass panel and choose a drain that matches your hardware finish. Keep the rest of the shower minimal — one showerhead and one control — so the shelf feels intentional.
Use a shelf depth that holds one bottle plus soap without stacking; stacking makes it look messy fast.
Avoid a deep shelf like a bench; it collects water and turns into a soap scum spot.
18. Black Linear Drain with Warm Greige Wall Tile
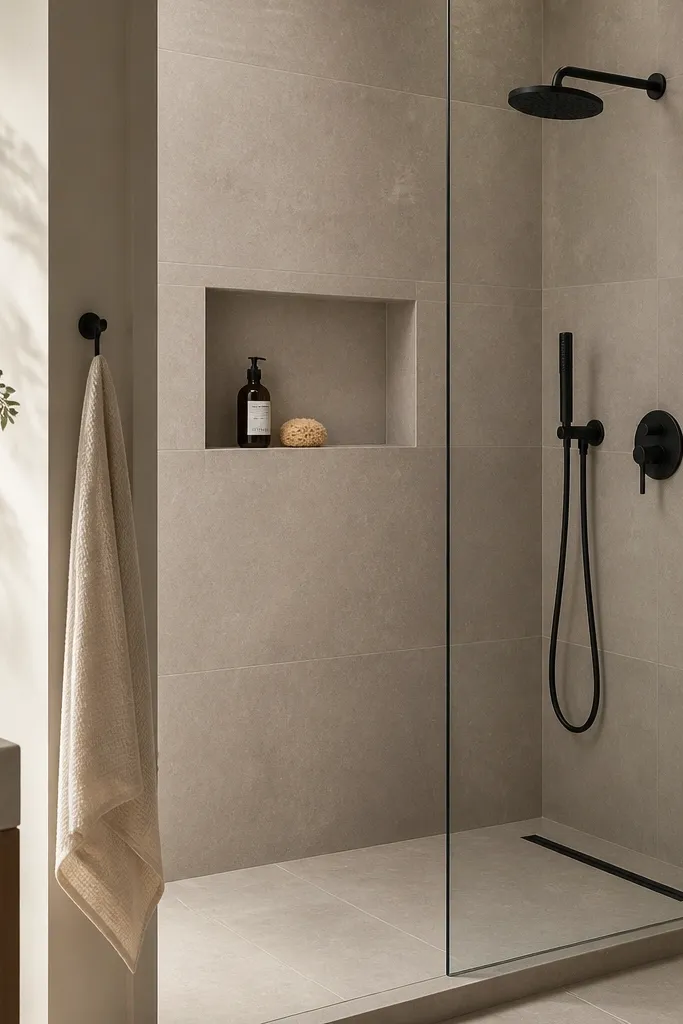
This idea looks modern because it keeps the color story warm but still crisp. Greige tile doesn’t look sterile like pure gray, and it hides minor wall imperfections better than bright white. The black linear drain gives you a clean modern anchor on the floor, especially when your hardware is also black. I like this combo in bathrooms that get morning light because greige reads soft and flattering on skin. It also works for people who want a darker accent without going full charcoal on the walls.
Start by choosing warm greige wall tile in large format and set it vertically or with a straight grid, then keep grout a matching greige. Install a linear drain with black trim and keep the drain line centered to the shower opening. Add a niche at about 42 inches high and line it with the same greige tile so it disappears into the wall. Use a floor tile that’s slightly lighter than the walls to keep the shower from shrinking visually. Finish with frameless glass and matte black hardware — shower head, control, and towel bar.
Buy a few extra tiles and mix batches — greige tiles can have slight shade shifts that are easy to fix early.
Avoid pairing greige walls with bright white grout; it makes the shower look temporary and less finished.
19. Glass Panel Offset with a Clean Shelf at the Entrance
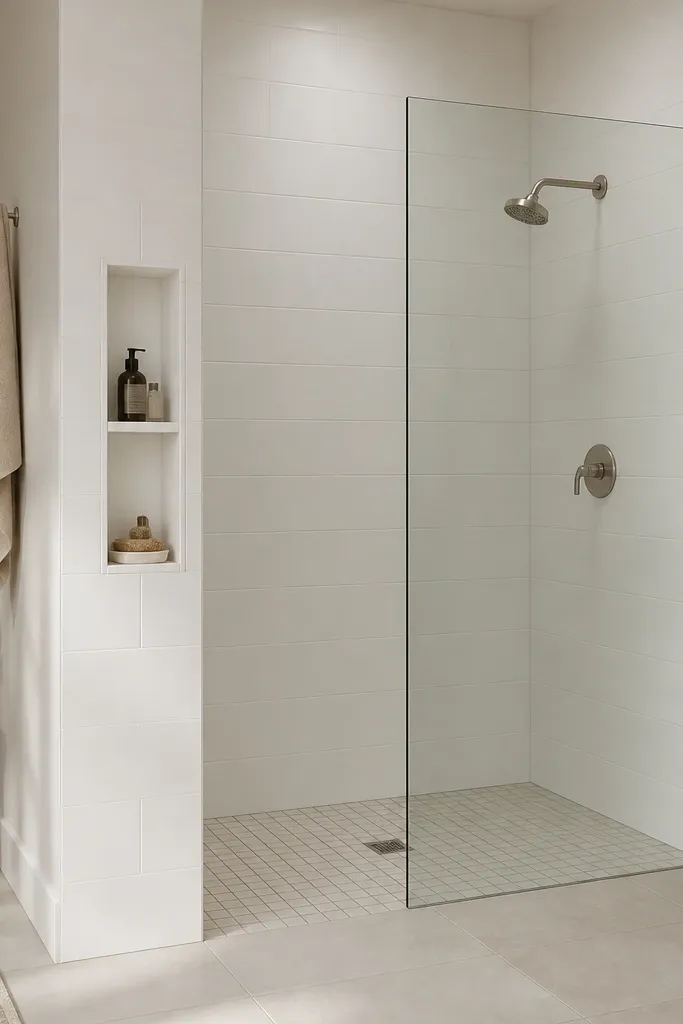
This is a small-space layout trick that improves how the bathroom feels day to day. When the glass panel is offset correctly, you get a clearer line of sight from the doorway and less visual blocking near the toilet or vanity. The entrance shelf gives you a landing spot for a bottle or razor without cluttering the main wet area. I like white tile because it makes the glass edge look intentional instead of random. This style works best when your bathroom has one main walkway and you want the shower to feel like part of that path, not a separate zone.
Start by planning the glass placement so the fixed edge doesn’t sit directly in your face when you open the bathroom door. Tile the shower walls in large white rectangles and keep the niche minimal or skip it if you use the entrance shelf. Build the shelf into the entrance wall just outside the direct spray line, around 34 to 38 inches off the floor. Use a center drain if your shower pan is narrow and straight, then keep floor tile joints aligned. Install the frameless glass and finish with matching hardware in brushed nickel or matte black.
Good to knowBefore tile, mark where your body lands when you step in — that shelf height should match real use, not the brochure.
AvoidAvoid putting the shelf inside the direct spray; it looks practical for a week and grimy after that.
20. Small Shower, Big Mirror: Extend the Modern Look Past the Glass
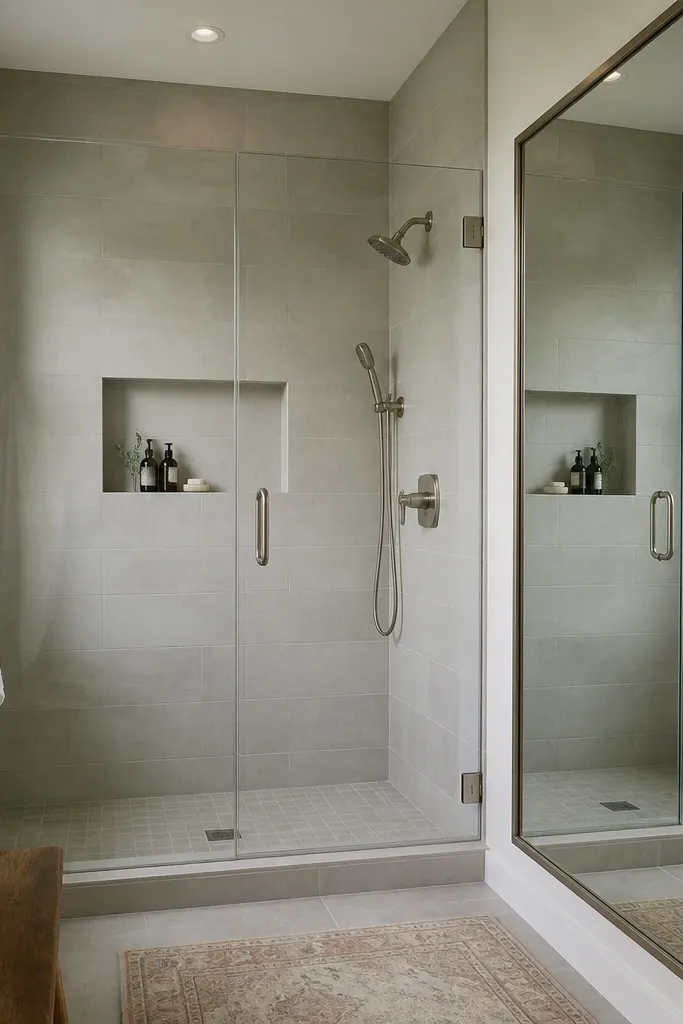
Modern small full bathroom ideas don’t stop at the shower tile. A large mirror makes the shower area feel doubled, and it turns the clean tile lines into a reflection effect. I’ve installed this in tight bathrooms where the shower is only 32 to 36 inches wide and the room still felt cramped until we added mirror size. The mirror should be tall enough to reflect the glass and niche, so the eye keeps moving instead of hitting blank wall space. This also helps with daily grooming because it gives you better face and body sightlines. The brushed nickel hardware stays neutral and the light gray tile prevents the mirror from looking too stark.
Start by selecting a shower width around 32 to 36 inches and tiling the walls in light gray large rectangles with minimal grout contrast. Install a frameless glass panel and add one recessed niche on the back wall. Choose a linear drain if possible for a sleek floor line, or a centered drain if the pan is small and narrow. Mount a mirror that’s at least 24 inches tall and wide enough to catch the shower glass in the reflection. Keep the vanity lighting neutral and evenly spaced so the tile looks consistent, not patchy.
Good to knowPlace the mirror so it reflects the niche — that makes the shower feel like it has more depth.
AvoidAvoid small mirrors in small bathrooms; they make the shower area look like a separate box.