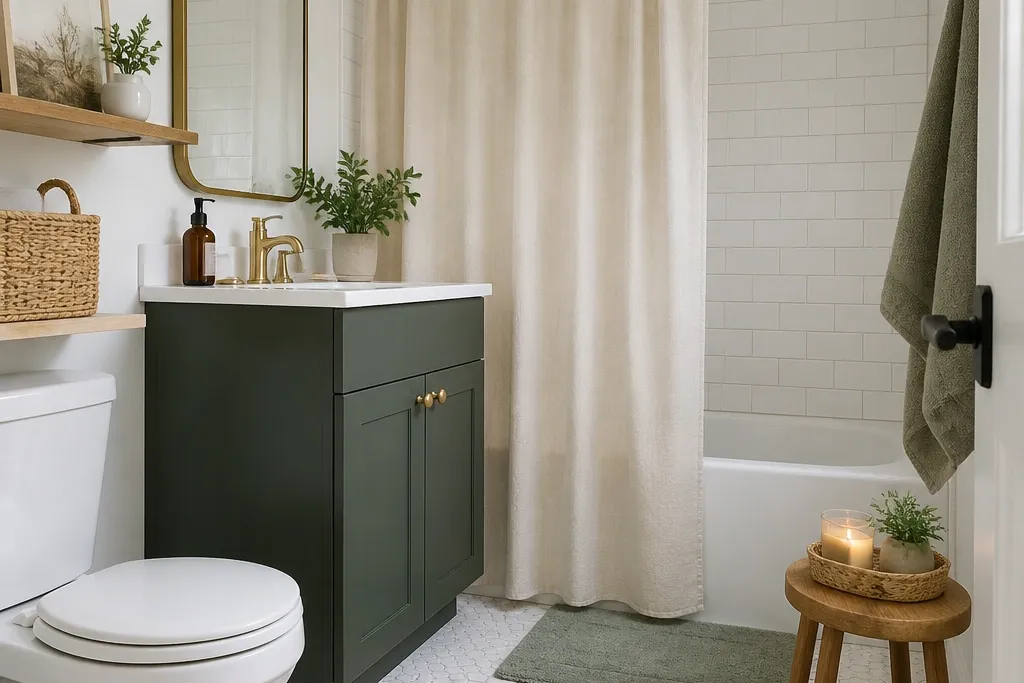
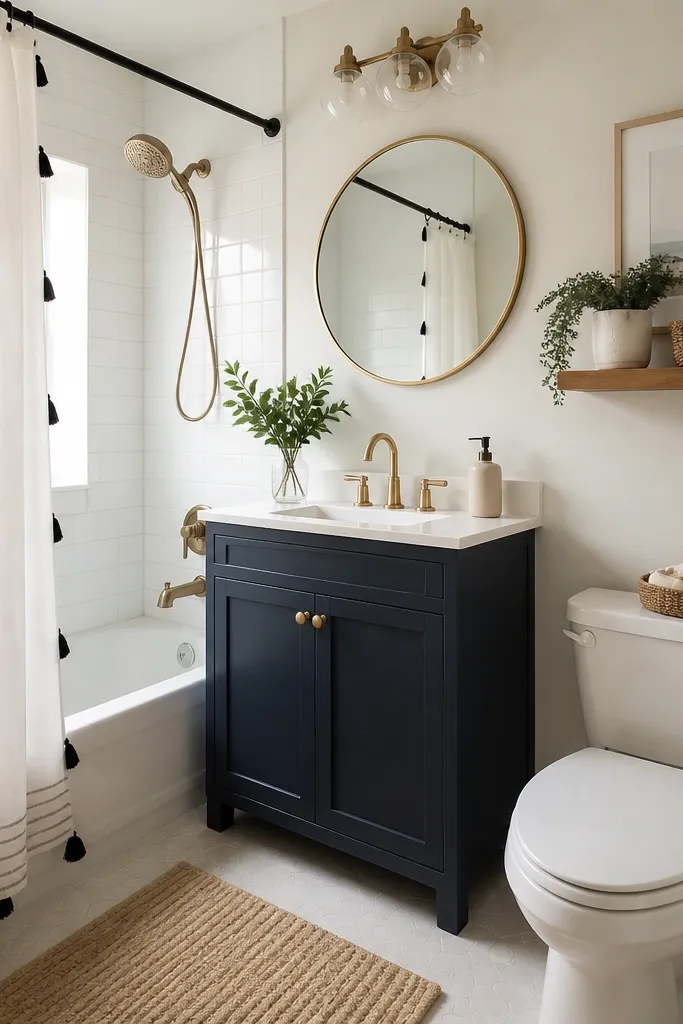
1. Matte Black Shower Liner With Crisp White Liner Underlay
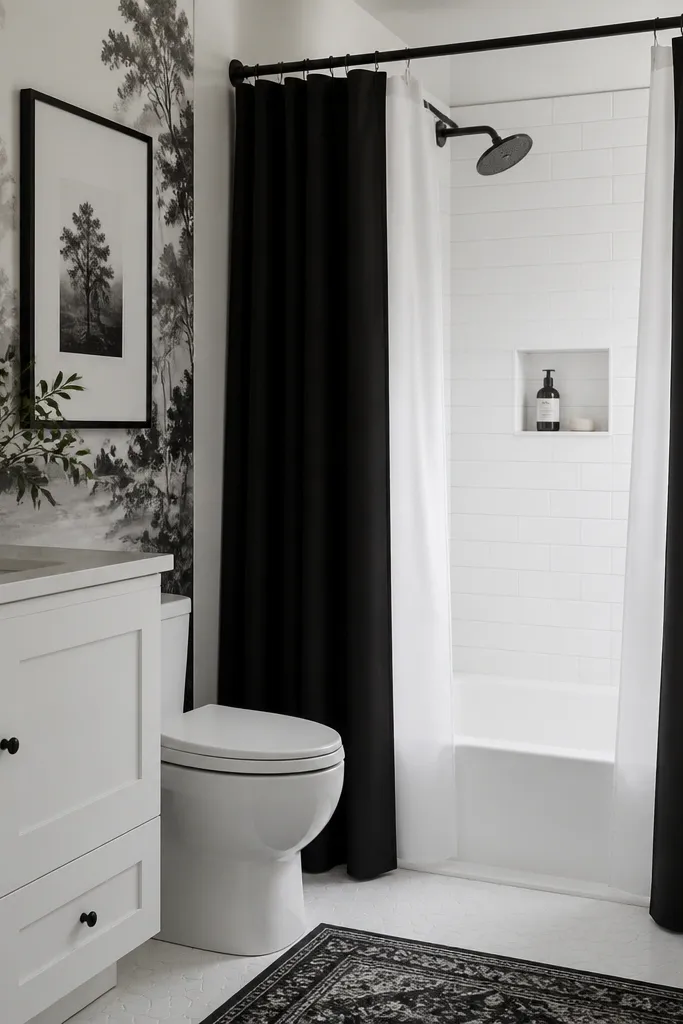
Start by measuring your shower opening width and height including the rod. Hang the white liner first, then add the matte black outer liner behind it so you get a double-layer frame. Choose a rod with a black finish or wrap an existing rod with removable rod covers in matte black. Finally, add one small black-and-white bath mat in front of the vanity and keep towel colors either white or black so the eye doesn’t bounce around.
This look works because the black is contained to the shower opening, where it reads like a frame instead of a ceiling-to-floor wall. Use a matte black outer liner so it doesn’t glare under bathroom lights, and keep a white underlay liner so the shower stays bright and water spots don’t show as much. The contrast makes the bathroom feel more “designed,” even if the rest of the room is plain builder beige. It flatters cooler undertones in skin because the whites look clean and the black adds definition around mirrors and fixtures.
AvoidSkip glossy black liners — they catch every light and make water spots obvious.
Good to knowIf your liner billows, tighten the top by using strong suction hooks or clip rings instead of loose hooks.
2. Peel-and-Stick Subway Tile Band Behind the Mirror
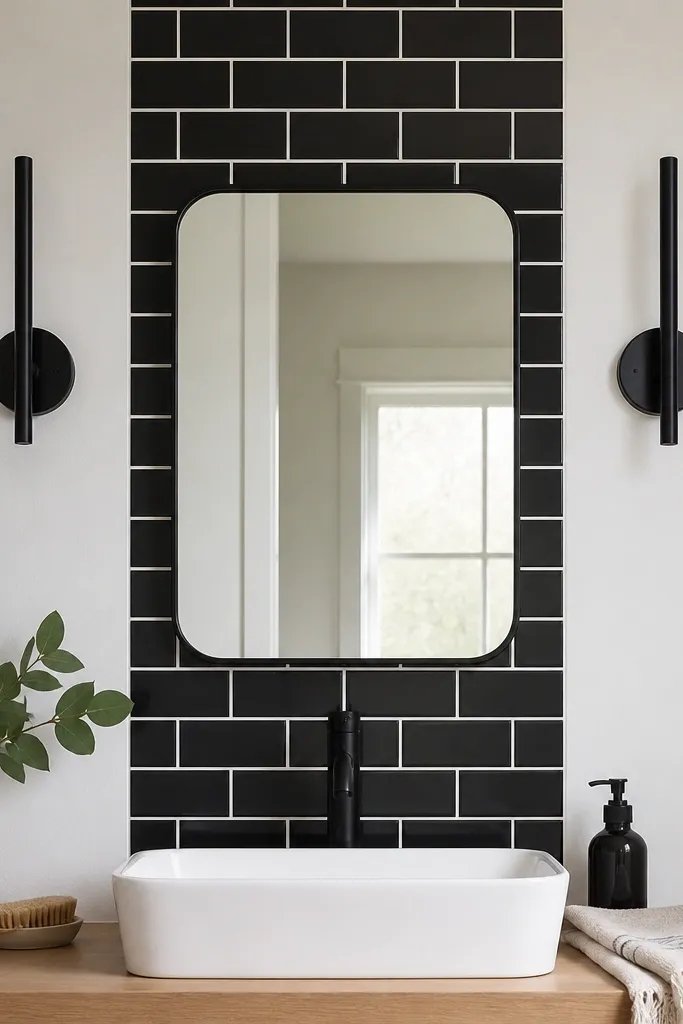
A subway tile band behind the mirror gives you that high-end bathroom feel without covering the whole room. Black tiles with white grout lines create depth, and the vertical strip pulls the eye upward, which makes the ceiling feel a bit taller. I’ve used this in rentals where repainting was a no-go, and it still reads clean after months because the adhesive is meant for walls. It looks especially good if your mirror is centered and your vanity is narrow, since the band becomes a focal point instead of a distraction.
Measure the mirror width and decide how wide you want the band: I like 3 to 6 inches on each side beyond the mirror edge. Clean the wall with rubbing alcohol, let it dry, then apply the peel-and-stick sheet starting at the mirror centerline. Press firmly along the grout lines so they don’t lift later. Finish by adding a black picture frame or thin black shelf above or beside the mirror, but keep everything else white.
Cut around the mirror edges with a craft knife and a metal straightedge for straight lines.
Don’t apply over textured paint bumps — the tiles will lift at the high spots.
3. Black-and-White Geometric Floor Peel Tiles
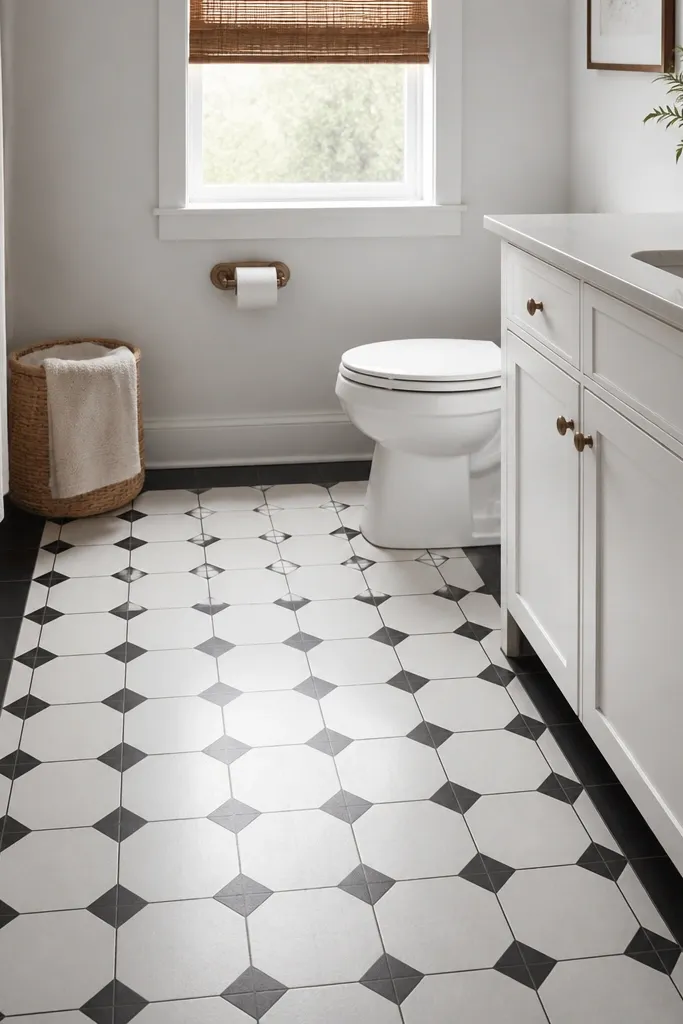
The floor is where you can go bold without making the walls feel smaller. A geometric black-and-white pattern adds motion and makes the room feel styled, even when the walls stay simple. I’ve found that a clear protective topcoat helps a lot in bathrooms because mopping doesn’t turn the pattern dull. This look flatters small spaces because your eyes land on the floor pattern first, then the mirror next, so the room feels layered instead of flat.
Start with a thorough floor clean and dry — no dust, no sticky residue. Lay out one tile row dry first to see how the pattern aligns with the toilet base and vanity edge. Apply tiles in straight lines, pressing each down for 20 to 30 seconds, then roll with a seam roller if you have one. Use a white wall color or white shower curtain so the floor doesn’t compete with other patterns.
Use a matte black bath mat with a small white border so it doesn’t fight the floor pattern.
Skip glossy floor tiles — they show foot scuffs and water marks faster.
4. Removable Wallpaper Stripe From Shower to Ceiling
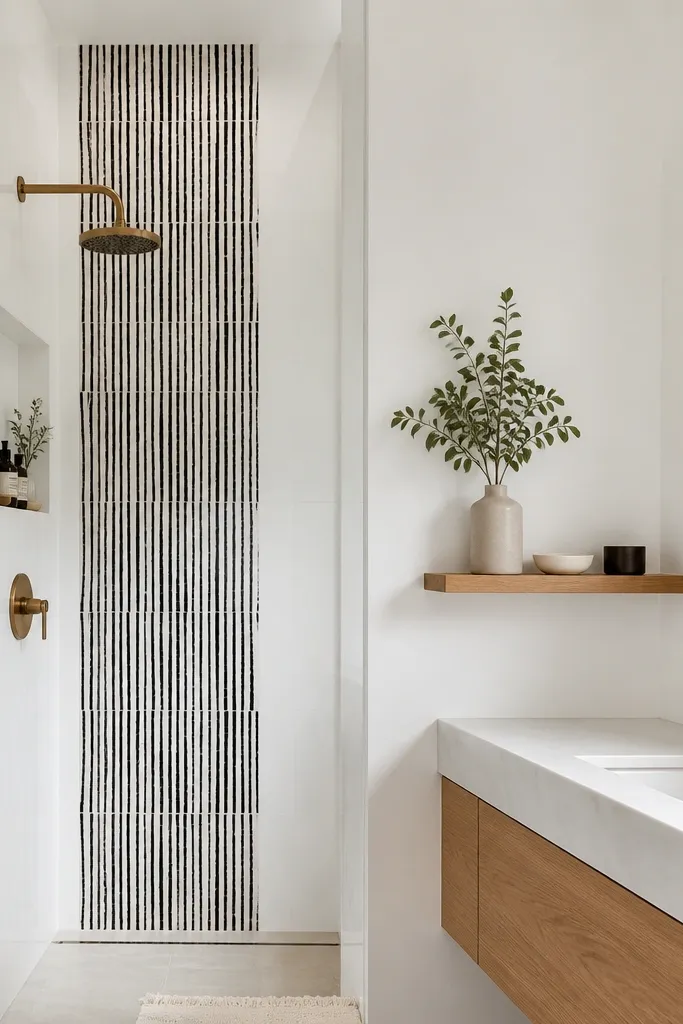
Measure the stripe width based on your wall width, then pick a wallpaper panel width that lets you center it. Clean the wall, then apply the stripe starting at the ceiling line with a level. Smooth from the center outward to push out air, and trim edges with a sharp blade. Keep towels white or light gray and choose a plain black faucet so the stripe stays the main event.
A vertical stripe is the fastest way to make a small bathroom feel taller. Keep it to one wall so you don’t clutter the room; the stripe gives you the drama while the rest stays calm. Black-and-white pattern lines work well because they guide the eye up, and the white background keeps it bright. This style is flattering for most skin tones because the mirror area stays bright, and the black linework makes your face look more defined in photos.
AvoidDon’t add a second patterned area on the same wall — two patterns in a small full bath looks busy fast.
Good to knowIf your wall has patch marks, cover them with white primer first so the pattern doesn’t look uneven through the paper.
5. Black Framed Mirror With White Backing Panel
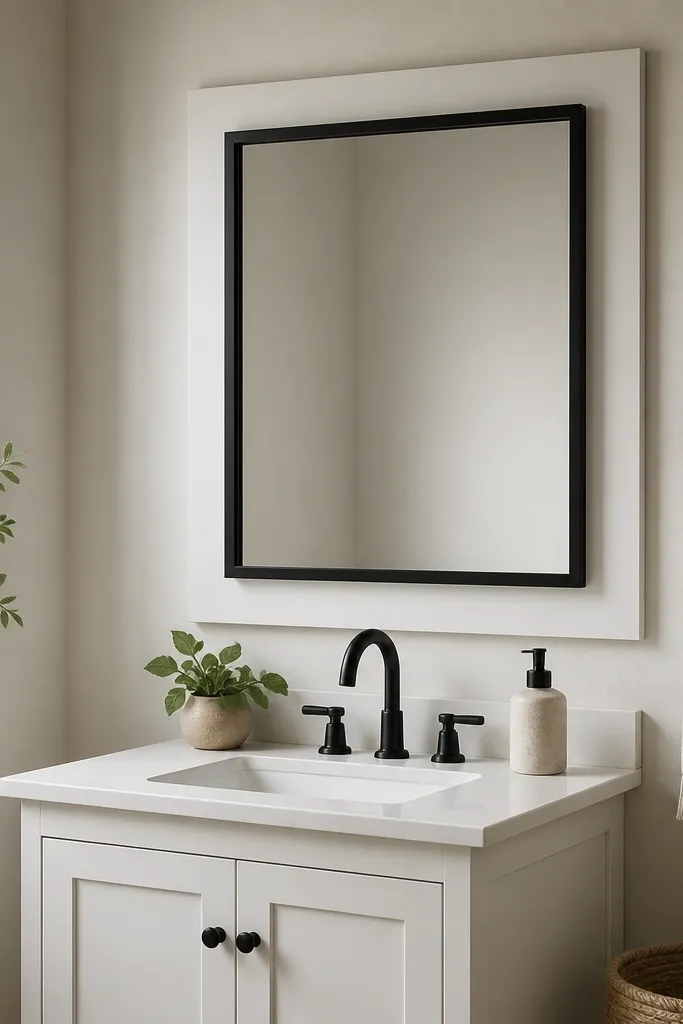
Mirrors control how big a bathroom feels, and a black frame adds structure. I like this version because the black reads as a border, while the white backing keeps the reflection bright and crisp. It’s great for renters because you can swap the mirror without touching the wall paint. If your lighting is harsh or yellow, the white backing helps the mirror area look more neutral and flattering.
Pick a mirror that’s wide enough to cover most of the vanity width, usually leaving 2 to 4 inches of clearance on each side. Mount it using the included hardware or a renter-safe bracket system, then add a white backing panel behind it if your wall behind the mirror is darker. Use black hardware in the same finish family — matte or satin — so the room looks coordinated. Style with one small black tray on the vanity and keep the counter mostly empty.
Choose a mirror with anti-fog or a good vented location so steam doesn’t blur the black frame.
Skip mixed finishes like black matte frame with shiny chrome faucet unless you keep everything else very simple.
6. Black Vanity Hardware Swap On a White Vanity
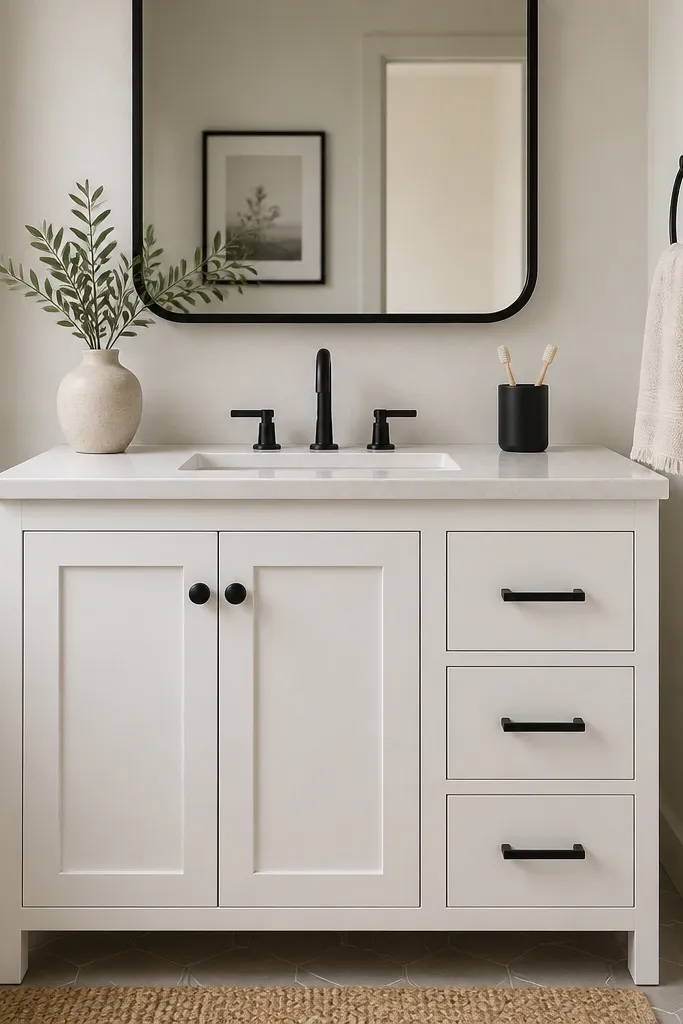
Measure the existing pull hole spacing and buy replacements that match the center-to-center distance. Remove old hardware with a screwdriver, then install the new black pieces with the same thickness screws. If the vanity has a glossy finish, wipe it with degreaser so the black doesn’t look dull next to smudges. Add a black soap pump and a matching black waste bin to keep the look tight.
Hardware is the cheapest way to make a small bathroom feel renovated. When you keep the vanity white and switch pulls to matte black, you get the black-and-white look without changing the cabinet doors or drilling new holes. I’ve done this in rentals where the vanity was ugly but sturdy, and the difference was dramatic because the eye reads “new” at first glance. It also flatters warm skin tones by keeping the mirror area bright and crisp.
AvoidDon’t mix black shades like matte knobs with glossy black accents — it looks mismatched.
Good to knowUse a small painter’s tape guide around the screw holes so you don’t scratch the vanity while aligning the pulls.
7. Black-and-White Ticking Bath Runner on the Floor
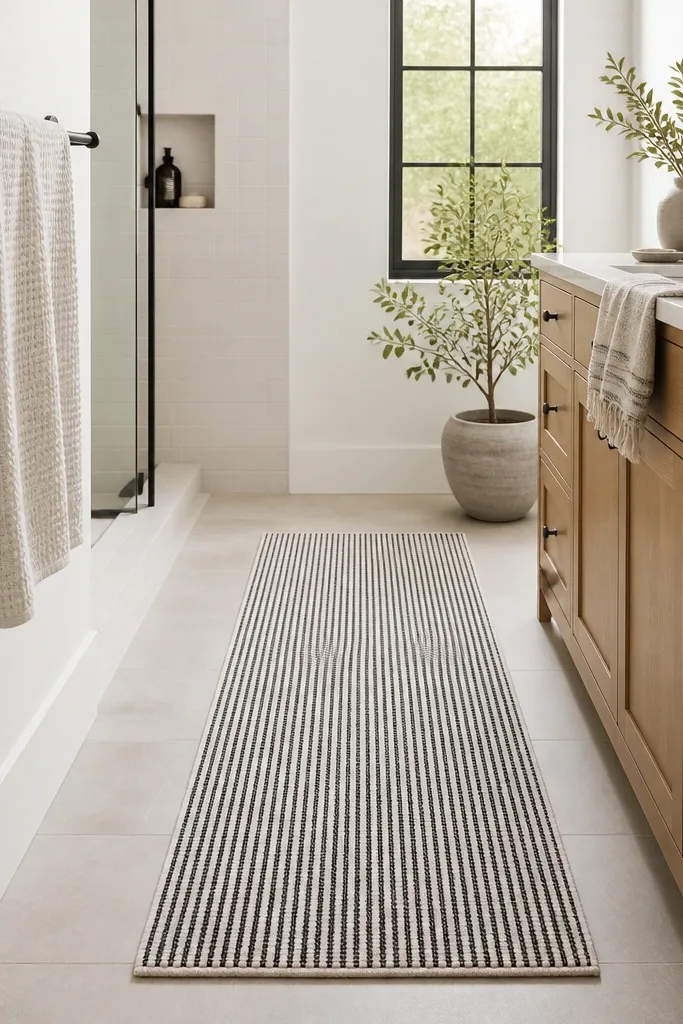
A runner brings order to tight layouts. Ticking stripes create a subtle pattern that doesn’t feel loud, and the black lines add the contrast your eyes crave in small rooms. I like this because it’s renter-friendly and easy to replace if the pattern goes out of style. It also helps visually define the path across the room, so your bathroom feels less cramped.
Measure the clear walking path from the shower opening to the vanity, then choose a runner that leaves 6 to 10 inches of space at the ends. Use a low-pile rug with a non-slip backing so it doesn’t curl near water. Lay it straight — if it’s off by even a quarter-inch, the stripes look sloppy. Pair with white towels and one black accessory like a small trash can.
If you have patterned peel tiles, keep the runner pattern simpler with thinner stripes.
Skip high-pile shag rugs — they trap moisture and look dirty quickly in full baths.
8. Black Tile-Effect Peel Sheets in the Shower Niche
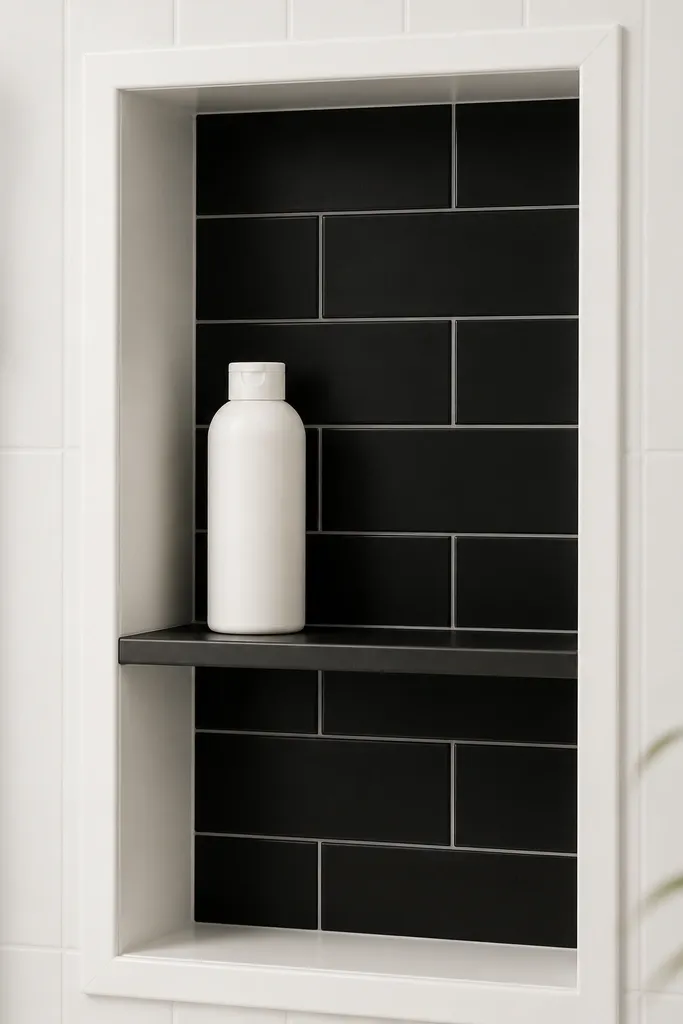
When you can’t change the whole shower, change the niche. A black tile-effect panel inside the niche looks like custom tiling, and the faux grout lines add realism. It also hides soap scum better than bright white because minor discoloration doesn’t show as fast. This is a great option for renters who want impact but don’t want to risk peeling wallpaper near constant steam.
Clean the niche thoroughly with a bathroom-safe degreaser and let it dry fully. Cut the peel sheet to fit the niche back wall first, then wrap side pieces if there’s space. Press along edges and corners, and use a plastic smoothing tool to avoid bubbles. Keep the rest of the shower bright white so the niche reads as a feature.
Use clear shower-safe caulk to seal any tiny gaps at the niche edges if your peel sheet doesn’t fully hug.
Don’t apply to wet or humid surfaces — the sheet will lift at the first steam cycle.
9. Black and White Roller Shade With Crisp Roman Fold
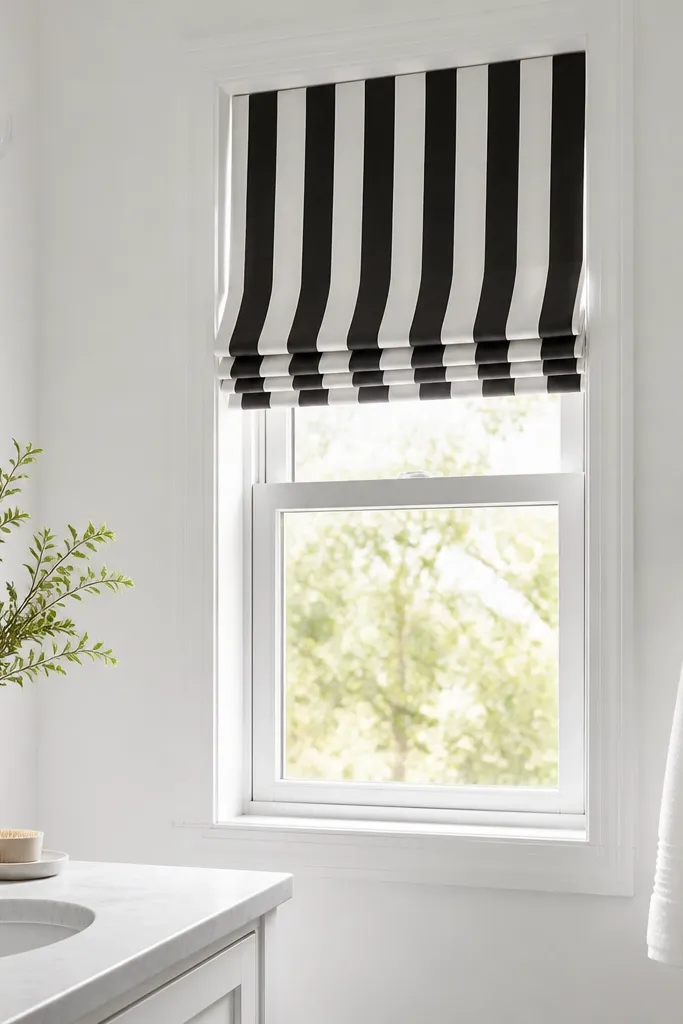
Measure the window width and buy a shade that sits inside the frame or mounts with minimal gaps. Install it so the stripes align vertically and the fold line sits centered. Choose a fabric that’s rated for bathrooms or use a wipe-clean backing. Pair with a white shower curtain and keep hardware in matte black.
Window treatments are where small bathrooms often lose the “finished” look. A black-and-white striped shade adds pattern without taking up wall space, and the vertical stripes can make the window area feel taller. Roman folds look tidy even in a humid room because the fabric isn’t ballooning like some curtain styles. This works well if your bathroom is light and you want a graphic touch without darkening the room too much.
AvoidSkip sheer curtains — they cling and look messy in a small full bath.
Good to knowIf you have a frosted window, choose higher-contrast black stripes so the shade still reads clearly.
10. Black Faucet and Shower Head With White Surround
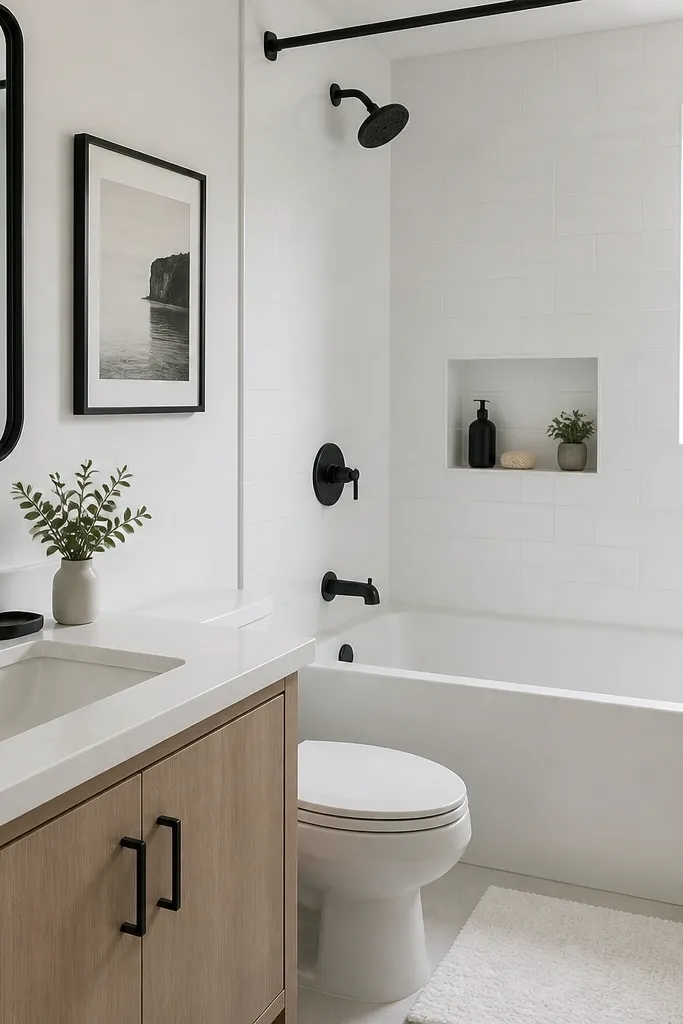
Changing fixtures is a bigger move, but it’s one of the few that instantly makes everything look cohesive. Matte black hardware reads clean against white tile, and it hides minor water spots better than bright chrome in real use. I’ve done this in apartments where the fixtures were the only dated part, and it made the whole bathroom look updated even with old tile. It also gives your face a sharper contrast in the mirror because the mirror area is framed in black lines.
If you can drill, swap faucet and shower head with matching matte black finishes. Shut off the water, replace one part at a time, and keep the old gaskets so the fit is exact. If you cannot drill, focus on shower head — it’s usually easier and uses existing connections. After install, wipe every surface once and run water for a minute to clear any residue.
Use plumber’s tape sparingly on threads — too much can cause leaks at the edges.
Don’t mix matte black with brushed nickel elsewhere; the mismatch looks cheap under bathroom lighting.
11. Black and White Gallery Wall of Waterproof Prints
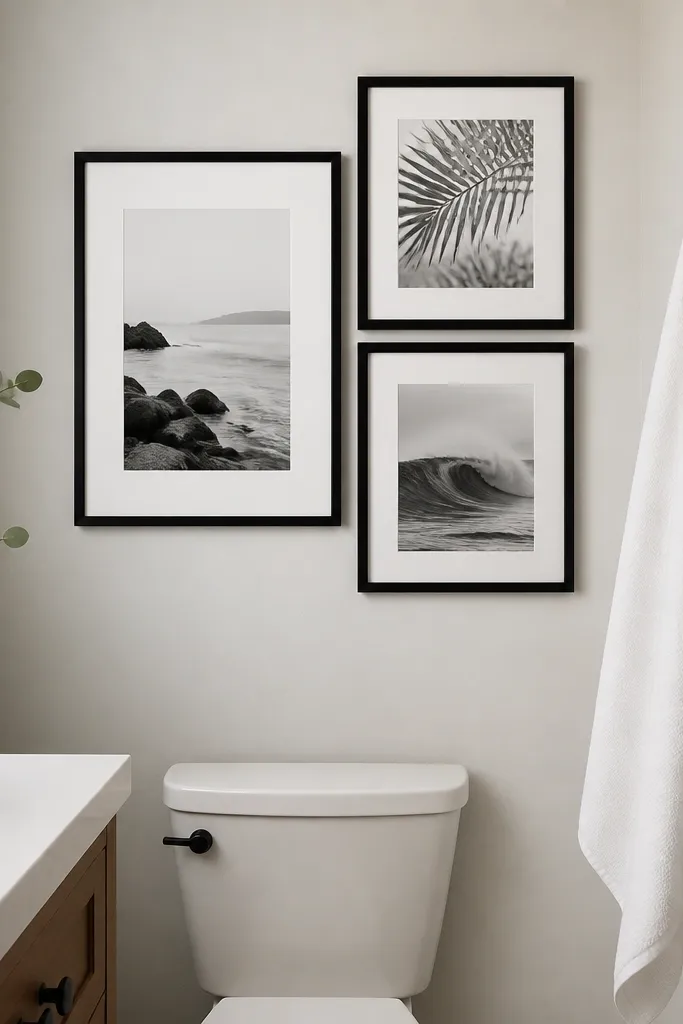
A gallery wall makes a small bathroom feel personal, not like a rental. Black frames tie the whole scheme together, and black-and-white prints keep it from turning into a color mess in a tiny space. I’ve used waterproof prints behind a shower-safe distance so they don’t warp or fade. This works best when you keep the frames uniform and the spacing tight, because tight spacing reads intentional in small rooms.
Choose three prints that share the same style — either high-contrast photography or simple line drawings. Pick black frames with the same width, usually 1 inch or slimmer so they don’t overwhelm. Mount them using picture hooks or adhesive strips that can be removed cleanly. Keep the bottom edge at least 18 inches above the toilet tank to avoid splash and cleaning wipe damage.
Use a level and measure from the mirror centerline so the grid doesn’t drift.
Skip cheap poster prints without a protective coating; steam will warp them.
12. Black Shelf Above Toilet With White Baskets
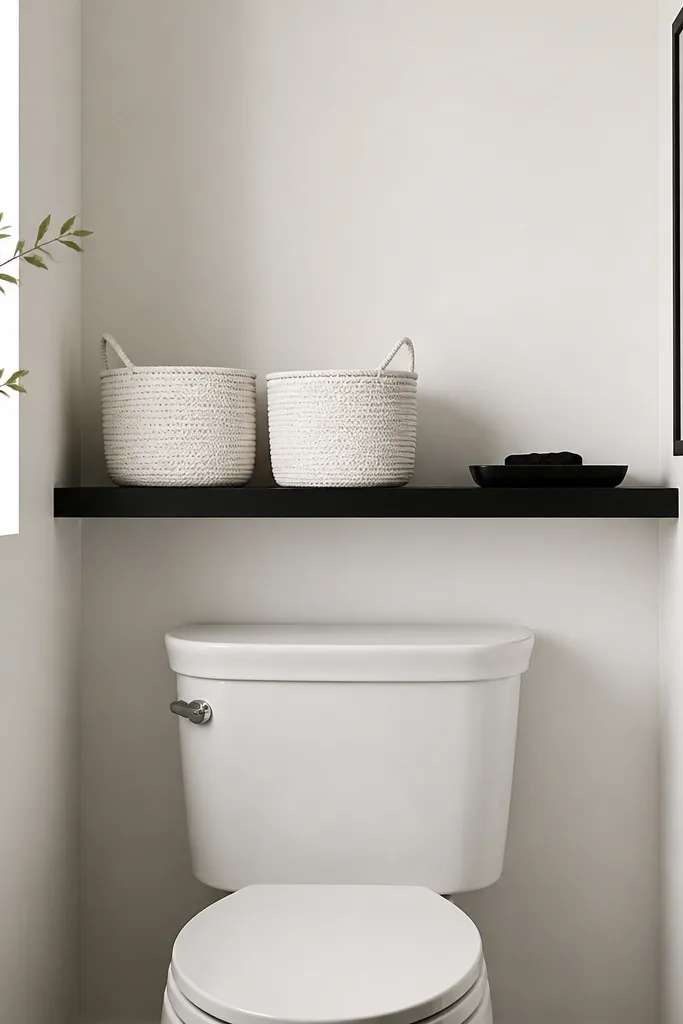
Storage makes small bathrooms look bigger because clutter disappears. A narrow black shelf adds contrast without adding visual bulk, and white baskets soften the look so it doesn’t feel like an office. In my rentals, this is where I stash backup toiletries, extra rolls, and a spare bottle of cleaner so counters stay empty. It also flatters the room’s brightness because white baskets reflect light, making the shelf area look clean even when you’re using it daily.
Measure the toilet tank width and install a shelf that sits with a few inches of clearance from the ceiling and splash line. Use a black shelf with a matte finish and add white baskets that fit the shelf depth — usually 10 to 12 inches deep. Style with one small black tray for daily items, then keep the rest behind the baskets. Keep towels folded in white and add a black-and-white bath mat for continuity.
Put the heaviest basket on the back of the shelf so it doesn’t tip forward over time.
Don’t use clear plastic bins — they look messy fast with small toiletries.
13. Black-and-White Patterned Shower Curtain With Solid White Towels
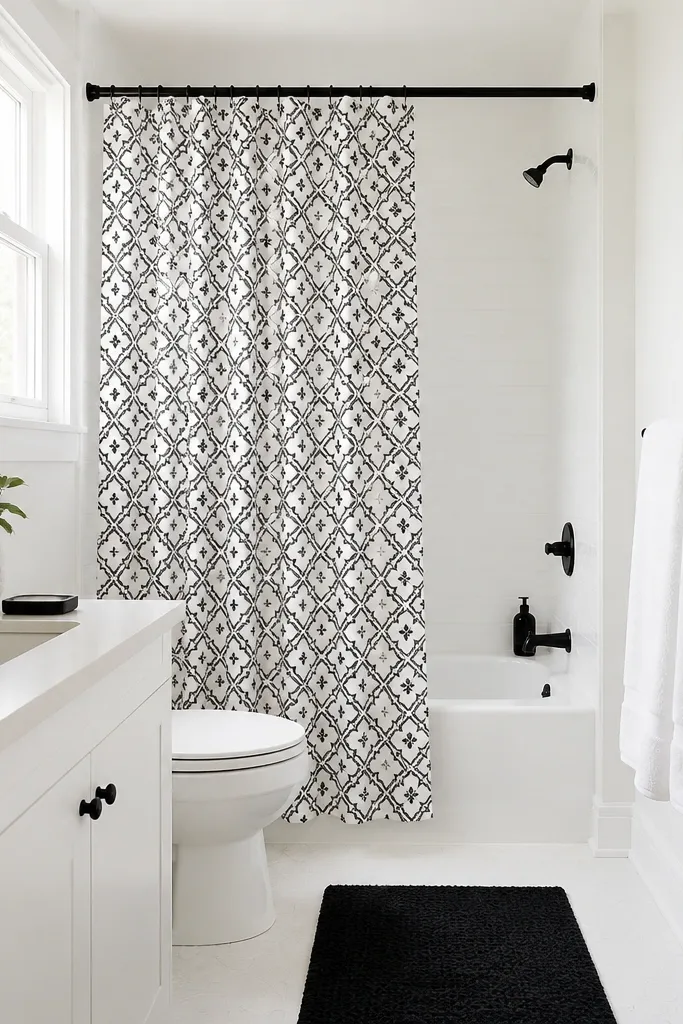
This is the simplest way to make a rental bathroom look styled: pick one patterned element and keep everything else calm. Choose a curtain with a repeating graphic that has lots of white space so it doesn’t feel heavy in a small room. Black-and-white patterns look sharp under overhead lights, and they hide minor wrinkles better than solid fabrics. It flatters most bathroom mirror setups because the black motif creates a frame around the sink and makes the faucet area look deliberate.
Measure your shower rod width and height, then buy a curtain that reaches the floor with about a 1-inch puddle overlap. Use curtain rings that slide smoothly and a weighted hem so the pattern stays flat. Pair it with all-white towels and a white bath mat with a black border or small black dots. If you have a patterned floor, choose a simpler shower pattern with larger shapes.
Hang the curtain 1 to 2 inches higher than you think so the pattern reads taller.
Skip curtains with tiny busy patterns; they look cramped in full bathrooms.
14. Black Accent Wall Panel Behind the Vanity Using Removable Board
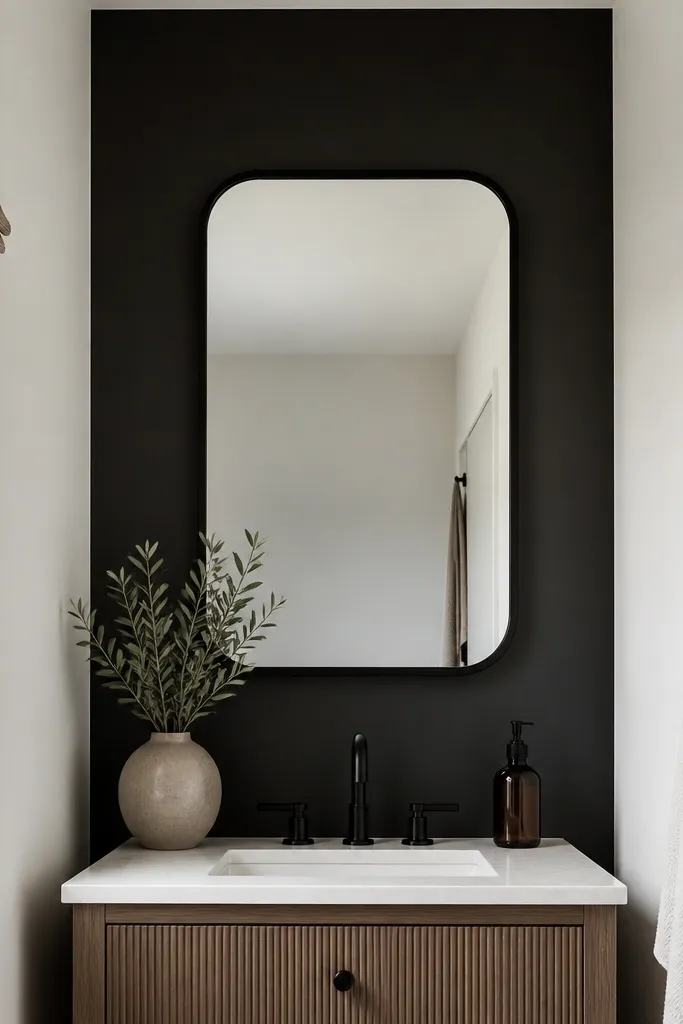
Measure the vanity back wall and cut a removable panel to fit so it leaves a small margin around the edges — about 1/4 inch. Clean the wall thoroughly, then apply adhesive backing according to the panel instructions. Press the panel in place and run your hand along the surface to ensure full contact. Mount the mirror centered on the panel using the mirror’s hardware, then add white accessories so the black stays the only bold color.
A single matte black panel behind the vanity creates instant depth and makes the mirror look like it belongs in a boutique hotel. Matte black is forgiving — it hides minor scuffs better than glossy finishes, and it doesn’t reflect overhead glare like shiny paint. I like this approach because it’s removable if you use a rental-friendly panel system or adhesive board designed for walls. It’s also very flattering for vanity lighting because the black background makes the mirror area brighter in contrast.
AvoidDon’t cover the entire bathroom in black — the room will feel smaller and dirt shows more.
Good to knowUse painter’s tape to mark your mirror centerline before you mount anything.
15. Black-and-White Vertical Stripe Wallpaper On One Half Wall
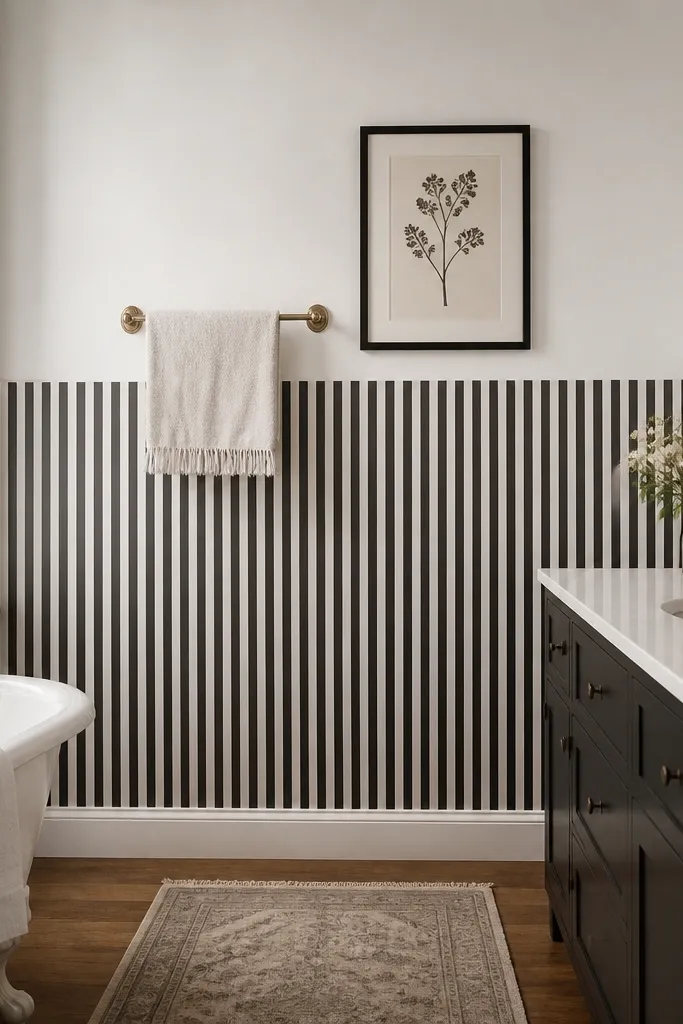
Decide the stripe height line — I like 36 to 48 inches from the floor depending on where the towel bar sits. Apply removable wallpaper only to the lower section, aligning the stripe pattern at the corner. Use a level to keep the horizontal line straight, and press seams firmly with a plastic smoother. Keep the upper wall plain white and choose black hardware so the stripe doesn’t compete.
Half-wall stripe treatment is a great renter compromise. The stripes add height and style, but the white upper half keeps the room bright and stops the black from taking over. This look works well when your bathroom has a window or a shelf and you want to avoid covering awkward shapes. I’ve seen this work especially well in small full bathrooms with a standard 8-foot ceiling because the stripes create a taller feel without making the wall look like it’s collapsing.
AvoidSkip seams that land awkwardly near a corner — they show more in tight bathrooms.
Good to knowIf your wall has a baseboard, press the wallpaper edge under the baseboard line for a cleaner finish.
16. Black Grout Look Peel Tile On the Tub Deck
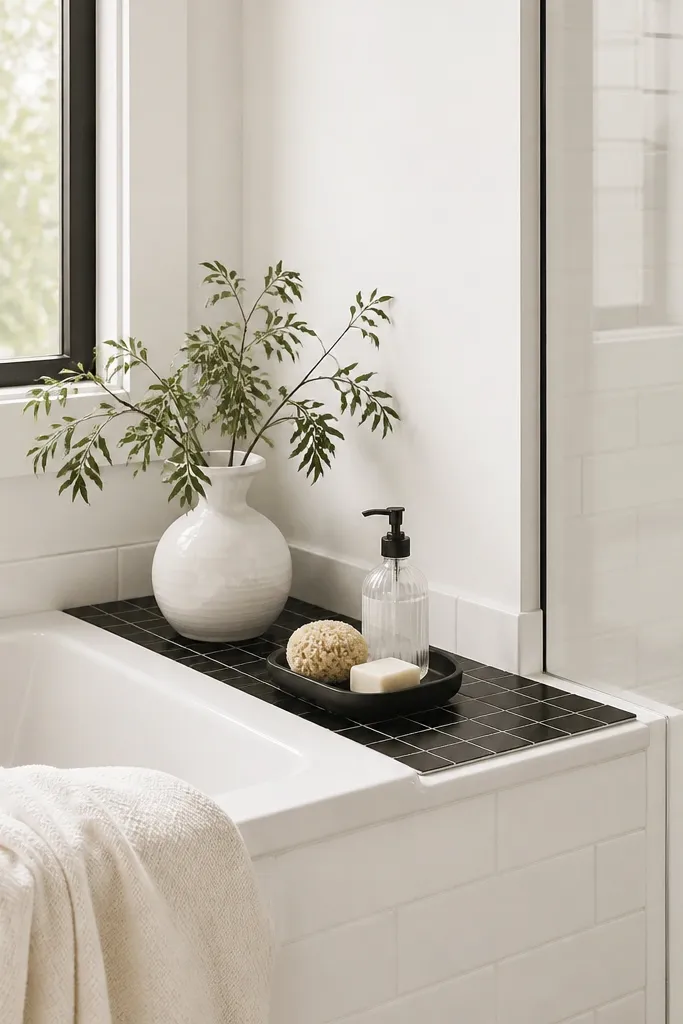
Clean and dry the tub deck thoroughly and remove any residue from previous caulk or cleaner. Measure the available flat area and cut the peel tile sheet to fit with a slight gap at the edges for expansion. Apply the tile sheet starting from the back edge and smooth as you go to avoid bubbles. Finish with a black tray and a white or clear shower-safe organizer so the deck stays neat.
A tub deck tile look gives you a “real tile” effect where your eyes land when you step in. Black grout lines make the area feel structured and clean, and the high contrast hides the mess that usually gathers around the tub edge. This is a smart move when you can’t change the main surround but you can update a smaller zone. It also makes the shower feel more intentional, which matters in small spaces where there’s nowhere to hide dated surfaces.
AvoidDon’t put peel tile over glossy acrylic without checking adhesion — it peels faster.
Good to knowUse a silicone-free cleaner on the deck before applying, since some silicone residues interfere with adhesion.
17. Black Towel Ladder Leaning on White Wall
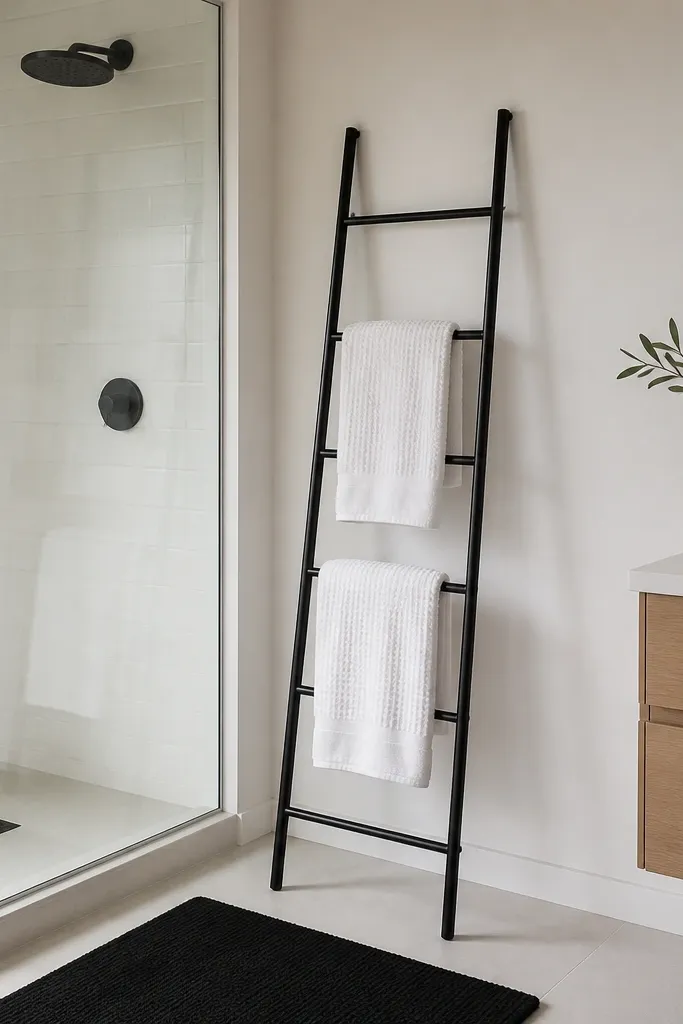
Choose a ladder that’s narrow enough to fit between the shower and vanity without blocking the walkway — measure first. Lean it against a white wall so the black frame stands out. Drape white towels so they hang straight and cover the rungs, not bunched. Add a black bath mat with a low profile and keep one small black accessory on the vanity for balance.
A towel ladder adds vertical lines, and vertical lines help small bathrooms feel less cramped. It also gives you a place to hang towels without installing anything permanent, so it’s renter-friendly. Keeping towels white keeps the black-and-white scheme crisp, and the ladder’s thin frame doesn’t take up much visual area. This works for bathrooms where your wall space is limited and you need storage that looks tidy.
AvoidSkip thick bulky towels on a narrow ladder; they slump and look messy.
Good to knowFold towels so the top edge sits level across the ladder — it looks styled, not thrown on.
18. Black-and-White Countertop Clutter Control With Trays
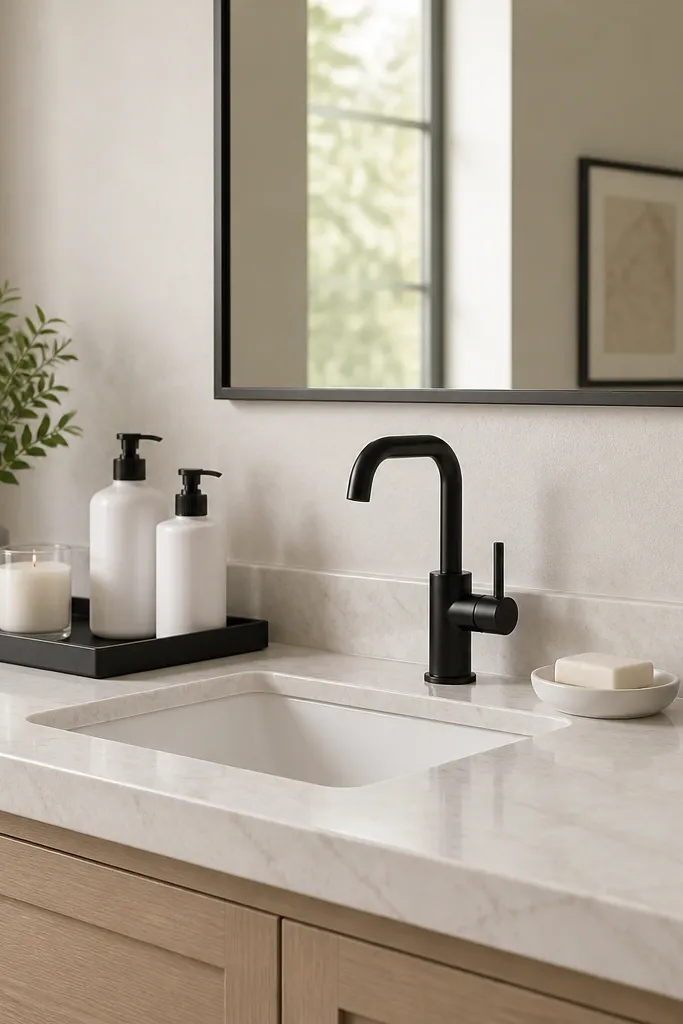
This is the part people miss: small full bathrooms look bigger when counters look planned. A black tray anchors the area, and white bottles keep the palette consistent so your eye doesn’t chase random colors. I’ve used this setup in bathrooms that were otherwise plain, and it still read high-end because the countertop became a clean stage. It also photographs better because black edges define the space and white surfaces reflect light.
Pick one tray in matte black and size it so it doesn’t touch both edges of the counter — leave 2 to 3 inches of breathing room. Group only daily items in the tray: one soap pump, one lotion pump, and one small organizer for cotton pads. Use matching white labels or plain white bottles so the clutter looks intentional. Place a matching black toothbrush holder and keep the rest of the counter empty.
Wipe the tray and bottles weekly with a microfiber cloth so the black stays free of dust haze.
Skip mixing multiple bottle styles in different colors — it makes the room feel busy even with black-and-white decor.
19. Black Vanity Light Bar and White Backdrop Bulb Covers
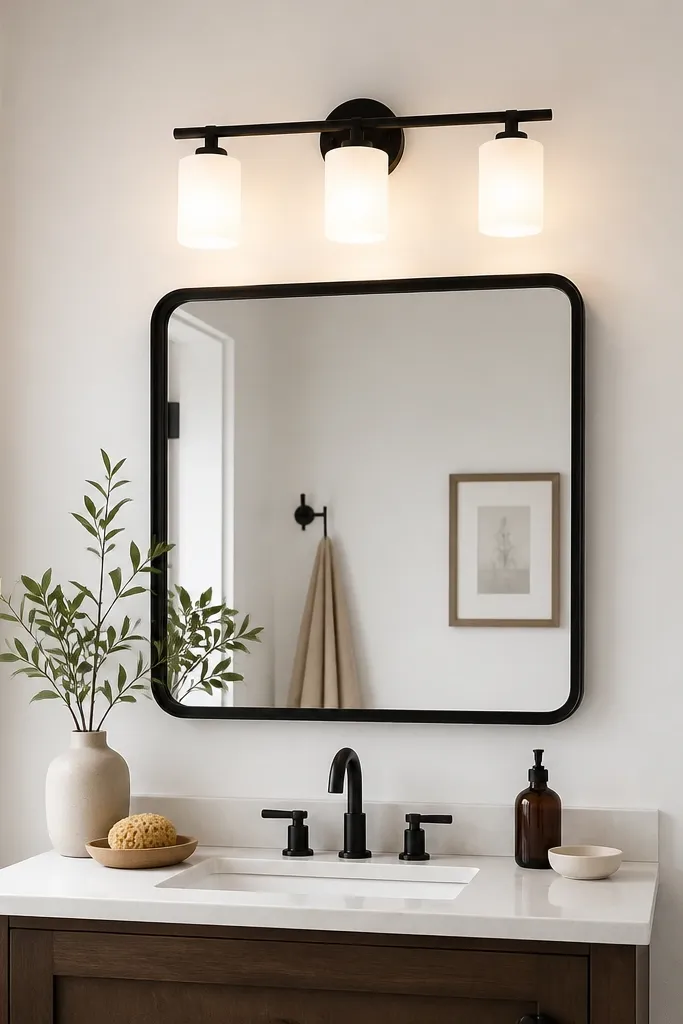
Lighting changes everything in a small bathroom, and black fixtures look crisp against white walls. This setup works because frosted white bulb covers keep the light soft, so the black mirror frame and faucet don’t create harsh glare. In my apartments, replacing a cheap chrome light with a matte black bar made the bathroom look more expensive even though nothing else changed. It also flatters your face in the mirror because the light is even and not too yellow.
Turn off power at the breaker, then replace the old fixture with a black vanity light bar sized to your mirror width — usually within 2 to 4 inches of the mirror edges. Install frosted bulbs or covers so you don’t get bright pinpoints. Check that the fixture height leaves about 70 to 75 inches from the floor to the bottom of the fixture, depending on your mirror size. Finish by matching the black tone to your towel bar and faucet.
Use a 2700K bulb for warm white — it makes black surfaces look less flat.
Avoid bare bulbs; they reflect as dots in the mirror and look dated fast.
20. Black-and-White Wall Hooks and Removable Towel Rings
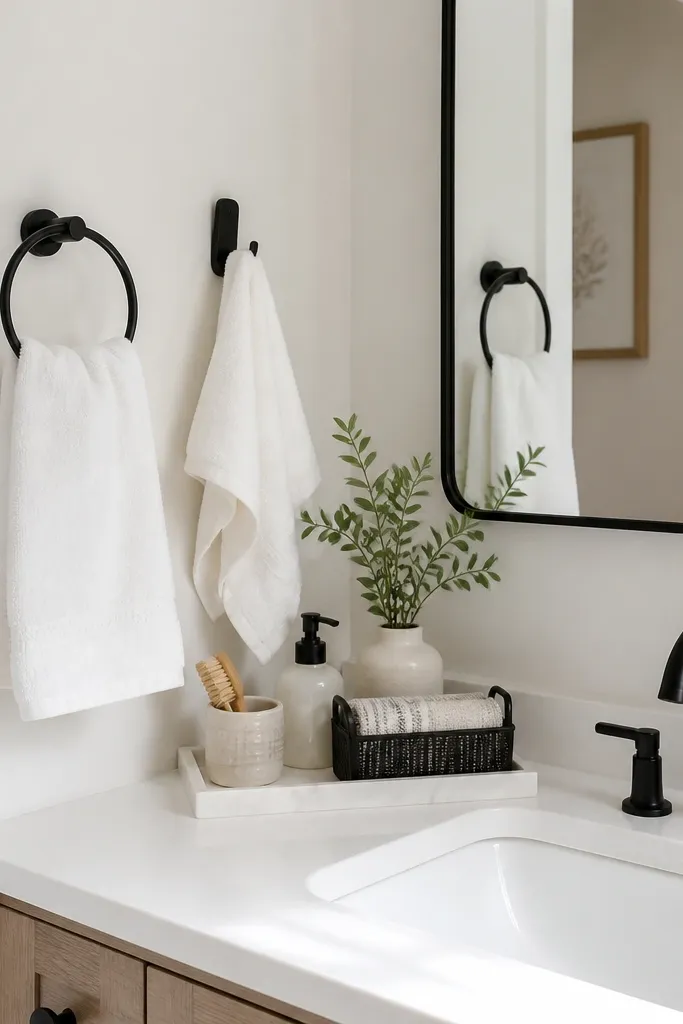
When you can’t drill or you don’t want to patch walls, removable hooks and towel rings solve the “where do towels go” problem. Black hardware creates a clean border around the sink area, and white towels keep the palette consistent. This look works because it reduces visual clutter — towels that hang neatly are part of the decor. I’ve used removable hardware in move-out situations, and it leaves less stress than permanent mounts.
Pick towel ring and hook sets in matte black that come with removable adhesive backing. Clean the wall with alcohol and let it fully dry so the adhesive holds. Place the towel rings at a comfortable height — usually around 44 to 48 inches from the floor for hand towels. Add one hook near the shower for a white bath mitt or small robe, and keep the rest of the wall blank for a clean look.
Press hardware in place for 30 seconds and avoid hanging towels for the first hour so the adhesive bonds.
Skip placing adhesive hardware over steamy bathroom walls — it fails fast.