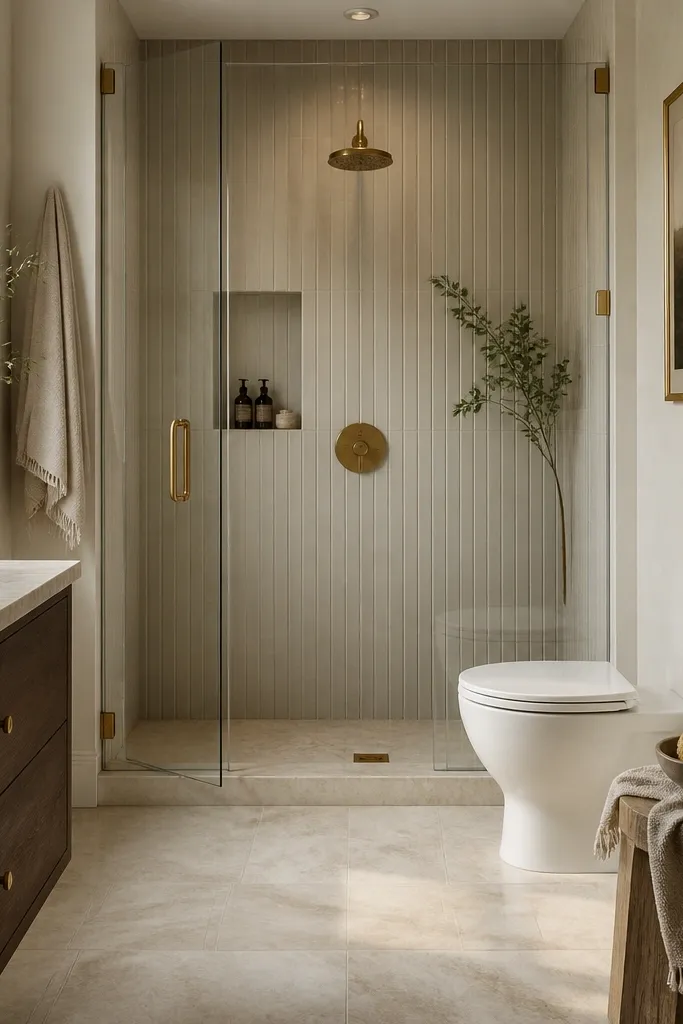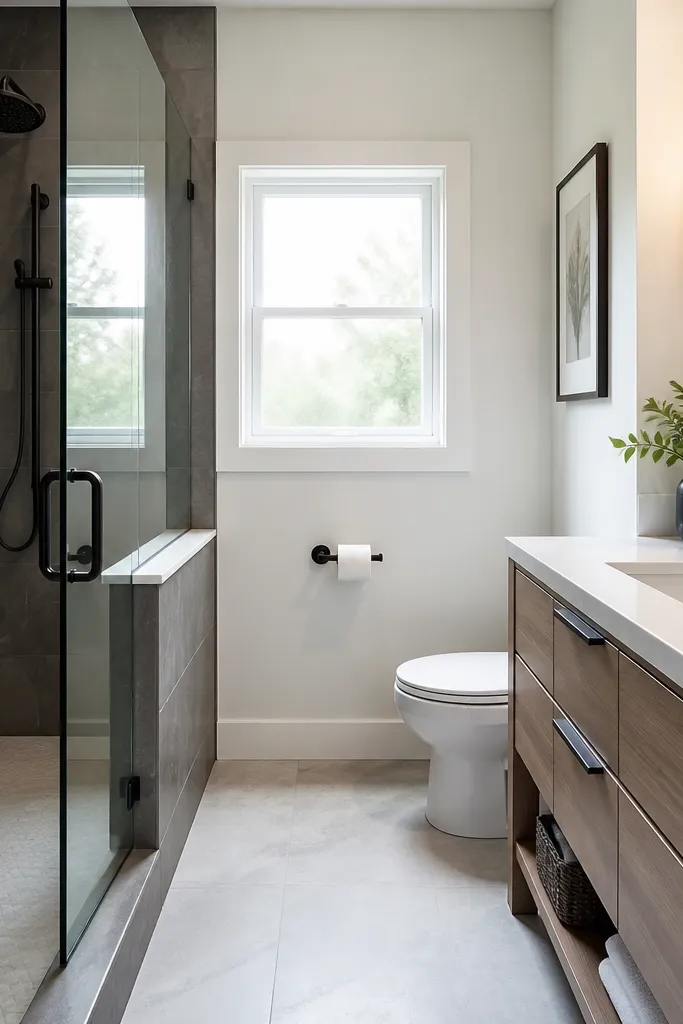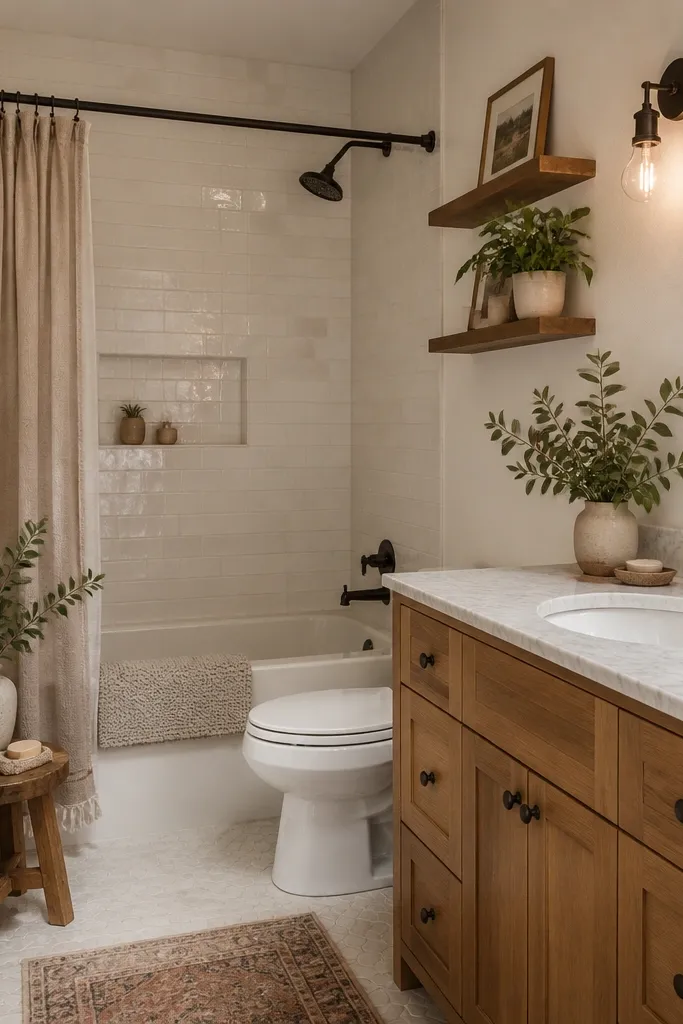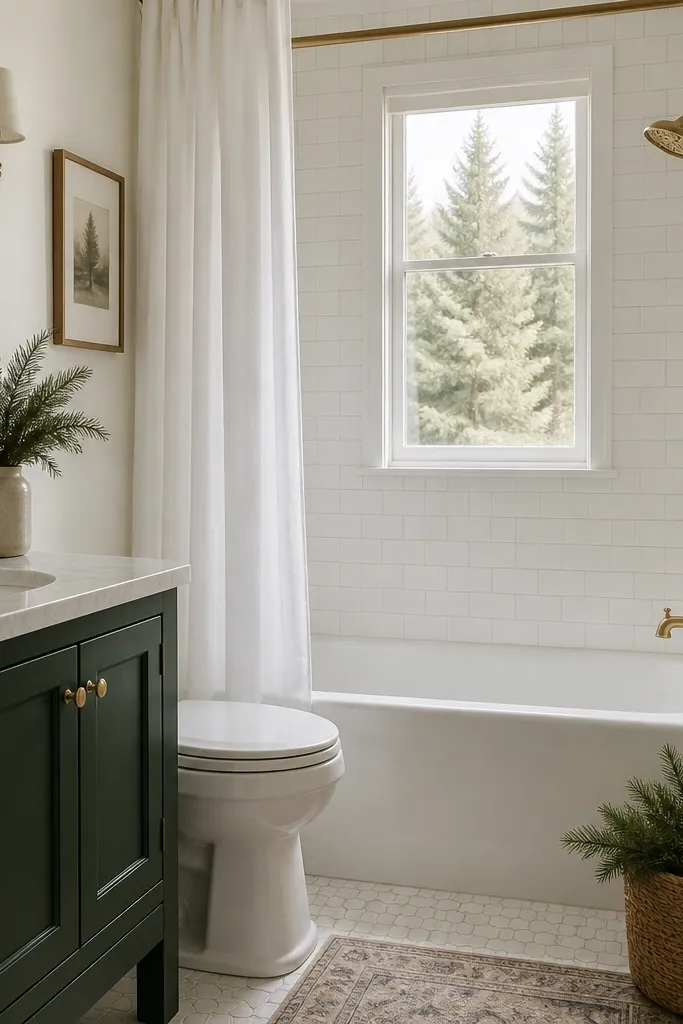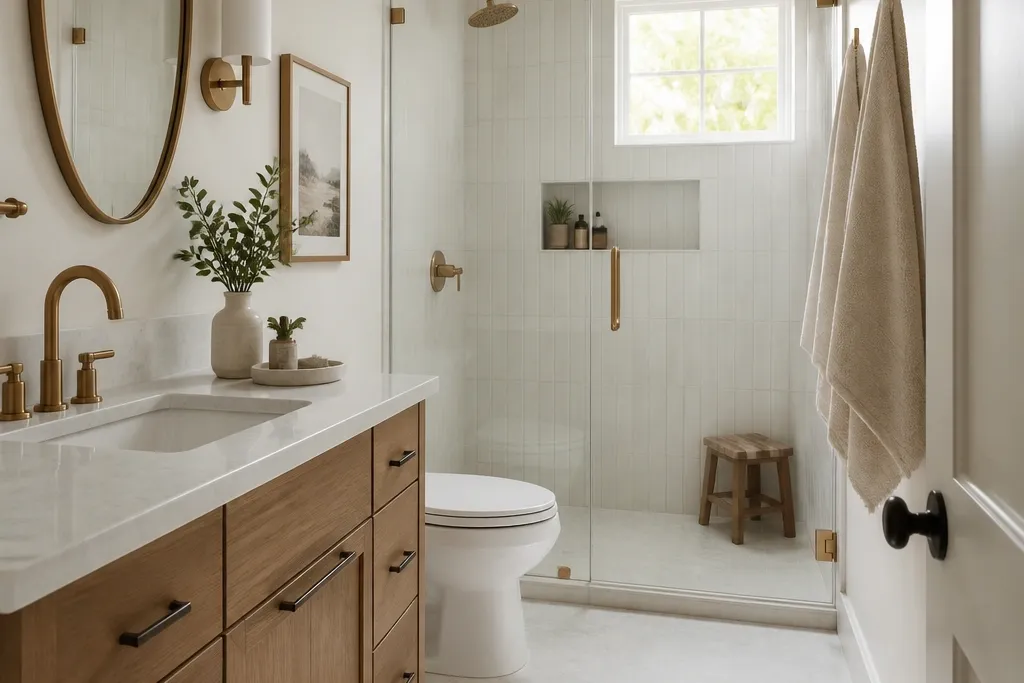
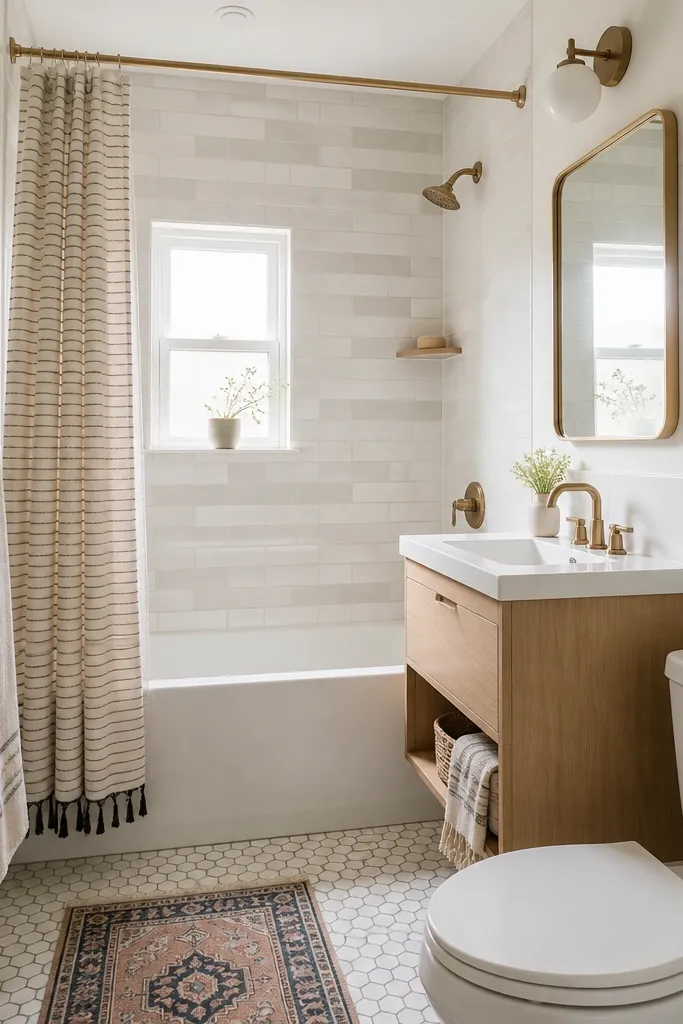
1. 24-Inch Vanity + Corner Shower (Single Door View)
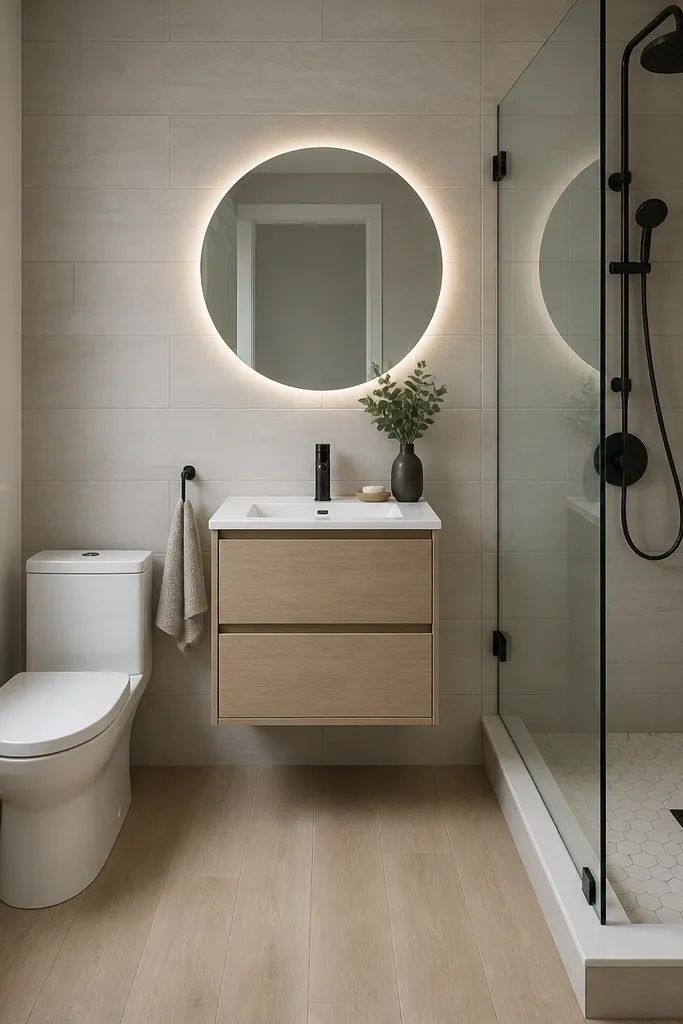
This layout works when you want one clean sightline from the door. The vanity stays on the main wall, so you don’t have to visually “hunt” for it, and the corner shower tucks the wet zone out of the way. I’ve used this in bathrooms around 5x7 where the door opens straight toward the toilet — corner placement keeps that wall from feeling like a traffic jam. The floating 24-inch vanity also helps because the floor reads open, which makes the room feel bigger for both fair and medium skin tones since the mirror glow is soft and flattering. Go with warm whites or light grays on the walls and keep the shower glass clear to prevent the space from turning cold.
Start by placing the shower in the corner closest to your existing water lines. Then install the 24-inch vanity so the door swing clears the drawer pulls — I aim for at least 2 inches of breathing room at the handle edge. Use 2x8 or 3x6 wall tile laid horizontally to stretch the wall visually, and run the floor tile straight through the vanity area for one continuous look. Finally, add a round backlit mirror and mount a towel bar on the side wall where it won’t block the shower opening.
Good to knowIf you’re choosing between brushed nickel and matte black, pick the one already in your lighting fixture — matching finishes reduces visual noise fast.
AvoidAvoid a chunky framed mirror or thick trim around the shower — it makes a small corner feel boxed in.
2. Toilet Flanked by Built-In Vanity Storage (No Counter Chaos)
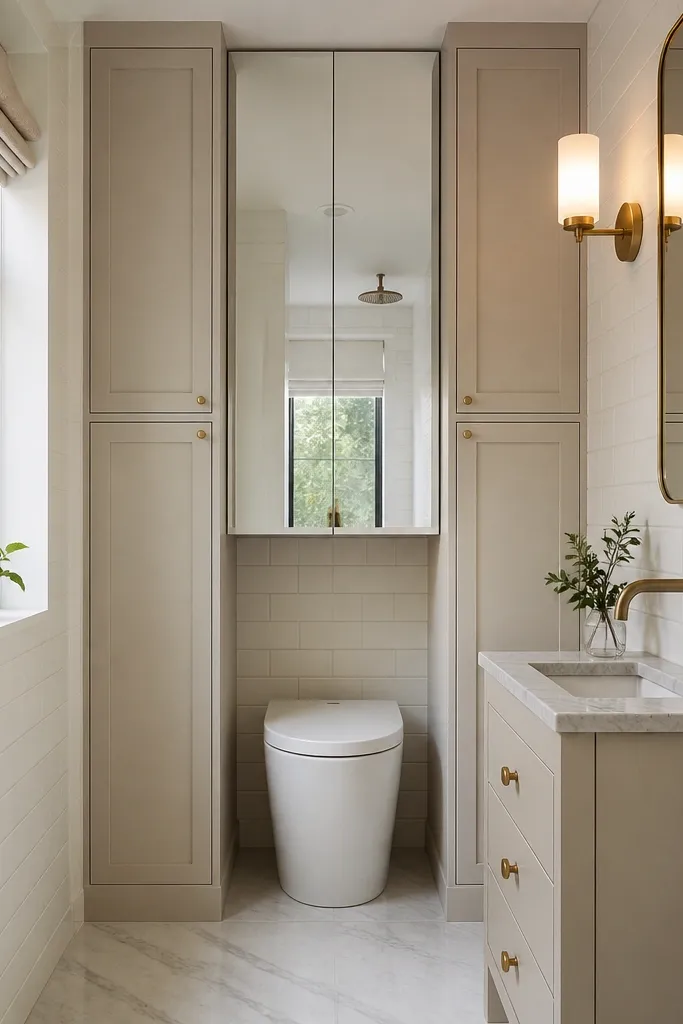
When the plumbing stack forces the toilet placement, this layout makes that constraint look intentional. Flanking the toilet with storage gives you a place for rolls, wipes, and daily items without spreading clutter across a tiny counter. I like it for renters and small families because you can keep the bathroom “reset” in under a minute. The tall mirror cabinet also brightens the room in a way a standard mirror doesn’t — it bounces light deeper and helps fair skin look less washed out under overhead lighting. Use clean white walls and a light stone top so the built-ins don’t feel heavy.
Start by framing the toilet recess only as wide as your toilet tank footprint plus 1/2 inch clearance each side for doors. Then build or buy two narrow cabinets that line up with the vanity height, keeping handles centered at 36 to 40 inches off the floor. Install the 18-inch console vanity with a slim vessel or undermount sink so you don’t lose usable counter space. Finish by mounting a tall mirror cabinet over the recess and adding one wall sconce at eye level so faces get even light.
Good to knowPut a small trash can inside one of the side cabinets with a pull-out bin — it keeps the floor clear.
AvoidAvoid open shelving over the toilet — stacks of bottles look messy in tiny rooms even when they’re “organized.”
3. Tub-to-Shower Conversion With Low-Profile Glass Door
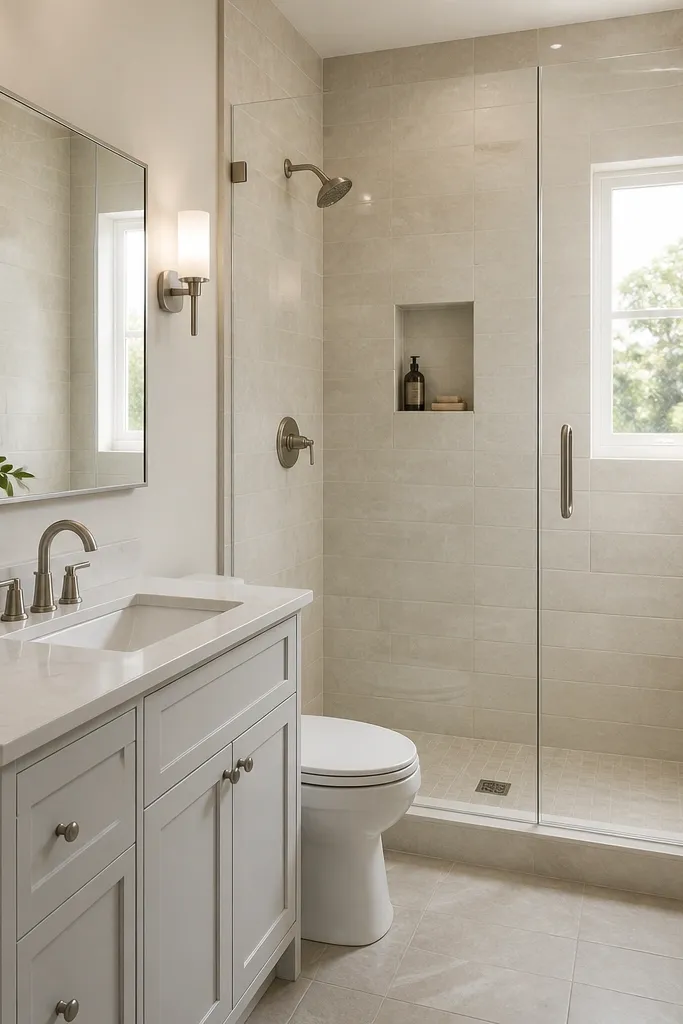
If your bathroom has a standard tub but you rarely use it, converting to a shower is the fastest way to gain space without changing plumbing. The low curb keeps the look clean, and frameless glass makes the room read larger because there’s no metal grid blocking sightlines. I’ve done this in bathrooms where the tub blocked the only window line — turning it into a shower opens that area and improves how light moves. It flatters everyone because the mirror stays clear and the bathroom feels brighter, which matters if you shave or do makeup. Choose the same tile in shower and bath area so the room has one continuous surface instead of “zones.”
Start by measuring your existing tub footprint and planning a 36-inch clear shower door opening where possible. Then have a contractor set the waterproofing and niche locations before tile — I always place a niche at about 48 inches high for shampoo bottles. Install a frameless glass door with a magnetic seal and keep the hardware finish consistent with your faucet. Finish by using the same floor tile in the shower and outside the shower, and run wall tile full height so the space doesn’t show patchwork.
Add one grab bar hidden inside a niche wall — it looks like a design detail, not a safety add-on.
Avoid mixing tile sizes between shower and vanity wall — the jump makes the room look chopped up.
4. Narrow Floating Vanity + Offset Toilet (Asymmetry That Works)
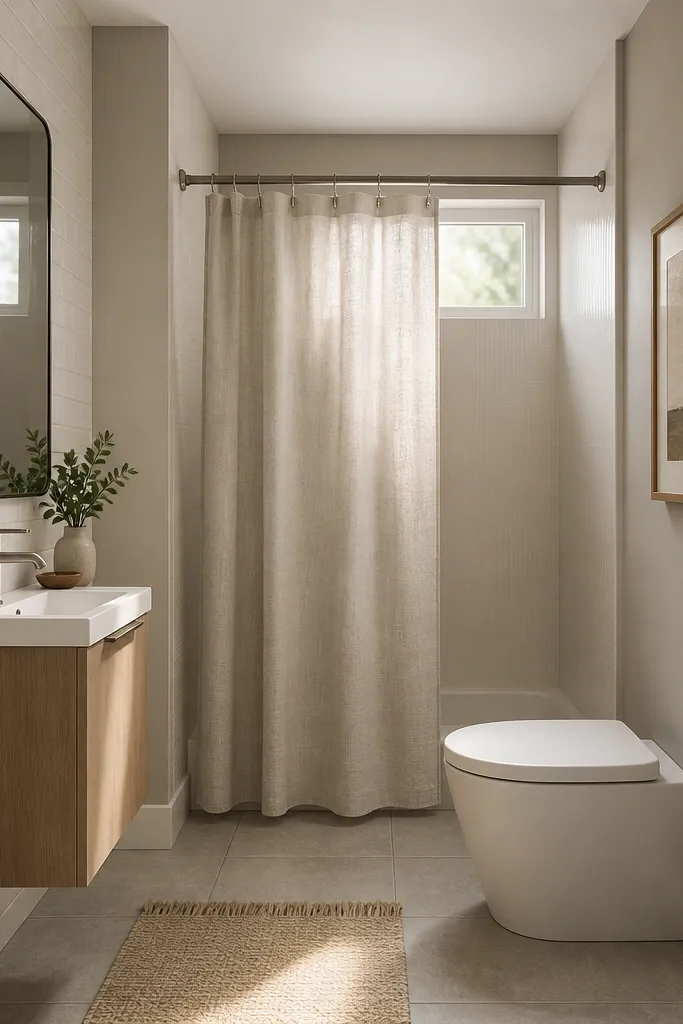
This is for the bathrooms where the door hits the toilet straight-on unless you cheat the layout. An offset toilet lets you keep a narrow vanity where you can actually access drawers without bumping a knee on the tank. I like asymmetry here because it breaks the “box” feeling — your eye doesn’t land on a centered, cramped wall. The floating vanity makes the floor feel open, which matters in rooms with darker paint or low windows. For deeper skin tones and anyone who prefers warmer lighting, a soft greige wall with a glossy tile band gives flattering contrast without looking harsh.
Start by drawing the door swing arc on graph paper and mark where your knees need clearance. Then place the narrow 20-inch vanity so the sink edge doesn’t block the walkway when the door opens. Offset the toilet by a few inches so the tank doesn’t align with the vanity centerline; aim for an easy path between toilet and shower door edge. Use a rectangular mirror that matches the vanity width and add a glossy tile band behind it in a 4-inch height strip for a bright focal point.
Use a long, slim soap dish mounted near the sink — it replaces counter clutter without needing extra storage furniture.
Avoid centering everything — a perfectly centered toilet and vanity in a tiny room often makes the walkway feel narrower.
5. Shower-First Layout With Pocket Door (No Doorway Bottleneck)
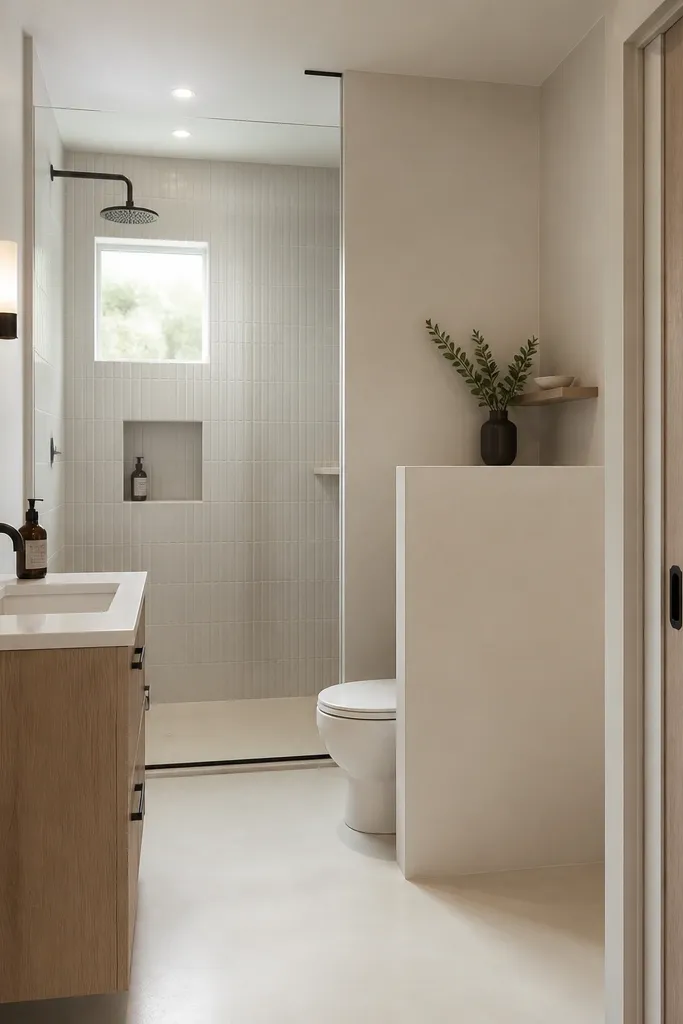
Pocket doors are the difference-maker when the regular swing door eats your usable path. With a shower-first plan, you keep the wet zone at the back and give the vanity and toilet room to breathe along the sides. I’ve installed this in narrow rentals where every inch counts and the old door would slam into a towel bar. It feels airy because the door is out of the way and the shower glass keeps the back wall visible. If you have light hair or cool-toned makeup, the matte bright floor and warm mirror lighting help avoid that “washed out” look.
Start by confirming your framing allows a pocket door without hitting the shower plumbing wall. Then place the shower so the glass panel opens toward the pocket door side, not into your main walkway. Install a 24-inch vanity with drawers and mount the mirror high so it doesn’t interfere with door clearance. Finally, add a slim corner shelf inside the toilet nook for extra tissue and a single candle — keep it to one item so the shelf doesn’t look crowded.
Paint the pocket door the same color as the wall, not a contrast — the hidden door disappears visually.
Avoid a towel bar right where your pocket door slides — it becomes an annoying bump every day.
6. Sliding Barn Door Over Toilet Wall (Soft Privacy, Clear Flow)
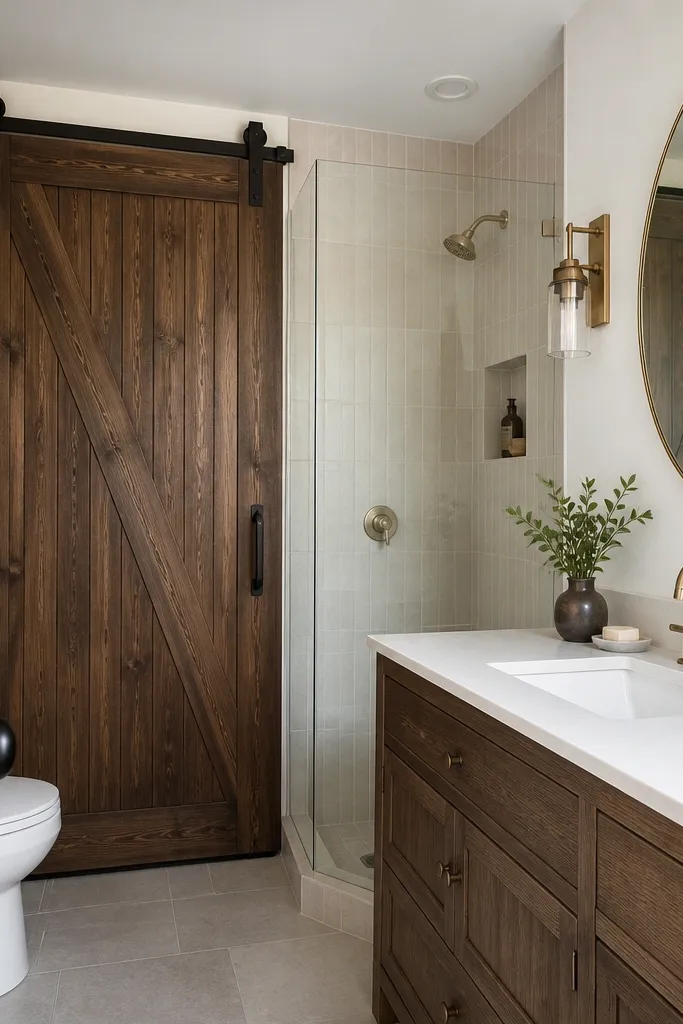
This layout is for bathrooms that feel awkward because the toilet is visible the second you walk in. The sliding barn door gives you privacy without a swinging door taking up floor space. I like it when the bathroom has a long wall for the track — it makes the toilet zone feel separate while keeping the rest open. Brass hardware and warm wood tones look great with both cool and warm undertones in skin because the lighting feels warmer and less clinical. The key is to keep the wall colors light so the wood door doesn’t darken the whole room.
Start by building a small toilet partition wall only if your plumbing wall already has space for it. Then mount the barn door track on the ceiling or high above the doorway so the door sits visually tall. Place the vanity on the opposite wall with at least a 30-inch clear path between vanity and shower glass edge. Use a large oval mirror and keep the shower glass clear — you want vertical reflections to make the room feel taller.
Good to knowHang one towel on a hook on the barn door — it keeps towels close without adding another bar that crowds the walls.
AvoidAvoid dark tile walls behind the toilet if you’re using a dark door — the combined shadows make the room feel smaller.
7. Diagonal Shower Entry (The 36-Inch Rule)
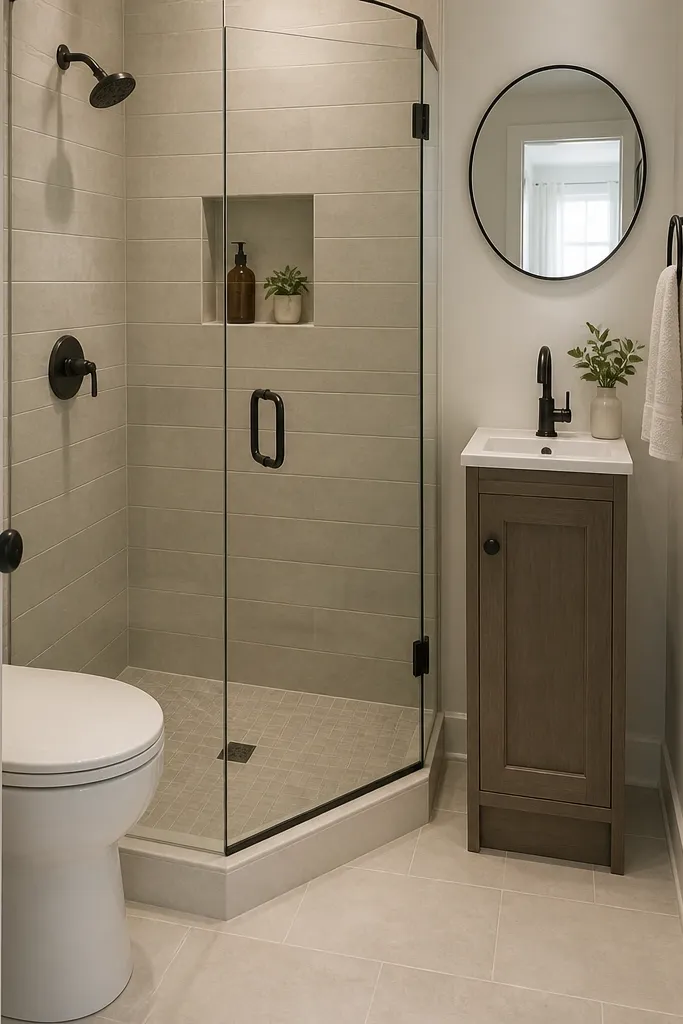
Diagonal shower planning is the trick when your straight-on entry is too tight. It helps you maintain a 36-inch minimum clear opening so you can actually reach the back wall without scraping elbows. I’ve used this in bathrooms where the door is close to the shower corner and a standard straight glass panel would block movement. The diagonal floor pattern also gives the eye a direction, which makes the room feel like it has more depth. Pairing a round mirror with angled tile keeps the visual balance — round shapes soften the sharp lines of the entry.
Start by marking the shower footprint as close to 36x36 as your plumbing allows. Then position the glass panel so it doesn’t hit the vanity door or cabinet trim when opened — test it with painter’s tape outlines. Install the narrow 20-inch vanity opposite the shower and keep the mirror centered over the sink. Use one grout color across the shower and walls, and repeat the same tile on the floor outside the shower for a continuous path.
Use a squeegee tool mounted on the shower wall — a diagonal shower collects water fast if you don’t wipe it down.
Avoid a tiny shower bench in a diagonal layout — it blocks your movement and makes the entry feel narrower.
8. 30-Inch Vanity + Recessed Toilet Wall (Classic and Tight)
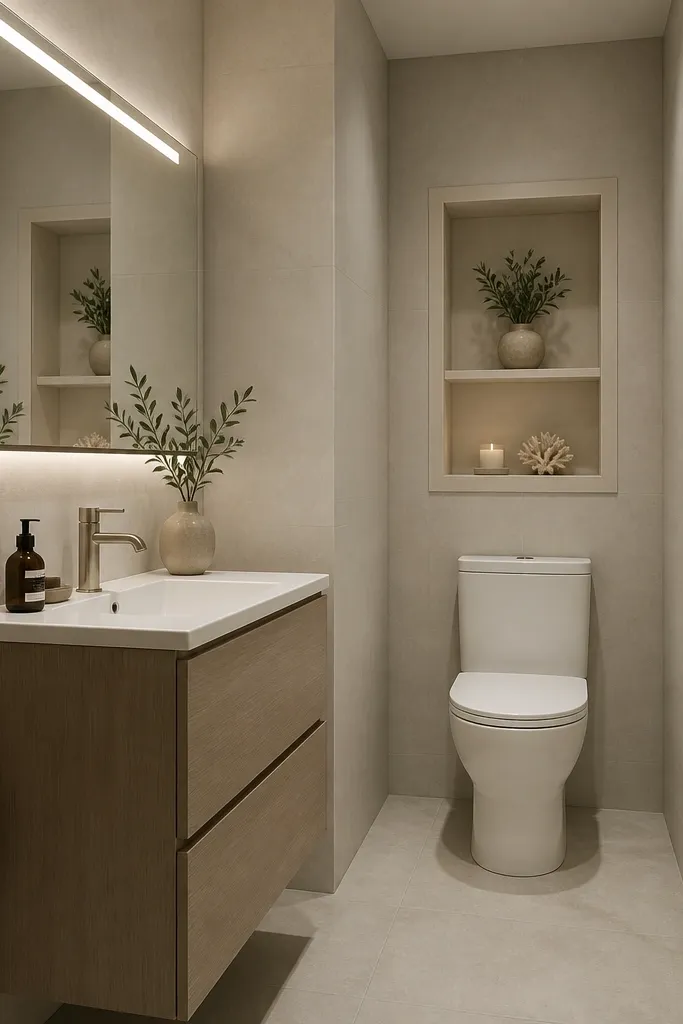
If you can recess the toilet even an inch or two, the room feels instantly more organized. A 30-inch vanity gives you real counter space for daily items without turning the bathroom into storage chaos. I like this when you have a family member who needs both sink and mirror space — it keeps morning routines from turning into a bottleneck. The recessed toilet also reduces the “lump” of the room’s center, which helps the layout feel balanced. For most skin tones, the matte wall tile prevents glare, and the mirror lighting keeps under-eye shadow from getting too harsh.
Start by checking if your wall framing allows a shallow recess without changing your plumbing. Then install the vanity with its top aligned to the recessed toilet wall face so you don’t get an awkward step. Use a large rectangular mirror that matches the vanity width, and mount it so the bottom edge sits around 2 to 3 inches above the faucet deck. Finish with a small framed niche above the toilet tank for toothbrushes or a single display item, and keep grout lines consistent across the wall.
Good to knowPut a light dimmer on the vanity light — small bathrooms get flattering fast when you can soften overhead brightness.
AvoidAvoid a vanity that’s deeper than 18 inches in this layout — it steals the walkway and makes the recess pointless.
9. Corner Vanity + Straight Shower Line (Mirrors Fix the Angle)
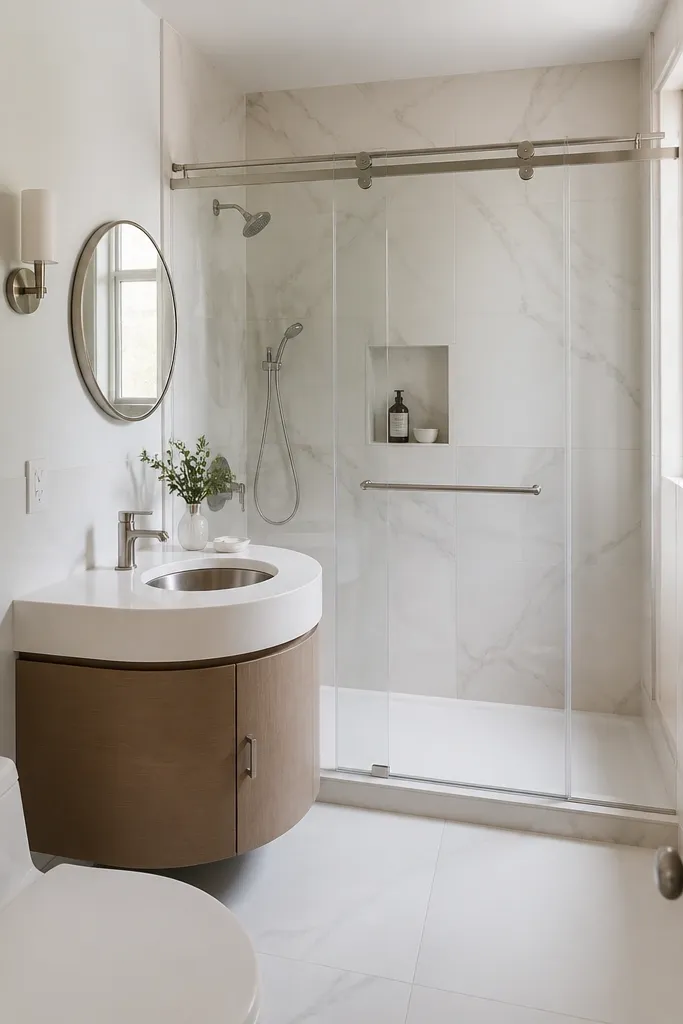
Corner vanities look fancy, but they’re also practical when the main wall has plumbing or door hardware. The rounded front makes the room feel friendlier and helps your eye avoid hard corners. Pairing it with a straight shower line keeps movement simple, because you’re not stepping around a corner glass edge. I’ve used this in awkward 5x6 bathrooms where the toilet is near one wall and a standard vanity would block the door swing. The two-mirror approach adds reflections in two directions, which makes the room feel larger than its footprint.
Start by choosing a corner vanity width that fits your clearance — measure the distance from corner to door and pick a size that leaves at least 30 inches open path. Then align the shower sliding door so it slides without hitting the vanity apron when opened. Install one round mirror over the corner sink and a longer mirror on the adjacent wall, keeping both at the same height for a clean look. Use consistent grout color and a wall tile with subtle movement so the room doesn’t feel flat.
Good to knowChoose a corner vanity with drawers instead of cabinets — pull-out access matters when you’re standing sideways.
AvoidAvoid two different metal finishes — the corner vanity already adds visual complexity, so keep hardware consistent.
10. Single-Wall Layout With Wall-Mounted Sink (Wardrobe Feel)
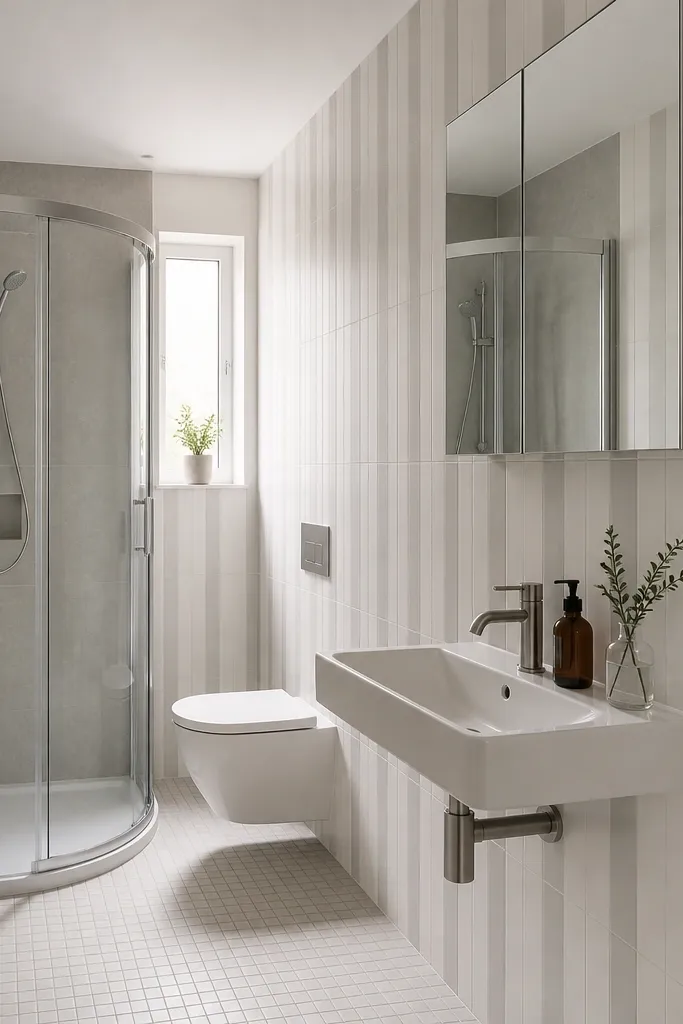
When your bathroom is narrow, the cleanest feeling comes from keeping the eye on one wall. A wall-mounted sink frees up floor space and makes the area around the toilet less crowded. This layout works well for small full bathrooms used by one person at a time, because storage stays behind the mirror cabinet. I like the “wardrobe” feel because it makes the room look designed, not improvised. Vertical tile stripes add height — I’ve seen it help in ceilings under 8 feet where everything otherwise looks low and cramped. For makeup application, the mirror cabinet lighting is steadier since you’re not relying on overhead alone.
Start by placing the toilet first at the end of the long wall where plumbing is easiest. Then mount the wall sink so the faucet sits about 36 inches above the floor and keep the mirror cabinet centered over the sink. Install the shower on the far corner with a sliding door so you don’t fight door swings. Use vertical wall tile stripes behind the sink area and keep the rest of the wall a simple neutral to avoid visual clutter.
If you hate wall-mounted everything, add a slim wall niche for lotion instead of a countertop organizer.
Avoid placing the sink too low — it looks cramped and makes daily use uncomfortable.
11. L-Shaped Vanity + Doorway Alignment (Best for 5x7)
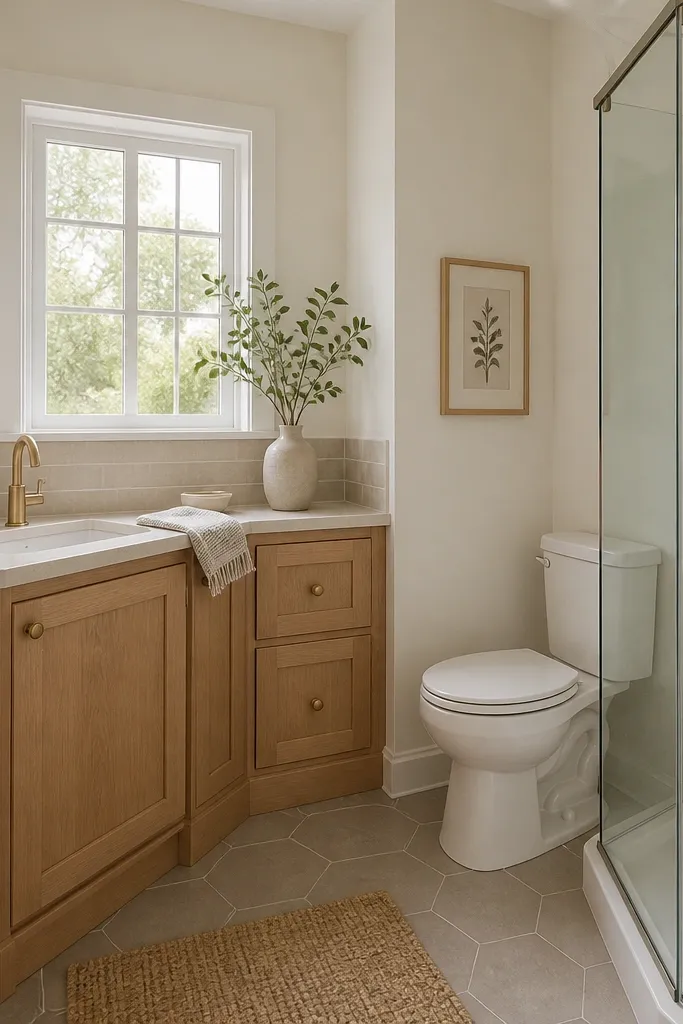
L-shaped vanities feel like they break the rules, but in a 5x7 they’re a lifesaver. The return gives you extra counter for a toothbrush cup or hand soap without adding a bulky full cabinet. I’ve built this in small bathrooms where the window limits where the mirror can go — the L shape lets you place the mirror on the main run and still keep a clear path to the shower. It flatters because you get balanced reflections at two angles, so your face doesn’t look shadowy on one side. Use warm whites and a light sand tile to keep everything soft.
Start by measuring the main vanity run first, then measure the side return so it doesn’t block the toilet clearance. Install the L-shaped vanity so the top edges align and leave a consistent 1/8 inch reveal at wall gaps. Use a mirror that spans the main run area, and keep the side return wall clean for a towel hook. Finish with a 36-inch corner shower so you don’t compromise daily comfort, and choose a light grout color to keep lines continuous.
Good to knowPut a single drawer organizer on the main run — smaller bathrooms need fewer items, just better placed.
AvoidAvoid an L-shaped vanity that’s too deep on the return — it makes the doorway feel tight even if measurements look fine on paper.
12. Shower Niche Bench + Tall Mirror for Depth
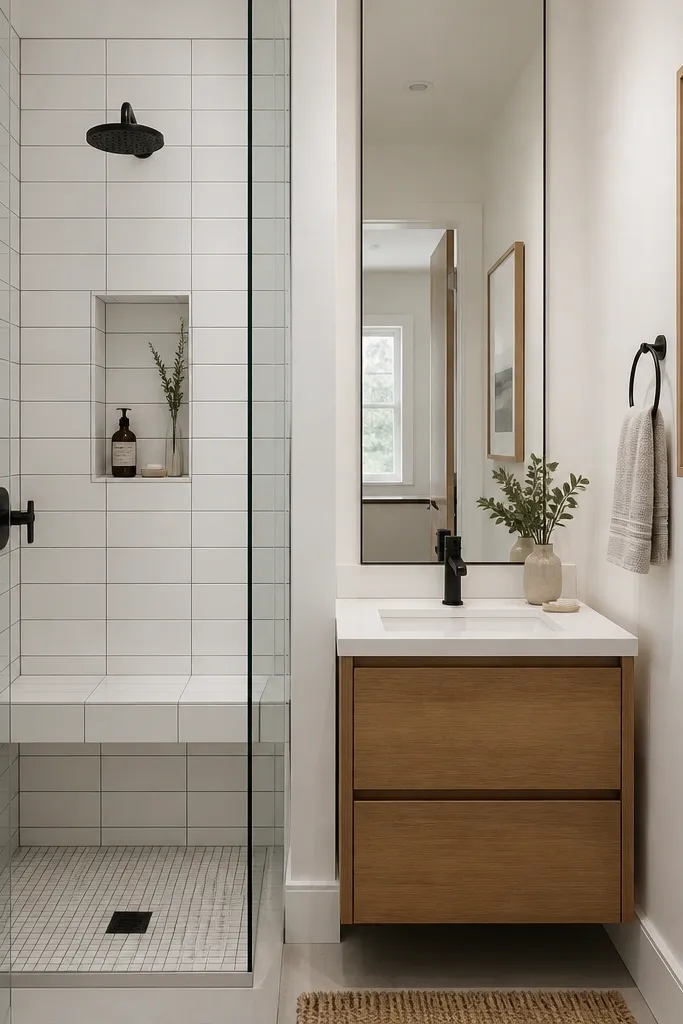
A niche bench changes how the shower feels, and it also makes the whole room look finished. In small full bathrooms, I like benches that are integrated because they reduce the “extra furniture” look. The tall mirror pulls the eye upward and adds vertical depth, which makes the shower and vanity feel less cramped. This layout suits anyone who shaves or uses body wash daily because the bench gives you stable space without a separate plastic stool. The matte white tile and thin dark grout look good on all skin tones under warm light because it avoids harsh glare.
Start by planning the niche height around 48 inches for shampoo and 24 to 28 inches for face wash bottles. Then set the bench so it sits above the shower floor with waterproof tile and a gentle slope toward the drain. Install a 24-inch vanity with a simple countertop and keep the mirror tall, aligned to the vanity center. Use matte wall tile and a darker grout line only if you’re consistent — patchy grout mistakes show in small rooms.
Good to knowChoose one soap dispenser and one toothbrush holder and keep the rest in drawers. Small bathrooms look calm when the visual count stays low.
AvoidAvoid a bench that’s too wide — it blocks water flow and makes the shower feel narrower.
13. Wrap-Around Tile Around Doorframe (Stays Calm)
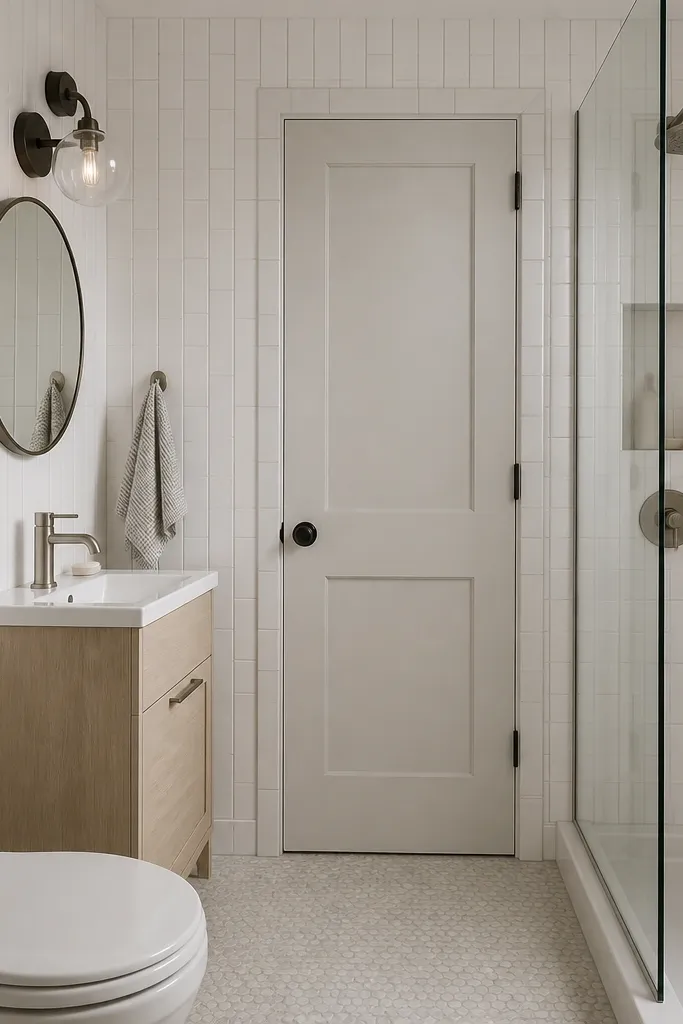
This one is less about plumbing and more about how the room reads. When tile stops and starts awkwardly around the doorframe, your brain notices the seam — and that seam makes the room feel smaller. Wrapping tile around the doorframe edges creates a continuous visual boundary, so the room feels calmer even when the footprint is tiny. I use this when the bathroom has a lot going on — a toilet, a vanity, and a shower all in one view. Glossy white tile makes light bounce, and the thin grout keeps the lines crisp for both cool and warm lighting setups.
Start by choosing a tile size that works for wrapping, like 3x12 or 2x8, so cuts look clean at the door jamb. Then plan the tile layout so the border line continues around the frame without breaking into a random patch. Install the vanity and mirror last so you can coordinate the tile height to the mirror bottom and faucet reach. Finish with a clear glass corner shower and keep the shower trim metal finish the same as your faucet for a tight, intentional look.
Good to knowBring one tile piece to your hardware store and match the trim edge — cheap trim profiles look sloppy in small bathrooms.
AvoidAvoid switching tile finish between areas — a glossy wall next to a matte doorframe edge looks like a mistake.
14. Sliding Shower Panel + Skirted Vanity (Softens Lines)
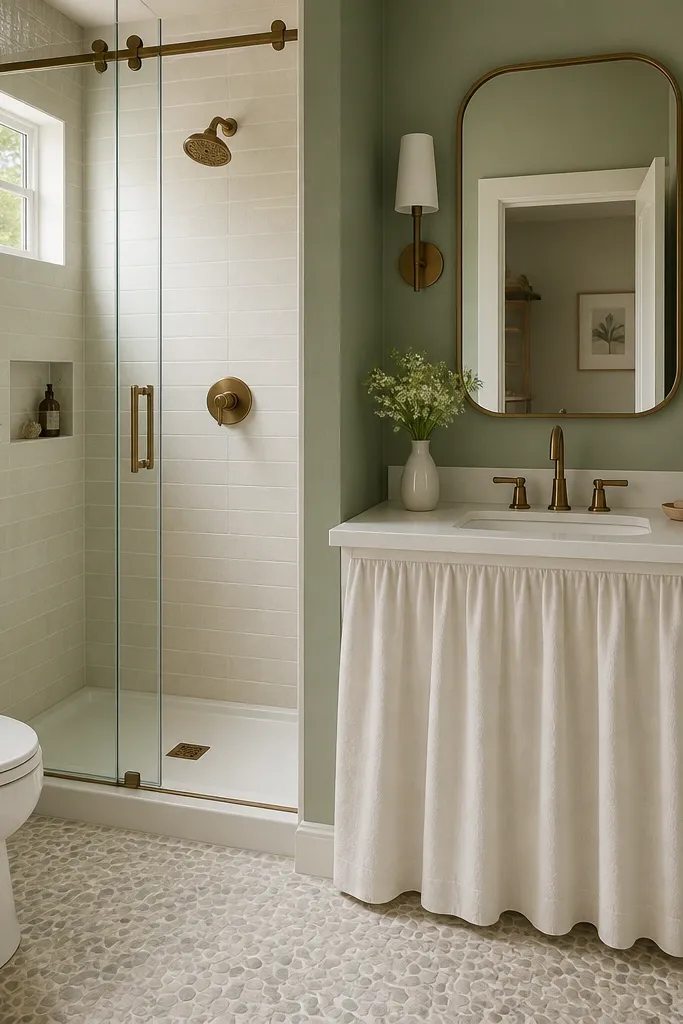
Sliding glass keeps the wet zone accessible, and a skirted vanity hides the ugly parts that make small bathrooms feel unfinished. This combo is great when you want a softer look — the skirt adds a gentle curve and reduces the harsh rectangle vibe of many small layouts. I’ve used it in bathrooms with green paint because the skirted base keeps the palette grounded and less “floating.” It also flatters because warm bronze hardware and sage walls reduce the starkness of overhead lighting. If you like a slightly spa feel, this gives it without going overboard.
Start by choosing a skirted vanity depth that still leaves 30 inches of walkway clearance between vanity and shower opening. Then install the sliding glass panel so it tracks smoothly and doesn’t hit the towel bar or wall niche. Paint the walls a sage green and keep the shower tile neutral white so the green stays fresh, not muddy. Use a small pebble-look porcelain only if you keep the grout light — dark grout can make the floor feel too busy in tiny spaces.
Good to knowUse a squeegee after showers and store it in the vanity — pebble floors show water spots if you let them dry.
AvoidAvoid dark grout on textured floors — it makes the floor look dirty even when it’s clean.
15. Pedestal Sink + Recessed Medicine Cabinet (Counter-Free)
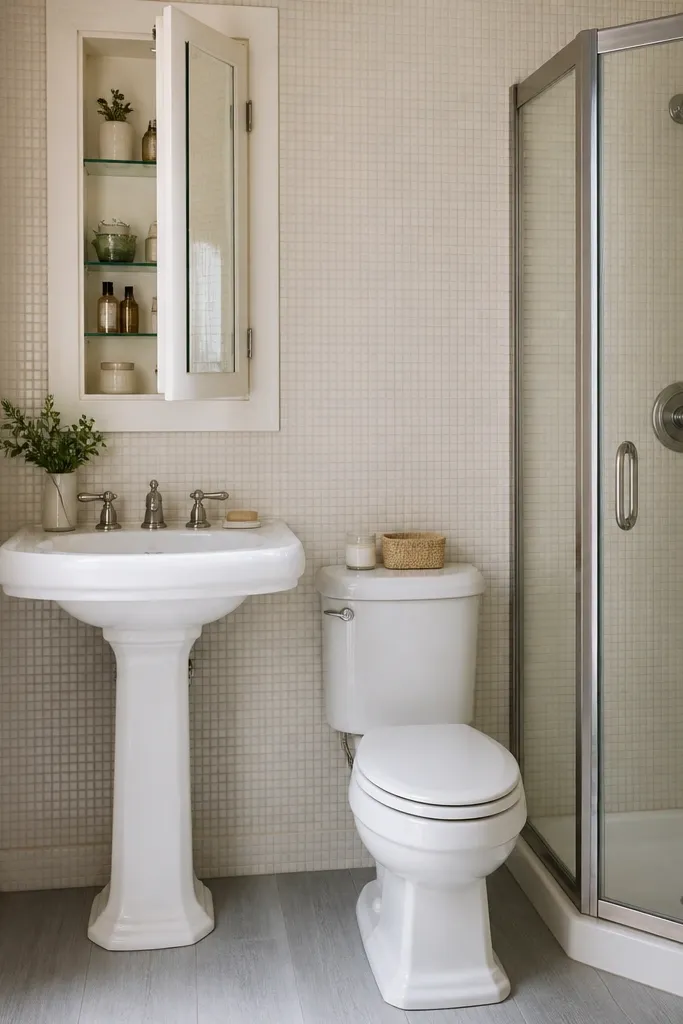
A pedestal sink looks airy, and the recessed medicine cabinet keeps the room from turning into a counter clutter zone. This is one of my favorite “budget layout” approaches because you don’t need a big vanity cabinet to get function. I used it in a rental where the owner hated large furniture in the bathroom, and the recessed cabinet solved storage without adding a bulky unit. The mosaic wall gives texture, but keep it pale so it doesn’t shrink the space. Under warm bulbs, the cream tones look flattering on everyone and hide minor wall imperfections better than flat paint.
Start by installing the pedestal sink and confirming the plumbing height matches your faucet spec so the sink sits level. Then cut or frame the recessed medicine cabinet so its edges line up with the tile grid — this matters more than people think. Place the mirror above the medicine cabinet opening so you get a single reflective area, not two misaligned mirrors. Finish by keeping the shower corner compact and using a light mosaic or small-format tile to add interest without heavy visual weight.
Good to knowUse matching small bottles in the cabinet bins so the door looks neat when it’s open for shaving or makeup.
AvoidAvoid leaving the pedestal top empty without a landing tray — you need one small surface for daily items or it turns into random clutter.
16. Toilet + Vanity Back-to-Back With Sound Tile (No Crowding)
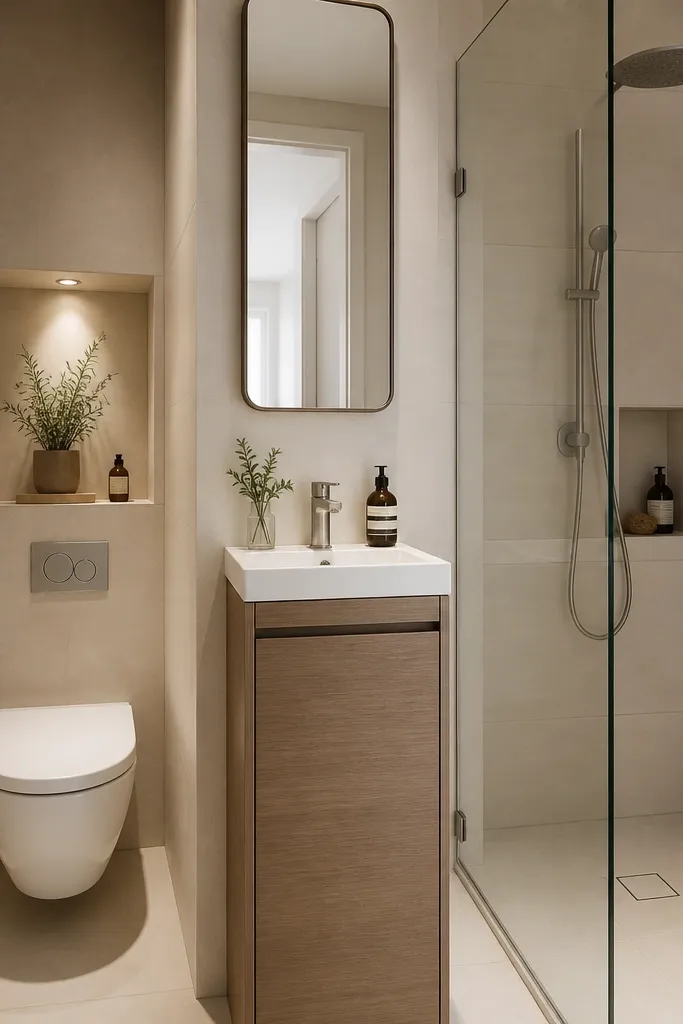
This layout is for small spaces where the walls are already doing the plumbing work and you can’t rearrange much. Back-to-back planning can feel weird, but in practice it works because each zone has its own wall and you keep a clear walkway. I like adding a recessed shelf near the vanity because it gives you a place for towels or a plant without adding another piece of furniture. The sound tile or denser wall finish keeps the bathroom from feeling hollow and makes the space feel more solid, which matters in narrow hall bathrooms. Big light tile panels keep the walls calm and help the room feel less busy.
Start by placing the toilet where the waste line already sits, then build the vanity wall on the adjacent side with a narrow vanity width like 22 to 24 inches. Install the vanity and sink so the faucet handle doesn’t hit the door or nearby wall when turned. Then add a corner shower with a glass panel and keep the shower door hardware finish the same as the vanity faucet. Use large-format tile to minimize grout lines, and add one recessed shelf to break up the wall without clutter.
Good to knowPut a towel ring at shoulder height near the vanity, not on the door side — door-side rings get in the way fast.
AvoidAvoid too many accessories on the recessed shelf — one stack of towels and a small tray is enough.
17. Corner Shower + Window Seat Bench Storage (If You Have a Window)
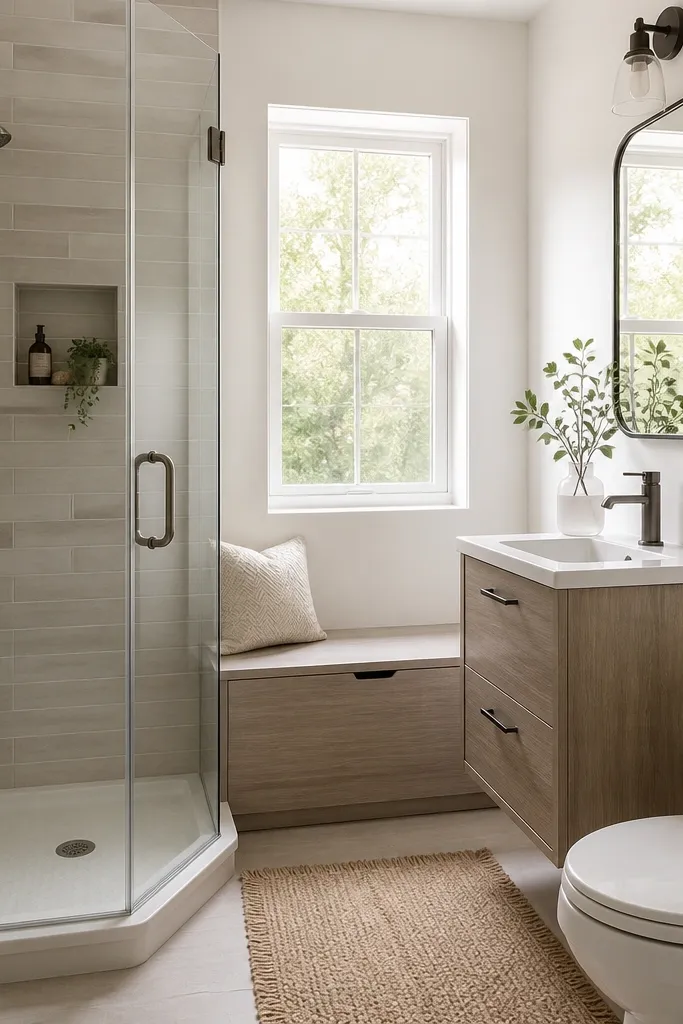
If you have a window, using it for seating or storage changes how the whole bathroom feels. The corner shower keeps water contained, and a window bench gives you a place to sit while dressing or shaving, plus storage for extra towels and bulk items. I’ve done this in small bathrooms where there was “dead space” under the window and nowhere to put a hamper. It flatters because the natural light from the window makes skin tones look more even than overhead-only lighting. Keep the bench materials waterproof and wipeable so the space stays practical.
Start by measuring the window sill height and building the bench so the top surface sits about 18 to 20 inches above the floor. Then choose a waterproof material for the top and hinge a lid that opens fully without hitting the curtain. Install the corner shower with a niche so bottles have a home and the bench stays uncluttered. Place the vanity on the wall opposite the shower and use a simple mirror that doesn’t block the window light.
Use a fabric cushion in a washable cover and store it inside the bench when you don’t need it.
Avoid a bench that’s too deep — it blocks leg movement and makes the room feel tighter.
18. Floating Vanity Under Recessed Ceiling Beam (Clever Height Control)
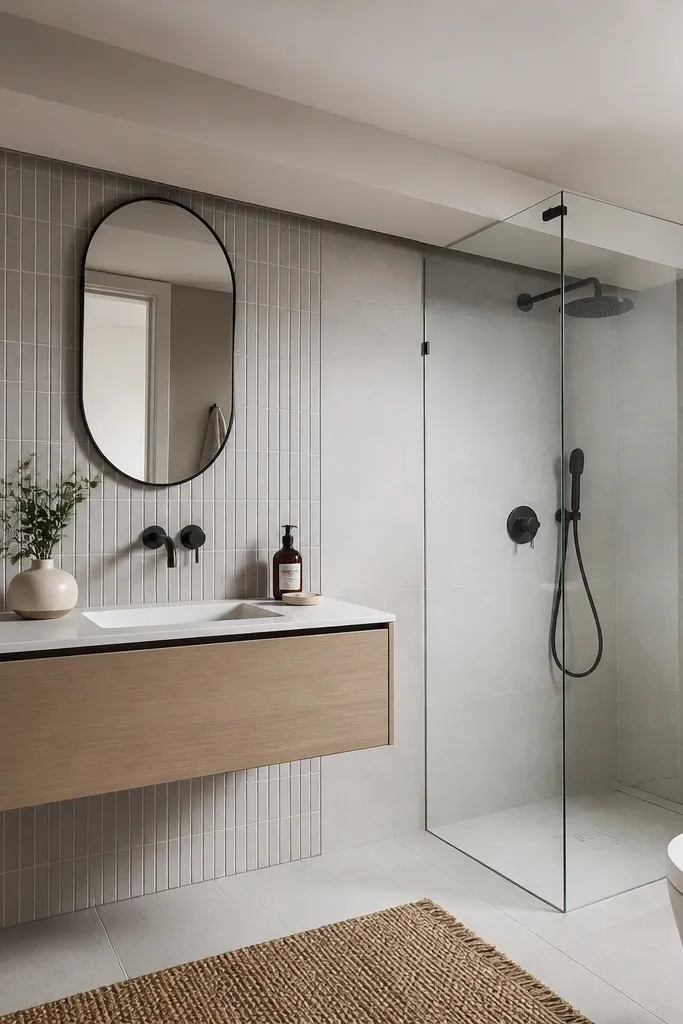
Low ceilings are where most small bathroom plans go off the rails. Floating vanities help because you can choose a shallow depth and keep the mirror positioned so your head doesn’t feel crowded. I’ve worked in older homes where the beam sits right above the sink — moving the mirror up and using an oval shape makes it less harsh than a rectangle. This layout works for short ceilings and for taller people because it keeps the sink height comfortable without adding a bulky cabinet. Light gray tile and a narrow vertical strip give you height without turning the room into a high-contrast showroom.
Start by measuring the beam clearance above your intended mirror location and pick a mirror that fits that space. Then choose a shallow floating vanity depth, usually around 16 to 18 inches, so your walkway stays open. Mount the mirror so the bottom edge lands around 6 feet from the floor only if you need to clear the beam; otherwise keep it at standard height for comfort. Install the shower in the corner and use clear glass so the ceiling line stays visible across the room.
Use a vanity light with a diffuser shade so it doesn’t cast a hard line from the beam onto your face.
Avoid hanging a tall cabinet in a low ceiling spot — it makes the bathroom feel like a hallway.
19. Full-Length Mirror Wall + 18-Inch Vanity (Makes It Feel Twice as Wide)
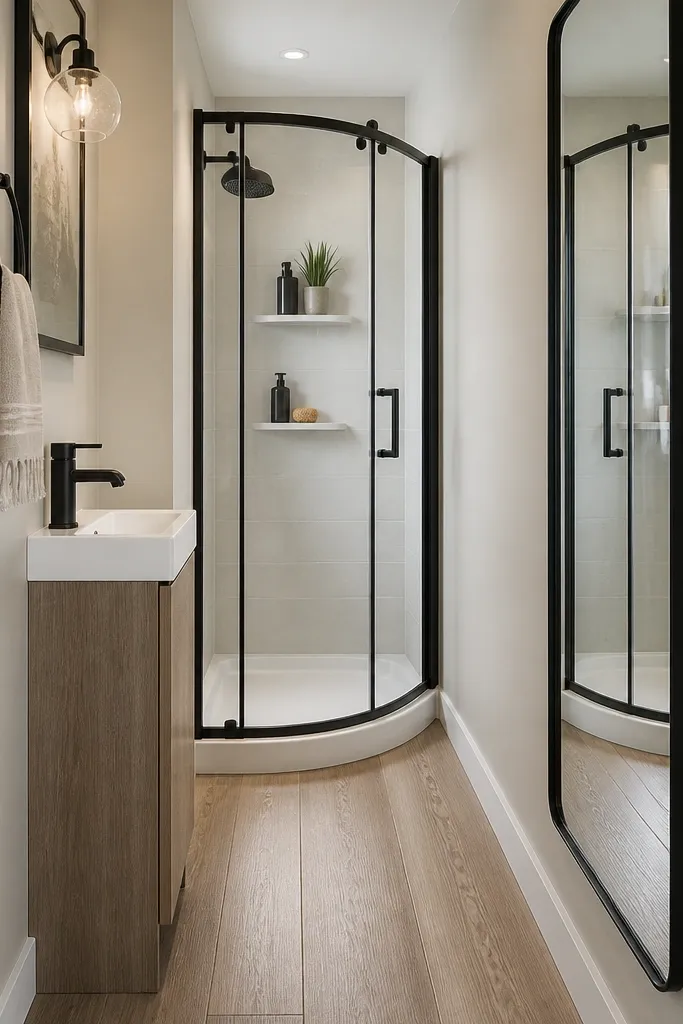
A full-length mirror wall is the easiest way I know to trick your brain in a narrow bathroom. With an 18-inch vanity, you keep the wet and storage zones tight while the mirror gives you a second “room” view. I’ve used this in bathrooms that were basically an indoor hallway, and the mirror made the space feel longer without needing a remodel. It looks good for everyone because it reflects the vanity light and softens shadows — shaving and makeup get easier. The key is thin framing and simple finishes so the mirror doesn’t look decorative and messy at small scale.
Start by installing the 18-inch vanity first and keep the sink centered so the mirror reflection looks intentional. Then mount the full-length mirror panel on the opposite wall, leaving 1/4 inch clearance around edges for safe installation. Use a long plank floor tile laid lengthwise to match the mirror direction, not across the room. Finish with a corner shower and a sliding door so you don’t lose space to door swing. Keep the wall paint light and warm so the mirror reflection doesn’t turn gray.
Add a removable mirror cleaner caddy on the back of the vanity cabinet door — you’ll actually keep it streak-free.
Avoid a thick ornate mirror frame — it reads bulky and ruins the illusion.
20. Tile-to-Ceiling Color Pop Behind Vanity (One Loud Area)
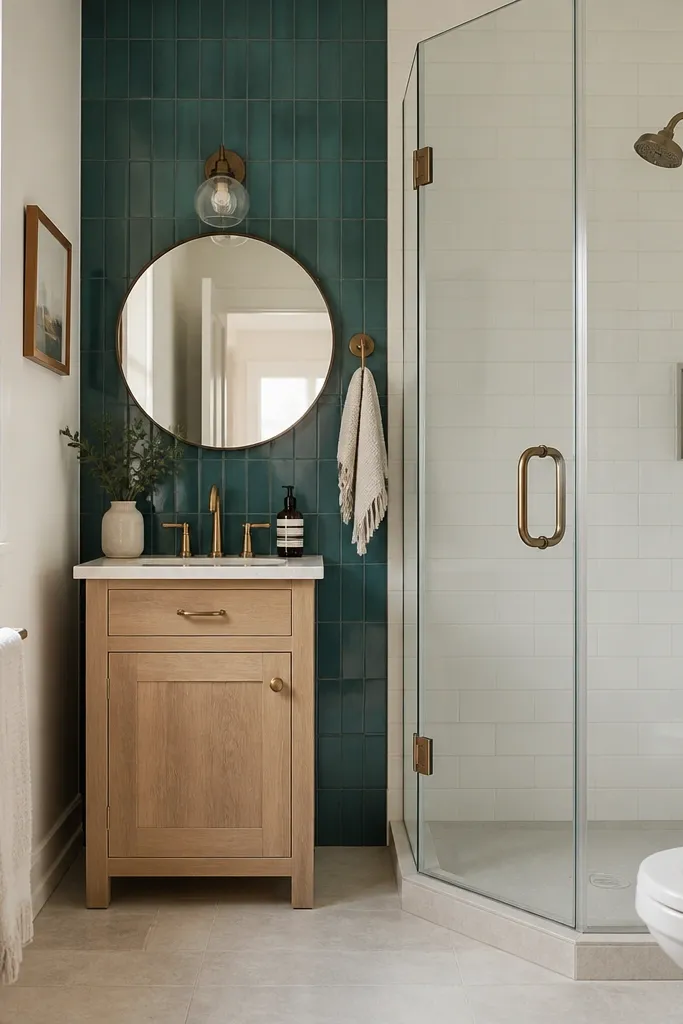
One strong color wall makes a small bathroom feel designed instead of small. Tile-to-ceiling behind the vanity creates a focal plane, and it also hides plumbing wall inconsistencies that show up in tight spaces. I like deep teal because it looks flattering with brushed nickel or matte black fixtures and it warms up under vanity lighting — it doesn’t look flat the way some blues do. This layout is best when the bathroom is narrow and the door view hits the vanity and mirror first. The shower stays neutral so the color pop stays the star, not the whole room.
Start by tiling the wall behind the vanity to the ceiling, using the same tile throughout so you don’t create visual seams. Then install a 24-inch vanity with a simple countertop and keep hardware in one finish only. Mount a round mirror centered over the sink and add one vanity light on each side or one centered bar light with diffusers. Finish by keeping the shower tile light and simple, and use a light grout color so the teal wall looks crisp instead of busy.
Good to knowUse a single towel color that matches the teal undertone — not bright patterns — so the room looks coordinated.
AvoidAvoid painting the ceiling the same deep color — it makes the room feel lower.