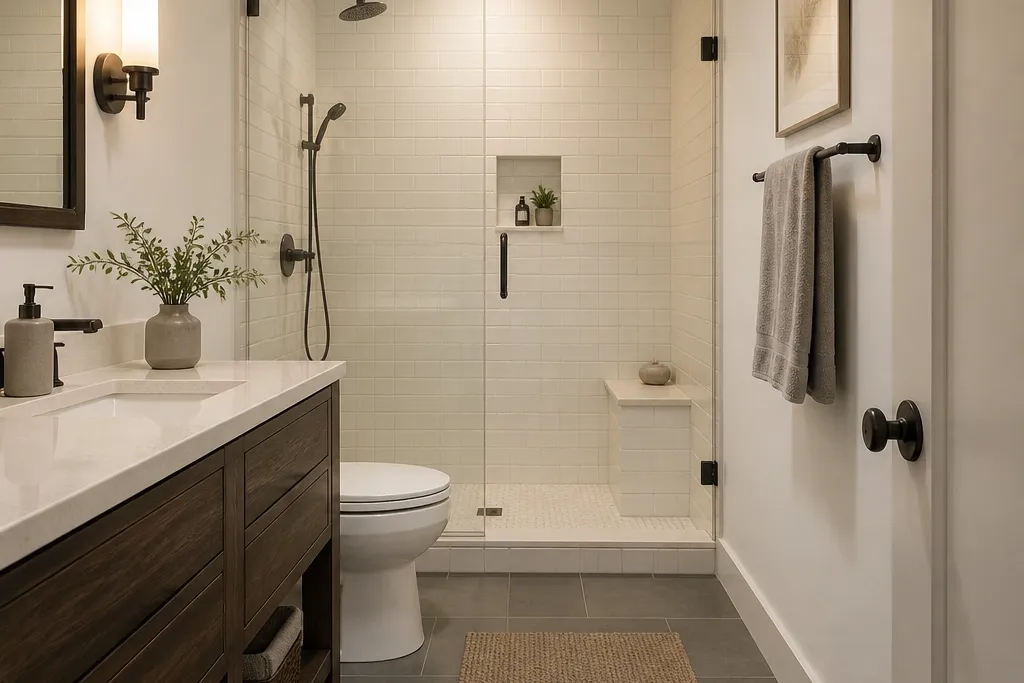
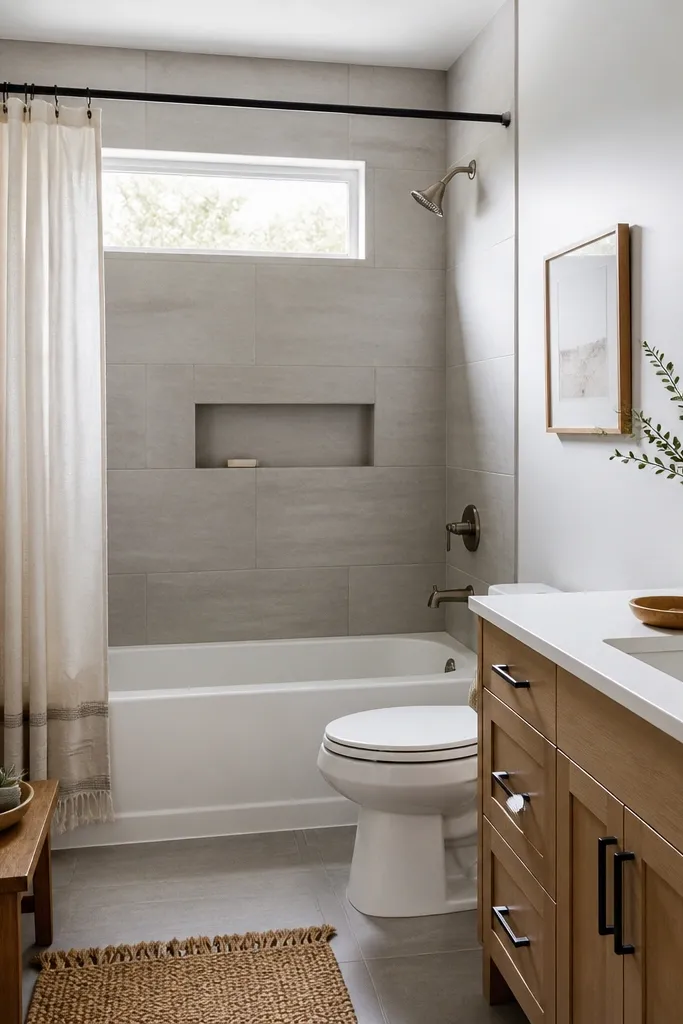
1. Porcelain plank tile with a matte finish for the whole floor
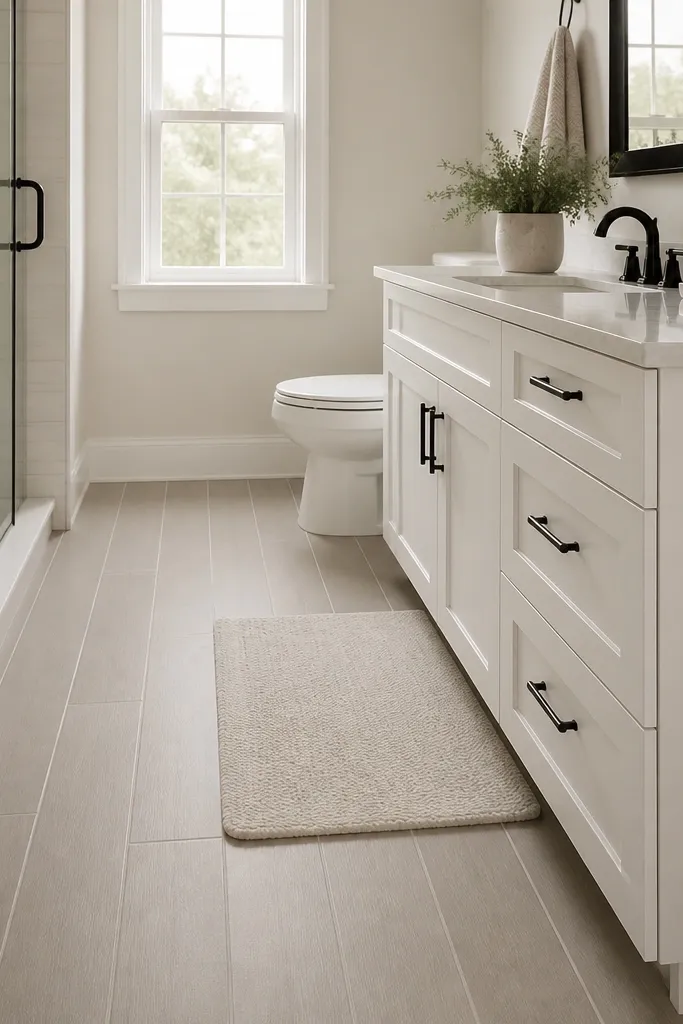
I’ve found that matte porcelain plank tile is the easiest “always looks clean” floor for a small full bath because it hides micro-scratches and water spots better than glossy tile. Pick a warm greige or light greige-brown, not icy gray — it warms up the room and makes grout look intentional instead of dirty. Matte finishes also make fingerprints less obvious when you’re grabbing towels quickly. This works best in bathrooms with cool lighting or a lot of daily traffic, because the floor stays visually calm even when the rest of the room is busy. If you have a slightly darker vanity, go with planks that have subtle linear veining so the floor doesn’t look flat.
Start by measuring the floor and planning your layout so you don’t end up with skinny slivers along the door or toilet wall. Choose plank sizes around 12x24 inches for a 5x8 space so you get fewer cuts and straighter lines. Install on a flat, well-prepped subfloor, then use a light, grout color close to the tile — I like a warm sand tone. Finally, seal only if your tile manufacturer says it needs it; porcelain usually does not, and sealing the wrong product is how you get a grimy haze. Place a low-pile bath mat that dries quickly near the sink and outside the shower path.
Good to knowUse a grout color that matches the warm undertone of your tile — it makes the floor look fresh even if grout darkens slightly over time.
AvoidAvoid glossy tile in a small full bath — it shows water spots and footprints like a mirror.
2. Large-format shower wall panels with no pencil-thin ledges
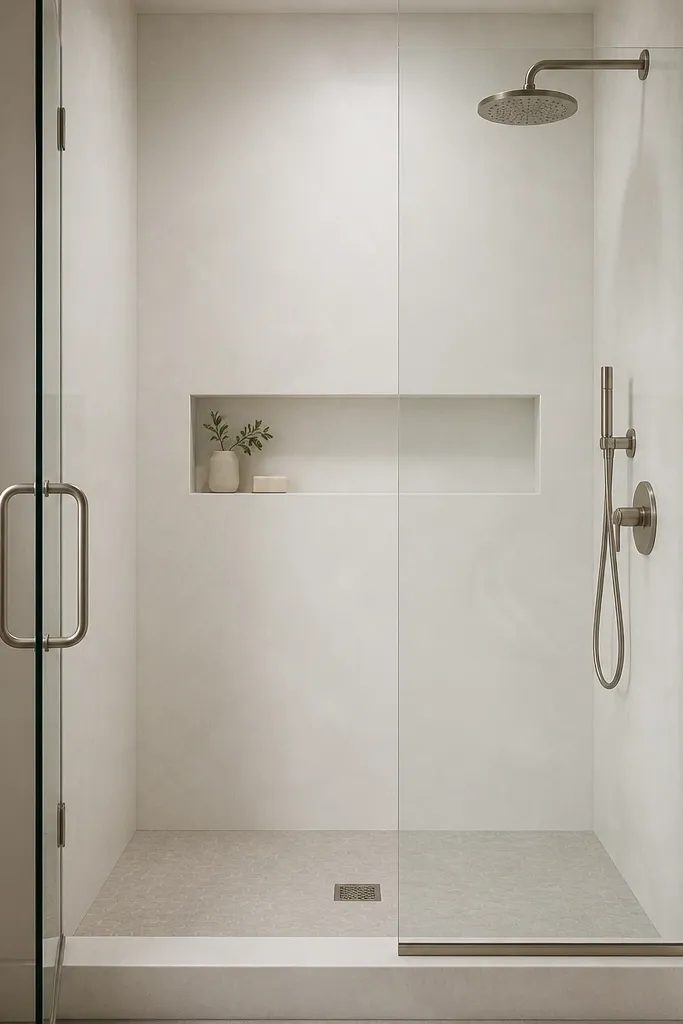
If you’re chasing low maintenance small full bathroom ideas, shower walls are where you win or lose. Large-format panels reduce grout lines dramatically, and fewer lines mean fewer spots for soap scum to cling to. I like soft white or off-white panels with a subtle texture because they don’t show streaks the way ultra-glossy surfaces can. This setup looks modern with a clean, continuous plane, and it works for anyone who doesn’t want to scrub grout lines every other week. It also flatters small bathrooms because bigger surfaces make the shower feel less “chunky.”
Start by choosing panels in a size that covers most of the height from shower floor to about 78-80 inches, so you only have a few seams. Install a built-in niche only if you actually use it; place it at about 40-44 inches high for easy reach. Seal seams with the manufacturer-recommended wet-area sealant, then keep the niche corners smooth so towels and bottles don’t catch. Mount your shower fixtures on the wall so you don’t add extra joints. Finish with a clear glass door and a brushable caulk line that you can re-caulk later without ripping anything out.
Good to knowDo a one-time silicone caulk check after the first month — small shifts happen when the bathroom dries out.
AvoidSkip add-on shelf ledges inside the shower — they trap water and soap film.
3. Satin black shower fixtures with a coated finish
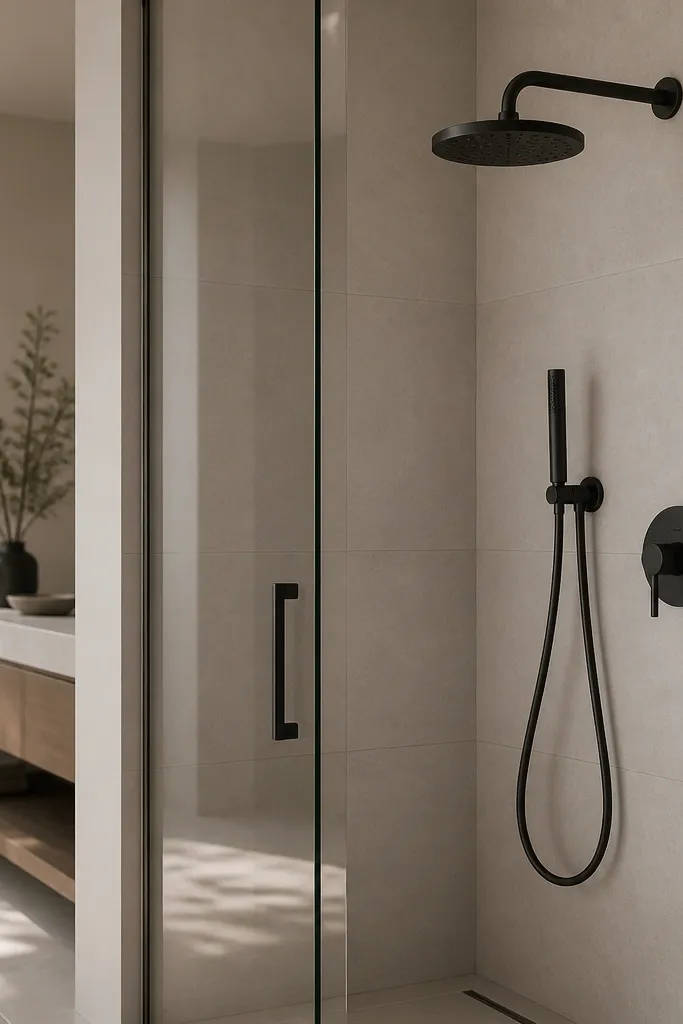
Matte or satin black fixtures look sharp in small full bathrooms because they hide water spotting better than chrome, especially when your family uses the shower daily. The coated finish is what matters — it resists the chalky buildup that makes shiny metal look dirty fast. I’ve installed these in a 6x8 bath where the owner hates scrubbing; the fixtures stayed visually clean longer with just a quick wipe. This also flatters a wide range of vanity colors: white, warm wood tones, and even light sage walls. If your bathroom has warm lighting, the black reads softer and more modern than stark black.
Pick fixtures with a consistent satin texture across the shower head, valve trim, and towel bar so the room doesn’t look mismatched. Install the fixtures so the shower head spray lands where the glass door will contain water; adjust angle before you fully tighten. Use a microfiber cloth for a weekly 20-second wipe — coated finishes respond well to gentle cleaning. Pair the black with a clear glass door and light wall color so the shower doesn’t feel heavy. Keep the same finish on your faucet and drain cover to lock the look together.
After showers, run the cloth once over the control handle and the shower head — that’s the two spots that show buildup first.
Avoid chrome if you hate wiping — it shows every droplet and leaves a hazy look.
4. One-piece toilet with a skirted base or concealed trap
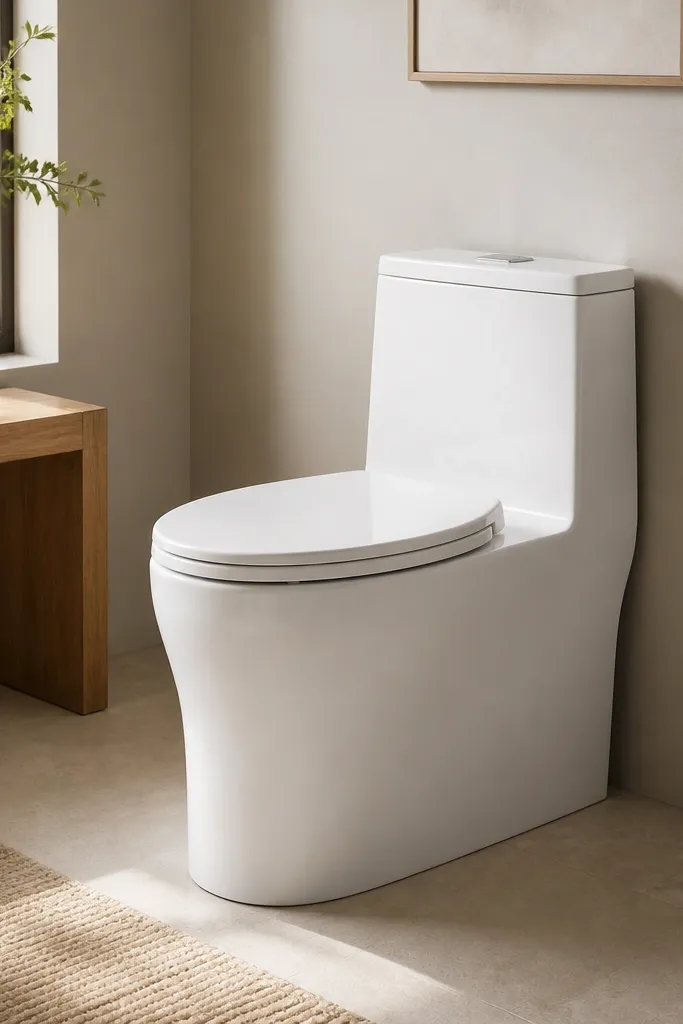
A small full bathroom is a cleaning magnet, and toilets are the worst offender because dust and splash hide in corners. A one-piece toilet with a skirted base makes wipe-down faster because there’s no seam for grime to collect. I chose one in a narrow bath where the toilet sits close to the tub, and it made the weekly clean feel less like gymnastics. White also keeps the room bright, and the smooth sides look modern. This works for anyone who wants a clean look without deep scrubbing around the base. If you have a lot of hard water, the glaze finish matters — pick a reputable brand with a smooth, durable coating.
Measure your toilet rough-in and space first, then choose a model that fits your floor plan without crowding the swing of the door. Install with a proper wax ring and level it carefully so you don’t create rocking that cracks caulk. After installation, caulk only where the toilet meets the floor if your model recommends it; keep the bead thin and continuous. Use a toilet brush with a holder so you don’t leave it leaning on the tub edge. Store cleaner in a cabinet so the bathroom doesn’t look like a cleaning supply closet.
Good to knowWipe the toilet base with a damp microfiber after each weekly clean and skip harsh scrapers unless you see mineral buildup.
AvoidAvoid toilets with lots of crevices and exposed mounts — they look fine until you clean and realize how much you missed.
5. Anti-mold shower curtain track and water-repellent liner
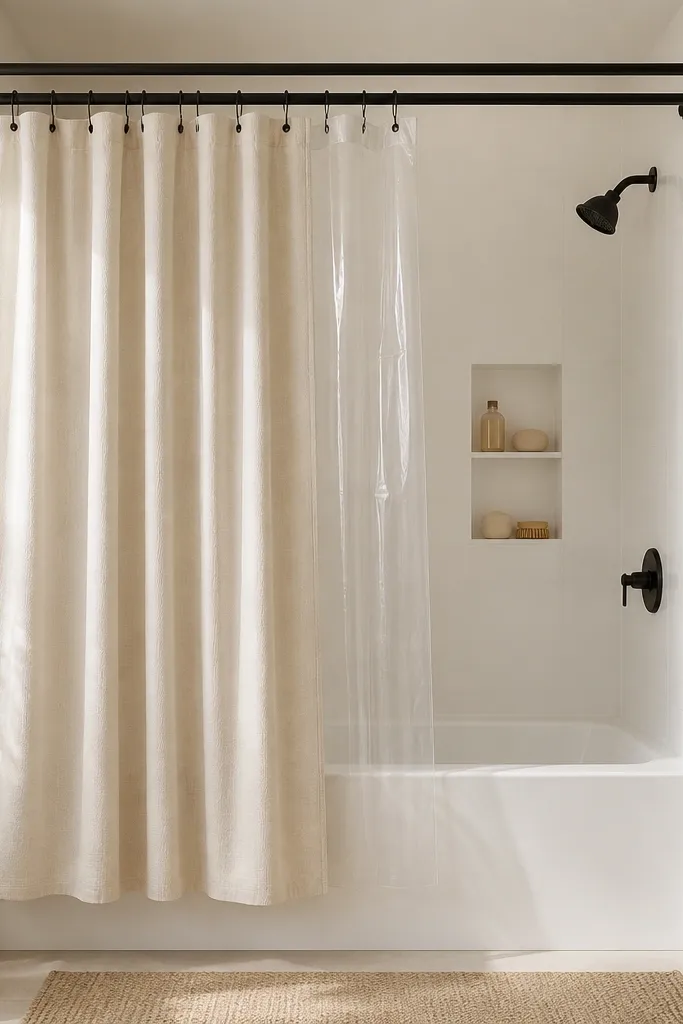
This is the budget-friendly move I’ve used when a glass door is too expensive or the space is awkward. A properly installed track plus a water-repellent liner reduces water escaping the shower zone, which means less floor grime and fewer wall spots. The trick is getting the liner length right so it reaches close to the tub edge without dragging. Fabric curtains look nicer and soften the room, but the liner is what controls moisture. This works especially well in bathrooms where you’re already dealing with hard water and you need fewer cleanup surprises.
Start by measuring from the track to the tub rim and cut or choose a liner that reaches about 1 inch above the tub edge. Install the track level so the curtain doesn’t twist and leave a gap. Hang the outer fabric curtain on decorative rings, then add the liner behind it on separate hooks so it doesn’t cling to the fabric. Use a magnetic hem or weighted bottom so the liner doesn’t billow. Finally, keep the curtain dry by spreading it open after showers — a quick step that prevents mildew.
Replace the liner every 12-18 months if it starts to lose its beading — it’s cheaper than repainting stained walls.
Skip cheap liners that feel waxy and stiff — they crease and leave gaps where water escapes.
6. Corian-style solid surface vanity top with integrated sink
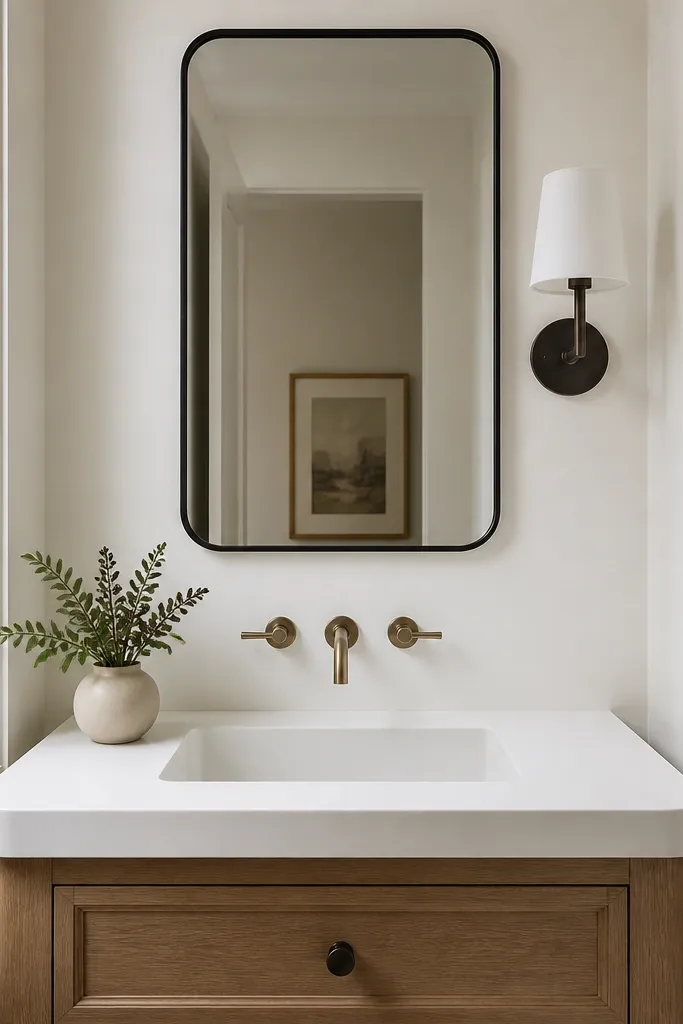
An integrated sink on a solid surface countertop is one of the most low maintenance small full bathroom ideas because there’s no caulk seam line around the basin where gunk hides. I’ve lived with both undermount and integrated sinks; the integrated one wipes clean in seconds and doesn’t trap grime at the edges. Choose a solid white or soft warm white so it stays bright even with daily water splashes. This looks modern and tidy, and it works great for small bathrooms because you can keep the countertop minimal without worrying about water soaking into joints. If you have kids, the seamless surface handles rough scrubbing better than you’d expect.
Start by choosing a vanity size that leaves clear walkway space — in a small full bath, aim for at least 30 inches from the sink edge to the opposite wall. Install the solid surface top so the back edge sits flush with the wall or backsplash panel, then use the recommended adhesive or leveling system. Use a gentle daily wipe with a non-abrasive cleaner; avoid scouring pads that can dull the finish. Style the top with one small tray for items you touch daily, like toothbrushes and hand soap. Keep everything else in a closed cabinet so the sink area stays visually calm.
Good to knowPut a suction cup caddy inside the cabinet for backup soap bottles so you don’t leave extra products on the counter.
AvoidAvoid undermount sinks with wide caulk lines unless you’re willing to re-caulk yearly.
7. Fog-free mirror with a built-in defogger

Steam is the enemy of a clean-looking small bathroom because it leaves streaks on mirrors and makes you wipe more than you need to. A mirror with a built-in defogger keeps the glass clear, so you spend less time polishing and more time enjoying the space. I installed one in a 5x8 bath with a weak fan and it made a noticeable difference the very first week. The mirror also makes the room feel bigger because it stays readable — you can see yourself without wiping. This is a great fit if your bathroom has limited ventilation or if you shower longer than 10 minutes.
Start by measuring the mirror width and placing it so the bottom edge sits around eye level, usually 56-60 inches from the floor. Choose a defog mirror that has a border width you like; thick borders can make small spaces feel smaller. Install near your existing light switch wiring so you can turn it on with the same routine. Use a non-scratch microfiber cloth for cleaning — defog mirrors don’t need harsh sprays. Pair it with one side sconce or a vertical bar light so the reflection looks even, not spotty.
Good to knowClean the mirror once a week with a damp microfiber and a tiny amount of dish soap — it beats streaky glass sprays.
AvoidAvoid placing the mirror too high — if you can’t see your whole face clearly, you’ll wipe it more and it will look worse.
8. Matte wall paint in a washable kitchen-bath hybrid finish
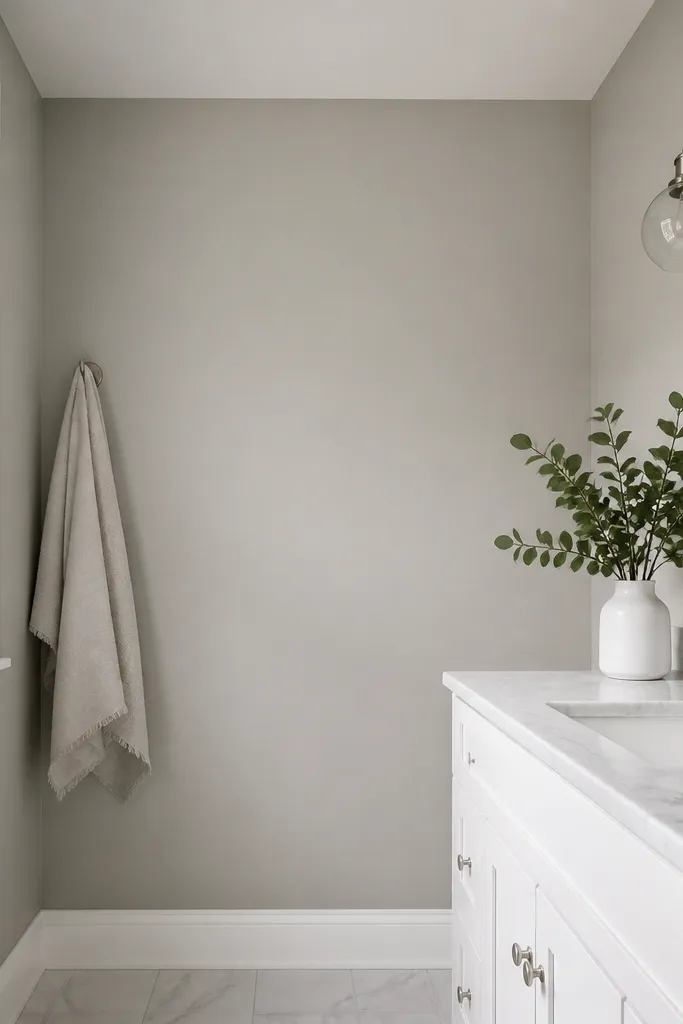
Paint is where small full bathrooms either feel fresh or feel tired. I like a matte or eggshell washable finish in a bathroom-safe formula because it wipes without turning shiny. The color choice matters: warm gray, greige, or soft greige-beige makes the room look clean even when you have light water splashes. Matte walls hide micro scuffs better than flat white, which can look dingy. This works for people who want a modern look without constantly repainting — the right finish handles everyday wipe downs. If your fan is weak, go slightly deeper than you think — light paint shows humidity marks faster.
Start by testing the paint on a small section behind the door or inside the vanity area so you see it with your actual lighting. Prep by scrubbing any existing residue and letting it dry fully; humidity trapped under paint shows up fast in small baths. Use painter’s tape to protect trim, then roll on two thin coats with a 3/8-inch nap roller for smooth walls. Cut in carefully around the mirror and edges so you don’t get ridged lines. After drying, wipe one spot with a damp cloth to confirm it cleans without smearing.
Good to knowKeep a small spray bottle of diluted dish soap and a microfiber cloth under the sink for quick wall spot wipes.
AvoidAvoid regular flat paint — it stains and won’t wipe clean.
9. Anti-fingerprint brushed nickel faucet and drain cover
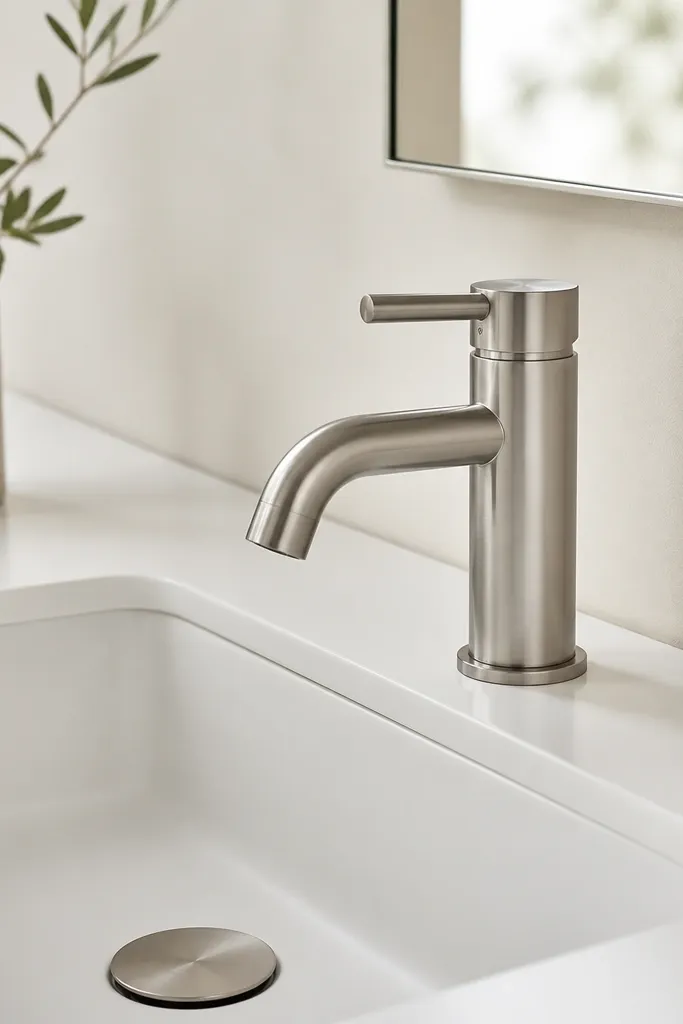
In a small full bath, your faucet gets touched constantly, so fingerprints and water spots can make the whole room look messy. Brushed nickel with an anti-fingerprint or coated finish hides smudges better than bright chrome, and it still reads modern. I chose it for a rental where the bathroom got used hard, and it stayed presentable with quick wipes. This finish works with warm woods and whites, and it doesn’t clash with black accents if you keep everything else consistent. If you want an easy-clean look without changing your whole palette, this is the fastest upgrade.
Start by matching the faucet finish to your towel bar, toilet paper holder, and shower hardware. Install the faucet so the spout clears the sink center — aim for about 2-3 inches from the drain line to reduce splash. Use a non-abrasive cleaner and a microfiber cloth, not paper towels that leave lint. Replace old drain covers that look scratched; they collect grime and make the sink area look neglected. For the countertop, keep one soap pump only — too many bottles make water spots obvious.
Good to knowDry the faucet with a microfiber after cleaning the sink — it takes 30 seconds and keeps spots from building.
AvoidAvoid mixing shiny chrome with matte black hardware — the bathroom looks unfinished.
10. Toilet paper holder mounted to the side wall at adult height
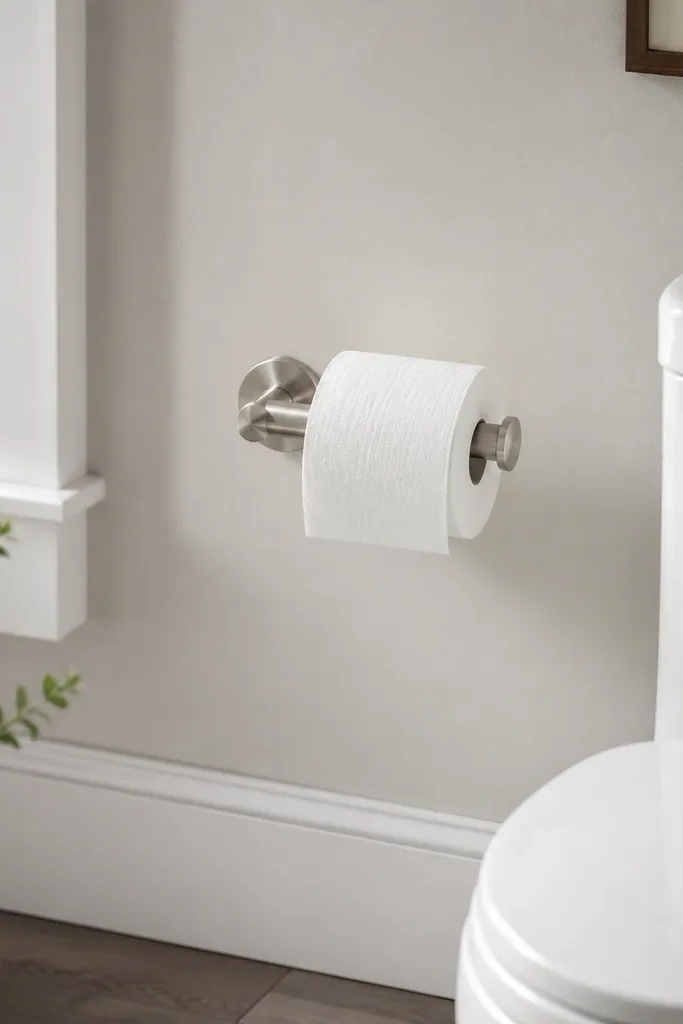
This sounds small, but it changes how clutter behaves in a small full bathroom. When the holder sits on the side wall at adult height, you don’t get a stack of spare rolls on the floor or a leaning pile that blocks cleaning. It also makes the room look intentional, because the “storage” is part of the architecture. I’ve installed these in narrow baths where the toilet is tight to the tub wall, and the side mount keeps towels and cleaning tools from getting bumped. It’s low maintenance because it eliminates the need to move objects during cleaning. Plus, the hardware line visually cleans up the space.
Start by measuring from the floor to where your hand naturally reaches while seated; most placements land around 26-28 inches. Mark the spot on the side wall next to the toilet, avoiding studs if you’re unsure — use a stud finder. Install the holder so the roll feeds from the top and doesn’t swing into the door swing. Keep the distance from the wall to the toilet tight enough that you can’t see a gap of dust behind it. Finally, skip a floor-mounted caddy and store spare rolls inside a cabinet or behind the door.
Good to knowIf you want it to look extra tidy, choose a holder that matches your faucet and towel bar finish exactly.
AvoidAvoid a floor stand toilet paper holder — it gathers dust and blocks quick mopping.
11. A narrow 2-door linen cabinet with soft-close and slatted sides
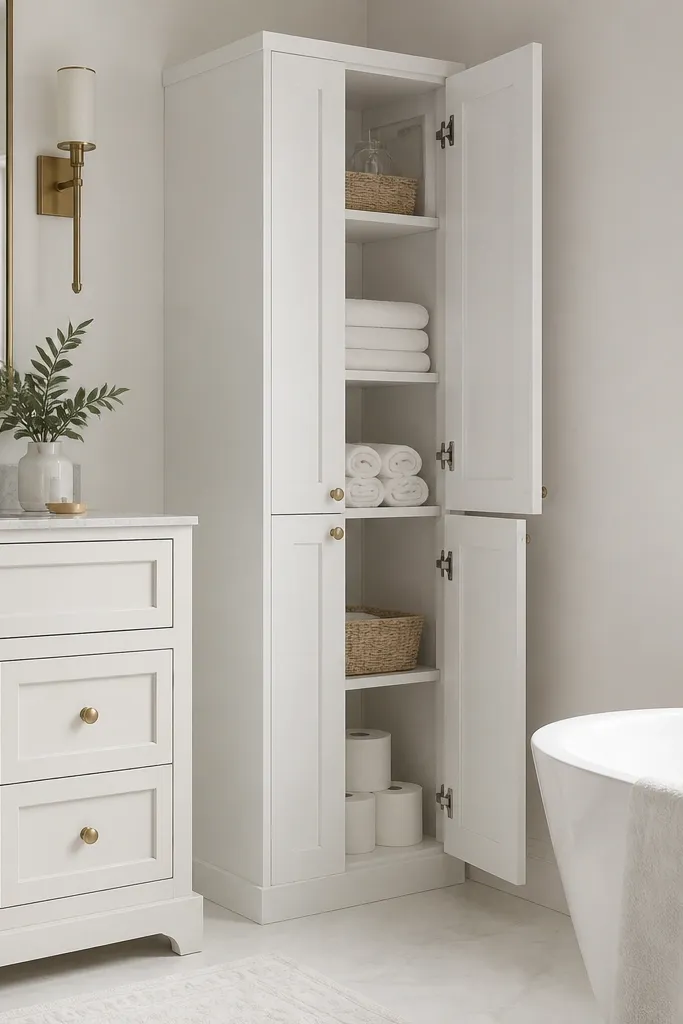
Small full bathrooms get messy fast because towels and backup toiletries have nowhere to go. A narrow linen cabinet with soft-close doors keeps damp items out of sight and reduces the “always reaching for stuff” chaos. I like cabinets with slatted or vented sides because they help towels dry between uses, which matters for mildew control. Soft-close is a quality-of-life upgrade — you close the door gently and it stays aligned, so it doesn’t start scraping and looking worn. This works especially well in bathrooms where the only storage is under the sink and it fills up with toiletries. Two doors also make it easier to keep the room looking tidy even if you’re rushing.
Start by measuring the spot you want to use and planning for door clearance; aim for a cabinet width around 12-18 inches in tight baths. Choose shelves that can handle folded towels — I space them so towels stack with about 10-12 inches of height. Install with shims so the doors hang straight; crooked doors look sloppy in small rooms. Add one small bin per shelf for items like cotton rounds, extra soap, and hair products so you can grab quickly. Use a vented back panel or slatted side if you’re storing damp towels.
Good to knowUse label stickers on the inside of cabinet doors, not on the front shelves — it keeps the bathroom visually clean.
AvoidAvoid open linen shelves in a small bath if you hate dust — they show damp towels and water spots quickly.
12. A slim vanity wall-mirror with a hidden medicine cabinet
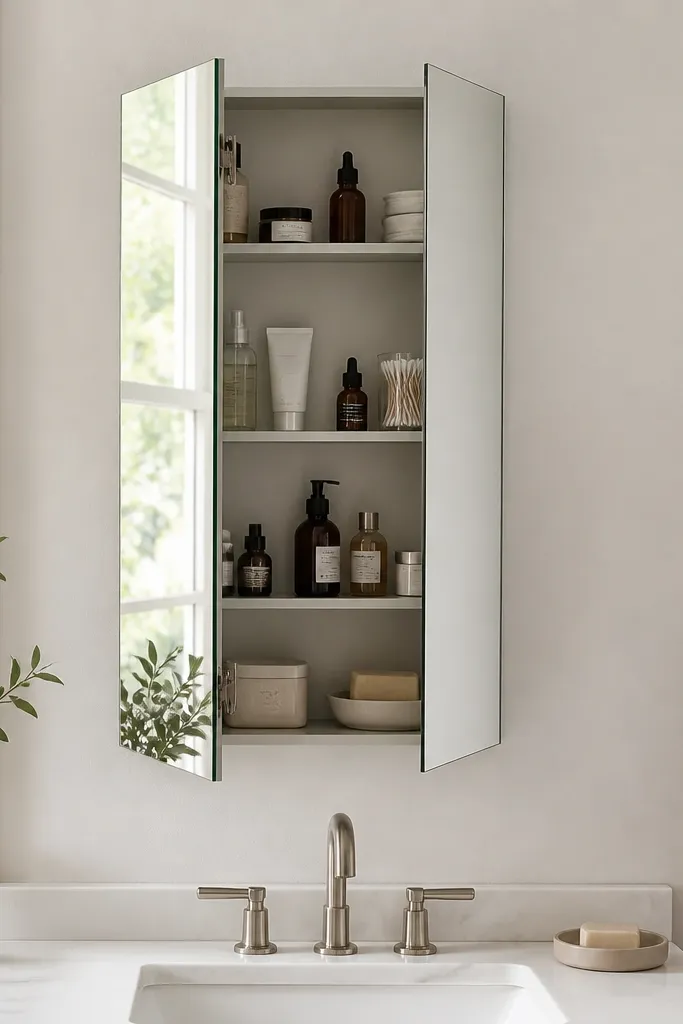
If you want low maintenance small full bathroom ideas that look modern, hide the everyday stuff. A medicine cabinet integrated with the mirror keeps your counter clear, which reduces the number of items that get splashed and wiped. I’ve used these in small full baths where the sink area was too cramped for a lot of storage, and it kept the vanity from turning into a clutter tray. Choose a cabinet with adjustable shelves so you can fit bottles without them tipping. This looks clean from across the room because the only visible items are the mirror and light. It also helps people who forget to put products away — the cabinet makes the “put it back” action easy.
Start by checking your wall space and plumbing clearance so you don’t hit pipes. Choose a cabinet width that fits between studs or use a surface-mount option if needed. Install the mirror cabinet so the bottom edge aligns with your sightline — typically 56-60 inches from the floor. Add small pull-out organizers inside if your products are different shapes; they stop bottles from rolling. Keep the cabinet curated: one toothbrush cup, one daily cleanser, and one backup roll of bandages, not everything you own.
Good to knowStore travel-size items together in one bin inside the cabinet so the cabinet stays balanced and easy to wipe.
AvoidAvoid a medicine cabinet with too much depth if you have short arms — it becomes a storage graveyard.
13. Matte white subway tile backsplash with sealed grout
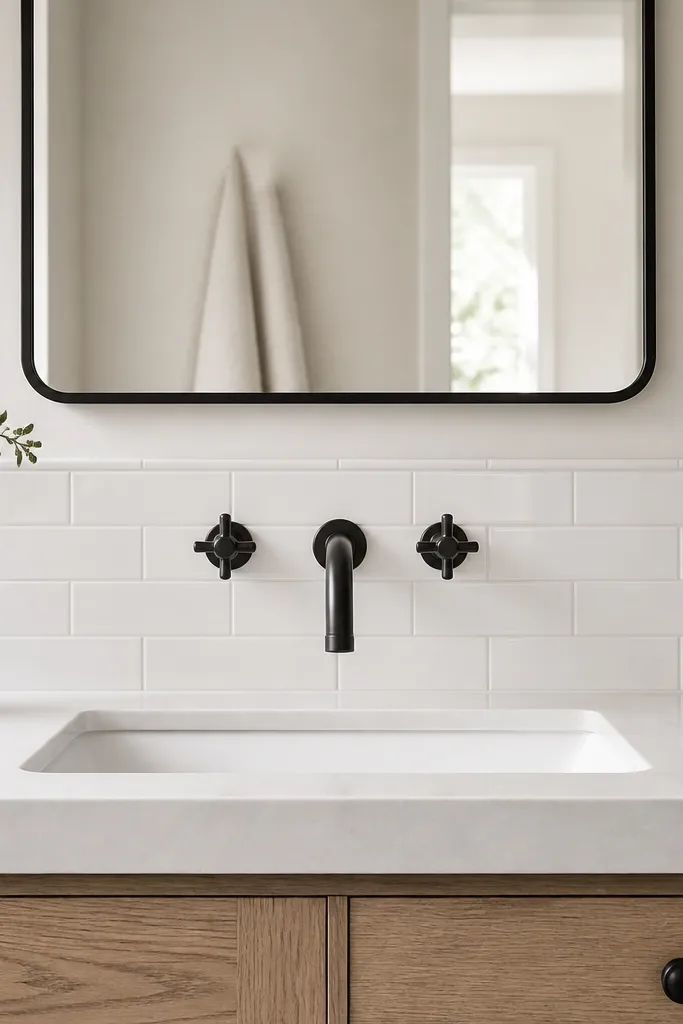
A backsplash is the easiest way to protect the wall from water splashes and toothpaste drips without repainting every year. Matte white subway tile looks classic but modern in small full bathrooms, especially when the grout color is light and consistent. Sealed grout helps with wipe-down — you can wipe toothpaste smears without scrubbing. I like installing it only where water lands: behind the sink faucet and out to the edges of the vanity top. This works for people who wipe their counters daily and want the wall to stay clean with minimal effort. It also helps small bathrooms look finished because the wall has a clear boundary.
Start by marking the backsplash height — usually 36 inches from the floor for a standard vanity, or just to the underside of the mirror if space is tight. Choose tile size around 3x6 inches, and keep the grout lines narrow for a clean look. Apply thinset and press each tile evenly, then use spacers to keep lines straight. After curing, seal the grout if the installer recommends it; use a penetrating sealer and wipe off excess. Caulk the bottom edge with a paintable, mildew-resistant caulk so water can’t creep behind the tile.
Use a toothbrush cup and keep it centered under the mirror — toothpaste splatter is real, and centering it reduces random wall marks.
Avoid dark grout on white tile if you have hard water — it looks dirty fast.
14. Two-tone vanity paint with washable topcoat and minimal hardware
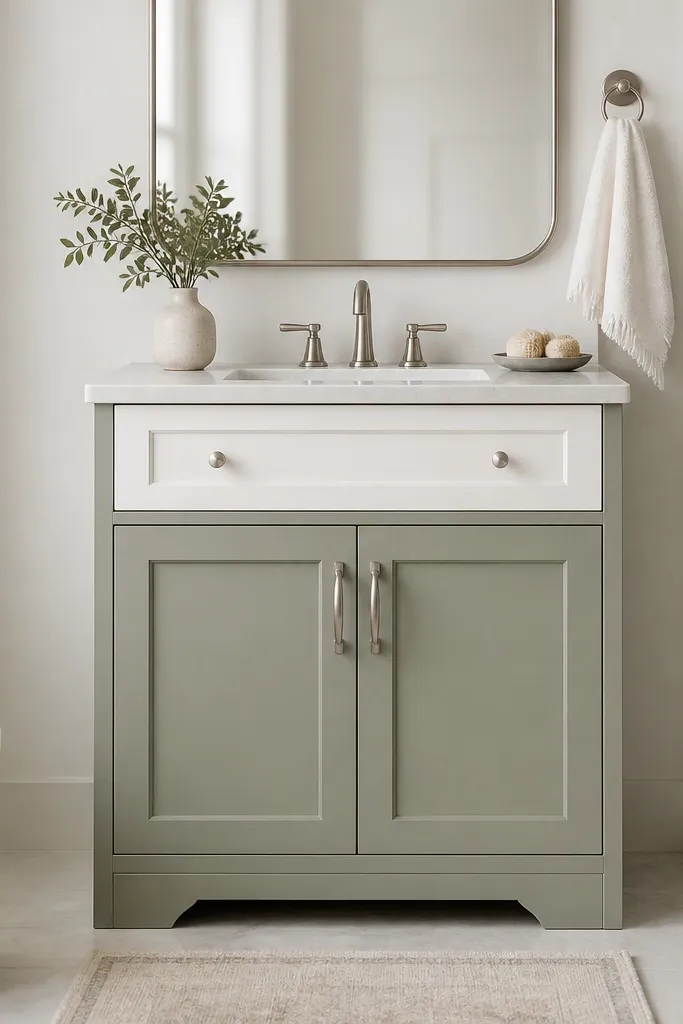
You don’t need a full renovation to make a small full bathroom feel updated. A two-tone vanity with a washable paint topcoat keeps the look fresh and hides scuffs better than glossy finishes. I’ve had the best results with a soft sage or muted blue on the lower cabinet and crisp white on the upper trim, because it makes the room feel airy without looking plain. Minimal hardware also helps; fewer knobs means fewer places for grime to collect. This works for people with small bathrooms that already have decent tile but feel dated around the vanity. It also flatters warm skin tones and warm lighting because sage softens the look.
Start by sanding the existing vanity lightly and cleaning with a degreaser so the paint grips. Apply a bonding primer, then paint the lower doors in your color and the trim/drawers in crisp white; let each coat cure fully. Use a cabinet-grade topcoat that wipes clean, and consider semi-matte for durability. Replace hardware with matching brushed nickel and install so the spacing lines up with the door edges. Keep the countertop styling minimal: one pump soap, one small tray for daily items, and nothing extra.
If you paint yourself, label the doors and drawers with painter’s tape so you rehang them in the same order and avoid mismatched lines.
Avoid painting over glossy varnish without sanding — it peels around the first wet season.
15. Slim wall niche for shampoo and conditioner with a removable caddy
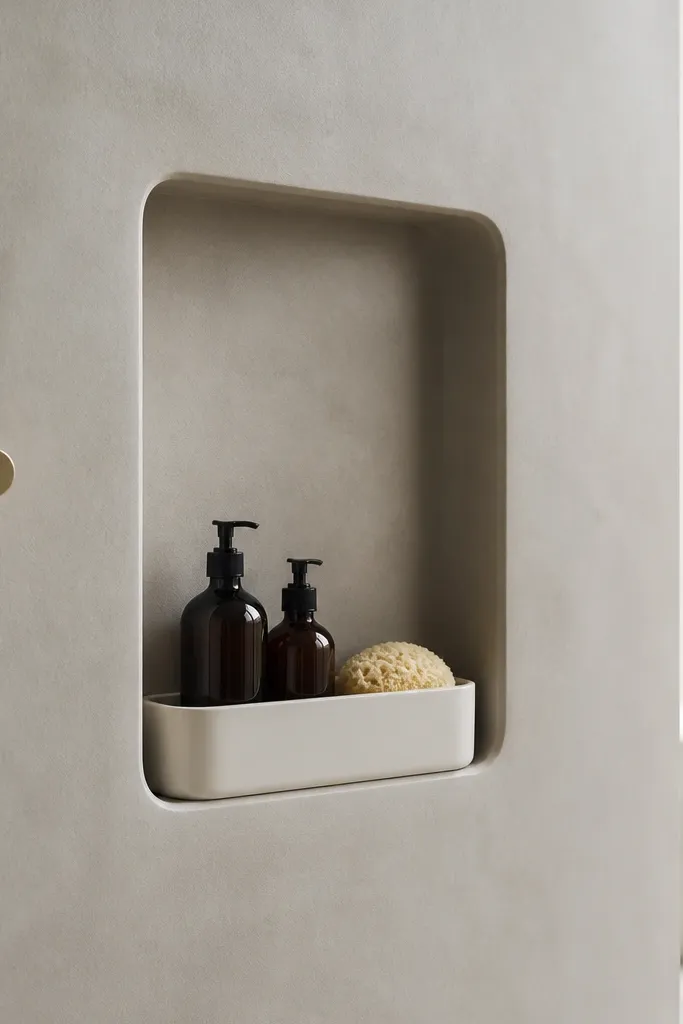
A niche is the small-space answer to clutter, but only if you keep the bottles from becoming a soap-scum ecosystem. I like a slim recessed niche with a removable caddy because you can lift the caddy out and wipe the shelf surface in seconds. The recessed shape keeps bottles from taking over the shower space, and it reduces water splashing onto the bottle labels. This works well for people who use multiple products and want them organized without leaving them on the shower floor. In small full bathrooms, it also helps the shower look built-in and intentional instead of like an add-on. Pair it with a smooth, non-porous wall finish so the niche surface stays wipe-friendly.
Start by choosing a niche height where you can reach without stretching — I aim for 40-44 inches for the shelf center. Install the niche so it’s flush with the wall surface and use clean, consistent seams. Add a removable caddy that fits the niche width so it doesn’t rattle; a tight fit prevents bottles from trapping water at the edges. Use smooth bottles with flat backs so they sit flush and don’t collect drips. After each week, lift the caddy out, wipe the niche, and put it back dry.
Pick a caddy material that rinses clean fast, like coated metal or smooth plastic, and skip textured ones that trap film.
Avoid a fixed shelf where bottles sit directly on the surface; you end up cleaning around them forever.
16. Low-profile bath mat with quick-dry backing and a second mat rotation
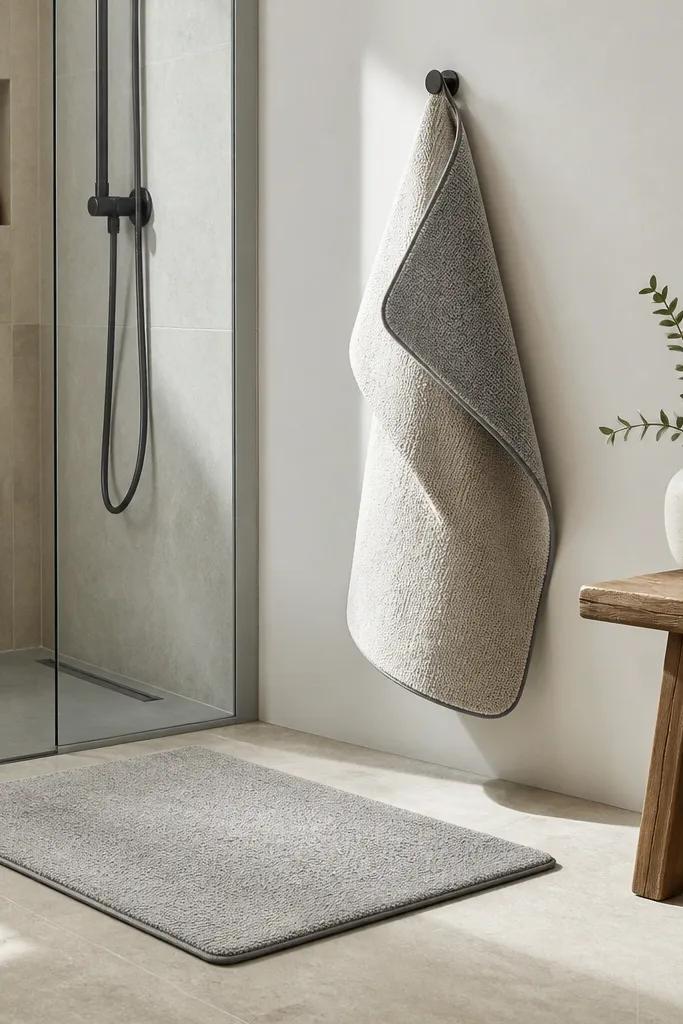
This is one of those low maintenance small full bathroom ideas that feels boring until you live with it. A low-profile quick-dry mat reduces the “wet floor” mess and keeps the bathroom from smelling musty. I use two mats and rotate them: one gets washed, the other stays down while the first dries fully. The quick-dry backing prevents that sticky, damp feeling that makes people leave towels on the floor. In a small bath, thickness matters; thin mats tuck better and don’t bunch near the door. This setup keeps the space looking clean between deeper cleans because there’s less water tracked around.
Start by choosing a mat with a thin profile so it doesn’t curl under the door or catch on the toilet base. Place it outside the shower and near the sink, not in the middle of the room where it blocks mopping. Use two mats so you always have a dry option; wash them on a gentle cycle and air dry fully. Add a hook inside the cabinet or on the back of the bathroom door for drying the spare. Replace mats when the backing starts to lose grip, which is usually around 12-18 months with heavy use.
Shake the mat after showering and let it air for 10 minutes before washing — it keeps buildup down.
Avoid thick memory-foam mats — they trap water and smell even when they look clean.
17. Clear glass shower door with a magnetic seal and minimal hardware
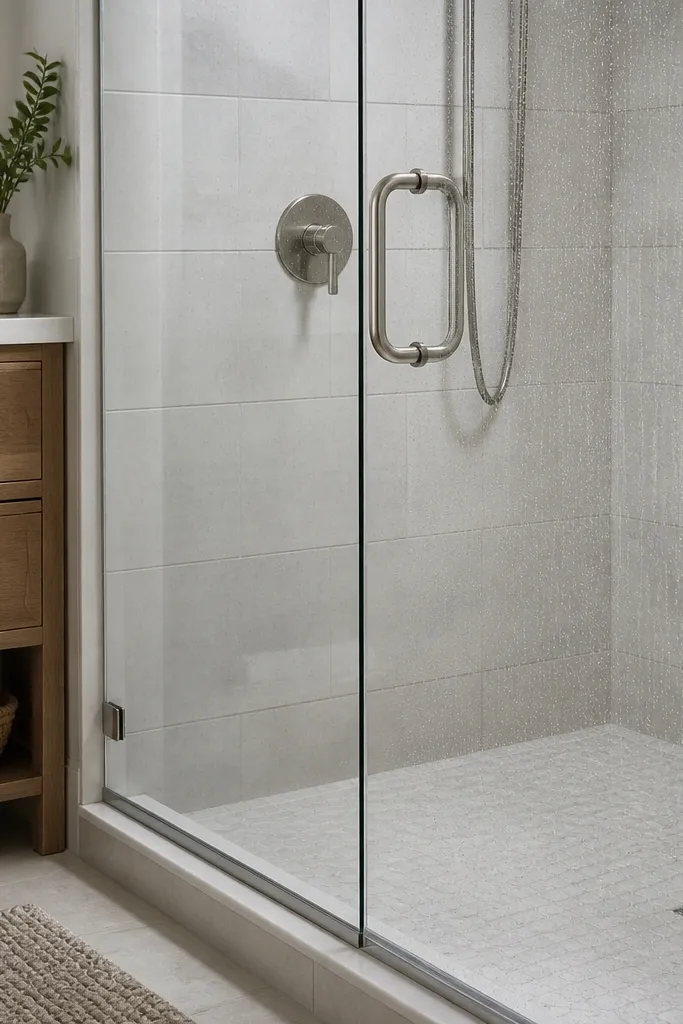
A clear glass door keeps the shower looking bright and modern, and the magnetic seal is what makes it low maintenance. When the seal is tight, water stays inside the shower zone so your floor and walls don’t keep getting wet. I’ve installed these in small full baths where the tub-to-floor splash was constant; adding the right seal reduced the weekly wipe time by a noticeable amount. Choose a glass door with a simple frame and fewer moving parts, because complicated hardware is where maintenance starts. Clear glass also helps small spaces feel larger because it doesn’t block light. If your bathroom has hard water, choose glass with a water-repellent coating so you can spot-wipe instead of scrubbing.
Start by checking the opening size and choosing a door type that matches your tub or shower width; measure twice and account for the door swing. Install level and plumb so the door closes evenly and the seal contacts the tub rim. Use a water-repellent treatment on the glass after installation if the manufacturer allows it. Clean with a microfiber cloth and a gentle glass cleaner; avoid acidic cleaners that can haze coatings. Keep the door hardware matched to your faucet finish so the whole bathroom reads intentional.
Wipe the bottom seal and track once a week; it’s the hidden place where water spots and grime start.
Avoid doors with lots of extra rails and shelves — they trap gunk and collect water.
18. A single-color palette with matching trim and caulk lines
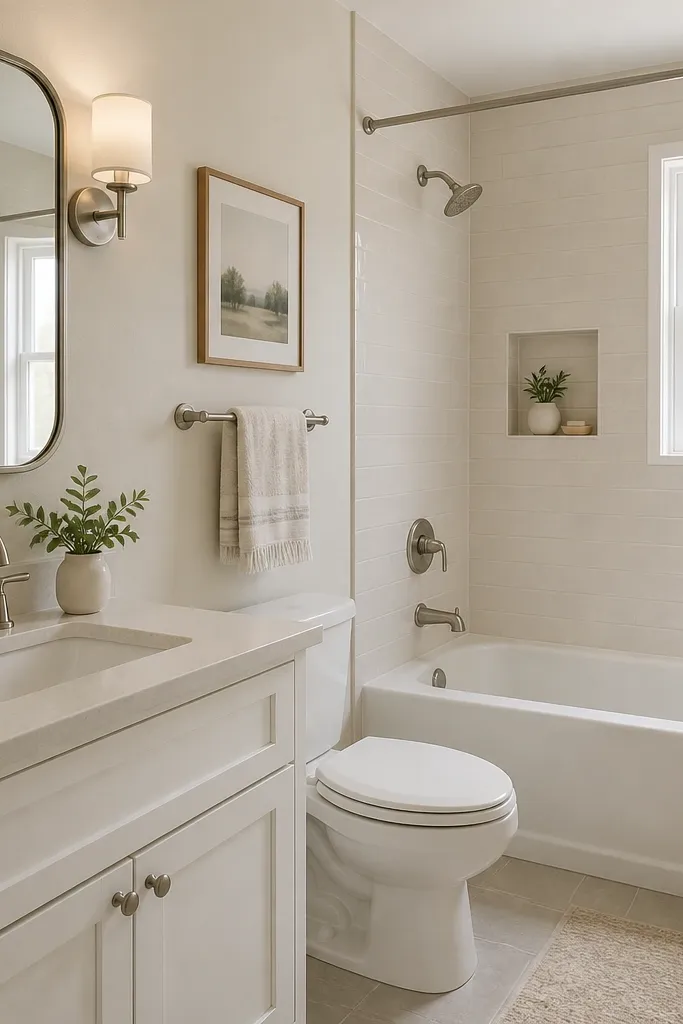
This is the part people skip when they’re chasing low maintenance small full bathroom ideas, and it’s why some bathrooms look messy even when they’re clean. When metal finishes don’t match and caulk lines are different colors, your eye catches every imperfection — especially in small spaces where everything is close together. I design around a tight palette: one wall color, one bright trim, and one metal finish. The result is that minor water spots or tiny scuffs don’t stand out as much. This approach also makes daily wiping feel easier because you’re not chasing a “perfect” look. It flatters any bathroom size because it reduces visual noise.
Start by picking one metal finish for all hardware: faucet, drain cover, towel bar, toilet paper holder, and shower fixtures. Choose one trim color, usually bright white, and keep it consistent around the mirror and door trim. Re-caulk any tub and sink edges with mildew-resistant caulk in a matching color — I prefer bright white or a tone that matches trim, not gray. Use one wall paint color and one backsplash material so you don’t create extra cleaning zones. After installation, wipe everything with a damp microfiber to remove dust so the caulk and grout look crisp.
Bring one of your existing hardware pieces to the store and match finish under the same light as your bathroom — it matters.
Avoid mixing warm and cool metal finishes — it makes the bathroom look unfinished.
19. Matte wall-mounted towel bar with a 2-bundle storage habit
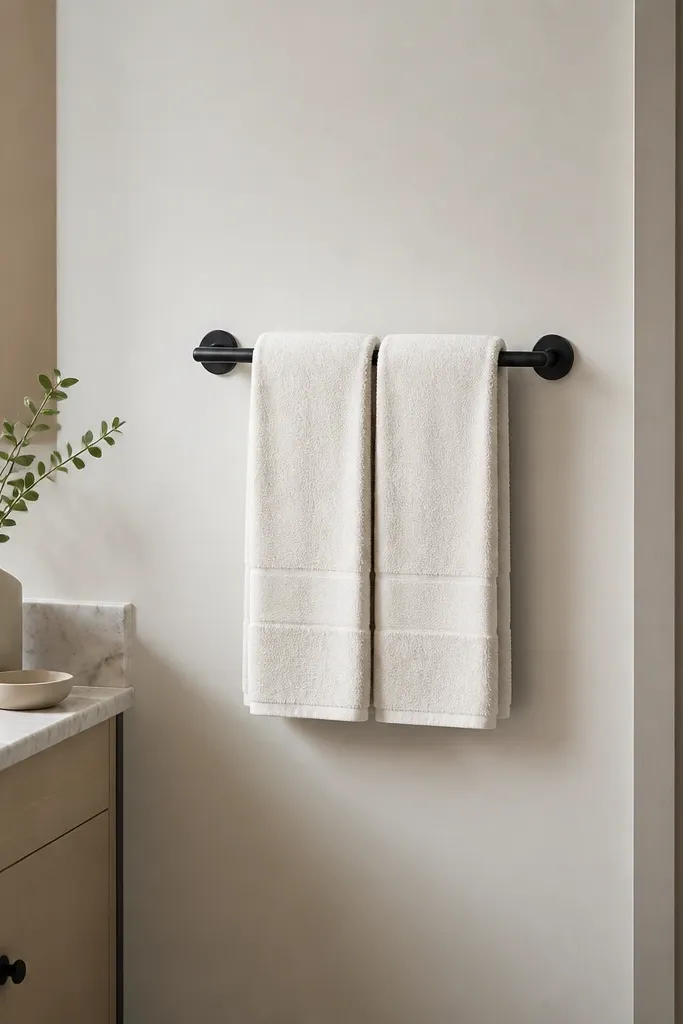
In small full bathrooms, towels are where the space gets messy first. A wall-mounted towel bar with a simple two-bundle habit keeps the room looking tidy without extra storage. I keep two towels only: one for daily use and one spare, folded and ready. Matte bars resist water spotting visually, and they don’t reflect light in a way that makes dampness obvious. This works for households where towels get thrown on a chair or left on the floor because there’s nowhere to put them. It also keeps the bathroom looking modern because the fabric is controlled and aligned.
Start by placing the towel bar so towels hang flat and don’t brush the sink or interfere with door swing; aim for about 36-42 inches from the floor. Use a matte finish bar that matches your other hardware. Fold towels into a consistent size so they stack neatly and don’t spill over the ends. Hang the daily towel on the bar and keep the spare towel folded on a nearby cabinet shelf or inside the medicine cabinet. After showers, spread the towel flat for a few minutes so it dries — then fold and swap into the “daily” spot.
Good to knowUse one color family for towels so the bathroom color story stays calm even when you switch between weekly loads.
AvoidAvoid leaving towels draped over the toilet tank or shower door — they stay damp and the bathroom looks cluttered.
20. Built-in vent fan upgrade with a humidity sensor
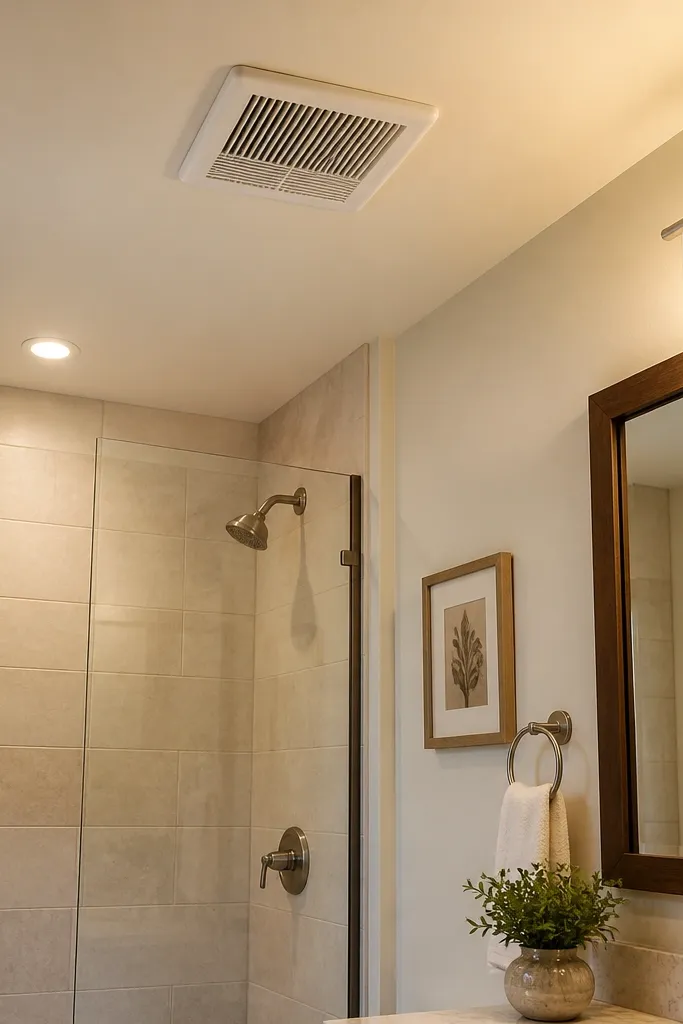
If you want low maintenance small full bathroom ideas that actually hold up, humidity control is where the maintenance time gets cut. A vent fan with a humidity sensor turns on when the room gets steamy and shuts off after it clears, so you don’t rely on remembering to flip a switch. I upgraded one in a 5x8 bath that had constant foggy mirrors, and the mildew smell stopped showing up in the corners. This doesn’t just protect paint and grout — it keeps glass and metal from staying wet long enough to stain. The bathroom looks cleaner longer because surfaces dry faster. It also helps your towels dry without that damp, stale vibe.
Start by checking your current fan size and duct route; pick a fan with enough CFM for your bathroom volume. Install the fan so it vents outdoors through a proper duct run, not into an attic space. Use the humidity sensor feature if your model has it, and set the threshold so it triggers after a typical shower. After installation, test by running a hot shower and watching the mirror and wall — you should see the fog clear within a short window. Keep the fan grille clean with a dry microfiber monthly so airflow stays strong.
Good to knowIf your fan is loud, choose a model with a quieter sound rating; people stop using loud fans fast.
AvoidAvoid ducting into a shared attic space — it moves moisture around instead of removing it.