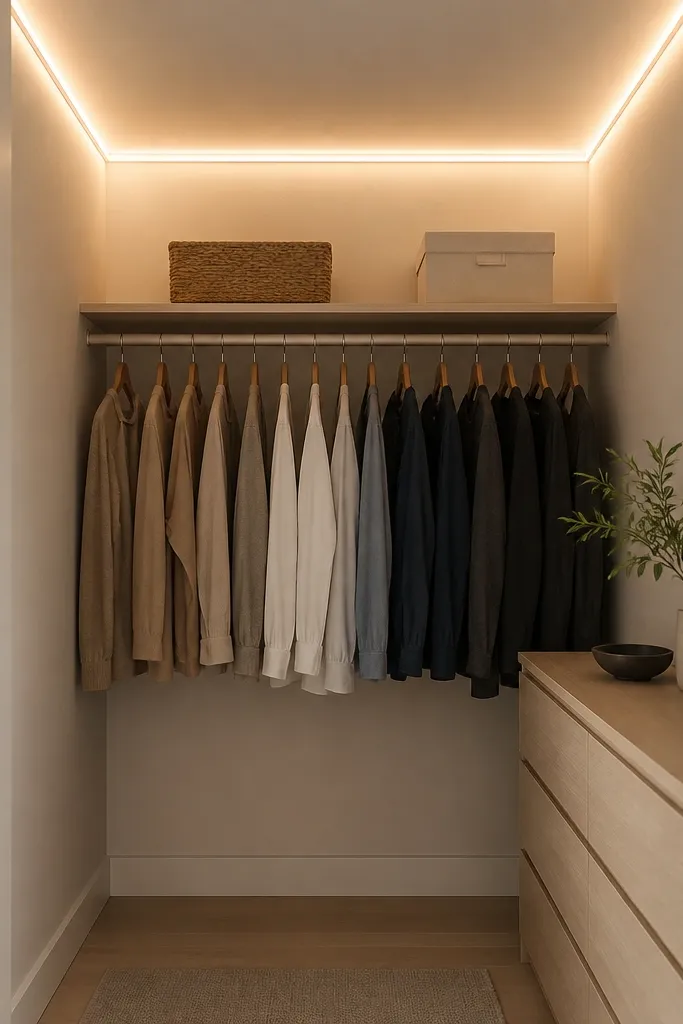
1. Top-shelf LED strip with frosted channel
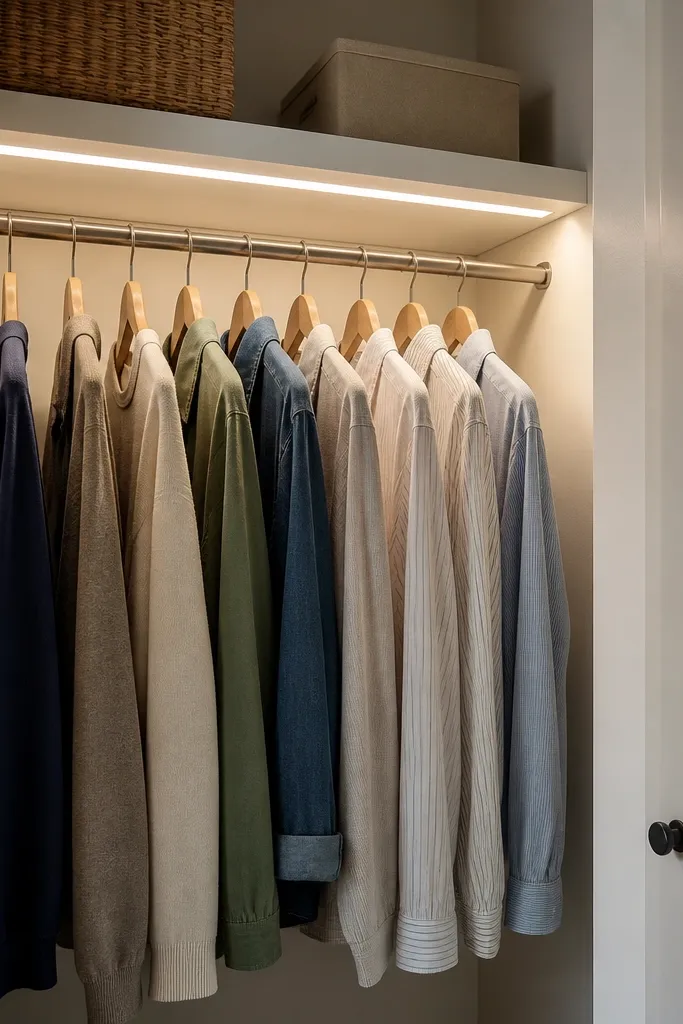
Start by measuring the inside width of the closet and cut the LED strip to length, leaving 1-2 inches of slack for routing the wire. Mount the frosted aluminum channel right under the top shelf lip so the glow points down, not straight into your face. Then run the wire to a hidden power point — inside the closet on the side wall if you can reach it, or to a plug-in adapter near the door. Finally, test with the closet door open and closed, and adjust the strip position if you see a dark band at the very front of the hanging clothes.
This setup works because it turns the top shelf into a soft light bar that spreads down onto the hanging rail. I like using a frosted diffuser channel because the closet is narrow and you’ll see LED points if you use a bare strip. Go with 2700K if your room is warm-toned (cream walls, honey wood), and 3000K if your closet is mostly white or you wear a lot of crisp black and gray. The light makes skin tones look more even when you’re choosing outfits, especially for fair to medium complexions, because it reduces the bluish cast that cheap LEDs can create.
AvoidAvoid bare LED tape without a diffuser — it makes visible hot spots that look cheap fast.
Good to knowUse a dimmer remote or inline dimmer if your LEDs support it. Small closets look best at about 60-70% brightness so dark fabrics don’t look flat.
2. Under-rail puck lights for instant outfit hunting
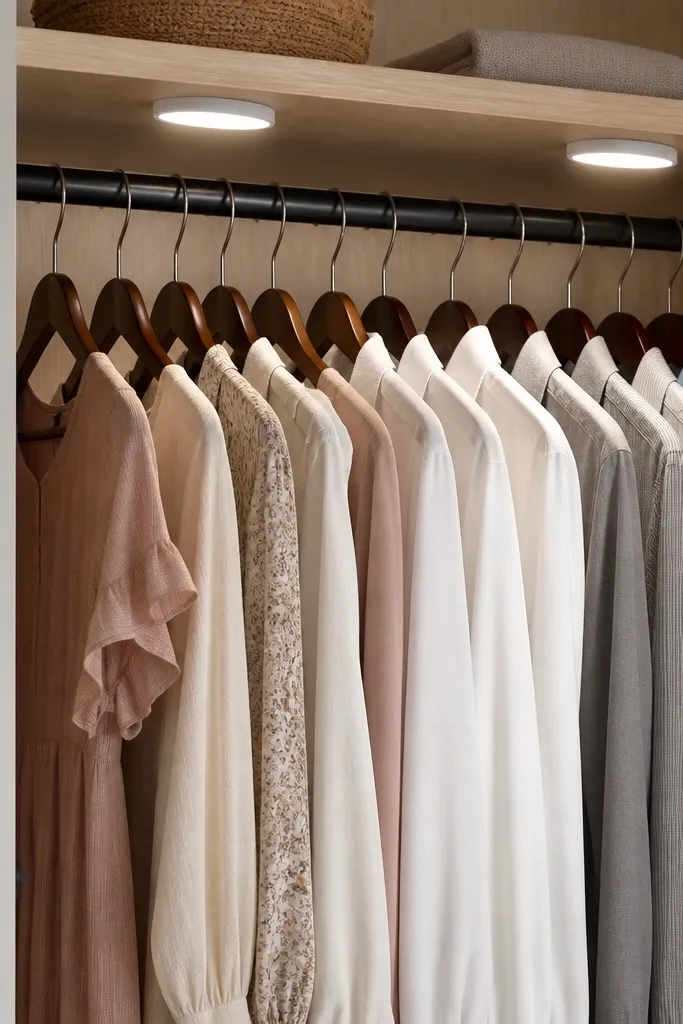
If your closet is only 2-3 feet deep, the most common issue is dead zones where you can’t see the front edges of clothes. Under-rail puck lights hit the exact area you’re grabbing from, so you stop rummaging. I’ve used this in closets where the back wall is painted dark and the clothes look gray without direct light. The angled beam gives crisp visibility for patterns and buttons, which helps if you wear jewel tones or small prints.
Start by pulling everything out and marking the hanging rod centerline. Install the pucks under the rod line with an even spacing of 12-16 inches so you don’t get a bright center and dim sides. Use a warm white bulb equivalent LED puck (2700K) and aim each light slightly toward the front edge of the hanging clothes. Finally, route the wiring behind the side panel or through a corner channel, then secure the cable with clips so nothing hangs where you swing hangers.
Add a small white storage bin label area under the pucks so you can read categories without turning on the main room light.
Skip placing the pucks too high — if they shine at the ceiling, the hanging rail still looks dull.
3. Magnetic door sensor LED strip
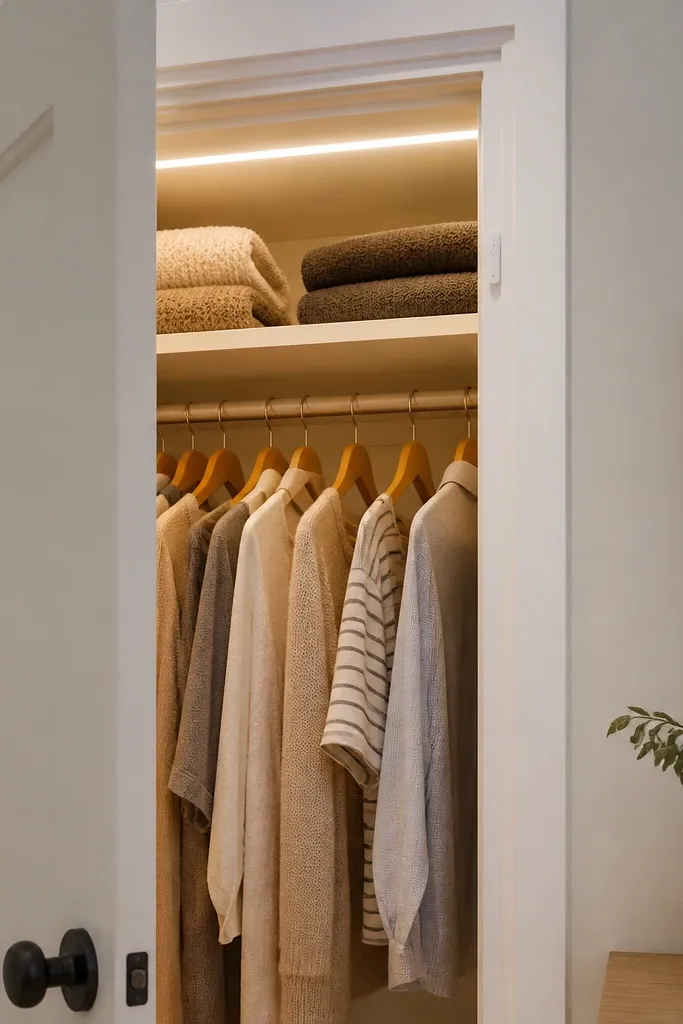
Start by cleaning the closet interior mounting surface with rubbing alcohol and letting it fully dry. Mount the LED strip under the top edge using an adhesive channel, then attach the magnetic sensor base to the door frame so it aligns when the door closes. Place the control box near the side wall where you can reach it, or use a self-contained battery strip kit if you don’t have an outlet inside. Finally, test the switch distance by opening and closing the door ten times — if it flickers, reposition the magnet by a few millimeters.
This is my favorite practical upgrade because you don’t have to find a switch with your hands full of hangers. The magnetic sensor turns the lights on the moment the door opens, which matters in very small bedrooms where you don’t want to fumble in the dark. I’ve used this in rentals where drilling is a no-go, and the adhesive mounting holds up well when you clean the surface with rubbing alcohol first. The warm light makes fabrics look true, especially cottons and knits that otherwise look washed out in cooler LEDs.
AvoidAvoid mounting the sensor where the door flexes — that causes intermittent flicker.
Good to knowUse a warm dimmable kit if you can. The first second after opening the door is when you’re most likely to squint.
4. Corner LED strip to erase shadowy back walls
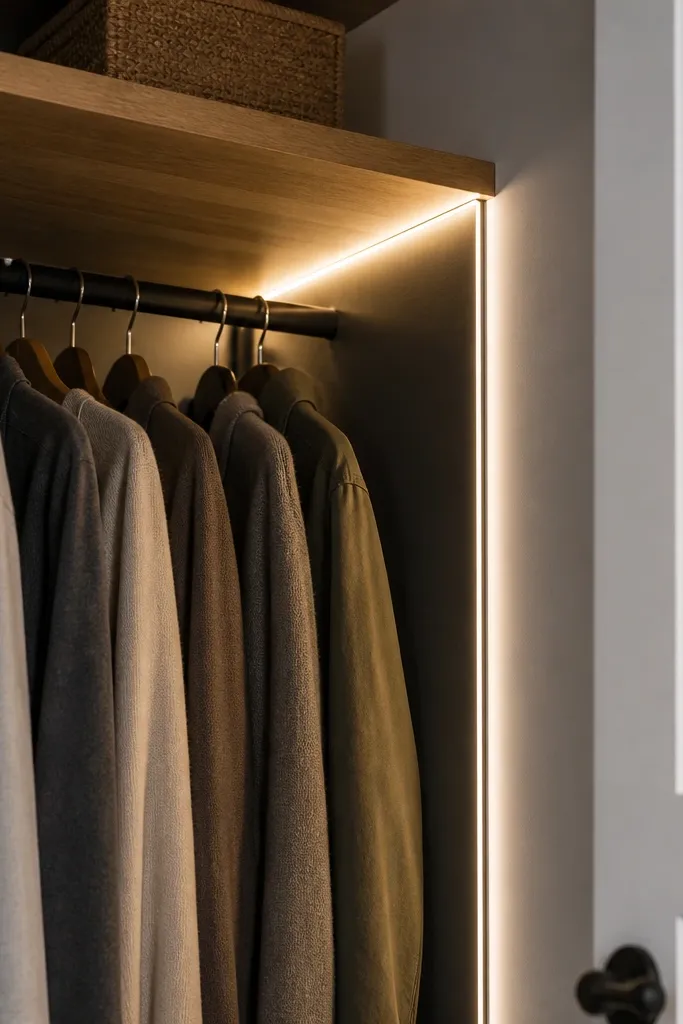
Start by cleaning the corner seam and fitting a slim diffuser channel so the strip sits flush. Mount the strip about 1/2 inch below the top shelf line, then run a second short strip on the other corner if the closet is wider than 30 inches. If you have an outlet nearby, use a low-voltage plug-in transformer; if not, use a rechargeable LED controller kit. Finally, place one small white board or light backing behind the hanging rail if your back wall is very dark, so the corner light has something to bounce off.
Shadow is the enemy in small closets, and corners are where shadows pool. A corner strip reflects light off two surfaces at once, which reduces the “back wall eats my clothes” effect. I like this when your closet back is dark laminate or you have a depth under 20 inches because you can’t place lights far enough apart for normal coverage. It also helps if you store long items like dresses — the fabric looks more dimensional instead of flat black blobs.
AvoidDon’t rely on ceiling-only lighting for corner problems — the back seam will still go dark.
Good to knowAim for 2700K if your room lighting is warm. Corner lighting amplifies color casts, so cooler LEDs can make whites look greenish.
5. Mirror strip light behind a small closet mirror
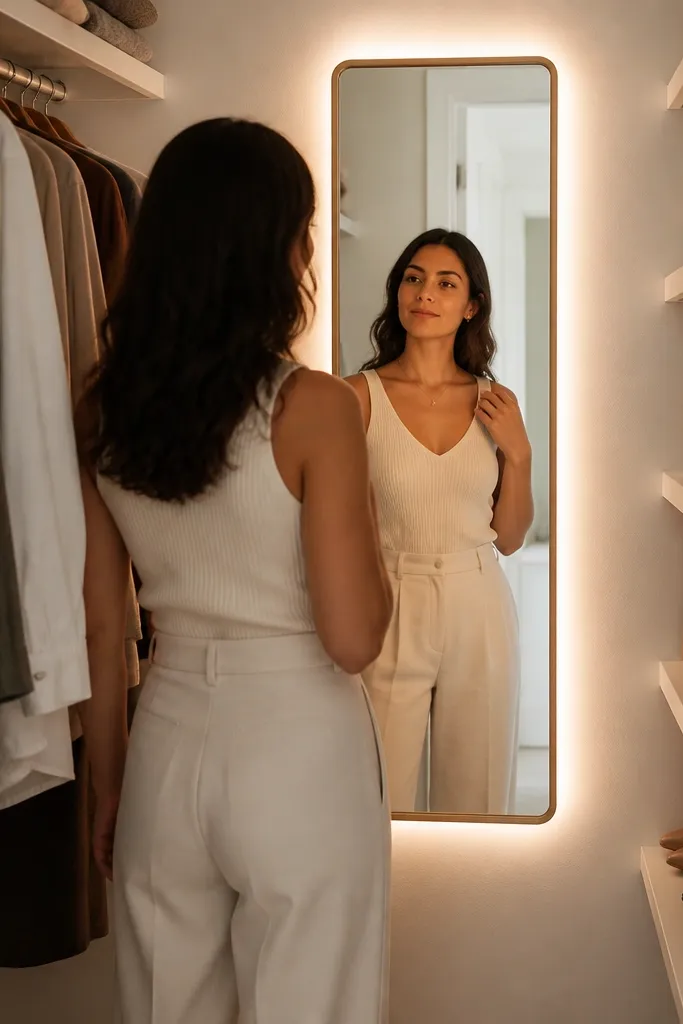
If your closet is too small for a full vanity setup, a mirror with hidden light gives you a mini dressing corner. The light behind the mirror reduces shadows under eyes and around collars, which makes choosing an outfit feel less stressful. I’ve done this in closets where the mirror is the only reflective surface, and the strip lighting makes the closet feel bigger because the mirror reflects the warm glow. This is especially flattering for medium and deep skin tones because it keeps undertones from looking ashy compared with overhead lighting.
Start by choosing a mirror that fits the wall without blocking door swing — for tiny closets, a 12x36 inch mirror works well on a side wall. Mount the mirror with a gap or use a mirror frame that supports a hidden channel, then install an LED strip behind it using a diffuser. Wire the strip to a dimmable controller so you can turn it down when you’re just checking a necklace or earrings. Finally, add a small clear tray at the bottom of the mirror for lip balm or hair clips so the mirror area stays tidy.
Use a neutral warm LED and avoid RGB strips. You want true fabric color, not color-changing drama.
Avoid mounting the mirror too low — if you can’t see your shoulders, the lighting won’t help.
6. Clothes-lane LED strip along the hanging rail back edge
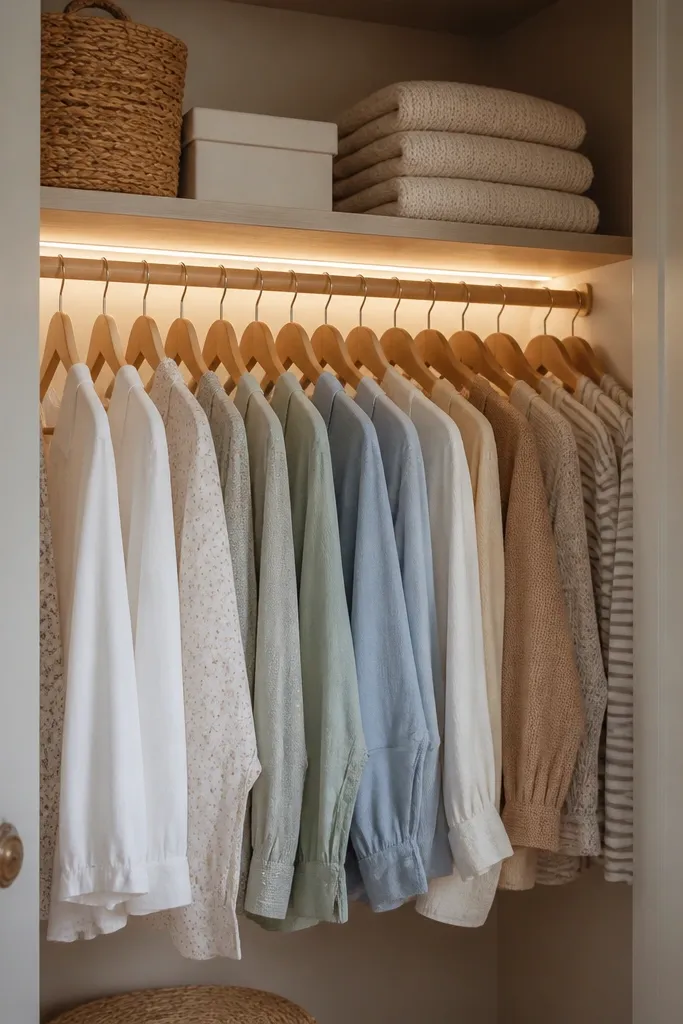
Start by adding a thin mounting surface behind the rod line, like a 1x2 painted board or a slim channel attached to the back panel. Place the LED strip on the underside of that mount so light spills forward onto the hanging clothes. Use a frosted diffuser or white channel cover so you don’t see bright points between hangers. Finally, set the strip to a warm 3000K if your clothes include lots of beige, camel, or off-white — it keeps those tones from looking gray.
This is the method I use when I want the closet to look clean and designer-like instead of “we installed lighting.” By tucking the strip behind the hanging rail back edge, you hide the source and keep the glow controlled. It’s great for small closets with one rod because you get consistent illumination across multiple hangers without lighting the whole room. The glow also makes textures show — denim seams, linen weave, and knit stretch look more accurate.
AvoidDon’t mount the strip where it can snag hangers. If it catches a hanger lip once, you’ll hate it forever.
Good to knowKeep the strip within 1-2 inches of the back edge. The closer it is, the less light you waste on the back wall.
7. LED strip on the inside of the closet door
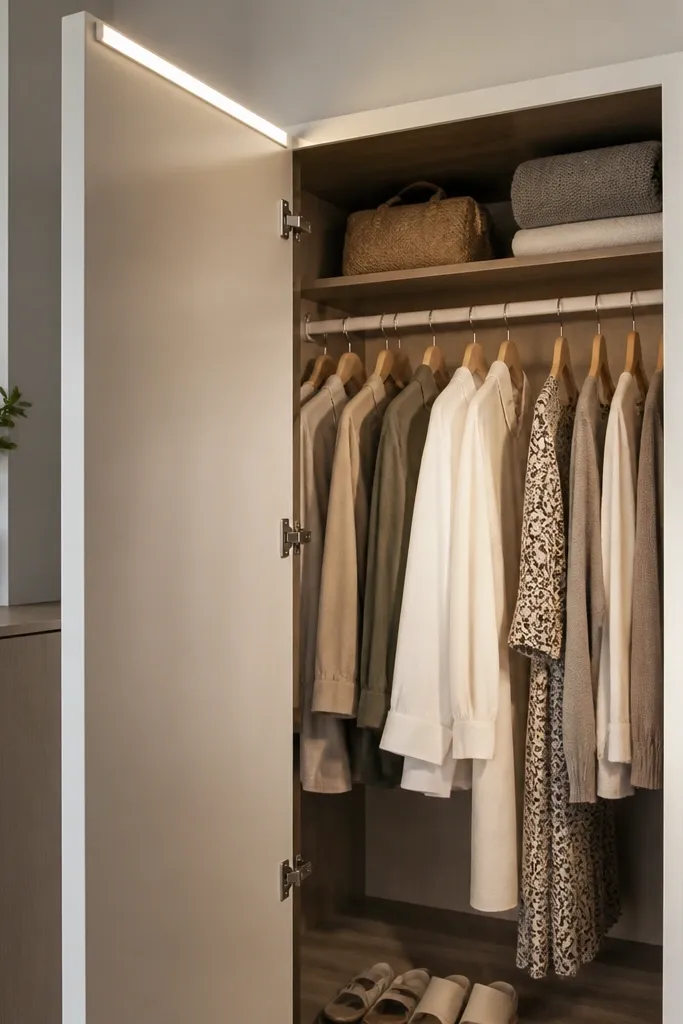
Start by installing a small low-voltage LED strip with an adhesive channel on the inside top edge of the door. Route the wire through a thin corner channel or along the hinge side so it doesn’t twist and pull. Use a door-activated plug or magnetic sensor so the light turns on when the door opens. Finally, check clearance with hangers in place — open and close the door slowly to confirm nothing rubs.
Door-mounted lighting is a smart fix when there’s no outlet inside the closet or you don’t want to run wires along walls. It also gives you a natural angle of light that hits the hanging rail as the door swings open. I like it most in walk-in-adjacent closets where the door opens toward you, because the light lands exactly where you’re standing. Warm lighting on the door also makes the closet feel cozy instead of like a cold utility space.
AvoidAvoid thick channels on the door — they can interfere with door fit and cause rubbing.
Good to knowUse a diffuser cover strip. Door lighting is close to your face, so harsh points will annoy you.
8. Battery puck lights with magnetic bases
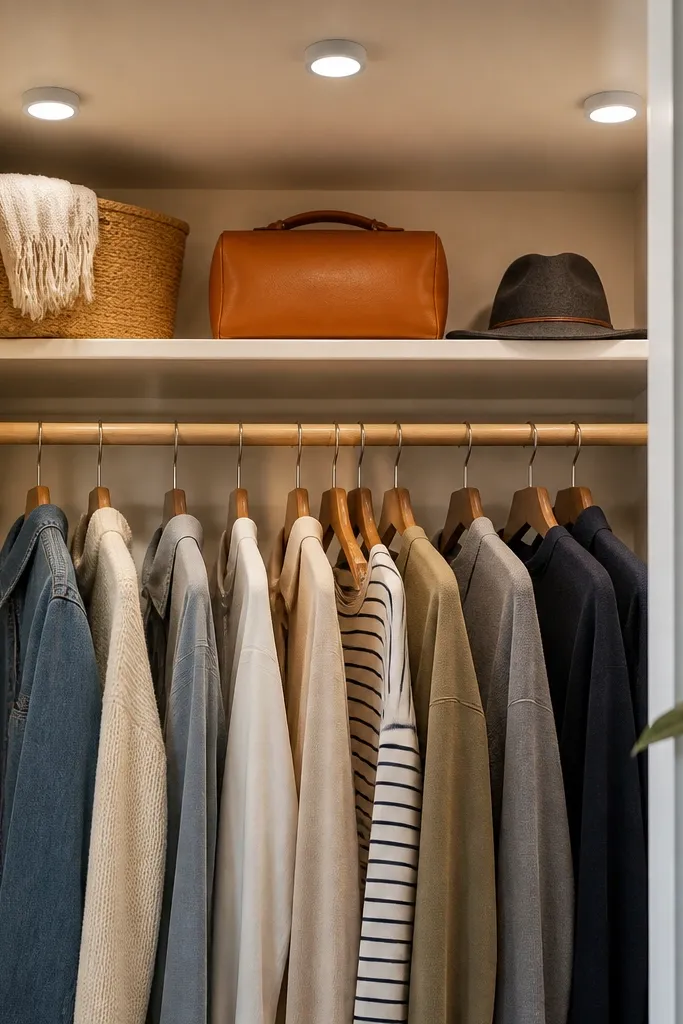
Battery puck lights with magnets are the easiest way to test lighting without committing to wiring. I’ve used them in apartments where the landlord wouldn’t allow any drilling, and they still look clean because the pucks sit flush. The magnetic bases let you move the lights if you change your closet layout later. This option is great for anyone who wears a lot of dark colors since bright, localized light keeps black and navy from looking flat.
Start by placing two pucks near the hanging rail front corners so the light covers the area you reach first. If you have shelves, add one more puck aimed at the shelf surface to prevent folded items from looking gray. Use warm 2700K puck lights with a diffuser lens if you can find them. Finally, set a reminder to swap batteries every 6-8 weeks if you use them daily, and keep spare batteries in a small drawer nearby.
Test with your closet door open at night. If you see glare in the mirror or on glossy hangers, move the pucks slightly inward.
Don’t mix random battery colors (some warm, some cool). It makes outfits look off even if the closet looks bright.
9. Slim LED under-shelf strip for folded stacks
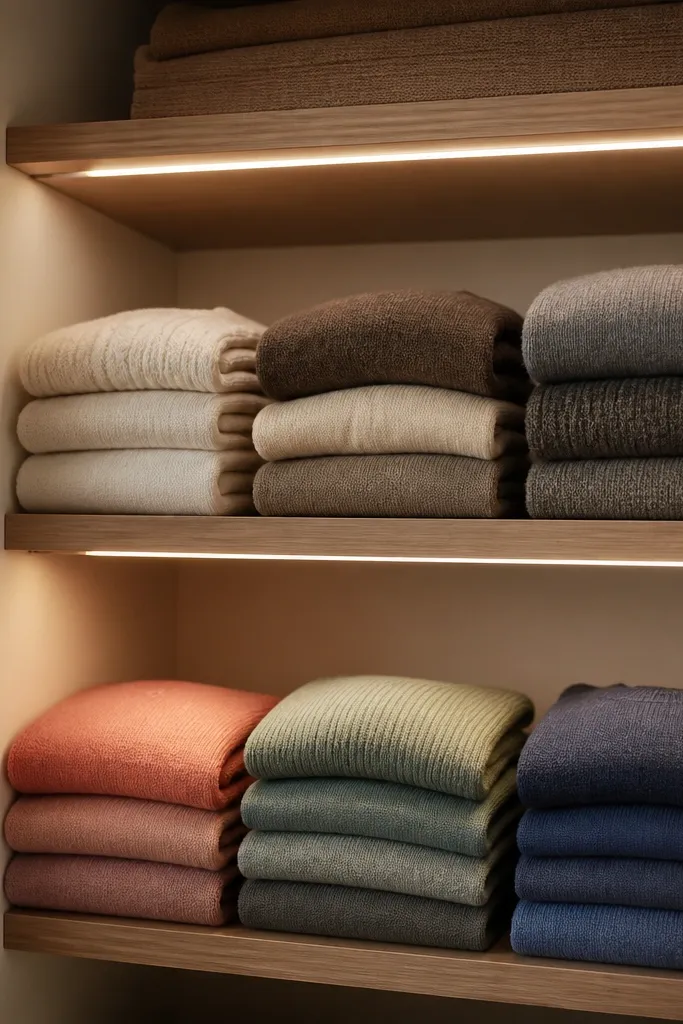
Start by deciding which shelf you actually use most and light that one first. Install a slim LED strip under the shelf edge using a thin channel, leaving a small gap between the strip and the front edge so the light doesn’t shine into your eyes. Space strips so each shelf gets its own coverage — don’t rely on one strip to light everything. Finally, use light-colored shelf liners or white contact paper on the shelf surface so the LED reflects instead of being absorbed by dark wood.
This works when your closet has more folded storage than hanging. Under-shelf lighting shows texture and color in knits, which otherwise look dull under indirect room light. In my own small closet, the top shelf was always darker, so I installed a strip under the shelf lip and the difference was immediate. If you store cream, gray, and blush items, shelf lighting keeps them from blending into one muddy pile.
AvoidAvoid placing the strip too far back. Light loses intensity quickly in tiny spaces, and you’ll still get shadowed folds.
Good to knowUse fabric bins in white, light gray, or natural canvas. The bins reflect LED light and make it easier to spot what you grabbed.
10. Dimmable LED bar hidden behind a valance
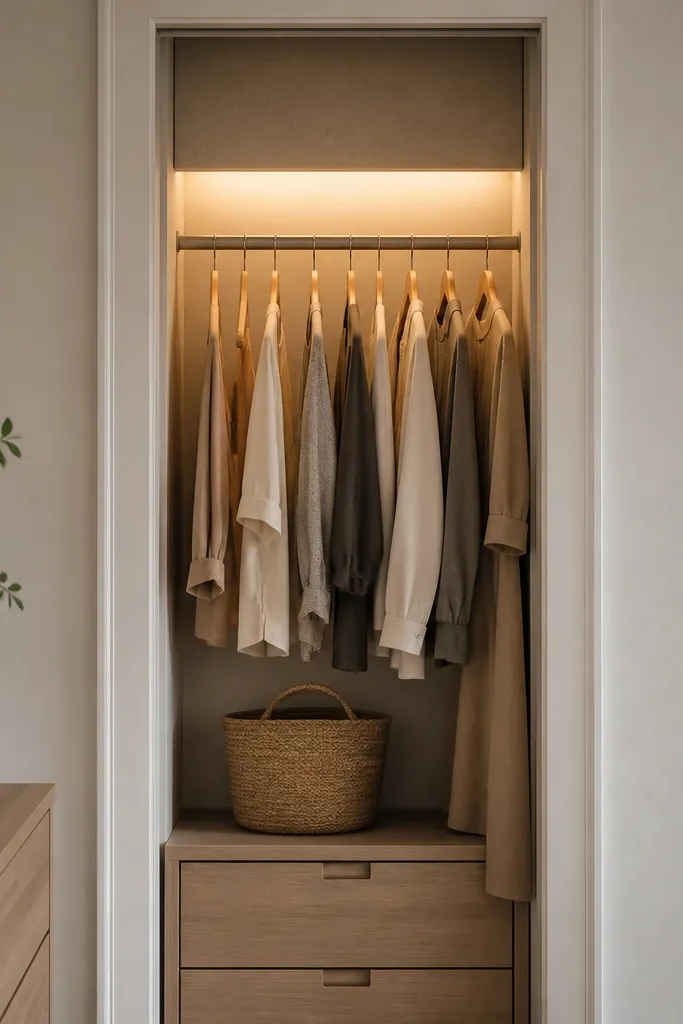
Start by building a simple valance box or using a pre-made shallow trim panel sized to the closet width. Place a dimmable LED bar behind the valance so it points downward at a slight angle toward the hanging rail. Route the dimmer control to a hidden spot near the door hinge side. Finally, set the brightness to 50-60% for daily use and test at night with the room lights off to confirm you don’t get glare on hangers.
A hidden valance makes lighting feel like it belongs there. You don’t see the LED source, and you get a smooth wash that makes the whole closet look intentional. I like this for bedrooms where the closet door is visible from the bed, because the glow looks warm and calm instead of like a gadget. Dimming matters here — when you dim, the closet looks more flattering for outfit checks and less harsh for late-night searching.
AvoidAvoid cheap RGB bars. Even if you set them to white, the color shift is noticeable on fabric.
Good to knowIf you have a ceiling light nearby, match the closet lighting brightness to it. Too bright makes the closet look like a spotlight.
11. Rope light inside a cable channel for rental-friendly brightness
Start by measuring the top perimeter where you want light and choose a rope light kit rated for enclosed spaces. Install a white cable channel along the top inside perimeter, leaving the channel lip facing downward. Press the rope light into the channel, then run the power wire to the closest outlet using clips so it stays flat. Finally, test coverage by moving a dark and light shirt side by side — you’re checking for color accuracy and shadow bands at the front.
Rope-style LEDs work well in tiny closets because they’re flexible enough to hug awkward corners and still look even once they’re diffused. I used this in a closet where the back panel wasn’t perfectly flat, and the rope light followed the shape without gaps. The cable channel makes it look tidy and protects the light strip from being bumped by hangers. Warm white lighting keeps wood tones from turning orange-brown and helps sweaters look clean and not yellow.
AvoidAvoid installing rope lights without a diffuser channel. You’ll see the individual segments and it looks messy.
Good to knowPaint the cable channel the same color as the closet interior. It disappears when the lights are off.
12. LED strip + white peg rail for accessories and belts
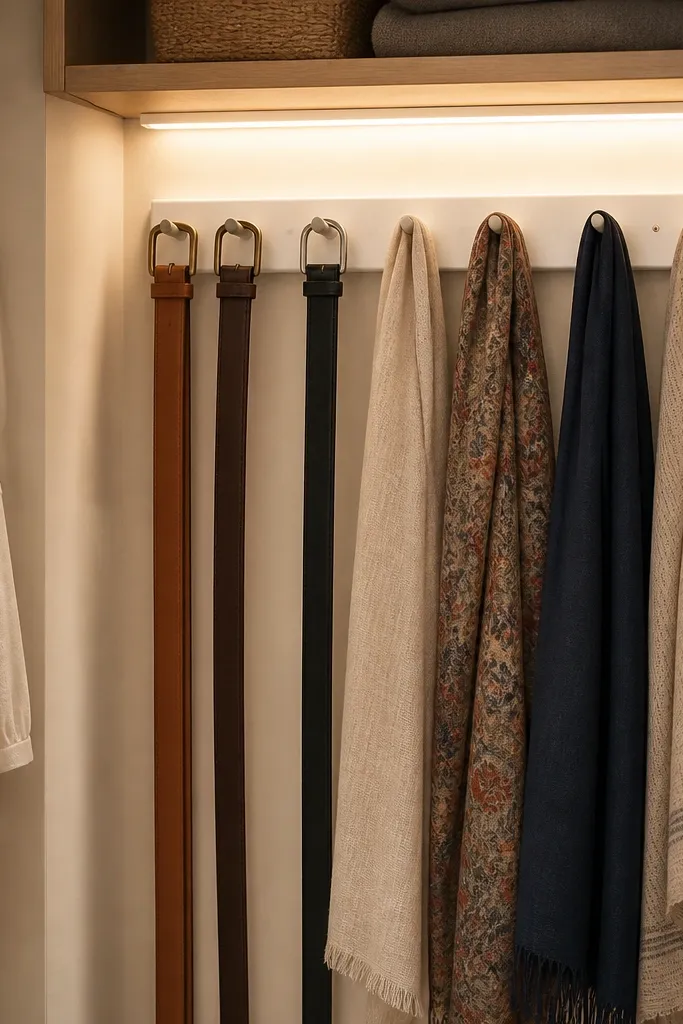
Start by installing the peg rail higher than you think, around eye level when standing at the closet opening. Mount the LED strip above the peg rail in a shallow channel so it lights downward. Use slim hooks that don’t overlap belt buckles, and keep the accessories in a color order — dark on one side, lighter on the other. Finally, add one small light bin on the bottom shelf for items you only grab occasionally, so the LED area stays clear and easy to scan.
Lighting gets even better when you organize the items so the light can hit them. A white peg rail turns belts, scarves, and small bags into a visible display, and the LED strip makes each item distinct instead of blending together. I like this layout when you have a shallow closet and you need to use vertical space without crowding the hanging rod. The warm light makes leather belts look more accurate — brown stays brown, not red-orange.
AvoidSkip mixing too many textures without separation. If scarves, belts, and bags touch, the LED makes the jumble look worse.
Good to knowUse light-colored hooks. Dark hooks absorb LED light and make small metal details harder to see.
13. Clothes divider panels with backlit glow strip
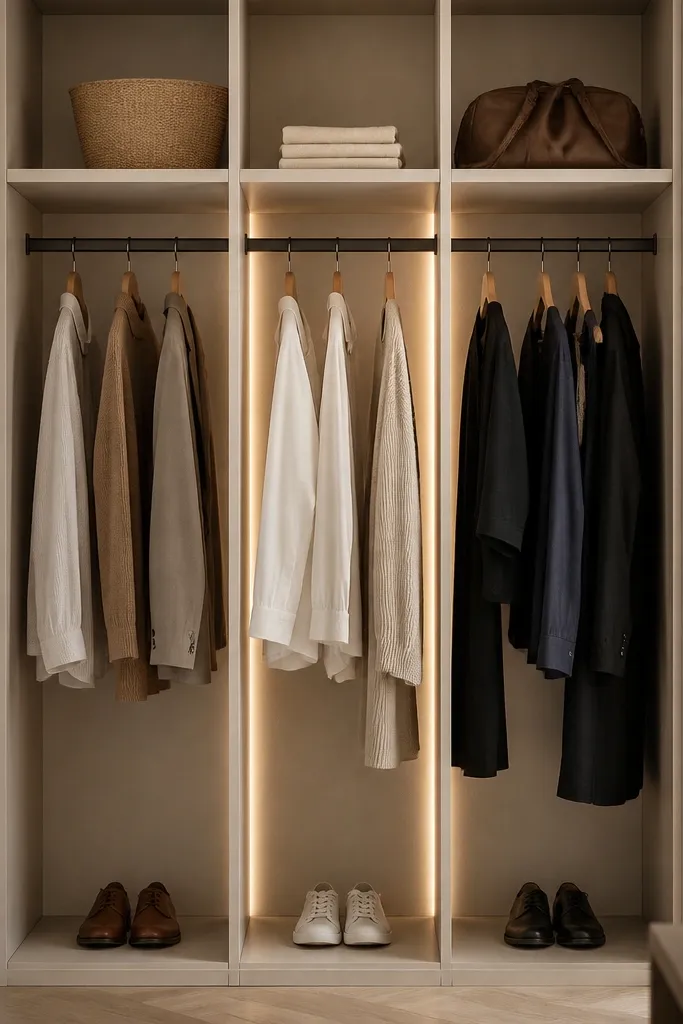
Start by installing thin divider panels between sections, leaving a small gap from the back wall so light can pass around the edge. Mount a warm LED strip behind the divider edge with a diffuser so you get a line glow instead of bright dots. Keep the main top shelf light dimmer than the divider glow so the boundary reads clearly. Finally, hang clothes by length — short sleeves on the front section and longer items on the back section — so the glow line doesn’t get blocked by fabric.
When you have a closet that feels chaotic, lighting can help you separate zones visually. Backlighting the edge of a divider panel creates a gentle boundary line, so your brain reads “work clothes” versus “weekend clothes” faster. I’ve done this in closets where the hanging rod is shared and everything hangs together at different lengths. The backlit edge keeps the zones from looking like one tangled mess, and it looks clean even in a small footprint.
AvoidAvoid using a clear plastic diffuser cover. It scatters light unevenly and can create a streaky look.
Good to knowPick 2700K if your closet has warm wood tones. Edge lighting amplifies undertones, and cool lighting can make wood look dull.
14. LED strip inside a closet shoe cubby
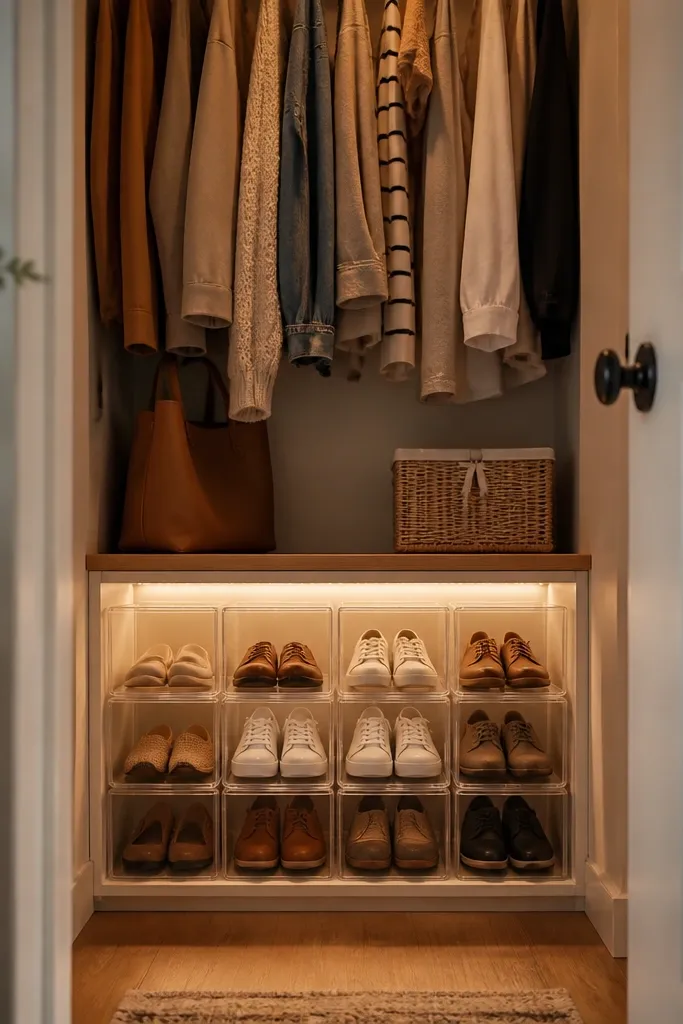
Shoes are where small closets go dark first because they sit low and the light has to travel upward. Lighting the shoe cubby from below or from the underside of the shelf makes the toe caps and laces readable without crouching. I like using clear or light bins because the LED then reflects through the bin walls and you see the pair instantly. This setup is great for people who own lots of black, white, or patent leather shoes since those finishes show dullness when lighting is poor.
Start by measuring the cubby width and install a slim LED strip under the cubby shelf edge, pointing down into the bins. Use a frosted diffuser so you don’t see bright strip segments through the clear bin plastic. If you have bins with fabric sides, choose bins in off-white or light gray so the light reflects. Finally, add one small “pair label card” on the front of each bin so you’re not pulling everything out to find the right sneaker.
Set the light slightly dim and rely on reflection for brightness. Too bright makes clear bins look hazy.
Skip placing the LED strip directly against the bin plastic. Heat and glare can make the plastic look cloudy over time.
15. Back wall light panel in light wood with LED edge
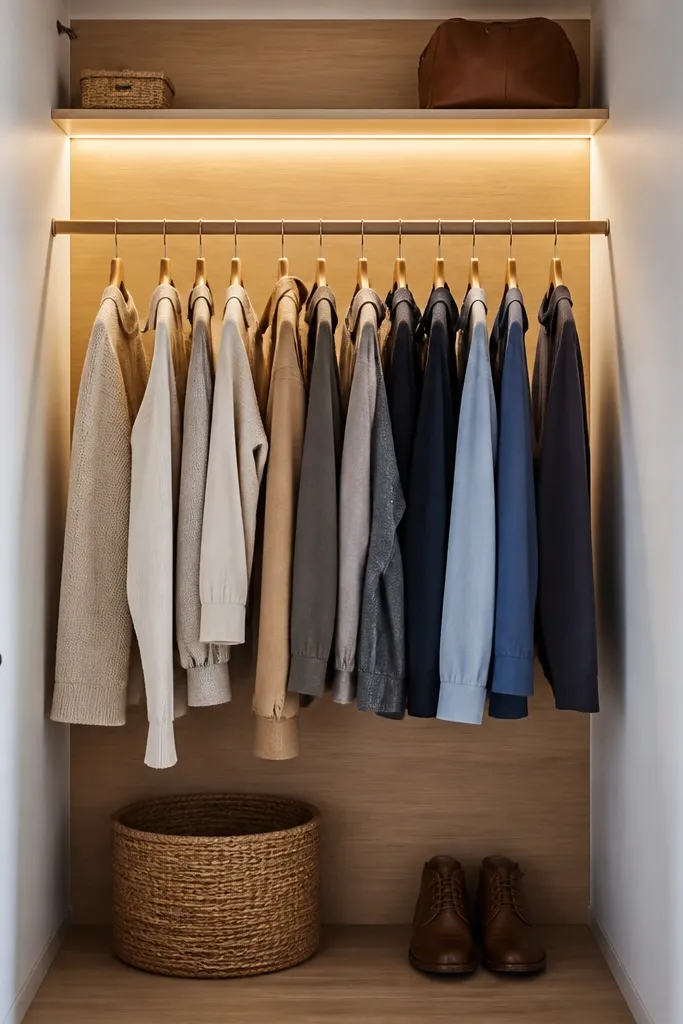
Start by removing the closet contents and cleaning the back wall. Cut a light wood panel or rigid board to fit the back wall and leave a 1/4 inch gap at edges so it doesn’t rub. Mount it with adhesive rated for walls or with thin screws if you can. Then install an LED strip along the top edge of the panel in a diffuser channel, and aim it slightly downward. Finally, keep the hanging rod close enough that clothes sit in the reflected light — if you push hangers too far forward, the back panel glow doesn’t help as much.
If you’re tired of your closet looking gray even with lights on, the back wall might be the culprit. A light wood panel or light-colored board reflects LED light more evenly, so your clothes look cleaner and you don’t get that flat, shadowy look. I’ve installed this in small closets where the original back panel was dark particle board, and the difference was bigger than I expected. It also makes warm lighting look richer without turning everything orange.
AvoidAvoid glossy laminate panels. They create glare streaks on hangers and make the closet look messy.
Good to knowUse a satin finish on the panel. Matte hides glare and still reflects enough light for small spaces.