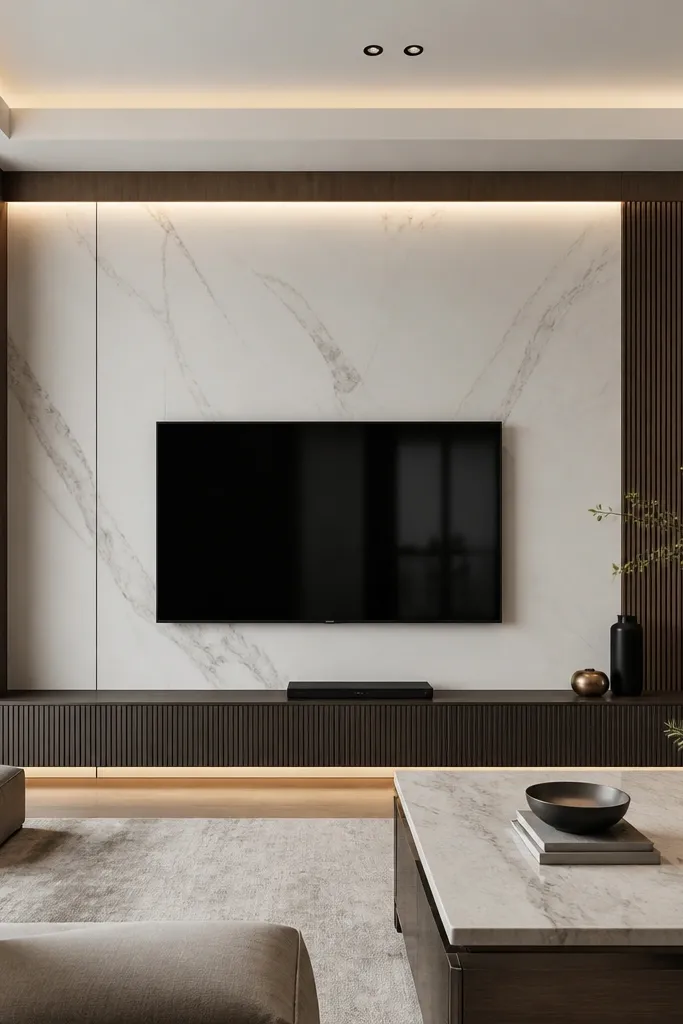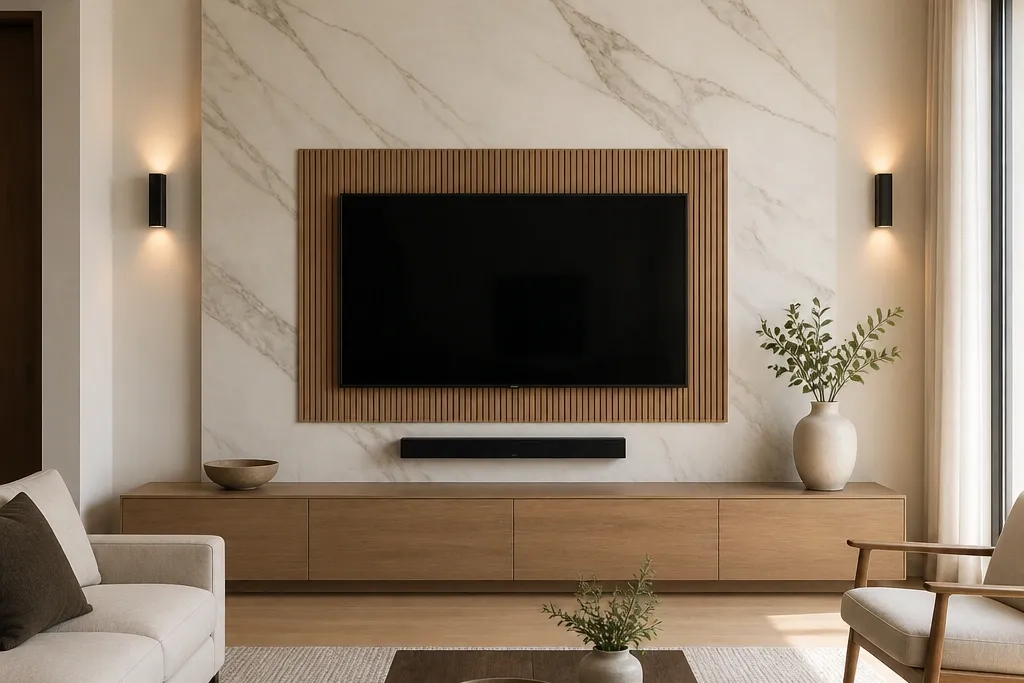

1. Honed Calacatta Panel Frame with 2-Inch Reveal
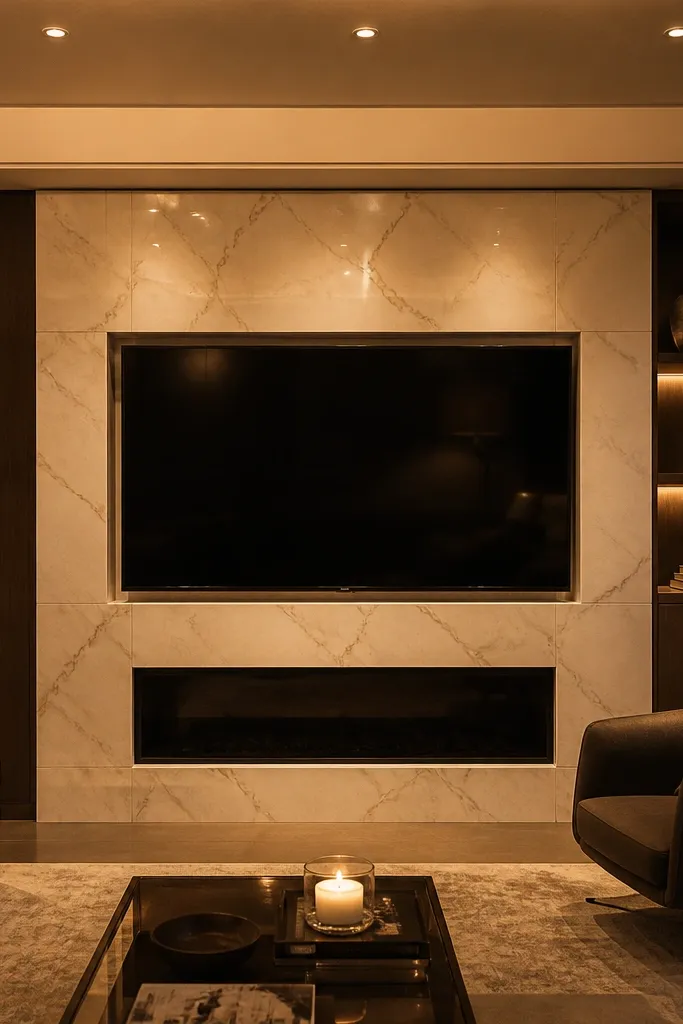
I like this layout when you want luxury tv wall design vs modern to land on “quiet expensive.” Honed Calacatta reads creamy under warm lighting because it kills glare and keeps the veining from looking plastic. The 2-inch reveal matters because it creates a shadow line that makes the TV feel built-in, even if your wall isn’t perfectly flat. This works best in rooms with light floors or warm neutrals, because the white marble plus oak keeps the palette from feeling cold. I’ve used it in living rooms with beige leather and it makes the furniture look richer without adding more color.
Start by choosing a TV mount that sits flush against the backer board, then plan a stone panel frame that is wider than the TV by about 5-7 inches on each side. Add a backer layer (1/2-inch cement board or rigid panel) so the surround stays flat, then set the marble panel with 1/8-inch grout lines or a tight butt joint if your installer does it cleanly. Build the frame depth to 2 inches by using a stacked trim system, then install a warm LED strip behind the TV opening so the marble edges glow, not the TV screen. Finally, mount the console 6 inches off the floor and keep the console height under the TV center by 4-6 inches for a balanced look.
Use 2700K LED lighting and dimmer control. If you can see the LED diffuser, the surround will look cheap fast.
Avoid polished marble with overhead glare — it turns the veining into reflections.
2. Polished Nero Marquina with Bronze Shadow Line
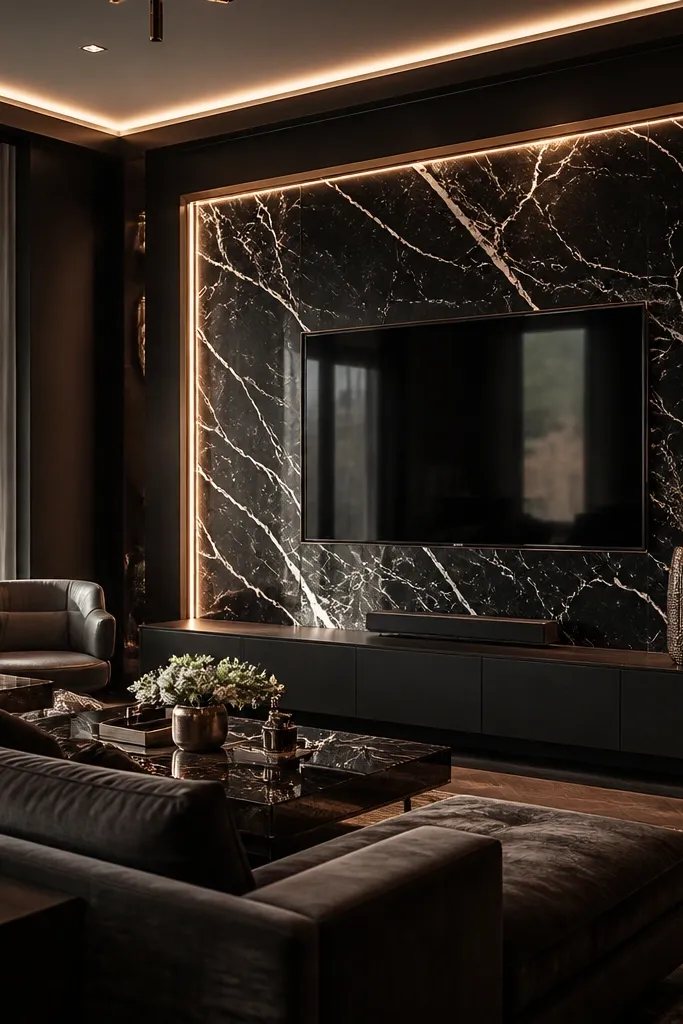
This is the luxury option when your room already has dark elements — black lamps, dark wood, or charcoal upholstery. Nero Marquina looks dramatic because the veining is high-contrast, but polished stone only looks high-end when the lighting is controlled. The bronze shadow line is the trick: it adds warmth so the black doesn’t look like a showroom void. I’ve done this in rooms with warm brass accents and it ties everything together without adding more clutter. It also flatters people with medium to deep skin tones in photos and evening light because the warm metal catches highlights.
Start by installing a matte backer wall first, then mount the marble panels so the veining direction flows vertically through the TV surround. Add a 1/2-inch bronze metal trim rail around the TV opening, leaving a consistent 3/4-inch shadow gap between the rail and marble. Keep the TV centered on a feature field about 12 inches wider than the screen. For the lower storage, use walnut shelves with a matte black base rail so the black marble doesn’t fight the wood. Wire the soundbar and hide cables in a channel behind the marble edge so you don’t see a cable run from the front.
Choose bronze tone based on your hardware — if your faucets are champagne gold, go lighter bronze; if your hardware is antique brass, use darker bronze.
Skip silver trims on black marble — it reads cold and mismatched.
3. Marble Look Slab Panels with Wood Slat Side Wings
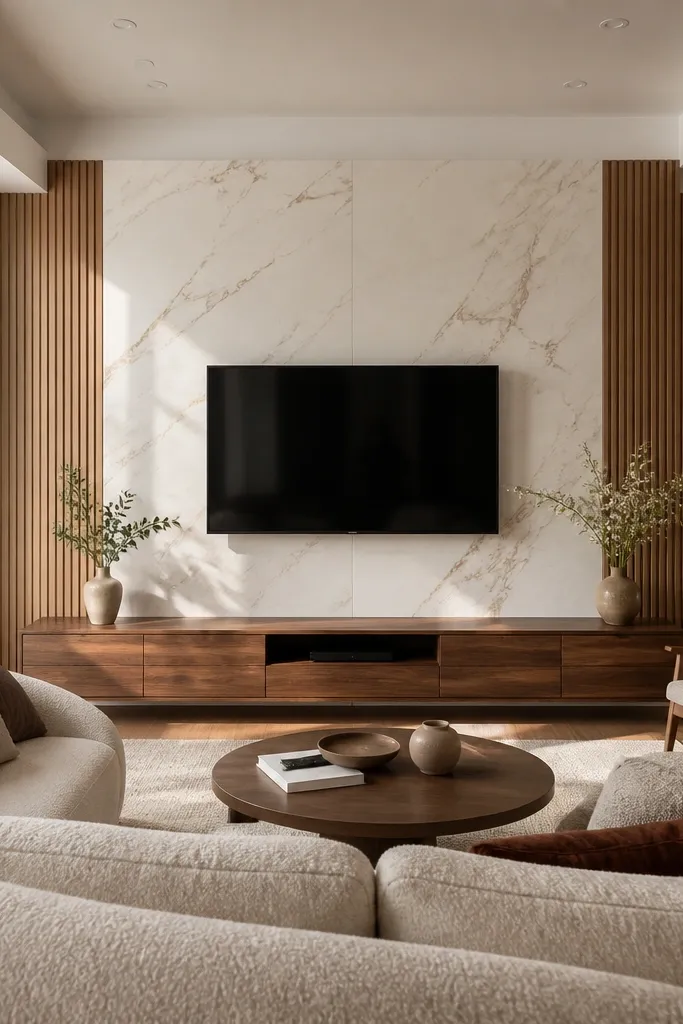
Start by measuring the TV width and planning a marble-look panel rectangle that’s 10-14 inches wider total. Install flat backer boards first, then attach the panels with matching seam alignment so the “vein direction” looks continuous. Build the wood slat wings using 1.5-inch slats with 1/4-inch gaps, spanning from just above the console height to near the TV top. Keep the slat wings 4-6 inches away from the marble rectangle so you get a shadow gap. Finish with a thin floating shelf above the TV and keep decor minimal: one tall vase or a single framed print centered.
This is a hybrid that actually works for luxury tv wall design vs modern because it mixes stone softness with modern texture. The marble-look panels give you the luxury surface without the cost or mess of full slab installation. The wood slat wings add depth and movement at the sides, which keeps the TV area from feeling like a sticker on the wall. I like this for open-plan living rooms where you need the TV wall to blend with dining or entry textures. It’s especially flattering when you have light walls and neutral furniture — the slats create warmth that doesn’t crowd the marble.
AvoidDon’t run the slats all the way behind the TV — you lose the clean frame effect.
Good to knowPick a marble-look pattern with large veining for a luxury read. Tiny busy veining makes it look like wallpaper.
4. Two-Tone Marble Columns Flanking a Cream Panel
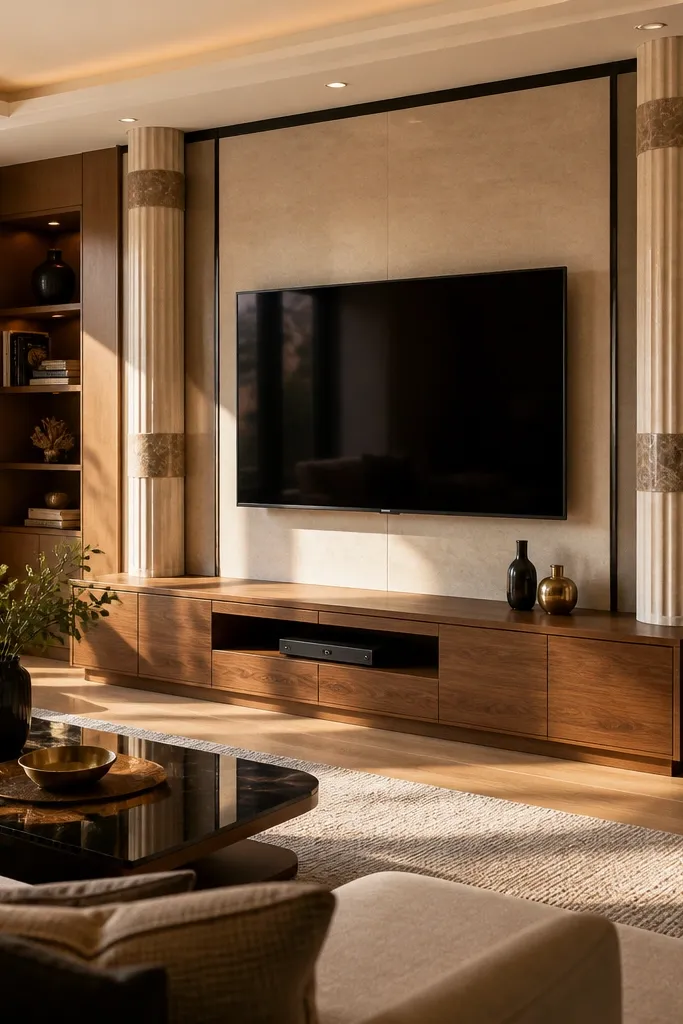
Start by choosing one cream marble-look panel for the center and one warmer beige stone for the columns, aiming for veining that reads at different scales. Plan the TV opening to sit inside the cream field, then place columns at least 6 inches wide each so they don’t look like thin trim. Use a consistent 1-inch border trim around the entire feature field to unify the materials. For the console, choose dark wood or espresso laminate and keep the console height around 18-20 inches so it doesn’t compete with the columns. Finish by adding a recessed outlet behind the TV area so you can keep the cable run hidden.
If your living room has warm undertones — like honey oak, warm beige walls, or camel-colored textiles — this design makes the marble look intentional instead of random. The two-tone columns create a “designed architecture” feel around the TV, which is what luxury walls do better than most modern-only styles. The cream panel stays calm for the screen area, and the columns add depth without pulling attention away from the TV. I’ve used this when people want luxury but don’t want a full black or full white wall. It flatters warm undertones beautifully and keeps the room from looking sterile.
AvoidAvoid mixing too many veining types. Two stones max looks designed; three starts looking chaotic.
Good to knowKeep the columns vertical and the center panel large. Cutting both into small sections kills the luxury effect.
5. Marble Backdrop with Blackened Steel Floating Shelves
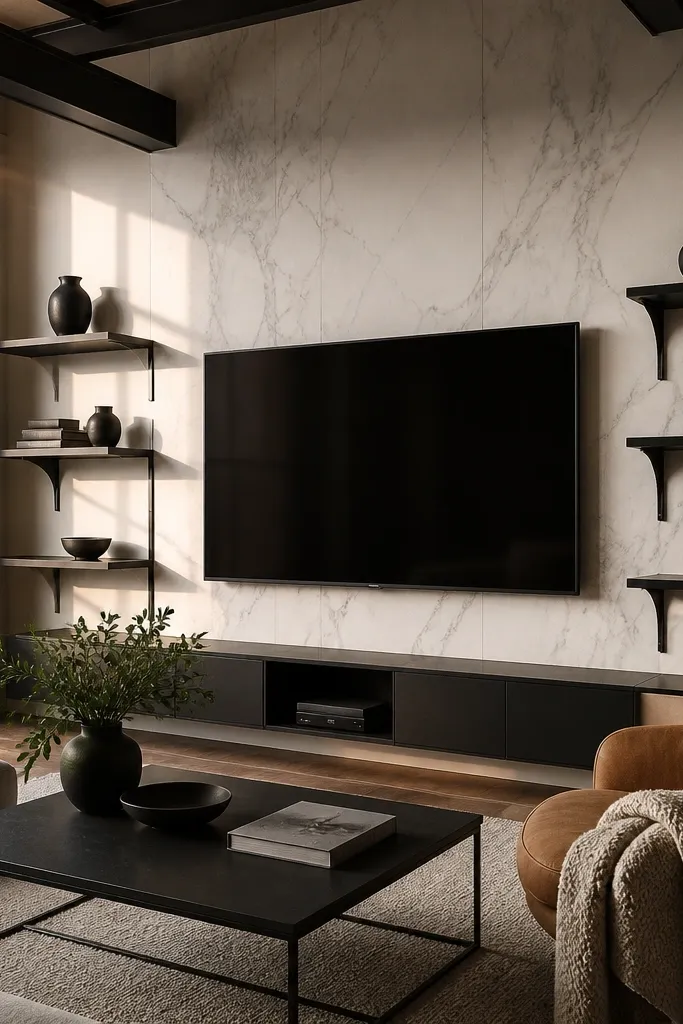
Begin with a marble backdrop rectangle that is wider than the TV by 12 inches total. Mount the TV so there is a 1.5-2 inch reveal around the screen opening. Install blackened steel brackets with a 24-inch shelf span for stability, then keep shelf depth at 8-9 inches so you don’t crowd the TV. Place one shelf above the TV centerline and one below, spaced about 10-12 inches apart. Style with one tall object per shelf and one small item — keep negative space so the marble reads clean.
This layout is for people who like modern lines but still want the luxury face. The blackened steel brackets give you a crisp industrial edge that modern interiors love, and the marble keeps it from feeling cold. I’ve installed versions of this in loft-style spaces where the ceiling beams already have dark metal — the shelves match without looking forced. The shelves also let you style tall objects without touching the marble directly, which protects the stone surface. It’s flattering in rooms with gray upholstery and cool lighting because the steel adds definition.
AvoidAvoid thin, wobbly shelves. If they bow even a little, the whole wall looks budget.
Good to knowUse shelf liners in matte black or dark felt so small decor doesn’t scratch the finish.
6. Full Height Marble Wall with Hidden Storage Base
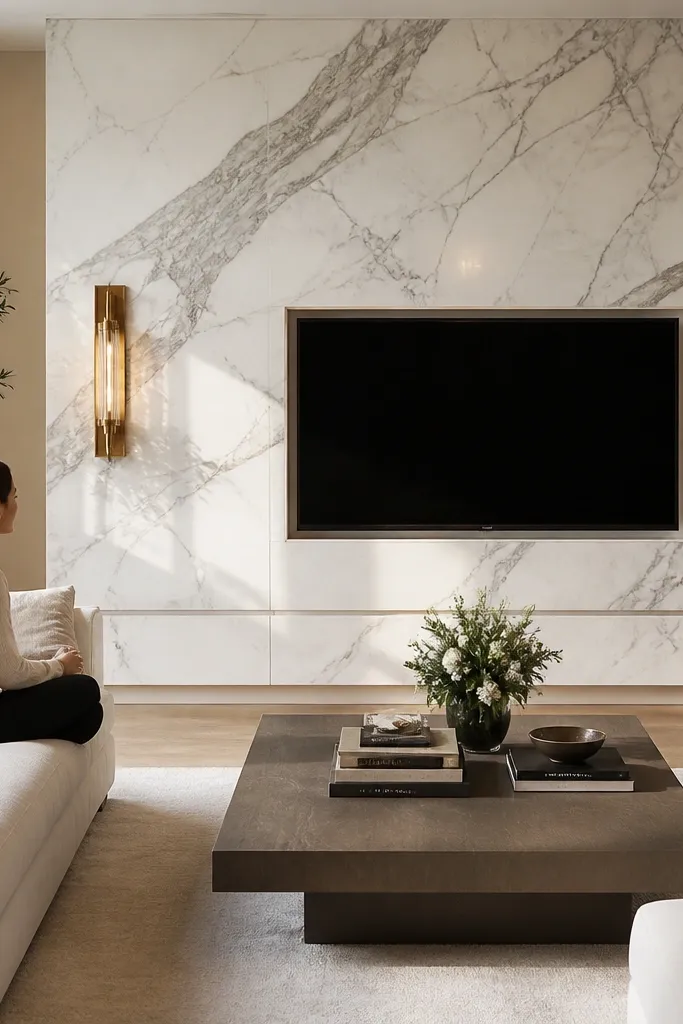
Start by planning a full height feature wall with a backer system first, not directly onto drywall if your installer warns against it. Set the marble so the veining lines up across the TV opening, with a surround border that is at least 3 inches wide. Design the storage base as flush doors with push-to-open hardware; keep the doors 24-30 inches tall for proportion. Leave a service access panel behind the TV area if you need to reach cables or the mount. Finish by adding a small kick plate or shadow gap at the bottom so the marble doesn’t look like it’s glued straight to the floor.
This is the “big commitment” idea that looks expensive because it eliminates visual seams. When the marble wraps nearly full height, the TV area feels like an architectural monolith instead of a furniture arrangement. Hidden storage makes the luxury part last because you don’t see clutter or mismatched media boxes. I like this in homes where the living room is a showpiece and you want it to look clean even when you’re busy. It also works well for people who hate visible cords — the base can hide a routing channel.
AvoidDon’t use glossy tile-style marble sheets for full height. The repeated pattern reads cheap from across the room.
Good to knowChoose a marble finish that matches your lighting. If you have bright windows, go honed to avoid glare across the TV screen.
7. Marble Mantel-Like TV Wall with Crown Trim
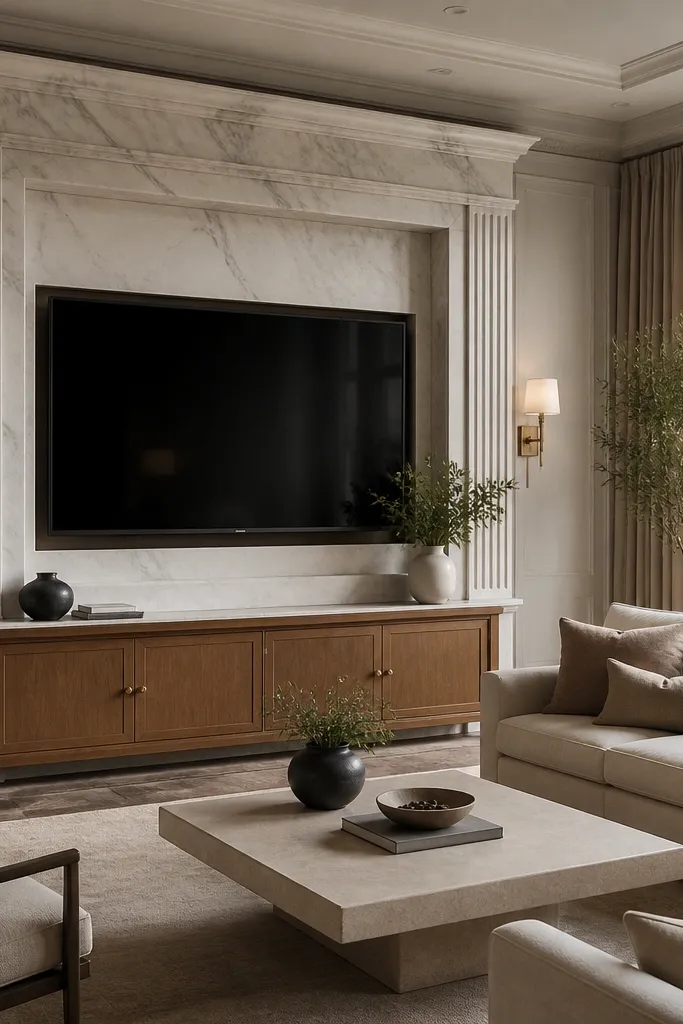
Start by building a mantel ledge that overhangs the TV feature field by 2-3 inches on each side. Keep the surround border thickness around 2 inches so the “mantel” reads intentional, not thin. Install the crown trim only on the sides of the top ledge and stop it before the console area, so the lower part stays clean. Use a semi-polished marble finish if you want some sparkle but not mirror glare. Mount the TV so the screen sits centered under the ledge, and keep the console height about 16-18 inches so the wall’s top weight doesn’t feel heavy.
When someone wants luxury that feels classic but still modern in layout, a mantel-style TV wall nails it. The thick top ledge makes the TV look framed like artwork, which is why it photographs well. Marble is doing the heavy lifting here, but the crown trim is what keeps it from looking like a flat TV backdrop. I’ve done this in rooms with traditional furniture — wingback chairs, dark wood side tables — and the wall ties the style together. It’s also forgiving if your room has uneven lighting because the ledge catches soft highlights.
AvoidAvoid crown trim that’s too tall. Overbuilt trim makes the TV wall feel like a costume.
Good to knowMatch the trim profile to your ceiling — if your ceiling has a simple flat molding, keep the crown subtle.
8. Herringbone Marble Accent Border Around a Modern TV Niche
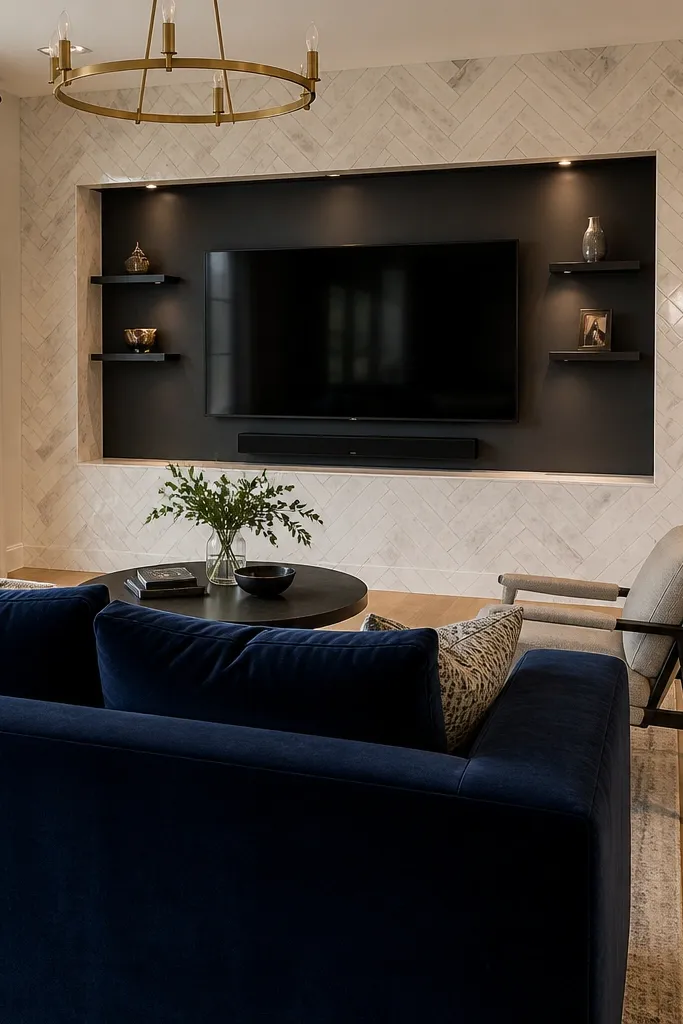
Start by building a recessed niche with painted back panel, sized so the TV has at least a 3-inch gap on all sides. Then frame the opening with a herringbone marble border using small tile pieces, keeping the pattern consistent across corners. Keep the border width 3-4 inches so it shows from the sofa, not just at arm’s length. Install a warm LED strip inside the niche, placed 2 inches behind the TV frame so it lights the marble border. Finish with an oak floating console centered under the niche and keep decor low — one tray or a single sculpture.
This is modern in structure but luxury in the edges, and it works because the border is the focal point. A herringbone marble accent gives a handmade feel without needing a full slab wall, and it reads high-end even when the rest is simple. I like it when the room already has strong color — like a navy sofa — because the border adds interest without turning the whole wall white. It flatters people who want a clean minimalist look but still want the “wow” moment up close. The herringbone also makes the TV look more centered and intentional.
AvoidAvoid a border that’s too thin. Under 2 inches reads like a sticker.
Good to knowUse a grout color close to the veining color, not pure white. The wrong grout makes the pattern look gray and cheap.
9. Marble Slab Surround with Two Side Gallery Panels
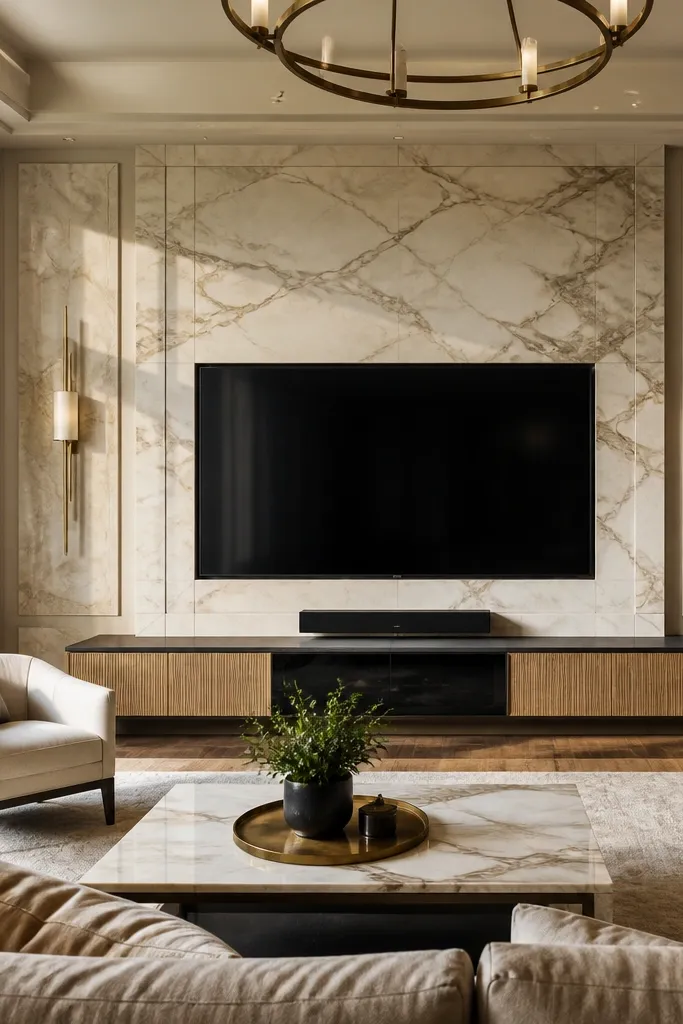
This one makes the TV wall feel like a gallery because it adds symmetry and side “breathing space.” Luxury tv wall design vs modern often fails when the marble surround stops abruptly at the edges of the TV, so the wall looks like a cutout. By extending with two side panels, you create a larger composition that supports art and makes the TV feel part of the room. I use this when I’m styling a living room with strong wall art or when the TV is the only large object on the wall. It looks great in rooms with neutral walls and framed prints in black or dark wood frames.
Start by choosing a marble slab surround that is wider than the TV by at least 16 inches total, so you can place side panels without crowding. Mount the TV with a reveal border that stays consistent across the slab edges. Add two side panels each about 10-12 inches wide, aligned vertically with the TV centerline. Keep the side panels slightly different — warmer tone or different veining direction — so the wall has depth without looking mismatched. Hang art only after the marble is installed, using a height where the art center lines up with the TV center.
Use the same frame thickness for art as the marble surround border. Matching thickness makes the whole wall feel designed.
Avoid random side panel widths. If they’re not equal, symmetry breaks and it reads DIY.
10. Stone-On-Stone: Marble TV Wall with Stone Base Cabinet
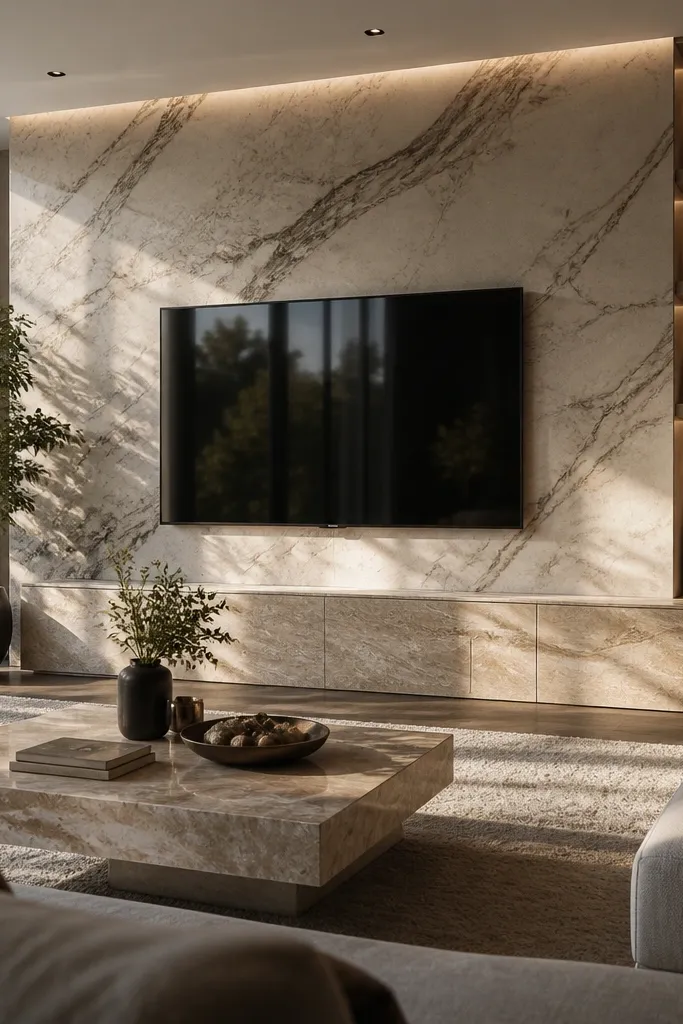
Start by selecting a marble finish for the surround and a coordinating stone for the cabinet doors, keeping veining direction consistent across the cabinet face. Plan the cabinet height around 20-22 inches and keep the TV centered so the bottom cabinet top sits 4-6 inches below the TV centerline. Install the cabinet first using a level rail so the marble doors align perfectly. Then mount the TV with a surround frame that covers the gap between cabinet and wall. Finish by adding a slim countertop or shelf line on top of the cabinet, 1-2 inches thick, in a dark neutral to reduce visual glare.
Stone-on-stone feels luxurious because it removes the “furniture floating in front of a wall” look. The base cabinet in stone finish anchors the whole layout, which is what luxury walls do better than modern-only units. I like this when you have a large TV and a lot of wall space — the bottom needs weight too. The effect is clean and grounded, especially if your floor is also stone or a similar warm neutral. This design flatters rooms with minimal decor because the cabinet adds pattern without extra objects.
AvoidAvoid mixing glossy cabinet fronts with honed surround. The contrast reads mismatched.
Good to knowMatch the cabinet door finish to the surround finish — honed to honed, not honed to polished.
11. Marble + Mirrored Back Panel for Night-Time Glow
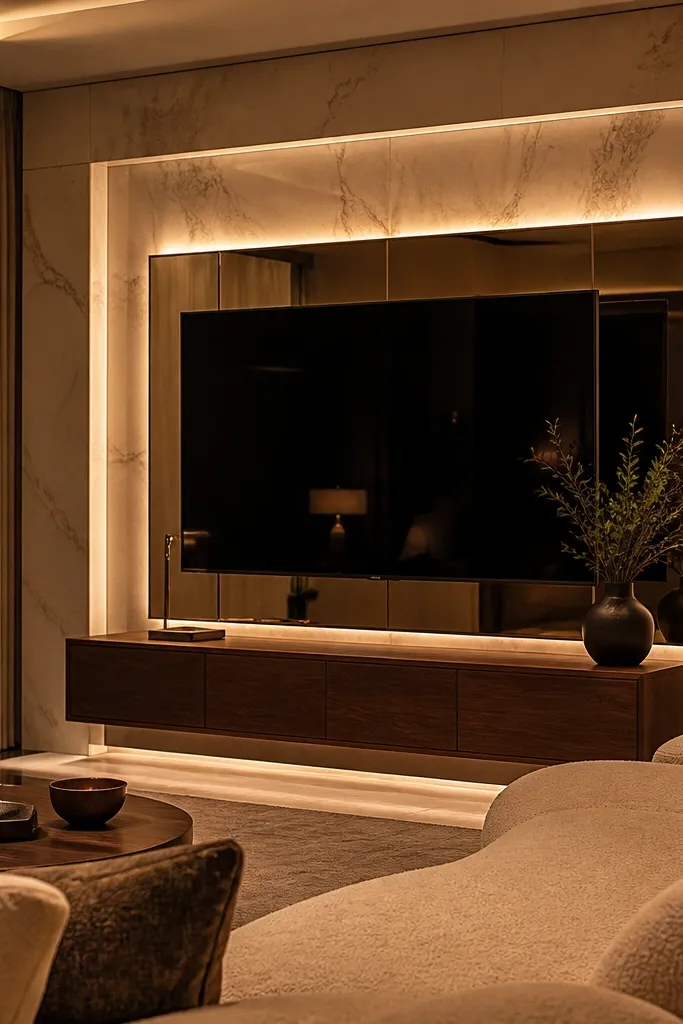
This is for people who want luxury tv wall design vs modern with a clear night-time effect. The mirrored back panel reflects light and makes the stone look deeper, especially when you use warm LEDs behind the TV. In daytime it looks clean because the mirror frame is thin and the marble surround stays the main element. I’ve done this in rooms where evening lighting is soft and the living room becomes the main hangout spot. It flatters small rooms too because reflections add depth without extra furniture.
Start by choosing a marble surround with a calm veining pattern so the mirror reflection doesn’t multiply chaos. Install a mirrored panel behind the TV opening with a thin frame, leaving a 1-2 inch gap around the TV so it still looks like an intentional niche. Add an LED strip behind the marble edge, not directly behind the TV screen, so you glow the surround. Keep the console low and light — light oak or off-white — so the mirror doesn’t create a heavy look. Route all cables through the wall and leave a service loop behind the TV so you’re not fighting wires if you change equipment.
Use blackout curtains if your mirror faces strong sun. High glare makes the whole wall feel harsh.
Avoid a wide mirror panel. Too big reads like a dressing room.
12. Marble TV Wall with Recessed Niches for Speakers
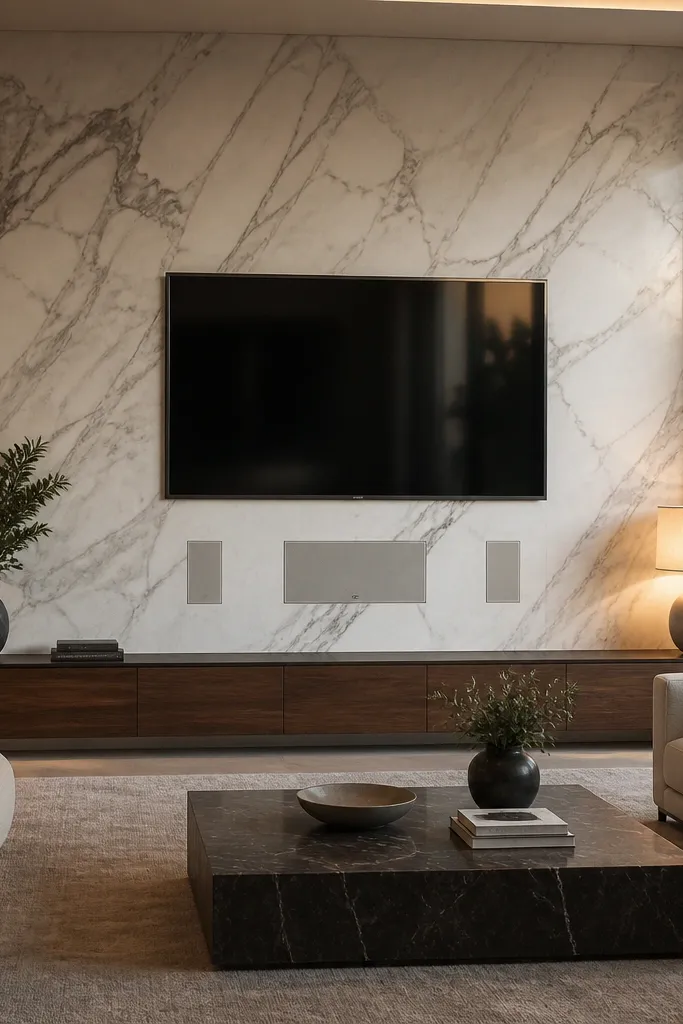
This layout looks luxury because it solves a real problem: speakers and cables make many TV walls look messy. When you recess the speaker area into the marble frame, everything becomes part of the architecture. The marble stays clean, and the wall reads intentional from across the room. I use this when clients have soundbars plus side speakers or when they want a full home theater look without loud decor. It also flatters people who have a lot of audio gear because it hides the gear behind a consistent stone surface.
Start by planning the TV opening and surround width, then measure your speakers and add a 1/2-inch clearance on each side for ventilation. Build the marble frame so the speaker niches sit symmetrically and match the height of the TV centerline. Install speaker backer plates behind the marble niche openings so you can mount the speakers securely. Use fabric speaker grille covers in a neutral tone that matches the marble border. Finish with a floating console 18 inches high and keep the top surface empty — speakers and TV already carry the visual weight.
Test sound before final stone placement if you can. Small changes in niche depth can change bass response.
Avoid installing speakers after the stone surround if you can’t access the back. You’ll crack edges trying to work around it.
13. Marble Veneer Accent with Thin Black Line Modern Frame
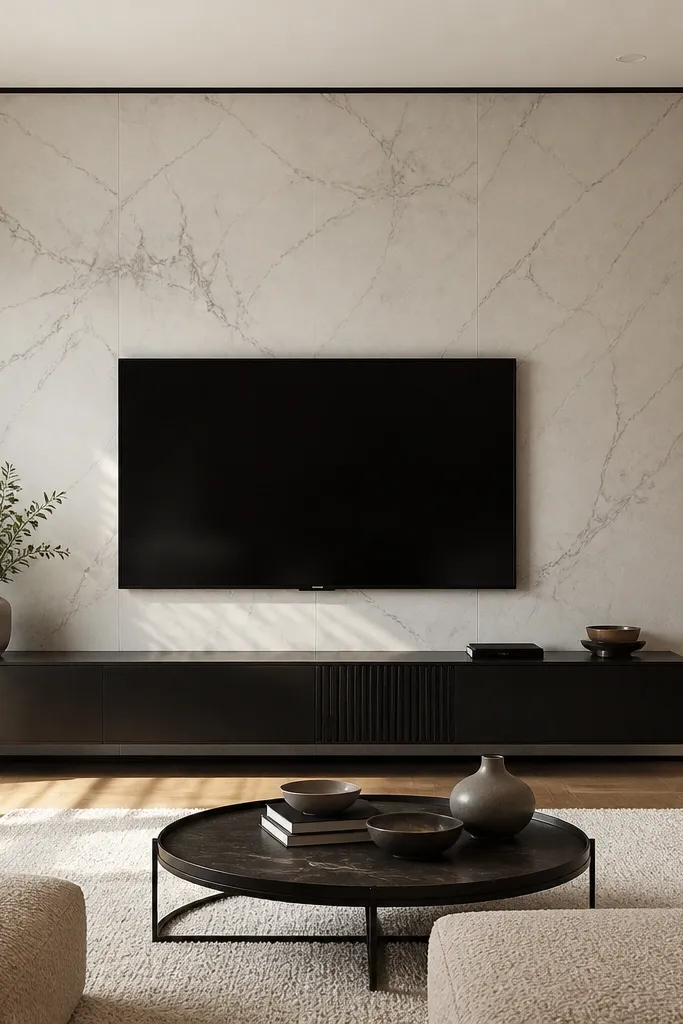
Start by painting the wall in a warm gray or greige that matches your trim — aim for a smooth matte finish. Install marble veneer as a single panel sized slightly larger than the TV opening, then build a thin black metal frame around it. Keep the frame width around 1 inch so it reads sleek, not chunky. Mount the TV so the screen sits centered within the frame with a 2-inch reveal line. Choose a slim media unit in walnut or black, 12-14 inches deep, and keep devices hidden behind doors.
This is the modern answer to luxury tv wall design vs modern when you want stone but don’t want a thick slab effect. Marble veneer looks convincing when it’s installed as a flat panel with tight seams and a real frame around it. The thin black line gives the modern structure, and it also hides minor wall imperfections that show up when you do full slab stone. I like this in condos and rentals because it’s cleaner and less heavy. It also flatters people with small rooms because the wall stays visually light.
AvoidAvoid veneer panels with visible backing seams. If the joins show, it reads like a craft project.
Good to knowUse a matte black frame, not glossy. Gloss catches light and makes the line look cheap.
14. Marble Waterfall Edge on a Built-In TV Credenza
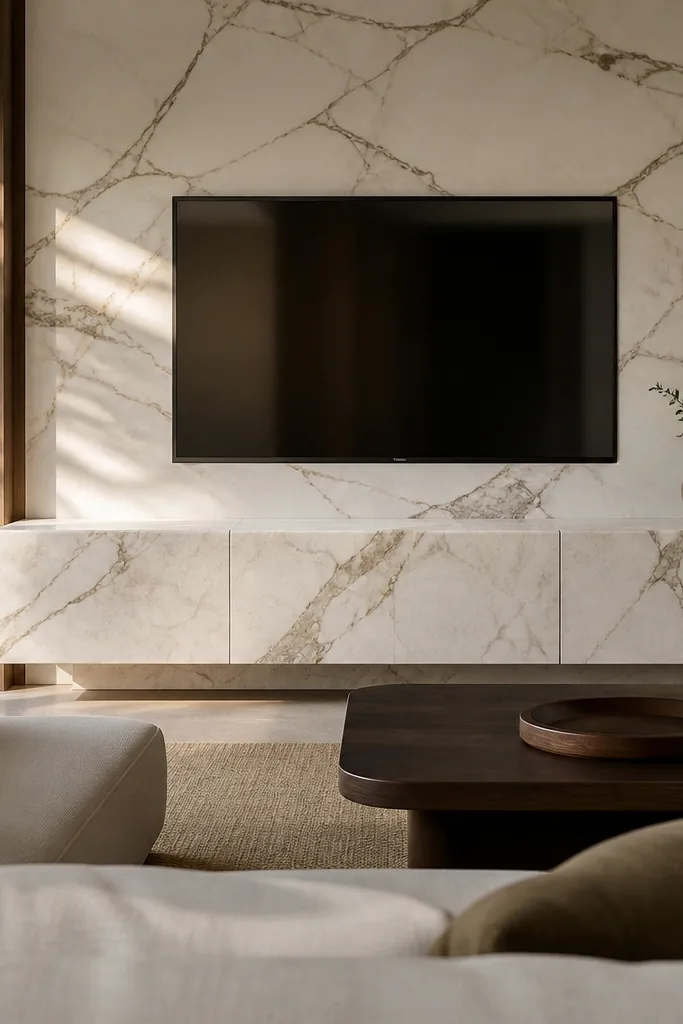
Start by building a built-in credenza with a flat front, then cap the top with a marble slab that extends down the sides by at least 6-8 inches. Install the TV above so the bottom of the TV surround aligns visually with the top edge of the credenza, leaving a 2-3 inch gap. Use matching marble for the TV surround panel so the lines connect. Keep the wall behind the TV painted matte off-white to avoid competing with the marble. Add a recessed toe-kick or shadow gap at the base so the credenza looks furniture-grade, not like it’s sitting on the floor.
Waterfall edges look expensive because your eye travels along one continuous surface. This design makes the luxury feel come from the build, not from extra decor. The marble waterfall on the credenza adds weight at the bottom so the TV doesn’t float above a plain cabinet. I’ve used this in rooms where the TV is big and the client wants a “custom furniture” look. It also flatters homes with light walls and neutral rugs because the marble reads crisp.
AvoidAvoid waterfall sides that are too narrow. Under 6 inches usually looks like a trim strip.
Good to knowPlan your cable placement before the waterfall stone is set. You need a clear route to outlets behind the TV area.
15. Arched Top Marble Frame Over a Rectangular TV
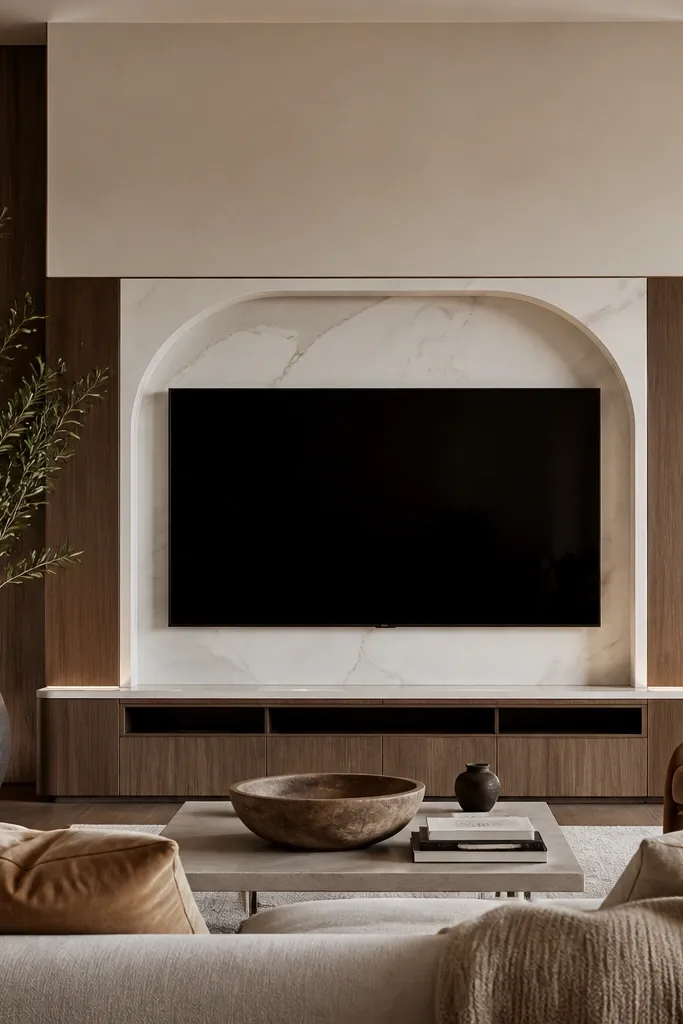
An arched top is a luxury move because it changes the geometry of the wall without making the TV area feel cluttered. Luxury tv wall design vs modern often sticks to straight rectangles, so adding one curve gives you a designer focal point. The trick is keeping the TV opening rectangular so it still looks modern and practical. I’ve done this in rooms with round mirrors or curved lighting fixtures and it ties the shapes together. It flatters people who want a softer look — it makes the wall feel less boxy and more inviting.
Start by building a marble frame with a rectangle TV opening and an arched crown above it. Keep the arch height around 6-10 inches above the TV top so it’s noticeable but not theatrical. Use honed marble for the frame if you have bright daylight; polished works only if your lighting is warm and indirect. Mount the TV and ensure the surrounding reveal is consistent — aim for 1.5-2 inches. Pair with a warm oak console and keep the console width slightly wider than the TV, about 2-4 inches on each side.
If you’re using a soundbar, keep the arch centered over the TV, not the soundbar. It keeps the visual balance clean.
Avoid tiny arches. If the curve is too small, it reads like a mistake.
16. Marble TV Wall with Vertical Fluted Panel Inserts
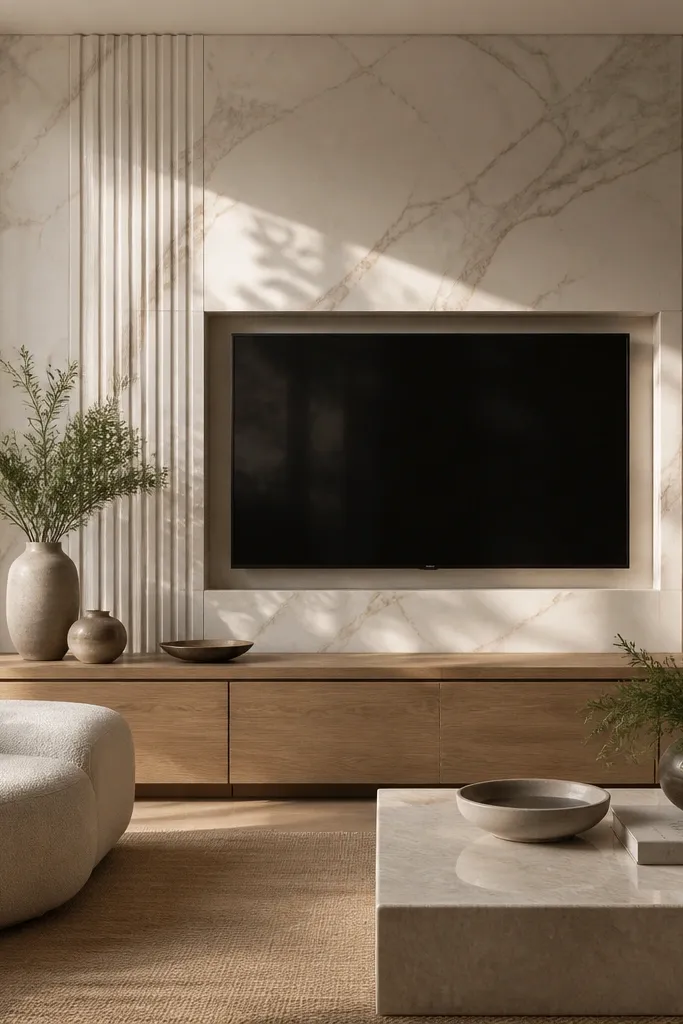
Start by choosing a calm marble for the main TV surround, then plan fluted inserts on both sides of the TV opening. Use flutes that are about 3/4-inch wide with 1/4-inch grooves, and keep the inserts vertical from just above the console up to near the TV top. Build a consistent border around the TV opening so the fluted pieces look like part of the architecture. Mount the TV with a 2-inch reveal and add an LED strip behind the border for soft glow. Keep the console simple and narrow — 14-16 inches deep — and style with one low plant or a pair of matching candle holders.
Fluted inserts make the luxury look feel dimensional, even when the marble is light and quiet. This is the style I pick when the room is modern but needs warmth and shadow depth. The flutes create a play of light that changes as you move, so the wall never looks flat. It’s especially good for living rooms with large windows because the light will catch the ridges. I’ve installed this with cream fluting next to white marble and it reads expensive without turning the wall into a high-contrast statement.
AvoidAvoid flutes that are too shallow. If the grooves are tiny, the wall reads decorative but not luxury.
Good to knowUse warm lighting and avoid cool blue bulbs. Fluted shadows look gray under cool light.
17. Marble Slab Chevron Backdrop Behind the TV
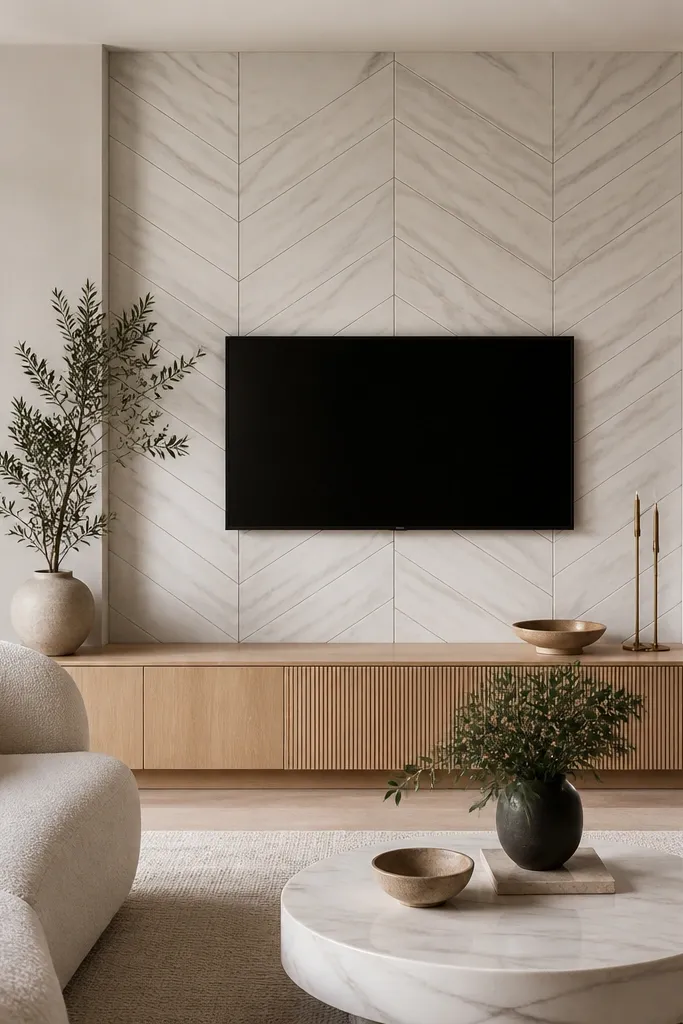
Start by deciding the TV surround first, then build the chevron field behind it at full width so the pattern doesn’t get cut off awkwardly. Use stone pieces or marble-look panels that create a true V pattern centered on the TV opening. Keep the chevron symmetry — the centerline should hit the TV center. Frame the TV with a calm marble surround that is honed or satin to avoid glare from the patterned background. Install a dark console below and keep decor minimal so the chevron stays the hero.
Chevron behind the TV is a luxury trick because it adds motion without adding clutter. It looks high-end when the chevron has clean alignment and consistent spacing, not random cut pieces. This style works best when your room is neutral and you want the TV wall to be the main design moment. I’ve done it in rooms with beige walls and black furniture, and the chevron makes the marble feel custom. It also flatters people who like bold design but don’t want color — the pattern does the work.
AvoidAvoid chevron made from mixed veining directions. The pattern will look like patchwork.
Good to knowStep back and check the pattern alignment from the sofa spot. If the chevron looks off by even a few degrees, it will bother you forever.
18. Matte Marble Wall with LED-Backlit Glass Shelf Line
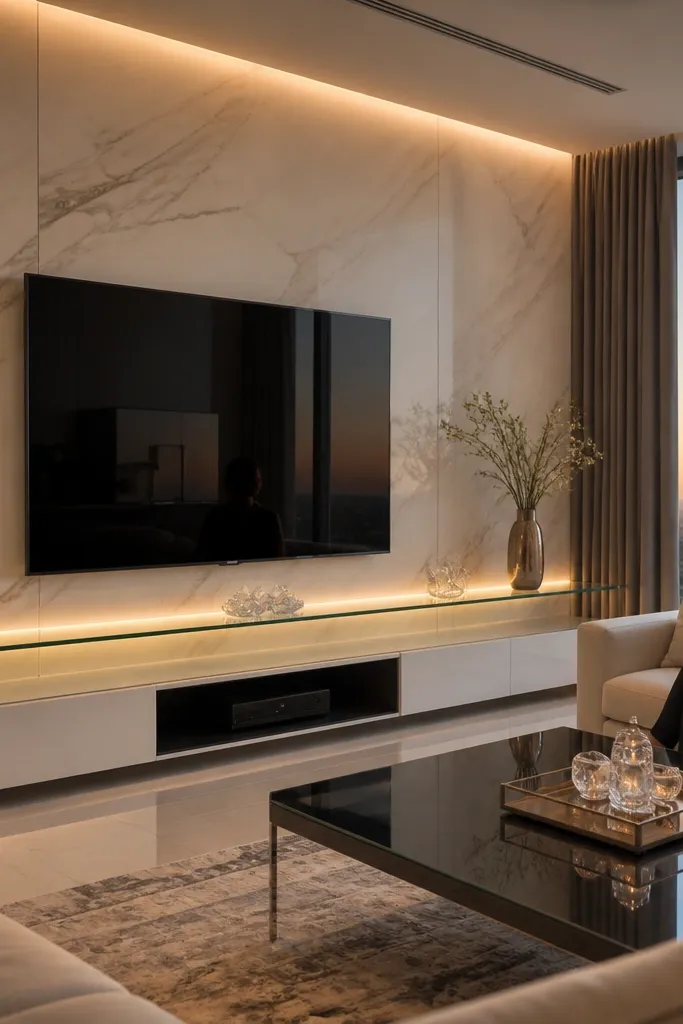
This is modern luxury done with light, not extra material. A matte marble background keeps the stone calm, and the LED-lit glass shelf line adds a sleek glow that modern interiors crave. I like it in rooms with white lacquer furniture because the glass line makes everything feel more custom. It also works for people who keep a lot of small decor — glass shelves can hold it without looking heavy. The result is a TV wall that feels curated without being crowded.
Start by installing matte marble panels as a large rectangle feature field, then frame the TV opening with a simple border that’s about 2 inches wide. Place a glass shelf line across the wall at about the same height as the TV bottom third, so it doesn’t cover the screen. Use a frosted or clear glass shelf with a slim metal bracket and LED strip behind it, aimed upward at the marble so you get glow, not a bright bar. Add a white lacquer console below with thin legs and keep the console top clear or with one low tray. Keep all cables hidden in a channel that runs behind the shelf line.
Use a diffuser on the LED strip. Visible LED dots scream “builder grade.”
Avoid placing the LED too close to the TV so it reflects on the screen.
19. Marble Corner TV Wall with Rounded Edge Panels
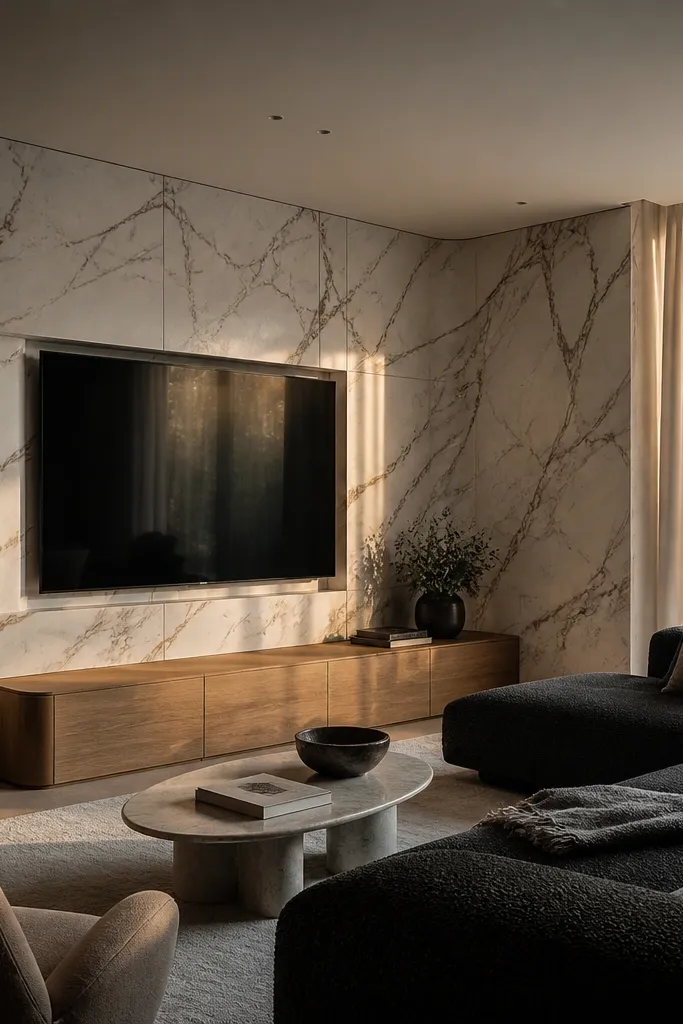
Start by mapping the TV centerline based on the sofa viewpoint, not just the corner geometry. Choose marble pieces that can wrap around the corner with a rounded bullnose or rounded edge trim — keep the radius around 1-2 inches for a soft look. Build the surround so the front face is a full rectangle, then extend the side faces about 18-24 inches along each wall. Use a consistent reveal line around the TV opening so it reads intentional from both angles. Place a low console on the front wall only and keep the side wall clear so the rounded marble wrap stays the focal point.
Corner TV walls get tricky fast, and this design fixes that by treating the marble like a continuous object. Rounded edges make the wall feel custom and reduce the harshness that corners often create in modern spaces. If your room has a sectional facing the corner, a corner-friendly marble wrap makes the TV feel like it belongs to the architecture instead of sitting awkwardly on one wall. I’ve done this in small living rooms where the corner is the only good viewing angle, and the rounded marble calms the space. It also flatters the room’s flow because it keeps sight lines smoother.
AvoidAvoid sharp 90-degree corners in marble around a TV. They chip and they look harsh.
Good to knowUse a matte marble finish here. Corner reflections are harder to control than straight walls.
20. Marble TV Wall with Dark Walnut Slab Counter-Ledge
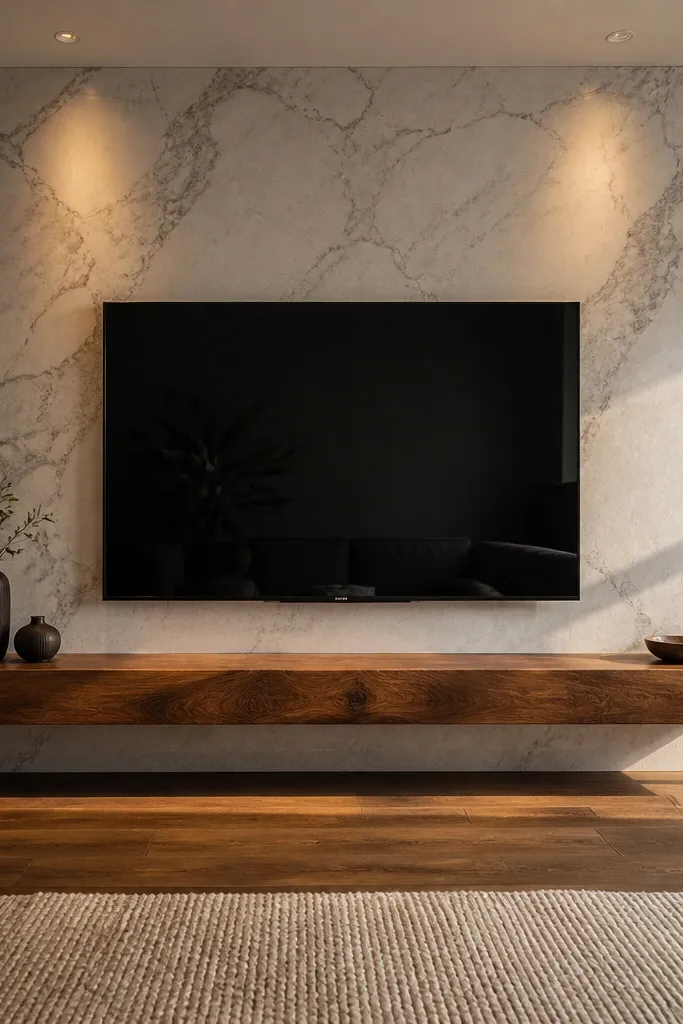
This is luxury because it adds thickness and weight in a way marble alone sometimes doesn’t. The dark walnut ledge creates a visual “shelf” line that anchors the TV and prevents the marble from looking like a backdrop. I like it when your room has warm wood tones but your walls are plain. The ledge also gives you a place to set remote controls, candles, or framed photos without cluttering the console. It flatters warm palettes and makes the marble look more grounded.
Start by building a marble feature field around the TV, with a surround border about 2 inches wide. Install a dark walnut slab ledge that runs along the bottom of the feature field, keeping the ledge thickness around 1.75-2.25 inches for that countertop feel. Mount the TV so the screen sits centered above the ledge line, leaving a 4-6 inch gap between the bottom of the TV surround and the ledge. Use a simple console below in a matching walnut tone or a matte black base if you want contrast. Finish by sealing the walnut with a matte hardwax so it doesn’t glare under lights.
Keep the ledge decor to three items max. The thick ledge already does the styling.
Avoid overly thin ledges. If it’s under 1.5 inches, it looks like trim, not a luxury surface.