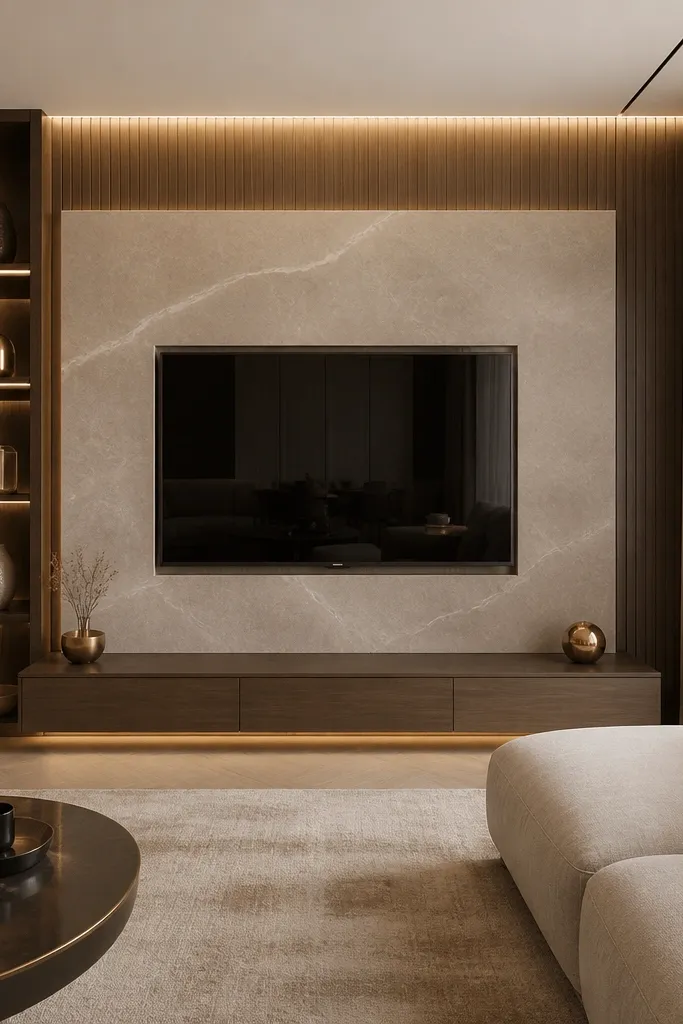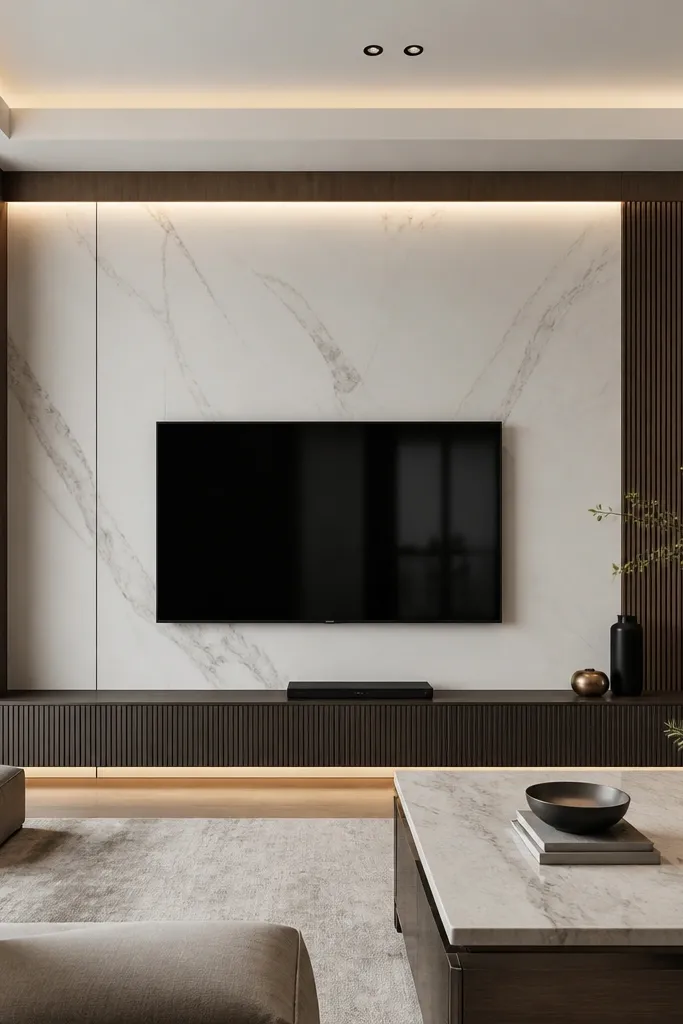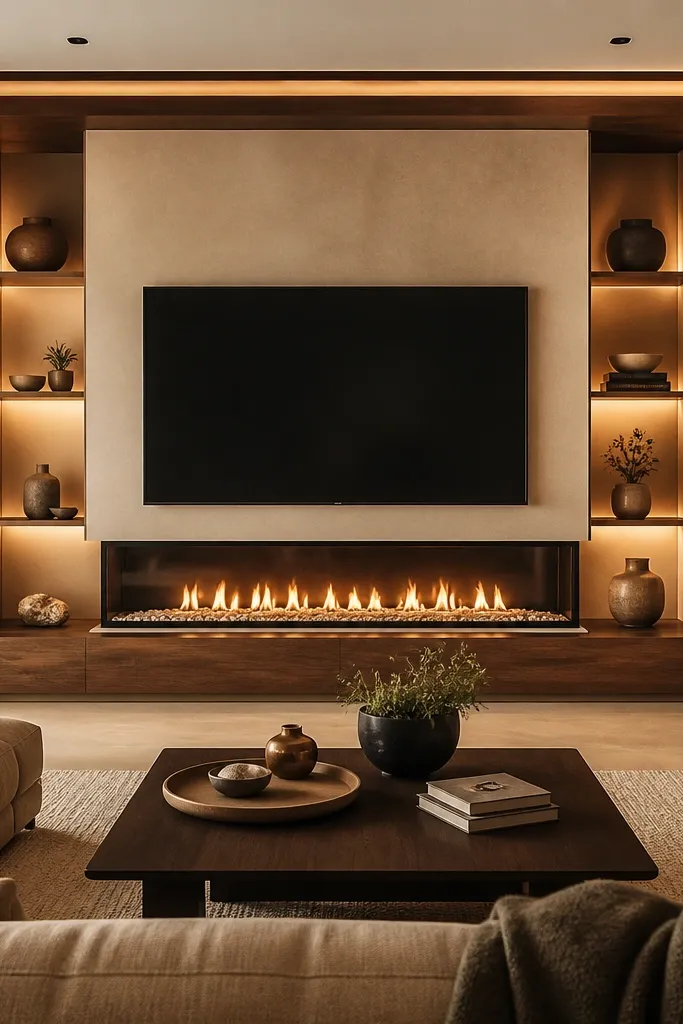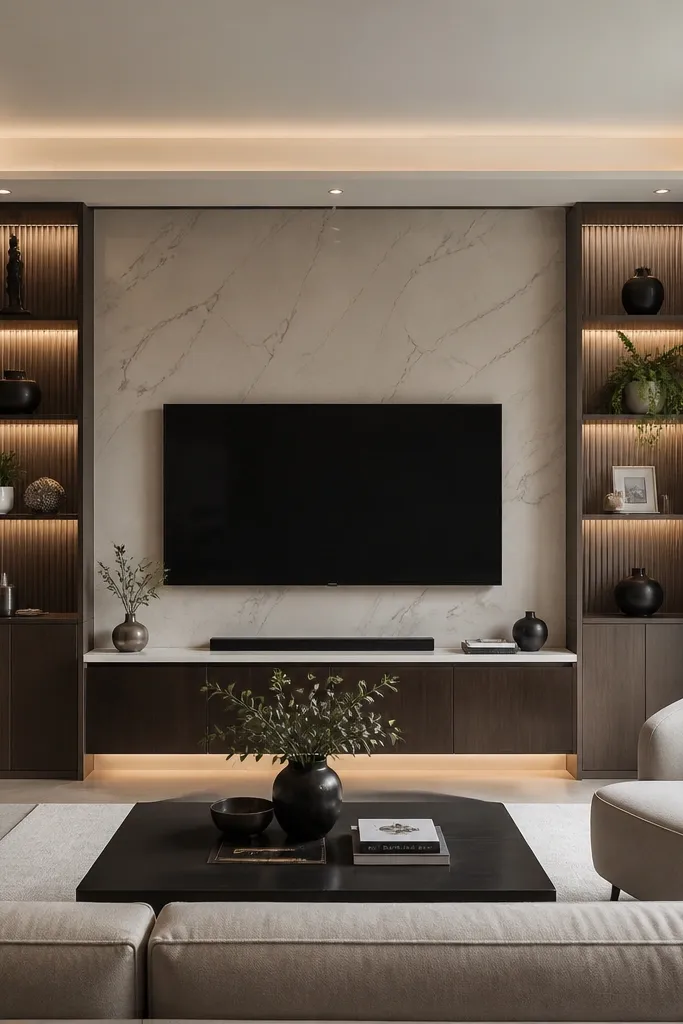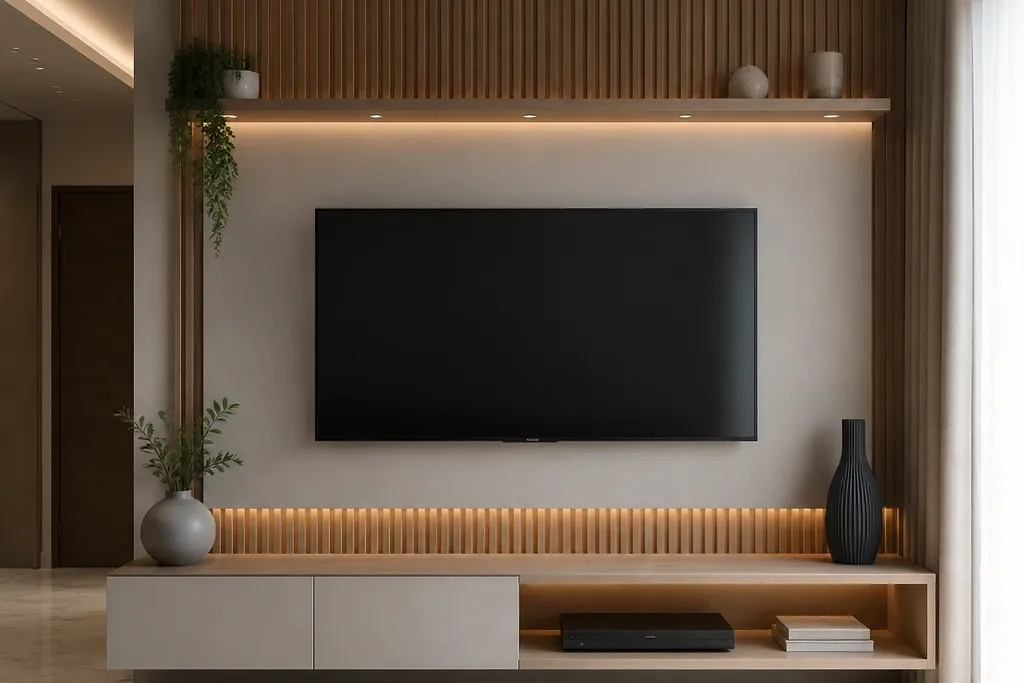
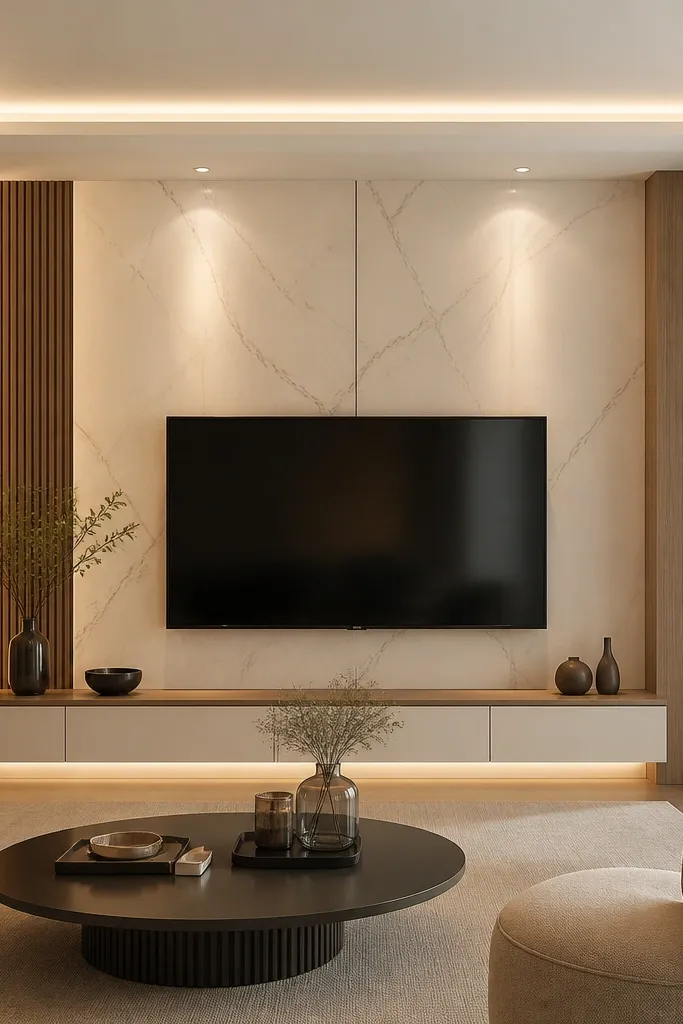
1. Framed TV Wall With 1x3 Trim and Warm Oak Veneer
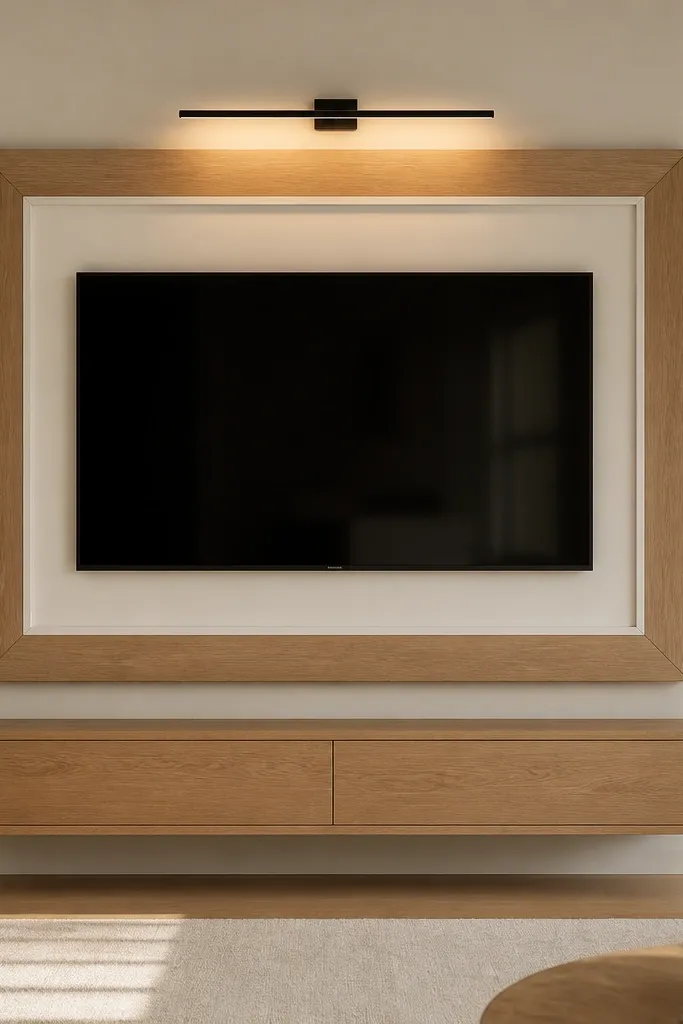
This layout makes the TV look like a modern framed print, not a flat rectangle stuck to drywall. The key is proportion: use 1x3 trim to create a crisp outer border and keep the inner edge slightly thinner so the TV feels “set back.” I like warm oak veneer because it reads cozy against most skin tones and works with both light and medium woods in the room. If your room is bright and airy, this style keeps the wall calm while still looking custom. It’s also forgiving if your wall has minor imperfections because the frame hides uneven edges.
Start by marking the TV centerline and taping a rectangle on the wall that is 3 inches wider on each side than your TV. Build the frame from straight 1x3 primed boards or veneer strips, and paint or stain them before installation so the finish is even. Mount the outer frame first, then add the inner trim so it creates a layered “shadow line.” Center the console so its width lines up within 1-2 inches of the frame’s outer width, and leave a 1/2-inch gap between console top and wall base trim area. Finally, add a black low-profile picture light aimed at the inside edge of the frame, not the screen.
Use a 45-degree miter for corners if you want that crisp luxury look; if you’re new to carpentry, butt joints with wood filler and sanded edges still look clean when painted.
Don’t make the frame too thin — 1x2 boards usually read flimsy and cheap.
2. Centered Paneling Luxury With 3D MDF Strips Behind the TV
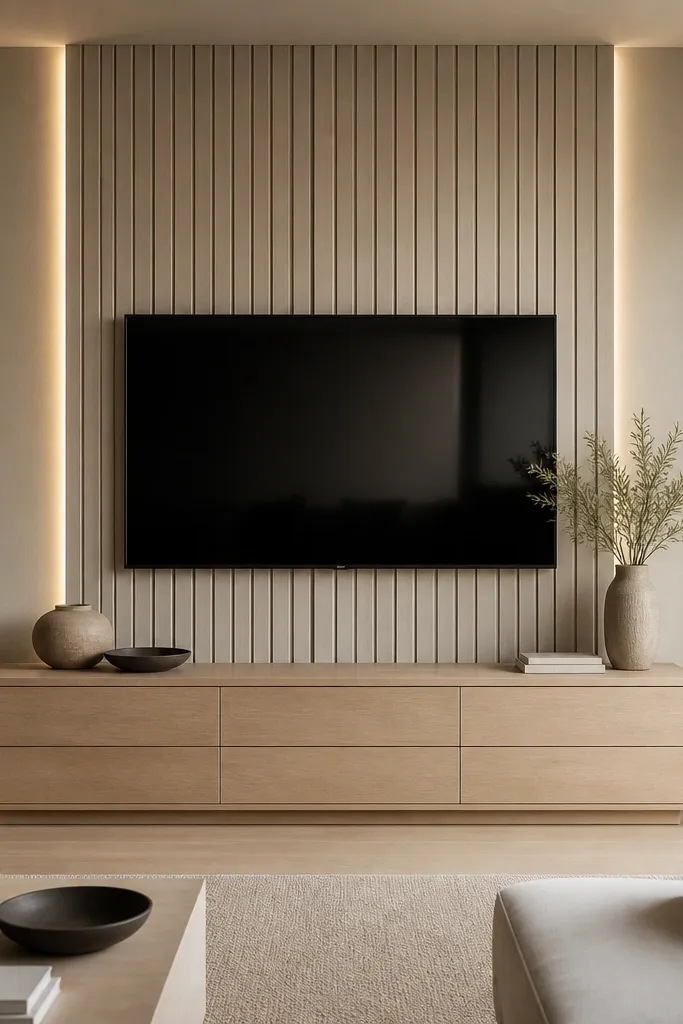
This is the “architect-designed” look without the architect price. The shallow 3D ribs catch light and create depth, so the wall never looks flat — that’s where the luxury read comes from. Greige is a smart choice because it doesn’t fight with warm wood floors or cool-toned furniture; it’s neutral on camera too. I’ve used this in living rooms where the couch is beige or taupe and it makes the whole space feel more intentional. It also flatters rooms with medium-height ceilings because the vertical rhythm pulls the eye up.
Measure the TV width and plan a centered panel area that is 6-10 inches wider than the TV on both sides. Install MDF rib panels on the wall with a level line first, then paint everything in the same greige so the ribs look built-in. Mount the TV on a bracket that sits centered within the rib area, leaving even margins on both sides. Put the console under the centerline and keep it wide enough to match the rib panel footprint. Add LED strip lighting along the inside edges of the rib frame area so the glow starts at the panel, not the wall.
Paint the ribs before final trim goes on. It hides tiny gaps and makes the depth look smooth.
Skip glossy paint on the ribs — glare makes the texture look cheap.
3. Two-Tone Walnut Slat Wall With Black TV Mount
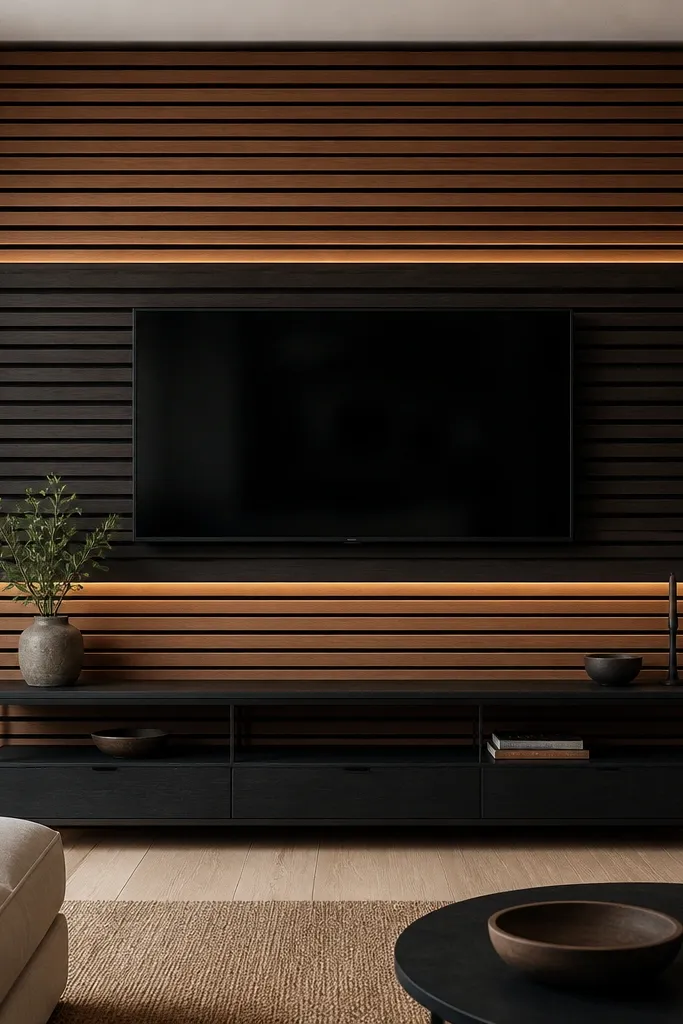
Slats give you that high-end hotel feel because the stripes create movement every time the light hits them. The two-tone trick looks more expensive than single-color slats because it frames the TV like a gallery. I like walnut and espresso together because walnut warms up the room and espresso adds contrast without turning the wall into a dark blob. This looks especially good if you have black accents already — lamps, frames, or a fireplace surround. If your walls are currently white, the slats instantly add depth and make the TV feel “owned” by the room.
Start by drawing a centered rectangle behind where the TV will sit, then decide your slat spacing (I use 2 inches on center for a modern look). Install slats on the outer band first so you get straight lines, then build the darker interior zone. Stain or use pre-finished slats to keep the color consistent; match the walnut tone to your console wood. Mount the TV so it sits flush inside the slat opening, then run LED strip lighting behind the interior slat zone. Finish with a matte black cable cover from the TV mount to the console area.
Use a laser level for the first slat — if the first one is straight, the rest look custom even if you’re using basic tools.
Don’t pick slat spacing under 1 inch — it looks like a cheap acoustic panel.
4. Limewash Wall With Oversized Art-Frame Surround
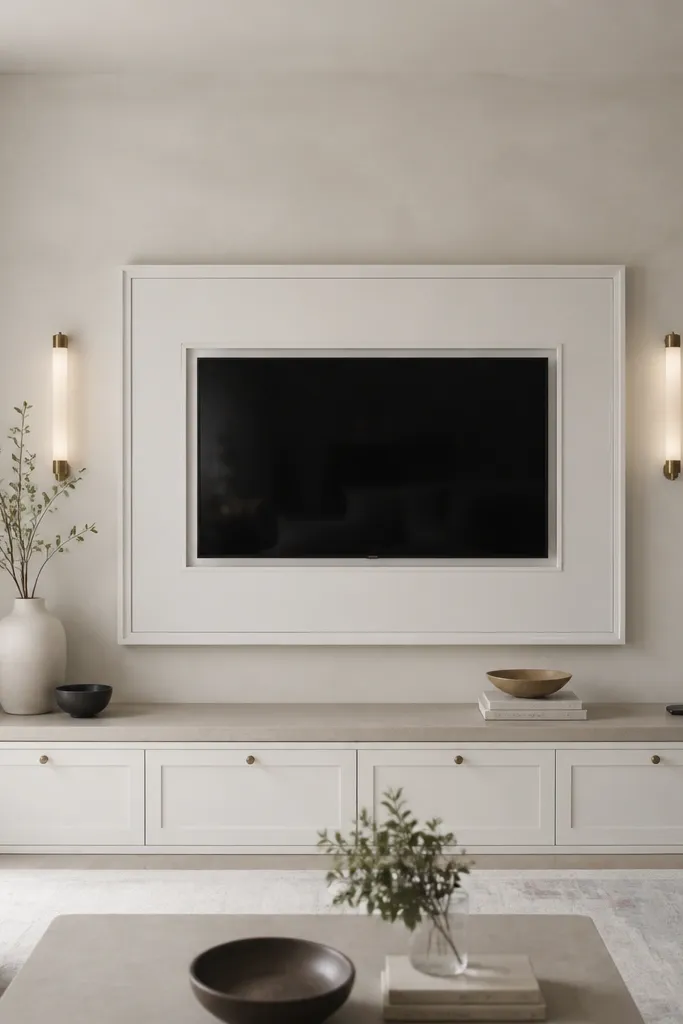
Limewash texture makes the wall feel hand-finished, and luxury often starts with surface texture. The oversized frame keeps the TV from looking like an appliance, and it gives you room to style decor around the edges later. Off-white limewash with gray undertone works well with both silver and warm gold hardware, so you’re not stuck if you mix metals. I’ve used this in living rooms where the lighting is warm and the couch is oatmeal — the wall texture makes everything look softer. It also photographs well because the texture adds dimension without heavy color.
Paint the wall with a limewash-style finish (or a limewash paint system) and let it dry fully so texture catches light. Build an oversized frame around the TV using primed MDF or wood trim, and paint it matte white. Size the outer frame so it extends about 5 inches beyond the TV on each side, then add a thinner inner trim to create a shadow gap. Install two slim sconces at eye level roughly 12-14 inches to the left and right of the frame, aimed toward the frame edges. Use a stone-look console top with a matte base so the wall texture stays the hero.
If your room gets direct sun, test limewash on a small corner first — some off-whites shift slightly under bright light.
Avoid flat paint over texture — it wipes out the depth and makes it look like regular paint.
5. Book-Match Veneer Accent Behind the TV
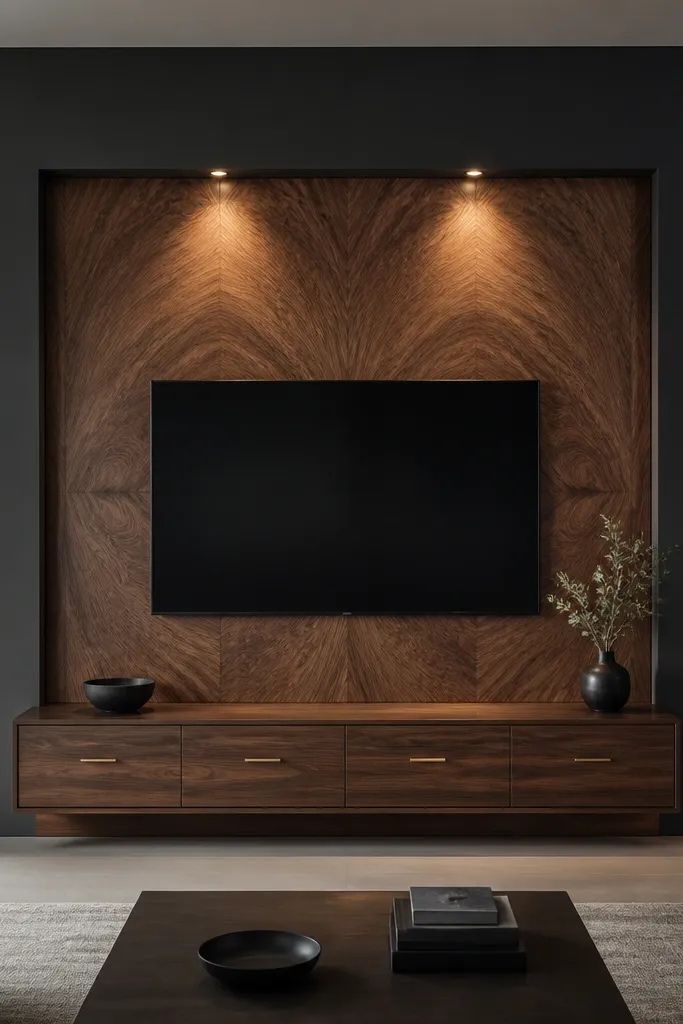
This is the most “luxury” trick per dollar because wood grain is already dramatic when you use it right. Book-matched veneer creates symmetry, so your brain reads it as custom millwork even if it’s a panel you built. Charcoal around it makes the wood grain pop without needing extra decor. I’ve done this in rooms that have dark floors or a black sectional and it makes the space feel designed instead of heavy. It also flatters warm undertones in furniture finishes and makes gold accents look intentional.
Pick veneer sheets and plan a rectangle behind the TV that is 6-8 inches wider than the TV on each side. Dry-fit the book-match by laying two panels together so the grain mirrors; mark the best pairing. Mount the veneered panel to the wall, then frame it with thin trim painted charcoal so edges look clean. Install the TV bracket centered on the veneered panel, not the trim, so weight is supported. Add two recessed spotlights or adjustable puck lights aimed at the veneer at a slight angle to show grain depth.
Seal the veneer with a satin clear coat instead of gloss — it keeps the grain rich without reflecting light back at the screen.
Don’t skip edge sealing — raw veneer edges look unfinished and cheap.
6. Marble-Look Peel-and-Stick Slab Grid With Floating Shelf
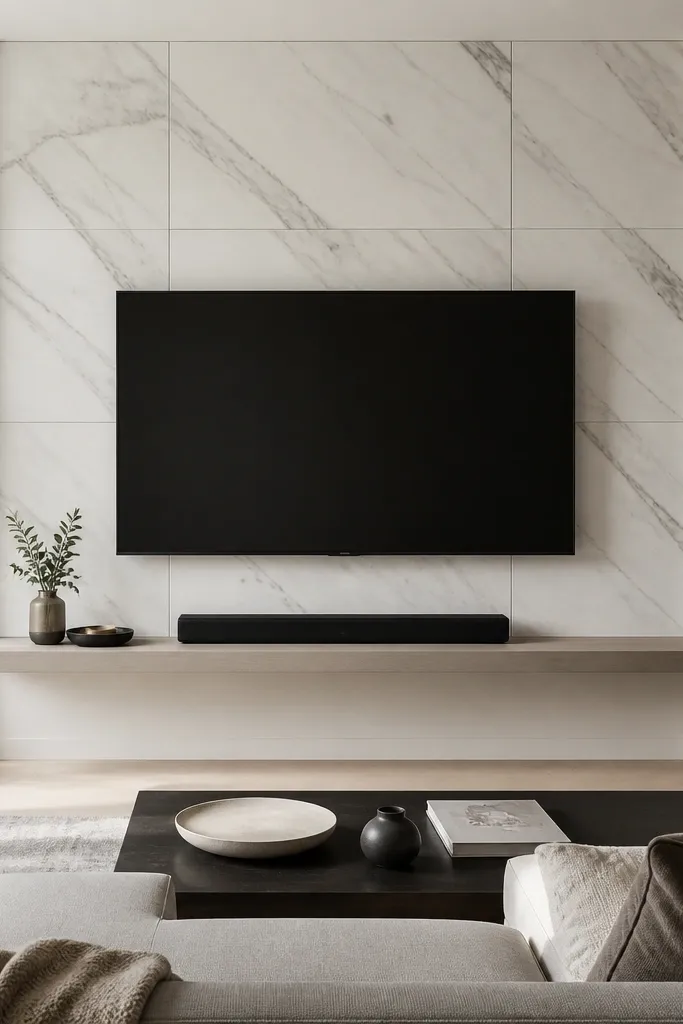
If you want modern luxury fast, a marble-look surface behind the TV gives you the “stone wall” vibe without stonework. The grid arrangement matters because it keeps the pattern from looking random, which is where peel-and-stick can go wrong. The white-gray marble looks good with cool metals like chrome and black, and it also brightens darker rooms. I’ve used this in compact apartments where you need impact but can’t lose wall space. The floating shelf adds lightness so the wall doesn’t feel heavy.
Start by measuring a rectangle behind the TV that leaves 3 inches margin on each side and 2-3 inches above the TV bottom line. Apply peel-and-stick marble panels in a grid, lining up pattern edges so the veining continues across seams. Seal the top edge with a thin trim strip so the marble surface looks built-in. Mount the TV bracket through the wall studs, not just the peel surface. Install a slim floating shelf under the TV with a 1-inch reveal so the soundbar and decor stay centered and tidy.
Use a seam roller and press slowly — trapped air makes seams look raised on camera.
Don’t cut around the TV bracket plate messily — neat edges are the difference between luxury and craft-store.
7. Warm White Shiplap With Black Picture Rail and Cable Cover
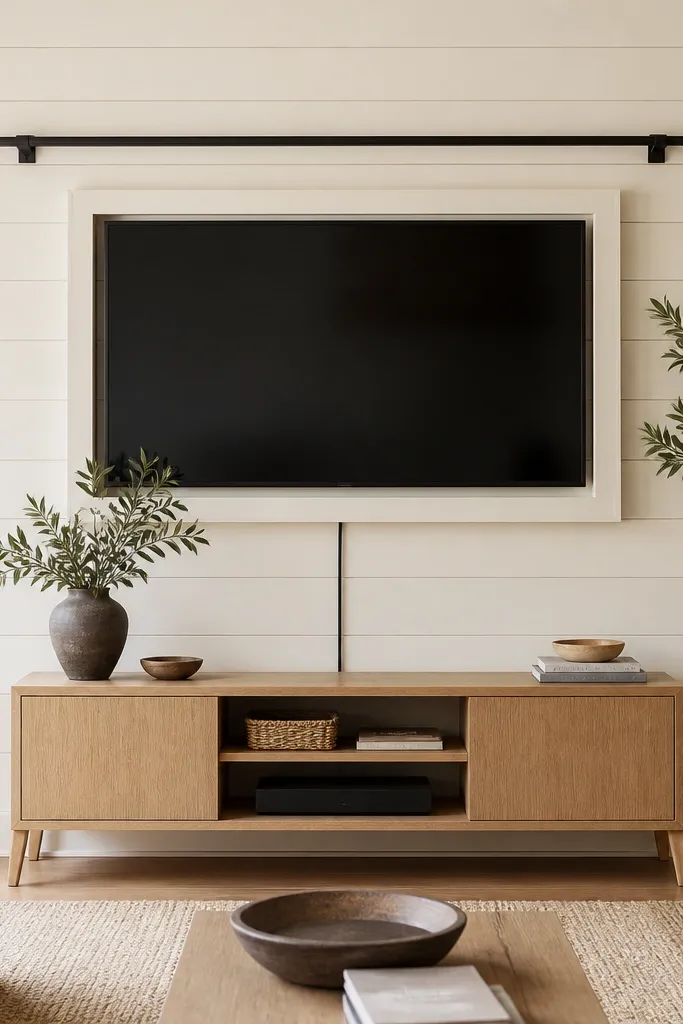
Shiplap reads cozy and structured, and luxury comes from clean lines and a strong top element. The black picture rail makes the wall look finished because it creates a horizontal “cap” that frames the whole TV zone. Warm white shiplap avoids the harsh look of bright white that can make living rooms feel sterile. I like this in homes with farmhouse touches or light wood floors because it ties everything together. If your room has neutral upholstery, shiplap adds texture without turning the palette loud.
Mark a level line where the TV surround top will sit, then install shiplap boards up to that point so the pattern stays straight. Build a simple TV surround using painted white trim, keeping the inner opening about 1 inch wider than the TV. Add a black picture rail above the TV area at a height that feels like standard artwork placement. Run a black cable raceway from the TV mount down to the console, then hide it behind the console’s back panel if possible. Finish by adding a small framed print or mirror above the TV if you’re not using sconces.
Stagger board seams slightly off the corners so the wall looks intentional, not like a kit.
Skip uneven shiplap — wobbly lines make it look like a weekend project.
8. Vertical Slab Panels With Backlit Reveal for a Clean Modern Look
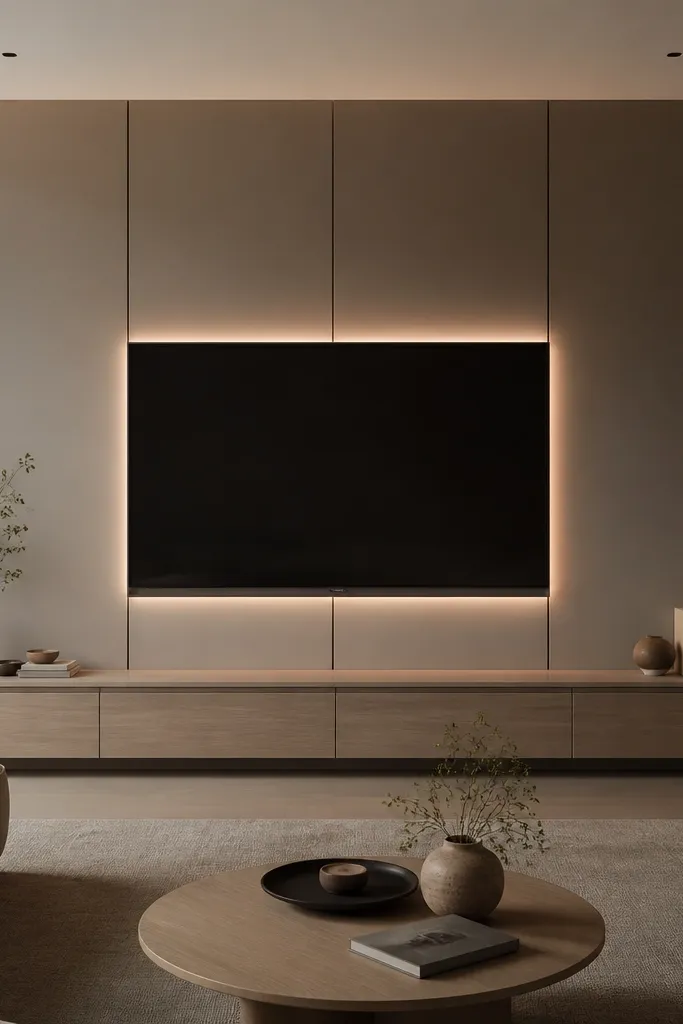
A backlit reveal is one of the fastest ways to make a budget wall feel custom. The halo effect draws a line around the TV, so the eye reads “designed opening” instead of “flat panel.” Soft taupe works with both warm and cool decor because it’s neutral with a slight warmth. I like this look in rooms that have a lot of plain surfaces, like a white ceiling and light walls, because the reveal adds dimension without clutter. It also flatters smaller rooms since the lighting makes the wall feel deeper.
Good to knowUse warm-white LEDs at 2700K for a luxury feel; cool white makes the reveal look like a showroom.
Install vertical panels (MDF or pre-primed slats) in a centered rectangle that is 6-8 inches wider than the TV. Leave a consistent 3/4-inch reveal gap around the inner opening where the TV will sit. Mount the LED strip inside that reveal channel so the light bounces off the panel edges, not directly into your eyes. Use a matte paint on the panels so the glow stays soft. Mount the TV bracket centered and then place the console so it aligns with the panel rectangle width within 1-2 inches.
AvoidDon’t place the LED too close to the TV — you’ll see the strip and it kills the halo.
9. Rustic Oak Mantel-Style Frame Around the TV
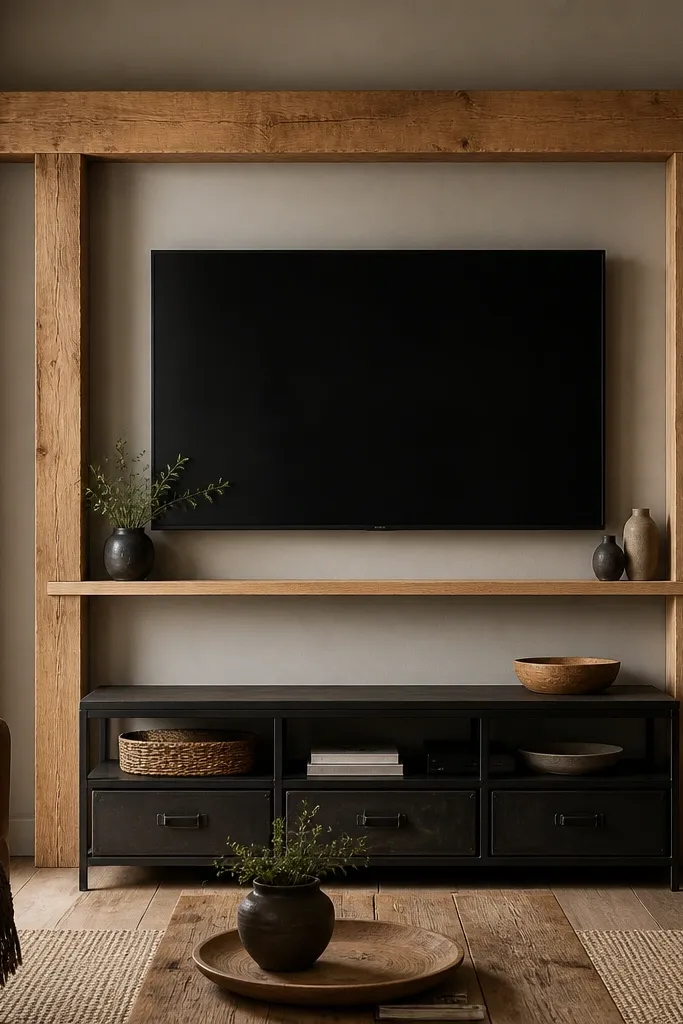
Mantel-style framing gives you luxury in a way that’s instantly familiar — your eye expects a fireplace or mantel, so the TV feels like it belongs. The trick is keeping the top beam thickness consistent and not over-decorating the surround. Warm gray walls make oak look richer without turning the room orange. This works well for people who have lived with TV walls that feel too modern and want something more lived-in. It flatters medium and darker wood furniture, especially if your floors are walnut or oak.
Build a thick top beam using solid wood or a hollow-core beam cover, and keep it centered above the TV. Add two side posts that extend down to just above the console, leaving a clean gap so the TV doesn’t feel boxed in. Paint or stain the wall in warm gray, then stain the oak frame and seal it satin. Mount the TV bracket onto studs and hide cables through the back of the frame opening. Style the console with one tall item and one low item only — keep the space under the TV clean.
Use a foam weatherstrip behind the frame edges to reduce rattling if the wood shifts with humidity.
Avoid chunky decor on the mantel — it competes with the TV and reads heavy.
10. Black and White Contrast With Glossy TV Frame Trim
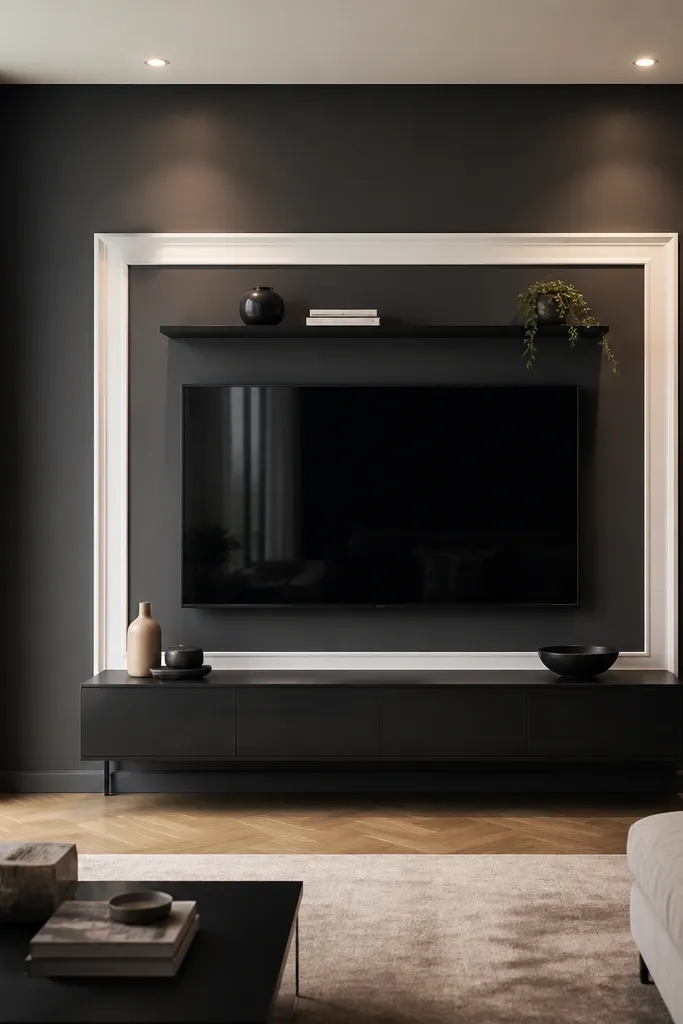
High-contrast walls feel expensive because they create a crisp boundary around the TV. The glossy white trim adds light reflection, which reads “polished” in person and in photos. Charcoal walls hide scuffs better than flat white, so the look stays sharp longer. This works great when your room has black accents, like a black ceiling fan, lamp bases, or dark frames. If your furniture is beige, this contrast makes the TV area look intentional without changing the rest of the palette.
Paint the wall deep charcoal with a matte or eggshell finish so it doesn’t glare. Install a TV surround using primed trim, then paint the frame with a satin or semi-gloss white for that clean reflection. Keep the frame width around 3 inches total on each side of the TV for a balanced look. Mount the TV and use a slim black cord raceway for a straight drop. Add two small recessed lights or adjustable puck lights above the TV aimed at the frame edges, not directly at the screen.
Test gloss finish on scrap trim — the sheen level changes how “luxury” it looks under warm bulbs.
Don’t use glossy paint on the wall — it shows every smudge.
11. Floating Media Console + Tall Side Panels for a Custom Tall Look
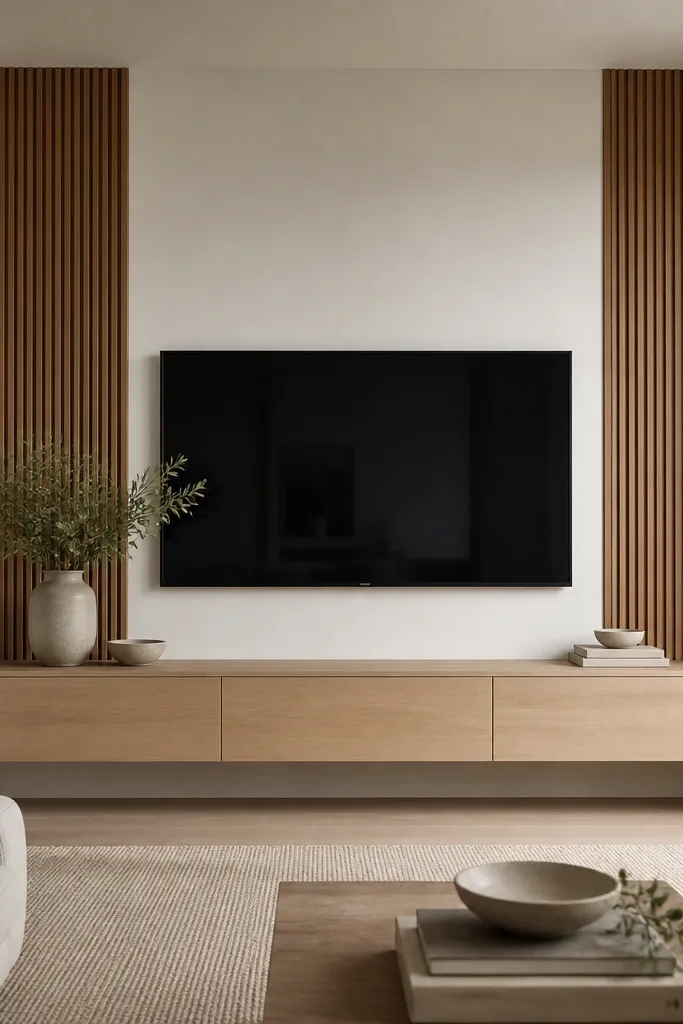
Tall side panels create a tall, custom built-in look even if your TV wall is small. They frame the TV vertically so it feels anchored, not floating. Warm wood veneer on the panels adds softness and makes the console look more intentional. This style flatters rooms with tall curtains or a tall bookcase nearby because the vertical lines visually match. If your living room has a lot of white surfaces, the wood panels break that up without turning the palette dark.
Good to knowUse the same wood finish on the console and side panels so the wall reads like one piece.
Mark the TV centerline and set a panel footprint that extends at least 12 inches above the TV top and down close to the console top. Build the side panels from veneer sheets or pre-made paneling boards, then mount them to studs. Use matte white paint behind and around the panels to keep the focus on the warm wood. Keep the console floating with a slim kick panel so it looks like it’s part of the built-in. Mount the TV bracket centered, then run cables behind the side panels for a clean, straight look.
AvoidAvoid panels that stop too low — if the side panels end under the TV, it looks unfinished.
12. Wall-to-Wall Curved Arch Accent Above the TV
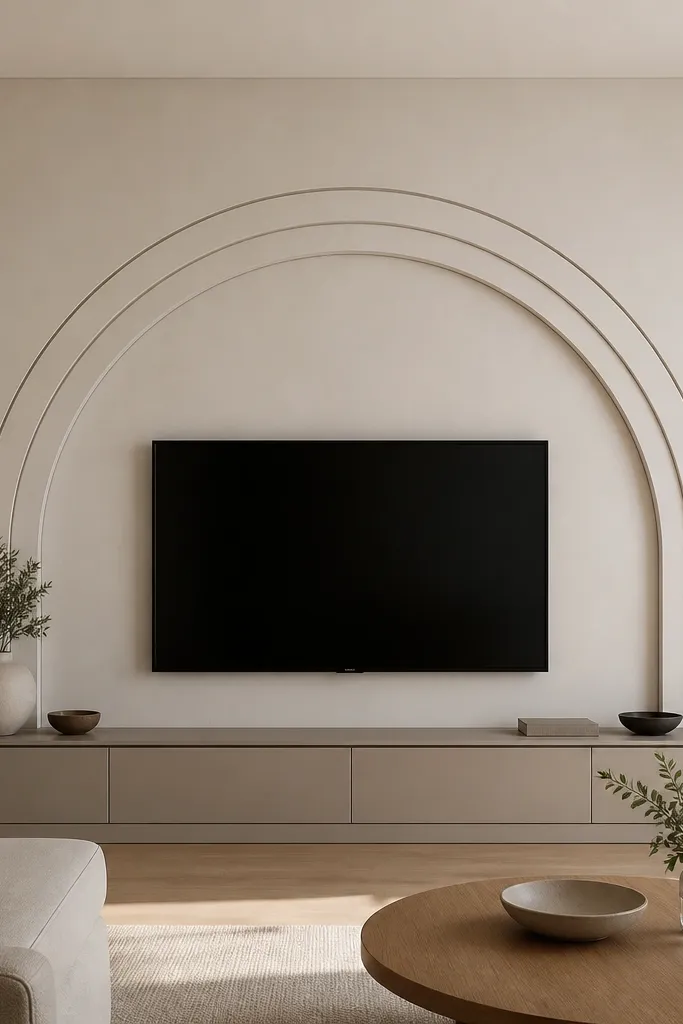
An arch above the TV makes the whole wall feel designed because it adds an expressive top frame. It’s also a great trick if your TV is too low on the wall — the arch draws the eye upward and balances the composition. I like off-white for the arch because it looks calm and expensive, especially with warm lighting. This style works well in living rooms with rounded furniture corners, curved mirrors, or arched doorways. It also looks flattering on darker walls because the arch creates a bright focal point.
Good to knowUse a flexible measuring tape to check the arch curve at eye level — it needs to feel centered, not mathematically perfect.
Sketch an arch shape that starts 6-8 inches above the TV top and ends about 10-12 inches above the console line. Build the arch using layered MDF strips so it stays smooth; sand the edges and paint the same finish as the wall. Add a thin dark line trim between layers so the arch reads crisp. Mount the TV centered under the arch opening and keep the surround minimal — a simple rectangular trim is enough. Install two small sconces at the sides of the arch aimed slightly upward for glow.
AvoidDon’t make the arch too small — a tiny arch looks like a sticker feature.
13. Textured Lime Plaster Wall With Black Floating Shelf
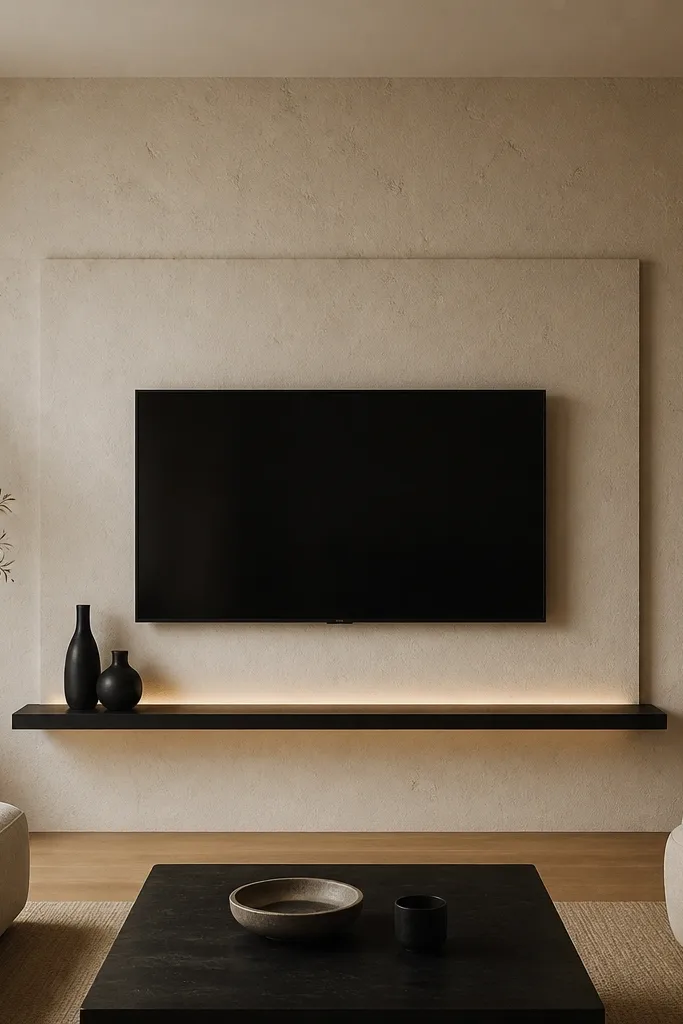
Texture does the heavy lifting here. Lime plaster-style walls add depth without needing slats or panels, and the subtle speckling hides minor wall imperfections. The smooth panel behind the TV keeps the screen area clean and prevents the texture from distracting you. A black floating shelf adds a modern contrast and gives you a place to style small objects that don’t overpower the TV. This looks great in rooms with light curtains and warm bulbs because it feels soft, not harsh. It also flatters people who want luxury without wood — the texture replaces the “material richness.”
Good to knowPick decor in matte finishes only — glossy ceramics catch light and look messy against texture.
Apply lime plaster texture across the wall and let it fully cure so the surface doesn’t smear when you install trim. Create a smooth rectangular backing zone behind the TV using painted MDF or a flat drywall patch painted the same color. Frame the smooth zone with thin black trim so it looks intentional. Mount the TV to studs and run cables through the smooth zone area. Install a black floating shelf at a height that leaves at least 6 inches of space between shelf and TV bottom, then add a warm LED strip behind the shelf underside.
AvoidAvoid high-contrast patterns on the shelf — busy decor competes with the plaster.
14. Matte Greige Wall With Brass Picture Rail and Simple Frame
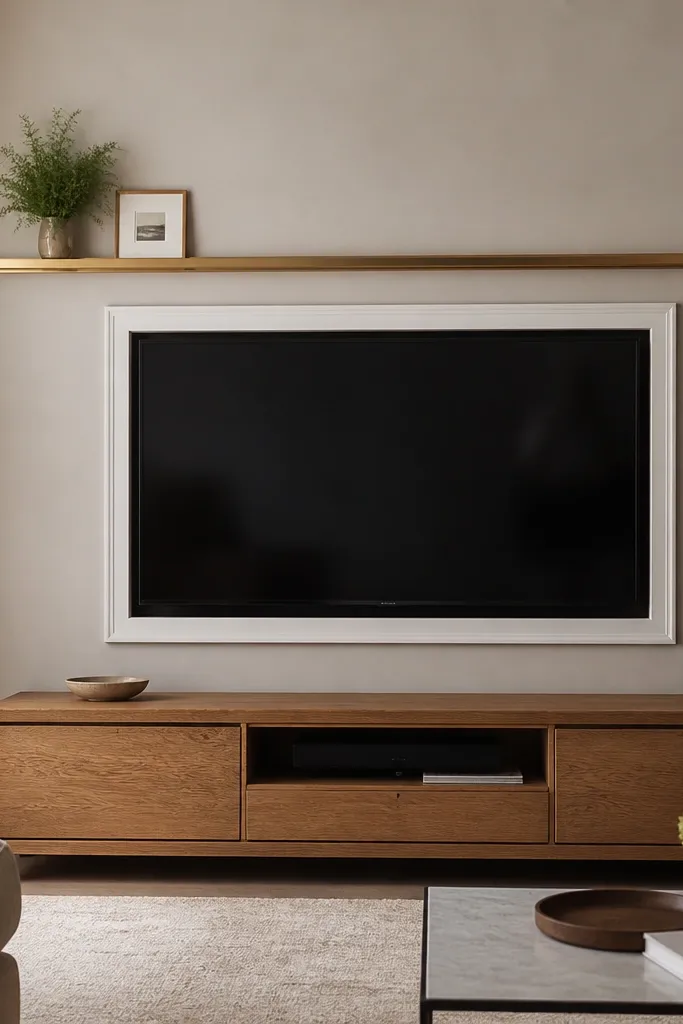
Brass is the quickest way to make a budget TV wall feel tailored. The picture rail creates a clean line at the right height, and it gives you a built-in place for decor so the wall doesn’t feel empty. Greige keeps everything calm, and the brass warms it up. I’ve used this in rooms with neutral sofas where the TV area needed a “finished” feeling without adding heavy wood textures. It also works well for people who want to change decor seasonally because the rail makes swapping easy.
Good to knowKeep brass accents small and intentional — one rail and one hardware tone looks expensive; five brass items looks costume.
Paint the wall matte greige and let it dry fully. Install a simple rectangular TV frame using painted trim in soft white, keeping margins consistent (about 3 inches total beyond the TV edges). Mount a brass picture rail above the TV at a height that aligns with typical artwork placement — I aim for the center of the rail about 60 inches from the floor. Add the rail’s small ledge and place one framed photo or a small tray near the TV. Use a warm oak console and match hardware tones to the brass so the wall reads cohesive.
AvoidDon’t hang the rail too high — if it sits above the TV, the wall looks top-heavy.
15. Monochrome Concrete-Look Panels With Warm Wood Console
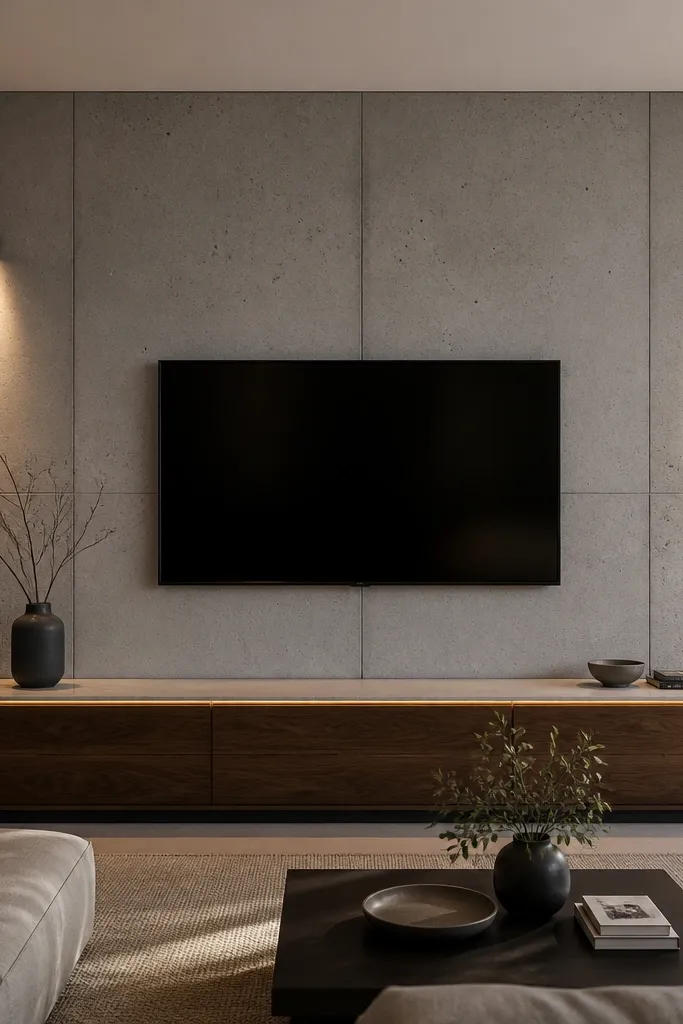
Concrete-look panels give you that industrial-modern luxury feel, especially when you balance them with warm wood. The cool gray surface has texture, so it reads expensive even without decorative clutter. I like this style for rooms with black metal furniture or dark floors because the concrete texture ties the palette together. It also works for people who don’t want wood slats or plaster texture — it’s a different kind of depth. Warm walnut console makes the contrast feel intentional, not random.
Good to knowUse warm-white LEDs so the concrete looks like a material, not like a painted wall.
Choose concrete-look wall panels or textured wallpaper and install them on a centered rectangle behind the TV. Keep the panel layout clean so seams fall where you can hide them with thin trim. Mount the TV on studs and keep the bracket centered within the concrete section. Add a minimal frame around the TV using thin trim in matte black or dark gray. Install warm LED wall washers at the sides aimed toward the concrete texture, not the TV screen. Place the walnut console centered with a width close to the panel rectangle.
AvoidDon’t add glossy decor against concrete — it reflects and can look scuffed.
16. Oversized Floating Frame With Recessed TV and Hidden Shelf
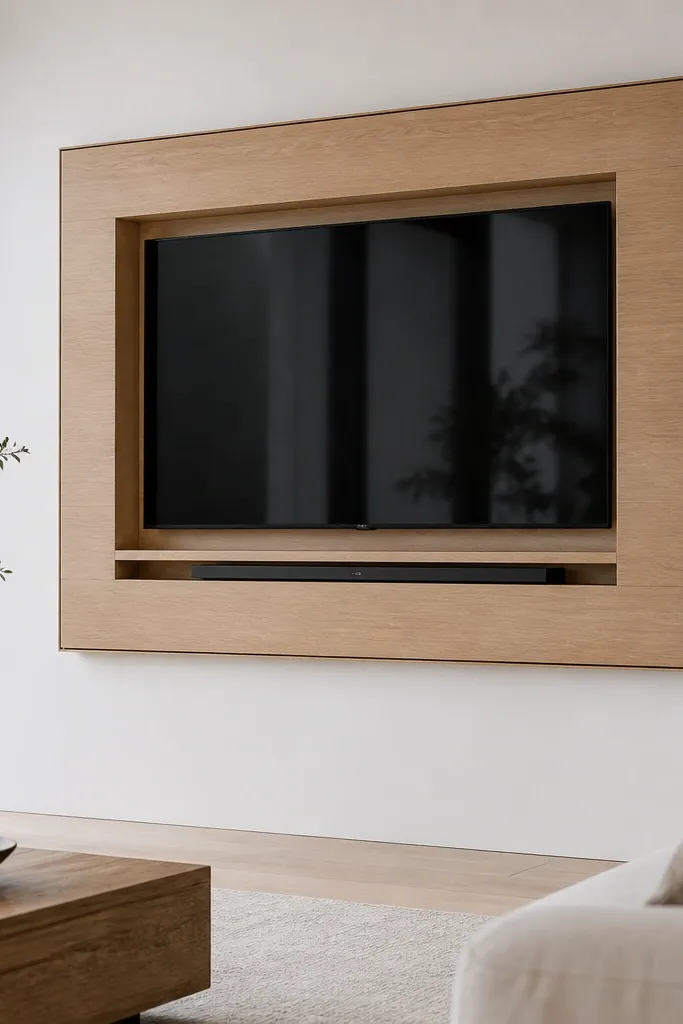
Recessing the TV is the real luxury move because it creates a built-in depth line. An oversized floating frame makes it look custom, and the shadow gap hides uneven wall edges and makes the geometry look sharp. Light oak keeps the room warm and prevents matte white from feeling cold. I’ve done this in rooms where the TV is near a window and glare is a problem — the recess helps reduce reflections compared to a fully flat mount. It also looks great with simple styling because the wall already has the “wow” structure.
Create a recessed opening by building a shallow box around the TV area using plywood and furring strips, staying within your TV bracket depth needs. Frame the opening with light oak trim so the TV sits back and centered. Leave a 1/4-inch shadow gap between the frame and the recessed box edges for that clean luxury line. Install the hidden shelf below the TV opening for the soundbar and streaming device so cables don’t show. Seal and finish all wood surfaces, then paint the surrounding wall matte white. Finally, mount the TV bracket inside the recessed opening and check that the screen sits perfectly level.
Recess depth matters — aim for a small back set (about 2-4 inches) so it reduces glare without making the TV look swallowed.
Avoid shallow recesses with no shadow gap — it looks like a mistake, not design.
17. Warm Wood Wall With Vertical Battens and Hidden LED Underlighting
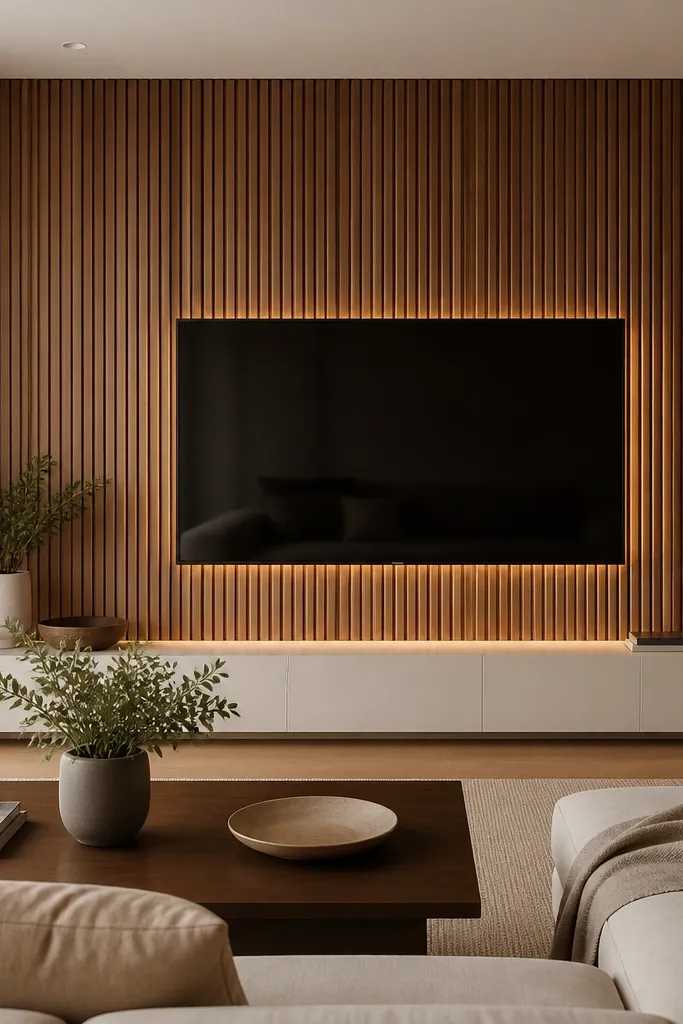
Full warm wood behind the TV can look expensive even on a budget if you keep the layout clean. Vertical battens give you consistent lines, and the hidden LED adds that “floating” feel to the console zone. I like this when your room has a lot of light — the warm wood reads cozy instead of heavy. It also flatters people who prefer minimal decor because the wall is already the feature. If you have a white or cream sofa, the warm wood makes it look softer and more grounded.
Cover the wall with a warm stained backing panel first, then add vertical battens spaced evenly (2 inches on center is a good start). Create an opening where the TV sits by leaving a clean rectangle without battens inside, or by spacing battens so they frame the TV edges. Mount the TV bracket to studs and make sure the opening edges are solid so trim can hide the cut lines. Add LED strip underlighting behind the console area so the glow starts at the wall, not on the floor. Choose a white media console with slim lines to balance the warm wood wall.
Use a diffuser channel for the LED strip so you get smooth glow instead of visible dots.
Don’t crowd the TV with too many decor shelves — a full wood wall already fills the visual space.
18. Gallery Wall Mix: Tall Mirror, Slim Panels, and Centered TV
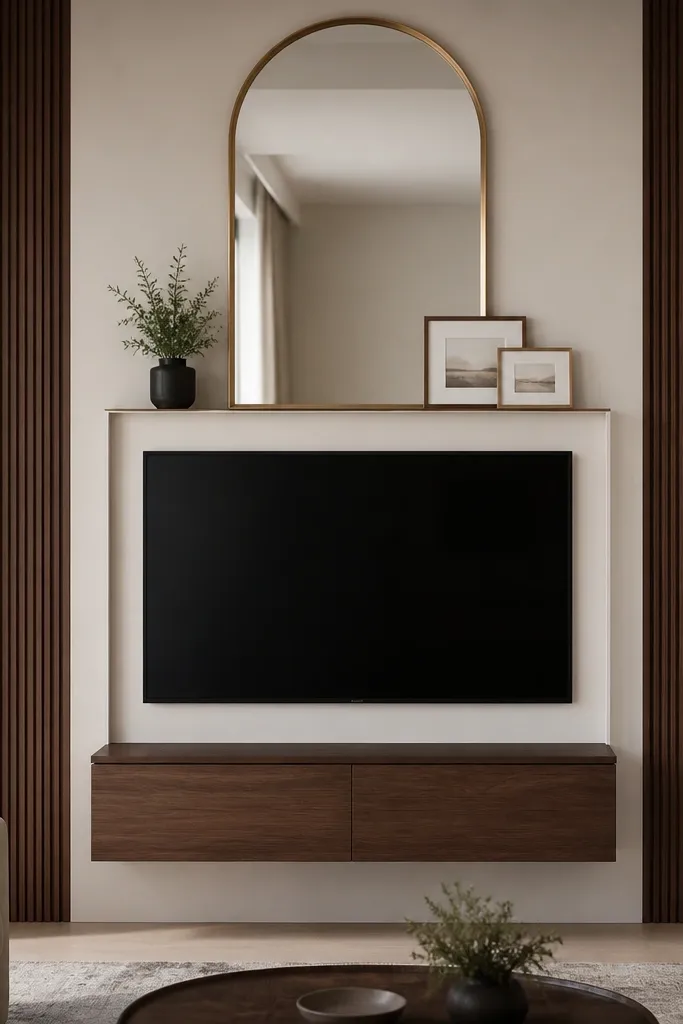
This one works when you don’t want the TV wall to feel like a single-purpose area. The centered frame gives the TV structure, while the mirror and side panels add warmth and depth. The tall mirror makes the room feel bigger and brings light into the TV area without adding extra lighting fixtures. I like gold frames here because they pair well with warm wood consoles and they look good next to neutral upholstery. This also flatters rooms that have blank wall space you’ve been avoiding — it turns that blank into a composition.
Good to knowKeep mirror frame thickness consistent with your TV frame trim so it all looks like one system.
Frame the TV with a simple rectangular surround using wood or painted trim, keeping the margins about 3 inches beyond the TV edges. Add two slim vertical panels on each side of the TV zone, leaving equal spacing so the symmetry stays clean. Mount a tall arched mirror above the TV so its bottom edge sits around 4-6 inches above the TV top. Place the console centered and keep it under the TV frame width. Style the mirror area with one or two framed pieces only, keeping them small so the TV stays the main feature.
AvoidAvoid random picture sizes around the TV — it should feel like a planned gallery, not a storage purge.
19. Soft Gray Panel Backdrop With Recessed Lighting Strip at Eye Level
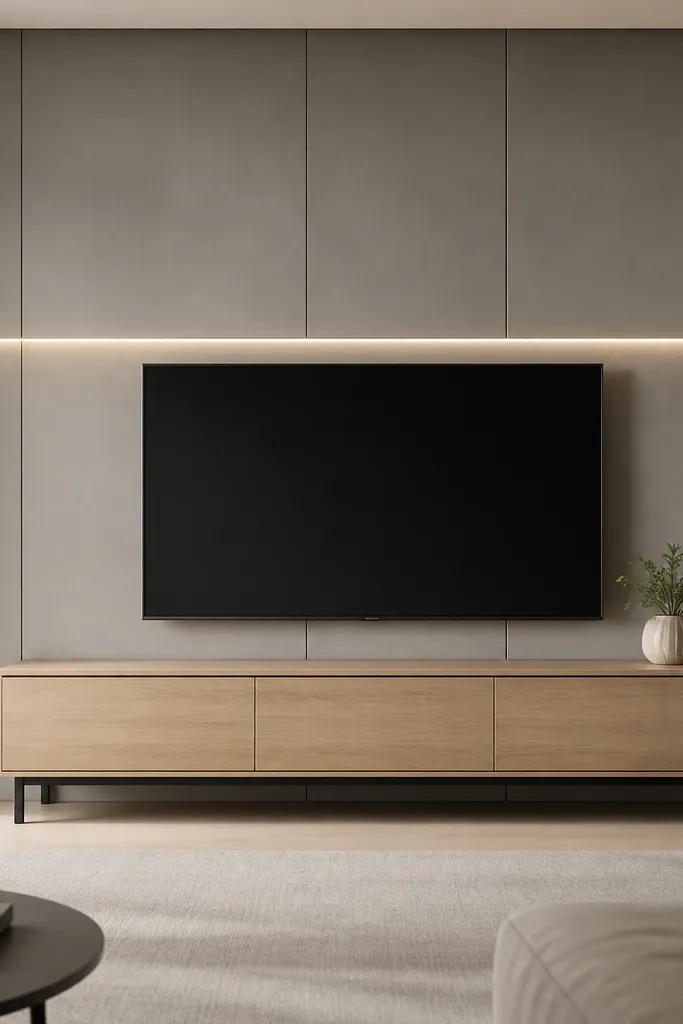
A horizontal light band at eye level makes the TV wall feel finished because it creates a deliberate “reading line.” Soft gray panels keep it modern and calm, and the gentle light makes the whole area feel brighter without harsh glare. I like this for living rooms where you have ceiling lights that make the TV look washed out. The light band also flatters people because it reduces the contrast between the bright screen and the surrounding wall — it looks easier on the eyes during movie nights. This design is clean enough for minimal homes but still reads luxury.
Good to knowSet the LED to 2700-3000K and use a dimmer — you’ll get that luxury glow without turning the wall into a billboard.
Install a centered panel backdrop in soft gray, leaving a rectangle for the TV opening. Add a recessed channel for an LED strip across the TV area at eye level, keeping the strip slightly above the TV center so it frames the screen. Mount the TV so it sits centered and level within the panel opening. Choose a light oak console with matte black legs to echo the lighting hardware if you use black channels. Keep decor to one plant or one small tray so the light band stays the focus.
AvoidDon’t place the LED too close to the screen — direct line of sight makes it look like cheap accent lighting.
20. Matte Black Frame With Micro-Bevel White Panels for Modern Luxury
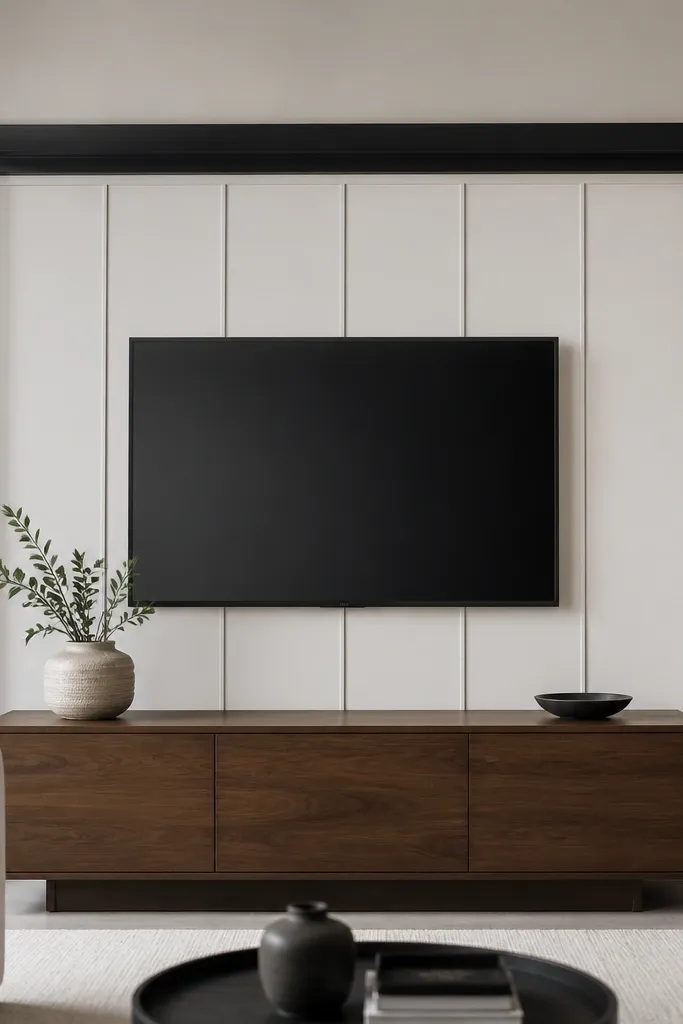
Micro-bevel panels look expensive because they create tiny shadow lines that read like millwork. Matte black framing sharpens the edge and makes the white panel texture feel crisp, not flat. This combination is clean enough for modern homes and still warm because of the walnut console. I’ve used this in rooms with white walls that felt boring — the beveled texture adds depth without adding color. It also flatters people who like a sleek look but don’t want a full slat wall.
Paint the main wall light warm gray and let it dry. Install micro-bevel white panels within a rectangle behind the TV, then frame that rectangle with matte black trim. Keep the black frame about 2-3 inches wide around the TV so it feels bold but not bulky. Mount the TV bracket to studs and ensure the screen sits centered within the beveled panel area. Use a walnut console and keep the styling minimal — a single decorative object and the soundbar only. Add a cable raceway painted the same color as the wall to keep it invisible.
Use a satin clear coat on the black trim so it wipes clean after dusting.
Avoid high-gloss black — it shows fingerprints and looks messy quickly.