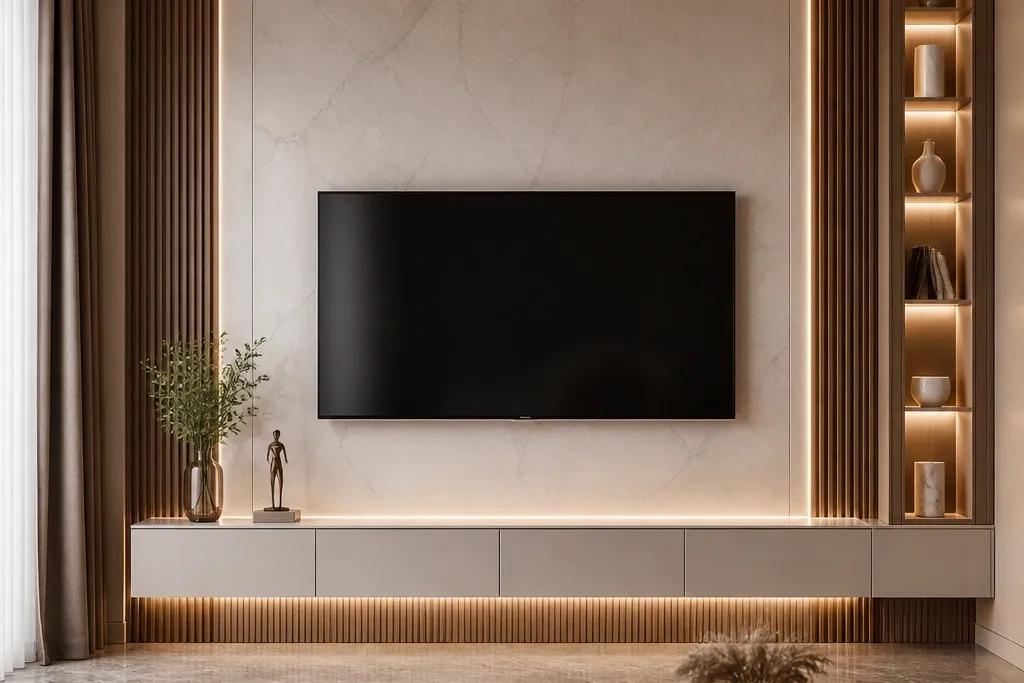
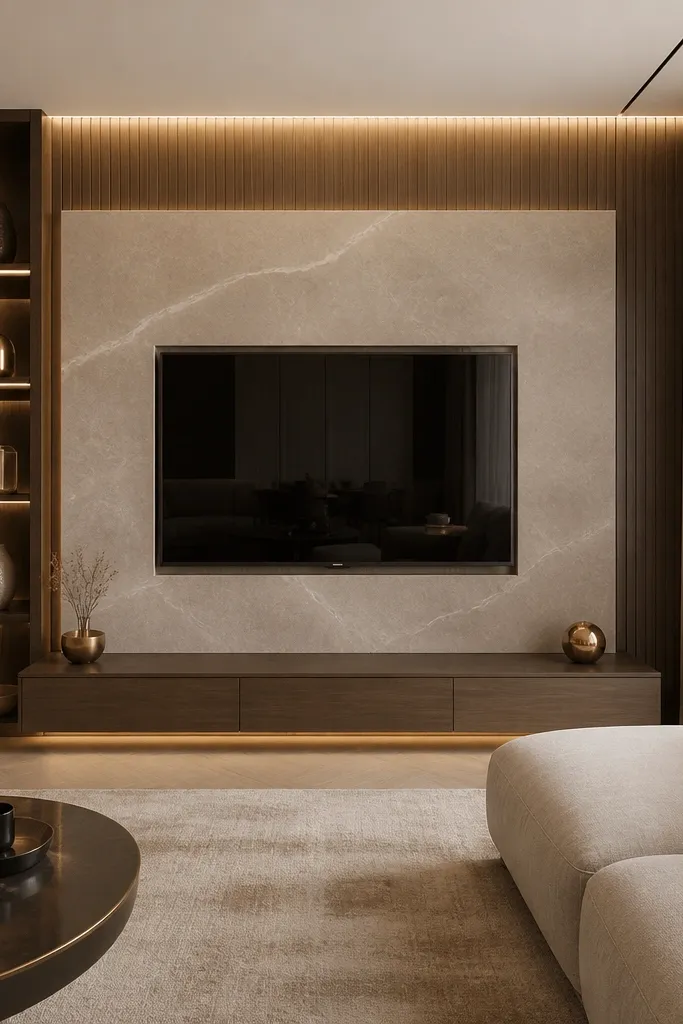
1. Matte Ivory Picture-Frame Border With 2-Inch Shadow Gap
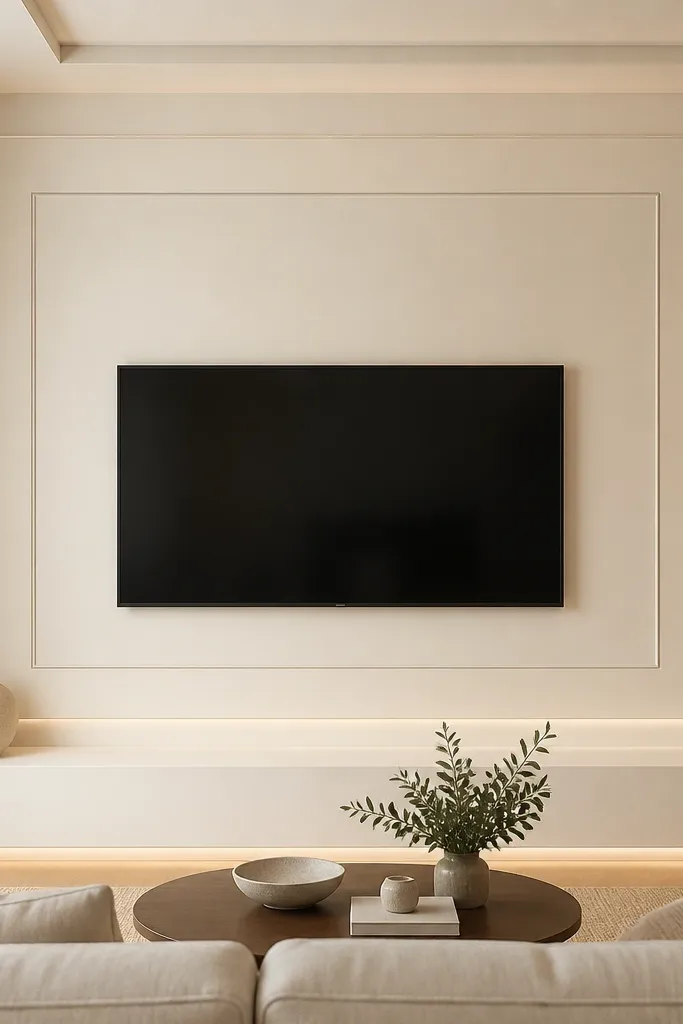
This design wins in small space TV wall design luxury because it uses borders to fake a larger architectural wall. I built it with MDF trim painted matte or eggshell ivory, then I added a deliberate shadow gap behind the inner frame so light creates depth. The TV sits centered inside the rectangle, and the base ledge extends 6-10 inches beyond the TV width so the wall feels grounded. It looks best with warm undertones — think ivory that leans slightly creamy instead of stark white — and it flatters rooms with beige, tan, or warm gray flooring. If you have dark wood floors, this bright paneling still reads luxurious because the trim edges stay crisp and the shadow gap adds polish.
Start by marking a level rectangle on the wall that’s TV width plus 6-8 inches total (3-4 inches extra on each side). Install a flat ledger board for the bottom line of the frame, then build the outer border first using 1x2 or 1x3 MDF strips. Leave a 3/8 to 1/2 inch shadow gap for the inner frame — I do this by spacing the inner trim with thin spacers while glue sets. Paint everything before mounting — two coats of satin or eggshell, light sanding between coats. Finish by adding a wide base ledge under the TV opening that matches the outer frame width, then run all cables through a concealed path behind the ledger.
Use warm white LED strips behind the inner frame, set to low brightness, so the shadow gap glows without looking like TV backlighting.
Skipping the shadow gap makes it look like a flat sticker frame.
2. Walnut Veneer Slat Wall With Whitewashed Panel Base
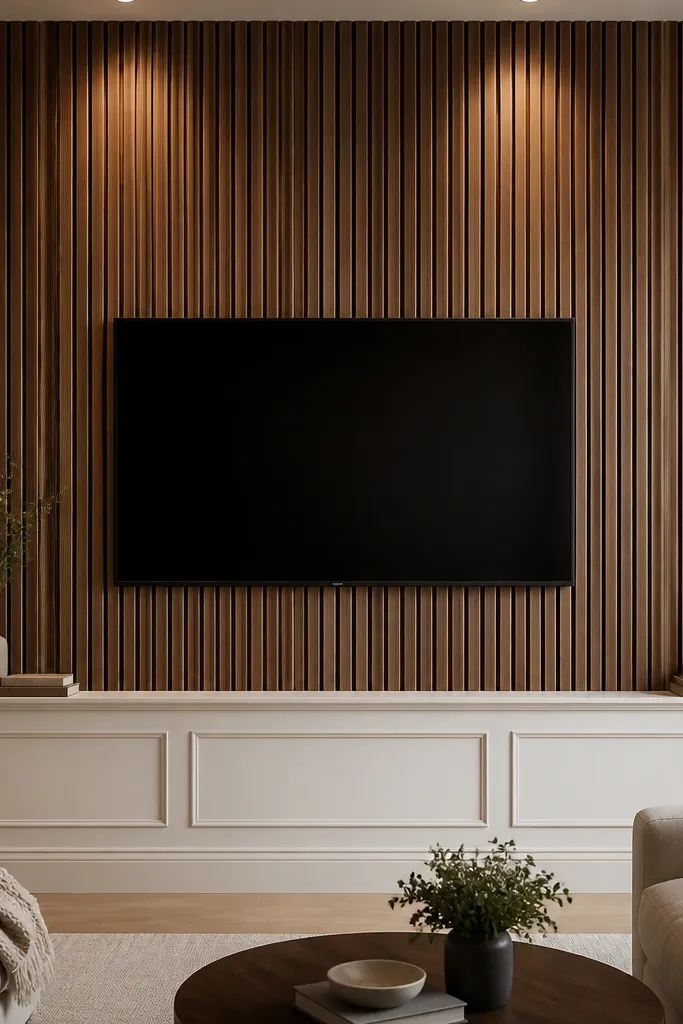
Measure from ceiling to where you want the slat section to stop, then divide that height by consistent slat spacing so the pattern lands cleanly above the TV. Install a level mounting grid first, then attach veneer slats over it, leaving 1/4 to 1/2 inch gaps for shadow. Build a lower raised panel base using MDF or plywood panels with a simple frame-and-ledge design, painted whitewashed or a creamy off-white. Stain the slats with a satin clear coat so they don’t look plasticky. Finally, center the TV in the opening and use a thin trim return around the TV so the edges look intentional.
Vertical slats are the fastest way I’ve found to make a small room feel taller while still reading luxury. Walnut veneer adds warmth against cool walls, and the raised panel base in whitewashed finish keeps it from looking heavy. This works especially well if your furniture is in espresso, cognac, or natural oak tones — the slats echo those colors. I like it for rooms with medium to light skin-tone friendly styling too: warm wood tones flatter skin in photos because they don’t throw harsh cool light. Keep the slats consistent in width — I use narrow slats so the wall doesn’t feel cluttered.
AvoidUsing thick, wide slats in a small room — it makes the TV wall feel like a block.
Good to knowSeal the veneer with a satin clear coat before installation so the wall looks even under different light temperatures.
3. Raised Rectangle Grid Panels in Soft Greige
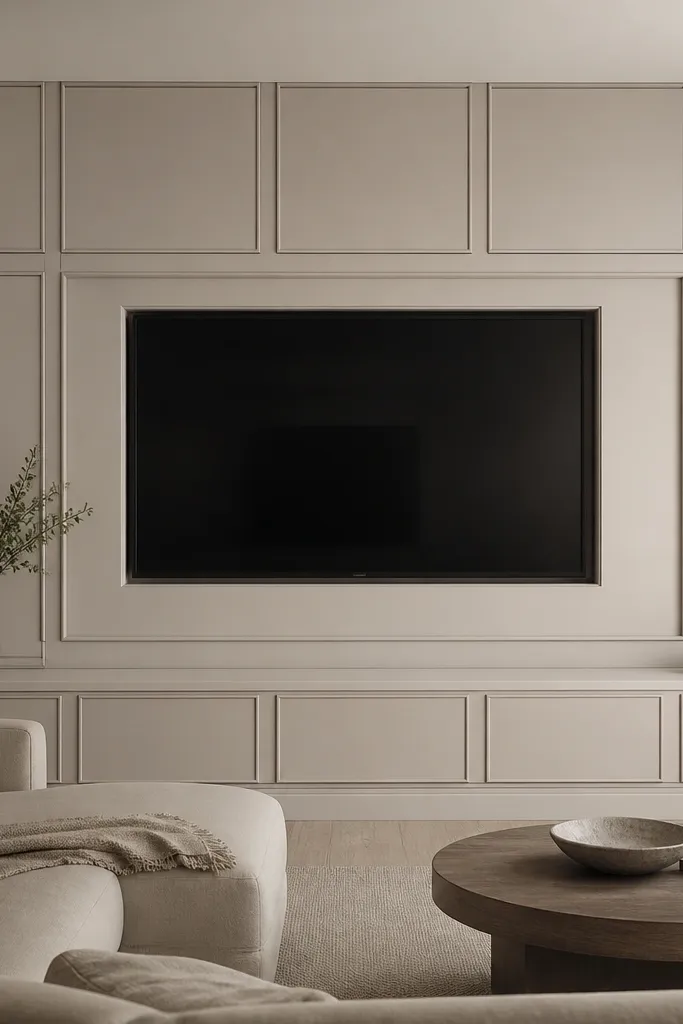
A raised rectangle grid reads expensive because your eye tracks edges and spacing. In a small space, you want the grid to be tight and consistent, not huge and dramatic. I paint everything in a soft greige (think 70-80% warm gray with a beige wink) so it works with both warm and cool decor. This style looks great if your room has lots of straight lines — sofa legs, table frames, even window trim — because the grid keeps the visual language coherent. It also flatters darker TVs (black or charcoal) since the raised panels create contrast without needing bold colors.
Start by choosing panel sizes that fit your wall width without awkward cuts — I like 8x10 inch rectangles for small walls. Mark the grid on the wall, then build the perimeter frame first using 1x2 MDF strips so everything references a square. Attach panel “raisers” (thin MDF strips) to create the raised rectangles, leaving a 1/8 to 1/4 inch shadow line. Paint with a satin greige in two coats, sanding lightly after the first coat. Add a wider base ledge under the TV grid that extends at least 5 inches beyond the opening so it looks like part of the architecture.
Do a quick test on one panel: dry fit the riser strips and look from the couch — if the shadow line disappears, widen the gap.
Overbuilding the raised depth — thick panels look heavy and cheap in tight rooms.
4. Beadboard in a Tall Frame With a Slim Mantel Shelf
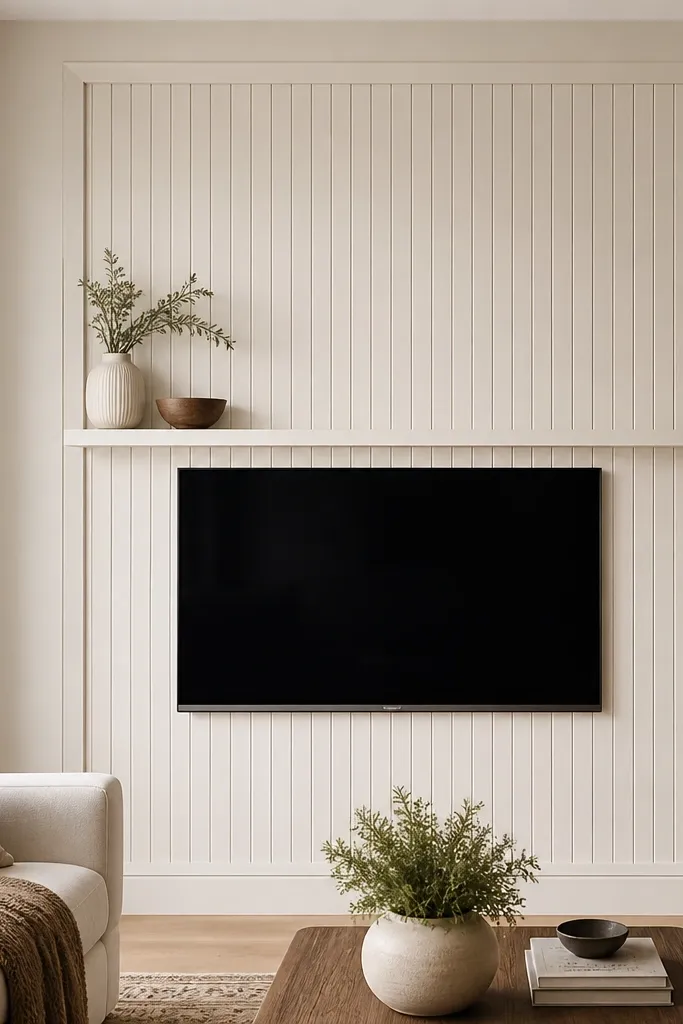
Beadboard usually gets used in kitchens, but in a TV wall it feels luxe when it’s framed cleanly and painted well. The trick for small space TV wall design luxury is to keep the bead lines fine and the frame narrow, so the wall doesn’t shrink your room. A slim mantel shelf adds that “designer moment” above the TV without taking over the space. I like this for rooms with traditional furniture — rolled arms, turned legs, or classic molding — because the bead lines match the detail. If your wall is already busy with windows or open shelving, this keeps the TV feature orderly.
Install vertical beadboard sheets or beadboard strips over a flat backing board so the lines stay straight. Build a tall outer frame around the TV opening using 1x3 trim, then add an inner frame that’s about 1 inch thinner on each side. Place the TV opening centered, leaving enough height for a slim shelf above — I keep the shelf thickness around 3/4 to 1 inch. Paint the beadboard and trim in one off-white tone, then caulk and sand the edges for crispness. Finish by adding a small cable access channel behind the TV so you don’t have to cut into the beadboard later.
Use a satin paint on beadboard; it hides minor bumps but still shows the bead shadows.
Leaving beadboard unframed — it reads unfinished and dated fast.
5. Two-Tone Paneling: Charcoal Outer Frame, Cream Inner Panels
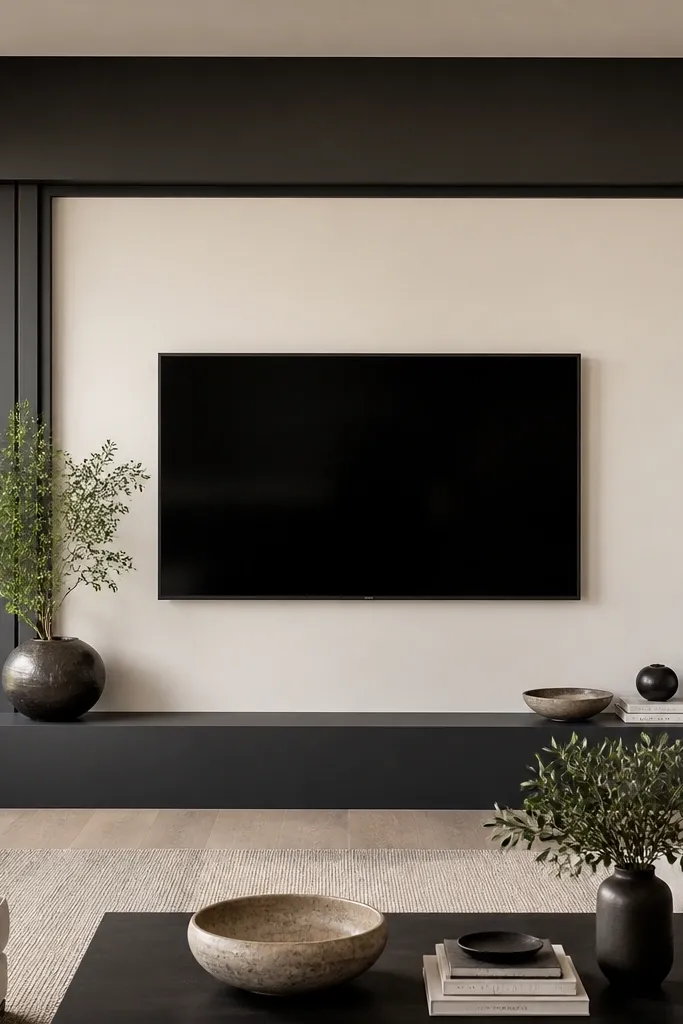
Two-tone paneling gives luxury because it creates a graphic frame around the TV — and you don’t need extra square footage. The charcoal outer frame pulls focus and makes the TV look like it belongs in an architectural feature. Cream inner panels keep it bright, so the wall doesn’t feel heavy. This works best when your room has a warm neutral palette — tan rug, oatmeal sofa, light wood — because charcoal gives contrast without going cold. It’s also forgiving for small rooms since the TV reads centered and intentional, not oversized.
Choose your color split: I like charcoal on the outer border and cream inside, with the base ledge matching charcoal for visual grounding. Mark the outer rectangle first, then install trim for the charcoal frame using MDF primed for paint. Build the inner panel field using flat MDF panels or a shallow raised panel, then paint cream. Keep the trim widths slim — about 1 to 1.5 inches — so the frame looks tailored. Install the base ledge last so it aligns with the outer frame edges, then mount the TV and hide the cable run behind the inner field.
Test your charcoal on the wall at two times of day. If it turns too blue, switch to a charcoal with a warmer undertone.
Using glossy black — it shows every brush mark and looks messy in real rooms.
6. Arch-Top Fluted Panels Above the TV
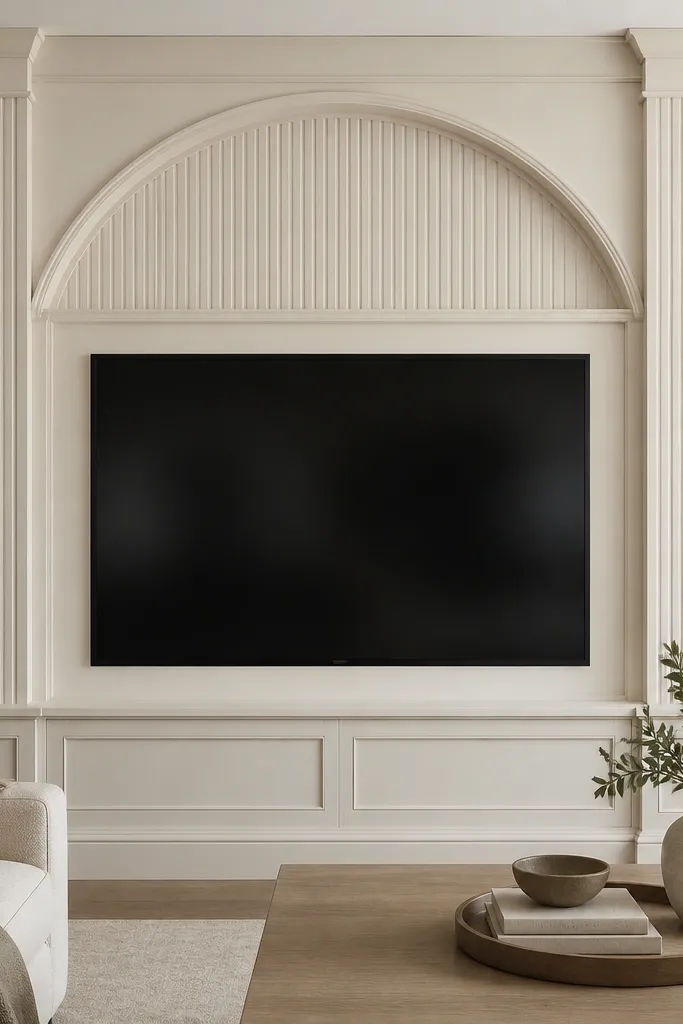
Curves read high-end when you keep them controlled. An arch-top panel above the TV adds a “custom built-in” feeling without building a full fireplace mantle. I’ve used fluted side columns in small spaces because they create vertical movement, while the arch gives softness so the wall doesn’t feel boxy. This style flatters rooms with rounded elements — a rounded mirror, a curved sofa back, or a circular light fixture. If you have a black TV and light walls, the arch creates a focal point that doesn’t rely on bold color.
Start by deciding the arch height — I keep it to about 12-16 inches above the TV opening so it doesn’t overpower. Build the rectangular TV surround first with flat panels and a thin border. Then create the arch using flexible MDF strip or pre-cut arch templates for the inner curve, and attach fluted columns on both sides of the arch. Paint everything in warm white with satin finish, then add a thin top shelf trim line if you want extra structure. Mount the TV centered, and leave a small gap between the TV surround and the arch panel so the edges don’t look fused.
Use a router template for the flute spacing if you want it to look truly even; hand-measuring flutes looks off from the couch.
Making the arch too tall — it crowds the ceiling line in small rooms.
7. Herringbone Accent Panels Behind the TV
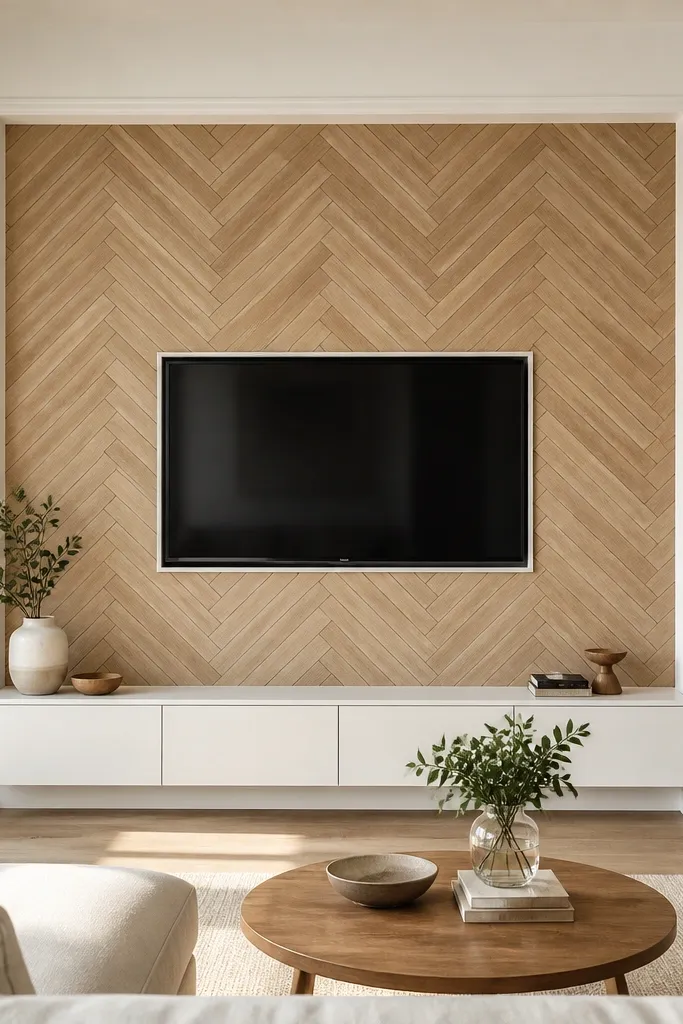
Pick a wood-look panel system that’s meant for wall surfaces, not floor tile. Frame the TV opening with smooth MDF trim in warm white, then install the herringbone panel field inside the frame. Keep the herringbone lines centered under the TV so the pattern doesn’t look skewed. Seal the veneer or panel with a clear matte or satin topcoat so it doesn’t glare under lights. Finish by adding a thin base ledge that matches the frame trim, and route cables through the wall before you install the herringbone field.
This is the luxury trick: texture reads expensive even when the room is small. Herringbone gives you diagonal movement, so the TV wall feels like it has depth beyond paint and trim. I like herringbone behind the TV because it stays focused — your eye lands on the TV, then notices the pattern. It’s especially flattering when your other decor is simple: plain curtains, solid-colored rug, minimal wall art. If your wall color is warm white, the light oak herringbone makes the whole feature feel cozy instead of stark.
AvoidUsing real floor tile herringbone on a wall — it looks heavy and can crack around screws.
Good to knowDry fit three rows around the TV area and stand back from your couch position to check symmetry before you glue anything.
8. Shadow-Lined Vertical Channel Panels in Warm White
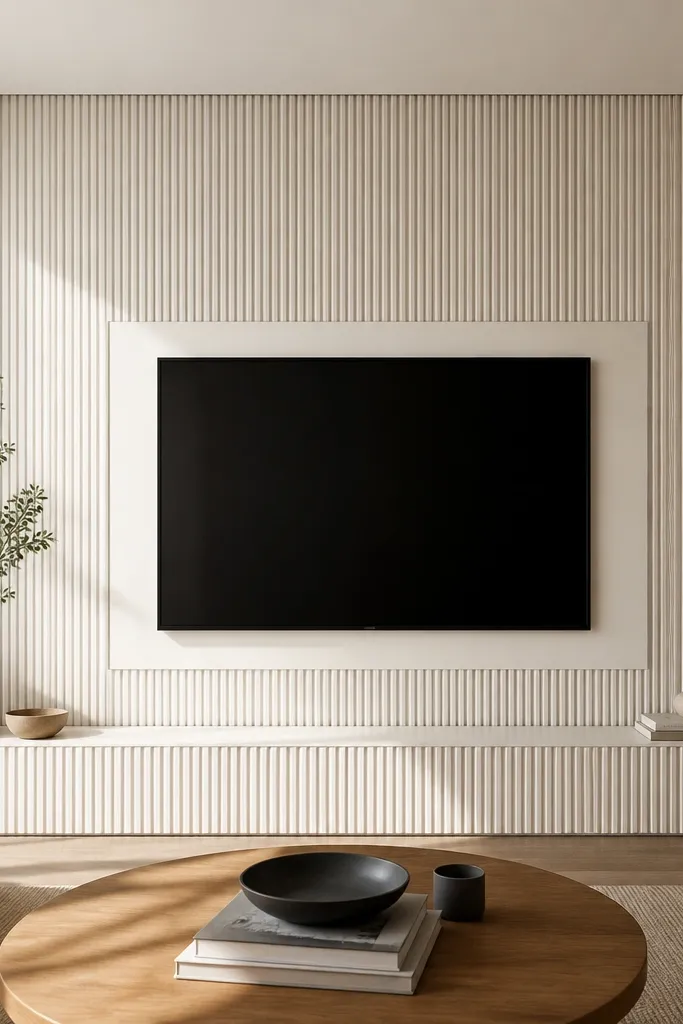
Mark a consistent spacing grid for the channels, then install a flat backer board if your wall has bumps. Create channels by attaching narrow MDF strips with a spacer behind them, or by using pre-made channel panel sheets. Keep channel width around 1/2 inch and spacing consistent so the shadows don’t look random. Build a simple outer frame around the TV opening, paint everything warm white in satin, and let the paint build slightly in the channels for a smooth look. Mount the TV and install a base panel under the opening that matches the channel rhythm.
Channel paneling looks luxury because it creates thin shadows — the kind you see in high-end hotels and custom millwork. In a small space, vertical channels also pull the eye upward, which makes ceilings feel higher. I use warm white because it keeps shadow lines soft instead of looking grey and harsh. This design suits modern and transitional rooms, especially if your furniture has straight edges and clean metal accents. It also flatters small rooms because the wall becomes a single unified feature instead of a bunch of separate trim pieces.
AvoidPutting channels too close together — it turns into a textured wall instead of clean luxury shadow lines.
Good to knowUse a caulk line that matches the paint sheen so the edges look like one continuous millwork piece.
9. Lacquered Soft Pink Panel Frame With Brass Trim
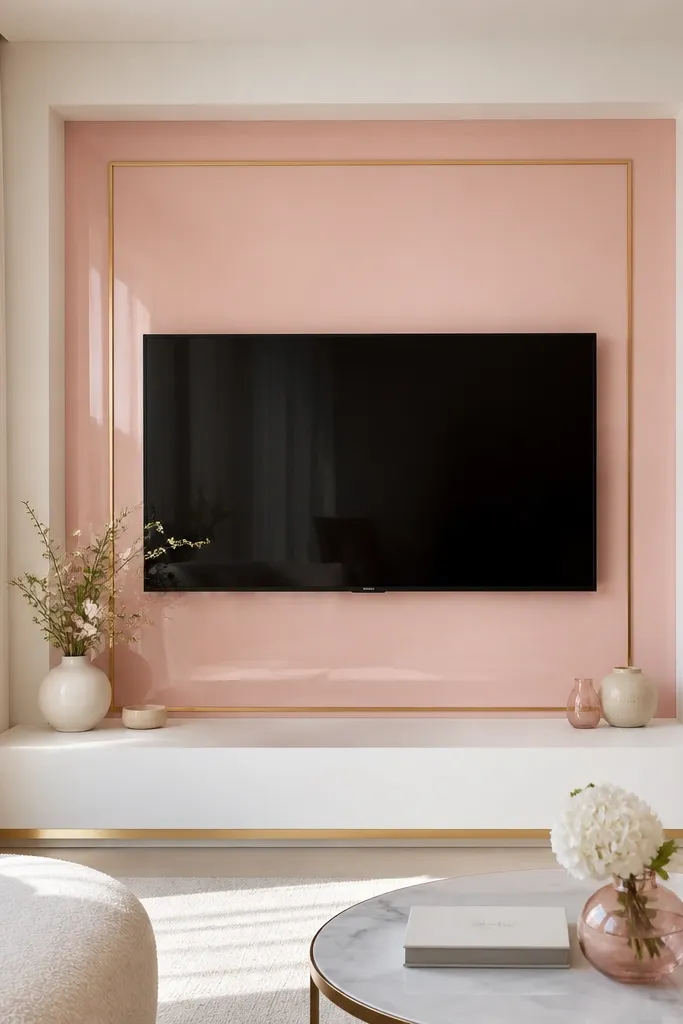
Color can be luxury when it’s controlled. A soft pink lacquer panel inside a white frame looks custom and playful without feeling childish, especially with brass trim that catches light. In small space TV wall design luxury, this combo makes the TV area feel like a piece of furniture, not a flat wall. It flatters warm skin tones and makes beige rugs and creamy sofas look richer. I’ve used it in compact apartments where people wanted personality but not clutter, and the result reads polished even from across the room.
Paint or finish the main panel field first — aim for a smooth lacquer-like finish, not chalky paint. Build the outer frame in matte white using MDF trim, then add thin brass strips as applied trim or adhesive metal edging. Outline the TV opening with the brass so it looks like a custom bezel. Keep the brass width slim (about 1/2 inch) so it doesn’t overpower the room. Install a base ledge in matte white with a brass accent strip on the front edge, then mount the TV and hide the cable run behind the panel field.
If your room lighting is cool, warm it up with bulbs around 2700K so the pink reads flattering instead of lilac.
Using a cheap metallic trim that looks dull or scratched — it shows up instantly next to lacquer.
10. Oak Slab Panels With a Black Floating TV Mount Niche
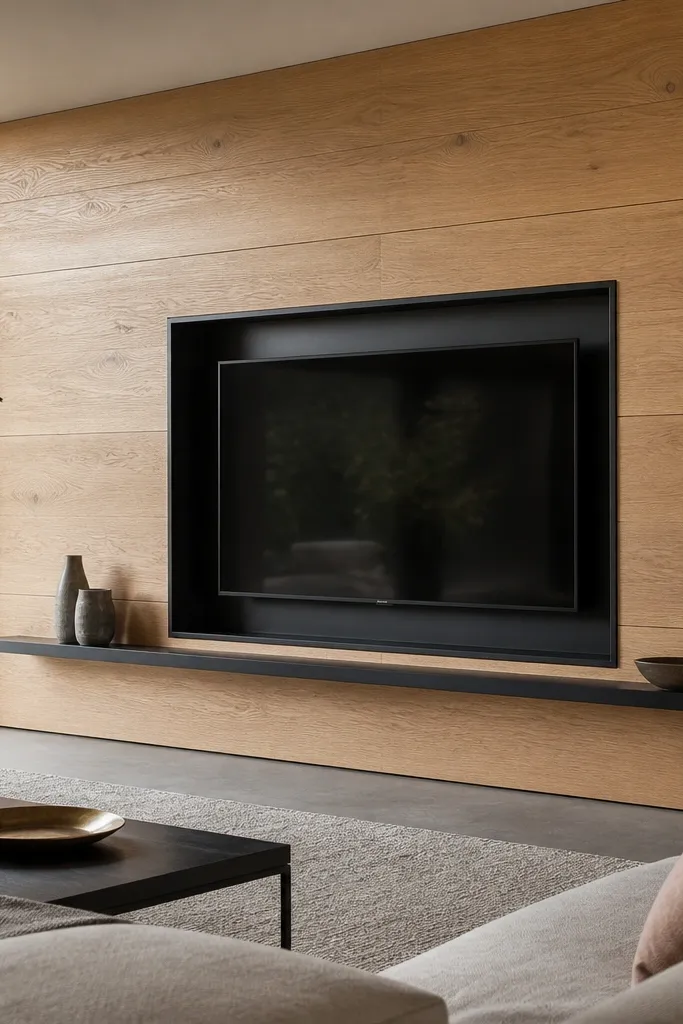
Wide oak slabs feel expensive because the grain has room to breathe. The black floating niche sharpens the look and makes the TV feel built-in, which is the whole point when you’re working with a small wall. This design is great if your furniture has black metal accents or if your TV is a dark matte finish. It also works well for rooms with natural wood floors because the oak paneling matches rather than competes. I like this when you want luxury without lots of little trim lines.
Cover the feature area with large-format oak veneer panels or pre-finished slat boards that look like slabs. Install a recessed backing box for the TV niche so the TV sits 1-2 inches back from the face of the panel. Add a black frame around the TV opening using MDF painted in a durable matte or satin black. Mount the TV to the niche structure, then install a thin black shelf beneath using metal brackets hidden behind the panel. Finish by sealing the oak with satin clear coat so it handles everyday cleaning.
Use a recessed niche depth that matches your TV’s cable clearance and keep the back panel removable for future repairs.
Mounting the TV flush to the panel face — it kills the shadow and makes it feel temporary.
11. Whitewashed Brick-Look Paneling With a Wood Mantel Base
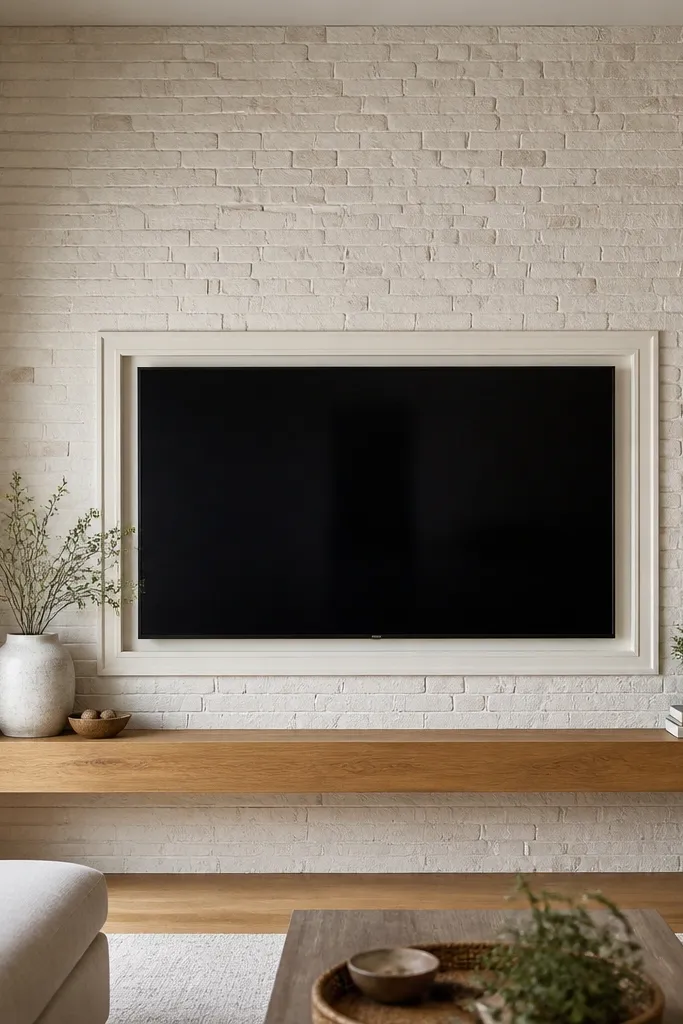
Brick-look panels read luxury when the color is light and the base is real wood. In small space TV wall design luxury, you need to keep the texture from getting visually heavy, so I choose whitewashed brick panels with narrow mortar lines. Then I ground the feature with a straight, chunky wood mantel base that gives the TV a home. This looks amazing in rooms with warm lighting, cream curtains, and rustic-modern decor — it adds character without making the wall feel dark. If your space is narrow, brick texture can shrink it, so the mantel base is what balances the visual weight.
Install brick-look panels first on a flat backer or directly over drywall if it’s smooth. Frame the TV opening with warm white trim that’s at least 1 inch wide, then add a wood mantel ledge under the opening that extends beyond the TV by 5-7 inches. Sand and seal the mantel so it matches your wood floor tone — I use satin clear for a natural look. Caulk all trim seams and paint the trim edges for a clean line. Mount the TV and route cables through the wall or through a covered raceway hidden behind the mantel.
Use a matte finish on the brick-look panels so the texture reads soft, not shiny.
Choosing dark brick-look panels — they make small rooms feel smaller.
12. Crown Molding Frame With a Built-In Media Nook
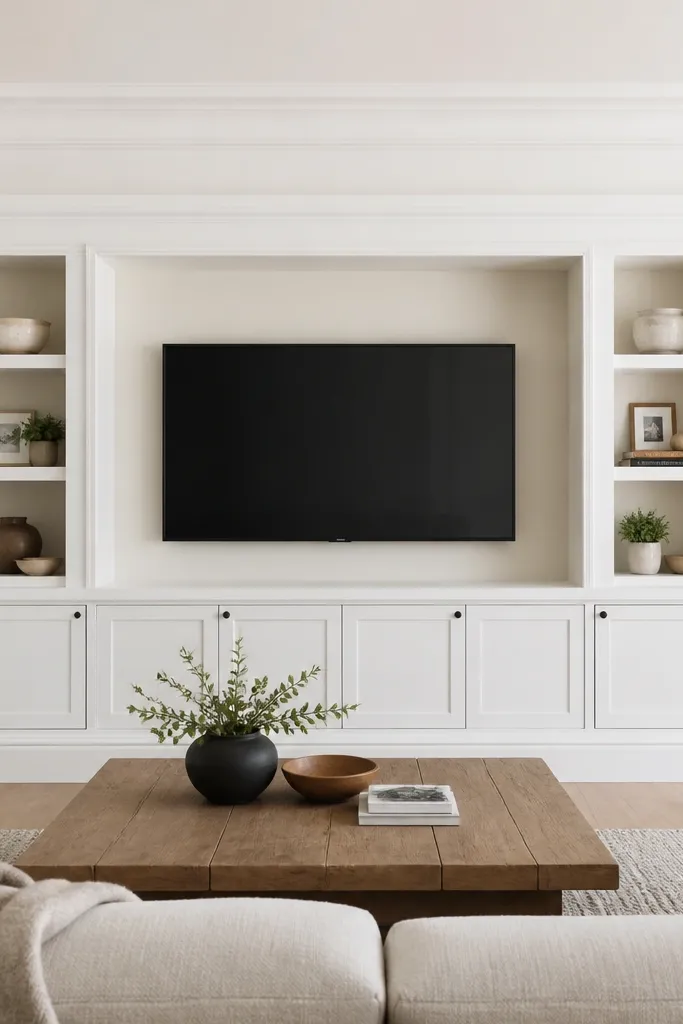
Plan your nook depth first — aim for at least 3-4 inches so the TV mounting bracket and cables fit. Build a perimeter frame with MDF trim and add crown molding on the top edge, keeping the crown profile slim to avoid bulk. Install side compartments either as open shelves or as simple panel doors, then paint everything bright white in satin. Set the TV opening centered in the niche, leaving a clean border around it. Finish by adding a base trim line and filling any gaps with caulk, then mount the TV after the paint cures so you don’t chip the finish.
Crown molding is the cheat code for luxury because it adds an upper “finishing line” that makes the whole wall feel custom. In a small space, you don’t want a massive mantel, so I build a recessed media nook instead — the TV sits in a carved-in area, and the crown molding frames it like a picture. This works best for rooms where you want storage but don’t have space for a bulky console. The nook also hides cables and gives you a place for games, remotes, and streaming devices. If your wall is plain and you want instant designer energy, this layout delivers without needing fancy color.
AvoidMaking the crown too wide — it overwhelms the wall in tight rooms.
Good to knowAdd a removable back panel behind the media nook so you can access outlets and cable connections later.
13. Panelled Corner Wrap: TV Feature Extends 12 Inches Sideways
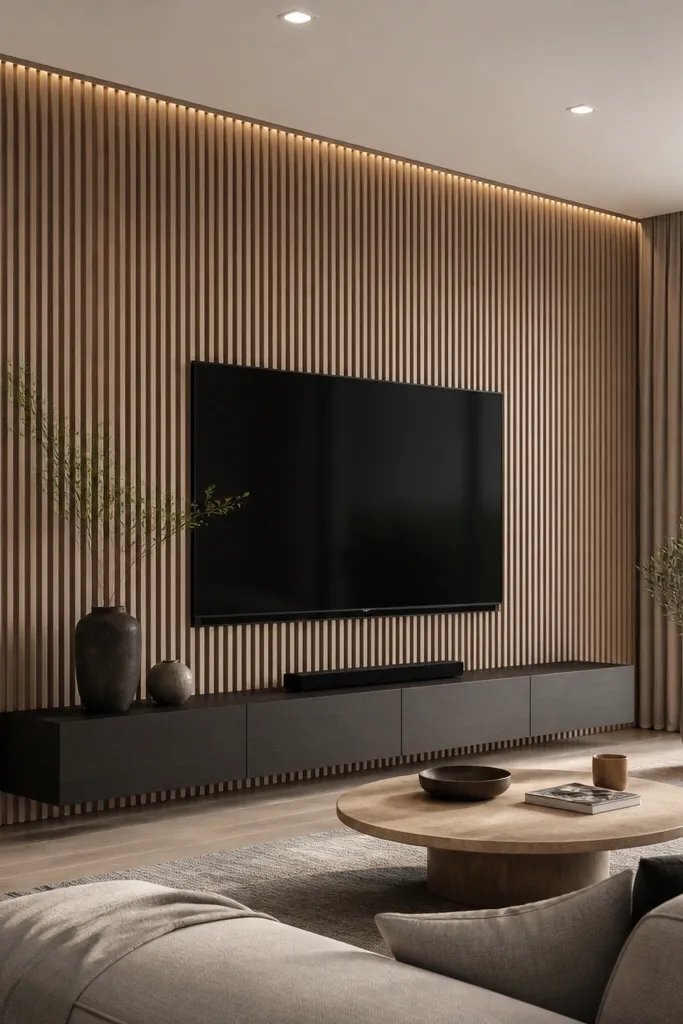
Measure the corner wall section that you can spare — keep it around 10-12 inches if space is tight. Build the main feature frame first, then carry the outer trim lines across the corner using mitered corners or simple butt joints with a trim cover. Use identical slat spacing or panel grid sizes on the wrap section so it reads continuous. Paint all pieces together to avoid shade mismatch. Mount the TV centered on the main wall and keep the cable path aligned through the shared frame so the wrap doesn’t create extra clutter.
Wrapping your TV wall paneling into the adjacent wall is how you make a small space feel intentional. That extra 8-12 inches of continuity removes the “single flat patch” look that cheap installs get. I’ve done this in tight living rooms where the TV was on a wall next to a doorway — the wrap made the whole area feel like one built-in unit. Use the same pattern family on both walls: if you start with vertical slats, keep vertical slats. The wrap also flatters the room because it adds depth cues, especially when you have a light-colored wall and warm lamps.
AvoidSwitching patterns at the corner — it looks like two separate projects.
Good to knowUse the same caulk color and sheen across both walls so the corner seam disappears.
14. Matte Charcoal Slab With Floating Light Ledge
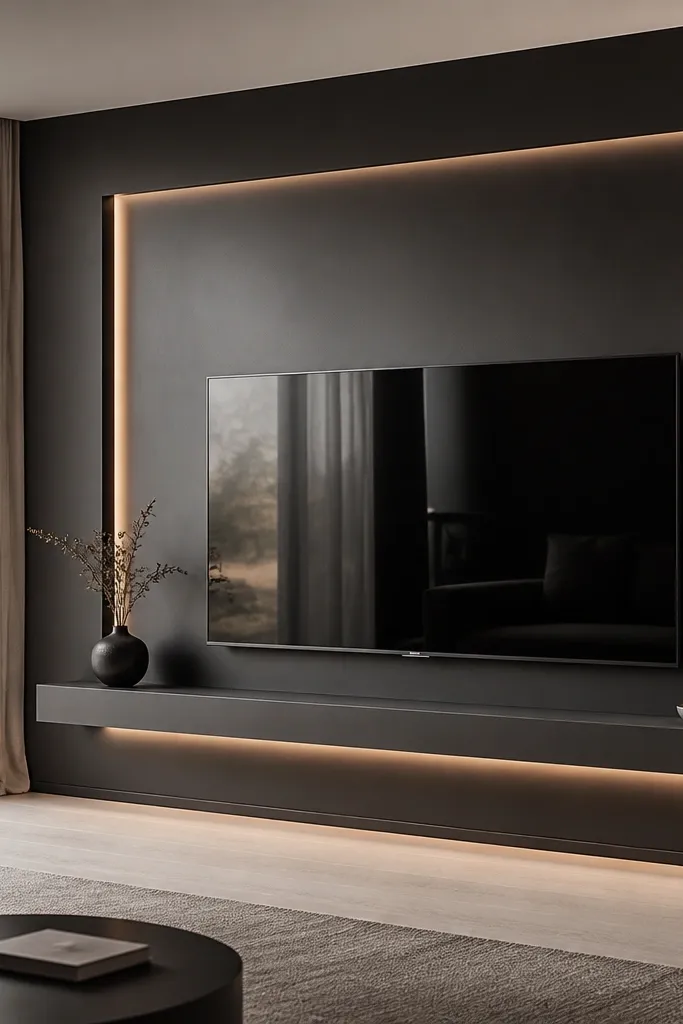
Minimal trim is luxury when the lighting is correct. A matte charcoal slab keeps the wall modern, and the floating ledge creates that “custom furniture” feel even in a small room. I like this look when your furniture is light-colored and you want the TV wall to be the anchor. The key is using matte paint so it doesn’t show wall imperfections, and adding a subtle light under the ledge to separate the TV area from the wall. This flatters rooms with neutral upholstery because the charcoal gives contrast without needing busy panel patterns.
Prep the wall carefully: fill holes, sand smooth, and prime with a bonding primer so the matte paint lays even. Create a recessed rectangle or build a simple frame using MDF strips, then paint the entire feature field matte charcoal. Install a floating ledge beneath the TV — I keep it thin, around 1-1.25 inches, and add hidden brackets. Run a low-voltage LED strip under the ledge so the light washes the wall lightly, not directly into eyes. Mount the TV to studs or a backer panel, then finish edges with slim trim so the charcoal field looks intentional.
Choose LEDs with a diffused cover so you see glow, not a line of dots.
Using flat black paint — it can look chalky and uneven under warm lamps.
15. French-Style Raised Panels in Warm White With Gold Knobs
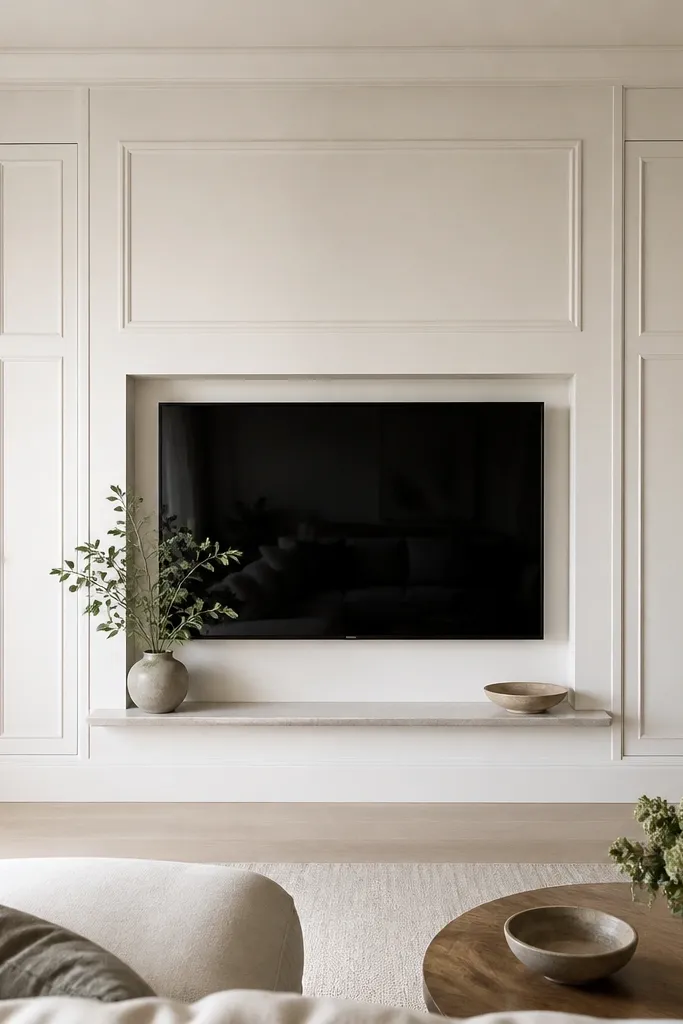
Build a centered TV niche frame using MDF trim, then install two side cabinet boxes either as built-ins or as pre-made units trimmed to match. Add raised panel inserts to the doors using MDF panel sections so the look is consistent. Paint everything warm white with satin finish, then attach gold knobs centered at the same height on both doors. Keep the TV opening border slim so the doors look like the main “furniture” elements. Mount the TV after the doors are installed so you can adjust the niche height for perfect alignment with the TV’s stand and soundbar.
French-style raised panels feel luxury because they combine order and softness. In small space TV wall design luxury, the doors on the sides matter — they hide clutter and make the wall look like built-in cabinetry. Warm white keeps it bright, and gold knobs add a small reflective detail that looks expensive without being loud. This works best if you want the room to feel polished for guests, like a compact living room that also doubles as an office. It flatters decor with cream, light wood, and subtle patterns because the raised panels add structure without competing with prints.
AvoidMixing door styles with the paneling — it makes the feature look like mismatched furniture.
Good to knowUse a consistent knob size (same diameter and finish) so the symmetry reads crisp from across the room.