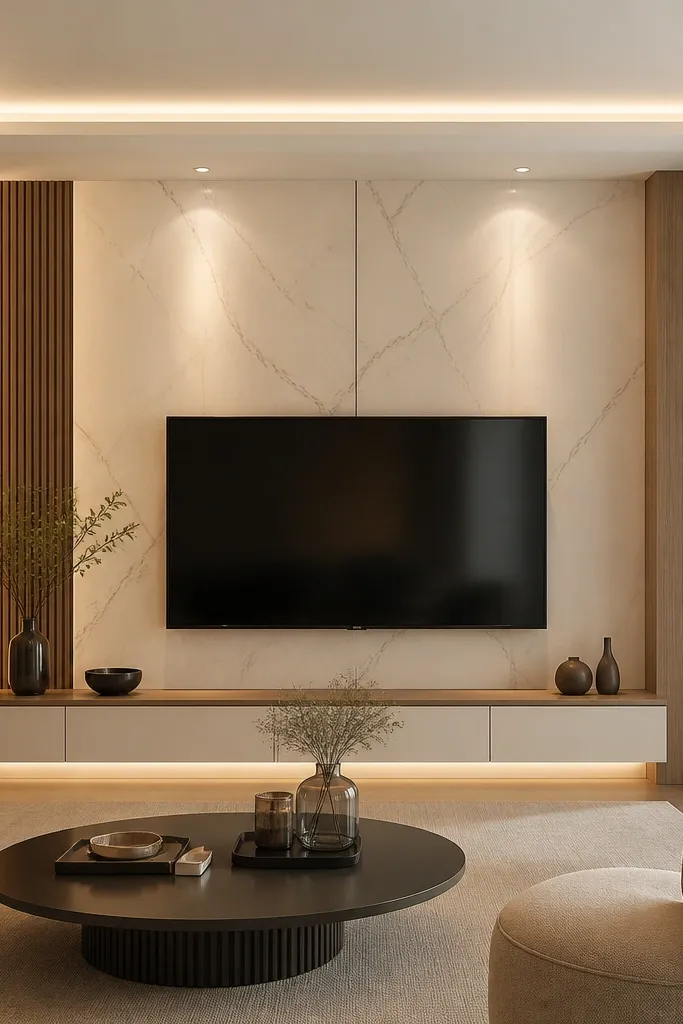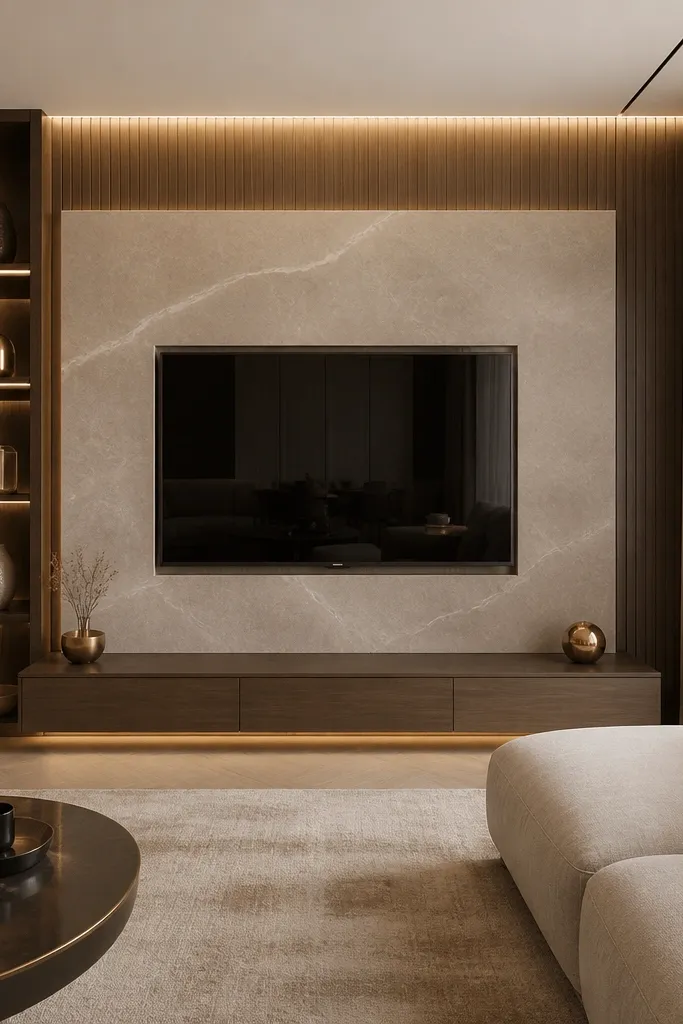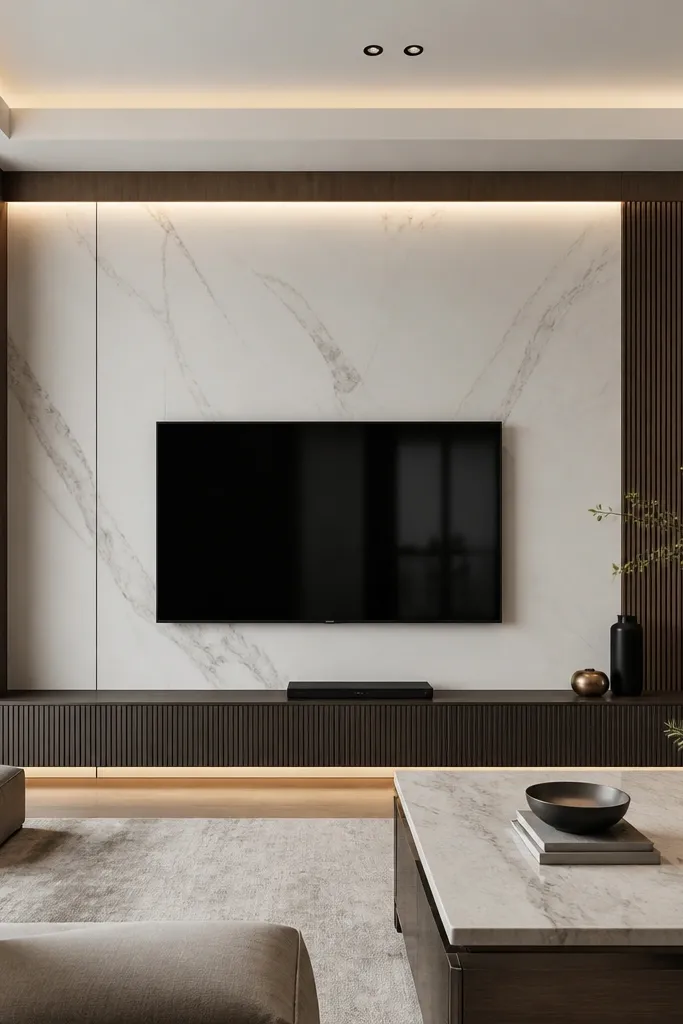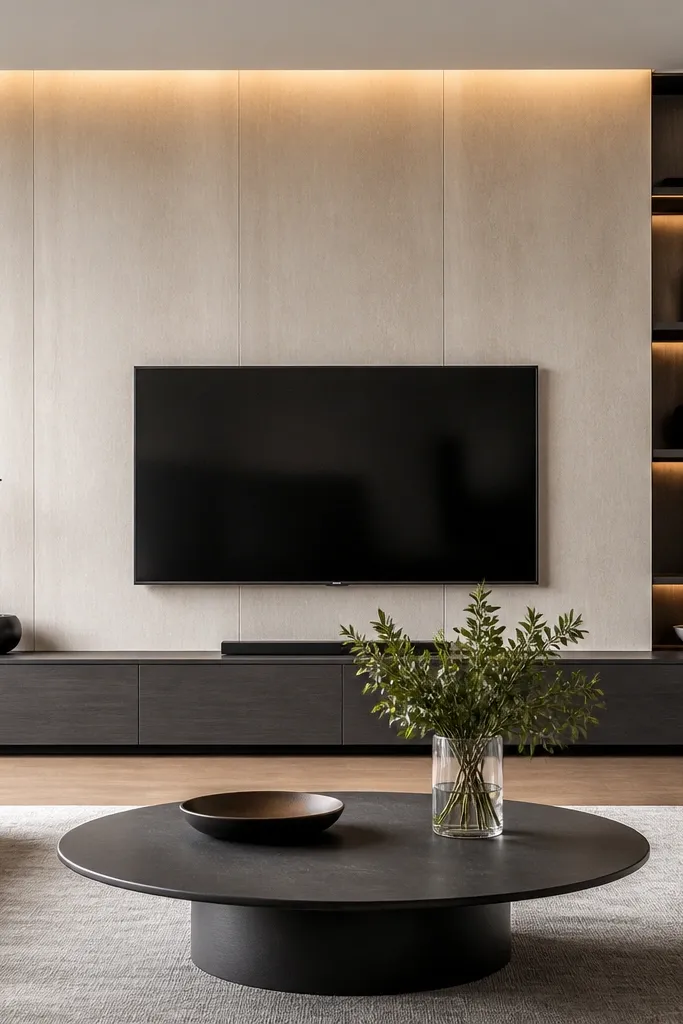
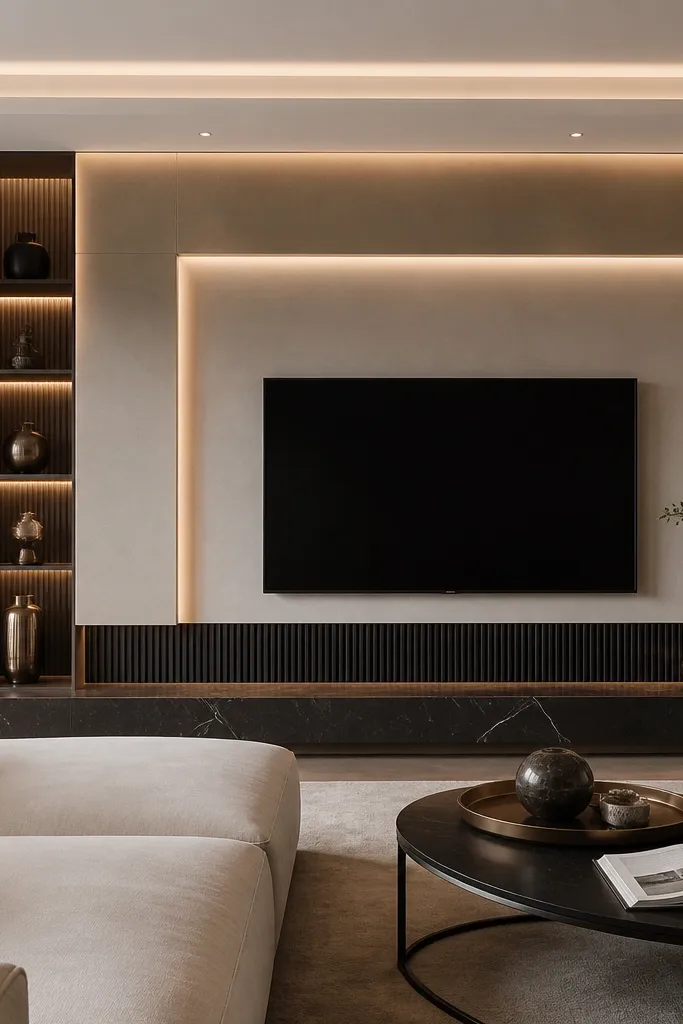
1. Smoked Oak Slat Wall With Recessed Back Glow
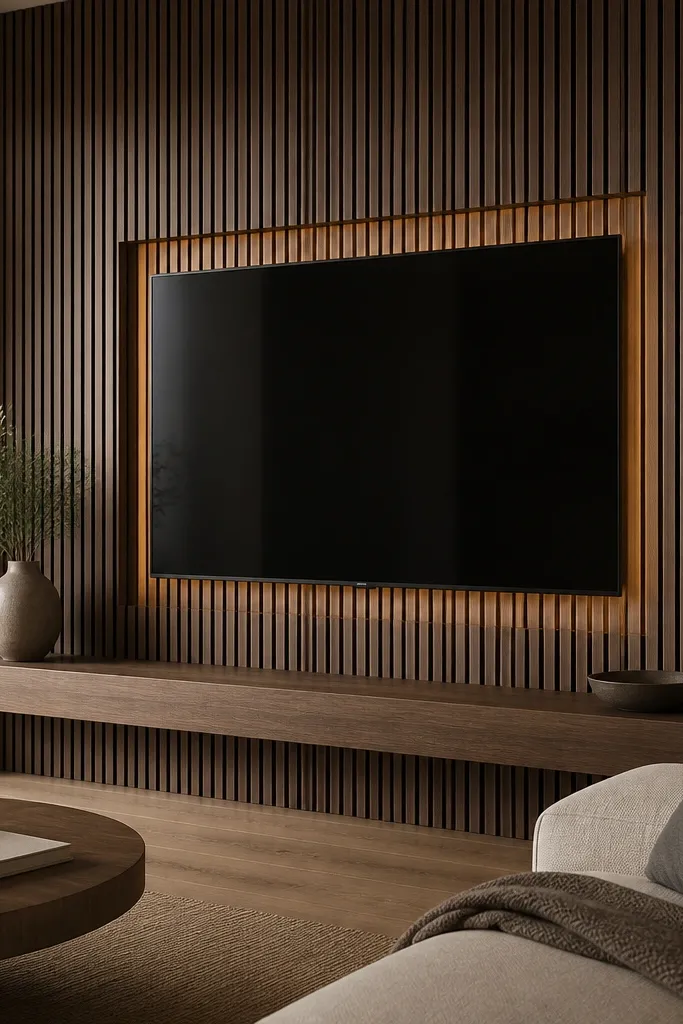
This is the setup I keep recommending because it looks custom even when you’re working with standard LED strips. The smoked oak slats give you depth and shadow, so the light has something to bounce off besides bare drywall. I like warm 2700K to 3000K LEDs recessed in a channel 1 inch deep behind the TV, so the glow lands on the slat faces and doesn’t reflect into the screen. If your room has medium to warm skin tones in furniture and rugs, smoked oak makes everything feel cohesive. It also flatters cooler rooms because the wood adds warmth without turning the glow orange.
Start by building a TV recess box 1 to 2 inches off the wall, wide enough to hide the LED channel and the power supply. Mount vertical slats over the box using 1/2 inch spacing so the gaps catch the light. Install a recessed LED channel behind the TV at the top third of the TV height, then test glow before you close the back. Frame the TV with a thin black metal trim piece to keep the look sharp. Finish with a floating oak shelf centered under the TV, sized to extend 6 to 8 inches past each side.
Use a diffuser lens or a channel with a frosted cover so you don’t see LED dots on the wall.
Don’t mount the LED strip directly behind the TV glass line — you’ll get a bright band and glare.
2. Matte Black Floating TV Console and Cove Light
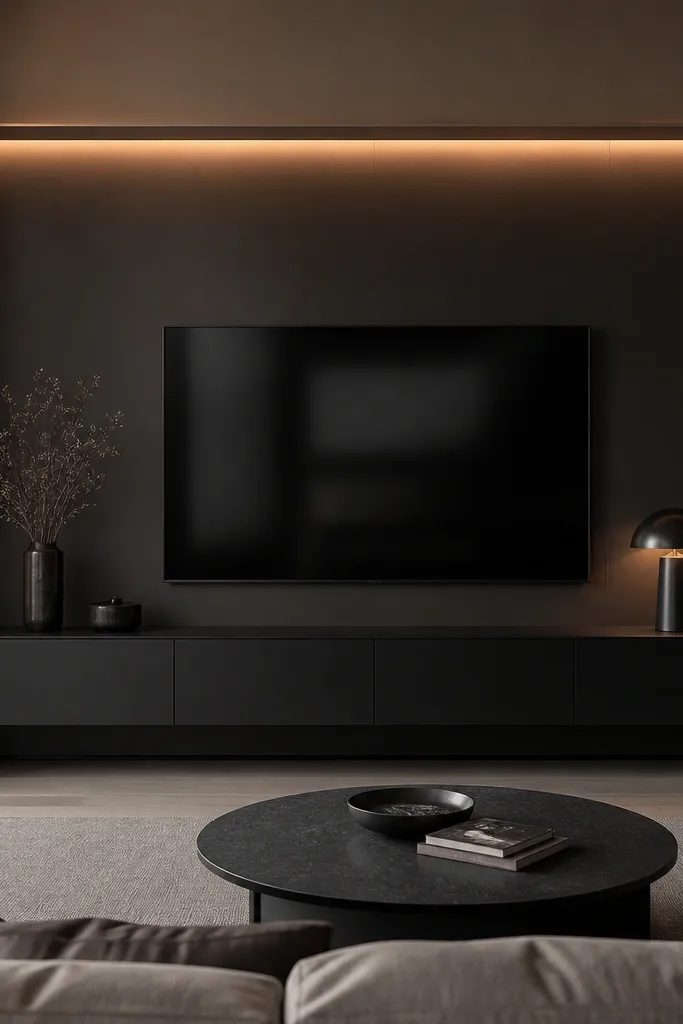
If your style leans modern and you hate visual clutter, this one works fast. The matte black panel absorbs stray light, so the only visible glow is the cove light. I’ve done this with 3000K LEDs and a diffuser cover, and the wall looks like it has a gentle spotlight without harsh shadows. It suits people with low-contrast rooms — think off-white walls, light gray sofa, and simple decor — because the black anchor gives the space structure. It also looks great with silver accents like brushed steel lamp bases.
Start by installing a smooth charcoal backing panel around the TV, leaving a 2-inch-deep top cove recess. Mount the TV so it sits about 1 inch below the top of the cove, then keep the cove centered. Add the LED strip inside the cove and wire it to a dimmer so you can bring the glow down for movies. Install a floating console with a 1/8 inch shadow gap from the wall to keep the look crisp. Finally, add one long linear decor object on the console, like a black ceramic tray, so the wall doesn’t feel empty.
Set your dimmer range so the glow is at its lowest during movie nights — you’ll feel the picture pop.
Don’t use glossy paint on the panel — it reflects the LED line and looks cheap.
3. Travertine-Look TV Backer With Warm Light Wash
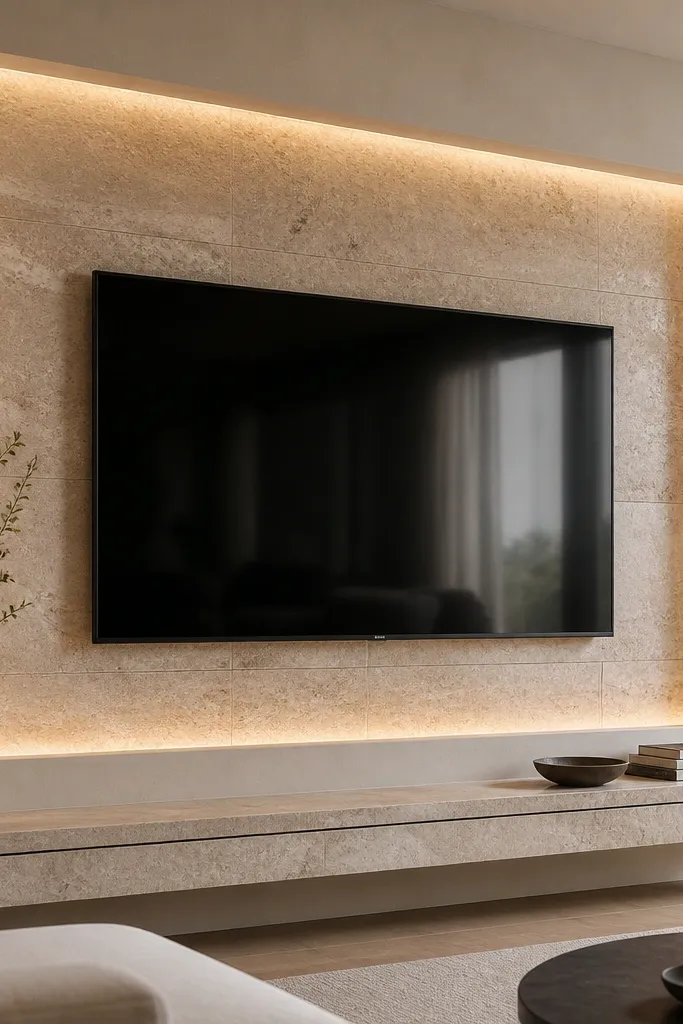
Stone textures change how light behaves. Travertine-look tile has natural-looking pores and veining, and the warm LEDs make those details show up like they do in a boutique hotel lobby. I like 2700K here because the undertones in beige and cream look flattering instead of yellow. This setup works especially well if your living room has warm neutrals — cream curtains, camel leather, or light wood floors. The light wash makes the TV area feel grounded, not floating.
Start by choosing a travertine-look tile or large-format panel and install it as a flat backer behind a TV mounting board. Create a recessed channel behind the TV area with an LED strip set back 1 inch from the tile surface. Aim the light upward slightly so it washes across the tile rather than shining straight out. Mount the TV on the mounting board, then add a matching stone-look shelf below with a 6-inch overhang on both sides. Finish with a thin black trim strip around the perimeter to keep the tile from looking too soft.
Good to knowIf you’re using tile, run the LED channel slightly lower than the TV center so the wash hits the middle third of the stone.
AvoidAvoid placing the light too close to the tile surface without a diffuser — you’ll see a hot stripe.
4. White Oak Frame With Linen Panels and Backlit Edge
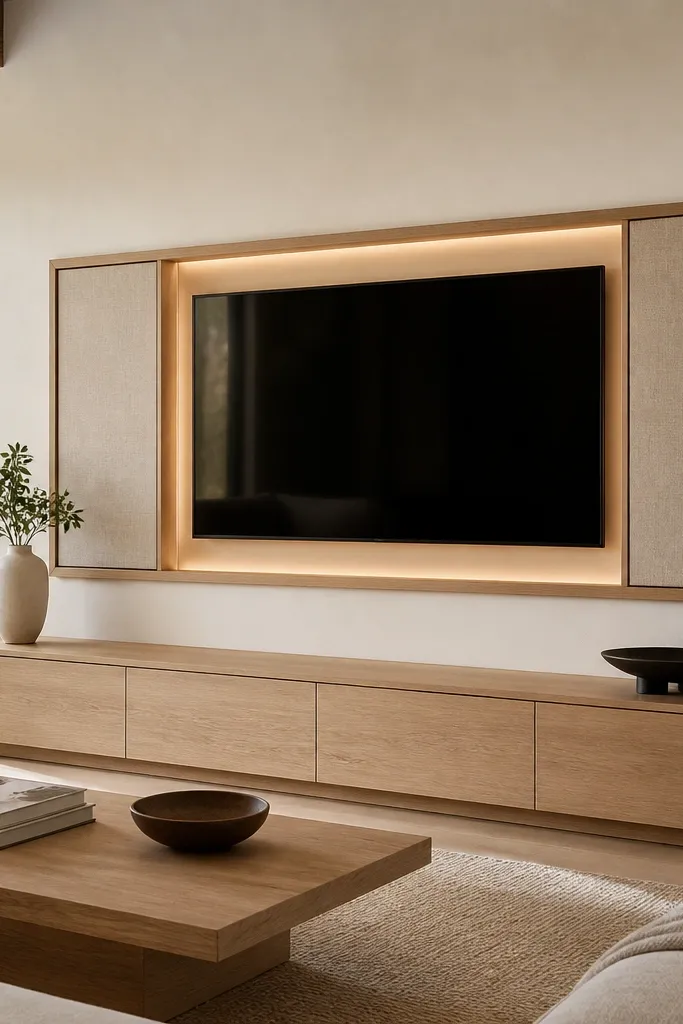
This is the “soft luxury” version that looks expensive without making the wall feel heavy. Linen panels diffuse light, so you get a gentle halo instead of a sharp line. The white oak frame keeps everything clean and light, which works beautifully if your furniture is light-colored or you want your room to feel airy. I’ve used 3000K LEDs in this setup and the glow looks flattering on cream, beige, and even cool gray decor. It’s also forgiving if your wall isn’t perfectly flat, because the linen hides tiny gaps.
Start by building a white oak picture-frame style border around the TV opening, leaving a 3/4 inch gap for the backlight. Mount linen panels on a rigid backing board so they don’t sag. Install an LED strip along the inner edge of the frame, then cover it with a frosted diffuser strip so you don’t see individual diodes. Mount the TV so its bottom edge aligns with the shelf line, then place a light oak console beneath. Add two slim matching wall sconces later if you want layered light, but keep them off during movie time so the edge glow stays the star.
Pull the linen slightly taut when you attach it so it doesn’t look wrinkled from across the room.
Don’t skip a diffuser — bare LED strips behind fabric look harsh and uneven.
5. Reclaimed Wood Mantel Look With Under-Mantel LED
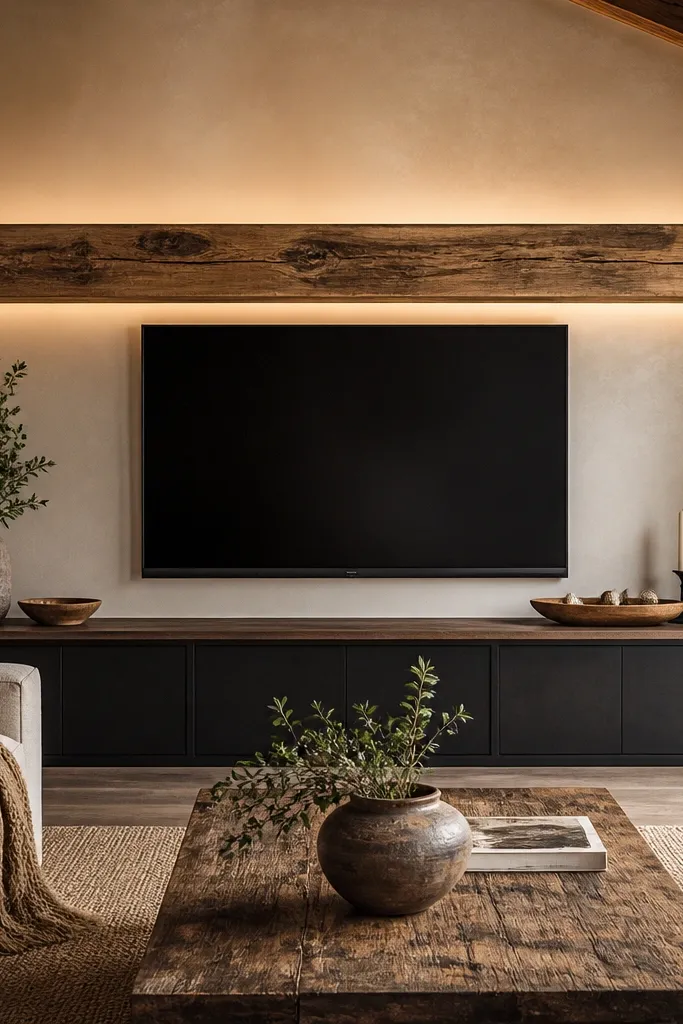
This is luxury with personality. The reclaimed wood’s grain and color variation make the light feel warmer and more dimensional, like a firelight effect without the flicker. I’ve done this with 2700K LEDs and a diffuser channel under the mantel lip, and the glow lands behind the TV in a flattering band. It’s great if your living room already has wood tones in floors or furniture and you want the TV wall to match. People with darker cabinets or rustic accents also love it because the wood doesn’t fight the room.
Start by sourcing a mantel board that’s at least 10 inches deep or has a thick lip so the LED has room to hide. Install it first, then mount the TV slightly below the mantel so the glow sits behind and above the TV edges. Add an LED strip inside the shadow space under the mantel, not on top of it, and wire to a dimmer. Use a matte black mounting plate or slim brackets to keep the reclaimed wood from looking busy. Finish by placing two matching reclaimed wood floating shelves on the sides for symmetry.
Pick a mantel with a mix of warm browns and honey tones so 2700K LEDs don’t turn everything muddy.
Don’t mount LEDs where you can see the plastic channel — it reads like a DIY hack.
6. Black Slat Wall With Warm Light Strip in the Top Rail
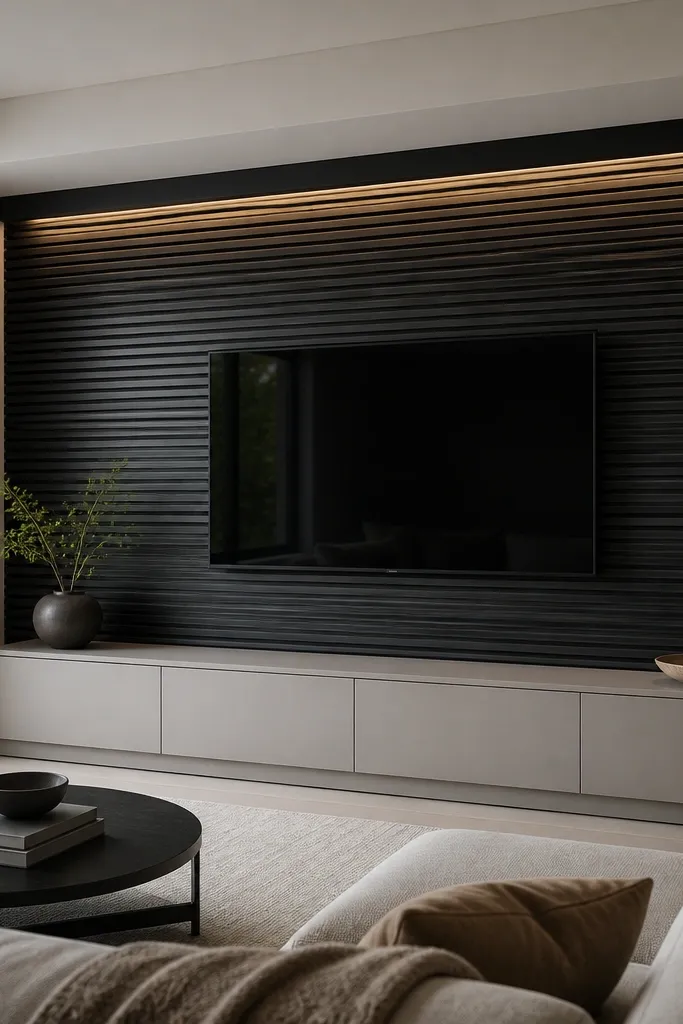
Horizontal slats plus a top rail light is one of my favorite ways to make a TV wall look “built” instead of decorated. The slats create stripes of shadow that move subtly as you walk around, and the LED sits high so it doesn’t glare in the screen. I’ve tested 3000K in this exact layout and the light looks cozy without turning gray furniture purple. It flatters both warm and cool rooms because the matte black absorbs the color cast. If you have a light gray or white sofa, this combo looks crisp and intentional.
Start by installing horizontal slats across a framed wall section around the TV, leaving a 2-inch gap at the top for a rail. Mount the TV so the top of the TV is about 3 to 4 inches below the top rail. Put the LED strip inside the top rail and angle it slightly downward toward the slat gaps. Keep the slat spacing around 1/2 inch so the light stripes are visible but not too bright. Add a simple cable chase behind the wall frame so you can hide everything before you close it up.
Good to knowUse a motion-friendly dimmer so the glow drops automatically when you start a movie at night.
AvoidAvoid wide slat spacing — the wall looks patchy and the light feels accidental.
7. Smoked Glass Side Niches With LED Accent Lines
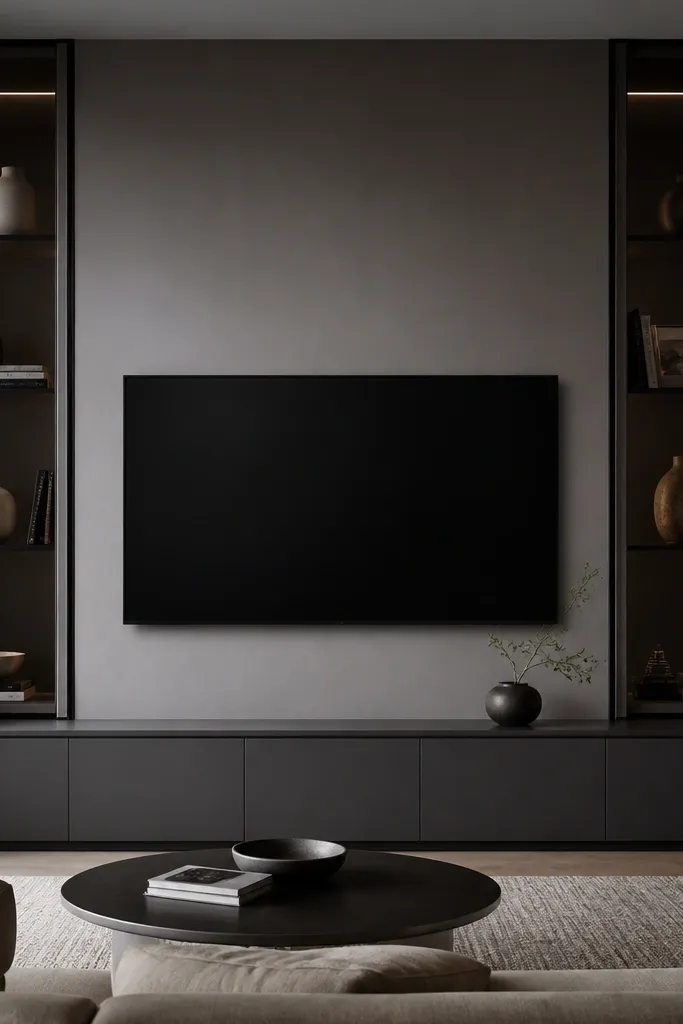
This design feels luxury because it creates a second focal point besides the TV. The smoked glass hides shelf clutter and makes the LED accents look intentional. I like this when you have a few curated items — framed photos, a small ceramic vase, or a slim sculpture — because the light makes them look like they’re in a store display. The matte gray backing keeps the glow from spreading too much, so the room stays calm. It’s also forgiving for mixed decor styles because glass and matte gray bridge everything.
Start by building a TV panel that’s matte gray and add two side niches with smoked glass fronts. Install LED strip channels along the inside edges of each niche, using a diffuser so the light doesn’t look like a line. Keep the LED level about 1/3 of the niche height so it grazes objects rather than lighting the glass evenly. Mount the TV centered on the panel and leave a 1-inch shadow gap behind it if possible. Style the niches with one tall item per side and one small item, keeping at least 2 inches of negative space between them.
Use warm LEDs (2700K) inside the niches so metal and ceramics look natural.
Don’t overload the niches — too many objects makes the glow look messy.
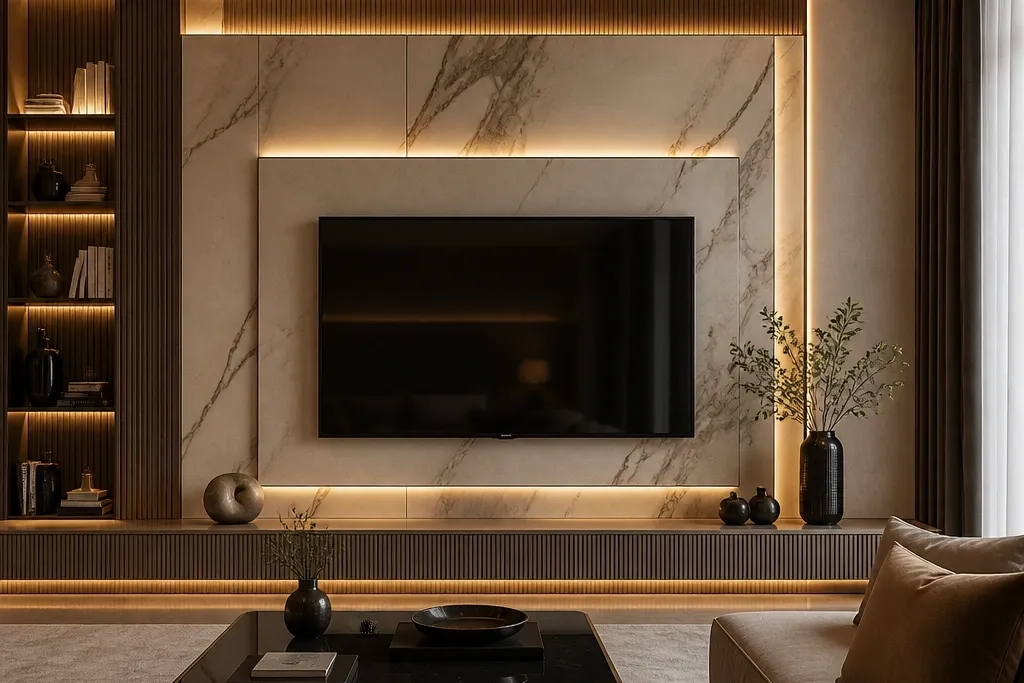
8. Monochrome Marble Panel With Recessed LED Halo
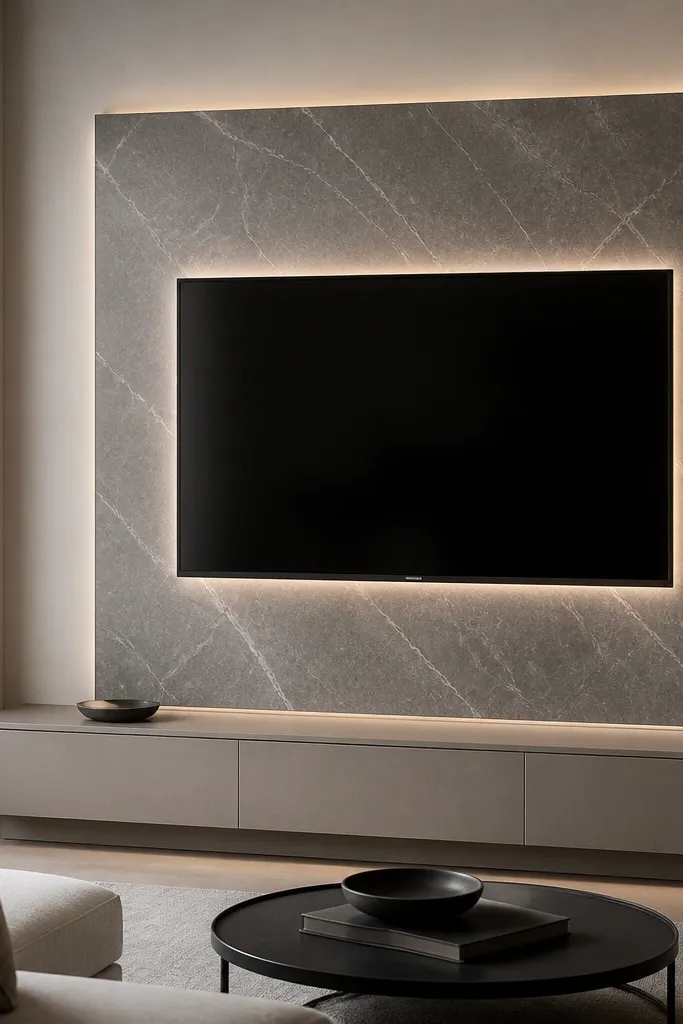
Monochrome marble is the cleanest way to make a TV wall feel expensive fast. The gray-and-white veining catches light without getting colorful, so your room stays modern. I like a recessed halo channel because it creates an even glow around the TV perimeter and makes the panel look like it’s floating. This setup works if your furniture is black, gray, or white, and you want the TV wall to match that palette. It also looks great for people who hate slats and prefer smooth surfaces.
Start by choosing a marble-look panel with a thin grout-free look, then mount it as a single flat surface around the TV opening. Create a continuous recessed channel behind the TV perimeter, leaving a 1-inch gap from the panel face so the glow spreads. Install LEDs around the inside edge and cover with a diffuser strip for uniform brightness. Mount the TV so it sits centered, and add a thin floating shelf that matches the marble finish. Finally, route wires through the wall or a hidden raceway that lands behind the panel.
Good to knowTest the halo glow with the TV turned off — you can adjust diffuser thickness or channel depth before you finish the wall.
AvoidAvoid warm LEDs that are too yellow on gray marble — aim for 3000K, not 2200K.
9. Cane Webbing Back Panel With Soft Corner Lights
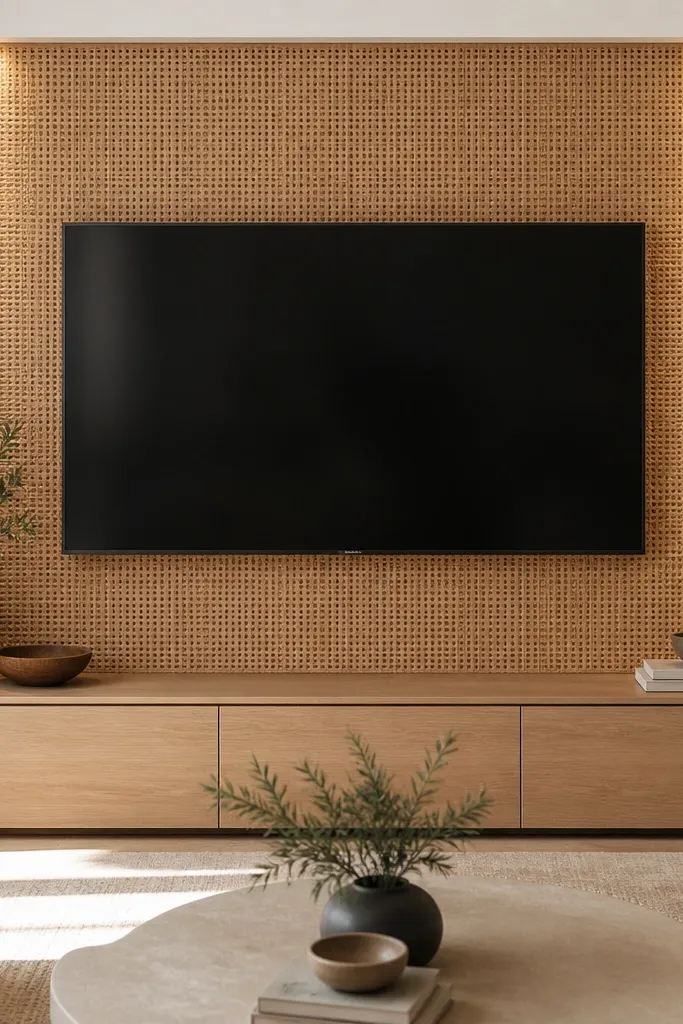
Cane webbing looks textured in a way paint never does, and it turns light into something you can see from across the room. The corner lights make the glow feel like it’s coming from the architecture, not from a strip. I’ve used 2700K corner LEDs here and the cane pattern catches light like soft shadows. This is a great pick for coastal, modern farmhouse, or anyone who wants a warmer look without going full wood. It also flatters spaces with natural fibers like jute rugs or linen curtains.
Start by installing a rigid backing board and then attaching cane webbing panels over it so it stays flat. Set two hidden LED corner channels at the top corners of the TV opening, aiming diagonally toward the center. Keep a small gap between cane and TV panel so the light can spread and not reflect directly at the screen. Mount the TV center and add a light wood console with simple legs. Style the bottom shelf with one low basket and one slim frame so the texture stays the main feature.
Use a dimmer and set the cane glow lower than you think you need — it looks better when it’s subtle.
Don’t put LEDs too close to the cane — you’ll see bright spots through the webbing.
10. Wall-To-Wall LED Backlight in a Built-In Media Column
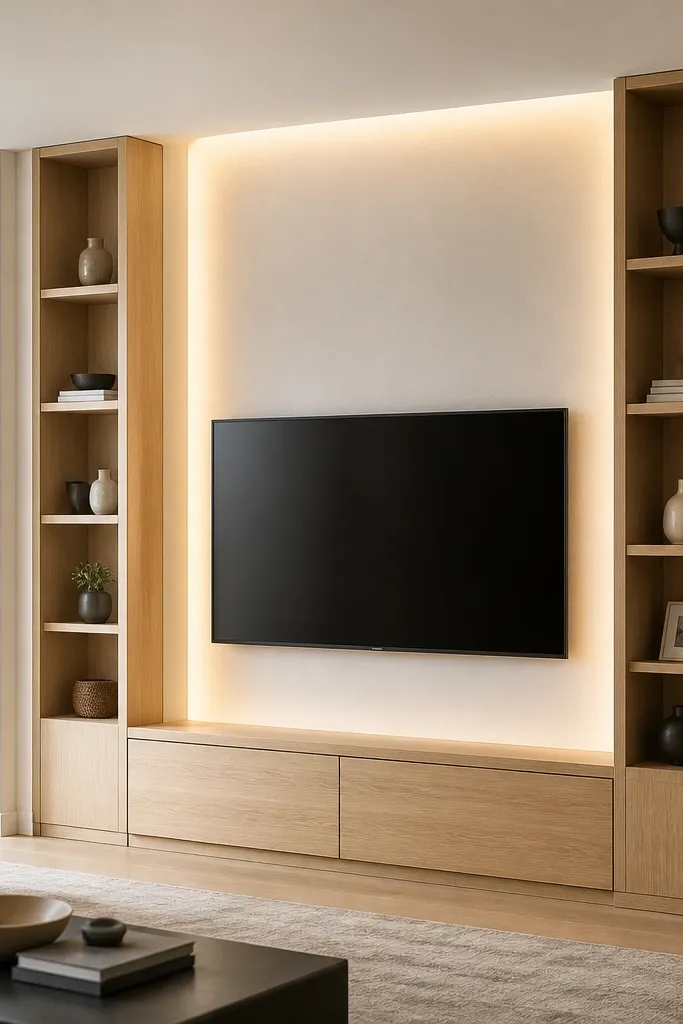
When you want luxury without a complicated DIY build, a built-in media column gives you big control over light spread. The vertical LED section makes the wall glow feel architectural, especially in rooms with tall walls or high ceilings. I like light oak and white paneling here because they keep the glow from looking gray. This design flatters modern interiors with clean lines and it works well if you store remotes, games, and cables behind doors. The glow also makes the TV area feel less like a separate object and more like part of the wall.
Start by framing a media column that extends at least 4 inches wider than the TV on each side. Install the LED strip on the back panel inside the column, then cover it with a diffuser so the glow spreads evenly. Leave a 1 to 2 inch air gap behind the TV opening so reflections stay controlled. Mount the TV centered on the inner board, then install cabinet doors below with a soft-close hinge. Finish the column with light oak veneer or boards and keep trim consistent across the full height.
Good to knowIf your room is dim, set the LED brightness so it’s just visible at full off — you’ll still see it at night without washing out the picture.
AvoidAvoid narrow columns — the glow looks like a strip stuck to the wall instead of a built-in feature.
11. Black and Walnut Corner Reveal With Side Glow
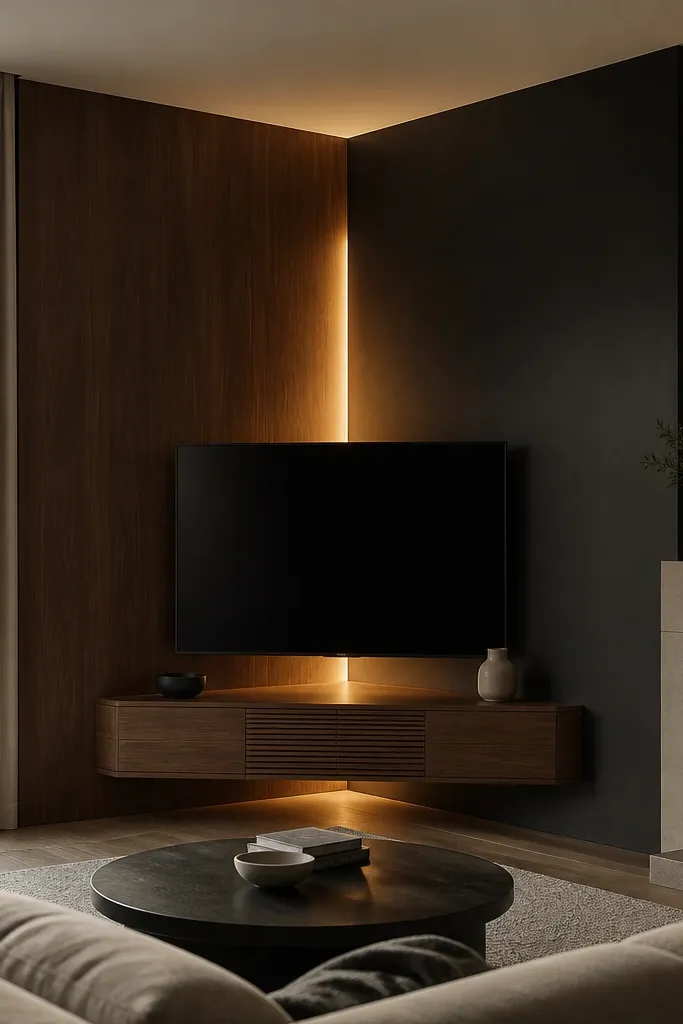
Corner TV walls are tricky because the light has two surfaces to bounce off. This design handles that by placing the LED inside the corner reveal so the glow fans out evenly. Walnut on one side adds warmth while black on the other keeps it modern and prevents the corner from feeling too beige. I’ve used 3000K LEDs in this exact corner setup and the side glow looks flattering on both light and medium walls. It suits people with open layouts where the TV is seen from multiple angles. The corner reveal also hides the mounting hardware and makes the whole thing look intentional.
Start by building two panels that meet at a right angle with a 1-inch reveal gap at the corner. Install an LED channel inside the reveal, then point the light toward each wall surface rather than straight out. Mount the TV so it sits centered between the two panels, and keep a small shadow gap behind it if the wall is uneven. Use walnut boards for the warmer side and black matte boards for the other side. Add a single floating shelf that spans the corner, with a 4-inch overhang on both edges.
Use a diffuser channel rated for backlighting so the corner doesn’t show LED “hot spots.”
Don’t mount LEDs flush to the wall surface in a corner — it creates a bright line you’ll notice every time you walk by.
12. Rosewood Veneer With Linear LED Under-Shelf
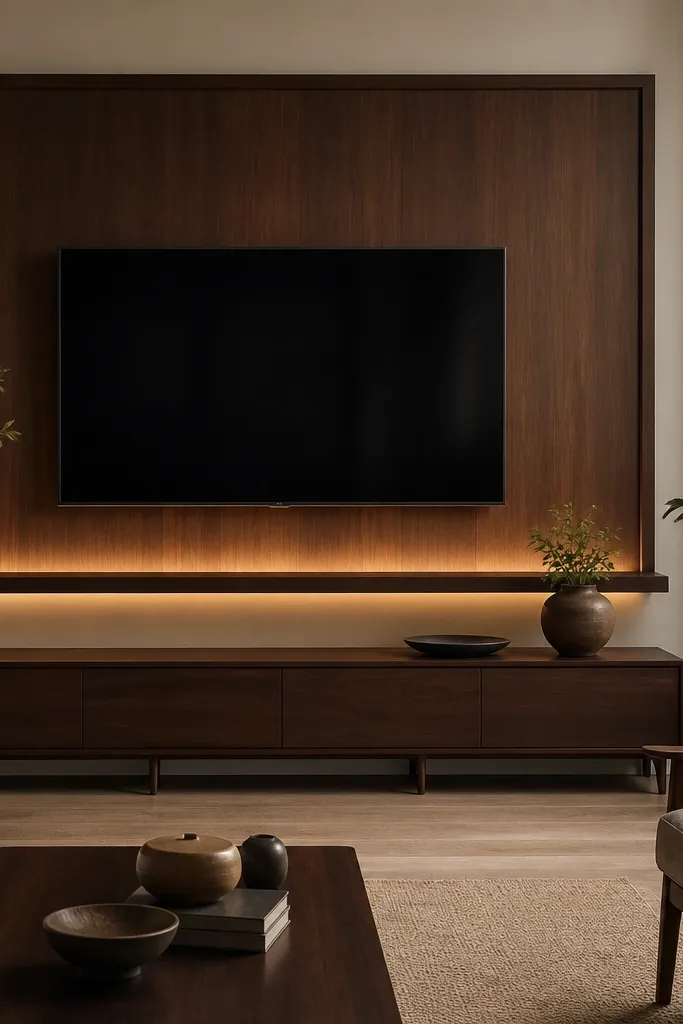
Rosewood veneer is one of those finishes that looks rich without needing marble or heavy stone. When you light it from the underside of a shelf, you get a gentle glow that looks like it’s coming from the wall itself. I’ve done this with 2700K LEDs, and the wood tone turns warm and inviting instead of pink. This is a great choice if your room has brown leather, cream textiles, or warm brass accents. It flatters darker rooms because the shelf glow adds brightness while still feeling cozy.
Start by applying rosewood veneer to a wall panel sized to the TV area, leaving a clean perimeter border of 1 to 2 inches. Install a floating shelf under the TV that is at least 8 inches deep so you can hide the LED strip. Place the LED strip under the shelf lip, angled slightly upward, and use a diffuser to prevent visible diode dots. Mount the TV centered on the veneer panel, then install the shelf so its bottom edge aligns with the TV lower third. Style the console with one low object and one vertical item so the wood tone stays the focus.
Good to knowChoose a shelf depth that hides the LED channel completely when viewed from the couch.
AvoidAvoid placing the shelf too close to the TV — the glow will hit the TV frame and look uneven.
13. Two-Tone Wood Panels With Vertical Light Strip Divide
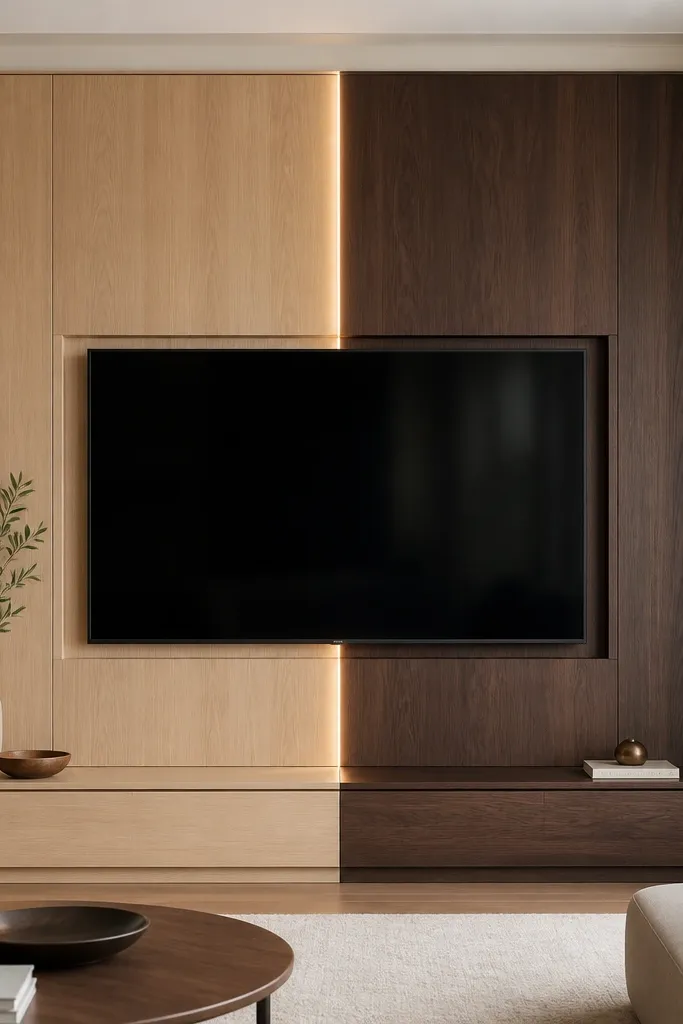
This design looks modern because it uses structure. The vertical LED strip acts like a visual seam, and the two-tone wood gives you contrast without needing a lot of ornament. I like it for rooms with open shelving on one side and a more minimal look on the other. Warm 3000K light works well because it keeps both oak and walnut looking natural, not washed out. It flatters people who have a lot of white in their room because the wood tones add warmth while the light line stays crisp.
Start by framing a TV wall section and dividing it into two equal panel zones, one in light oak and one in walnut. Install a recessed vertical LED channel at the center divide, with the strip set 1 inch back and covered with a diffuser. Mount the TV centered over the seam so the light line sits behind the TV area, not beside it. Add a thin white or black trim border to keep the two-tone effect clean. Finish with a low console that matches the lighter oak so the room doesn’t feel too heavy.
Good to knowKeep the vertical LED line height aligned with the TV height — a short strip looks like a mistake.
AvoidDon’t use a high-contrast LED brightness — the line will overpower the TV and look like a neon sign.
14. White Plaster Wall With Backlit Shadow Box Frame
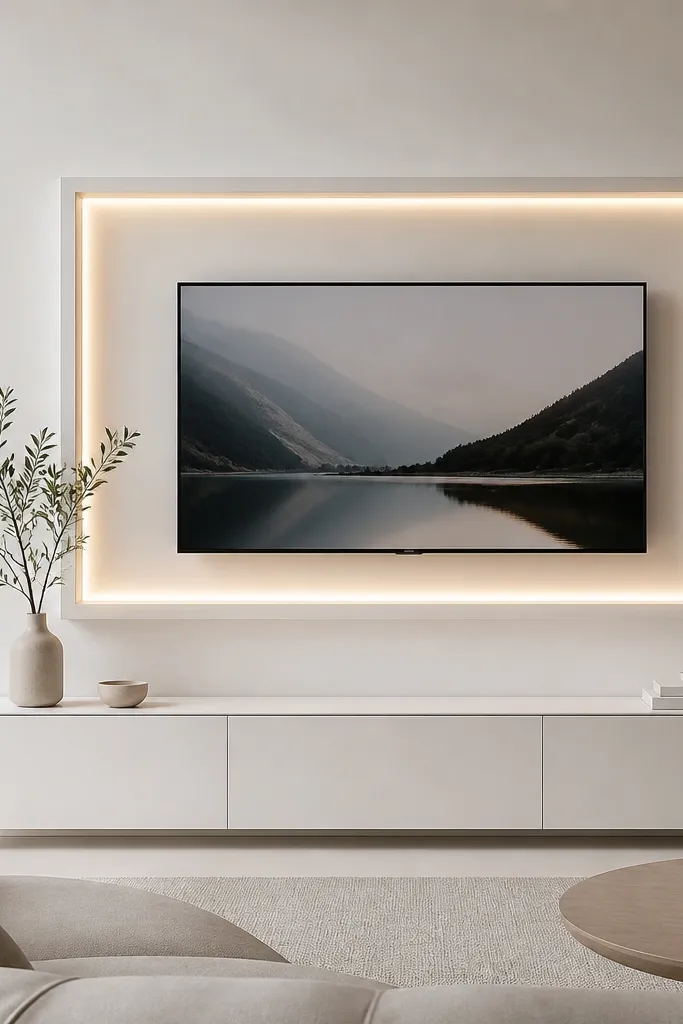
This is luxury for people who love clean lines and hate visible detail. The white plaster finish looks smooth and expensive, and the backlit shadow box creates a glow that looks like it’s part of the architecture. I’ve used 2700K LEDs with a frosted diffuser so the glow stays even and doesn’t show hotspots. This setup works especially well if your room is mostly white, cream, and light gray because the glow adds warmth without adding color. It also looks great with black TV frames and brushed metal accessories.
Start by building a rectangular frame around the TV using a rigid backer board so it stays straight. Leave a 3/4 inch channel inside the frame for the LED strip, then insert LEDs and cover with a frosted diffuser. Mount the frame so the TV opening sits centered, with a 1 to 2 inch shadow gap behind the TV. Install a slim console with legs so the bottom stays light visually. Keep decor minimal: one tall vase or one long tray on the console, both in neutral tones.
Good to knowUse frosted acrylic diffuser at least 2mm thick for the cleanest, even glow.
AvoidAvoid textured wall paint behind the frame — it causes uneven light scatter.
15. Black Steel Trim and LED Behind a Gallery Shelf
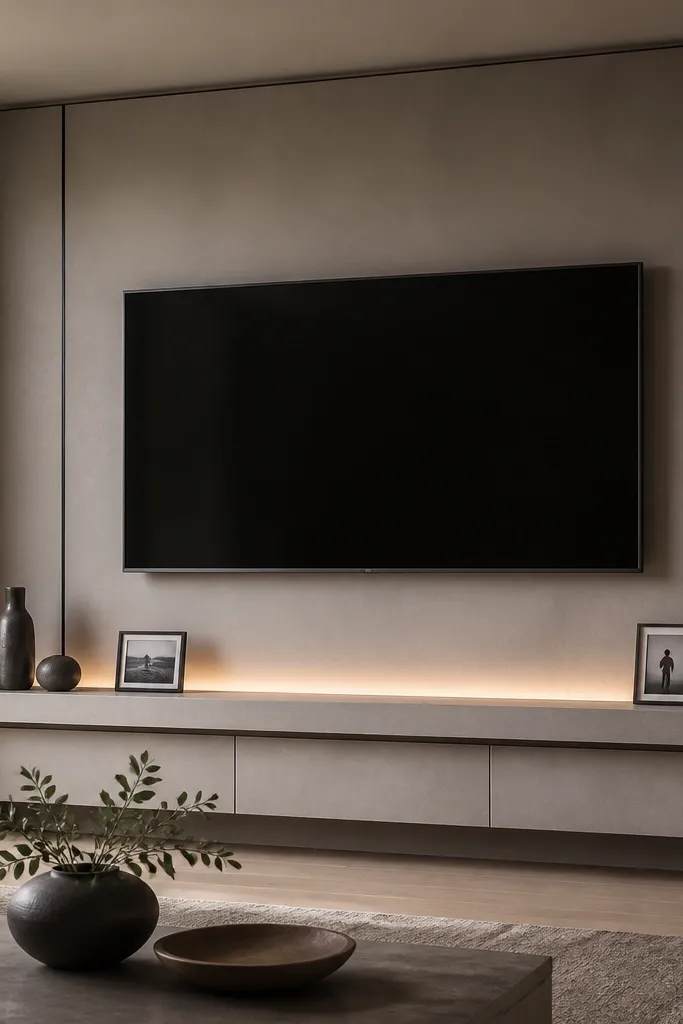
Steel trim makes the whole wall read “designed,” even if the wall panels are simple. The LED behind the gallery shelf gives you a light source that feels layered, because it lights the back panel and the objects slightly. I like this look with warm gray walls and brushed black hardware because it keeps the contrast smooth. It’s flattering if your decor includes metal picture frames, watch-like accessories, or modern ceramics. The glow also makes framed art feel more intentional than random shelf styling.
Start by installing black steel angle trim around the TV area and around the shelf opening below. Build a back panel in warm gray, then mount a shelf that sits 6 to 8 inches below the TV. Install LED strip channels behind the shelf lip, then diffuse them so the glow looks like a wash. Mount the TV panel on top of the shelf line so the light hits behind the TV edges. Style the shelf with 3 frames total, spaced evenly, plus one small sculpture, keeping objects under 6 inches tall so the glow doesn’t look blocked.
Good to knowChoose frames with matte finishes; glossy glass frames create glare when the LED is on.
AvoidDon’t crowd the shelf — too many objects make the glow look like a cluttered workbench.
16. Cedar Panel With Indirect LED in a Top Slot
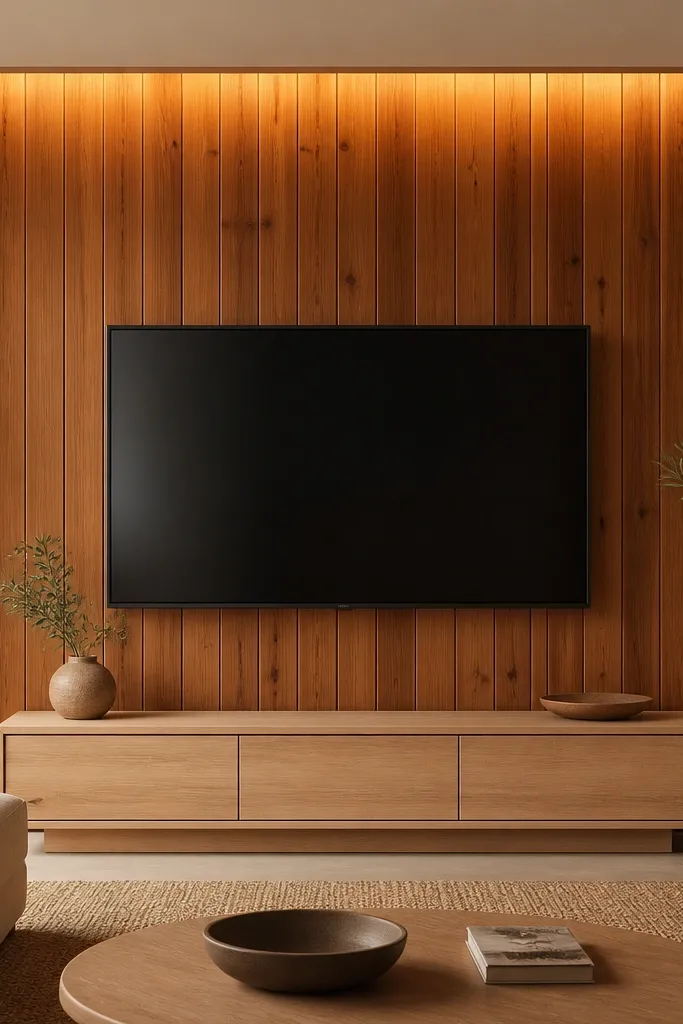
Cedar has that natural warmth that makes lighting feel cozy. When the LED is hidden in a top slot, the glow spreads down softly and gives the cedar panel a “lit from within” look. I’ve used 2700K LEDs with cedar and it keeps the wood looking rich instead of turning it orange. This works well in rooms with tan, cream, or warm white walls because cedar adds warmth without clashing. It’s also a smart choice for people who want a natural material look but don’t want to deal with heavy stone.
Start by lining the wall section with cedar boards or cedar-look panels in vertical orientation. Build a 1 to 1.5 inch deep top slot above the TV that hides the LED strip and diffuser. Place the LED about 2 inches back from the slot opening so it doesn’t create a bright line. Mount the TV centered and keep the top of the TV 4 to 5 inches below the slot. Add a simple console in light oak or maple and keep accessories in neutral colors like off-white and tan.
Good to knowUse a warm dimmer and set it so the glow is strongest just before bedtime — it changes the whole mood.
AvoidAvoid placing a very cool LED with cedar — it makes the wood look dull and gray.
17. Black Rimmed TV Recess With RGBW Accent Fade
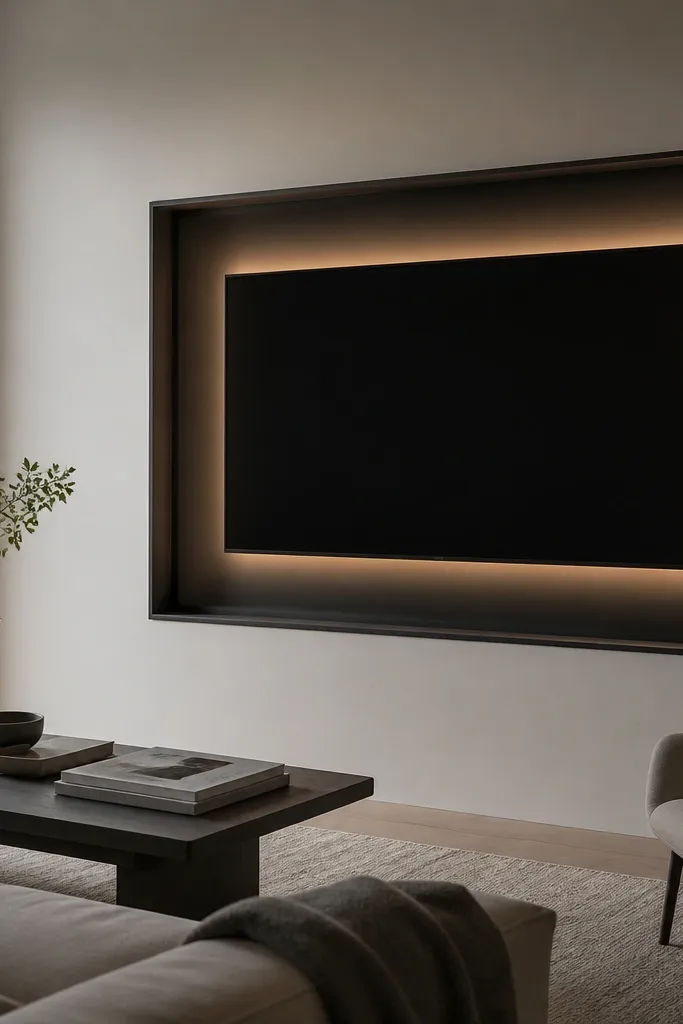
If you like mood lighting, RGBW systems can look luxury when you keep the color restrained. The black rim makes the light feel intentional, and the gradient fade stops the glow from looking like a single strip. I like using RGBW controllers and setting a default warm mode for everyday viewing, then switching to a gentle color mode only for parties. This design flatters minimalist rooms because the black frame gives structure. It also works for people who want to change the vibe without changing the decor.
Start by recessing the TV into a black frame panel with at least a 1-inch shadow gap behind it. Install RGBW LEDs in the back channel and use a diffuser so the light blends smoothly. Set a default warm white scene at 3000K and dim it to about 40 to 60 percent for movies. Program a second scene with a soft blue or green fade at low brightness for evenings, keeping it subtle so it doesn’t wash out the picture. Add a thin matte shelf below the TV and keep decor minimal so the glow stays the center of attention.
Pick scenes that keep brightness low; the best “colored light” looks like atmosphere, not like a stadium.
Avoid full-bright RGB colors — they reflect in the TV and make the wall look tacky.
18. Walnut Picture Frame Around TV With Bottom LED Step
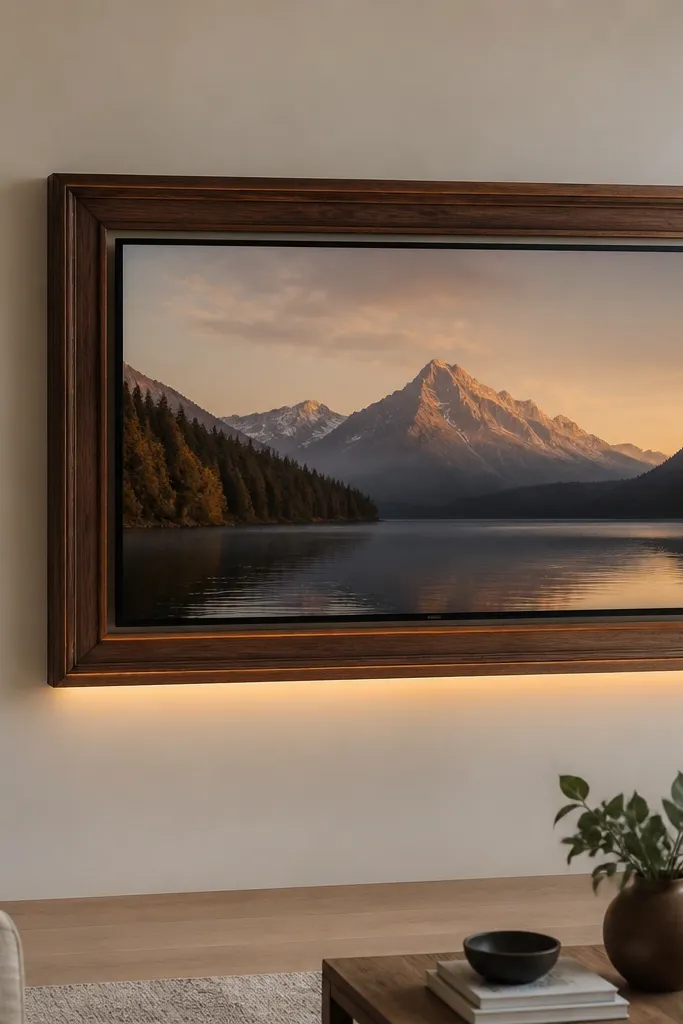
This is the luxury look that feels classic but still modern because the light is controlled. The walnut picture frame gives you that “gallery” feeling, and the bottom LED step adds a warm lift that makes the TV feel anchored. I’ve used this in rooms where the TV is a little higher on the wall, and the bottom glow balances the composition. Walnut flatters medium skin tones and warm undertones in wood floors. It also plays well with brass hardware and cream textiles.
Start by building a thick walnut frame with a 2-inch inner opening around the TV. Install a bottom LED step inside the frame, set back 1 inch and covered with a diffuser. Mount the TV on a board behind the frame, leaving a small shadow gap so the light doesn’t reflect directly at the screen. Position the frame so the TV center lines up with your seating height, then keep the bottom LED step about 3 inches below the TV. Style the area with one simple plant or one framed piece on the console to match the gallery vibe.
Use a warmer dimming range so the glow feels like candlelight during movies.
Avoid thin frames with strong LEDs — the glow looks like it’s floating without support.
19. Terracotta Panel With LED Uplight and Plaster Shelf
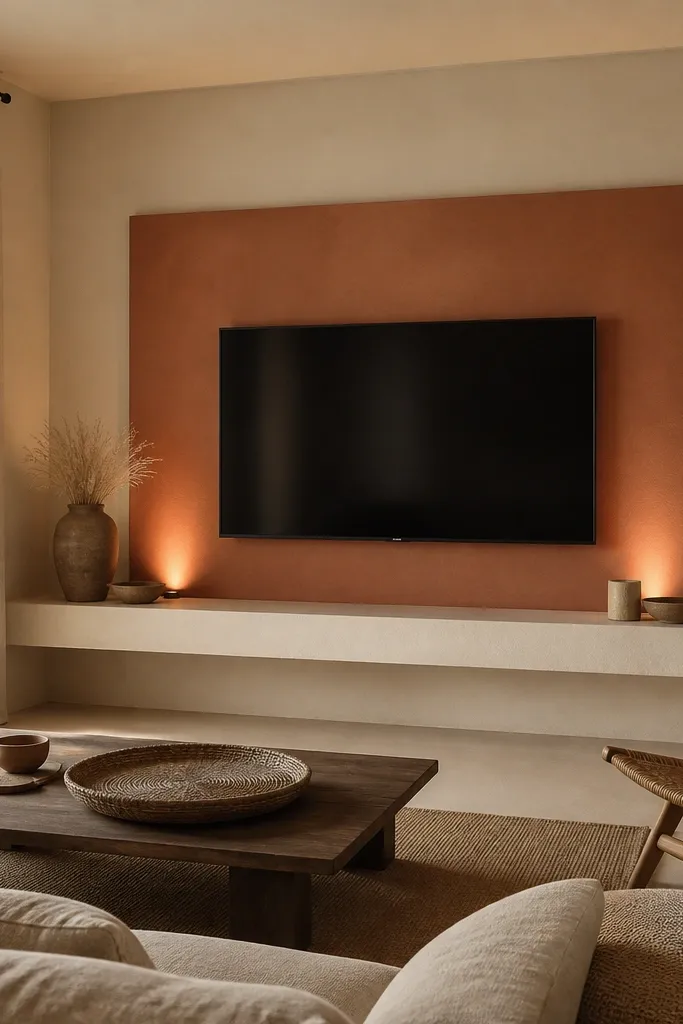
Terracotta is a sleeper choice for TV wall design luxury with lights because it makes warm lighting feel natural. When you uplight from the sides, the glow adds depth to the panel and avoids the flat look you get from a single back strip. I like this when your room has natural textures like linen, jute, or woven baskets. The warm tones flatter people with golden or olive undertones because the lighting feels consistent with the palette. It also makes the TV area feel cozy even when the room is bright.
Start by installing a matte terracotta panel around the TV, keeping the surface clean and dry-finished (no glossy sealant). Add two recessed uplight pockets on each side of the TV at about the mid-height of the TV. Put warm LEDs (2700K) in the pockets and aim them upward at a slight angle so they wash the panel rather than blasting the corners. Mount a plaster-look shelf below the TV and keep it minimal, not overly thick. Add one or two natural decor items in neutral colors so the terracotta stays the star.
Good to knowUse a diffuser for the uplights so the edges don’t show bright LED dots.
AvoidDon’t use a cool white LED with terracotta — it makes the panel look dusty.
20. Ribbed White Panel With Backlit Horizontal Band
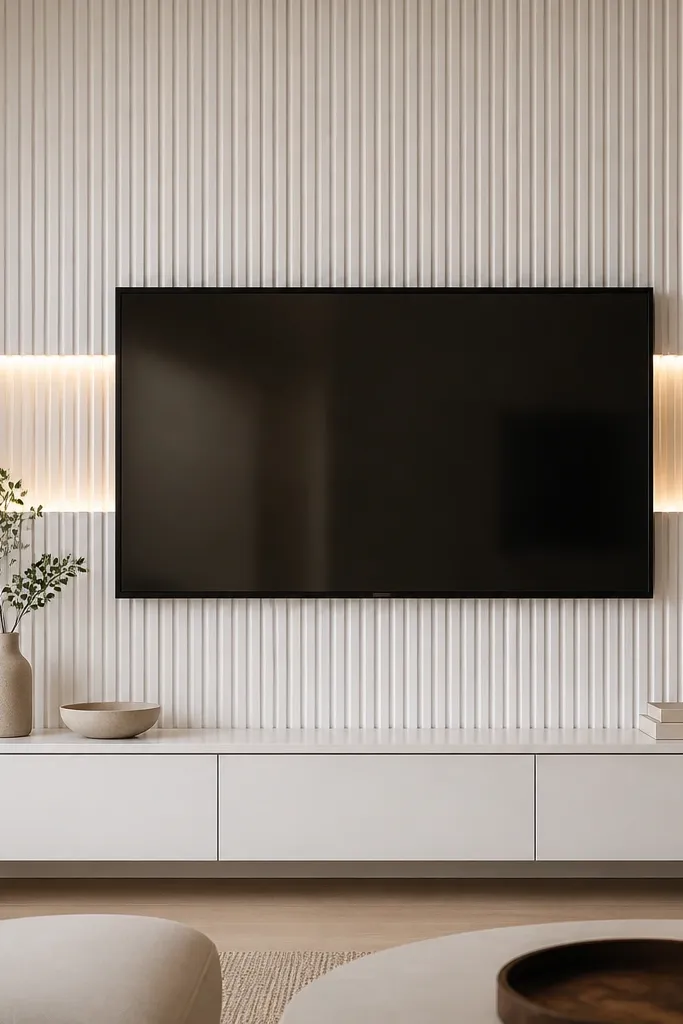
Ribbed panels create texture that makes light look expensive even when you keep the design simple. The horizontal band is a controlled way to light texture without washing the whole wall. I’ve done this with 3000K LEDs and a frosted diffuser, and the ribs look like they’re lit from within rather than lit from one direction. This setup flatters white-on-white rooms and works great with modern decor that has clean shapes. It also hides small wall imperfections because the texture reads as intentional.
Start by installing ribbed panel boards around the TV area, keeping the ribs vertical or horizontal consistent. Create a recessed channel behind the TV for a horizontal LED band, positioned around the middle third of the TV height. Install LEDs inside and cover with a diffuser so the glow spreads evenly across the ribbing. Mount the TV on a board that sits flush enough that the ribbed texture remains the frame. Use a white console with a simple silhouette and style it with one low tray and one tall plant.
Dim the band slightly lower than you think; texture looks best when the glow is gentle.
Avoid placing the light band too close to the TV edges — it can create a distracting bright outline.