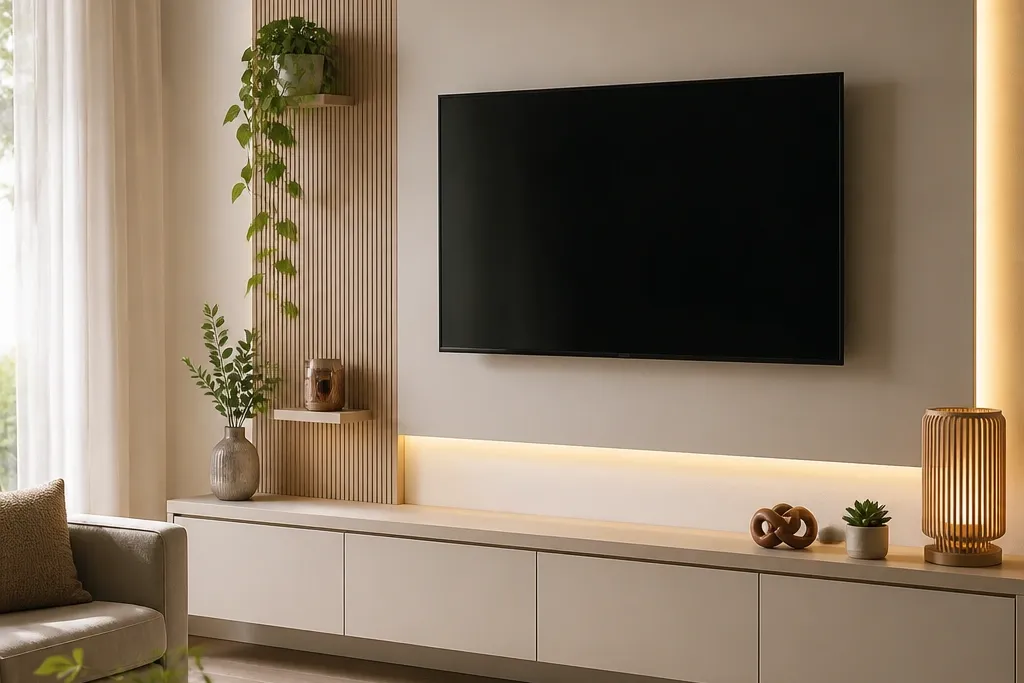
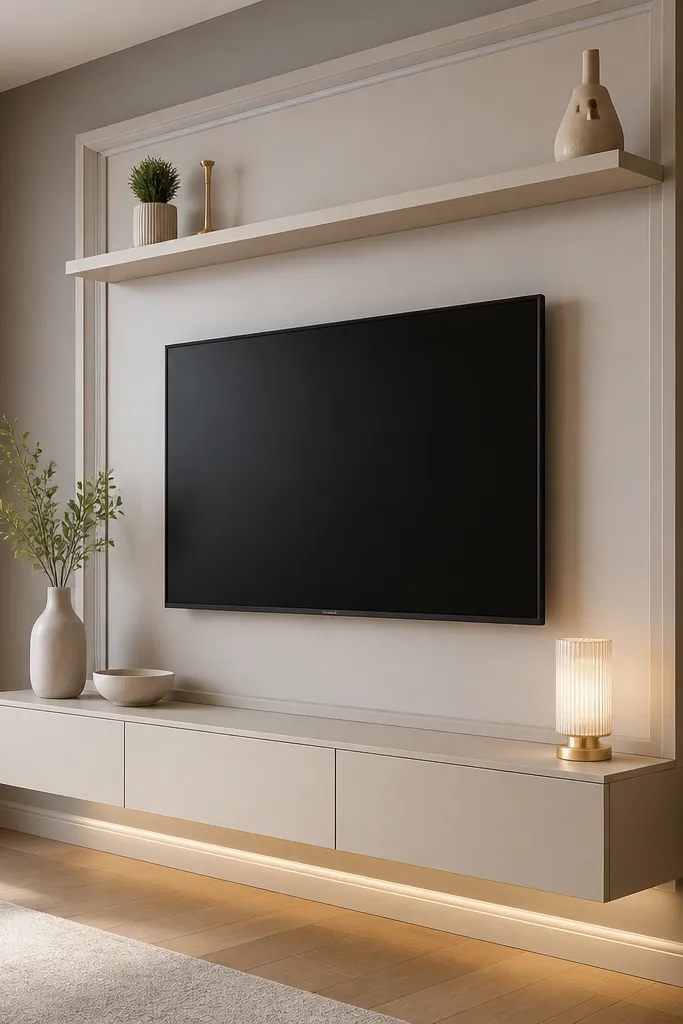
1. Faux mantel beam with a TV-ready floating shelf rail
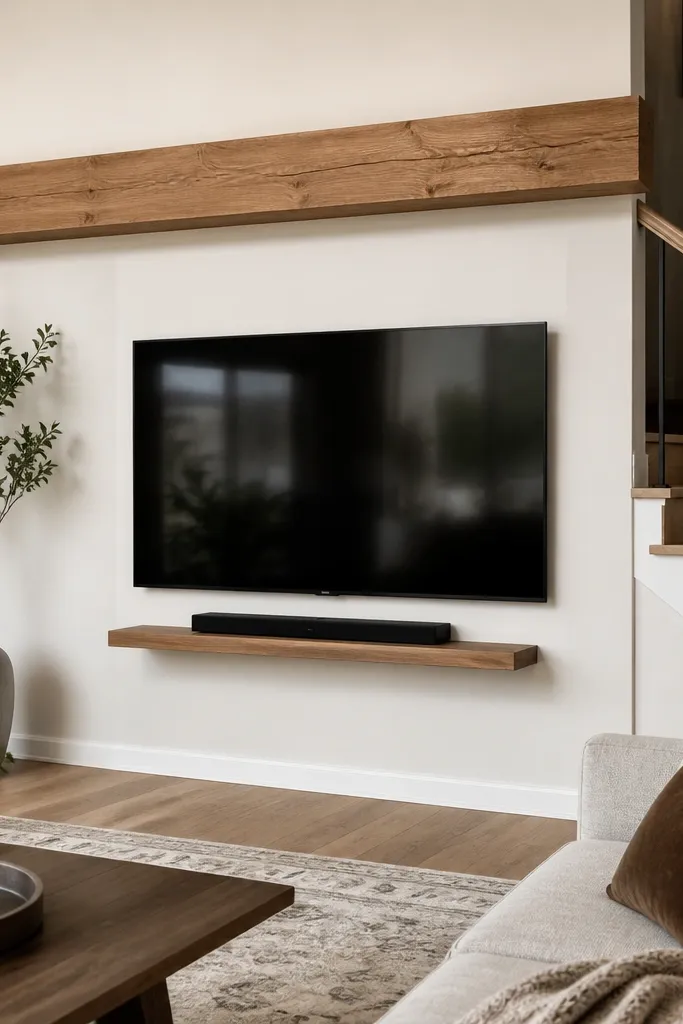
This design makes your TV look like it belongs to a fireplace wall, even when the room has stairs and odd angles. I use a warm oak beam look because it reads cozy and expensive against most paint colors, especially soft greige, warm white, and muted sage. The TV sits on a slim floating shelf rail so it looks level and intentional, not “hung by the cord.” It flatters small rooms too because the beam creates one strong horizontal line that balances the stair height changes.
Start by measuring the TV width and mark a center point on the stair wall. Mount a renter-safe floating shelf rail system first at the exact height where the TV bottom will land, then place the TV on the bracket plate that attaches to the rail. Add the faux mantel beam above the TV using a lightweight MDF beam with a peel-and-stick backing strip or removable standoffs, so you can take it down later without tearing paint. Finally, run a paintable cord channel from the TV down to your power outlet, then cover it with a matching face strip so it disappears into the wall.
Paint the cord channel the same shade as the wall before you install it — it vanishes from across the room.
Skipping the center mark and mounting everything by eye is what makes this look crooked and cheap.
2. Fluted panel grid behind the TV with a removable frame
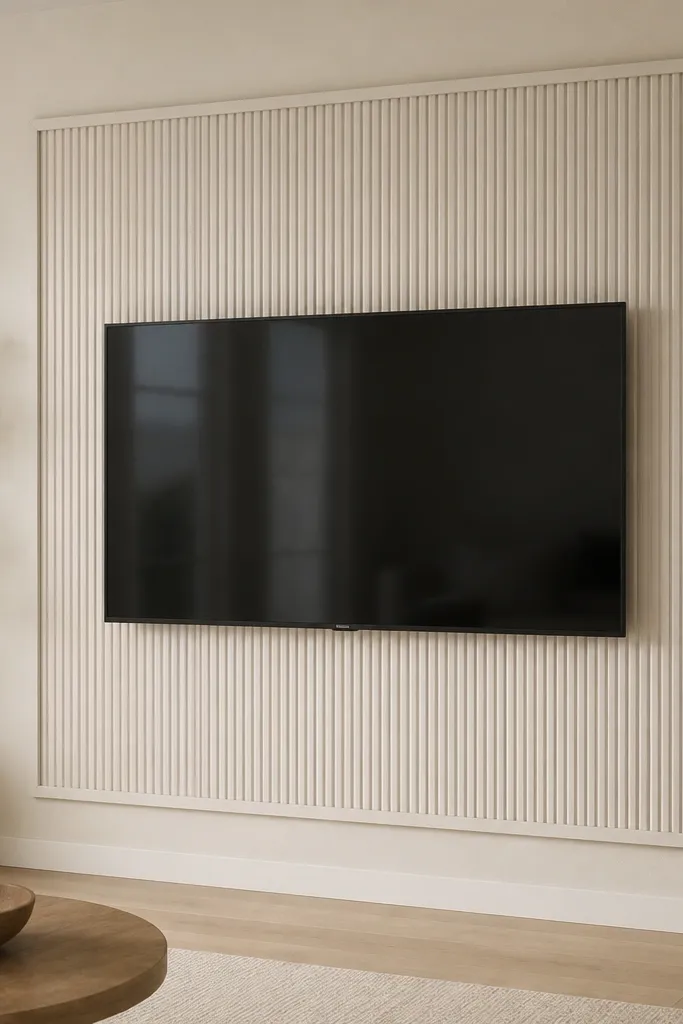
Fluted panels give you that high-end hotel hallway look with almost no furniture required. I like matte white fluting because it catches light gently and doesn’t glare like glossy finishes, especially in rooms with stair shadows. When the TV sits inside a framed panel grid, your eye reads the TV as part of the architecture. This is flattering for rooms with darker walls too — the panel brightens the TV zone without needing extra decor.
Start by choosing fluted trim strips that are thin enough to be lightweight, then build a removable rectangular frame using pre-cut corner pieces and a backing board like 1/4-inch MDF or foam board. Attach the fluted strips to the backing board in a grid pattern, keeping the columns evenly spaced around the TV. Place the finished panel behind the TV so the screen sits centered within the rectangle, then use renter-safe removable mounting points along the frame edges. Run cables into the backing cavity or behind the panel edges, and finish with a removable cord cover that matches the panel color.
Good to knowUse a single grout-like spacing width between flutes (like 1/2 inch) to keep the grid looking crisp instead of random.
AvoidUsing heavy, thick panels without checking wall limits — it makes the whole thing feel flimsy and wobbly.
3. Two-tone stair wall color block with a floating media ledge
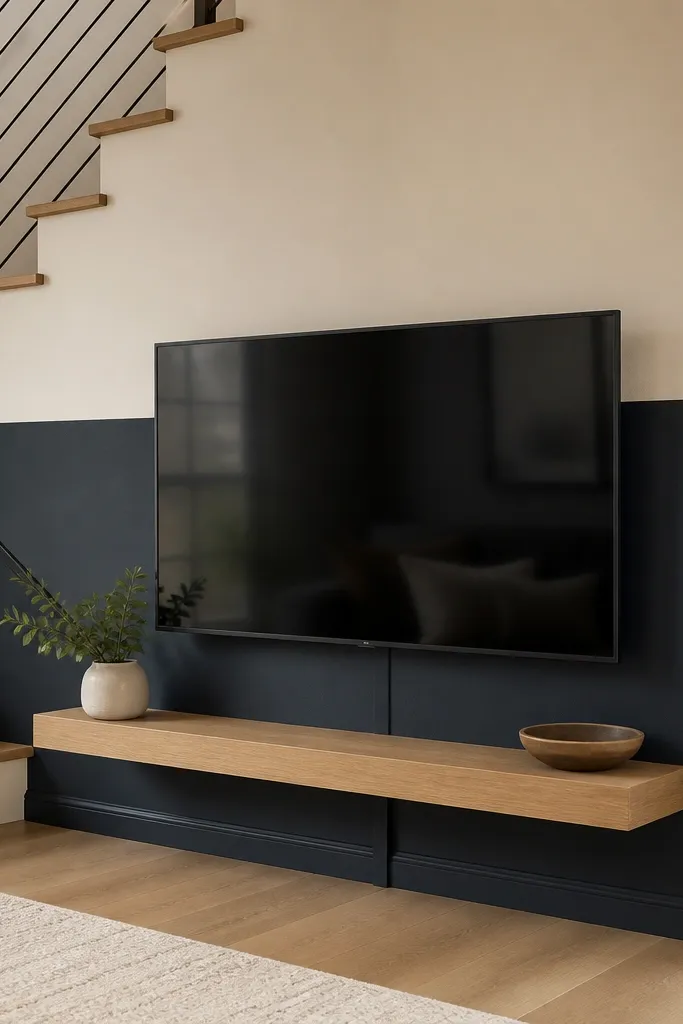
Color blocking is the fastest way to make a renter TV wall look custom, especially when stairs create strong vertical lines. I’ve had the best luck with warm white on top and deep ink blue or charcoal on the bottom because it makes the TV feel grounded and “designed,” not tacked up. The floating ledge in light oak gives warmth and keeps the block from looking too severe. This works well for medium to dark rooms because the lighter top section reflects light from stairs and windows.
Start by taping off a straight horizontal line at the height that visually centers the TV, usually with the TV midline aligned to the top third of the lower color band. Paint the upper band warm white and the lower band charcoal or ink blue, using high-quality painter’s tape for sharp edges. Install a renter-friendly floating media ledge under the TV using the same rail or mounting system you’d use for a shelf, then stain or finish the ledge in light oak or whitewashed oak. Add a removable cord channel in the lower color and paint it so it blends perfectly with the band.
Press tape firmly along the edge with a plastic ruler so the line stays razor clean.
Choosing two colors that are too close in undertone — the wall won’t read as intentional.
4. Wainscoting-style beadboard backdrop with a slim TV frame
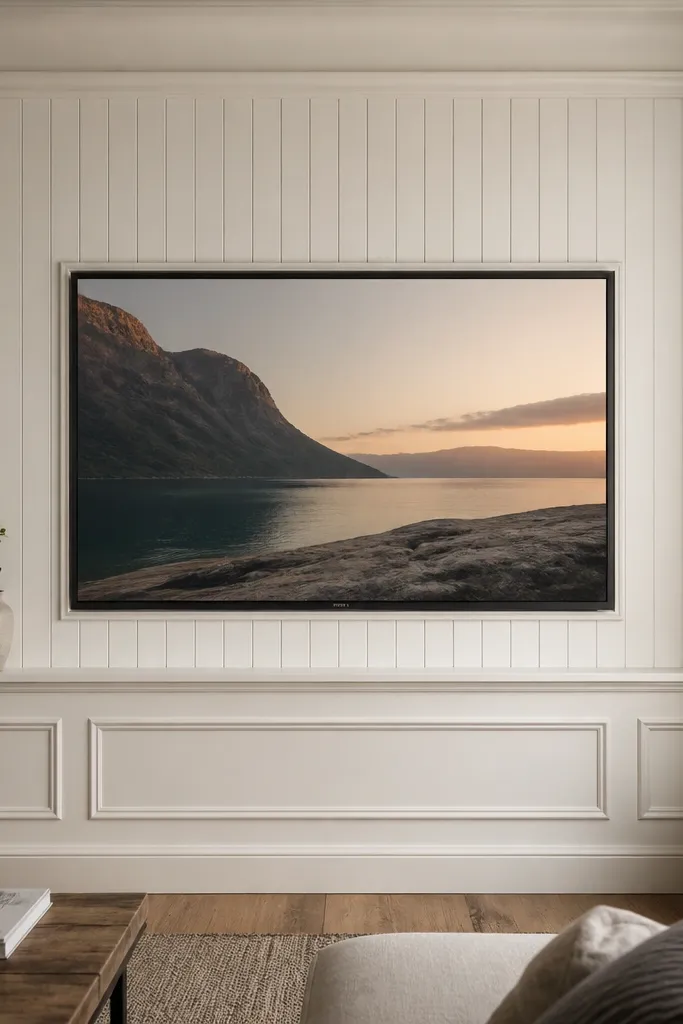
Beadboard gives you that cottage-modern luxury look and it hides imperfections in stair-adjacent walls. I like soft white beadboard because the grooves create depth even when the room lighting changes during the day. Pairing it with a slim TV frame makes the screen feel like it’s set into cabinetry, not mounted on a blank wall. This style flatters warm skin tones in photos and makes the whole area feel calmer, which matters when your stairs already add visual motion.
Start by measuring the TV and building a beadboard panel section that’s slightly larger than the screen — about 4 inches wider and 6 inches taller than the TV footprint. Paint the beadboard panel first so the grooves look even, then let it cure fully. Mount the panel to the wall using removable hooks or a lightweight cleat system that doesn’t chew up paint, then attach a slim rectangular frame around the panel edges. Place the TV on a no-drill mounting bracket that attaches to a rail or clamp system, and run cables behind the panel edges into a removable cord channel.
Good to knowUse a satin finish on beadboard so it looks clean under stair light without showing every fingerprint.
AvoidLeaving the beadboard panel edges raw — unfinished edges make it look like a temporary cover.
5. Black metal lattice wall with warm wood shelves on both sides
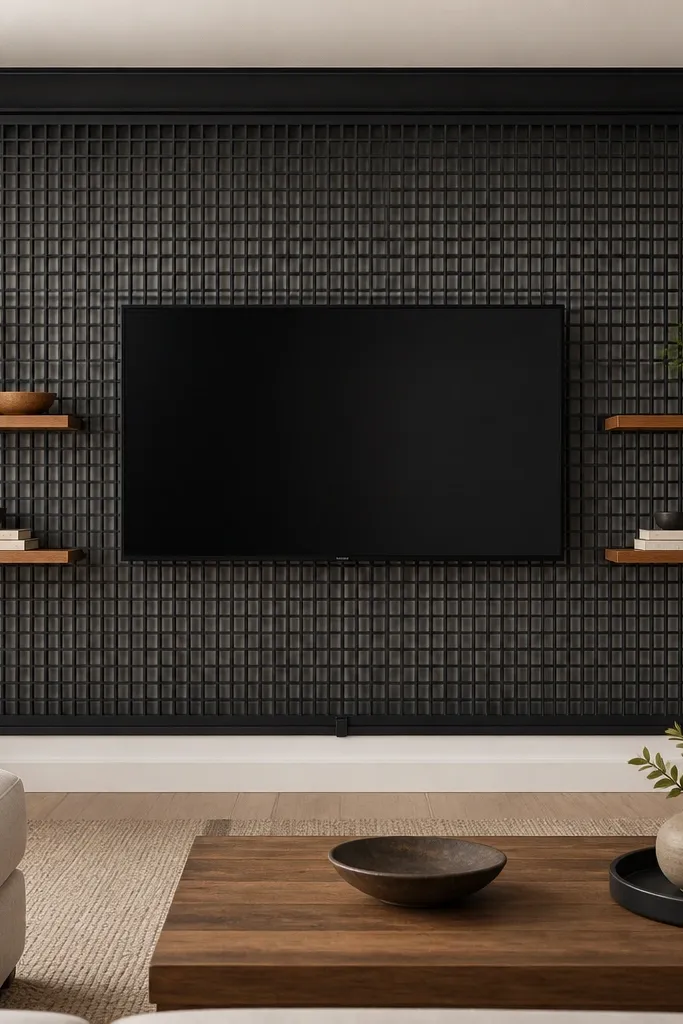
This is the “designer loft” luxury look that still works for renters, because the lattice can be freestanding or mounted on removable standoffs. Black metal makes the TV pop, and the warm wood shelves keep it from feeling harsh. I like it most in rooms with light walls and dark stair railings because the finishes match. It also flatters narrow stair alcoves: the lattice adds structure without adding bulky depth.
Start by choosing a metal lattice panel that’s close to the TV width, then mount it using standoffs or removable brackets so it doesn’t touch the wall directly. Install a TV mounting plate on a renter-safe rail behind the lattice plane, so the screen stays centered. Add two matching warm wood shelves on either side, keeping the shelf edges aligned with the TV centerline. Hide the cord run in a black cord channel that sits along the lattice vertical line and paint or cover the channel to match the metal.
Good to knowKeep decor on the shelves to two heights — one taller piece and one low tray — so the symmetry reads luxe.
AvoidOverloading the shelves with small items; it makes the lattice look cluttered fast.
6. Oversized framed art panel look with TV centered inside
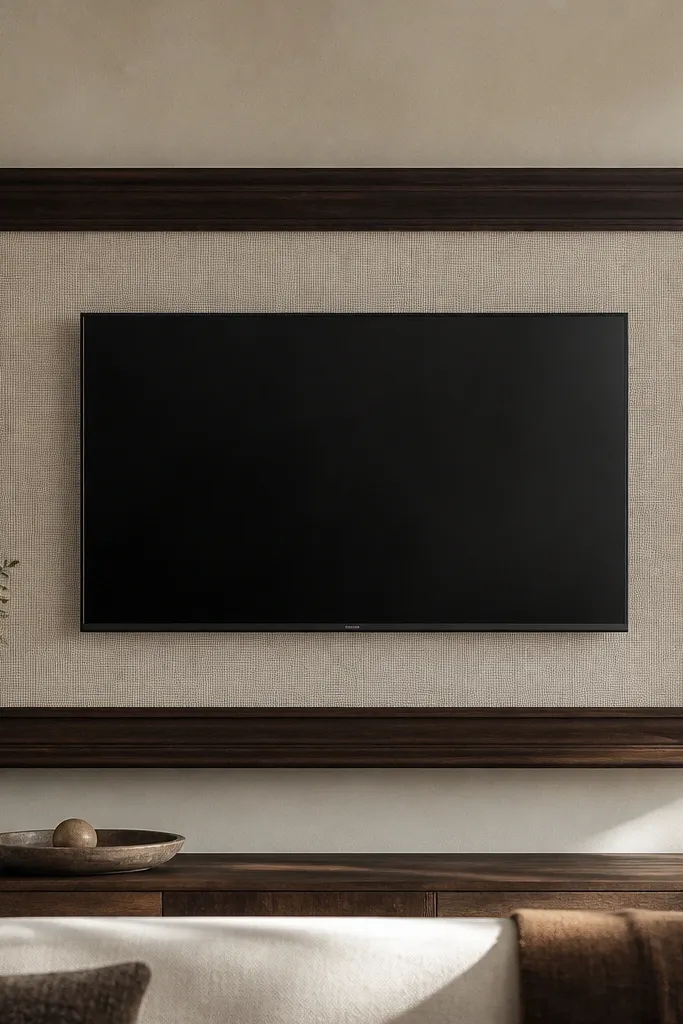
This design tricks your brain into treating the TV like a gallery piece. A thick dark walnut frame reads expensive and makes the TV feel intentional, especially on stair walls where the space is broken up by railings or steps. I’ve used textured linen panels behind the TV for a soft, high-end contrast that reduces the “flat black rectangle” look. This works for almost any room because you can match the frame to your stair banister or coffee table wood tone.
Start by building or buying an oversized frame that’s about 6 to 8 inches larger than the TV on each side. Add a backing board inside the frame using a linen-texture panel or light fabric stretched taut over foam board. Mount the frame to the wall using removable corner brackets that don’t rip paint, then mount the TV on a renter-safe bracket behind the frame opening. Finish by running cables behind the frame edge into a removable cord channel painted to match the backing panel.
Good to knowPick a frame finish that matches your hardware in the room — I match black metal to black door handles and warm wood to brass lamps.
AvoidUsing a too-thin frame; it reads like a prop instead of architecture.
7. Light oak slat wall with warm LED strip above the TV
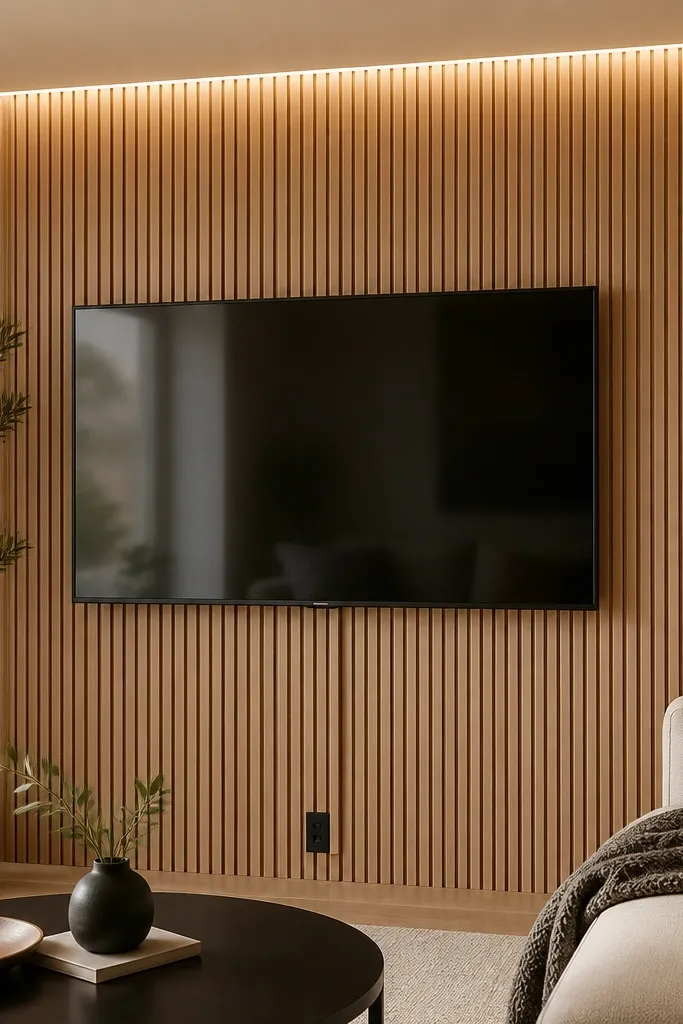
Slats give you that clean, modern luxury look with real depth, and the warm LED wash makes the whole TV zone feel finished. I use light oak slats because they soften stair-shadow patterns and keep the wall from looking cold. The LED goes above the TV, not behind it, because it lights the wall — you see the glow, not the strip. This looks great in rooms with white ceilings and moderate natural light, where warm light adds cozy contrast.
Start by installing slats on a removable backing board or using lightweight slat strips mounted with standoff clips so you can remove them later. Keep the slat spacing consistent, usually around 1/2 inch between strips, for a tight, expensive rhythm. Mount your TV on a renter-safe plate at the center point, then attach a warm LED strip (2700K) along the top edge of the slat wall. Route the LED wire into a removable cable raceway and finish with a straight-down cord channel for the TV power.
Use a dimmer inline for the LED strip; stair rooms change lighting fast between day and evening.
Placing the LED too low — it creates glare and makes the TV look like a cheap backlit display.
8. Marble-look peel-and-stick panel surround with slim black trim
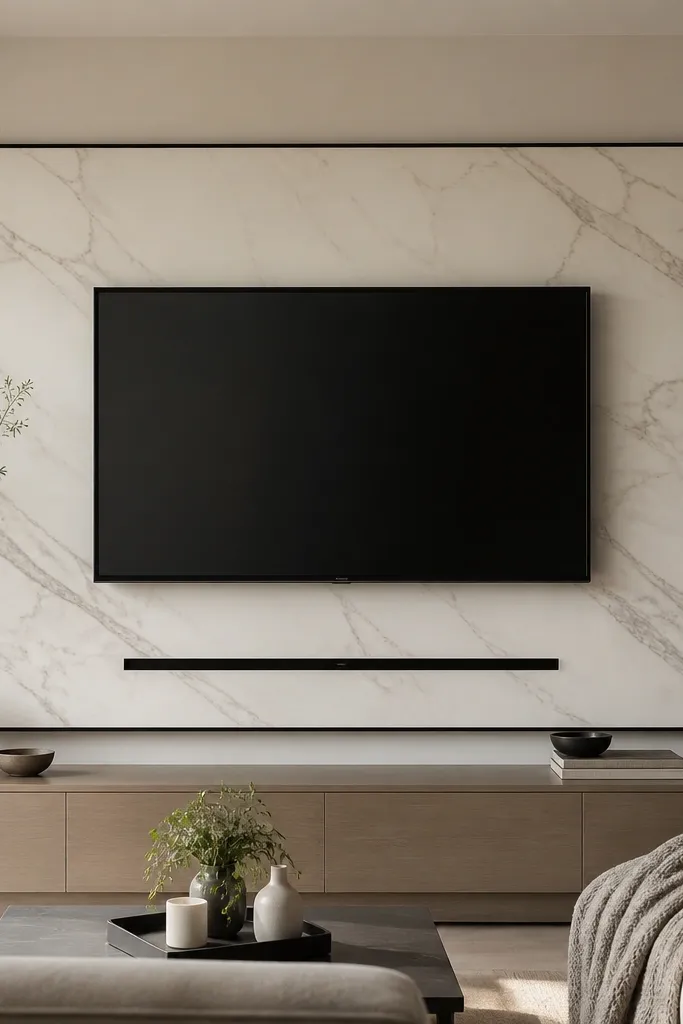
If you want luxury without building, marble-look panels do it better than paint ever will — especially on stair walls where you need the look to read from multiple angles. I pick creamy white marble with soft gray veins because it looks expensive and doesn’t fight warm woods or brass. The slim black trim makes the panel feel like a custom surround. This flatters modern interiors and also works in older homes where the wall surface might have small dents.
Start by cleaning the wall thoroughly with a degreasing cleaner and letting it dry fully so the peel-and-stick adheres. Measure the TV surround area and cut the marble panel to fit with a 1 to 2 inch border around the screen opening. Apply the panel slowly, smoothing from the center outward to avoid bubbles, then add thin black trim strips along the edges. Mount the TV using a renter-safe mount behind the surround area, and hide cords in a black cord channel that matches the trim.
Good to knowWarm the peel-and-stick panels with a hairdryer before applying if your room is cool; it lays flatter and looks cleaner.
AvoidApplying over dusty walls; it peels at the corners and looks messy fast.
9. Soft bouclé wall panel behind TV with brass corner caps
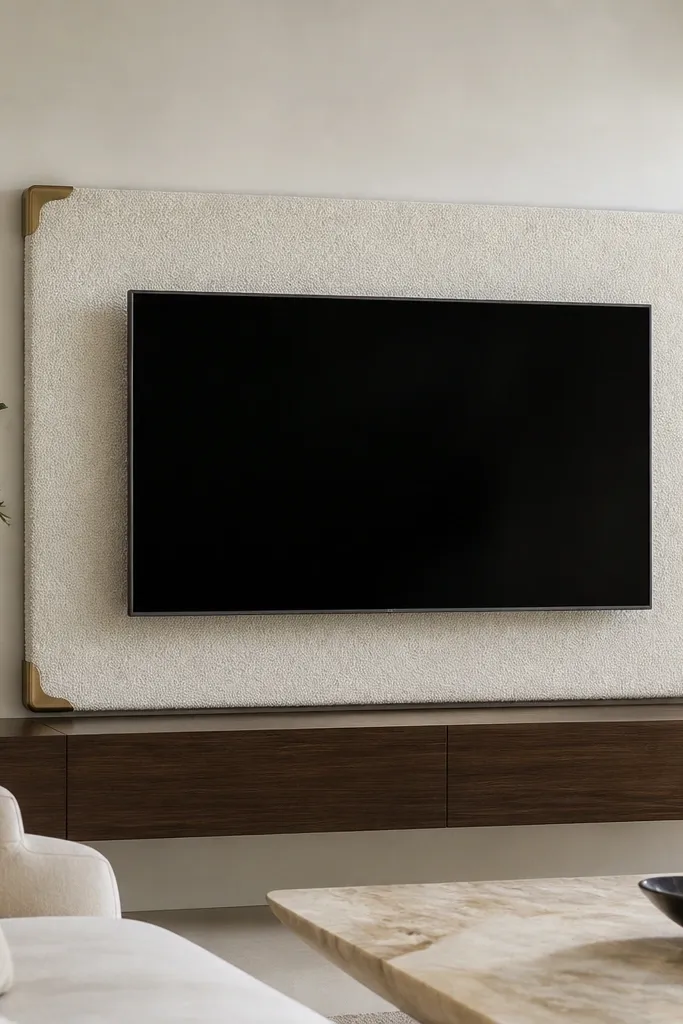
Bouclé makes a TV wall feel like a boutique hotel lobby. The texture breaks up flat shadows from stair lighting, so the wall looks expensive even when the room is dim. I like off-white bouclé because it pairs with almost any wood tone and doesn’t look dated like pure ivory can. Brass corner caps bring in a warm metallic note without turning the whole thing into a theme. This works best if you have neutral furniture and want the TV area to look softer than standard paneling.
Start by building a rectangular upholstered panel on a backing board, using high-density foam so it holds shape. Stretch bouclé fabric taut and staple it neatly on the back, then add brass corner caps on the front edges. Mount the panel to the wall with removable standoffs or hooks along the back corners, keeping it centered on the TV. Use a renter-safe mounting rail for the TV and run cords behind the upholstered panel into a removable cord channel hidden at the bottom edge. Place a small low-profile media console just wide enough to avoid blocking the lower edge of the panel.
Keep the wall decor minimal near the panel; bouclé already adds texture and looks best with clean spacing.
Using a stretchy, thin fabric that sags; it ruins the luxury look immediately.
10. Classic panel molding with a no-drill TV niche
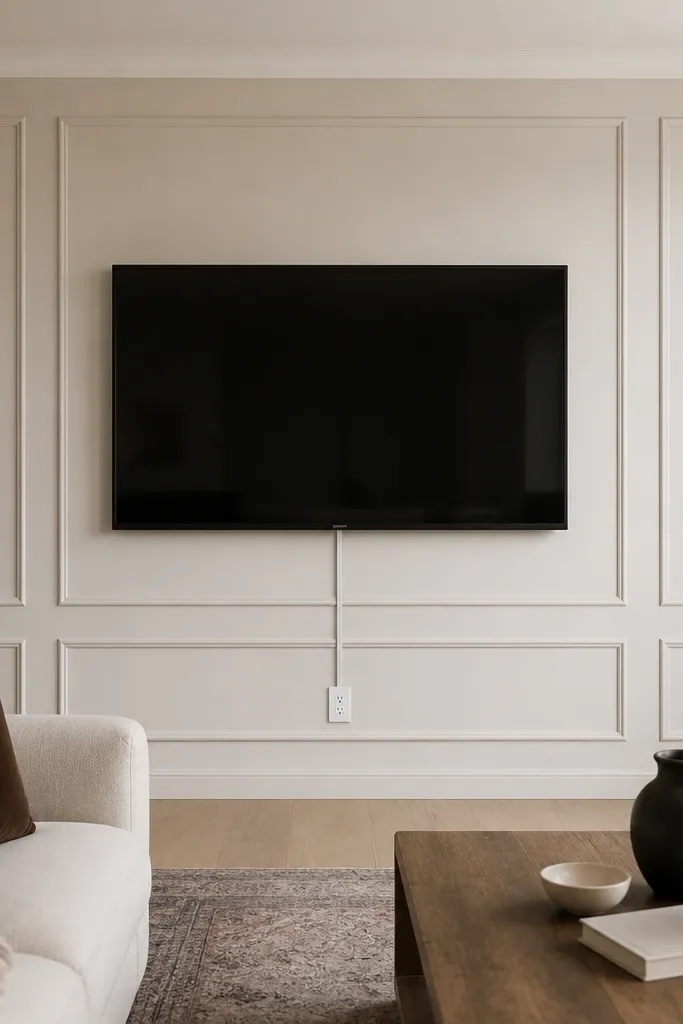
This is the “traditional trim but renter-friendly” option that looks custom even in modern apartments. The molding creates depth and frames the TV without bulky shelves, which matters when stairs leave you with limited wall space. I use crisp white molding on a warm off-white wall because it reads architectural, not flat. This style flatters people who like classic furniture — it makes the TV zone feel like part of the room instead of an afterthought.
Start by mapping a rectangular niche around your TV, leaving about 3 inches of border on each side. Install molding strips on a removable backing board or use removable mounting points along the molding edges so you can remove it later. Paint everything the same crisp white, then mount the niche panel to the wall. Install the TV using a renter-safe mount behind the niche center, and run cords into a slim cord cover painted to match the niche. Finish by adding a low decorative tray or two small items on a ledge only if the niche bottom needs visual balance.
Use a level and painter’s tape to check the niche edges from the stair angle; perspective makes tiny misalignments show up.
Mixing molding profiles; different trim shapes make it look like you bought pieces separately.
11. Floating ladder shelves for a stair-adjacent luxury look
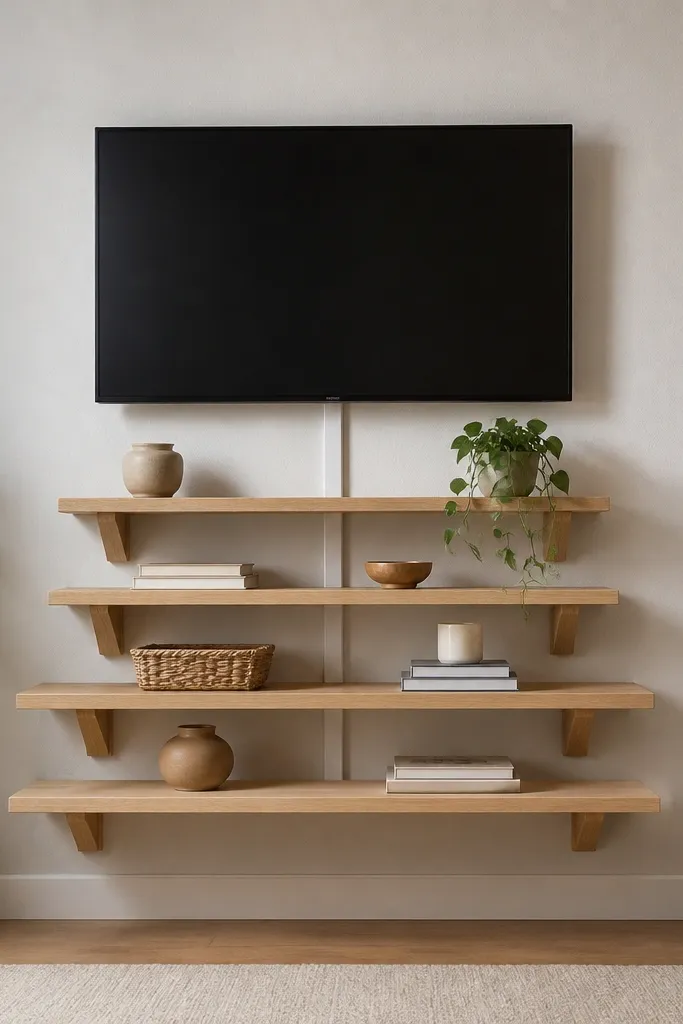
If your stair wall is awkwardly shaped, ladder shelves help you create structure without covering everything. The steps of the shelves echo the staircase rhythm, so the whole wall looks designed instead of random. I like light wood ladders because they keep the wall airy, especially in narrow hallways. This setup flatters small rooms and also looks good in homes with mixed furniture tones because the shelves don’t demand one specific style language.
Start by placing the TV at a height that keeps your screen centered to the strongest stair visual line, usually where the stair banister changes height. Mount renter-safe bracket points for the ladder shelves first, then attach the shelves so they sit symmetrically below the TV. Keep the shelf depth shallow, around 6 to 8 inches, so the wall doesn’t feel heavy. Run the TV cord into a straight cord channel that matches the wall and hides behind the right or left side shelf leg. Style with a single tall object on the top shelf and two low items on the lower shelf — keep it tight.
Good to knowAnchor the shelves to studs or use the manufacturer’s rated rails; ladder shelves look flimsy when they’re under-supported.
AvoidOverfilling each rung; too many objects breaks the luxury spacing.
12. Dark walnut vertical columns with a light center panel
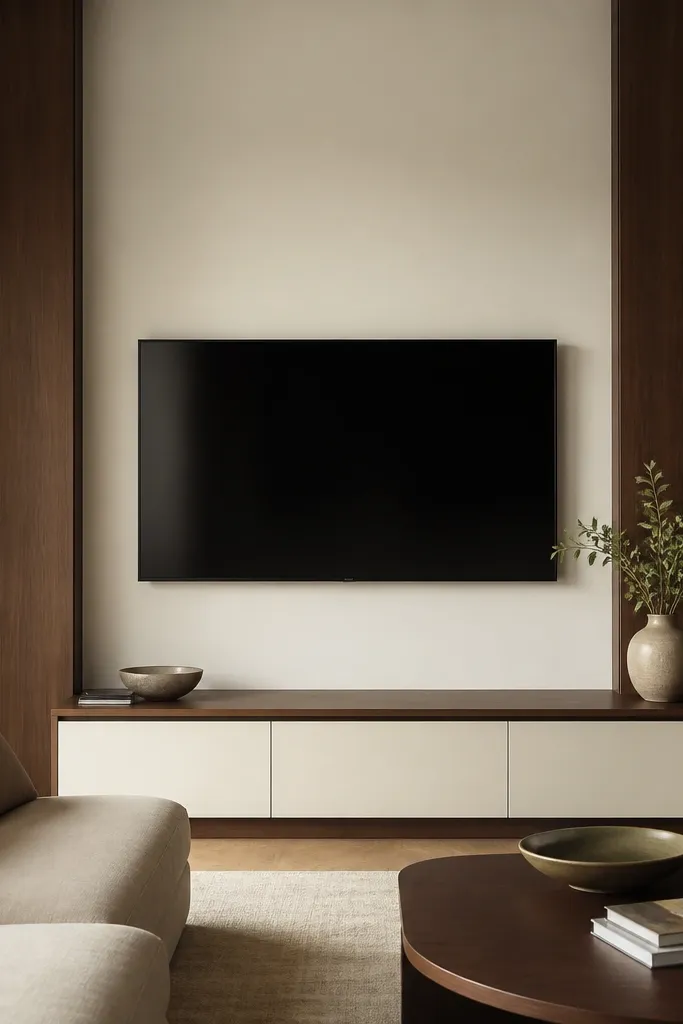
Vertical columns make stair walls look taller and more intentional, which is exactly what you want when stairs interrupt the wall surface. I use dark walnut columns because they add warmth and depth without needing a lot of decor. The light center panel keeps the TV area bright and stops the columns from feeling too heavy. This is especially flattering if you have warm undertones in your flooring or furniture — the walnut pulls the room together.
Start by marking where the TV center sits, then decide on column placement so the columns land just outside the TV edges. Install two removable column panels on standoff brackets or a lightweight backing board so they’re sturdy and reversible. Paint or apply a smooth light center panel behind the TV area, keeping it matte so it doesn’t glare. Mount the TV on a renter-safe bracket behind the center panel. Hide cables in a vertical cord channel inside the center panel area and cover it with a removable face strip painted to match the center panel.
Keep column width consistent and leave the same gap between columns and TV frame so the eye reads clean symmetry.
Making the columns too wide; big columns can swallow narrow stair walls.
13. Oversized round mirror frame look with TV inside a faux opening
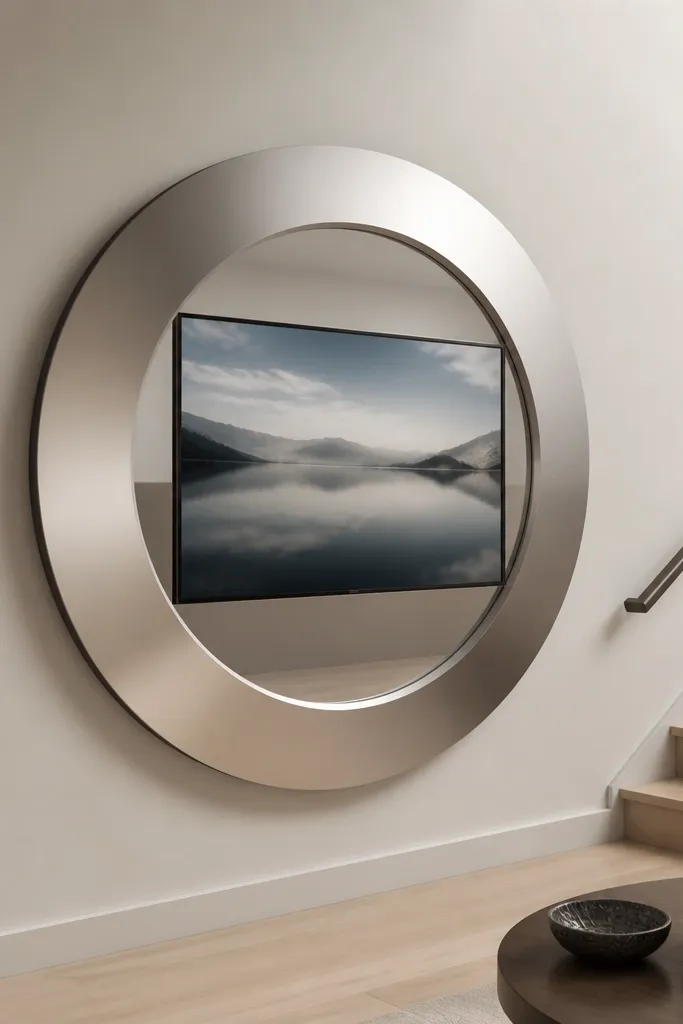
A round frame adds instant designer energy because it breaks the strict rectangle shape of the TV. I use a brushed brass or champagne gold ring because it warms up stair corners and looks good next to warm wood stairs. The reflective ring also bounces light, which helps the TV zone look brighter even when the stairs create shade. This is flattering in rooms with neutral furniture and a bit of metal in lighting fixtures — it ties everything together without adding clutter.
Start by selecting a renter-safe circular frame ring or creating one with lightweight MDF and a faux mirror finish vinyl. Create an inner opening slightly smaller than the TV so the screen sits centered and doesn’t look like it’s floating. Mount the ring frame to the wall using removable brackets at the back of the ring, not on the front face. Mount the TV with a renter-safe bracket behind the opening, then run cords behind the frame and down into a removable cord channel. Style the area around the frame with one slim decor object on a nearby ledge, keeping negative space.
Good to knowAngle the TV so the ring reflection doesn’t create glare on the screen — test once in the evening lighting.
AvoidUsing a high-gloss mirror finish; it throws glare and makes the TV look washed out.
14. Stone-effect peel-and-stick subway surround with a narrow floating console
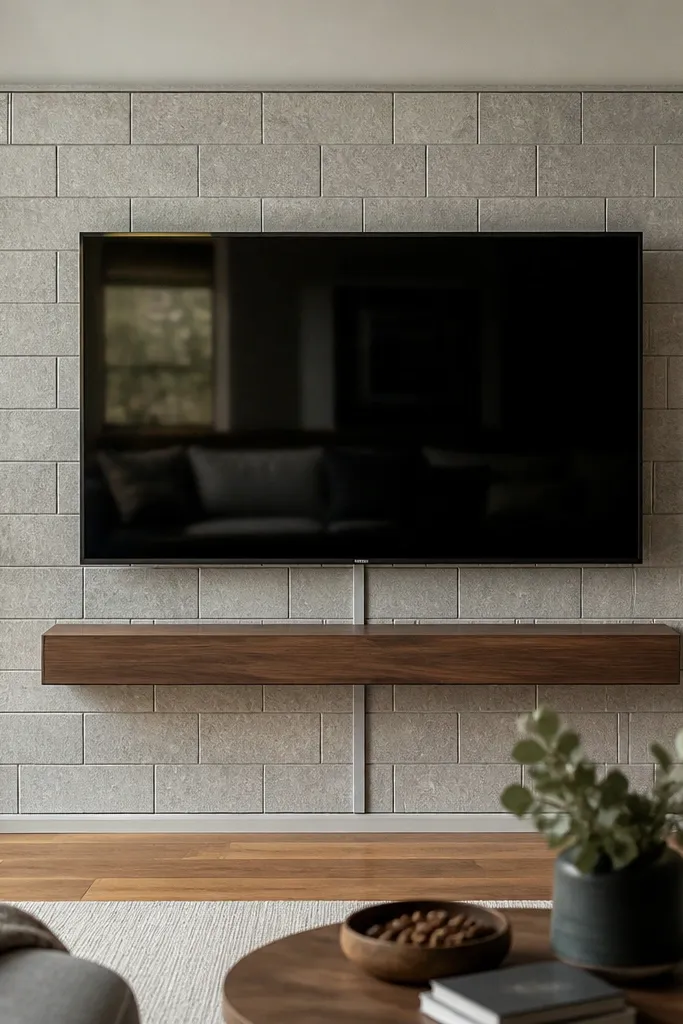
Subway tile is one of the few patterns that still reads luxury when it’s scaled up, because grout lines create crisp structure. A stone-effect version in light gray makes the TV wall feel clean and modern, and it works with both warm and cool rooms. I like adding a narrow floating console because it gives you a place for a soundbar or two small decor items without turning the wall into a clutter shelf. This style flatters people who want a modern look but don’t want the starkness of all-black walls.
Start by cleaning the wall and planning the surround size so the tile border stays even around the TV. Apply the peel-and-stick stone subway panels in a rectangle, aligning grout lines carefully with painter’s tape guides. Add a thin trim border to frame the tile surround so it looks like a built niche. Mount the TV with a renter-safe bracket behind the surround area, then place the narrow floating console beneath at a height that doesn’t block the TV’s lower edge. Finally, hide the cords in a slim cord channel painted to match the grout or covered with a stone-colored face strip.
Good to knowDry-fit a few rows on the floor first — subway tile alignment is easier when you see the pattern size.
AvoidCutting tiles without planning the corner layout; the corners look off and cheap.
15. Renter-safe gallery rail with layered picture ledges and TV
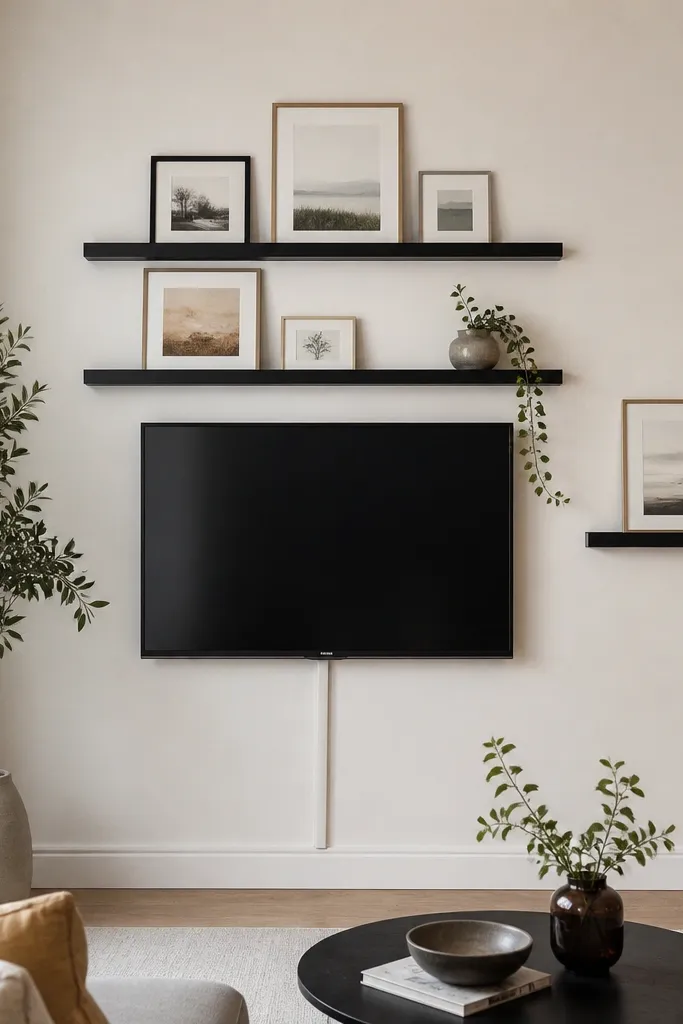
This one looks like a high-end showroom wall because you treat the TV area like a gallery. The matte black gallery rail and ledges create a clean, modern frame around the TV zone, and the picture ledges give you space for a couple of framed pieces without adding a big media console. It’s flattering for stair rooms because it keeps everything vertical and light, so the wall doesn’t feel heavy. I use this when the stair wall is narrow and you want the TV to feel like the centerpiece, not a bulky element.
Start by finding the center of the stair wall and installing the renter-safe gallery rail at the correct height for the TV mount. Attach the TV to the rail using the rated bracket plate so the screen stays level. Add two thin picture ledges on either side or above the TV, keeping the ledges 2 to 3 inches apart so the spacing looks intentional. Style with 2 framed prints only, using matching frame widths (like 1 inch) and glass-free prints if you want to avoid reflections. Run the TV power and HDMI into a slim cord cover that follows the rail line, then paint or wrap the cover to match the wall.
Use frames with the same depth so the shadows line up — it looks expensive from the stair angle.
Adding too many frames; three or four small pieces start to look random instead of planned.