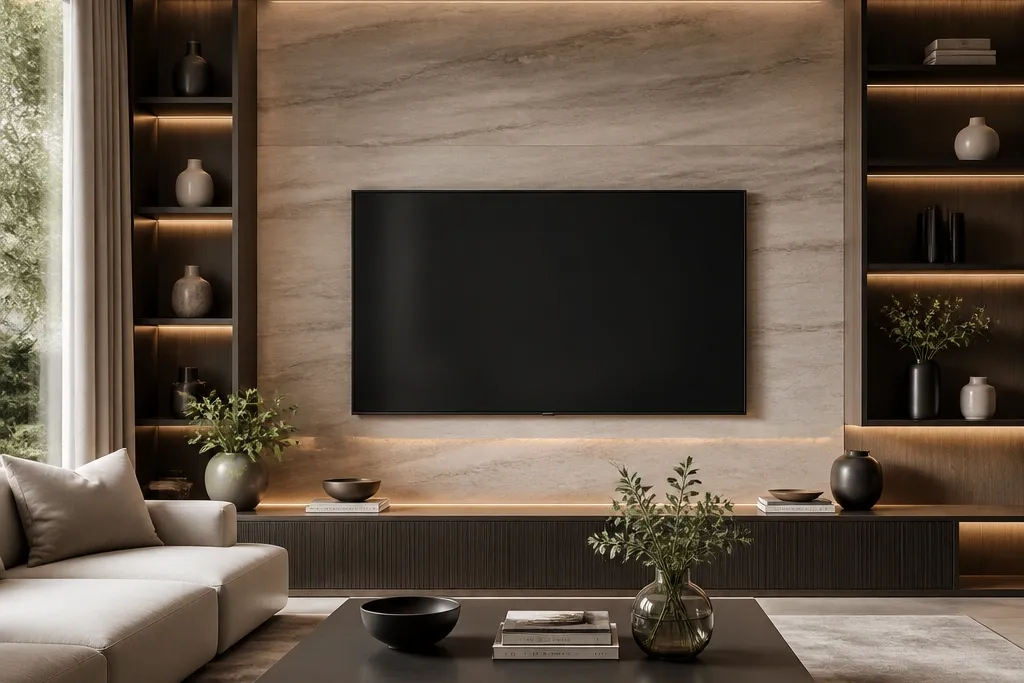
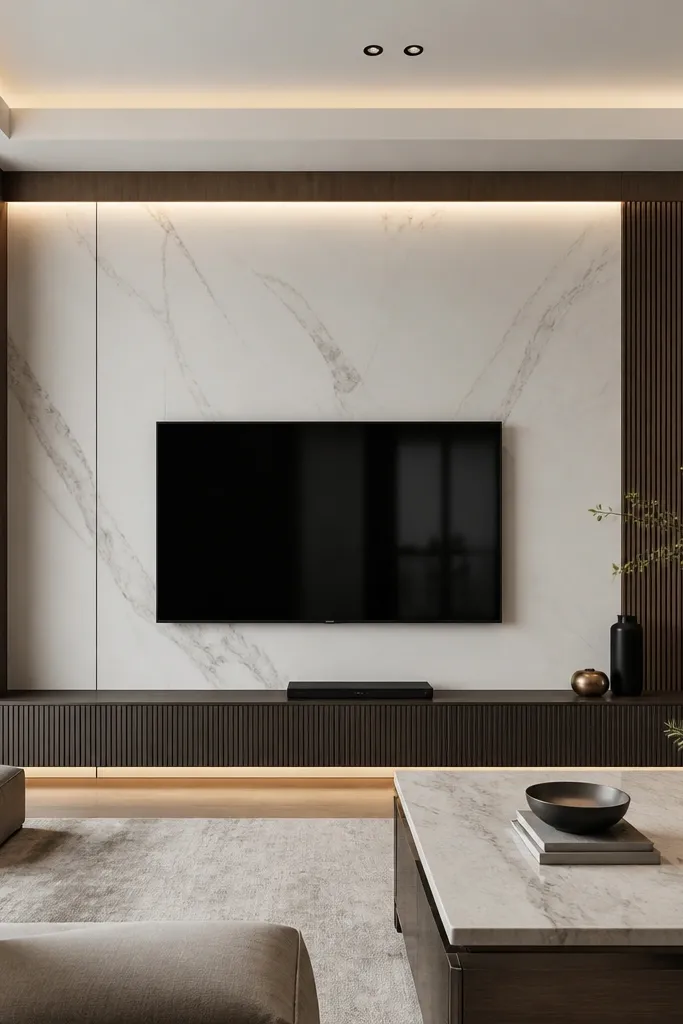
1. Warm Oak Slat Frame with Ivory Plaster Backdrop
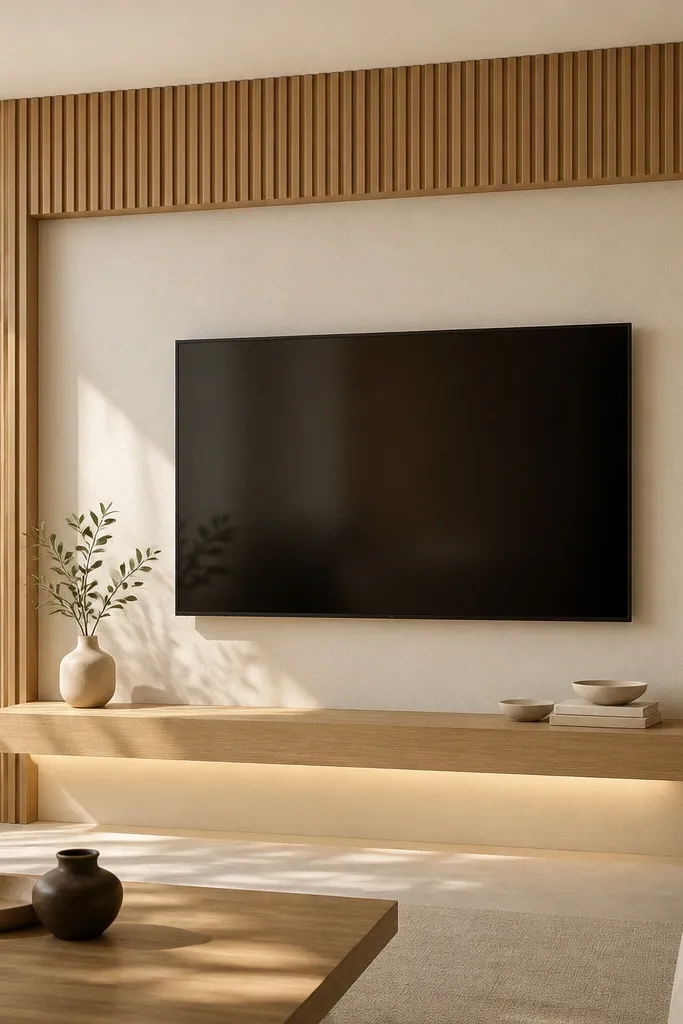
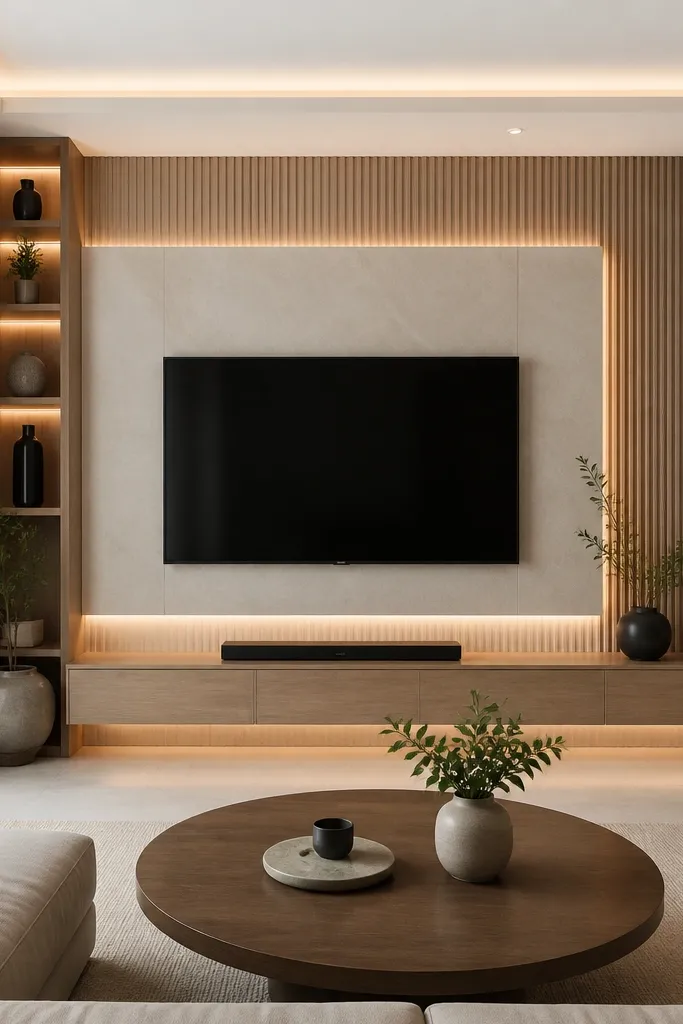
This is the TV wall I keep recommending when someone wants luxury that still feels cozy. The warm oak slats catch light without looking shiny, and the ivory plaster keeps everything bright even if your room gets little natural sun. I’ve seen this work beautifully on medium and dark skin tones in the room because the warm wood and cream tones don’t pull gray. It also flatters rooms with warm beige sofas and walnut tables, since the undertones match. The styling principle is contrast through texture: slats create shadow, plaster creates a smooth “canvas.”
Start by marking a centered rectangle around your TV. Build or buy slat panels that are 1.5-2 inches deep so they create real shadow, then frame the perimeter with flat oak trim. Use ivory paint or plaster finish on the flat backdrop, then add a floating shelf under the TV that is about 8-10 inches deep for presence. Hide a strip LED behind the shelf lip or inside a shallow channel so the light washes the plaster, not the TV screen. Style the shelf with two tall pieces at the ends and one low tray centered so the TV looks intentional, not crowded.
Good to knowChoose slats with a matte or satin finish. Glossy slats show dust and fingerprints fast.
AvoidAvoid thin stick-on veneer slats that don’t cast shadow — they read flat in photos.
2. Matte Black Linear Frame with Stone-Look Porcelain Panels
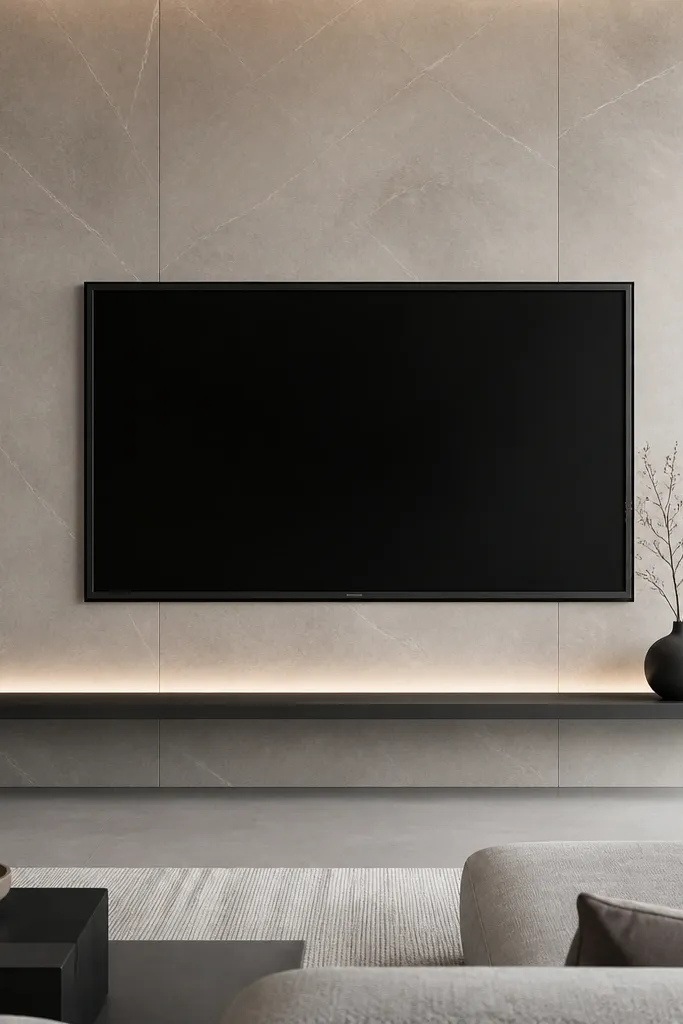
If you want modern luxury that looks sharp even in daylight, this layout is hard to beat. Matte black framing gives you clean edges, while stone-look porcelain adds the expensive-looking texture that paint can’t replicate. In rooms with cool gray furniture or stainless accents, the greige stone tones keep everything cohesive. It also flatters people with cooler undertones in their decor palette because the black and stone don’t warm the room too much. The principle here is controlled contrast: black outlines the TV, stone provides movement, and the LED gives a gentle halo.
Begin by installing a backer wall surface for the porcelain panels if your wall is uneven. Use large-format panels to avoid visible seams; aim for a consistent vertical pattern centered behind the TV. Mount the matte black frame so it projects about 1 inch from the wall. Add a slim ledge below the TV that’s 5-7 inches deep, then run LED inside a recess under the ledge pointing upward. Keep decor minimal: one low black vase or ceramic bowl centered on the ledge and two small accent pieces at the corners.
Pick porcelain with a satin sheen, not glossy, so it doesn’t throw glare at night.
Don’t use high-shine stone-look panels with a bright LED — you’ll see reflections on the screen.
3. Two-Tone Built-In: Dark Walnut Media Cabinet + Light Plaster Wall
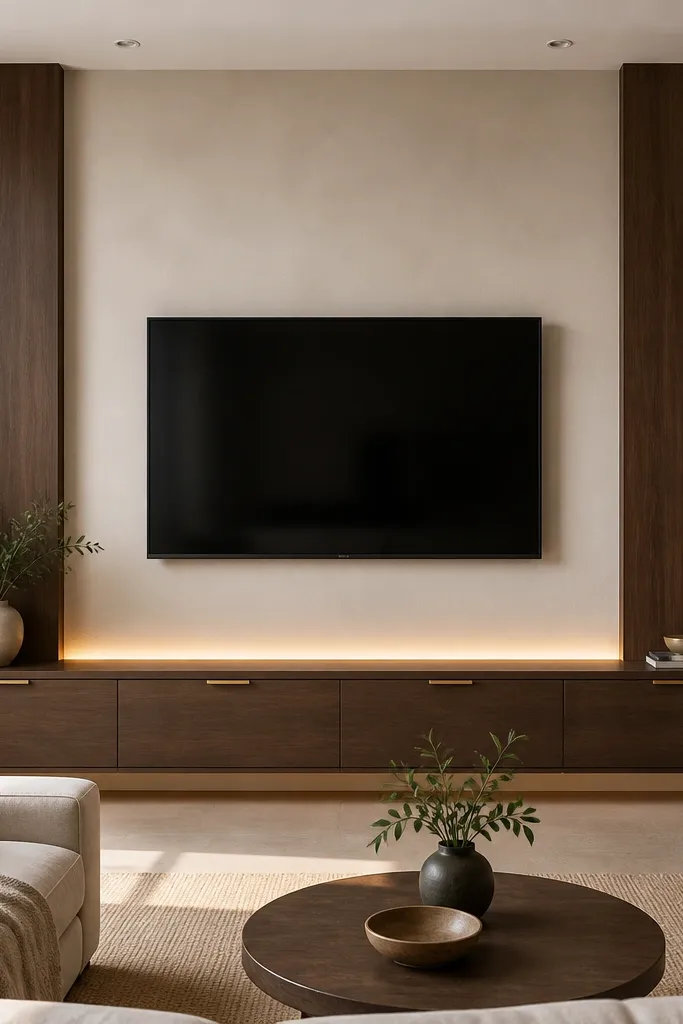
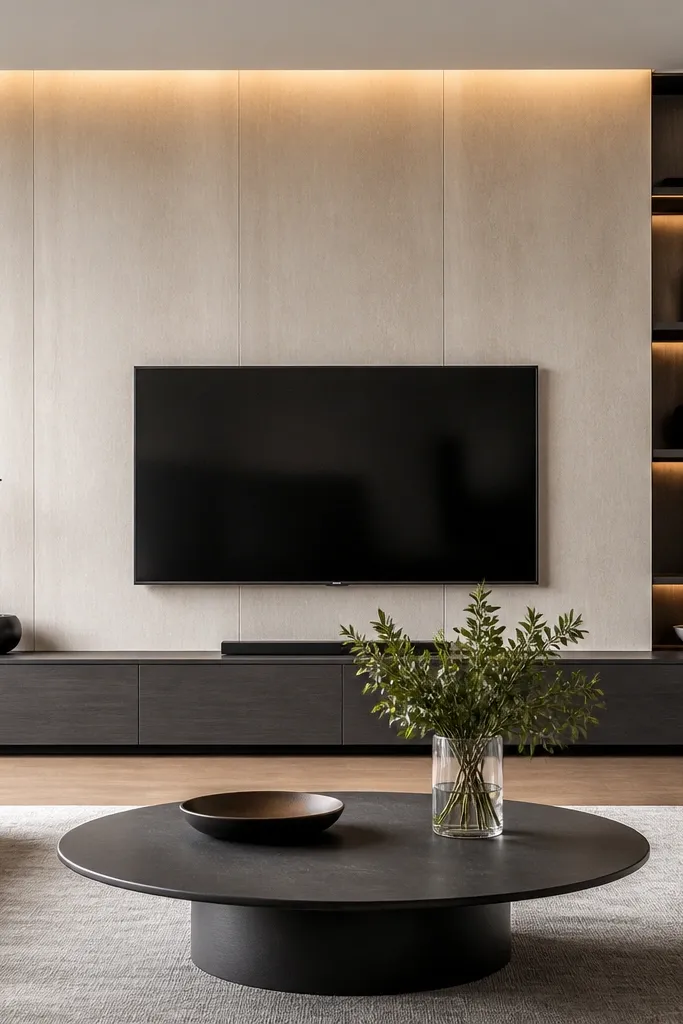
This is the “real furniture” look that makes a rental feel custom. The dark walnut grounds the room and hides clutter, while the light plaster keeps the wall from feeling heavy. I’ve used this in living rooms with tan leather or caramel wood floors, and it consistently looks expensive without being loud. It also flatters spaces with warm lighting because walnut doesn’t go reddish when paired with creamy plaster. The principle is weight balancing: dark storage at the bottom, airy wall above, plus warm brass hardware for a finished edge.
Measure the TV width and plan a cabinet that is about 2-4 inches wider on each side than the TV frame. Build the cabinet with recessed doors and install slim brass pulls that match your lamp hardware. Mount the TV centered above the cabinet so the bottom of the TV lands around eye level when seated. Add walnut vertical side panels that run from the cabinet top up to just under the TV height, leaving a plaster gap in the middle. Finish by adding a warm LED channel at the top of the cabinet so the glow stays on the wall, not the TV glass.
Use recessed doors instead of open shelves if you want the wall to look luxury even when life happens.
Avoid mixing walnut with very orange lighting. If your bulbs are too warm, switch to 2700K white that reads natural.
4. Full Height Fluted Panel Frame with Warm Bronze Accents
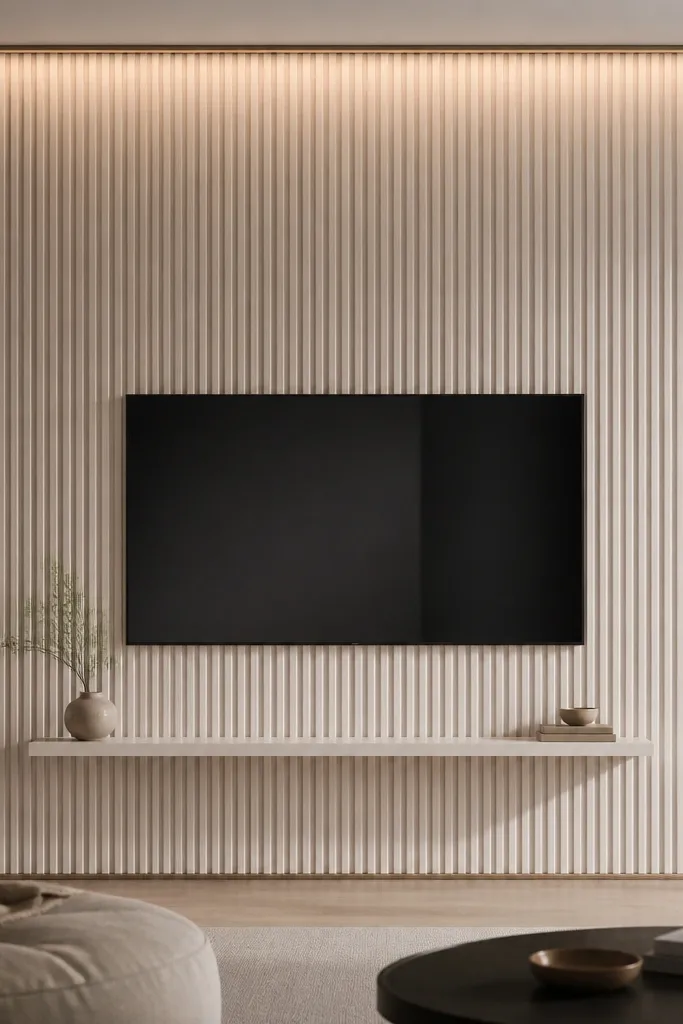
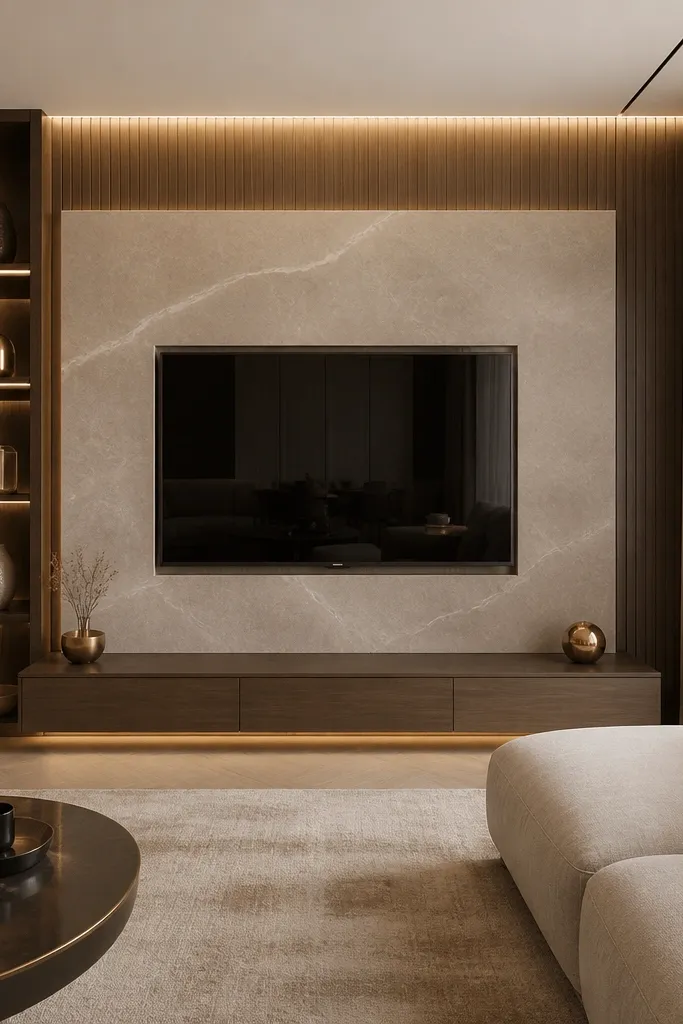
This design makes the TV wall feel like architecture, not decor. Fluted panels add rhythm and a sculpted look that reads upscale in both daylight and evening. Off-white flutes are forgiving and work with a wide range of skin tones and decor colors because the undertone stays neutral. Warm bronze accents prevent the palette from going cold, especially if your room has black-framed windows or bronze lamps. The principle is vertical emphasis: flutes pull the eye up and make the TV look properly framed.
Start by choosing fluted panels with a matte finish and install them as a perimeter frame, not a full wall if you want it to stay manageable. Add bronze trim around the TV opening, aiming for a slim profile like 1-1.25 inches wide. Mount the TV slightly higher than you think, so the shelf below reads balanced. Install an off-white floating shelf 7-9 inches deep under the TV, then run LED behind the shelf or near the top channel to wash the flutes. Style with one tall ceramic piece on each side of the shelf and keep the center clear for a gallery calm.
Use fluted panels with consistent spacing; uneven flute rhythm makes it look handmade and messy.
Avoid shiny fluted finishes. They show every tiny wall imperfection.
5. Marble-Effect Surround with Floating TV Niche
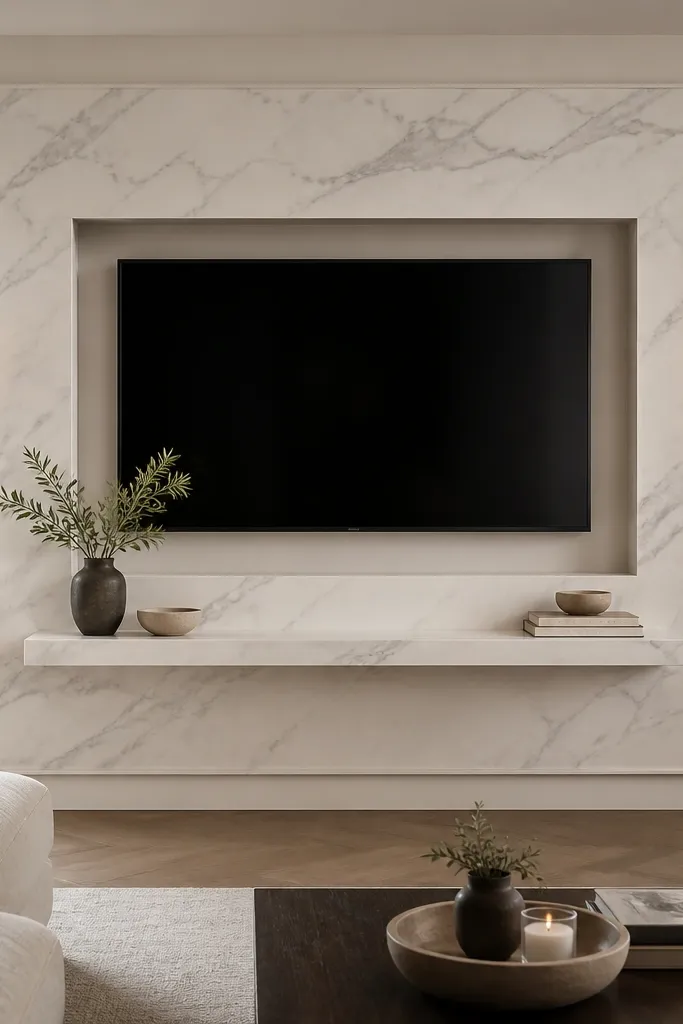
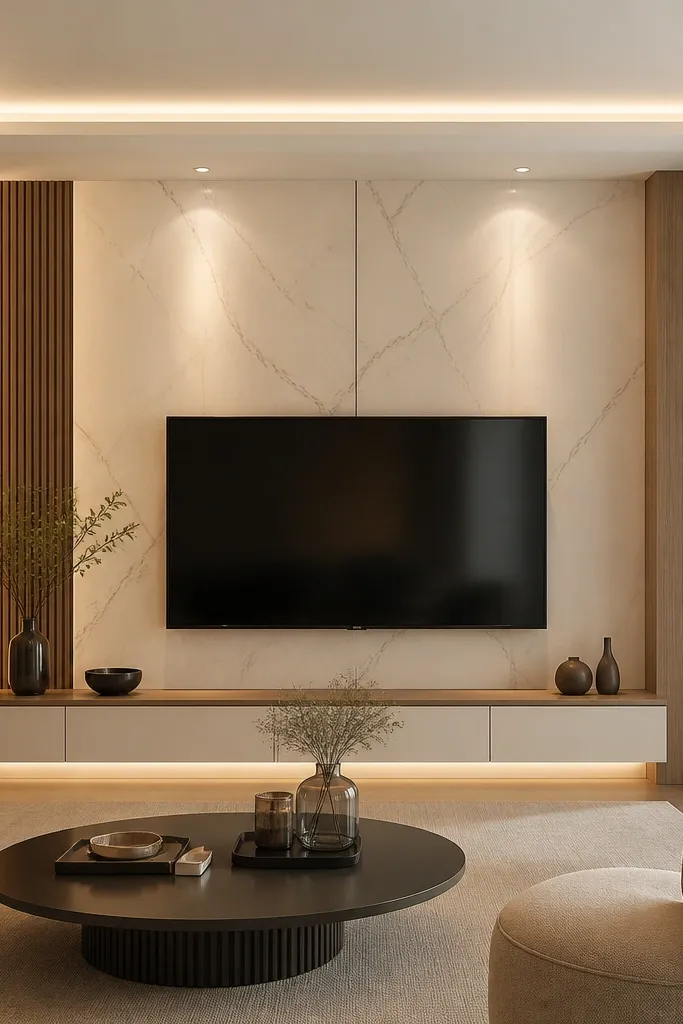
Marble-effect surrounds look luxury because of the veining and the way the surface catches light. A recessed niche adds shadow depth, so the TV reads like it belongs to the wall. This palette works especially well if your room has light beige walls, cream curtains, or chrome-free warm metals. It also flatters medium and deeper skin tones in the room because the whites stay warm rather than icy. The principle is framing with thickness: the border needs to look like a solid element, not a thin sticker.
Choose a marble-effect panel system with a satin finish so it doesn’t glare. Build a niche opening that is about 2-3 inches larger than the TV on all sides, then recess the panel border around it. Make the surround border 2-3 inches thick visually; if you’re using panels, add a thicker trim layer to get that mass. Mount the TV so there’s a 6-8 inch gap between the bottom of the TV and the shelf ledge. Add two small sconces at equal height, then style the ledge with one sculptural object and one book stack.
Good to knowIf your marble-effect is too gray, warm it with a brass bulb tint at 2700K.
AvoidAvoid glossy marble-effect panels. They reflect the room lights and ruin the clean look.
6. Textured Boucle Accent Wall with Low Profile TV Console
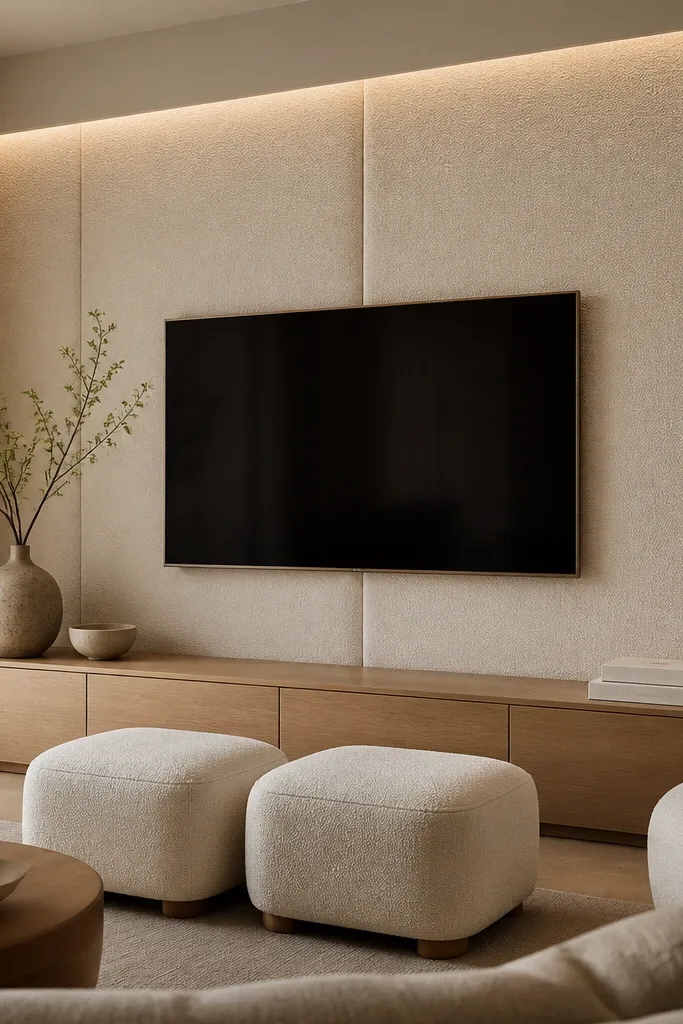
For a truly dreamy luxury vibe, texture beats hard materials. Boucle on the wall makes the whole TV area feel softer and more expensive, especially if your furniture is already fabric-based. I’ve used this in rooms with cream sofas and it made the wall look tailored, like a boutique hotel lounge. It also flatters people with warm undertones because the off-white reads creamy, not stark. The principle is tactile luxury: you’re using softness as the “frame,” then keeping the console low so the texture stays the star.
Start by stretching boucle fabric over a rigid backing like MDF panels so it stays taut and smooth. Cut an opening for the TV and mount the TV on a separate mounting plate that doesn’t crush the fabric. Keep the fabric color a warm off-white, not bright white, so it doesn’t look stark under LED. Use a low profile oak console under the TV with thin legs to keep the space light. Add one thin gold or brass picture light above or warm LED strips behind the console to avoid harsh overhead glare.
Good to knowUse a matte LED dimmer. Boucle shows hotspots fast with bright fixed lighting.
AvoidAvoid stretch fabric directly on drywall. It sags and wrinkles in months.
7. Walnut Veneer Slab with Hidden Cable Shelf and Sculpted Corners
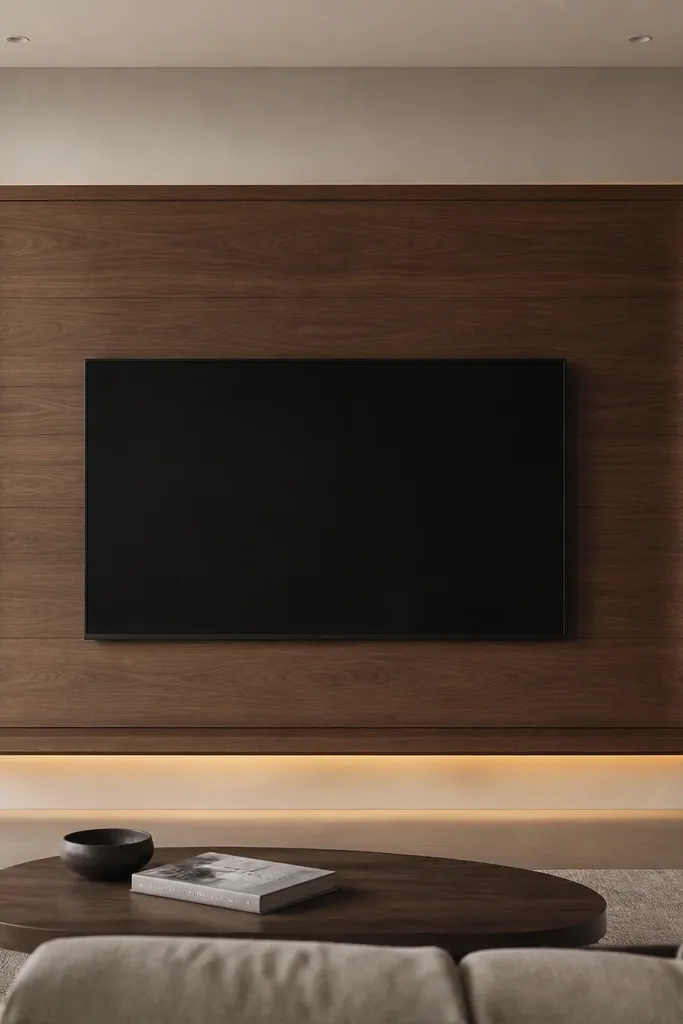
This is the “clean luxury” look when you hate visible cords and clutter. A continuous walnut veneer slab creates a seamless backdrop, and the hidden cable shelf keeps the bottom area calm. In rooms with dark floors or espresso furniture, walnut reads grounded and expensive instead of heavy. It also works well for people with olive or warm skin tones because the warm wood tones feel natural under indoor lighting. The principle is uninterrupted surfaces plus practical invisibility: the wall looks like one piece, and the messy stuff stays hidden.
Install a plywood or MDF backer first, then veneer over it with matching walnut grain direction. Cut a centered opening area for TV mounting hardware and leave a clean perimeter border. Build a shallow hidden shelf below the TV area where the receiver and cables sit, then cover it with a removable panel. Add a thin LED strip along the lower edge of the veneer border so it washes the wall below. Style the area with one slim framed print or two small objects on the side ledge, keeping the TV zone clear.
Pick veneer with consistent grain and plan the direction before you cut. Random grain makes it look DIY.
Avoid visible cable loops. Even one loose coil ruins the high-end feel.
8. Soft Ivory Paneling with Picture Frame Moulding Around the TV
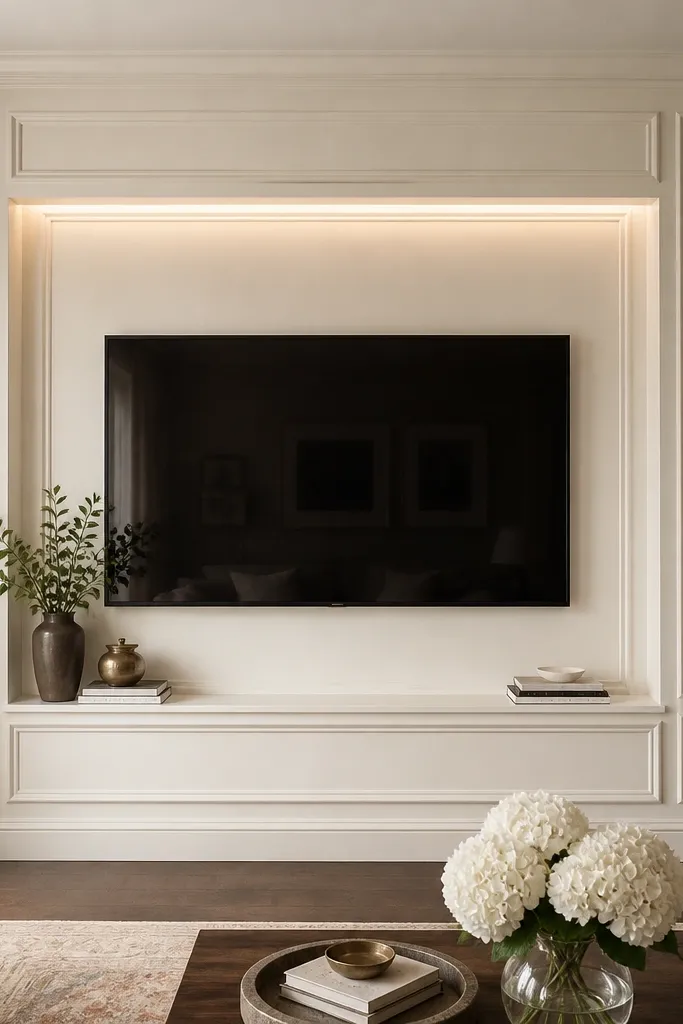
This is for people who like luxury that doesn’t feel modern-cold. Picture frame moulding gives you instant “built-in” vibes, and the stepped trim catches light in a way flat boards never do. It works great in living rooms with traditional furniture, cream drapes, or off-white rugs because it matches the classic lines. It also flatters warmer skin tones since the ivory stays soft and creamy rather than gray. The principle is light-catching geometry: trim creates micro-shadows that make the wall look finished.
Start by installing rectangular wall paneling with a simple groove pattern, keeping the panel size around 12-18 inches wide. Then build a TV surround with picture frame moulding that is 2-3 inches wider than the TV on each side. Add a slight step in the trim profile so the inside edge sits forward by about 1/2 inch. Mount the TV centered within the moulded opening, then add a ledge under it with the same finish. Hide LED in the top trim line or behind a shallow notch so it lights the paneling, not the TV.
Paint the trim the same base color as the wall, then use a satin sheen on trim and matte on panels for depth.
Avoid bright white trim next to warm ivory walls. It looks like a mismatched paint job.
9. Smoke Gray Slat Wall with Mirrored Accent Shelf
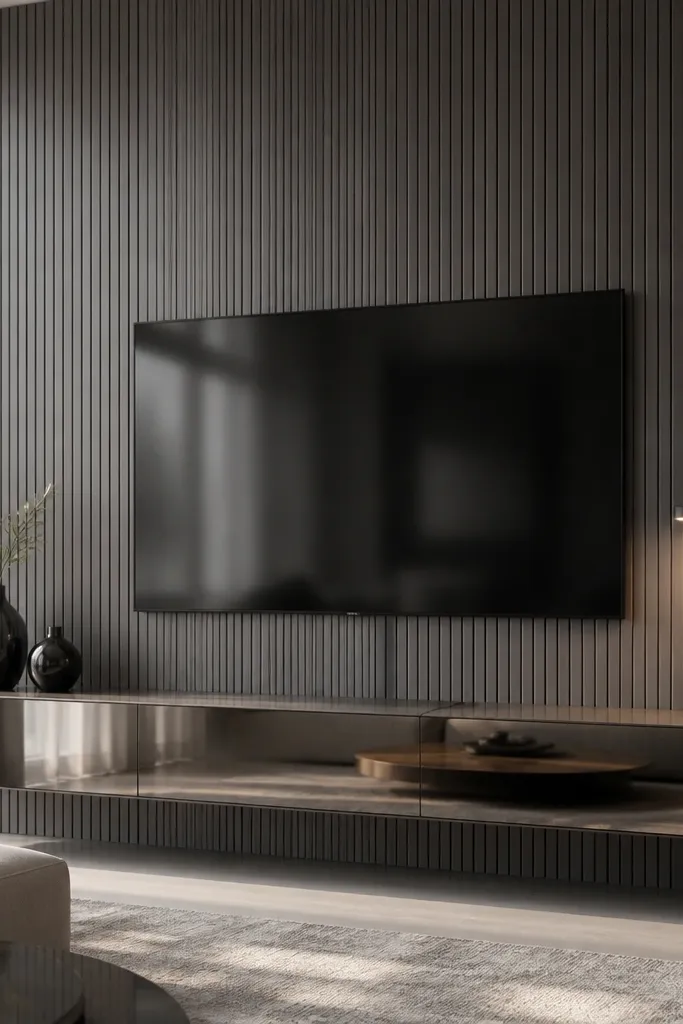
Mirrors can look tacky if you overdo them, but used as a single shelf surface, they make the whole TV wall feel expensive. The smoke gray slats add texture and a modern edge, while the mirrored shelf bounces warm light back into the room. I’ve done this in spaces with small windows where the room feels dim — the shelf reflection lifts the mood without adding more fixtures. It also looks great with cooler-toned decor like black, charcoal, and silver accents. The principle is one reflective element in a textured plan — controlled shine instead of scatter.
Choose slats with a matte or satin smoke gray finish, about 1 inch wide each with consistent spacing. Mount them on a backer so the slat lines stay straight from top to bottom. Keep the TV centered and consider a slim trim border in the same gray for a clean edge. Install a mirrored shelf under the TV that is 6-8 inches deep, with a polished edge frame so it looks intentional. Style with two tall objects at the ends and keep the center either empty or with one low tray so the reflection doesn’t look cluttered.
Good to knowUse a mirrored shelf with a slight tint, not ultra-clear — it keeps the look luxe and hides smudges better.
AvoidAvoid placing too many small decor items on a mirrored surface. The reflection multiplies visual noise.
10. Linen Sheer Backdrop with Floating TV and Brass Track Lighting
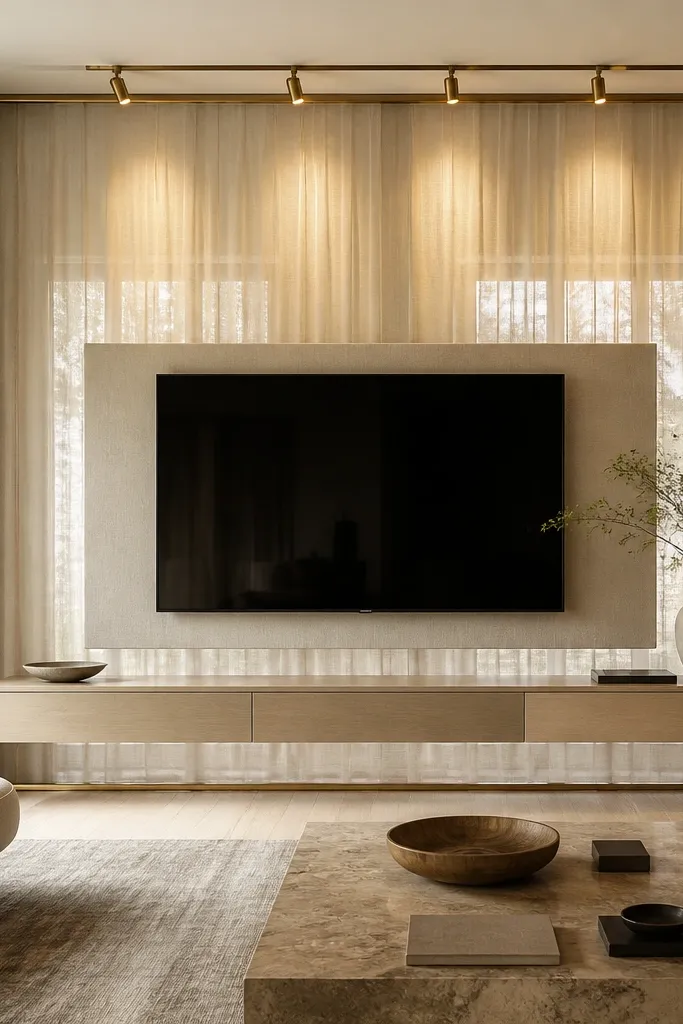
This setup is dreamy in the best way because it removes the harshness that many TV walls create. A linen sheer backdrop makes the wall feel layered and soft, and the TV looks like it’s floating on a calm surface. I’ve used it in rooms with linen curtains and it instantly ties the whole space together. It also flatters warm and neutral skin tones because the fabric diffuses light and avoids harsh shadows. The principle is diffusion: you use soft material behind the TV and then light it carefully from above.
Mount a fabric backing panel on the wall first, with a frame that holds the linen sheer taut. Cut an opening for the TV and ensure the TV mounting plate is separate so the fabric doesn’t sag around hardware. Use brass track lights positioned so the beam hits the fabric, not the TV screen directly. Add a slim floating TV panel in matte white or warm wood for structure. Style the sides with two minimal wall sconces or keep it clean and let the fabric be the centerpiece.
Good to knowTest lighting angles by turning off overhead lights and turning on track lights. You want soft glow, not screen glare.
AvoidAvoid thick blackout fabric. It makes the TV wall feel heavy and absorbs too much light.
11. Off-White Slab Shelf with Oversized Oversight Frame and Hidden LED
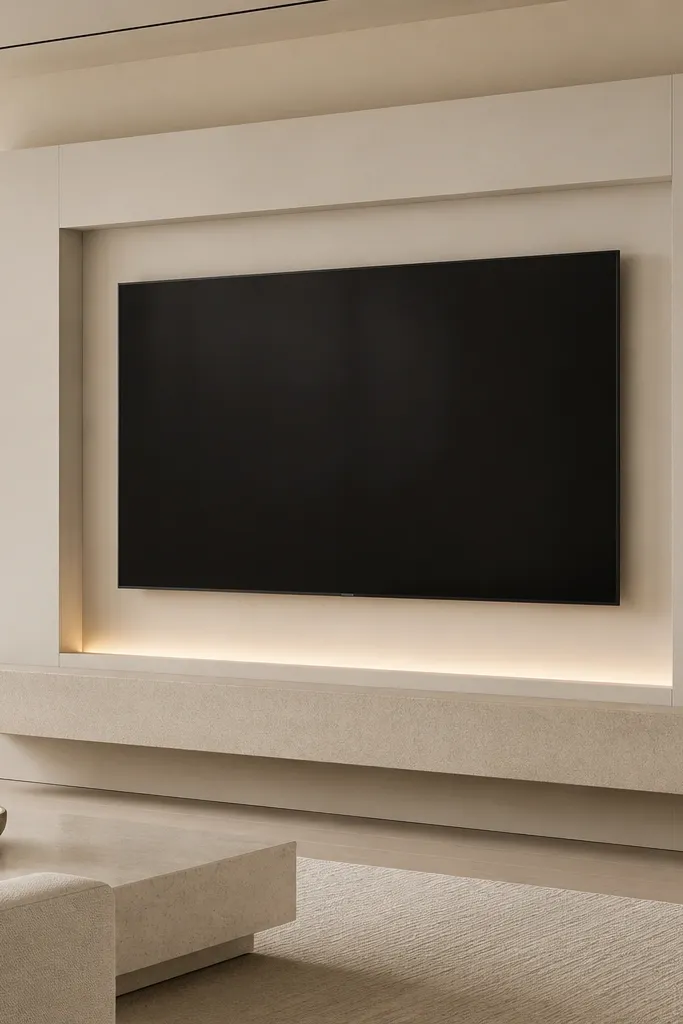
This is a luxury look for people who want drama without dark colors. Oversized frames visually “contain” the TV and give the wall a built-in feel, while the thick slab shelf makes it feel like furniture. I’ve done this in small living rooms where people worry about visual bulk — the off-white keeps it light, and the frame does the work. It also flatters everyone because it avoids strong undertones. The principle is proportion: make the frame bigger than you think and let the shelf add weight.
Start by choosing a frame width that is at least 6-8 inches wider than the TV on each side. Build an off-white panel surround with a smooth finish and a slight inset so it looks dimensional. Install a thick shelf under the TV about 10-12 inches deep, keeping it level and centered. Add hidden LED in a channel along the top inside edge or behind the shelf lip pointed upward. Keep styling minimal: one large tray or one tall object on each end of the shelf, nothing in the center.
Good to knowUse dimmable LED and set it low. Luxury looks like glow, not brightness.
AvoidAvoid tight frames that hug the TV. They make it look like a TV mount, not a design.
12. Terracotta Accent Brick Panels with Black TV Frame
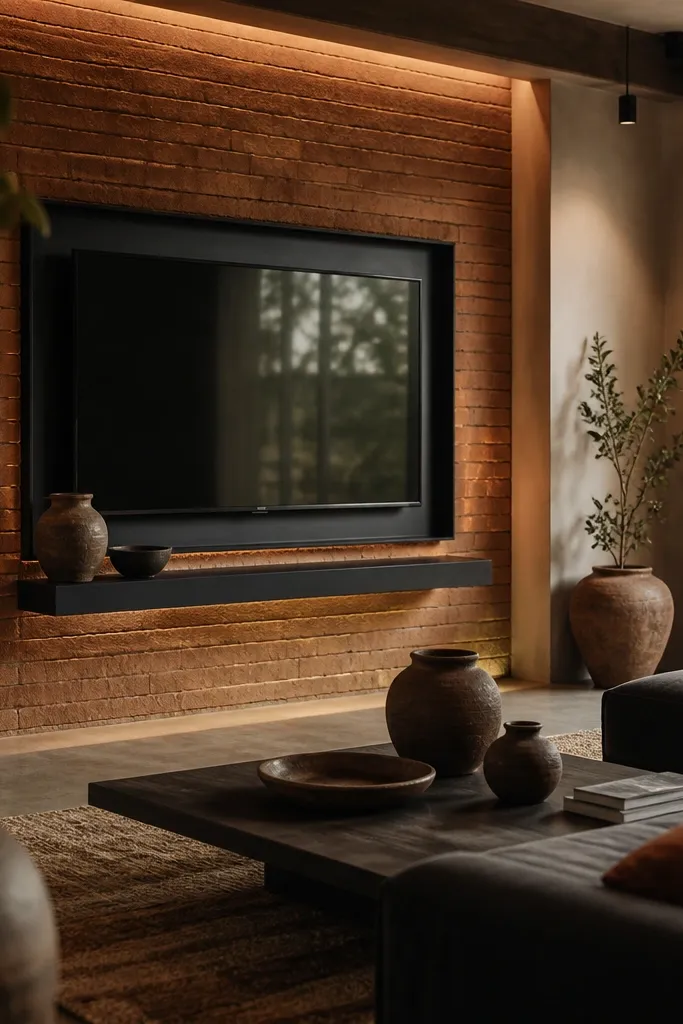
Terracotta brick panels bring warmth and pattern to a TV wall, and the black frame keeps it from looking rustic. This combo looks expensive because the brick texture has depth and the black lines give structure. I’ve used it in living rooms with olive, camel, or dark brown textiles and it makes the whole space feel collected instead of random. It also flatters warm undertones in decor and skin tones because terracotta reads friendly under warm lighting. The principle is texture + contrast: patterned backdrop, clean black edges, and warm illumination to show the relief.
Pick brick panels with a satin finish and install them so the brick lines align straight across the TV center. Add matte black frame trim around the TV opening, projecting about 1 inch for shadow. Install a small floating shelf under the TV that is 4-6 inches deep so it doesn’t fight the brick. Run warm LED behind the frame edges or along the underside of the shelf pointing upward. Style with one pair of ceramic vases in terracotta or cream and keep the rest off the ledge so the brick pattern remains the hero.
Choose LED at 2400-2700K if you want terracotta to look like it belongs, not orange-painted.
Avoid glossy brick-effect panels. They look like wallpaper when the lights hit.
13. Cream Micro-Cement Backdrop with Floating Mirror Above TV
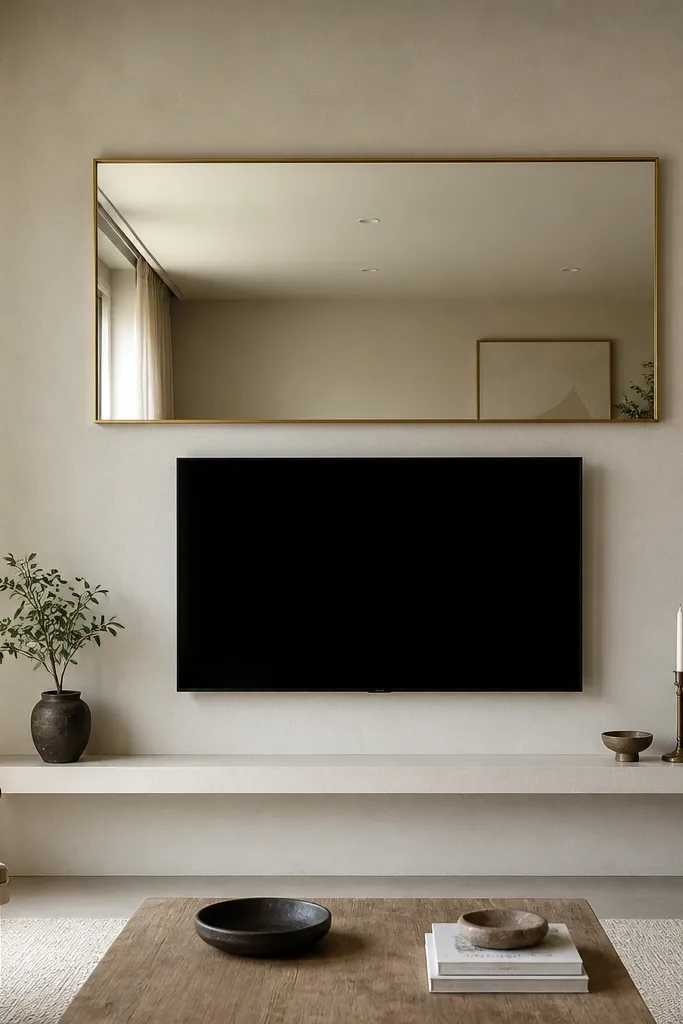
Micro-cement gives you the luxury of a custom finish without the maintenance of real stone. The speckled texture hides minor wall imperfections and looks premium in close-up. Adding a large mirror above the TV makes the wall feel layered and makes the room look taller, especially in narrow living rooms. I used this in a small townhouse where the TV wall was the first thing you saw when walking in. It looks great with warm neutrals and brushed brass accents, and it flatters warm skin tones because the cream base stays soft. The principle is material honesty: texture on the wall, reflection as extra depth.
Apply micro-cement or a micro-cement look coating on a prepared wall surface, then keep the finish matte. Mount the TV centered, leaving a clean margin around it so the cement texture isn’t blocked by trim. Install a thin floating ledge below the TV, about 6-8 inches deep, in matching cream or light wood. Hang a large mirror above the TV with a thin brass frame, keeping the bottom of the mirror about 10-14 inches above the TV top. Style with one low ceramic piece on the ledge and leave the mirror area clean for a gallery effect.
Wipe micro-cement surfaces with a soft dry cloth only. Wet wiping can leave streaks.
Avoid placing strong overhead lights directly above the TV in this setup. The mirror can amplify glare.
14. Sculpted Plaster Dome Surround with Hidden Shelf Lighting
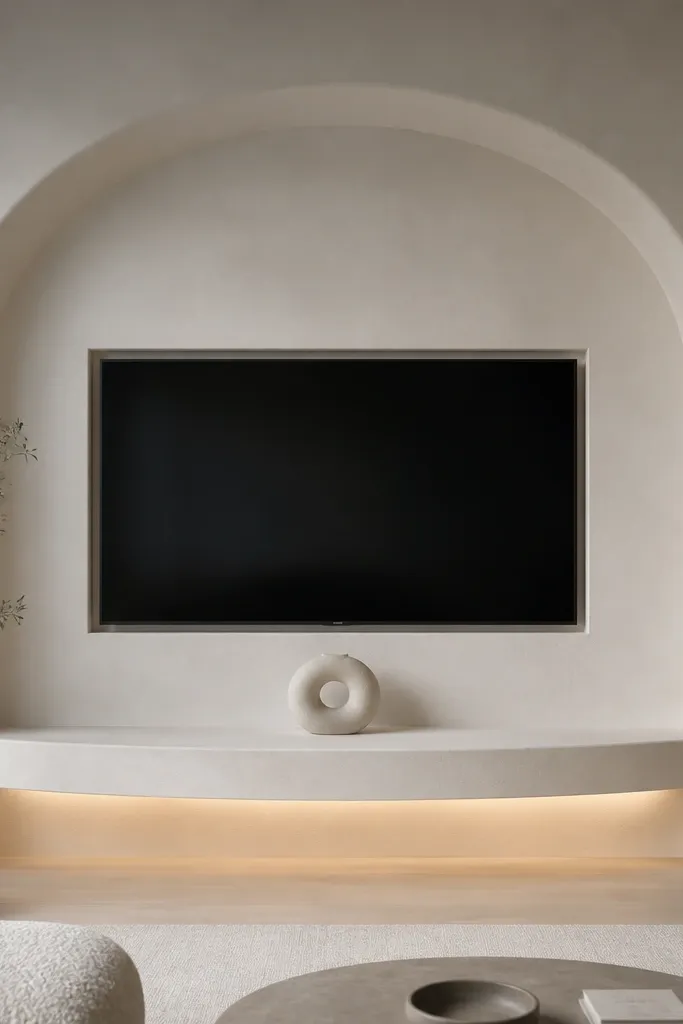
A sculpted arch surround makes the TV wall feel like a custom art piece. The dome shape softens the rectangle of the TV and gives that “designer living room” look without needing heavy stone or dark wood. Warm off-white plaster also plays nicely with both warm and cool rooms, because it reads neutral under different bulbs. I’ve done this for clients who wanted luxury but didn’t want a modern slat wall — the plaster reads softer. The principle is softened geometry: use curves to make the TV feel integrated and intentional.
Build the arch surround using plasterboard or a moulded plaster panel system sized to the TV opening with 2-3 inches margin around. Keep the surround warm off-white and use a matte finish so the shadows look velvety. Install a curved floating shelf below the TV that is 7-9 inches deep, with a slight lip to hide LED. Place a concealed LED channel under the shelf edge so light grazes the plaster, not the TV. Style with one medium-height sculpture centered and two slim candle holders at the far ends if the room needs balance.
Good to knowUse a dimmer and set the LED to just enough to show texture. Over-bright shelf lighting makes plaster look flat.
AvoidAvoid sharp glossy paint on the dome. Gloss makes the edges look cheap and harsh.
15. High Gloss Champagne Lacquer Frame with Dark Walnut Inserts
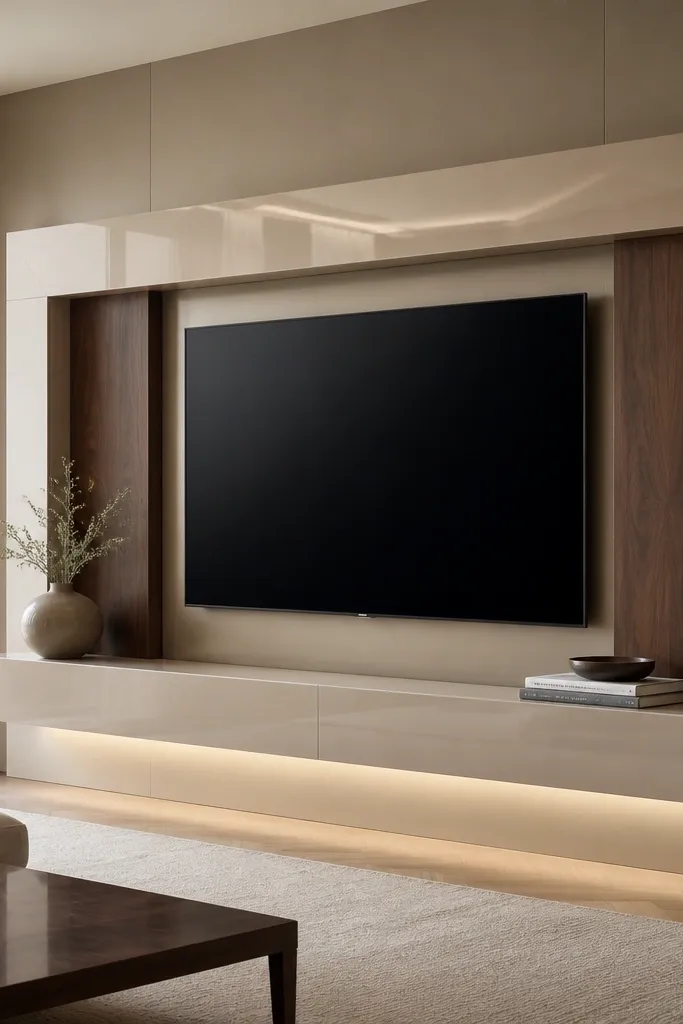
If you like glam luxury, this is the cleanest way to do it without looking like a nightclub. Champagne lacquer adds a mirror-like glow, but the dark walnut inserts keep it grounded and prevent the wall from feeling too sweet. I’ve used it in living rooms with black accents and it looks sharp, not childish. It also flatters cool undertones because champagne reads warm but not orange when the lacquer is true champagne. The principle is controlled shine: one glossy element, balanced by deep wood and warm concealed light.
Choose a champagne lacquer finish that is high gloss but smooth, ideally cabinet-grade. Frame the TV opening with a lacquer border that projects about 1 inch from the wall. Add dark walnut side inserts or vertical panels that are about 8-12 inches wide each, positioned to balance the TV center. Install a matching lacquer shelf below the TV with a concealed LED strip under the front edge. Style with one black or dark ceramic vase centered and keep the shelf otherwise empty to let the lacquer reflect light.
Use microfiber cloths for lacquer. Paper towels leave micro scratches.
Avoid mixing lacquer with matte brass hardware that looks dirty. Match finishes so it reads intentional.
16. Two-Level Shelf Wall with Vertical Book-Match Panels
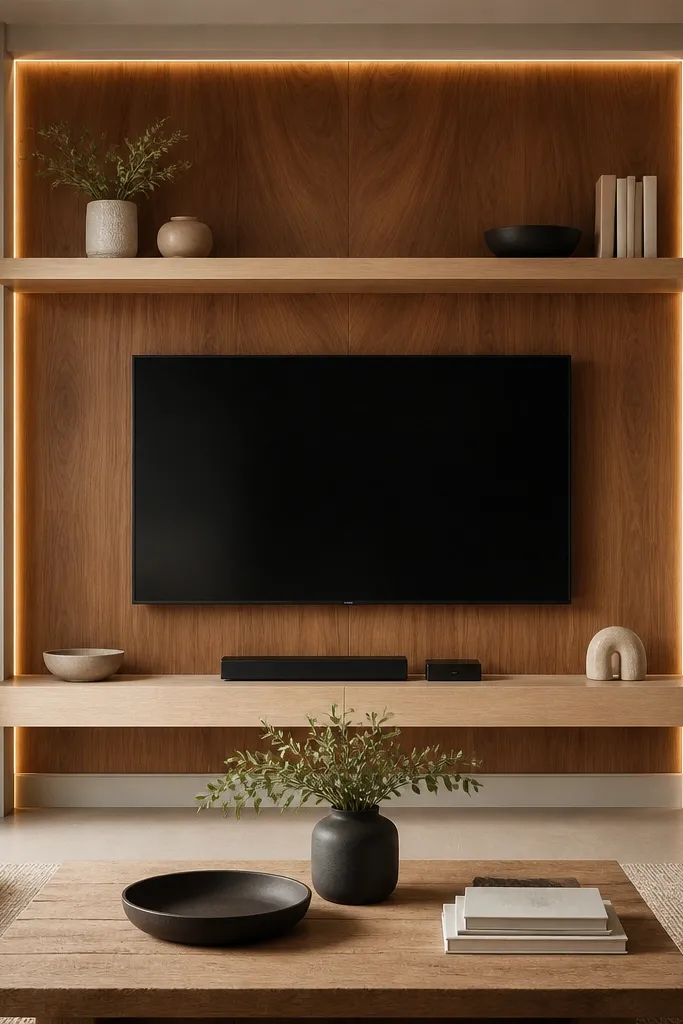
This one works when your living room needs storage and you love displaying a few curated pieces. Book-matched panels look expensive because the grain lines mirror each other, and that symmetry reads high-end even from across the room. Two-level shelving adds visual rhythm and keeps the TV from becoming the only focal point. I’ve styled this in rooms where people have a lot of books or tall decor — the shelves give them a home without overcrowding the TV area. The principle is symmetry plus function: centered wood, balanced shelves, and lighting that outlines the panel edges.
Install vertical book-matched panels centered behind the TV, keeping the seam lines aligned with the TV center. Mount the TV with a 2-3 inch margin from the panel edges so the wood frame looks intentional. Add a lower shelf about 8-10 inches deep for media items and a higher shelf about 6-8 inches deep for decor. Recess LED along the inner edge of the wood panel frame so it creates a thin glow line. Style the lower shelf with a closed media box and one small tray; style the upper shelf with two tall objects and one small framed photo.
Good to knowKeep objects on each shelf in the same height range. It makes the wall look designed, not cluttered.
AvoidAvoid mixing too many wood tones. If the panel is warm oak, keep shelf and decor in the same warmth.
17. Oversized Fabric Wall Frame with Removable Panel Inserts
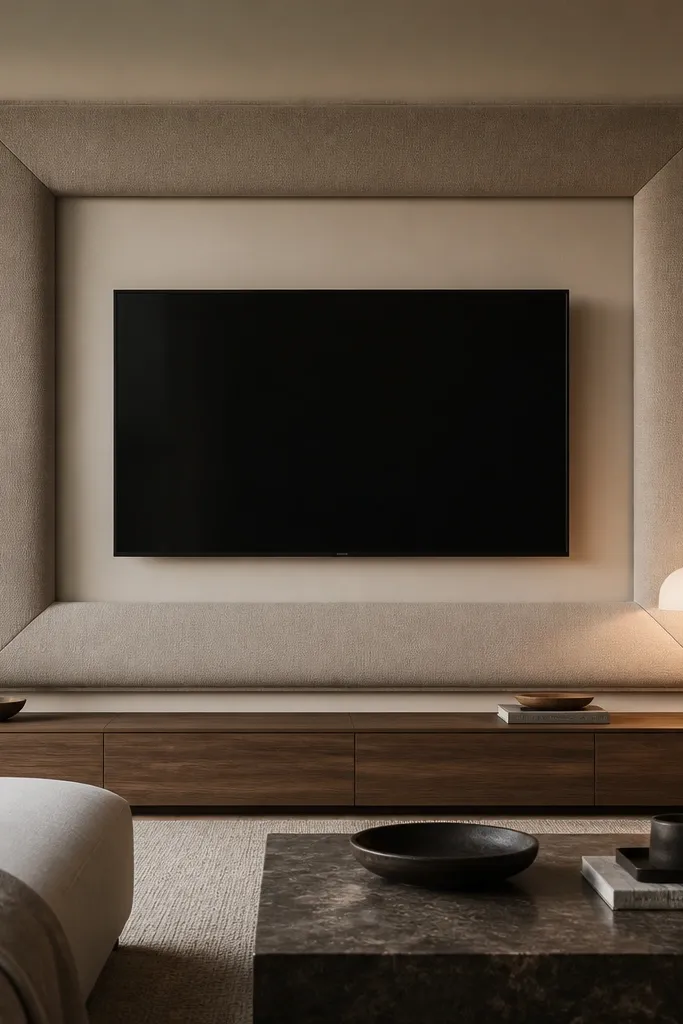
This is the luxury approach for people who want softness and zero visual harshness. Upholstered framing makes the TV area look like part of the seating — like the room was designed as one piece. I’ve done it in homes with kids and busy living rooms because fabric hides small scuffs and wall imperfections that paint would show. It also flatters warm and neutral decor palettes because the fabric reads calm. The principle is framing with fabric — the TV becomes art inside a tailored border, while the rest of the wall stays visually quiet.
Build the frame using rigid foam or plywood covered in upholstery fabric, then attach it to the wall with hidden brackets. Leave an opening for the TV and mount the TV on a separate backer plate so the fabric doesn’t flex. Use a removable insert panel behind the TV if you want easy access to cables. Keep the console low and in matte wood so it doesn’t compete with the fabric frame. Add warm LED behind the console or in a small wall-wash fixture so the fabric texture shows without glare on the TV.
Choose a tightly woven performance fabric. It holds shape and cleans easier than loose bouclé.
Avoid fraying edges or loose stitching. Those details show up instantly in photos.
18. Monochrome Limewash Wall with Brass Picture Rail and TV Centering
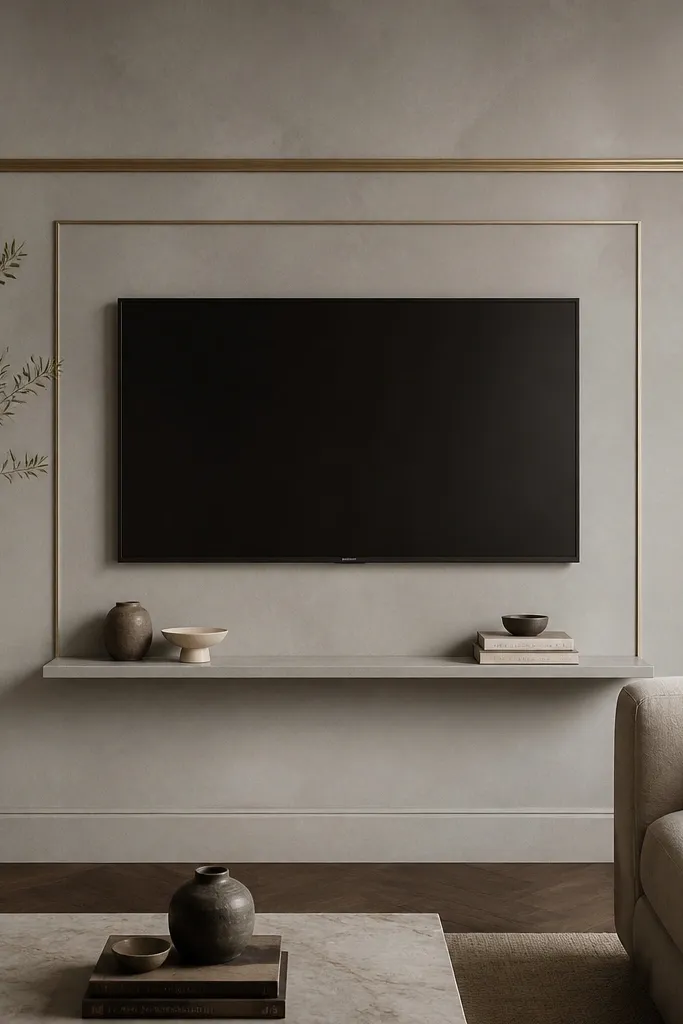
Limewash reads expensive because it looks hand-finished, not machine-flat. The mottled surface adds depth at a distance, so your TV wall doesn’t look like a painted rectangle. A brass picture rail gives you that gallery styling line and makes the TV feel “hung” like artwork. I’ve used this in rooms with plain modern furniture where people want texture but not wood. It also works across skin tones because the wall stays neutral and doesn’t cast strong color shadows. The principle is texture first, metal line second, and keep the styling minimal.
Apply limewash or limewash-look paint on a clean, prepped wall and let it cure fully before installing hardware. Add a brass picture rail at eye-level height, then align the TV so its center matches the rail’s center line. Create a thin metal or wood trim outline around the TV opening, keeping it slim so the limewash texture stays visible. Install a small ledge under the TV that is 5-7 inches deep in matching brass or light wood. Style with one framed piece on the left and one on the right, then keep the ledge empty or with one small object.
Good to knowWhen you paint limewash, use two thin coats and stop. Heavy layers kill the mottled look.
AvoidAvoid glossy topcoats over limewash. They flatten texture and look plasticky.
19. Rattan and White Plaster Hybrid with Black TV Mount
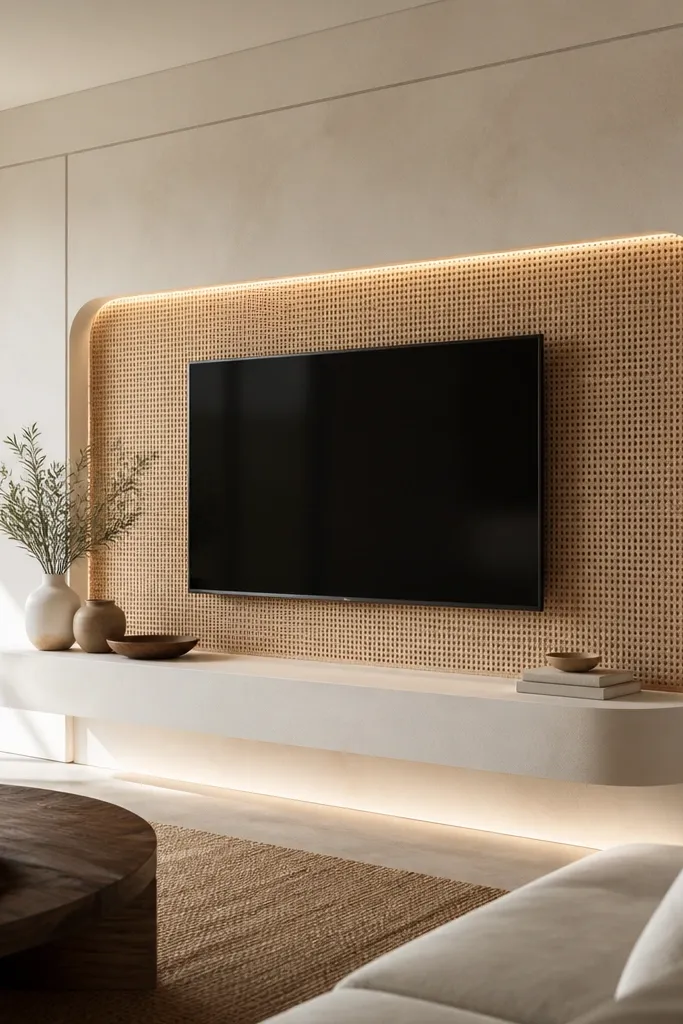
This one feels airy, warm, and honestly more expensive than it looks. Rattan adds handmade texture and movement, and the white plaster keeps it from looking boho-chaotic. I’ve installed this style for clients who want luxury but don’t want heavy stone or dark wood — it reads light and lived-in. It also flatters warm skin tones because rattan undertones are honeyed and soft under 2700K lighting. The principle is contrast between woven texture and clean plaster lines.
Start with a white plaster backdrop or a white panel system with crisp edges. Add a rattan inset panel around the TV opening, keeping the rattan surface behind a thin trim border so it stays protected and straight. Use a black TV wall bracket for a clean line, and keep the TV centered within the rattan inset. Install a white floating shelf under the TV that’s 7-9 inches deep and matte, not glossy. Style the shelf with one light ceramic piece and one woven basket or tray off to one side so the texture keeps repeating.
Good to knowPick rattan with a fine weave. Big chunky rattan looks casual and can read cheap near the TV.
AvoidAvoid rattan touching the TV edges directly. Leave a trim gap so it looks finished.
20. Charcoal Cement Look Wall with Floating Walnut Ledge and Uplight
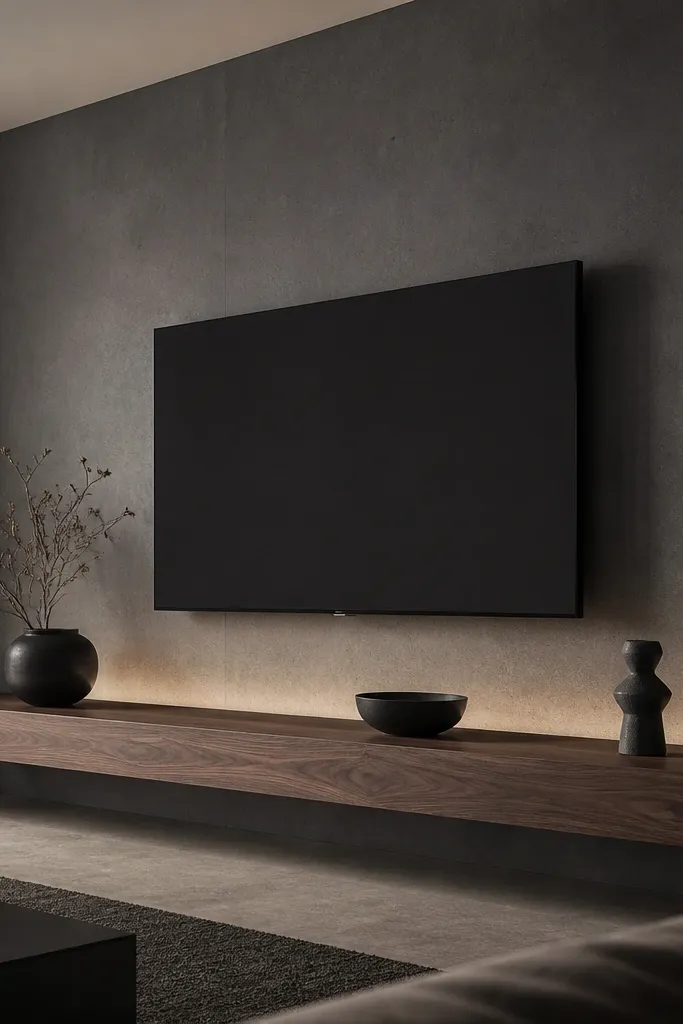
Charcoal cement look makes the TV feel like it sits inside a studio set. It hides wall imperfections and gives you that concrete texture that reads high-end when the lighting is right. I’ve done this in rooms with light rugs and it looks dramatic without feeling gloomy because the uplight warms the wall. It also flatters people with darker or olive undertones in decor because the charcoal doesn’t cast a harsh blue-gray shadow. The principle is a matte textured base with a single warm wood element — walnut brings the warmth back.
Choose a charcoal cement-look coating or textured panel in matte finish. Mount the TV with a slim mount so the wall texture stays visible around it. Install a walnut floating ledge about 9-12 inches deep with a thick edge, and keep it centered under the TV. Add hidden uplight along the bottom edge of the TV frame or behind the ledge pointing upward so it creates a soft glow gradient. Style with two objects max: a tall sculptural piece on one side and a low tray on the other, both in black, walnut, or cream.
Good to knowUse warm LED at 2700K and dim it. Bright cool uplights kill the cement mood.
AvoidAvoid glossy cement finishes. They reflect light and make the wall look plastic.