1. Fluted Panel Frame with Walnut Mantel Shelf
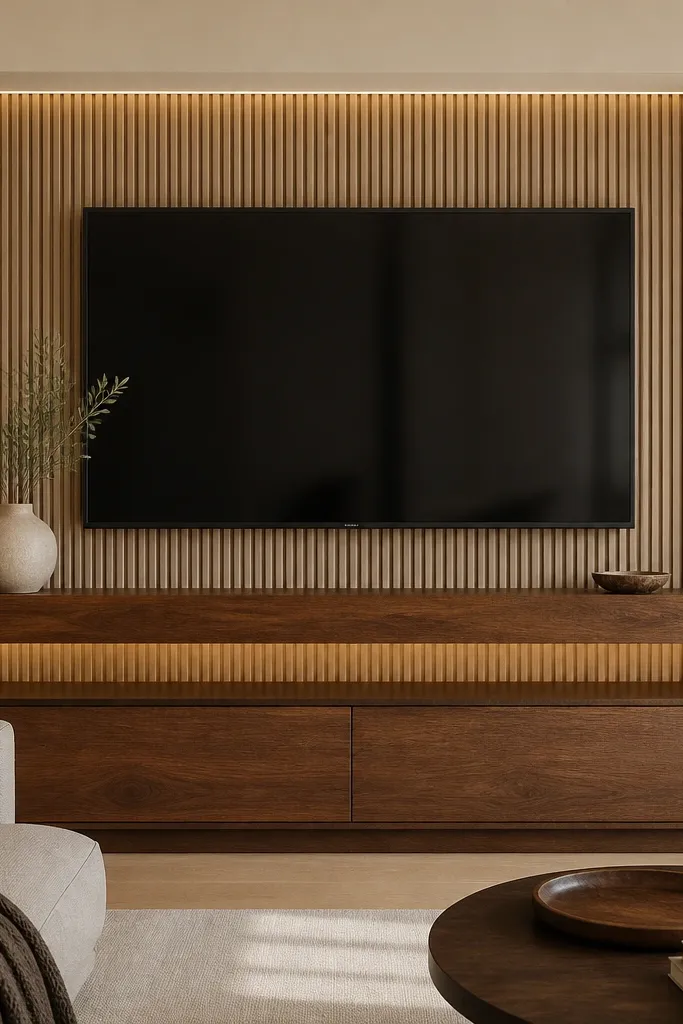
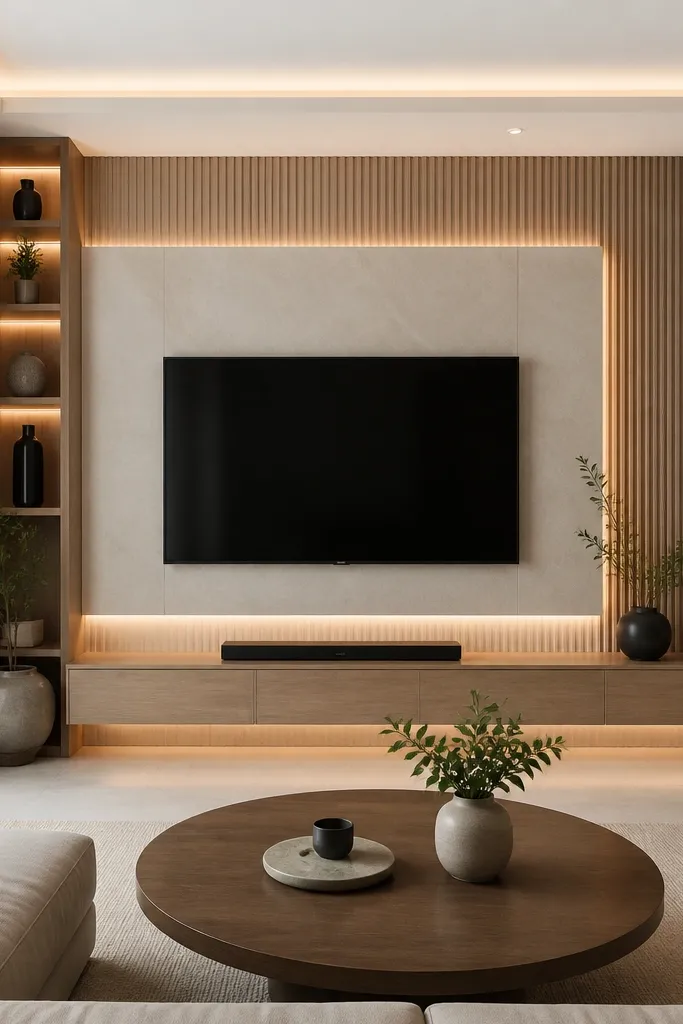
This is the “expensive but cozy” look I keep coming back to. The fluted panels create shadow lines that read as luxury even in daylight, and the walnut mantel gives you that built-in furniture feeling. I’d do it in warm beige, greige, or cream so the wood tones stay flattering against skin and warm throws. If your furniture is already mid-tone wood or you wear gold jewelry, walnut and beige makes the whole room look cohesive fast. The trick is to keep the shelf depth chunky — around 7-9 inches — so the TV feels anchored, not floating.
Start by finding your TV centerline and mark it on the wall. Build the surround first: install fluted panel sheets or individual fluted strips so the total surround width sits about 10-18 inches wider than the TV on each side. Mount the TV so the screen sits slightly above eye level when seated, then install a walnut mantel shelf beneath it with a 1/4 inch reveal on each side for a clean shadow gap. Finish by adding an LED strip behind the fluted panel edge so the light washes the grooves, not the TV directly. Style the console with two matching cable-free decor pieces — like a ceramic vase and a small framed art — so the walnut doesn’t look empty.
Good to knowUse a warm LED color around 2700K and diffuse the strip with a channel cover so you don’t see a bright line.
AvoidSkipping the shelf depth makes the whole frame look like thin trim stuck to the wall.
2. Full Height Stone-Look Accent with Built-In Niches
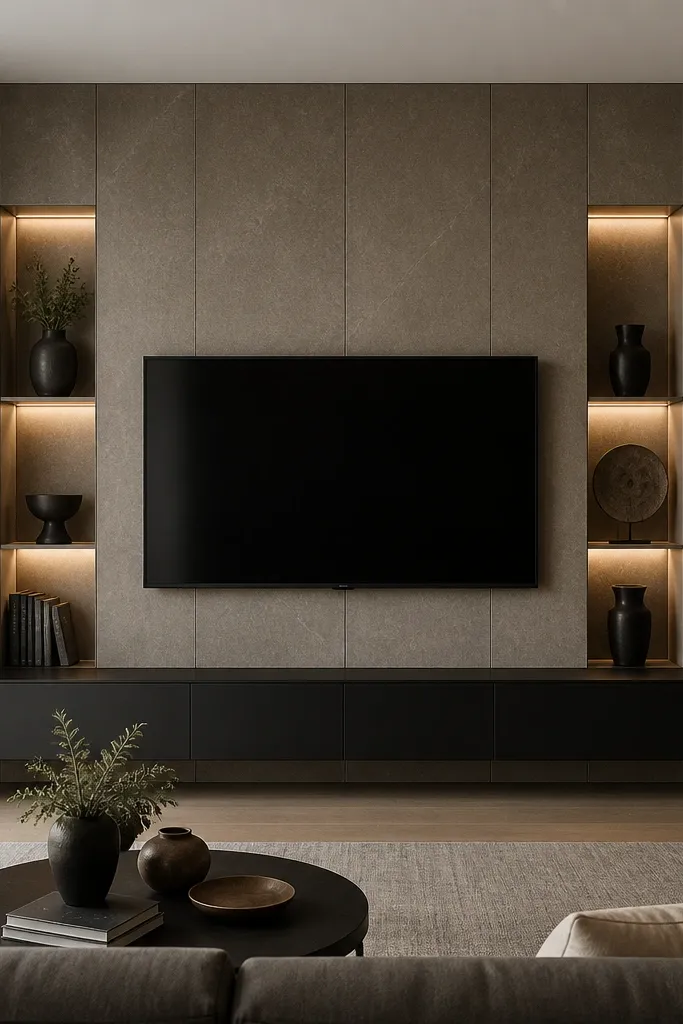
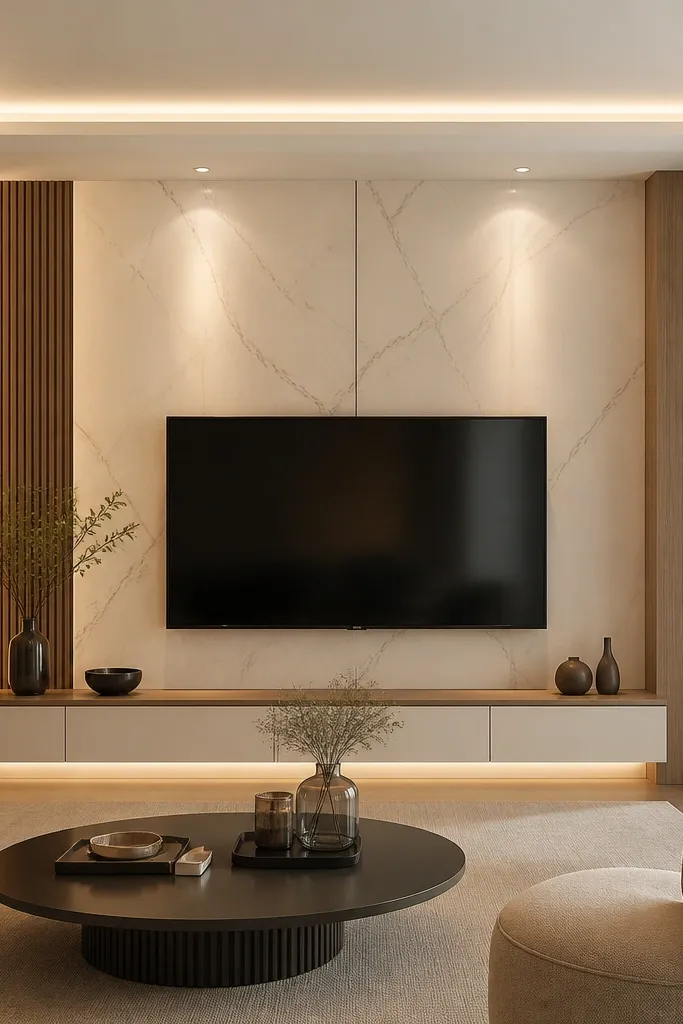
Stone-look panels are the fastest way to make a TV wall feel high-end because they add texture you can’t get from flat paint. I like taupe-gray stone-look for rooms that have both warm wood and cool metals, since it plays nice with both. The side niches add a gallery feel and give you a place for objects that make the room look lived-in, not staged. If your living room is light and airy, this keeps it from feeling sterile. The design works especially well when you use black or dark hardware for contrast so the stone stays the hero.
Start by choosing a stone-look tile panel or large-format board that covers the area behind the TV and niches in one or two sections. Plan niches at about the height of your eye line standing and keep their width roughly 12-18 inches so they don’t look like random holes. Mount the TV centered, then install the niches with a slight shadow gap around the edges. Add a matte black floating media cabinet below — leave at least 2 inches of vertical spacing between cabinet top and the bottom of the TV frame. Finish by placing one tall object in the left niche and a flatter piece in the right niche, so both shelves don’t look identical.
Good to knowUse warm micro-LEDs in the niches at 3000K so the stone looks like it’s lit from within.
AvoidPutting niches too close to the TV corners makes the wall feel crowded and cheap.
3. Blackened Steel Grid with Oak Slat Surround
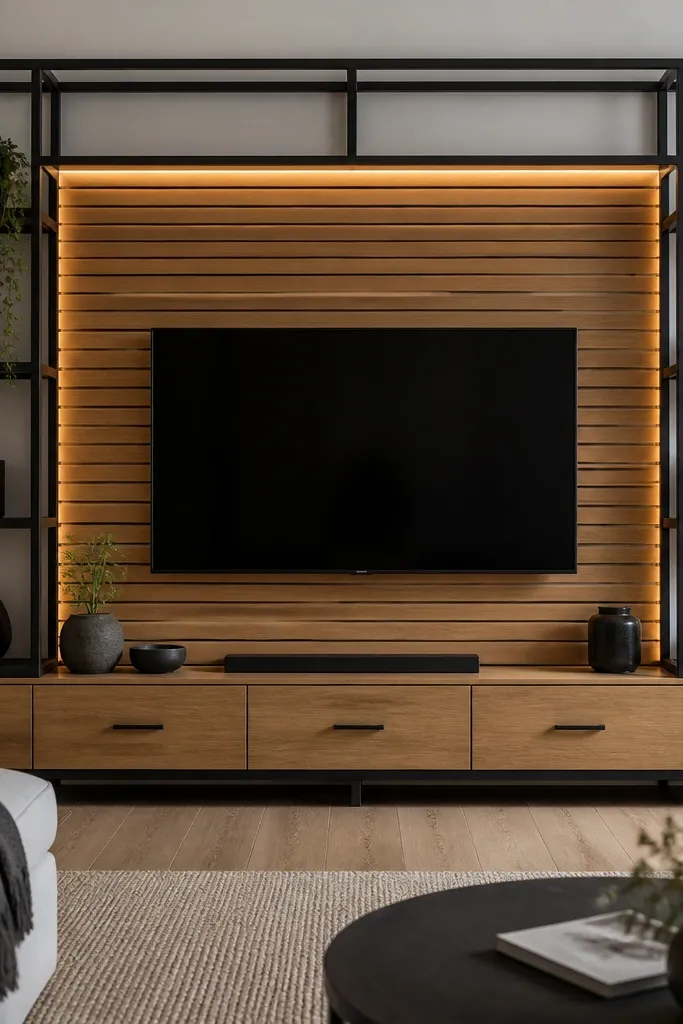
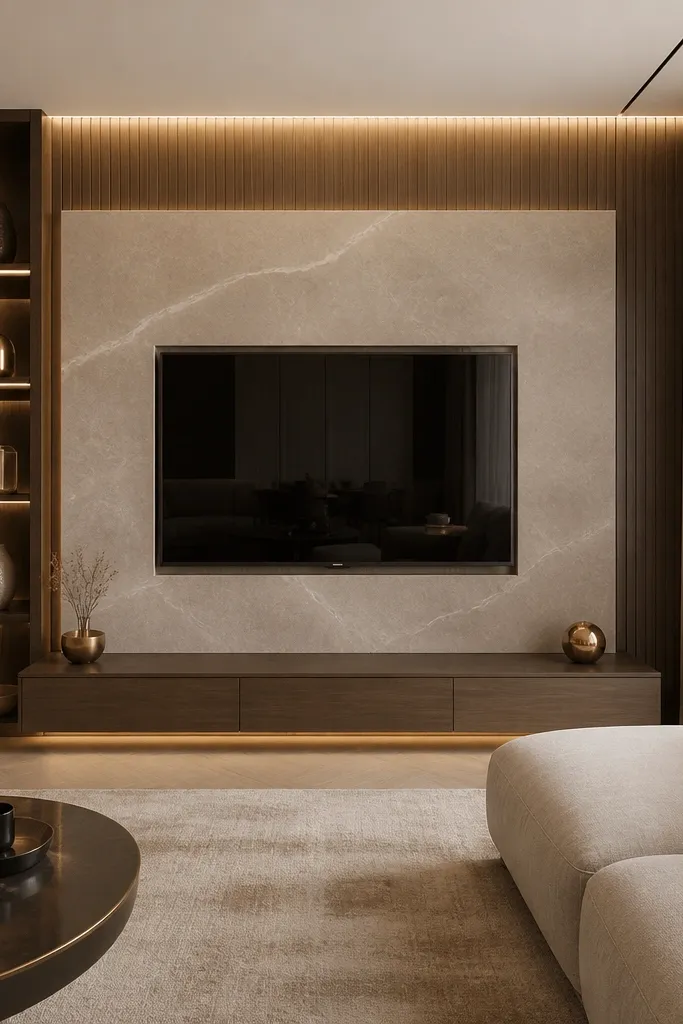
This look reads modern luxury because it mixes industrial structure with warm wood. The oak slats add movement and softness, while the blackened steel grid keeps the whole thing crisp. If your living room has black picture frames, matte black lamps, or dark metal accents, this design ties everything together. It’s also forgiving if your room has a lot of sightlines since the grid creates order. I’ve found that horizontal slats look best when your ceiling height is standard (8 feet-ish), because they visually widen the wall without making it feel too busy.
Start by installing oak slat panels or individual slats on the wall where the surround will sit. Then mount the blackened steel grid frame over the slats, keeping the inner opening centered on the TV. Use a recessed channel for the LED strip along the inside edge of the grid so the light forms a thin halo. Mount the TV on a bracket that lets you keep a consistent gap behind the screen — aim for 1.5-2 inches for ventilation. Finish with an oak console that has flat-panel doors and black pulls, and add one black ceramic sculpture on each side to echo the grid.
Good to knowPaint or finish all exposed metal edges before install so you don’t get patchy spots where hardware touches.
AvoidUsing shiny black metal makes it look like hardware-store shelving instead of a finished design.
4. Ceiling-to-Floor Cabinet Columns with Hidden Media
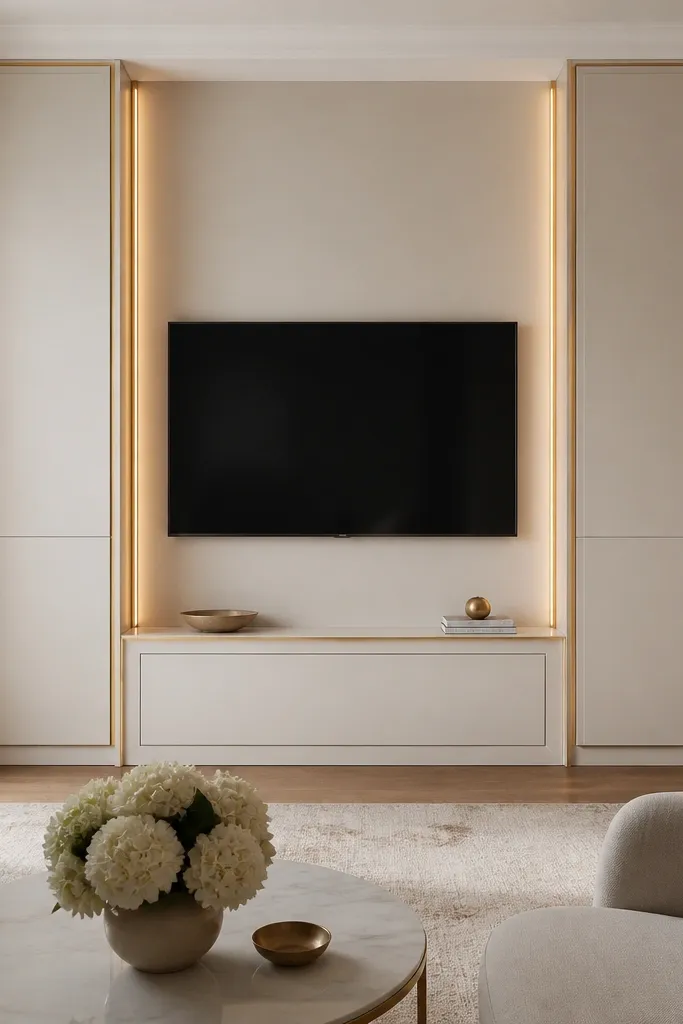
If you hate seeing devices, this is the luxury solution. Full-height cabinet columns give your TV wall a built-in, architect look, and the hidden center storage keeps the surface calm. I like off-white with subtle warm undertones so it doesn’t look gray or sterile next to wood floors. Gold trims make the whole thing feel intentional, especially if you have brass lamps or warm metallic accents. This design flatters rooms with high ceilings because the vertical cabinets pull the eye upward.
Start with a template for the center opening: measure your TV width and decide how much storage you want under it. Build or buy two side cabinet columns that extend toward the ceiling with a small reveal at the top — about 1 inch — for a high-end finish. Install the TV bracket inside the center zone so the screen sits aligned with the cabinet door height. Add warm LED strips along the inside edges of the columns so the light grazes the trim and doesn’t shine into your eyes. Put your media gear in the hidden center niche and leave 2-3 inches of airflow behind the devices.
Good to knowUse soft-close hinges and keep the door opening depth at least 18 inches so you don’t fight access later.
AvoidLeaving the media gear visible underneath instantly kills the luxe feel.
5. Marble-Effect Backplate with Leather Storage Bench
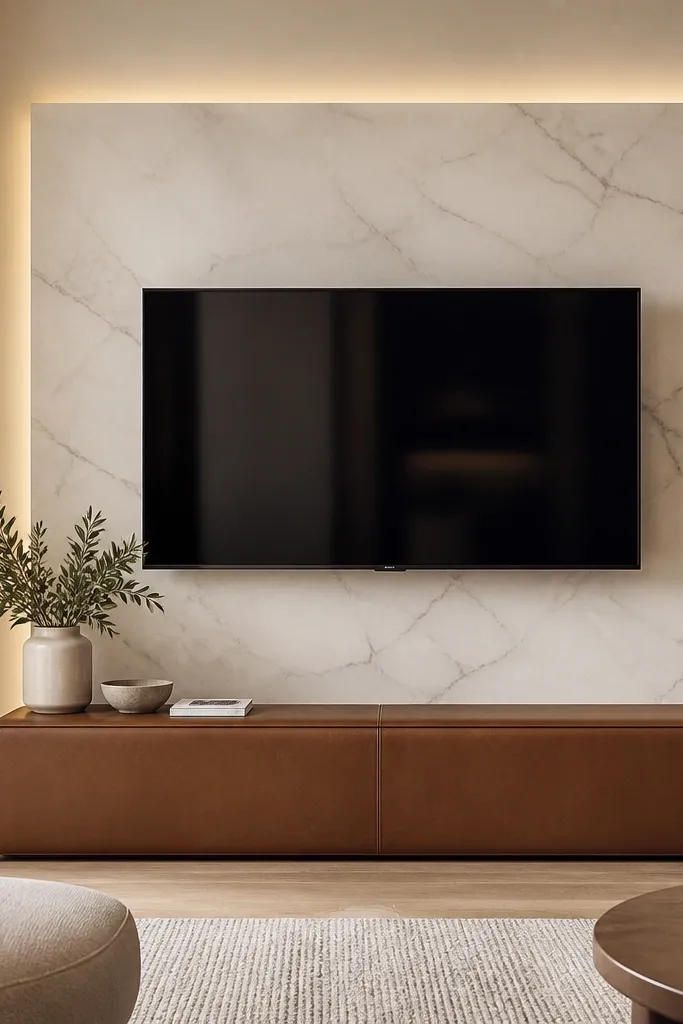
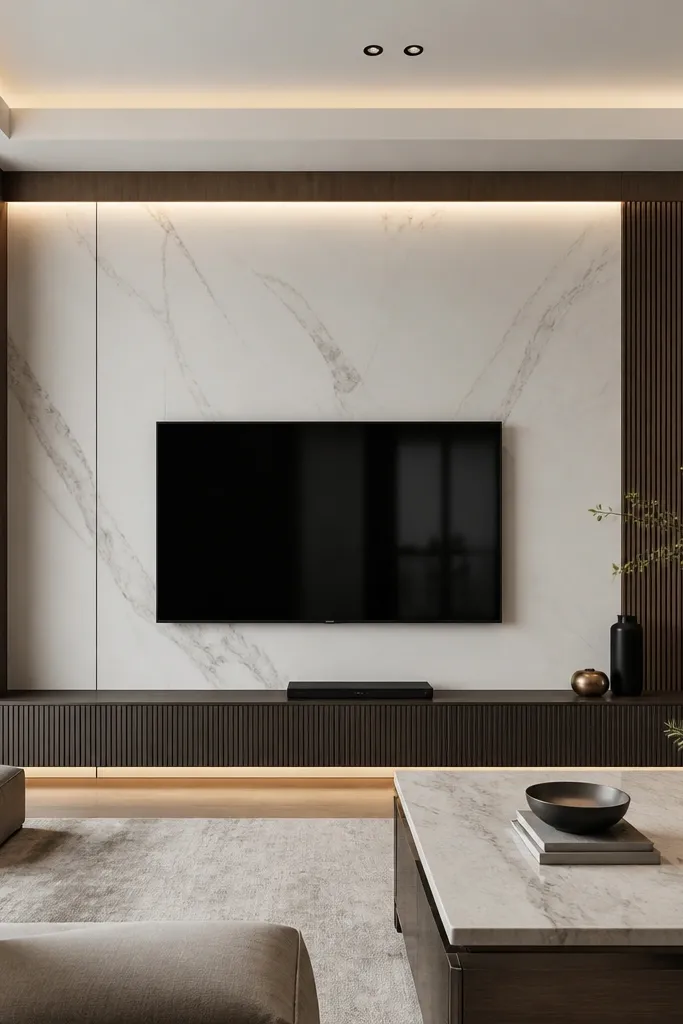
This one feels designer because the materials do the talking. The marble-effect backplate gives you high contrast and movement, while the caramel leather bench adds warmth and comfort. It’s a great pairing for rooms with neutral rugs and light curtains because the leather color shows up like a warm accent. If you have a sofa in oatmeal, camel, or light taupe, this setup looks tailored. The luxury part is the balance: cool stone behind the screen and warm leather in front makes the wall look “finished,” not just covered.
Start by centering the marble-effect panel so it’s wider than the TV by about 8-12 inches on each side. Mount the TV so it’s centered vertically over the bench, leaving enough space for soundbar placement. Install a recessed LED strip along the top and side edges of the backplate so the stone looks softly lit. Choose a leather bench height around 16-18 inches and keep it the same width as the TV zone — typically within 1-2 inches of the backplate width. Style the bench with one low tray and a pair of matched candle holders in brushed brass, not a bunch of small items.
Good to knowUse a matte finish marble-effect panel so you don’t get glare spots on the screen.
AvoidUsing a glossy stone finish can create reflections you’ll notice every movie night.
6. Warm White Plaster Look with Oversized Picture Rail
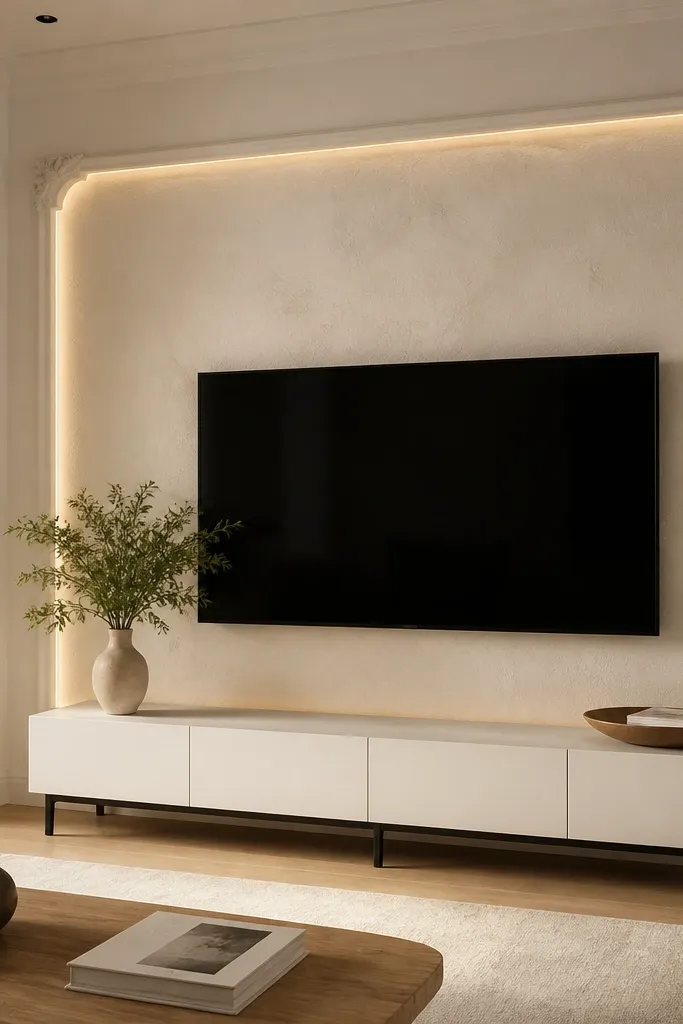
Plaster-look walls are the easiest way to make your TV area feel custom without adding a ton of visual clutter. The oversized picture rail gives you that classic framing, like a gallery wall, but tailored to a screen. I love warm white here because it reads creamy next to natural wood and doesn’t wash out skin tones in photos. If your room is smaller, this design still works because the frame is clean and the lighting is soft. It also flatters people who like minimal styling — you can keep decor to two items and it still looks complete.
Start with a plaster-look finish or textured paint on a defined rectangle where the TV wall will sit. Build the picture rail frame with molding that’s about 3-4 inches wide, so it has weight. Mount the TV inside the framed area and keep a consistent reveal gap of around 1/4 inch between TV and molding. Hide an LED strip in the top rail so it creates a gentle glow around the frame. Install a white console with black legs, then hang or place one large art piece above the TV frame if you want extra depth.
Paint the molding the same warm white as the wall so the frame looks like it grew there.
Using bright pure white everywhere makes it look like a rental renovation.
7. Two-Tone Built-In: Light Oak Base with Greige Upper Panels
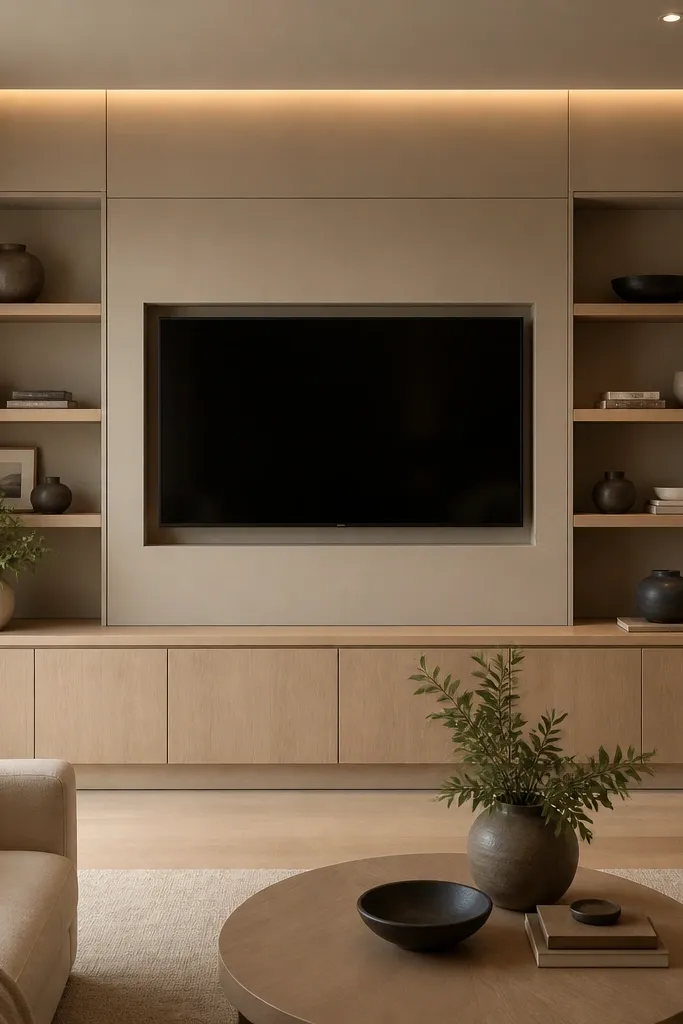
Two-tone built-ins make a TV wall look expensive because your eye reads separation and craftsmanship. Light oak on the bottom keeps the room warm and grounded, while greige upper panels keep the wall from getting too heavy. This design is great in living rooms with beige carpets, oatmeal sofas, or neutral curtains. It also works well if you want a place to display books or small ceramics without exposing clutter all day. The luxury feeling comes from proportions: the bottom cabinet should feel substantial, and the upper panel area should have clean, flat surfaces.
Start by sketching your TV opening width and decide how wide you want the cabinet base to be. Install the greige upper panels first so you have a flat backing for the TV zone. Mount the TV and keep it centered, then install the light oak cabinet base below with a consistent 2-3 inch vertical spacing from the TV opening. Add LED strips behind the upper panel edges so the glow sits at the ceiling side of the cabinet line. Style the side shelves with one stack of books and one framed photo per side, keeping shelf clutter low.
Good to knowUse the same wood finish on console legs and cabinet fronts so the warm tone feels intentional.
AvoidMixing too many wood tones in one wall looks like you patched it together over time.
8. Walnut Shiplap with Brass Picture Lights
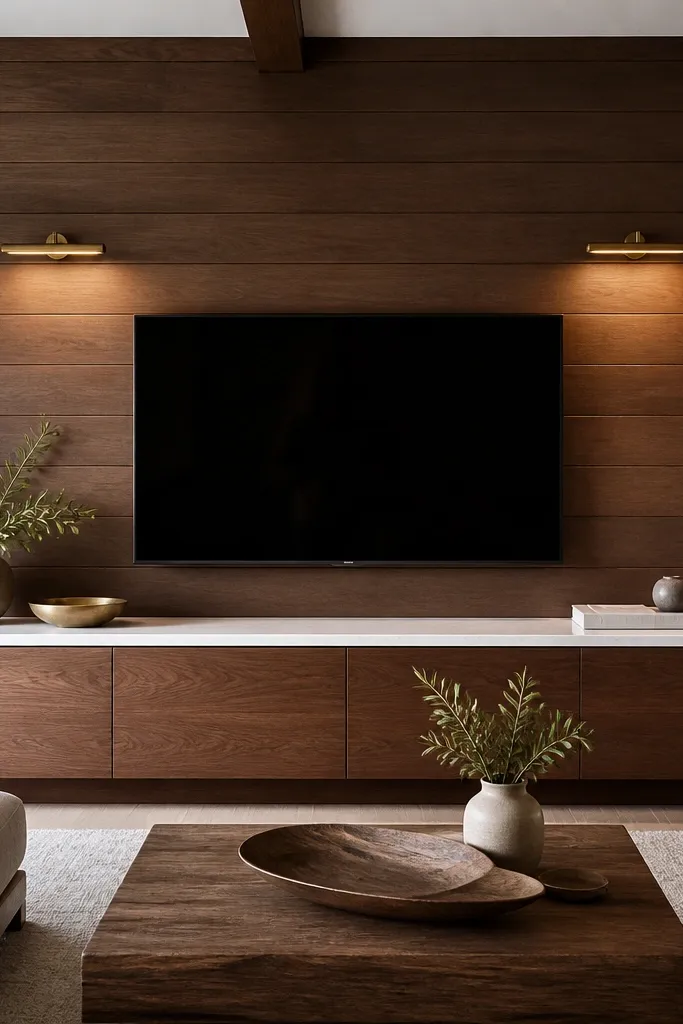
Shiplap in walnut tones gives you that cozy cottage warmth, but the brass lights push it into luxe territory. The horizontal lines make the wall feel wider, which helps if your TV is on a shorter wall. Brass picture lights add controlled lighting you can aim, and that’s what makes the TV area look like it belongs in a showroom. This works especially well with white or light gray sofas because the warm wood doesn’t fight the fabric color. I also like it for rooms where you want texture but not heavy stone.
Start by installing walnut shiplap or a walnut veneer shiplap paneling system with tight seams so the lines look consistent. Mount the TV centered and keep the TV opening slightly smaller than the panel width so the wood frames it cleanly. Install brass picture lights on the wall studs, positioned so the beam hits the top half of the TV surround area, not the screen. Add a walnut console with a quartz top in white or light gray, keeping the console width close to the TV zone. Finish with two small objects on the console and a taller plant in a textured pot on one side.
Use dimmers for the picture lights so movie nights don’t get washed out.
Aim the lights too low and you’ll create glare on the screen.
9. Dark Charcoal Backdrop with Floating Glass Shelves
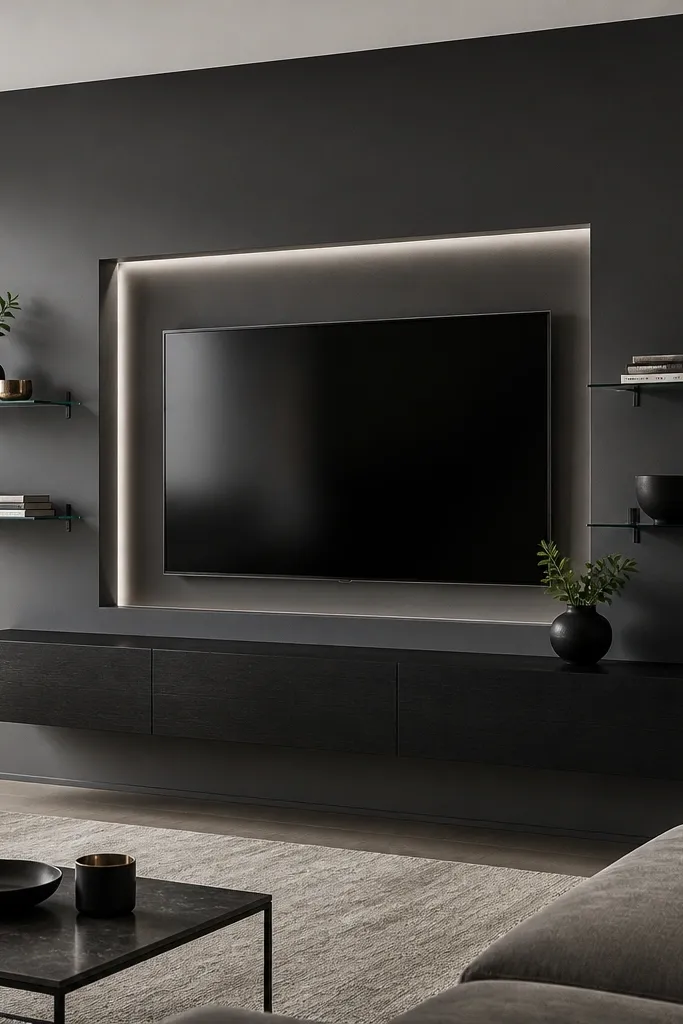
Charcoal is dramatic, and drama is part of luxury. The recessed niche makes the TV look like it’s set into furniture, not attached to a wall, while the glass shelves add lightness so the dark wall doesn’t feel heavy. This design is perfect if your room has light walls, white trim, and a modern sofa. It also flatters people who love a clean, curated look because glass shelves hide nothing and force you to style with restraint. If you have a lot of small decor, this is the one place you need to keep it minimal.
Start by painting the wall charcoal and marking a recessed niche outline that’s 6-10 inches wider than the TV. Frame the niche with wood or metal trim and install the TV so it sits inside the opening with a 1/2 inch shadow gap. Mount two floating glass shelves at different heights — one about 8 inches above the TV, the other about level with the bottom of the TV — so the composition isn’t flat. Install a slim LED strip along the inside top edge of the niche in a cool white around 4000K for crisp contrast. Use a black wood floating console below and keep it free of bulky media gear.
Choose smoked or clear glass based on your decor: smoked hides dust, clear looks sharper.
Cool white LEDs in a warm room can make everything look gray and harsh.
10. Rattan + Oak Hybrid with Cane-Front Cabinet Doors
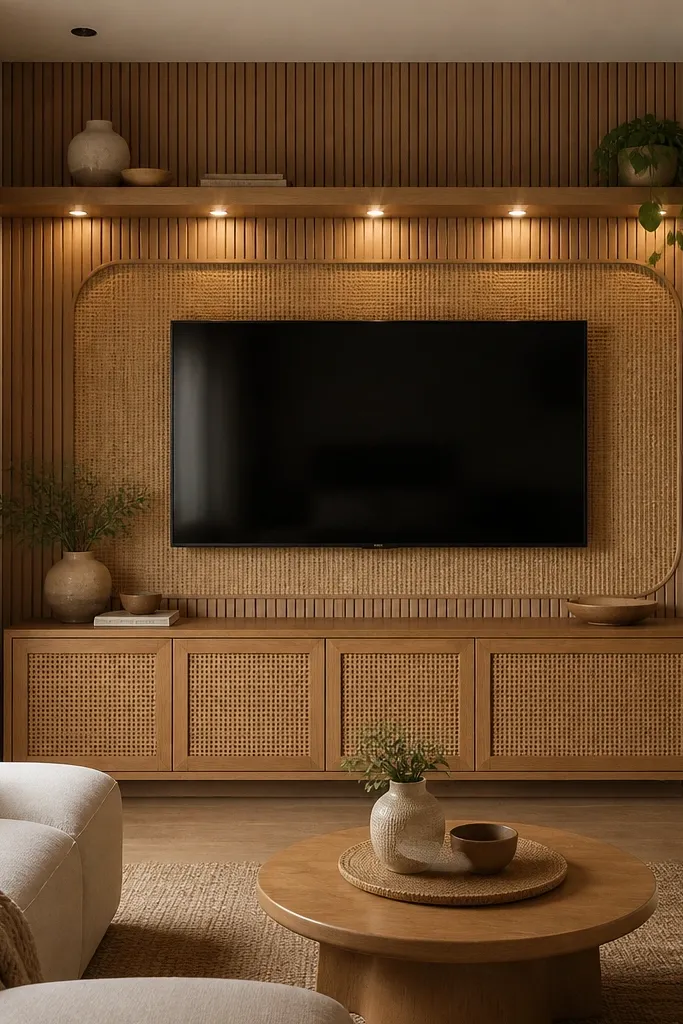
This is the luxe version of natural texture. Oak slats bring structure, and rattan cane doors add a handcrafted feel without looking boho-random. I love this in living rooms with beige rugs, linen curtains, and light wood floors because it makes the room feel intentional and breathable. If you have warmer skin undertones, the honey rattan looks flattering in photos and in person. The luxury rule here is restraint: use rattan in cabinet doors or one main panel area, not everywhere.
Start by installing oak slats as the main backing behind the TV, keeping spacing consistent. Add a rattan-wrapped panel above or around the TV zone, and keep the rattan area limited to one section so it reads like design, not clutter. Choose a media console with cane-front doors in a honey tone, and match it to your oak. Mount the TV so the bottom edge sits about 6-10 inches above the console top. Add warm LEDs under a shelf line or behind the rattan panel to create soft highlights, then style with one woven basket on the floor and two neutral decor items on top.
Good to knowUse a rattan sealant or choose pre-finished cane so it resists dust and fingerprints.
AvoidToo many different natural textures on one wall makes it look accidental.
11. Pale Sand Plaster with Recessed Linear LED Channel
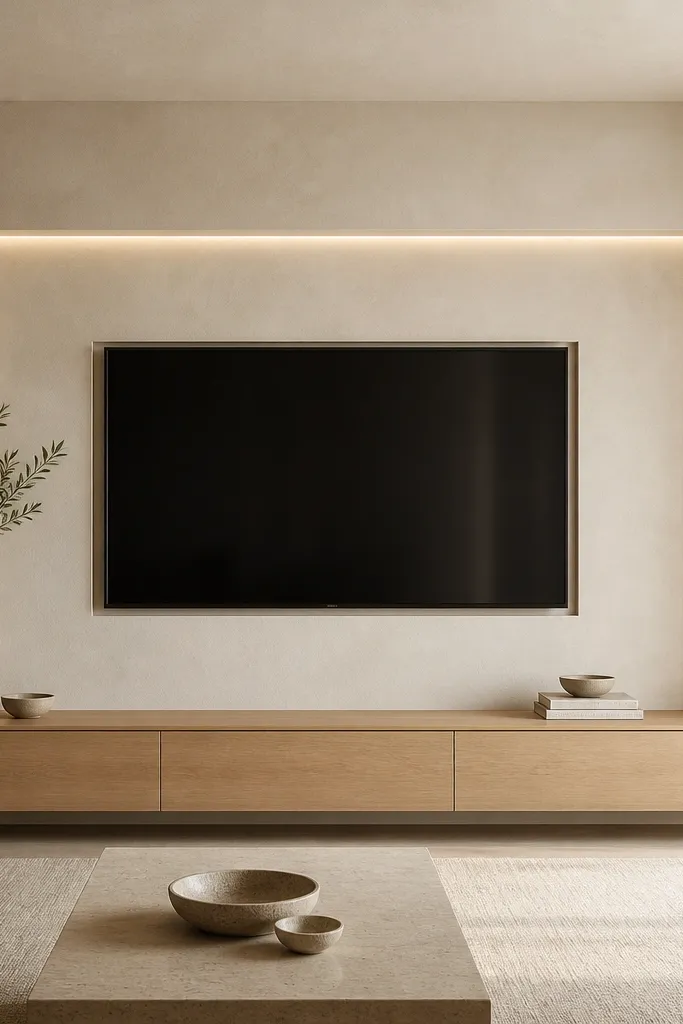
This look is sleek luxury without heavy materials. Pale sand plaster gives you subtle texture, and the recessed linear LED channel creates a clean halo that looks expensive in both daylight and night. I recommend this for people who want a calm, modern wall that doesn’t compete with art above the sofa. It also works great if your room has a lot of neutral fabrics since the texture adds interest without adding color noise. The best part is how easy it is to style: one or two objects near the console and you’re done.
Start by choosing a plaster-look paint or finish in pale sand and applying it evenly with a small roller for a consistent texture. Mark a rectangular recess behind the TV — keep it about 8-12 inches wider than the TV on each side. Install thin trim to define the recess and mount the TV centered inside. Add a recessed LED channel around the inner perimeter and diffuse it with a cover so you see glow, not the diode points. Finish with a light oak console with clean lines and minimal hardware, then add a single large ceramic on one side.
Set your LED dimmer so the glow is noticeably softer than your overhead lights.
If the LED is too bright, the TV looks like it’s floating in a spotlight.
12. Sculptural Arch Surround in Soft Cream Plaster
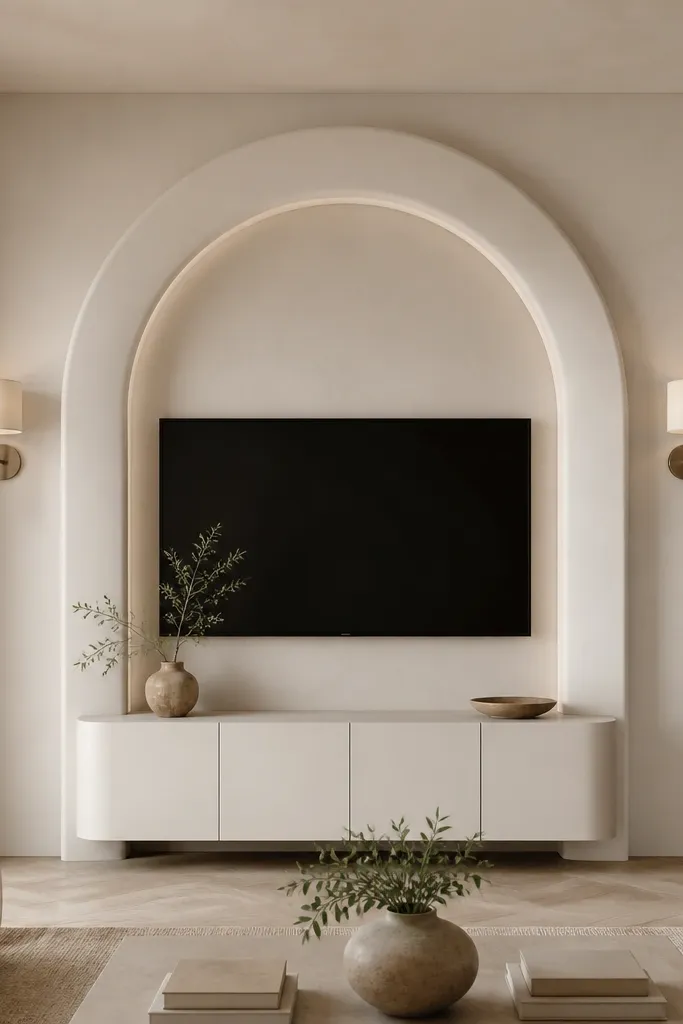
An arch is an easy way to make a TV wall feel custom and architectural. The soft cream plaster finish keeps it gentle and high-end, not gothic or heavy. This works beautifully in rooms with rounded furniture edges like curved sofas, oval mirrors, or arched windows. If your home has warm lighting and you want a romantic modern look, this is it. The luxe factor comes from the curve plus the shadow gap — it makes the surround look like a single built piece.
Start by measuring the TV width and deciding the arch width so it sits about 10 inches wider than the TV on each side. Build the arch surround with flexible plaster paneling or MDF rounded forms covered in plaster-look finish, leaving a 1/2 inch shadow gap at the inner edge. Mount the TV so it sits centered within the arch, then place the console directly under the arch base, keeping the console width matching the arch width minus a small margin. Add two sconces at equal distance from the arch sides, aimed slightly upward. Style with one tall vase and one low tray so the arch doesn’t feel busy.
Good to knowUse warm bulbs around 2700K in the sconces so the plaster looks creamy, not chalky.
AvoidA thin arch edge looks flimsy; make the surround thick enough to cast real shadows.
13. Walnut Slat Wall with Hidden Soundbar Channel
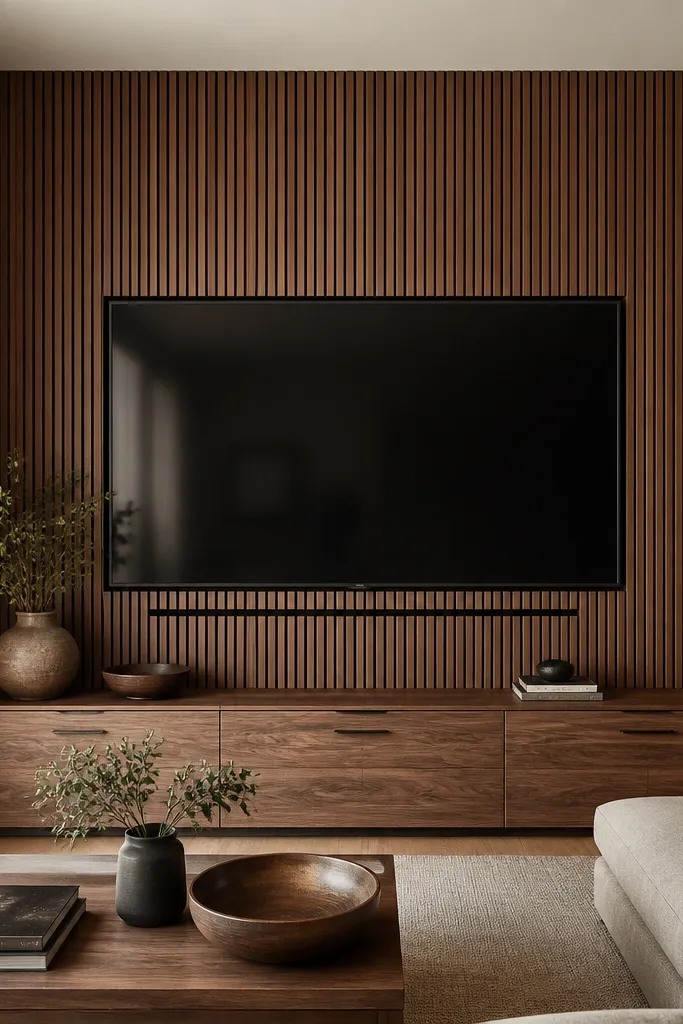
This is a clean-luxe combo because the slats do the texture work and the soundbar channel keeps the “tech clutter” out of sight. Vertical slats make your ceiling feel taller, which is helpful in many living rooms with standard heights. Walnut keeps it warm and flattering, especially with beige, cream, and light gray upholstery. The hidden channel is the part people notice when they walk in — it looks like the wall was built around the audio system. If you’re picky about visual noise, this design is for you.
Start by installing walnut slats on the wall with consistent spacing, then mark where your soundbar will sit. Cut a hidden channel slot below the TV opening that matches the soundbar depth, and line it with a thin black backing so it disappears visually. Mount the TV on a bracket and ensure the soundbar sits in the channel without blocking airflow. Add a slim black frame or trim around the TV opening to define the shape against the wood. Finish with a walnut console with matte black handles and keep decor minimal: one dark ceramic and one framed photo.
Good to knowUse felt or a thin acoustic backing in the soundbar channel to keep audio clean while staying invisible.
AvoidMounting the TV without planning the soundbar cutout makes the final look messy fast.
14. White Oak Herringbone Accent with Bronze Trim
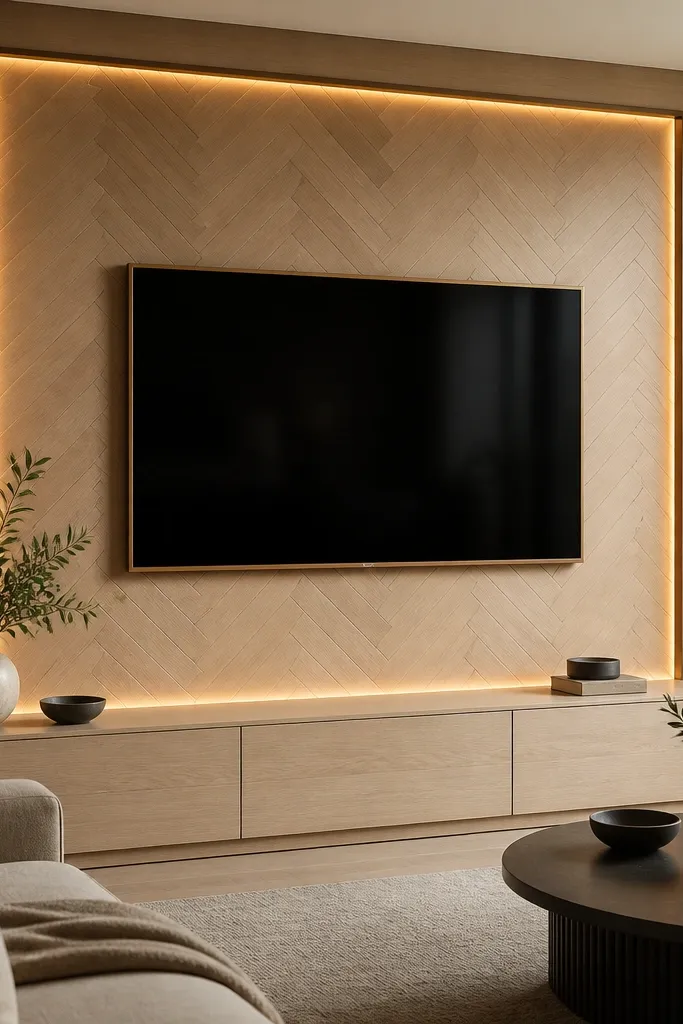
Herringbone reads expensive because the pattern feels engineered. White oak keeps it bright and modern, while bronze trim adds warmth and a slightly old-world touch. This look flatters clean interiors: white walls, light gray carpets, and modern sofas with simple lines. If your room has brass lighting already, bronze trim makes it feel like a matching set. The luxury move is the outline: the bronze frame defines the TV area so the pattern stays focused rather than busy.
Start by installing a herringbone panel section that’s centered behind the TV and sized to be wider than the TV by 8-14 inches per side. Mount the TV so the screen sits within the herringbone area, then attach bronze trim around the opening with a consistent 1/4 inch reveal. Install warm LED strips behind the bronze trim — not on the TV — so the glow outlines the frame. Choose an oak console with simple doors and matching finish, and keep the console top clear except for one larger object. Add two matching picture frames on the sides at equal height if you want a balanced look.
Good to knowSeal the oak herringbone panel with a matte finish so the pattern doesn’t glare.
AvoidUsing glossy finish on the herringbone makes the pattern look like cheap laminate.
15. Linen-Fabric Panel Backdrop with Hidden Magnetic Art
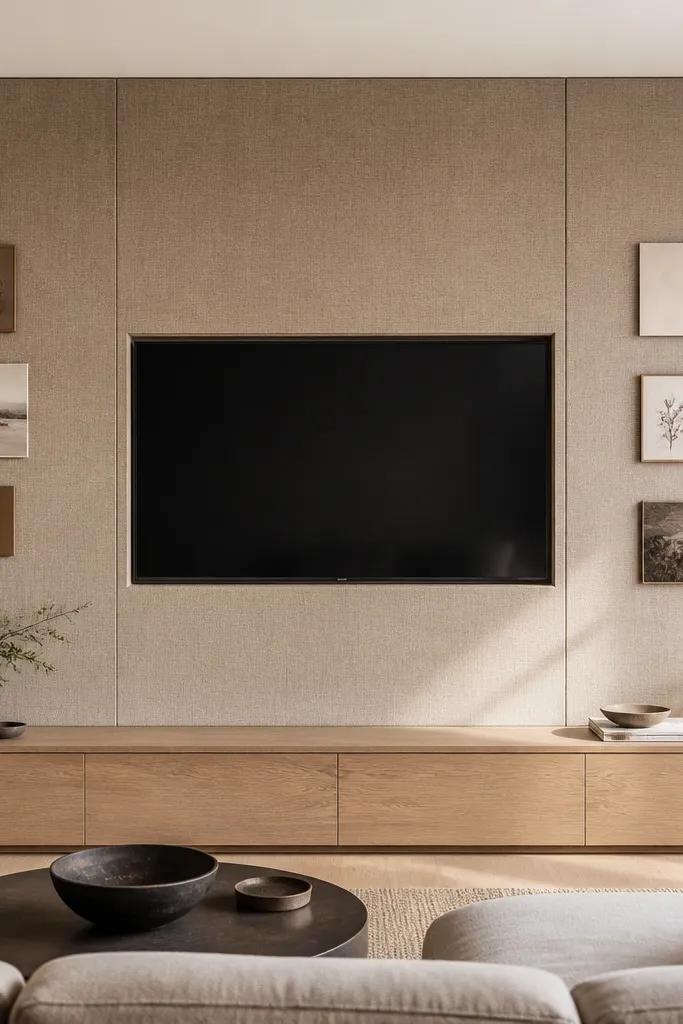
Fabric backdrops are rare, and that’s why they look luxe when done right. Linen-look panels soften everything around the TV, which makes the screen feel less harsh and more like a focal piece. I like warm taupe because it works with both cool and warm furniture tones. This is also a smart choice if you change decor seasonally — you can swap magnetic art without repainting or reinstalling panels. The luxury principle here is texture plus clean boundaries: keep the TV frame simple so the fabric reads intentional.
Start by covering a defined area behind the TV with stretched linen-look fabric panels on a rigid backing board. Install a slim recessed frame around the TV opening so the fabric doesn’t touch the screen edges and looks neatly finished. Mount the TV on a bracket that allows at least 2 inches of clearance behind for airflow. Place a light wood console under the TV and keep the front minimal. Add magnetic frames above or on the sides so you can switch out prints — use one large piece at a time so the wall stays calm.
Use a fabric panel backing that’s removable so you can access cables later.
Letting fabric sag or wrinkle around the TV looks handmade in a bad way.
16. Dark Walnut V-Groove Panels with Floating Stone Shelf
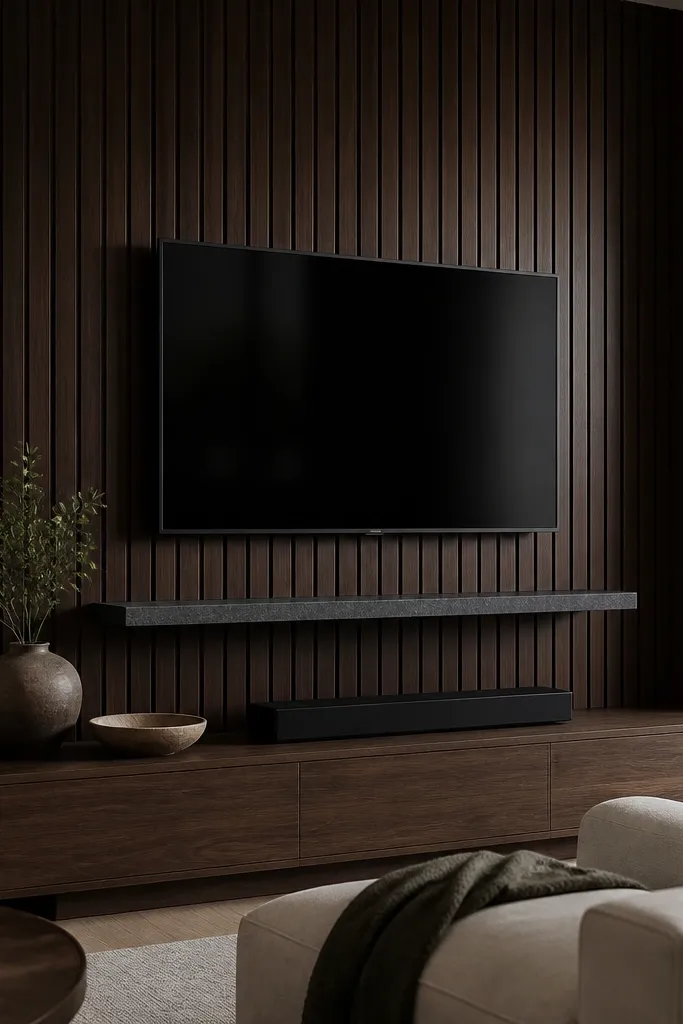
V-groove paneling is a cheat code for luxury because the channel shadows look like built-in depth. Dark walnut keeps it rich without going black — it still reads warm. The floating stone shelf adds weight and contrast, like a mantel, which makes the TV feel anchored. This style works best with neutral walls and modern furniture in black, gray, or cream. If your room has a darker rug or you like moody interiors, this design looks spot-on.
Start by installing dark walnut V-groove panels centered behind the TV. Mount the TV so it sits within a simple trim outline that matches the panel finish, keeping a 1/4 inch reveal. Install a floating stone shelf below in dark gray with a depth around 6-8 inches, and align it so the shelf is centered under the TV. Leave enough clearance between the bottom of the TV and the shelf — about 4-6 inches — for a balanced stacked look. Style the console with one long horizontal piece like a low ceramic tray and keep the rest minimal.
Good to knowUse a matte stone finish so it doesn’t reflect the TV content back at you.
AvoidSkipping the trim outline makes V-grooves look like a generic wall panel.
17. Two-Sided Fireplace-Style Media Wall with Mirror Finish
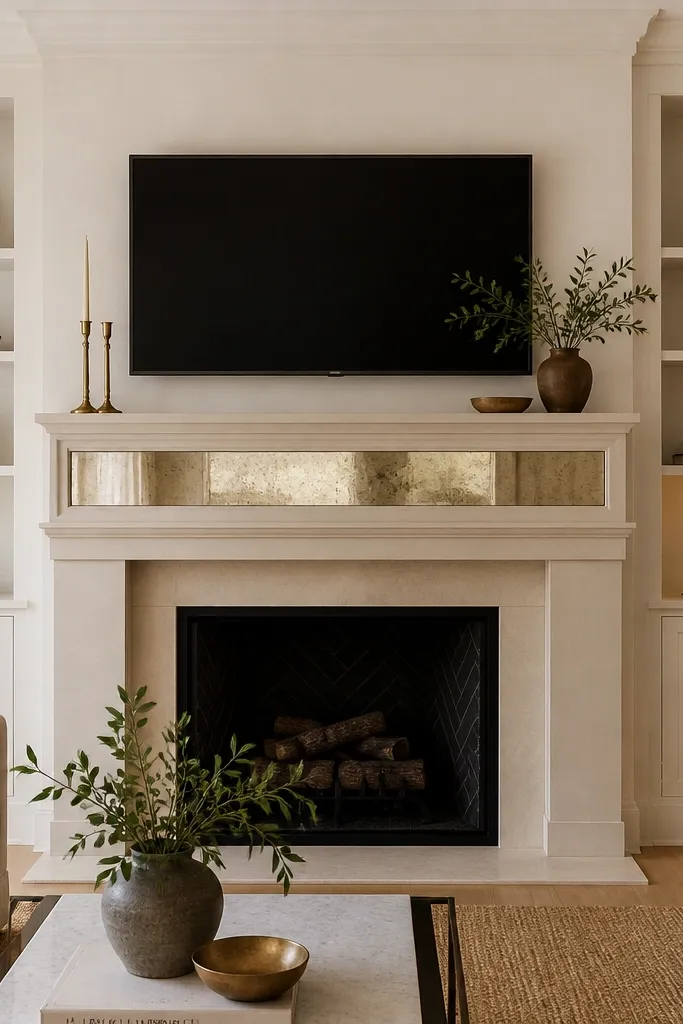
A fireplace-style layout is luxury because it copies the way people naturally treat a focal point in a room. The mirror-finish insert might sound risky, but it works when it’s centered and framed — it bounces warm light back without turning the whole wall into a disco. I like this for living rooms where the TV is the main focal point but you also want the space to feel warm and “gathering.” If you have a neutral sofa and a mantel vibe already, this design feels natural. The key is the framing: keep the mirror insert small and bordered so it reads like a detail, not a mistake.
Start by building a mantel structure that’s wider than the TV opening by 4-6 inches on each side. Install the TV centered above the mantel with a consistent gap of about 6 inches between the bottom of the TV and the top of the mantel opening. Place a mirror-finish insert in the middle of the mantel face, framed with bronze or wood trim so edges look clean. Add flanking shelves for books or objects, but keep them about 10-12 inches deep so they don’t look bulky. Style with one tall object on each shelf and keep the mantel top clear except for a single sculptural piece.
Use warm bulbs and avoid placing mirrors across from bright windows to reduce glare.
A mirror insert that’s too large makes the wall look like a cheap reflective panel.
18. Satin Black Backplate with Oversized White Plinth Columns
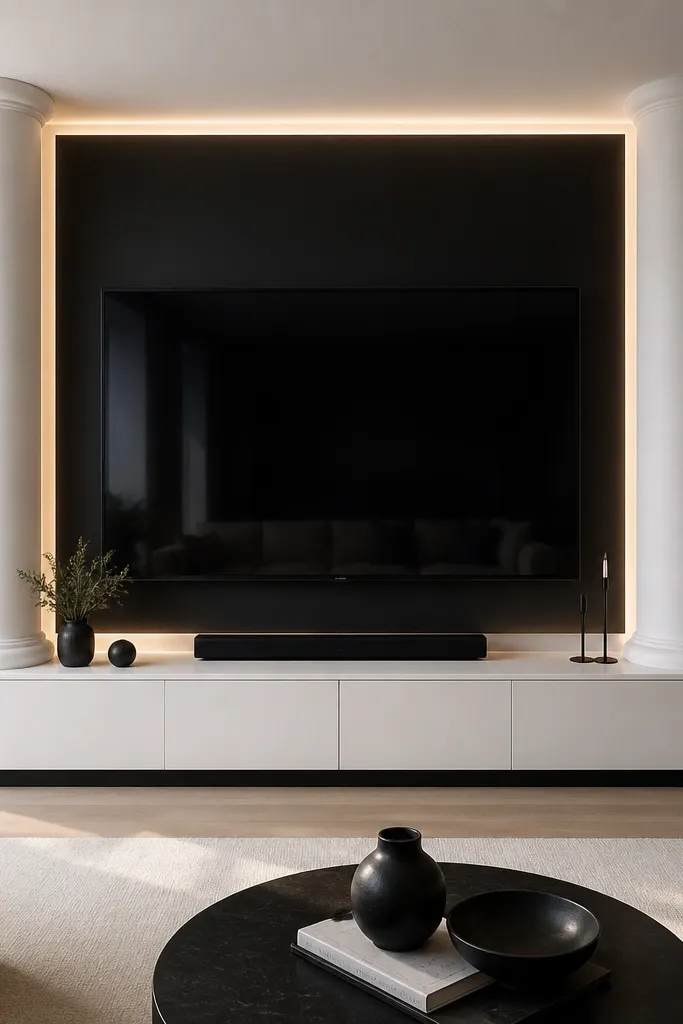
This is high-contrast luxury with a sculptural feel. The satin black backplate makes the TV look like it sits in a framed niche, and the white plinth columns add a gallery pedestal effect. It’s one of the few designs that looks good even if you keep decor nearly empty because the structure does the styling. If your room is modern with white walls and black hardware, this will match without work. I’d pair it with neutral rugs and a sofa in cream, light gray, or black to keep the palette tight.
Start by painting or installing a satin black backplate area that’s wider than the TV by 8-14 inches per side. Build two plinth columns at the sides of the backplate, keeping them thick enough to cast shadows — about 3-5 inches wide depending on your scale. Mount the TV centered and keep a 1/2 inch shadow gap between the backplate and TV frame. Add a thin LED line along the backplate edges so the glow stays behind the TV zone. Finish with a low console in white with black legs and keep decor to two objects that match the plinth color — like white ceramics or black metal frames.
Good to knowChoose satin, not glossy, black so you avoid reflected glare from the screen.
AvoidUsing glossy black and bright LEDs together makes the wall look harsh.
19. Cream Shaker Cabinet Wall with Glass Door Insert
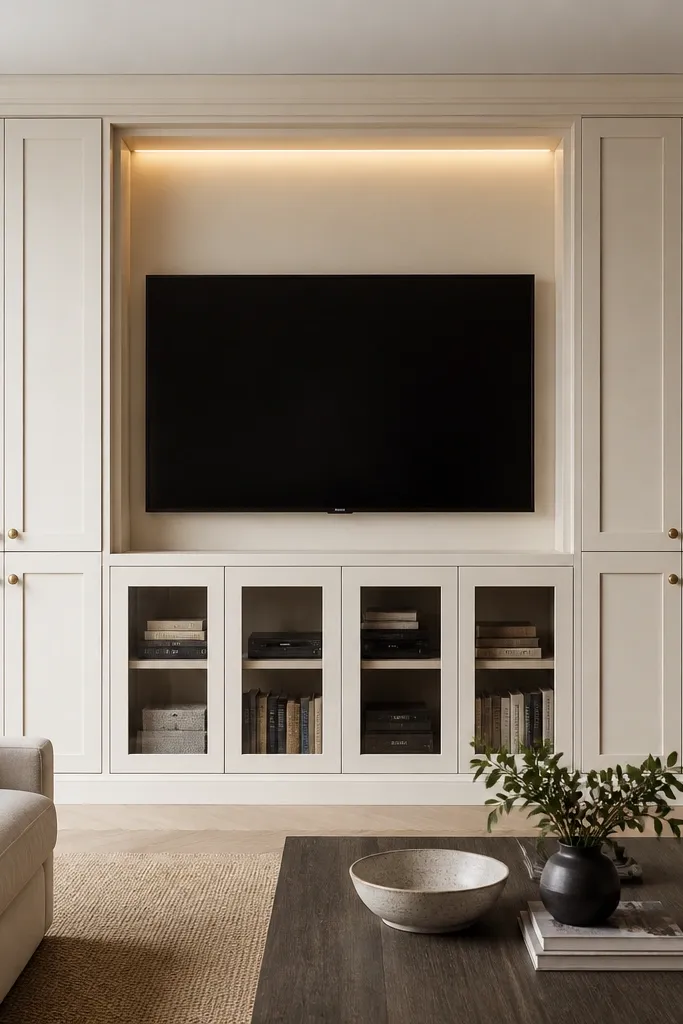
Shaker cabinet walls look luxurious because the joinery reads like furniture, not decoration. Cream keeps it bright and soft, and the glass insert gives you a controlled view of organized tech without exposing a messy countertop. This design is ideal if you have a traditional-leaning living room but you want the TV wall to feel current. It also works well for families because doors keep clutter hidden between uses. The luxury detail is symmetry and hardware: consistent spacing and matching brass knobs make it feel built.
Start by deciding the TV opening size and then building shaker cabinet doors around it with equal margins. Mount the TV inside the central opening, then add a glass door insert below or slightly to one side for media organization. Install LED strips along the inside top edge so the cabinet interior glows softly. Choose brass knobs or pulls and keep them consistent across the entire wall. Style inside the glass door with a neat stack: one media box, one slim remote organizer, and one small decor item, so the glass doesn’t look random.
Use shelves with adjustable pegs so you can fit different media sizes later.
Mismatched hardware finishes make the wall look like it was assembled from leftovers.
20. Monochrome Brick-Effect with Floating Walnut Media Console
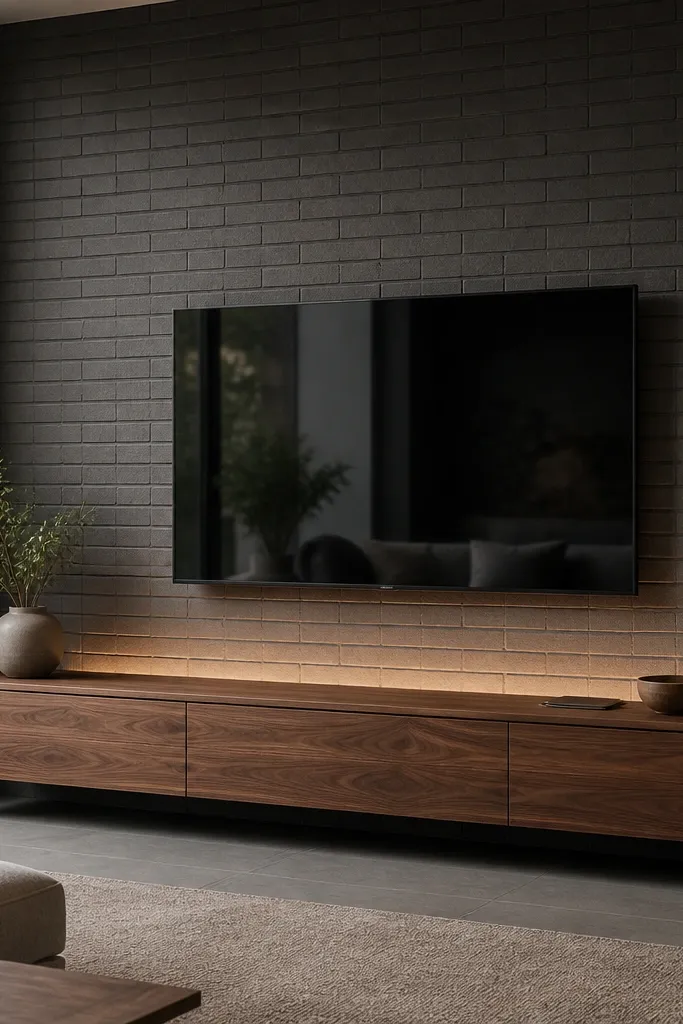
Brick-effect walls look luxe when the color is controlled and the surface is matte. Dark gray brick gives you texture without going rustic, especially when you pair it with a sleek floating walnut console. This design works well in modern apartments where you want character but not farmhouse vibes. If your furniture is black, gray, or dark navy, the wall makes those colors look richer. The luxury principle is contrast and cleanliness: keep lines straight, keep the console minimal, and let the brick texture do the work.
Start by applying a brick-effect panel or wallpaper on a defined rectangle behind the TV, using a matte finish so it doesn’t glare. Mount the TV centered with a thin trim outline in black or dark gray. Install a warm LED uplight behind the TV so the light grazes the brick — aim it upward and slightly off-center to avoid bright spots. Use a floating walnut console that’s low and wide, and leave at least 3-4 inches of clearance between console top and the TV bottom edge. Style with one long planter or candle holders on the console and keep the rest of the wall empty for a gallery feel.
Good to knowPick a brick-effect panel with consistent mortar lines so the texture looks intentional, not patchy.
AvoidUsing glossy brick wallpaper makes it look like a cheap theater set.