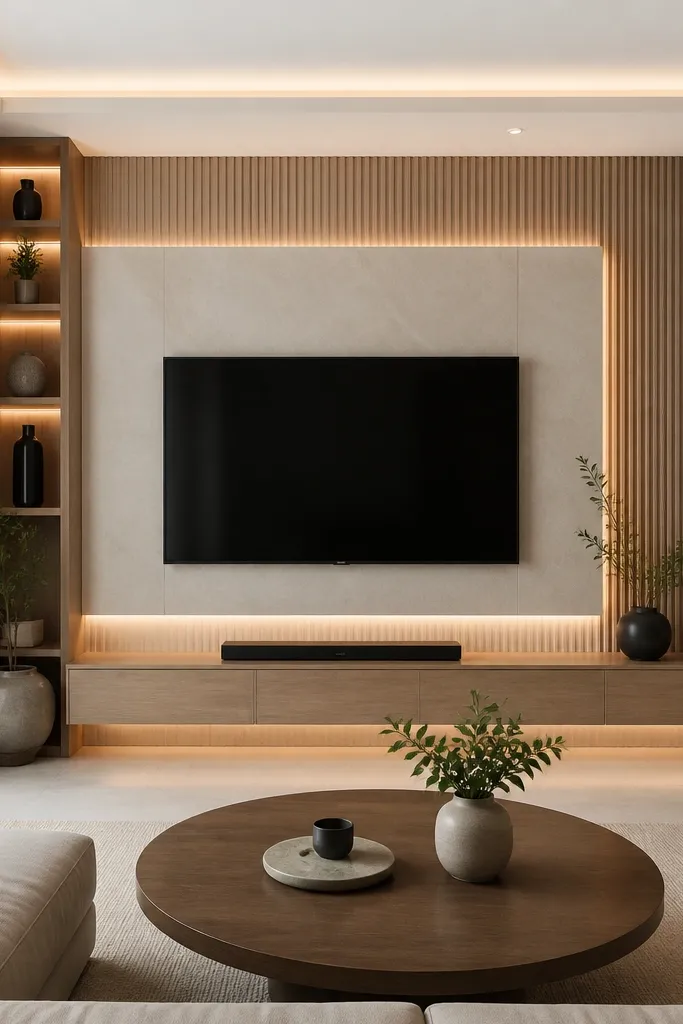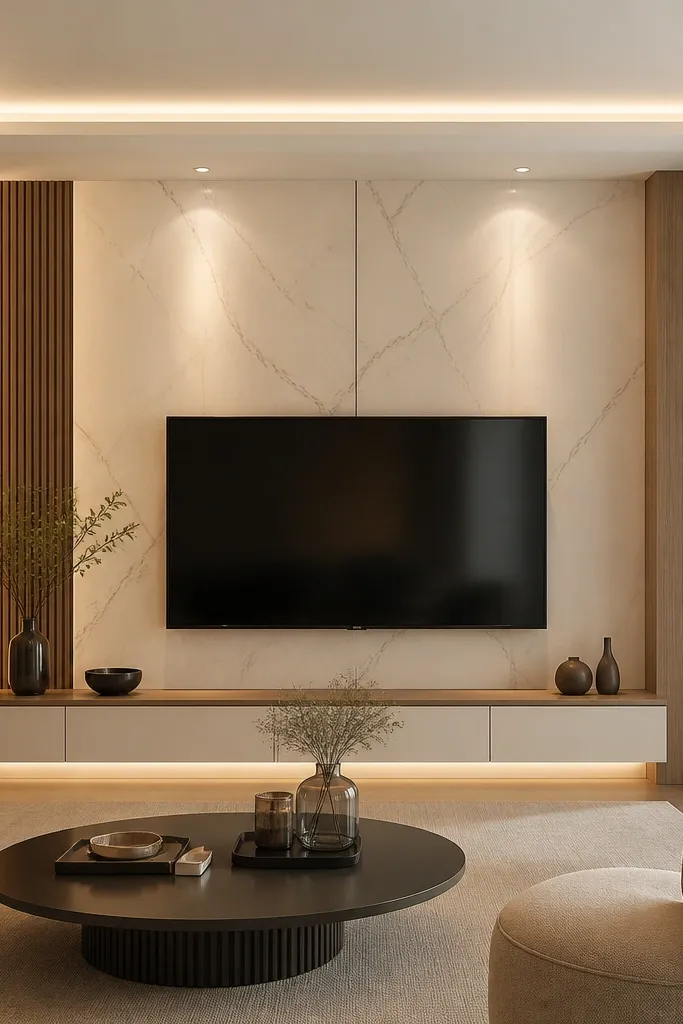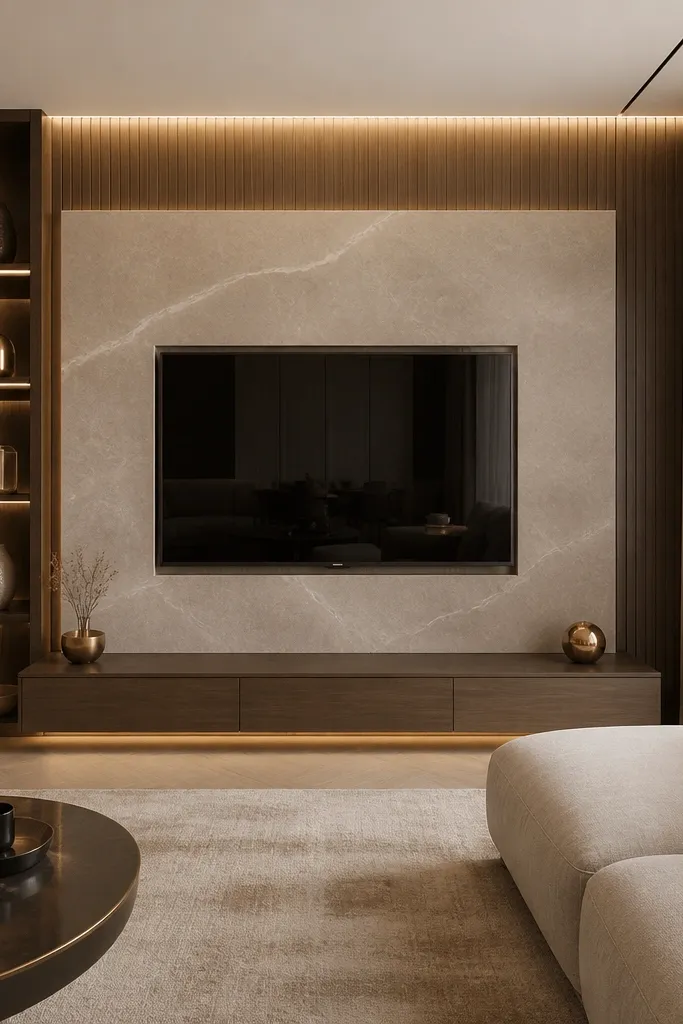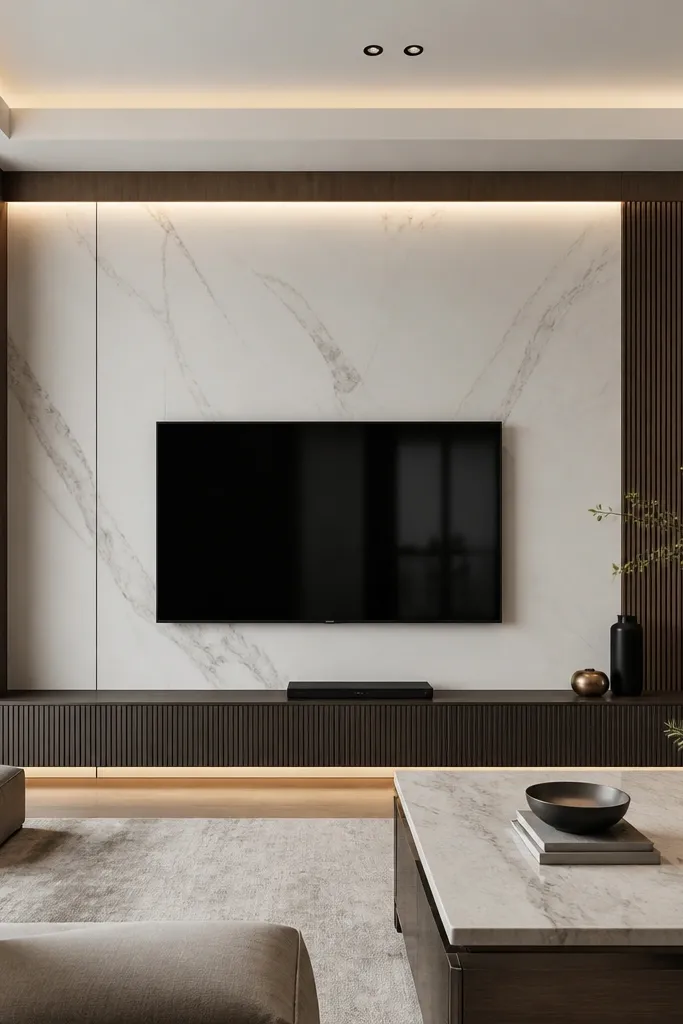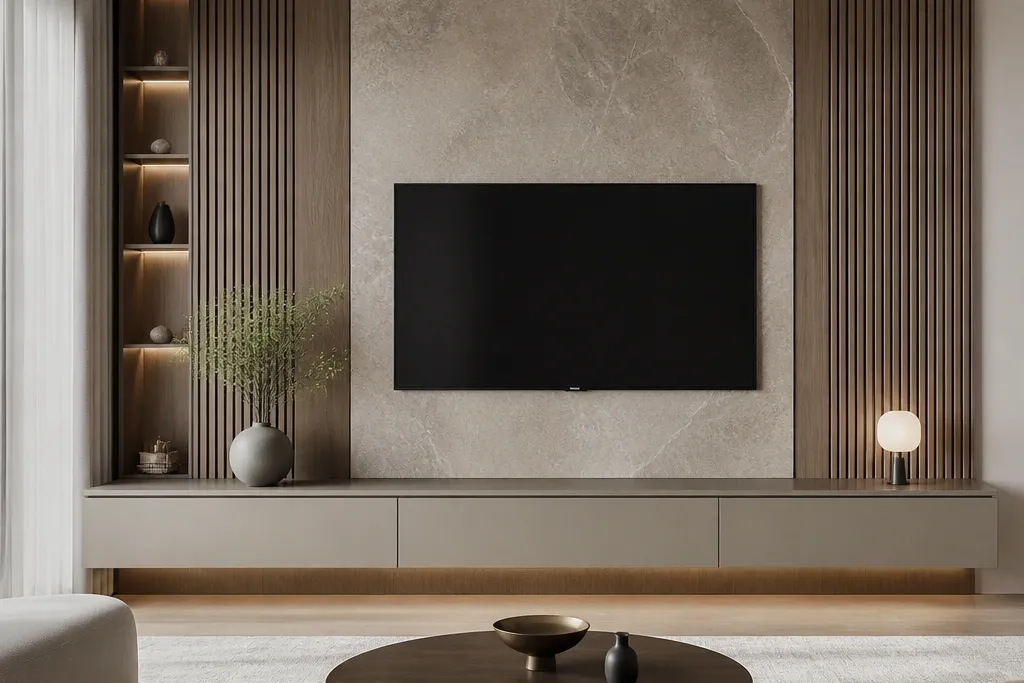
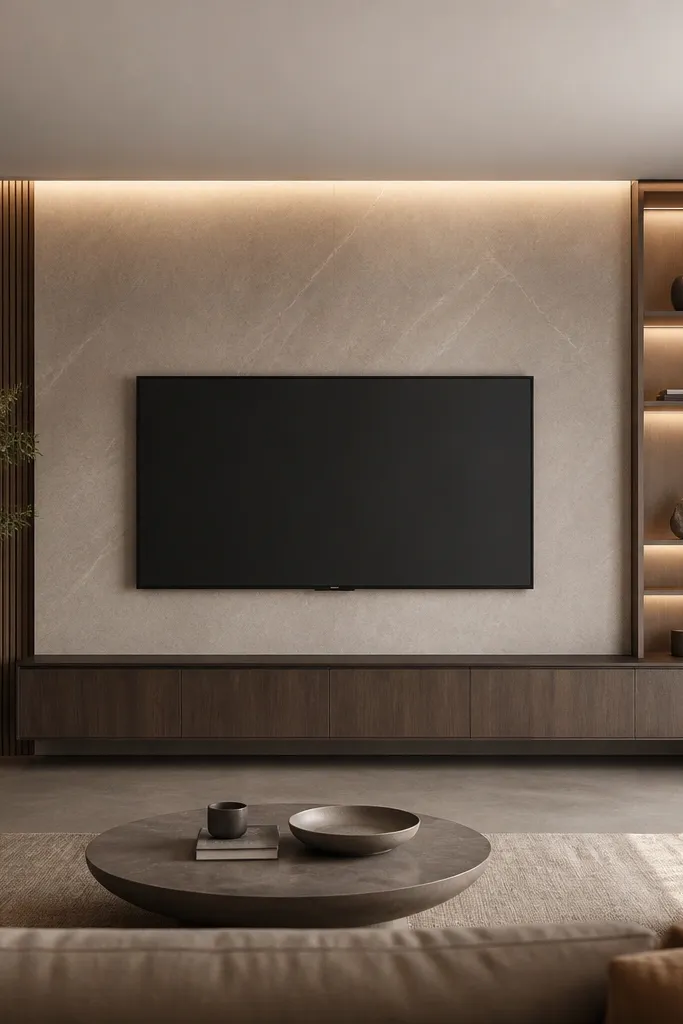
1. Sealed Limewash Wall with Built-In Floating Media Shelf
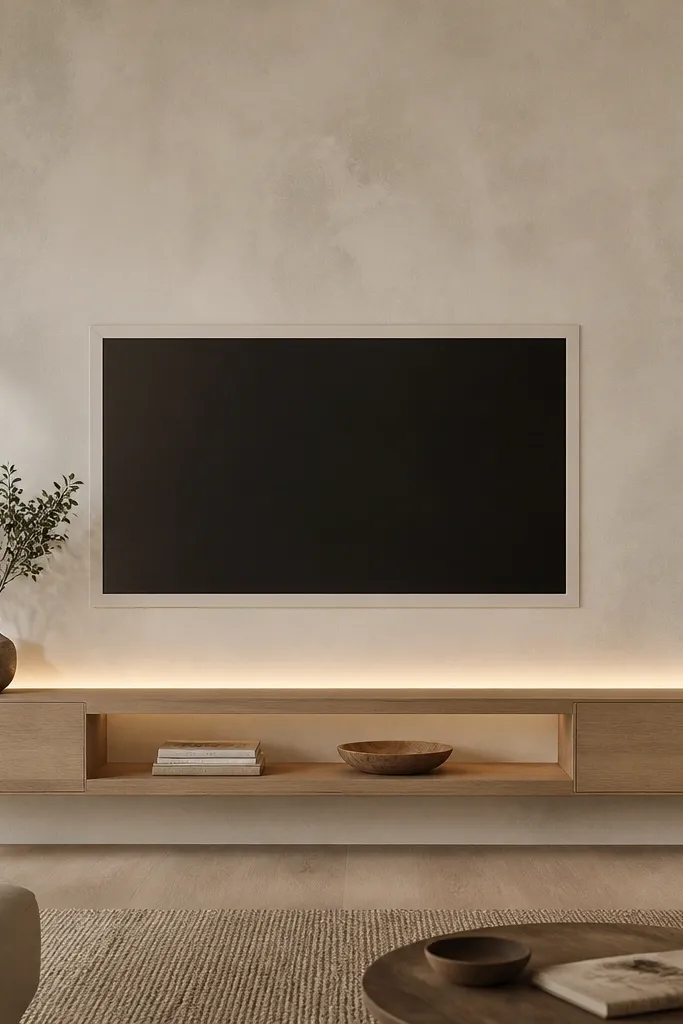
This setup looks high-end because limewash-style texture gives depth, but the wall is sealed so it still behaves like a wipeable surface. I like warm white or soft ivory because it hides smudges better than cool white and it flatters most skin tones when you’re sitting in front of the TV with natural light. The floating shelf makes the wall feel taller, and the closed ends stop clutter from turning into dust. The luxury part is the quiet contrast: sealed off-white background with honeyed oak hardware and a gentle LED wash that doesn’t create bright glare.
Start by painting your wall with a limewash-look product or a limewash technique, then seal it with a matte, water-based sealer made for plaster-like finishes. Install the TV mount first and keep a 1/4-inch gap between the TV frame trim and the wall for a shadow line. Build the shelf with a 3/4-inch thick oak face and a hidden ledger so it doesn’t sag; set the shelf bottom about 12-14 inches below the TV center for a balanced visual. Add closed cabinet end panels that match the shelf finish, and run a continuous LED strip behind the shelf so the light hits the wall, not your eyes. Finally, hide cords inside the vertical panel runs behind the shelf ends with a removable access board.
If you want the limewash look without the maintenance hassle, ask for a “scrub-rated matte” finish in the same off-white shade and then add a limewash-style roller texture only on the outer field, not the shelf area.
Avoid unsealed textured paint — it looks gorgeous for photos, then it turns into a fingerprint and dust trap.
2. Matte White Slat Panel Frame with Concealed Cable Run
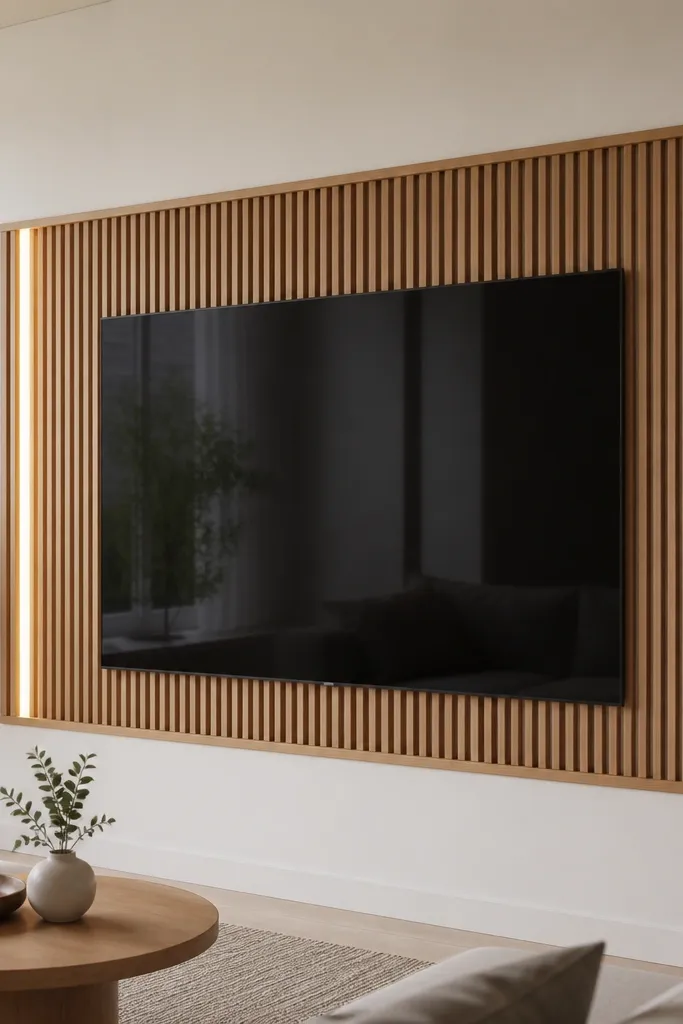
Start by deciding your slat spacing — I use 2 inches between slats for a calm, expensive look, and I keep slats around 3/4-inch wide. Mount a backer panel first (MDF or ply) so the slats sit flat; then attach slats with a consistent reveal of about 1/8-inch between each slat. Frame the TV opening so the slats extend 6-8 inches beyond the TV edges on all sides, and keep the TV centered to your wall stud layout. Add a slim LED strip behind the slat frame at the side edge, using a diffuser channel so you don’t see LED dots. Run an in-wall cable chase behind the slat backer and finish with a removable access panel on the lower right.
Vertical slats read luxury because they create rhythm and structure, and matte white keeps it modern instead of rustic. I’ve installed this in rooms with both warm and cool lighting; matte white holds up because it doesn’t reflect glare like glossy paint. The slat frame makes the TV feel built-in, even when the TV is slightly smaller than the opening. It flatters most spaces because the vertical lines make the wall feel taller, and the concealed cable run keeps the look clean from every angle.
AvoidAvoid thick slats with wide gaps — they look like cheap DIY paneling once you step back.
Good to knowUse a white that matches your trim exactly, then add walnut or black accents only in one place — either the media console or the shelf brackets.
3. Blackened Oak Veneer Surround with Stone-Look Accent Shelf
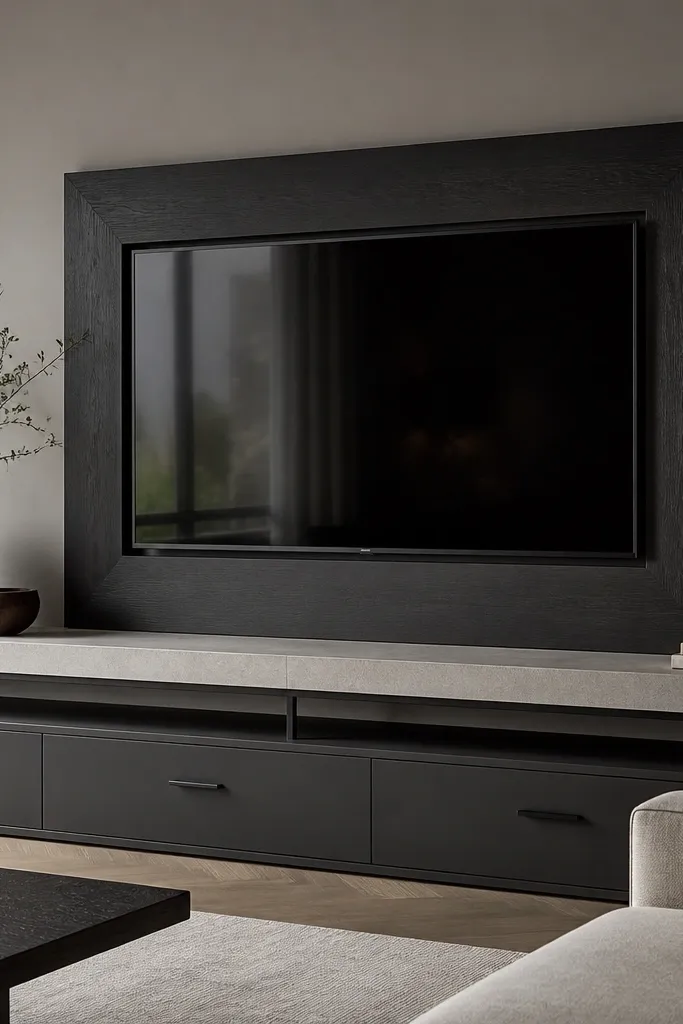
Start by installing a plywood backing panel so the veneer sits perfectly flat around the TV opening. Apply blackened oak veneer to the frame pieces only, not the whole wall, then add a matte clear coat so it doesn’t look oily. Paint the wall around the frame in a warm gray with a satin-scrub finish. Install the TV mount and then build the surround with a 1/4-inch shadow gap behind the veneer edge so it looks like a custom opening. Add a stone-look shelf with a ceramic or laminate top and a 1-inch front lip to catch dust. Finish by aligning cabinet pulls and shelf supports to the same vertical line as the TV center.
This is the “quiet dramatic” option. Blackened oak veneer reads luxury because it has depth and a slight smoky tone, and it hides minor wall marks better than bright wood stains. The warm gray background keeps the dark frame from swallowing the room, so your TV stays the focal point without turning the space gloomy. The stone-look shelf gives a tougher surface for wiping fingerprints, and the black hardware ties everything together. It flatters rooms with neutral furnishings and looks especially good with cream, camel, and charcoal textiles.
AvoidAvoid mixing three dark tones (black, espresso, and charcoal) in the same wall without a light neutral background.
Good to knowChoose a stone-look shelf material with a matte finish, not glossy — glossy shows every smudge the moment you wipe.
4. Porcelain Tile TV Wall with Floating Media Console
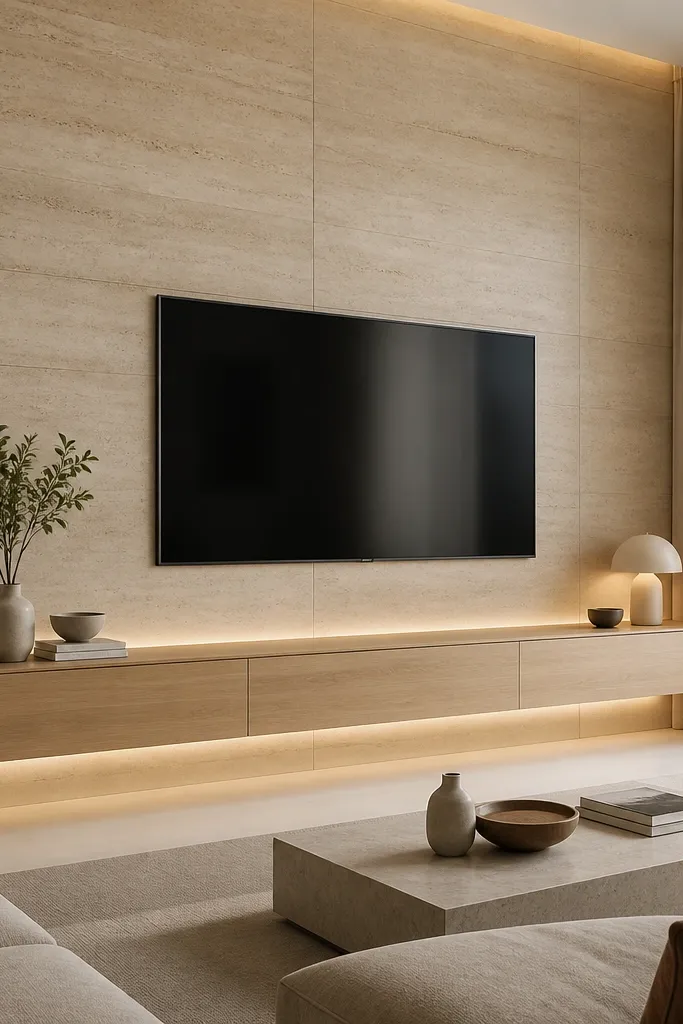
Start by tiling the full wall area behind the TV, including the zone where the media console will sit, so you don’t get a line of mismatched materials. Use large-format tiles (24x48 inches or similar) and keep grout lines tight to reduce visual clutter. Frame the TV with a slim metal trim kit or build a tile edge border using bullnose or a 1/2-inch trim profile. Mount the TV so the screen center is 58-60 inches high, then plan the console height at about 14-16 inches above the floor. Install the floating console with hidden brackets and leave a 1/2-inch gap above the tile so you can wipe behind it. Add an LED strip behind the console with a diffuser channel for a soft glow that won’t reflect on the TV screen.
If you want truly low maintenance, porcelain tile is the cleanest answer. It wipes down fast, doesn’t stain from cooking smoke, and it doesn’t care if you use a damp cloth. The travertine-style pattern adds warmth without the mess of natural stone. I’ve used this in busy households where fingerprints and dusty media shelves happen daily. The floating console keeps the tile wall from feeling heavy and makes the whole design look intentional instead of like a remodel that swallowed the room.
AvoidAvoid glossy tile finishes — they turn every cleaning wipe into streaks.
Good to knowBefore you commit, hold a sample tile next to your TV — some travertine patterns reflect light in a way that makes glare worse.
5. Warm Oak Shiplap with Picture-Frame TV Trim and Hidden Doors
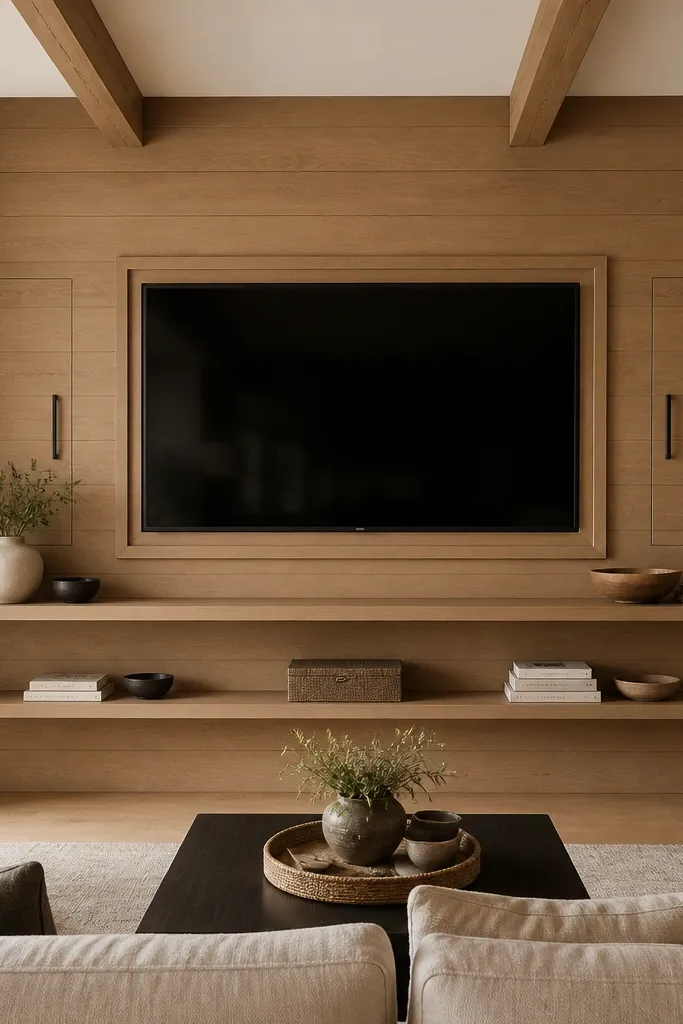
Start by installing shiplap boards with a consistent reveal, aiming for a 1/4-inch gap between boards so the wall looks intentional. Build a picture-frame surround around the TV with thicker trim — about 1 inch — so you get a bold shadow line. Keep the TV slightly inset so the frame overlaps the TV edges visually by 1-2 inches. Add flush recessed doors on the sides with soft-close hinges and a pull that matches your lighting metal (black or brushed nickel). Install two slim ledges only if you commit to styling them the same way every week; otherwise, use the doors instead. Finish with an LED strip behind the TV trim, not behind the shiplap — it reduces glare and makes the frame glow.
Shiplap feels cozy, but it only looks luxury when the seams and trim are crisp. This design works because the picture-frame TV trim creates a clean boundary and the hidden doors keep visible items from turning the wall into a storage dump. Flush doors are a lifesaver for low maintenance, since you can close everything before guests arrive. I’ve built this in rooms where the TV area also holds a lot of everyday stuff — headphones, remotes, chargers — and it stays tidy. Warm oak flatters most furniture palettes, especially beige, cream, and muted green.
AvoidAvoid stained shiplap with random plank widths — the wall looks handmade and messy instead of finished.
Good to knowIf you hate dusting, limit open shelves to one level and keep that shelf width under 10 inches.
6. Beige Micro-Cement Wall with Brass Edge Lighting
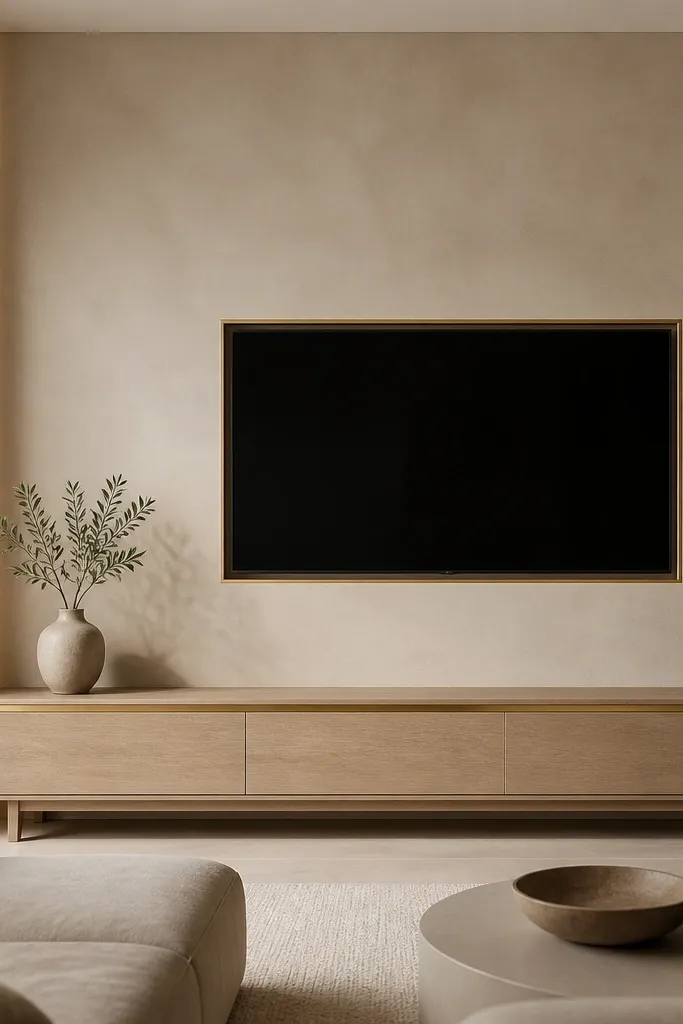
Start by using a micro-cement system meant for interior walls and seal it with a clear matte topcoat — gloss micro-cement shows every wipe. Build a thin trim frame with brass edge pieces around the TV opening; keep a 1/4-inch shadow gap so the brass reads as a separate layer. Mount the TV so the bottom edge sits about 10-12 inches above the media cabinet top. Install a recessed LED channel behind the brass edges, then use a diffuser so you don’t see bright dots at close range. Choose a media cabinet in light oak with simple straight lines and a single brass handle finish. Keep the wall styling minimal — one tray or one tall object only.
Micro-cement looks architectural, and in the right product it wipes like a dream. I like beige because it hides minor scuffs and it pairs with brass hardware without looking yellow. Brass edge lighting gives you a luxury glow without needing a big chandelier or heavy decor. This setup flatters warm-toned interiors and looks especially good with boucle, linen, and cream leather. The TV wall feels custom because the brass trim traces the TV like a frame in a gallery.
AvoidAvoid unsealed micro-cement — it stains fast and it feels chalky to the touch.
Good to knowUse a damp microfiber cloth for micro-cement; avoid harsh scrubbing pads that can dull the sealer.
7. Two-Tone Panel Wall with Gray Upper and Off-White Lower
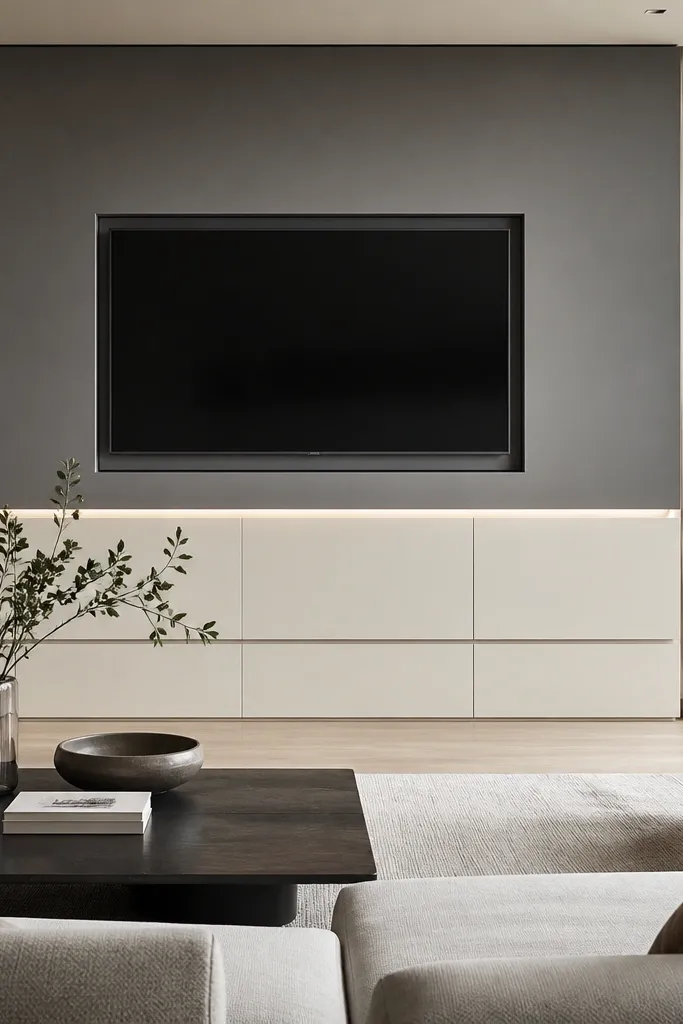
Start by choosing a split line at about one-third from the floor, then measure so the panel doors align with that line. Paint the upper section in a matte scrub gray and the lower in an off-white matte with the same sheen. Install flat panel doors or recessed panel boxes in the lower half using 1/2-inch thick rails so the lines stay crisp. Build a TV frame in the upper gray with a 1/2-inch shadow gap behind it. Mount the TV so the frame top sits about 6 inches below ceiling height for proportion. Add an LED strip behind the frame edge, set on a dimmer, and keep the media console centered under the TV for symmetry.
Two-tone panels look expensive because they add structure without adding clutter. The gray upper anchors the TV, while the off-white lower gives your eye a place to land and keeps the room bright. I’ve done this in living rooms with low natural light, and the lower off-white section makes the whole wall feel lighter. It flatters people who like clean rooms and hate visual chaos, because closed storage hides everything. The luxury principle is contrast with restraint — two finishes, repeated hardware, and consistent panel spacing.
AvoidAvoid random panel sizes — if the rails don’t line up across the wall, it reads like patchwork.
Good to knowMatch the sheen across both paints (both matte or both eggshell). Mixed sheens look cheap under side lighting.
8. Full Height Velvet-Matte Backdrop with Easy-Wipe Microfiber Edge
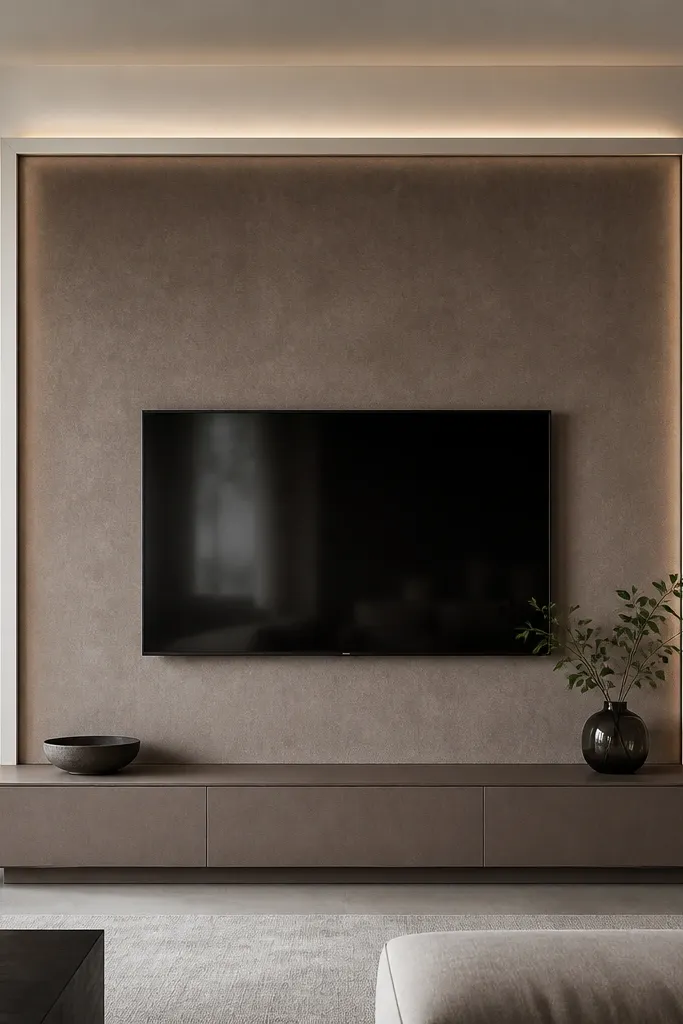
Start by measuring your wall height and building a fabric panel grid with removable sections (so you can clean or replace one section). Frame the TV with off-white trim and keep a 1/4-inch gap so the fabric doesn’t touch the TV mount hardware. Install the fabric panels with tension and hidden hooks behind the trim, then add a treated edge band at the TV opening so the fabric stays protected. Run an LED strip behind the trim with a diffuser to create a halo effect without hotspots. Choose a closed media console in a similar taupe tone and keep the top clear except for one tall piece. Use a damp, treated microfiber cloth for quick clean-ups around the TV area.
Velvet-matte looks luxe fast, but the key is using a fabric panel system that includes a cleanable, treated surface. I’ve used a microfiber-backed, stain-resistant fabric panel that still has that soft look in person. Taupe is the safest color because it hides dust better than light beige and it doesn’t look pink under warm bulbs. The full-height framing makes the TV feel like part of the architecture, not an add-on. This works best for bedrooms or quieter living rooms where you’re not wiping sauce splatters daily.
AvoidAvoid untreated velvet directly behind a TV — it collects dust at the seam and it’s a pain to clean.
Good to knowIf you have kids, place the fabric panels only behind the TV and not under the shelf where hands rub most.
9. Smoked Mirror Accent Strip with Matte Stone Surround
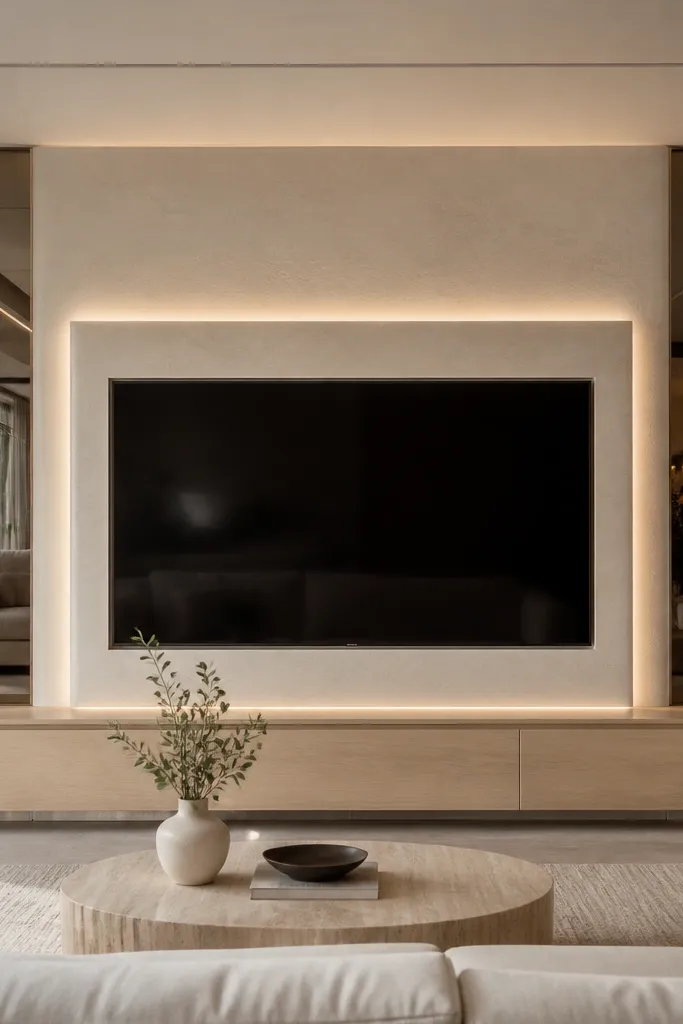
Start by choosing a matte stone-look panel or laminate with a subtle pattern and low gloss. Build the TV frame using that stone-look panel and keep a 1/4-inch shadow gap between it and the wall. Install smoked mirror strips vertically on the left and right edges of the TV opening, about 2-3 inches wide each. Add a hidden LED strip behind the stone edge so the light grazes the frame and creates a soft glow. Mount the TV at a standard 58-60 inch center height, then keep the media console width slightly wider than the TV by 2-4 inches. Finish by matching your console hardware to the mirror edge — either black or brushed nickel.
This design reads luxury because the smoked mirror adds controlled reflection without turning the wall into a disco ball. The matte stone surround keeps the center grounded, so the reflections don’t steal attention from the TV. I like smoked mirror because it flatters different lighting temperatures; it stays neutral instead of looking icy. It’s great for rooms that need a little depth, especially if your wall is plain and your furniture is mostly warm wood. The key is restraint: one mirror strip per side, not a full mirror wall.
AvoidAvoid bright, clear mirrors — they cause glare spots that show up on the TV screen.
Good to knowWipe smoked mirror with a microfiber cloth and a tiny amount of glass cleaner on the cloth, not sprayed directly on the mirror.
10. Walnut Veneer Slab with White Backer and Floating Drawer Console
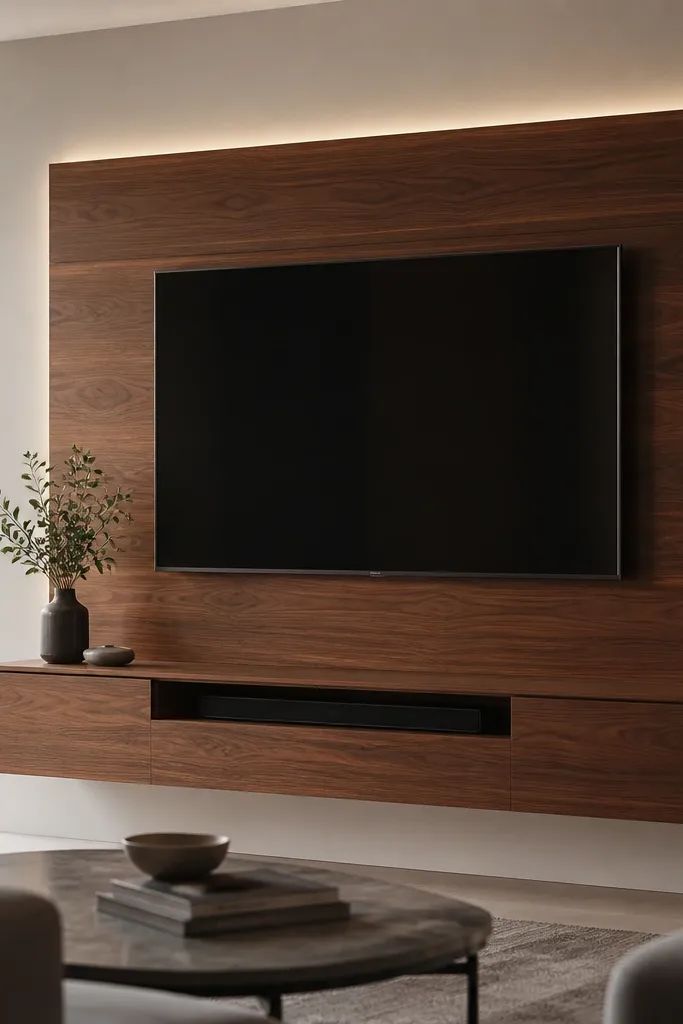
Start by installing a white backer panel on the wall so you have a clean base and easy paint touch-ups. Cut walnut veneer panels for the TV surround as one larger slab shape, then wrap the edges so you don’t see raw substrate. Keep the shadow gap consistent at 1/4-inch around the opening. Mount the TV and then align the floating console so the drawer center lines up with the TV center. Use a console with a full-length drawer and soft-close rails, and keep the open niche narrow for the soundbar. Install an LED strip behind the walnut edge with a diffuser so the glow stays even.
Walnut veneer looks rich without the maintenance headaches of solid walnut that can show uneven tone over time. Pairing it with a white backer keeps the wall crisp and makes the TV look centered and intentional. The floating drawer console is low maintenance because it hides remotes, games, and cables where dust can’t land. This layout flatters people who like a modern look but still want warmth. The design principle is contrast and massing: one warm slab shape and clean white negative space around it.
AvoidAvoid open media shelves in walnut — dust and cable clutter show too quickly.
Good to knowChoose a walnut veneer with a matte clear coat. Gloss shows fingerprints on the surround edge fast.
11. White Panel Shiplap with Black Hardware and Lift-Top Storage
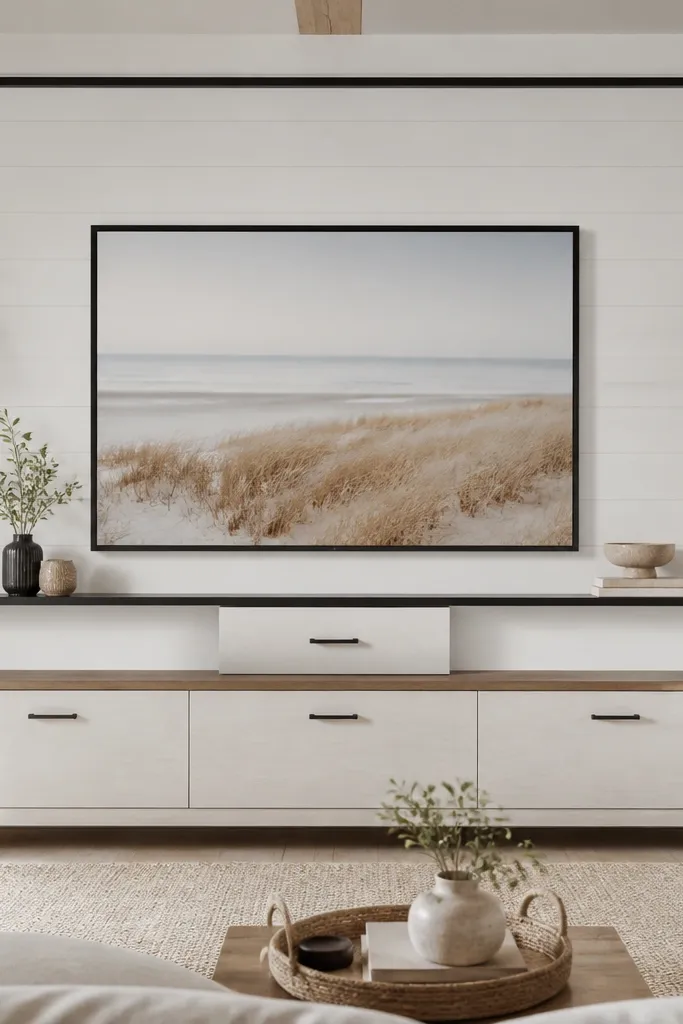
Start with white shiplap panels installed with a consistent 1/4-inch reveal. Paint with a scrub-rated satin or eggshell so you can wipe hand marks without damaging the finish. Build a simple rectangular frame around the TV using smooth trim, and keep the gap around the TV at 1/4-inch. Choose a console with lift-top compartments wide enough for controllers and chargers; mount it so the top sits 16-18 inches below the TV center. Add a thin black shelf bracket only if you keep it empty most days; otherwise skip it and rely on closed storage. Run your LED behind the TV frame edge and set it on a dimmer so you can change the vibe without glare.
This is the “busy household” luxury look. White shiplap hides smudges better when it has a durable scrub finish, and black hardware makes the whole thing look crisp instead of farmhouse. Lift-top storage is low maintenance because you can dump the mess inside in 20 seconds and close it before dust settles. I used this exact setup in a living room with constant remote traffic, and it stayed neat even when we were not. It flatters minimalists who still want soft texture in the room.
AvoidAvoid high-contrast black-and-white if your room has warm yellow lighting — the wall can look harsh.
Good to knowLabel the inside of the lift-top with small tape tabs so you put items back in the right spot the same day.
12. Travertine-Style Wallpaper with Removable Frame Inserts
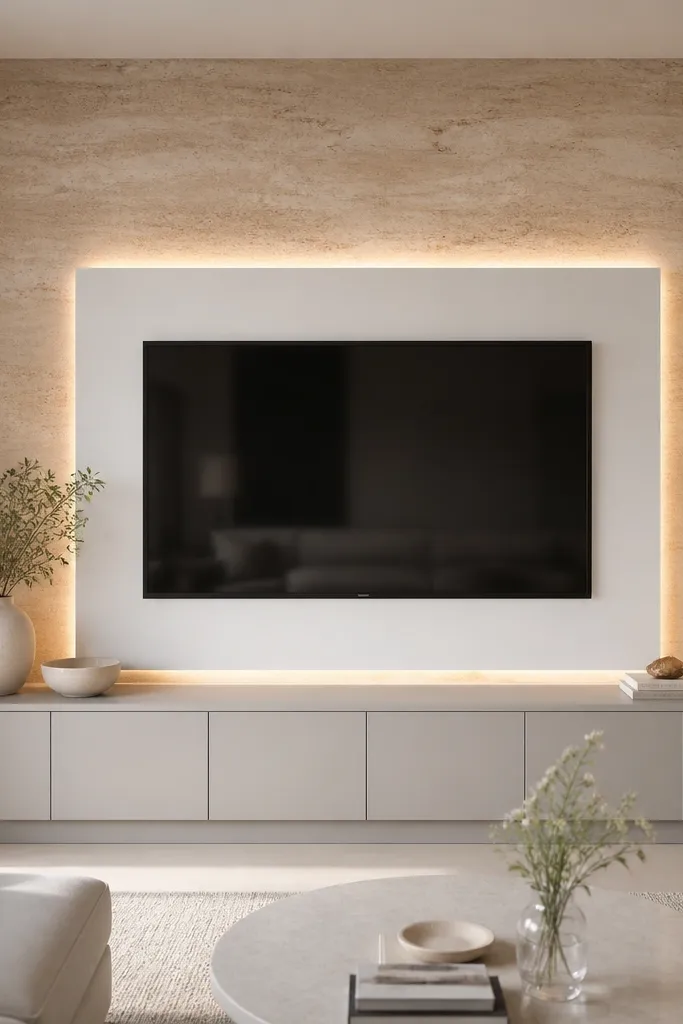
Start by prepping the wall with a primer that prevents bubbling and then apply the travertine-style wallpaper smoothly, aligning pattern seams exactly at the TV center line. Build a removable TV surround frame using smooth MDF trim painted off-white; keep the frame slightly larger than the TV opening by 2 inches on each side. Install the TV mount on a backing board, then attach the frame so it covers the edges and hides cable cutouts. Add a diffuser LED strip behind the frame so the glow is soft and even. Place a media console with closed doors below and keep the console color closer to the wallpaper than the trim. Finish with a small gap between the console top and the bottom of the frame so dust doesn’t collect in a ledge.
Wallpaper can look high-end if you treat it like an accent layer, not the whole wall you have to live with forever. I’ve used travertine-style wallpaper with a washable coating behind a TV because it gives that stone look without the grout maintenance. The removable frame inserts matter a lot — you can take the frame off to access cables or replace one section if it gets damaged. Warm beige wallpaper flatters most color palettes and it makes the TV area feel warmer than plain paint. The luxury principle is clean framing around a textured surface so the texture looks intentional, not random.
AvoidAvoid textured wallpaper exposed to direct sunlight — it fades unevenly and the stone pattern looks blotchy.
Good to knowUse a washable wallpaper version and test a tiny corner with a damp microfiber cloth before you commit to the full wall.
13. Matte Charcoal Panel Wall with Light Oak Storage Tower
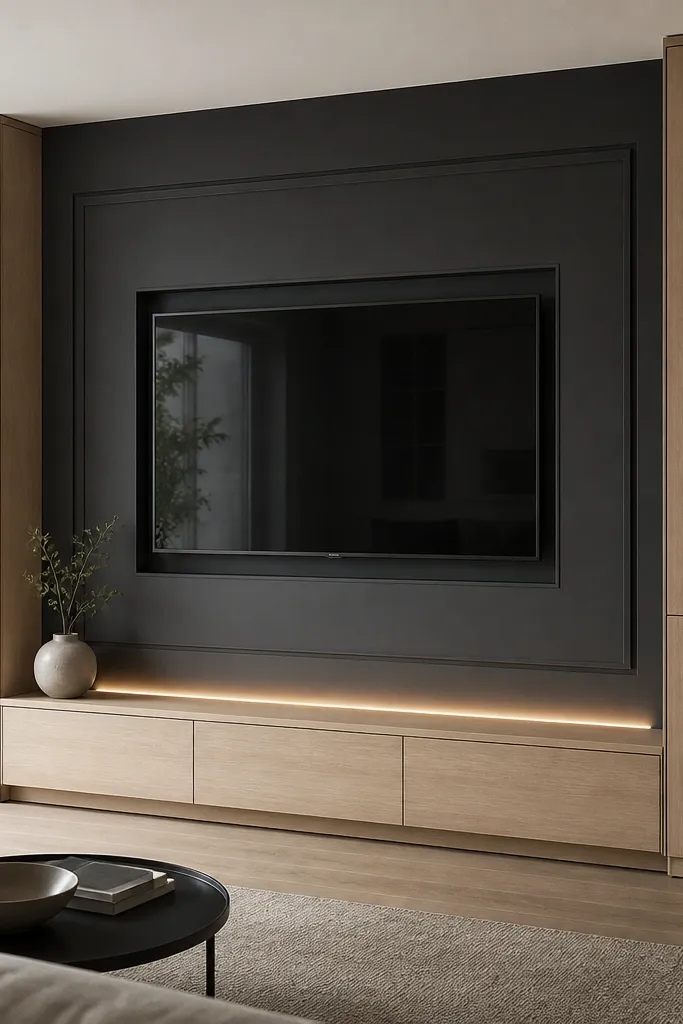
Charcoal makes the TV pop, but it only looks luxurious when you balance it with light, wipeable storage. The light oak storage towers keep the room from feeling heavy and they hide clutter behind clean doors. This design works especially well in rooms with beige, gray, or cream upholstery because charcoal makes those colors look richer. I also like it for people who have lots of media devices — the tower doors hide routers, game systems, and charging clutter. The luxury principle is massing: a strong dark field plus a bright storage frame.
Start by painting the wall matte charcoal using a scrub-rated interior paint. Build a simple TV opening frame in the same charcoal so there’s no color mismatch; keep a 1/4-inch shadow gap around the frame edges. Install light oak storage towers that match in height on both sides, with doors that close flush to the frame. Mount the TV at a 58-60 inch center height, then center the towers so the TV sits between them with equal spacing. Add a continuous LED strip behind the top edge of the TV frame or just above the console, using a diffuser channel to avoid visible light bands. Use a media base in light oak or a matching finish with straight drawer lines.
If you’re going charcoal, commit to warm light bulbs (2700K-3000K). Cool bulbs make charcoal look flat and gray.
Avoid open shelves in charcoal — dust shows instantly and it ruins the “clean designer” look.
14. Soft White Plaster Look with Hidden Door Media Wall
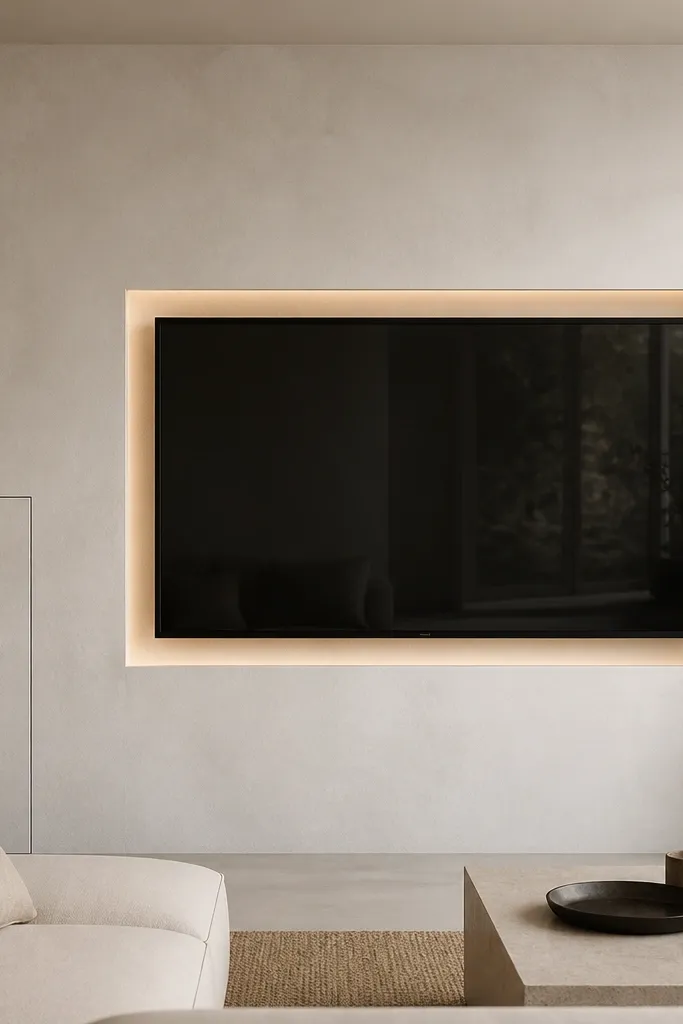
Seamless plaster-look walls feel expensive because they don’t show panel lines, and hidden doors keep daily mess out of sight. I like soft white because it makes the wall feel calm and it works with almost every rug and sofa color. The hidden door is the low maintenance trick: you can access media storage without leaving open shelves that collect dust. This works well for apartments or smaller living rooms where you need every surface to look clean. The luxury principle is invisibility — hardware disappears and the wall looks like one continuous surface.
Start by creating a plaster-look finish with a system that includes a durable topcoat; matte is fine as long as it’s scrub-rated. Build a TV frame out of smooth trim and keep a 1/4-inch reveal so the TV looks recessed. Install a hidden door panel on the lower section of the wall with a magnetic catch or a concealed push latch, and align it so the seam sits in a shadow line. Mount the TV and route cables to a media box mounted behind the door area. Add a diffuser LED strip behind the TV frame edge and run it on a dimmer. Finish with a low-profile media console only if you need extra device space — otherwise let the hidden door handle storage.
Use a lint-free cloth to wipe the door seam and frame edges weekly. Those tiny seams collect dust faster than you expect.
Avoid shiny plaster-look coatings — they show uneven wall texture and glare at night.
15. Off-White Wainscot Panels with Center TV and Two Side Shelves
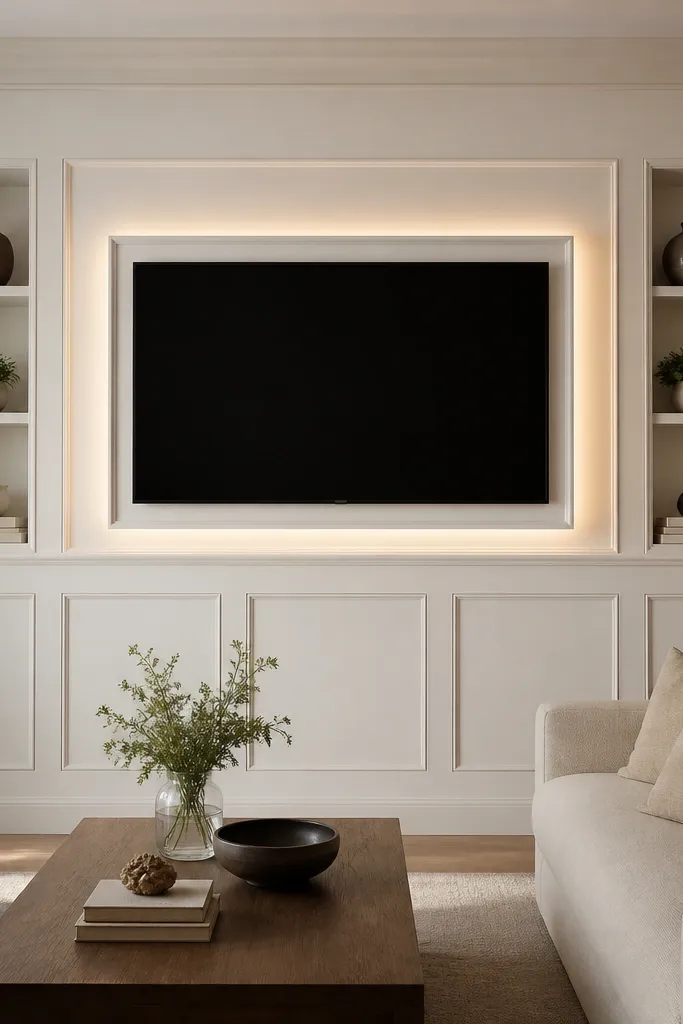
Start by installing wainscot panels with consistent spacing: use a top rail and evenly spaced rectangles, keeping the panel edges straight. Paint the entire wainscot in a durable off-white eggshell so it wipes clean. Build a simple frame around the TV opening that matches the wainscot trim thickness and keep a 1/4-inch shadow gap. Install two narrow shelves on each side only if you can keep them styled with one small object each; set shelves about 8-10 inches below the TV frame midpoint. Add a diffuser LED strip behind the TV frame so you get glow without direct glare. Keep the media console minimal or use a low cabinet that matches the trim.
Wainscot gives instant structure, and off-white makes it feel calm and modern instead of old-fashioned. The raised panel geometry looks luxury when the paint finish is smooth and consistent. Two narrow side shelves let you style a couple of items, but the trick is keeping them narrow so dust doesn’t build up on broad surfaces. I’ve done this in dining-adjacent living rooms where people want charm without losing practicality. It flatters people who like symmetrical layouts and it makes the TV area feel like part of the room, not an afterthought.
AvoidAvoid over-styling the shelves — three knickknacks turn a luxury wall into clutter fast.
Good to knowChoose shelf items with flat bases (ceramic or wood trays) so dust wipes off in one pass.