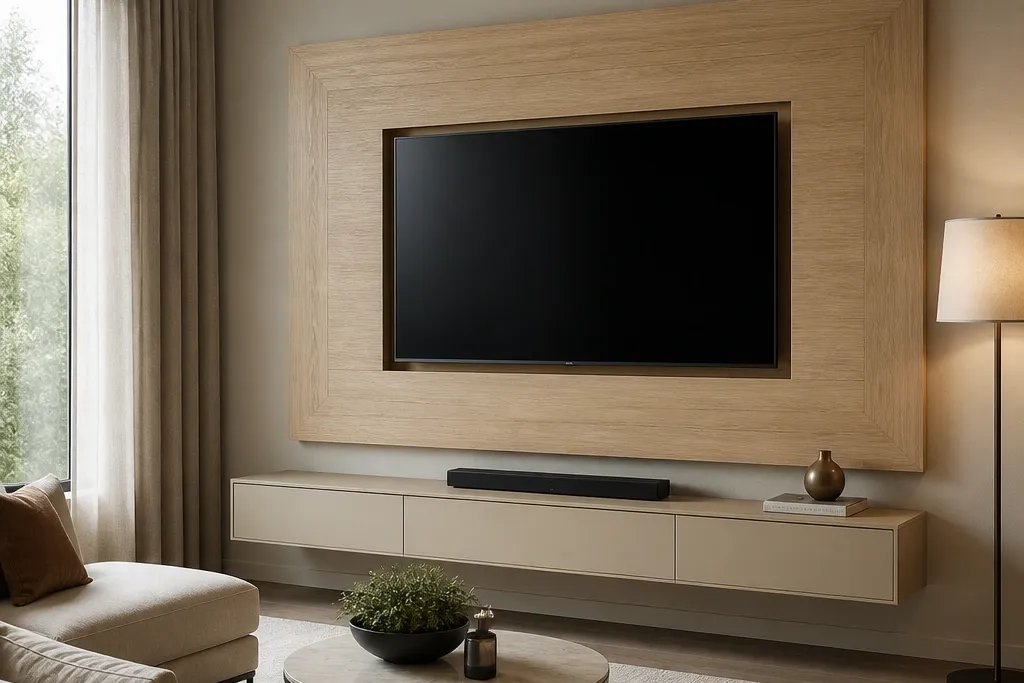

1. Oak veneer slat wall with a recessed TV niche
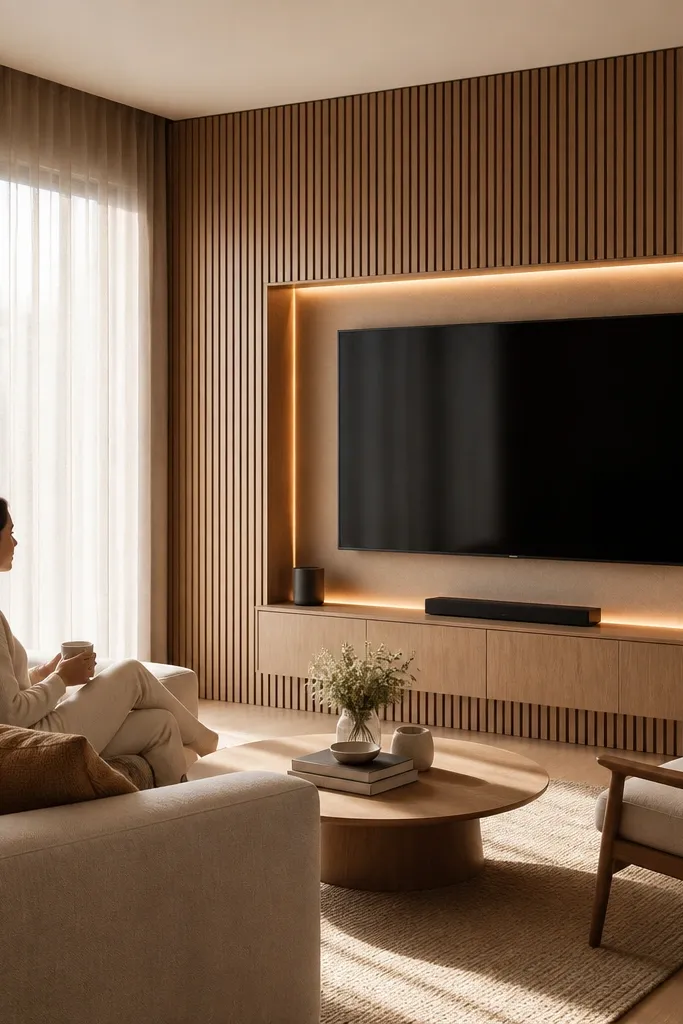
This luxury look works because the slats create a steady rhythm and the TV sits inside a recessed “picture frame” that gives depth. Oak veneer with a matte clear coat looks expensive in real life because it holds light softly instead of reflecting it harshly. I’ve used this in rooms with beige or warm gray walls and it still reads warm, not yellow. It flatters most spaces, but it especially helps if your ceiling is standard height since the slats add vertical interest without clutter.
Good to knowUse a matte clear coat on the veneer. If you go glossy, the slat pattern turns shiny and cheap-looking under ceiling lights.
Start by laying out your slat spacing — I use 2-inch slat width with 1/2-inch gaps for a clean modern grid. Build the recessed niche first: frame the opening so the TV face sits 1 to 1.5 inches back from the slat plane. Install slats around the niche, keeping the shadow gap consistent on all sides. Finish by adding a hidden LED strip in a small top channel, aimed to light the inside edges of the niche, not to blast the screen.
AvoidAvoid a flat slat wall with the TV mounted flush — it reads like an afterthought.
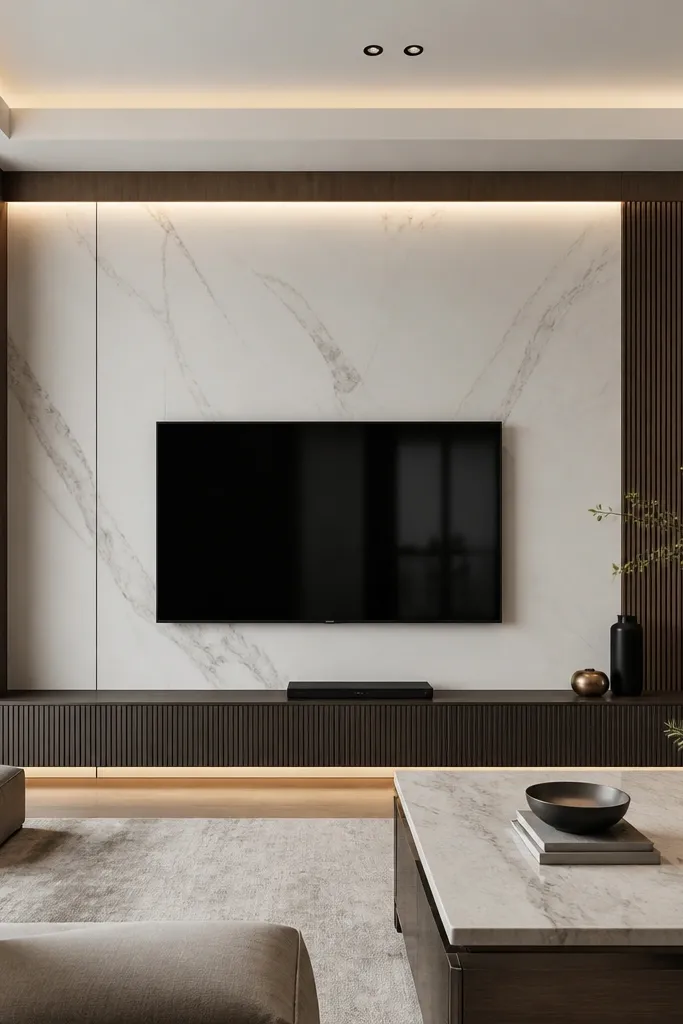
2. Fluted MDF columns framing a calm center panel
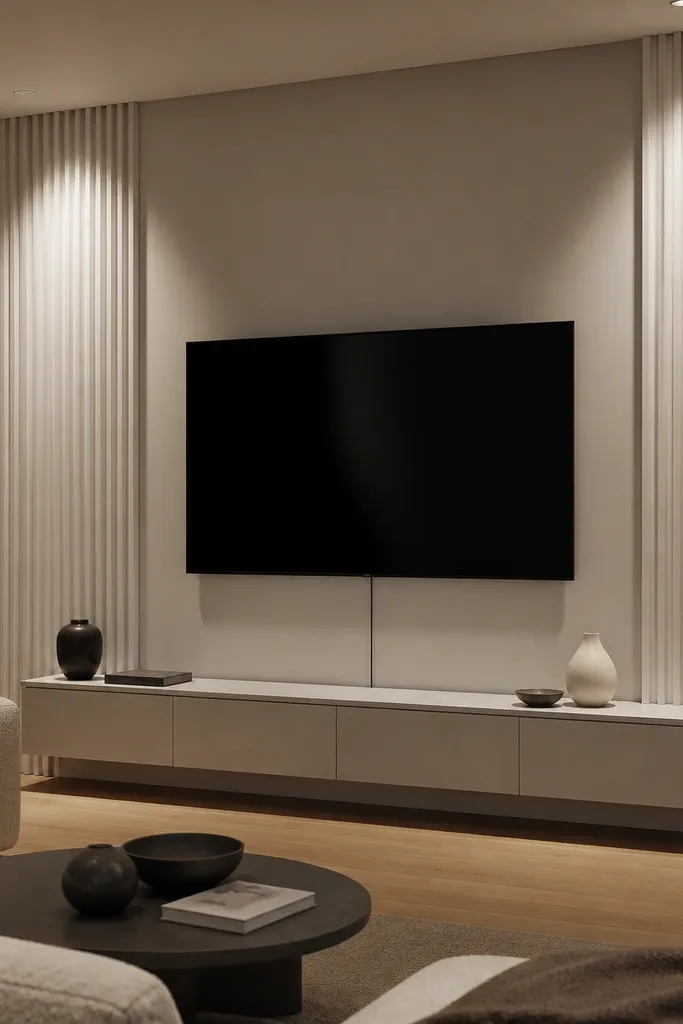
Fluted columns give you luxury texture without heavy woodworking. The smooth center panel keeps the look modern and quiet, so the flutes act like vertical “jewelry.” I’ve done this in small apartments where you still want a statement wall, and it doesn’t feel bulky because the center stays clean. This style also flatters cooler color palettes — think greige, soft gray, and taupe — because the off-white paint keeps everything fresh.
Begin by picking one paint finish: satin for the center panel and semi-matte for the columns so the light catches edges. Mark a vertical grid for the columns, then keep the flutes consistent height with a 1/4-inch shadow gap between column and center panel. Mount the TV so its center lands around 42-44 inches from the floor, then build a thin inner trim border around the opening. Finally, add a low-profile LED strip behind the center panel perimeter, not behind the TV itself.
If you can, run the flutes all the way to the top of your feature zone. Stopping them halfway makes it look like decorative add-ons.
Skip mixing glossy column paint with matte wall paint — it looks patchy in photos.
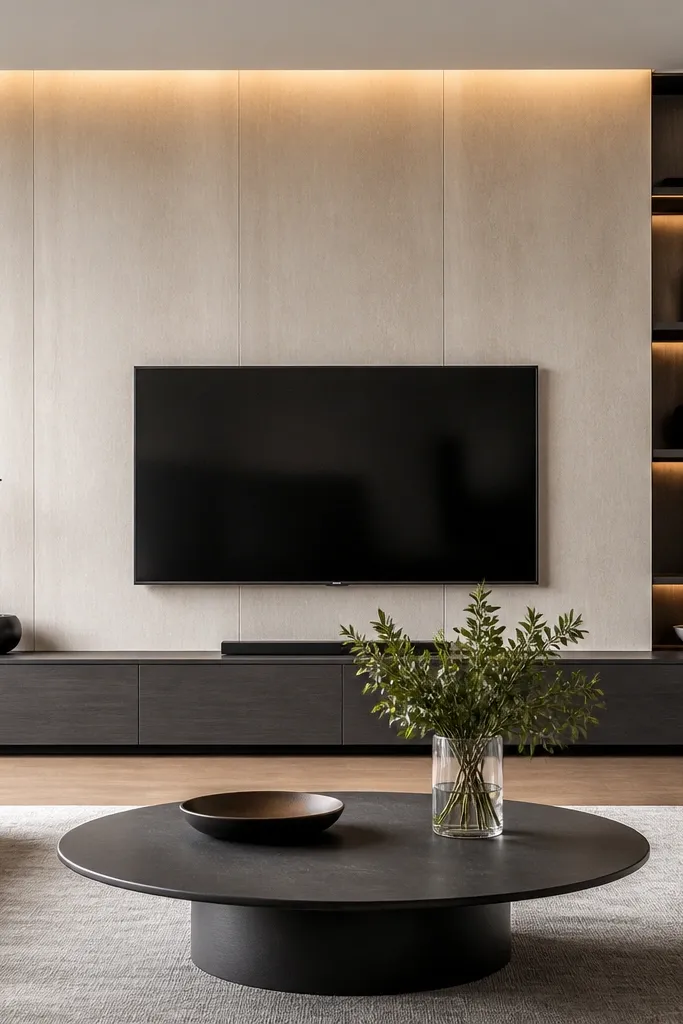
3. Microcement wall with a thin black steel TV frame
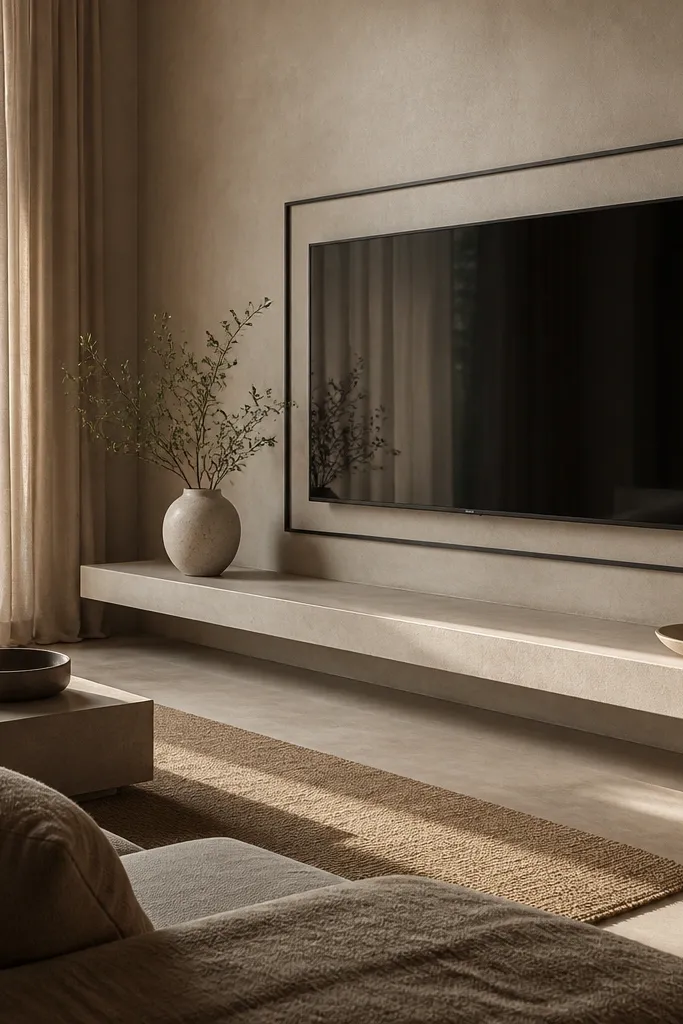
Microcement reads high-end because it has that soft, mineral look you can’t fake with flat paint. Pairing it with a thin black steel frame gives modern contrast and keeps the TV area crisp. I like this combination in rooms with light flooring and natural textiles because the microcement won’t overpower the space. It also works well for people who hate bulky paneling; the wall is texture-first, not structure-first.
Start by applying microcement to the full feature area, then plan your TV frame size so it leaves a consistent 3 to 4 inches margin around the screen. Install the black steel frame after the microcement cures — use anchors rated for your wall type. Keep the frame thickness under 1 inch so it stays “luxury thin,” not industrial. Finish by mounting the TV on a recessed plate or mounting rail so the screen face sits slightly forward of the microcement plane.
Seal microcement with a matte sealer. Gloss makes the surface look like it’s wet.
Avoid painting microcement over without a proper primer — the texture dulls and chips faster.
4. Tall black slat + walnut base for a moody luxury look
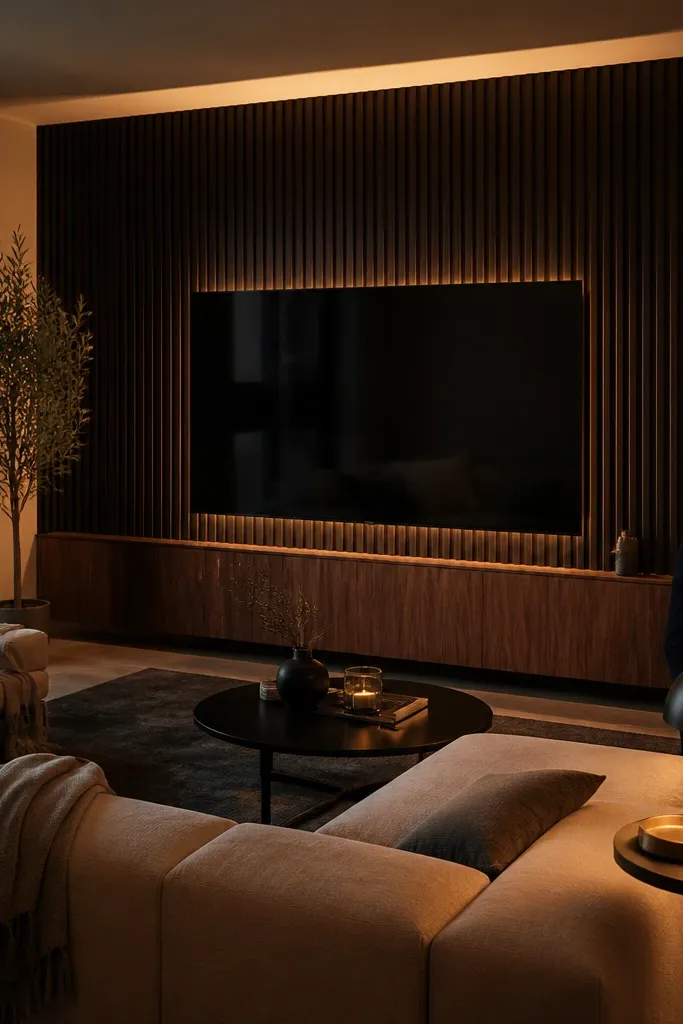
Vertical black slats look luxurious when they’re tall enough to feel intentional and paired with a warm wood base. The black adds depth, while walnut keeps the room from feeling cold. I’ve used this in living rooms with lots of daylight and it still looks rich at night because the hidden LEDs create controlled glow. This style flatters medium to darker floors because it balances the weight of the room.
Good to knowKeep your slat finish consistent. If one batch is satin and another is semi-gloss, the wall looks patchy.
Start by choosing vertical slat width — I like 3-inch slats with 1-inch spacing so the shadow lines stay visible. Build a center smooth panel behind the TV so the screen area doesn’t fight the slats. Mount the TV so it sits centered and the bottom edge clears the console by about 4 to 6 inches. Add an LED channel at the top of the feature zone, then use warm 2700K bulbs for a cozy luxury tone.
AvoidDon’t add a thick picture-frame border on top of tall slats — it becomes too busy.
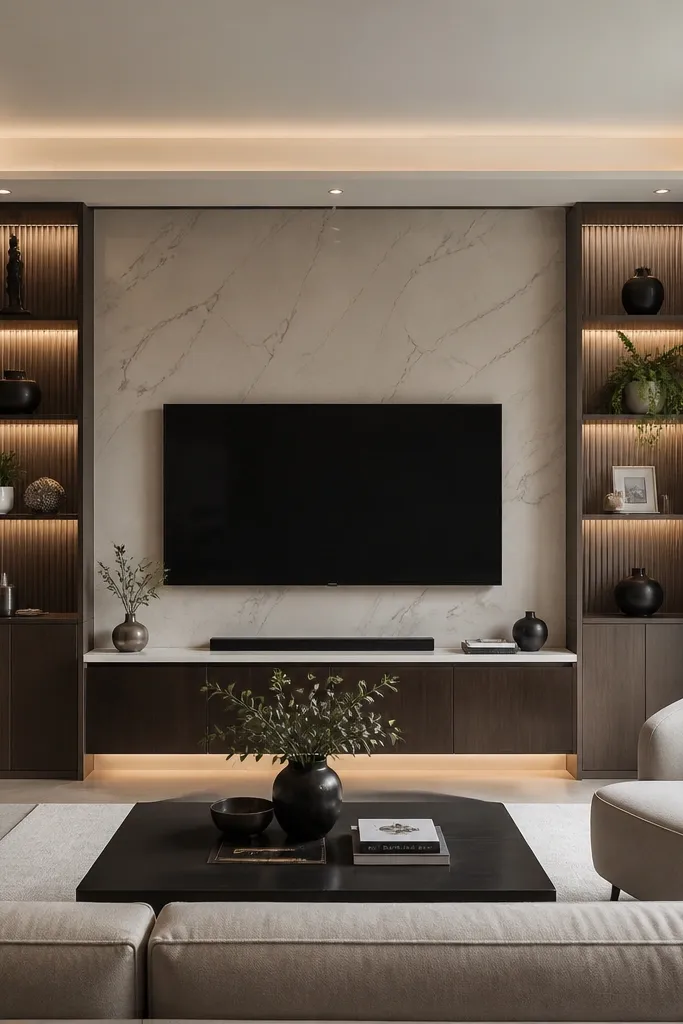
5. Stone-look porcelain panels with a floating TV platform
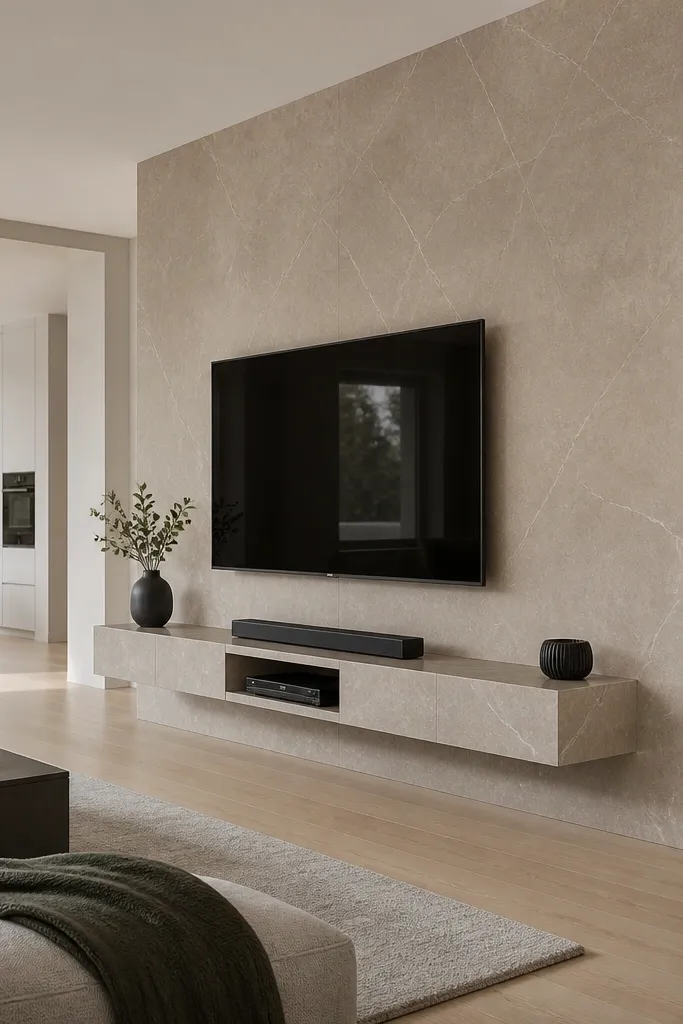
Stone-look porcelain makes the wall feel “finished” immediately because the surface has real depth and pattern. The key luxury move is a floating TV platform that breaks the flatness and gives you a place for devices. I’ve installed this in open-plan spaces where people want the wall to look like architecture, not furniture. It flatters warm whites and light woods, and it can brighten a room because limestone tones reflect light.
Good to knowUse grazing light for texture. One recessed light aimed at a low angle makes porcelain look like real stone.
Measure your TV opening and plan panel layout so the screen sits over full tiles, not centered on a grout line. Use large-format panels with minimal grout width — around 1/16 inch if your installer can handle it cleanly. Build a floating platform shelf in matching porcelain or a stone-look slab, with a gap of about 2 inches under it for visual lightness. Mount the TV using a concealed bracket and route cables through the wall with a service cavity behind the platform.
AvoidAvoid small tile mosaics behind the TV — the grout grid looks busy and dated.
6. White linen-look paneling with a slim brass line
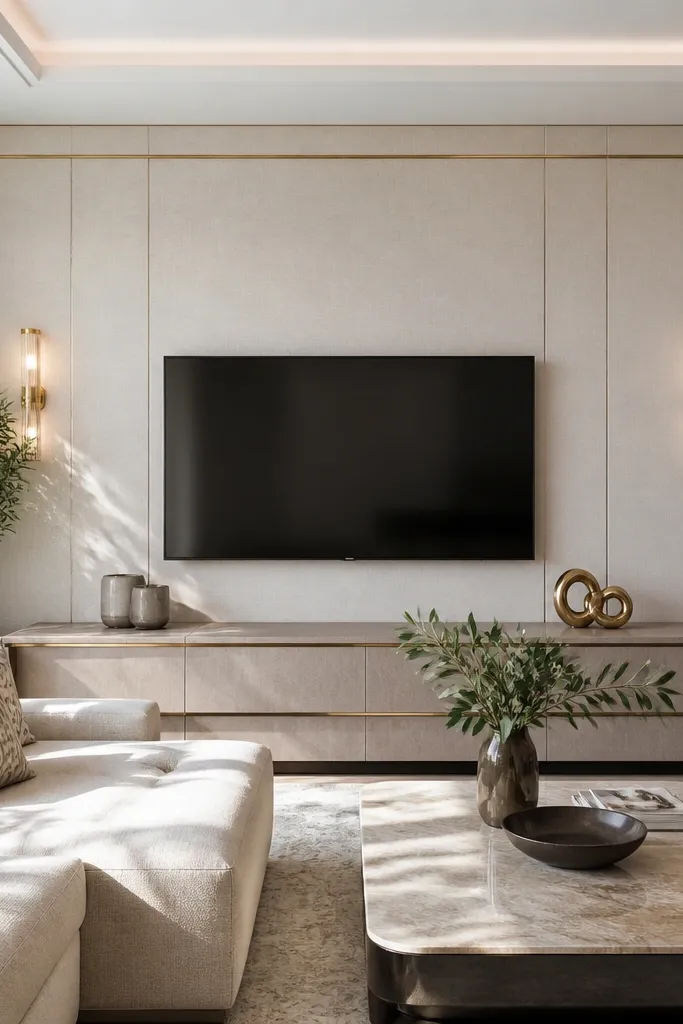
Fabric-textured paneling feels luxury because it adds softness and hides small wall imperfections. The linen-look surface also makes the room feel calmer, which matters if your furniture has bold patterns. Brass in a thin line keeps it modern — you get warmth without the “antique” vibe. This works best in rooms with beige, cream, or pale oak, and it flatters people who want a luxury look without dark paint.
Good to knowUse a dimmer. The wall texture looks better when the LEDs aren’t at full brightness.
Start by using a wall panel system with a replaceable textile face or a painted MDF surface finished to mimic linen texture. Frame the TV opening with a 1/2-inch brass strip, centered and level, keeping the gap between brass and panel consistent. Mount the TV so the bottom sits about 12-14 inches above the console top. Add LED lighting behind the frame, using warm 2700K, and avoid any light that hits the screen directly.
AvoidSkip thick brass trim — it reads heavy and can look like costume jewelry.
7. Walnut veneer checkerboard border around a matte center
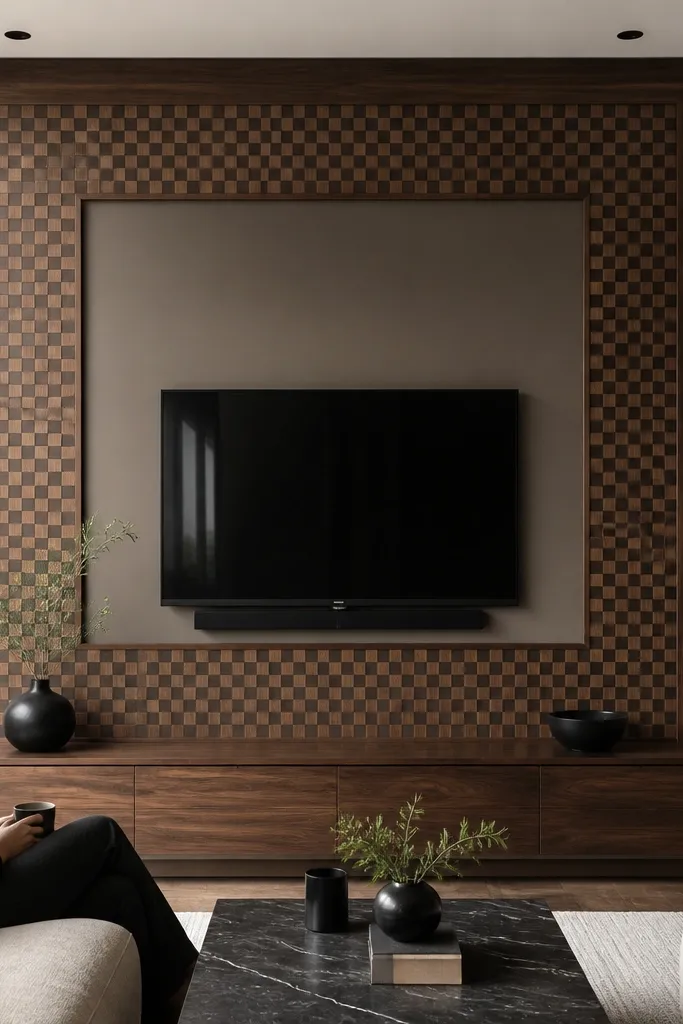
A walnut border gives luxury because it creates a frame within the frame. The checkerboard detail is small enough to stay modern, but it still reads as handcrafted when you’re close. I like this for people who want something more interesting than plain wood slats, without going full “theme wall.” It flatters neutral rooms because walnut adds warmth and the matte center keeps the TV from looking like it’s floating.
Choose a matte center paint finish — I use a warm gray satin to avoid glare. Build a border that’s about 6 to 8 inches wide around the TV zone, then cut walnut veneer strips into small squares for the checker effect. Keep the checker pattern aligned to the TV center so it doesn’t feel random. Install the border first, then mount the TV opening inside the matte center and add LEDs behind the border edge with a small diffuser.
Pre-cut your veneer squares and dry-fit them on the wall. Veneer alignment looks perfect in real life only when you plan the grid.
Don’t use a shiny paint for the center. Gloss makes the border look cheap and draws attention to screen glare.
8. Two-tone panels: warm white top, oak slat bottom
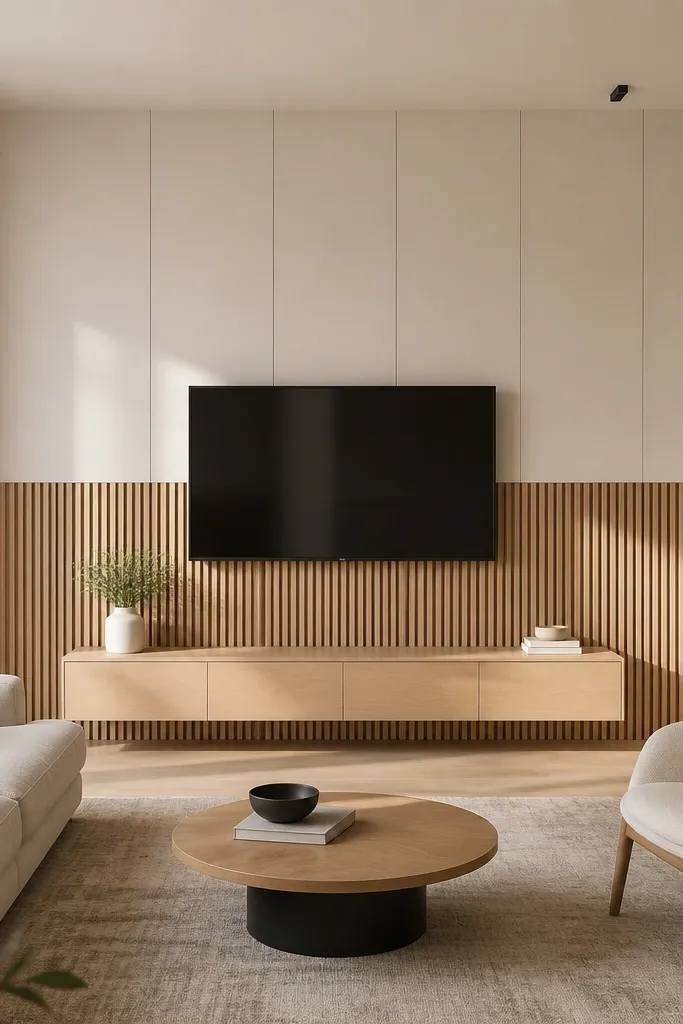
Two-tone walls look luxurious because they add structure and help your room feel taller. The trick is keeping the color split at a logical height, usually around the middle of the feature zone, so the TV feels anchored. Warm white on top keeps the wall bright, while oak slats on the bottom add texture where your eye lands when you’re seated. This style flatters rooms with darker furniture because the top lightens the overall mass.
Good to knowUse the same trim profile on both zones. Different trim shapes at the split line kill the luxury look.
Mark a horizontal line first, then build the feature zone around it — I use 12- to 16-inch tall panel segments. Keep the TV niche centered on the split line, with the TV face recessed so the shadow gaps read crisp. Install oak slats only in the lower zone, and keep slat spacing consistent across the entire width. Finish with an LED strip behind the warm white top panel edge so the light washes the seam between the two materials.
AvoidAvoid splitting the wall at an awkward height where the TV overlaps two finishes messily.
9. Rattan cane panel inset with a sleek black surround
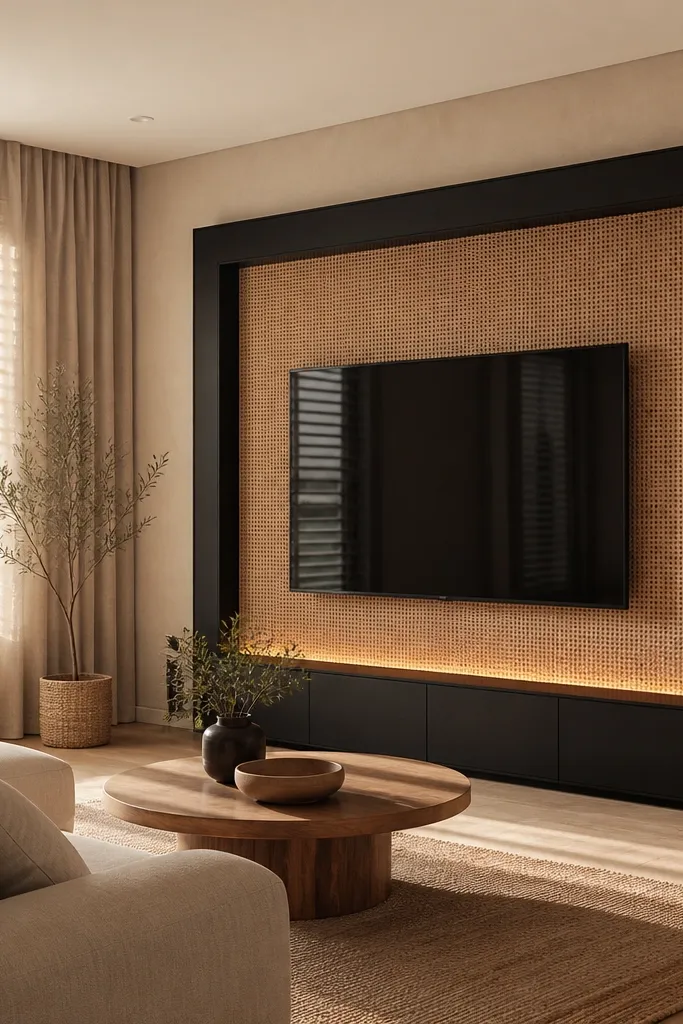
Rattan cane inset looks luxury when it’s framed tight and kept modern. The texture gives depth and hides minor imperfections, and the black surround keeps it from turning boho. I like this in rooms with light beige walls and natural fibers like linen curtains. It flatters warm skin tones and cream palettes because the cane adds honey undertones without going orange.
Good to knowKeep the cane dry-fit first. Some sheets expand or bow if they weren’t stored flat.
Start by choosing cane panels with a consistent weave size so the texture doesn’t look uneven. Frame the inset with matte black MDF trim, keeping the surround width around 2 to 3 inches. Mount the TV slightly forward of the inset plane so the cane doesn’t sit too close to the screen edges. Install a concealed LED strip behind the inset perimeter and add a thin black floating shelf underneath for the streaming box.
AvoidSkip thick distressed wood framing around rattan — it reads dated and heavy.
10. 3D acoustic panel texture with a recessed TV box
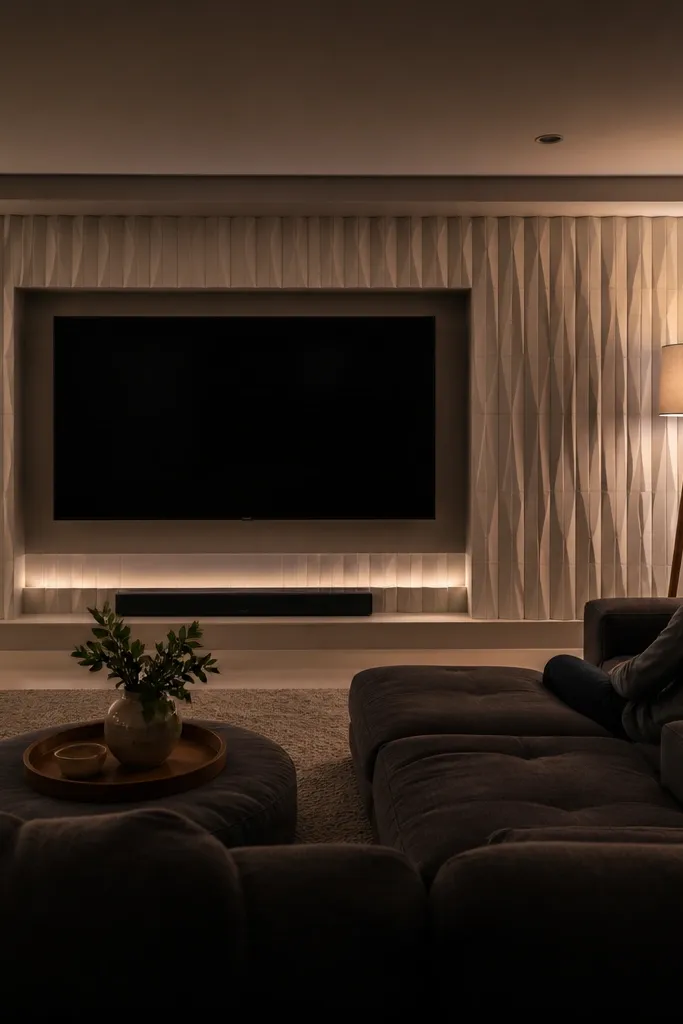
Luxury can be quiet, and 3D acoustic panel texture is one of the best ways to get that. The texture absorbs glare and makes the wall look intentional from every angle. I’ve used it in home theaters and living rooms where sound matters, and it looks better than plain foam because it’s integrated and paintable. This style flatters modern furniture with clean lines because the wall texture adds interest without adding clutter.
Good to knowUse a satin paint, not eggshell. Eggshelled walls look too flat and can show uneven texture in photos.
Choose acoustic panels that are designed for painting, then apply a primer and a satin paint so the texture stays soft. Build a recessed TV box with a consistent 1-inch shadow gap around the opening. Mount the TV so it sits centered and level, then ensure the box edges align with the panel grid lines. Hide an LED strip behind the top of the recessed box, angled upward to light the wall texture rather than the screen.
AvoidAvoid leaving acoustic panel texture exposed around the TV opening with random cut edges.
11. Blackened steel + warm oak grid with a cable service door
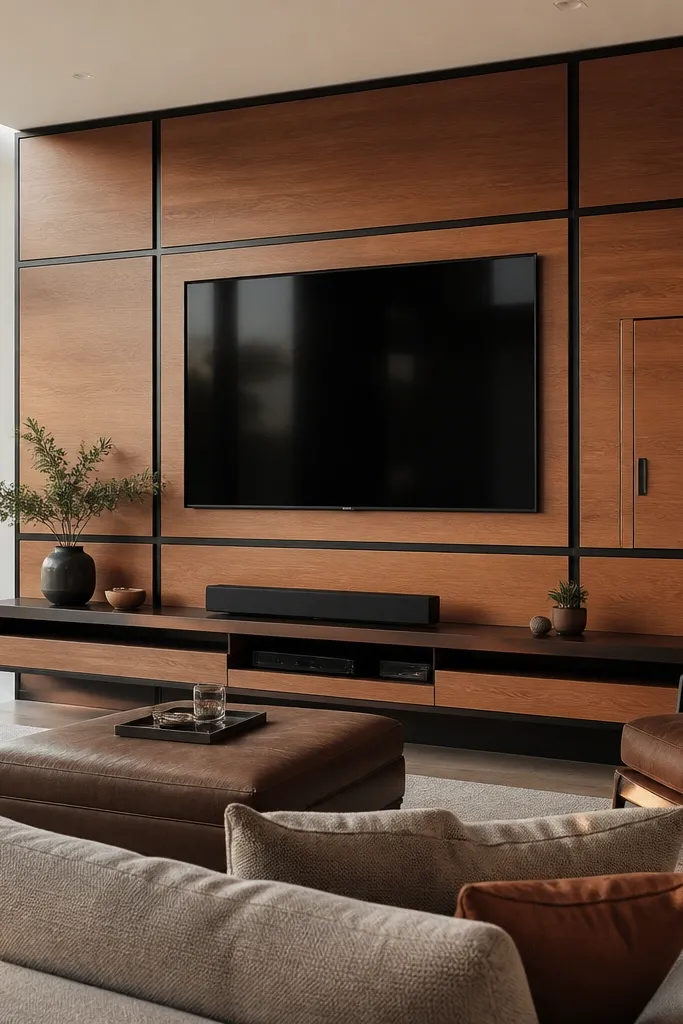
This is the luxury look that stays neat after the first month. The blackened steel grid gives you architectural structure, and the warm oak panels keep it from looking like a showroom. The service door matters because cable chaos is what ruins expensive walls over time. I’ve installed these for clients who hate seeing wires, and the difference is huge because maintenance stays easy.
Good to knowLabel both ends of every cable before you close the wall. Future-you will thank you when you swap a streaming box.
Start by planning the grid size around your TV and your media devices. Use a steel frame with fixed spacing, and cover each grid section with oak veneer panels. Place a service door on the lower left or lower right area within the grid so it’s reachable without removing panels. Route all cables through the service cavity, then mount the TV bracket to a stable plate behind the panel system. Finish by adding a warm 2700K LED strip inside the grid edges with a diffuser so it doesn’t create glare.
AvoidDon’t rely on cable ties and hope. If you can’t access the wiring, the wall stops being luxury the first time something fails.
12. Oversized plaster panel with thin vertical shadow lines
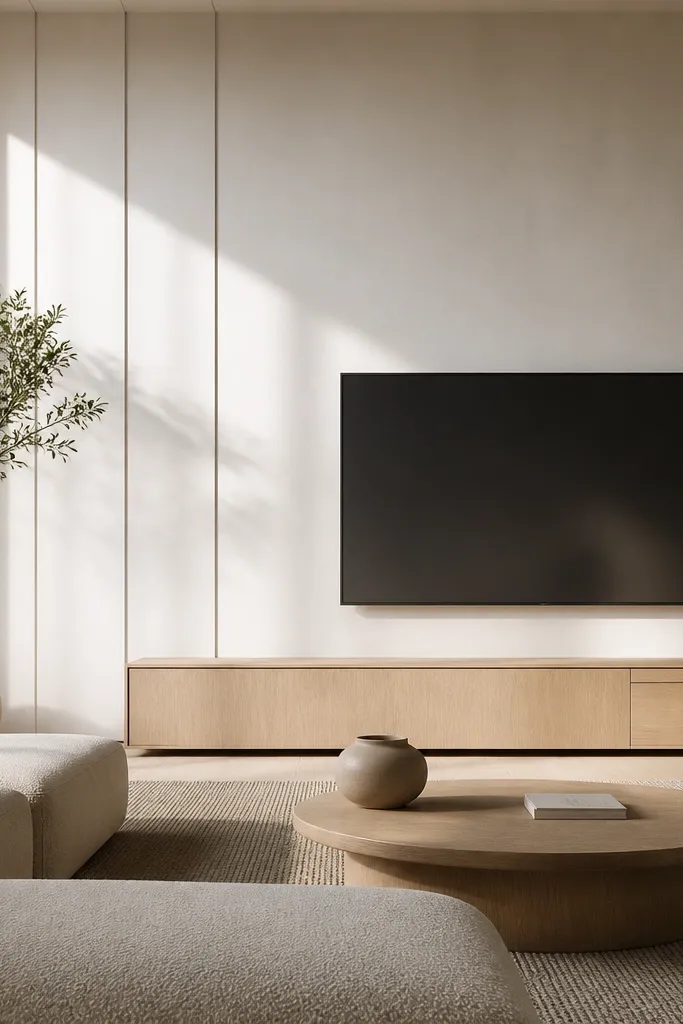
This luxury look comes from restraint. The plaster-like surface is smooth and calm, while the thin vertical shadow lines create depth without adding clutter. I’ve seen this work especially well in modern homes with large windows, because the wall stays bright and still looks dimensional. It flatters spaces with simple furniture, since the wall does the visual work. If your goal is “designer” without heavy materials, this is one of the cleanest routes.
Good to knowDo a test patch with your exact paint and lighting. Warm white can shift quickly under LED.
Start by applying a plaster finish or plaster-style coating to the feature area, then mask and install slim trim strips to form the shadow lines. Keep each shadow line consistent — I like 3/8-inch width with a 1/2-inch depth so the light catches them. Recess the TV opening by about 1 inch and keep the trim border thin, around 3/4 inch. Mount the TV so it’s centered, then add grazing lights from the side or use a low-profile LED strip behind the top edge of the recessed opening.
AvoidAvoid thick molding around a smooth plaster wall — it turns it into a dated frame.
13. Chevron oak paneling with a slim stone shelf
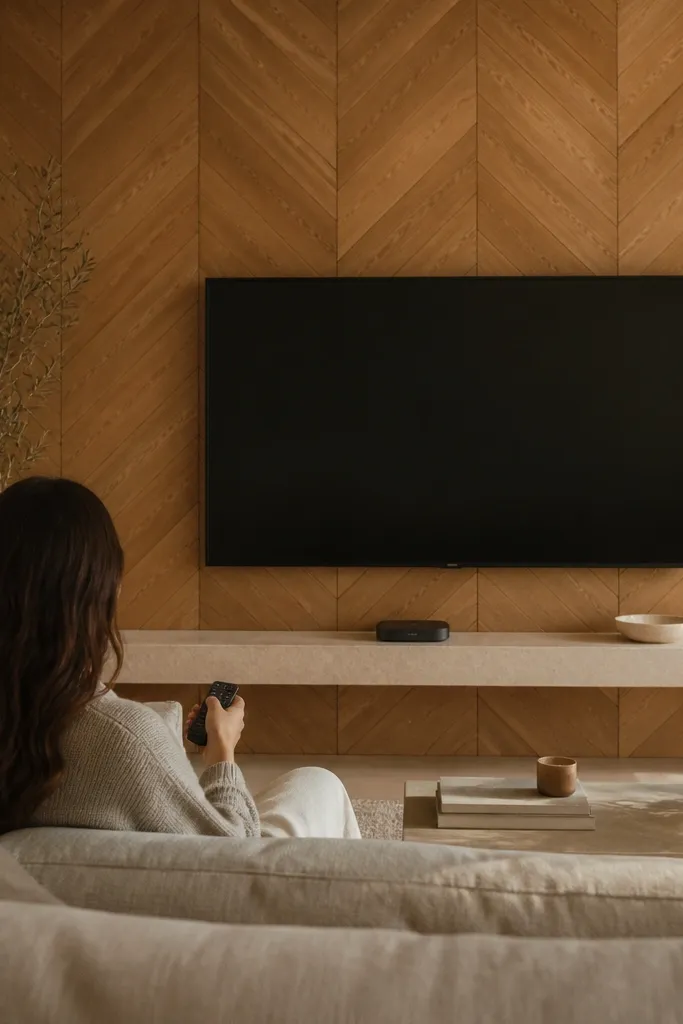
Chevron looks luxury when it’s controlled and scaled to the wall, not when it’s random small herringbone. Oak chevron gives movement and depth, and the slim stone shelf adds a practical surface for devices. I’ve used this in rooms with neutral sofas and it adds just enough drama without making the space feel busy. It also flatters darker wall colors because the oak pattern pops against them.
Good to knowUse a matte oak finish with a micro-sanding step. Rough chevron edges catch light and look sloppy.
Start by deciding the chevron size based on wall width. For a modern look, I keep the chevron angles consistent and use wider plank widths, like 5 to 6 inches per plank. Frame the TV opening with a simple border that doesn’t compete with the chevron pattern. Mount the TV with a recessed bracket so it sits 1 inch back from the panel plane. Install a slim stone shelf below with a 1/2-inch overhang on both sides, then hide LED lighting behind the top of the TV opening.
AvoidSkip chevron on the entire wall if your TV is very large. Too much pattern makes the TV area feel crowded.
14. Matte black panel grid with warm recessed lighting
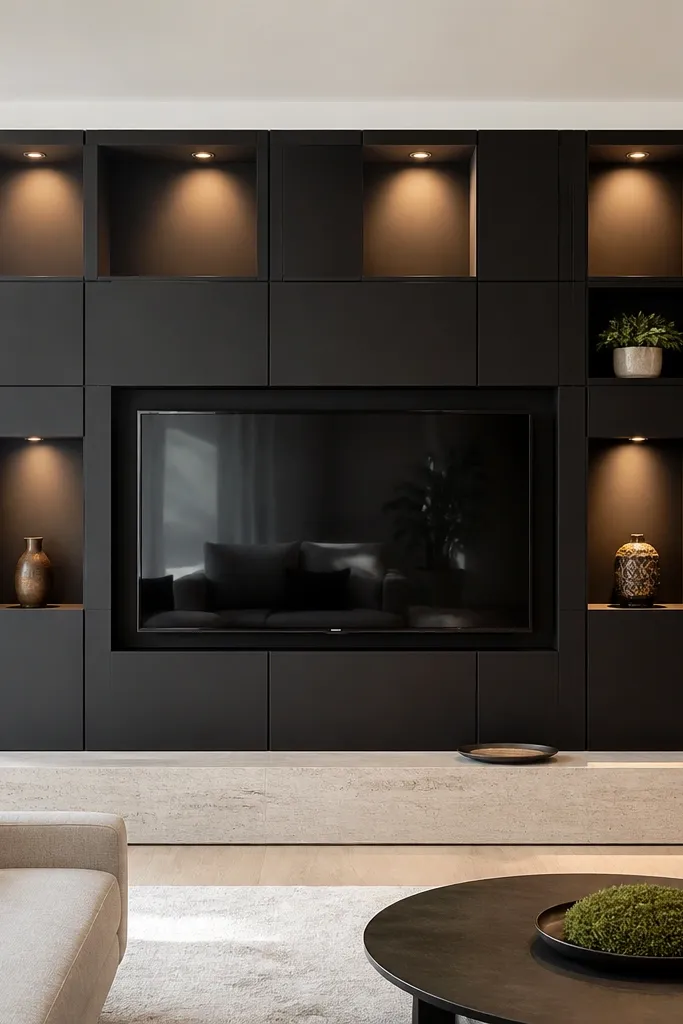
Matte black makes luxury look sharp, but only if the panel grid is subtle and the lighting is controlled. The grid gives structure so the black doesn’t feel like a flat paint job. Warm recessed lighting keeps the black from looking harsh and makes the wall feel designed. I’ve used this in rooms with white walls and light floors, and the contrast looks expensive. It also flatters modern minimal furniture because the wall handles the visual weight.
Good to knowTurn off overhead lights during your test. Matte black can look flat under harsh lighting but gorgeous under lamps.
Start by painting the feature wall with a true matte black, then add a hidden panel system using thin MDF battens or a 1/2-inch recessed rail grid. Recess the TV opening so the screen sits back and the lighting can wash the inside edges. Place the console in light wood and keep it simple — no heavy trim. Install recessed channels or LED strips behind the top and sides of the recessed opening using 2700K bulbs, then test glare by watching the TV in the evening.
AvoidDon’t use glossy black. It shows wall imperfections and looks cheap fast.
15. Sculpted plaster arches with a flat TV center
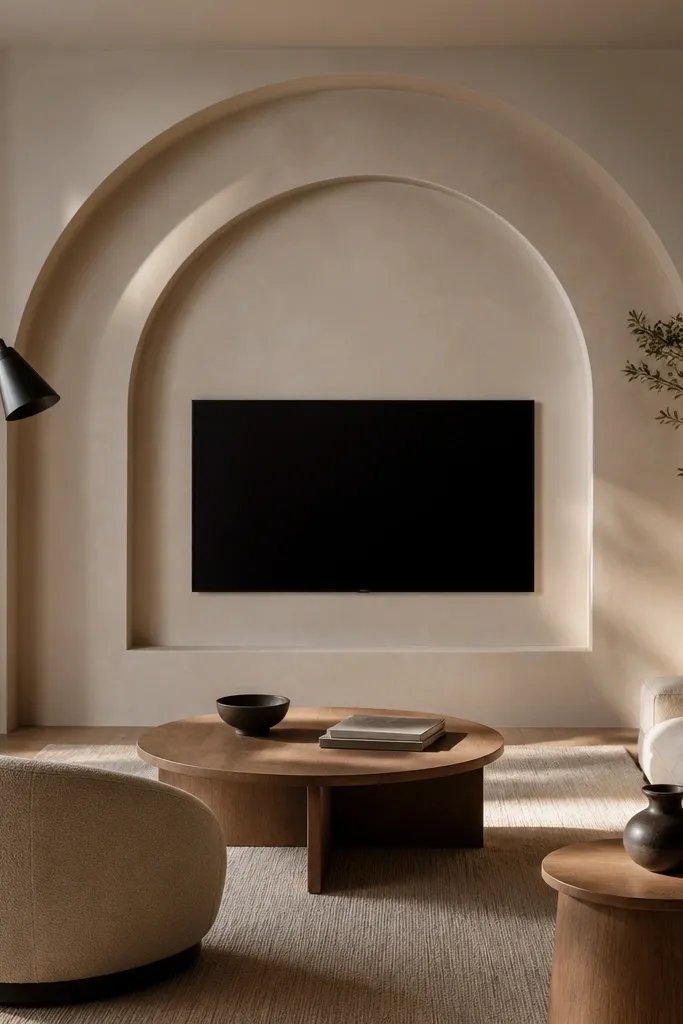
Sculpted arches add luxury because they create real shadow depth, not just texture. Keeping the TV center flat keeps the screen readable and stops the wall from competing with the image. I’ve done this in rooms where the owner wants something architectural but still modern. It flatters warm neutrals and cream textiles because the plaster shadows look soft and expensive. If you have a tall wall or slightly higher ceiling, this style looks especially good.
Good to knowUse painter’s tape to map your arch lines before you commit. Small shifts in symmetry show up instantly on a TV wall.
Start by building a flat center panel zone sized to your TV opening. Then sculpt or mold plaster arches on both sides, keeping the arch depth around 1 to 1.5 inches so shadows show without looking bulky. Paint the whole feature area in one finish so the arches and center match. Mount the TV centered in the flat zone, with a thin trim border and a consistent margin around the screen. Add two small LED points in the top corners, aimed down the arch grooves to create a slow gradient at night.
AvoidSkip deep arches that wrap too close to the TV edges — they make the screen feel trapped.
16. Ribbed ceramic tile vertical panels
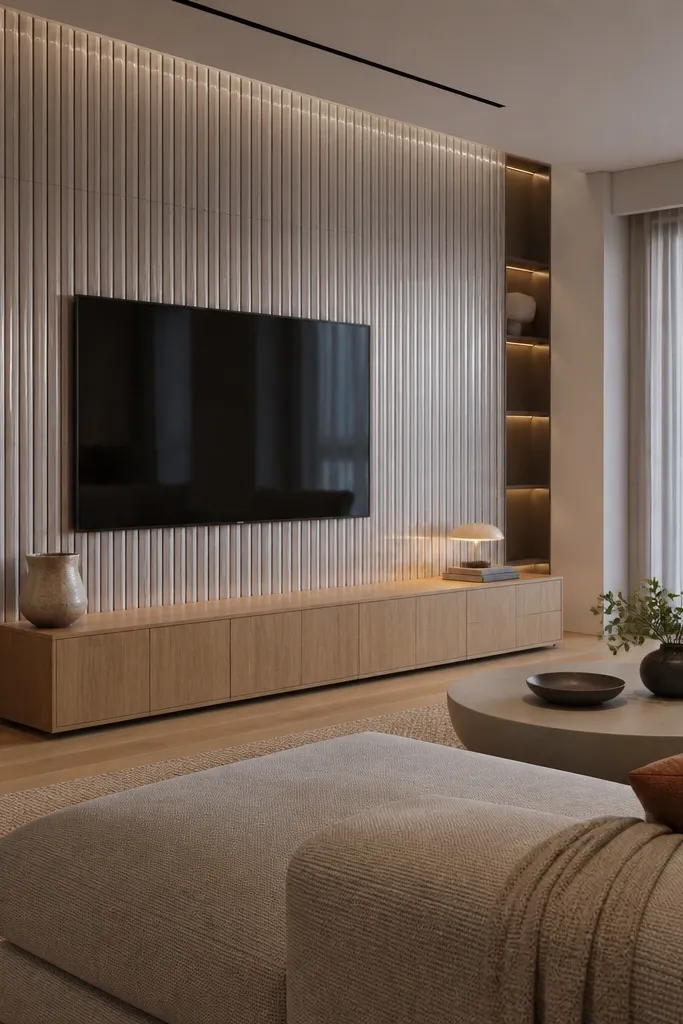
Ribbed tile reads luxury because the highlights move across the wall as the day changes. It also hides minor surface imperfections better than smooth tile because the ribs distract the eye. I like this in modern homes with neutral decor because it adds texture without color chaos. It flatters light rooms and makes them feel taller because the ribs run vertically. It’s also a good option if you want a finish that’s durable around real living — no scuffs like fabric panels.
Choose a ribbed tile with consistent rib width, then design your layout so the TV opening aligns with a rib edge, not the center of a rib. Install the ribbed tiles vertically across the feature zone, then frame the TV niche with smooth trim in the same warm white tone. Mount the TV recessed about 1 inch so the opening feels like an architectural cutout. Add a warm LED strip or recessed light that grazes the tiles from the side to emphasize the ribs. Keep the console floating and simple so the wall texture stays the hero.
Grout matters. Use a warm white grout that matches the tile tone, not bright white, so the ribs look continuous.
Avoid mixing ribbed tile on one side and flat tile on the other without a strong framing plan.
17. Warm gray painted MDF with stepped picture-frame layers
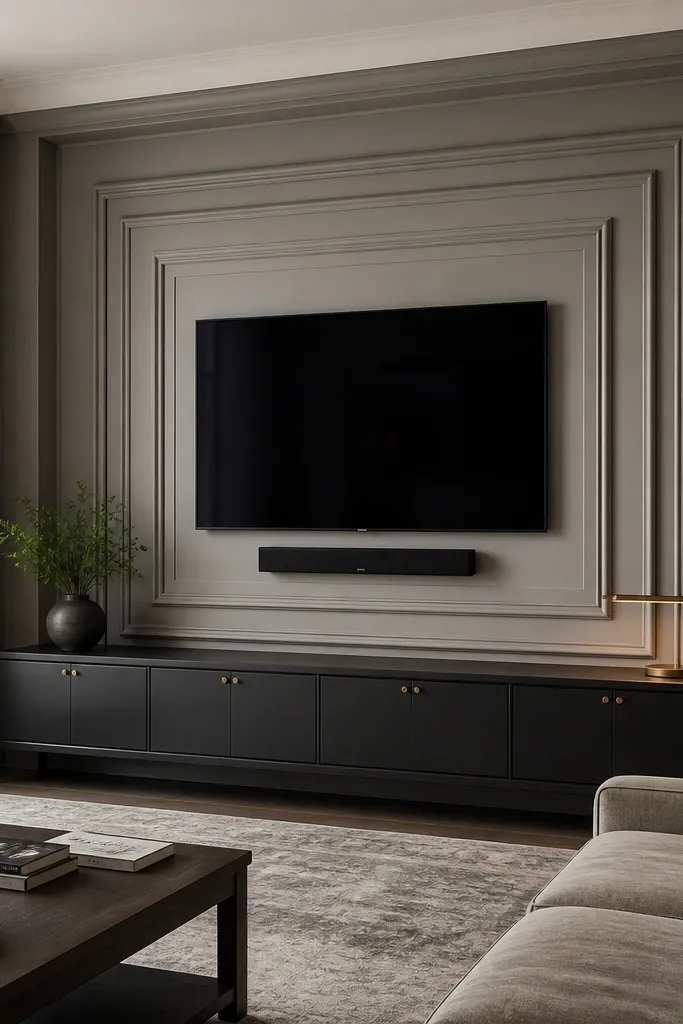
Stepped picture-frame layers look expensive because they create depth in a controlled way. MDF is easy to build clean lines with, and paint gives you a uniform luxury finish when you sand between coats. Warm gray is forgiving and looks modern with both black and brass accessories. I’ve used this in rooms with busy furniture patterns because the wall stays calm and structured. It flatters most skin tones because it doesn’t pull the room too cool or too yellow.
Good to knowSand edges after primer, not just after topcoat. Sharp edges with smooth paint look custom.
Start by building a layered frame around the TV opening: a shallow outer layer, then a deeper inner layer. I use about 1/2-inch depth difference between layers so you get visible shadow lines. Mount the TV so the screen sits back from the front edge of the inner layer by roughly 1 inch. Paint everything in one warm gray and keep the finish satin for light reflection control. Install LED behind the deepest layer only, aimed to light the frame edge, not the screen.
AvoidAvoid one-layer frames. Flat frames make the whole build look DIY.
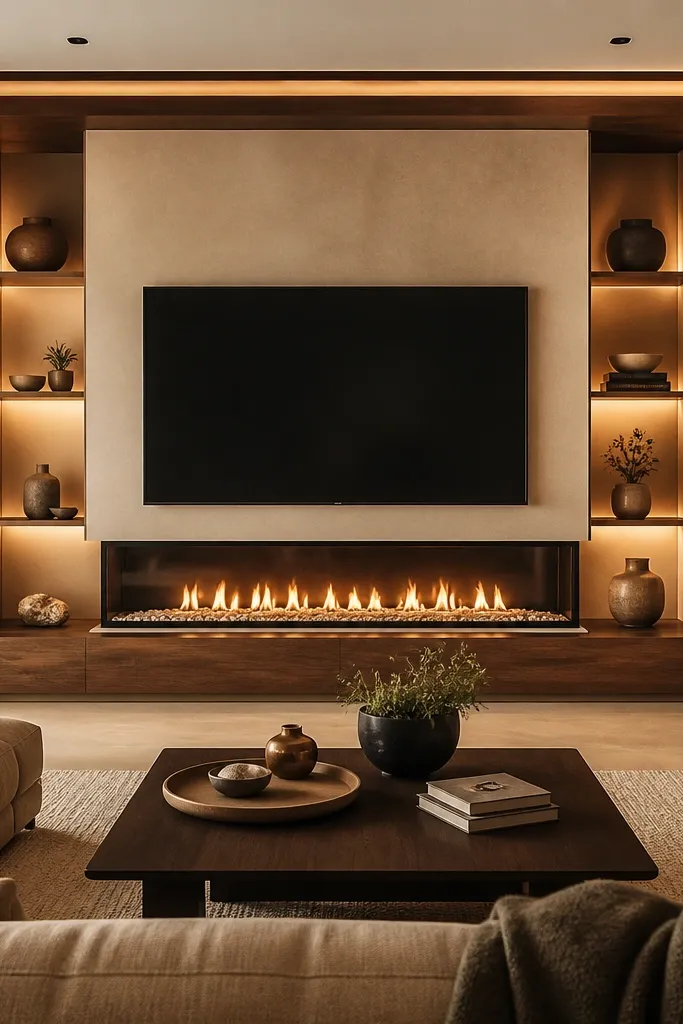
18. Charcoal slat wall with backlit alcove shelves
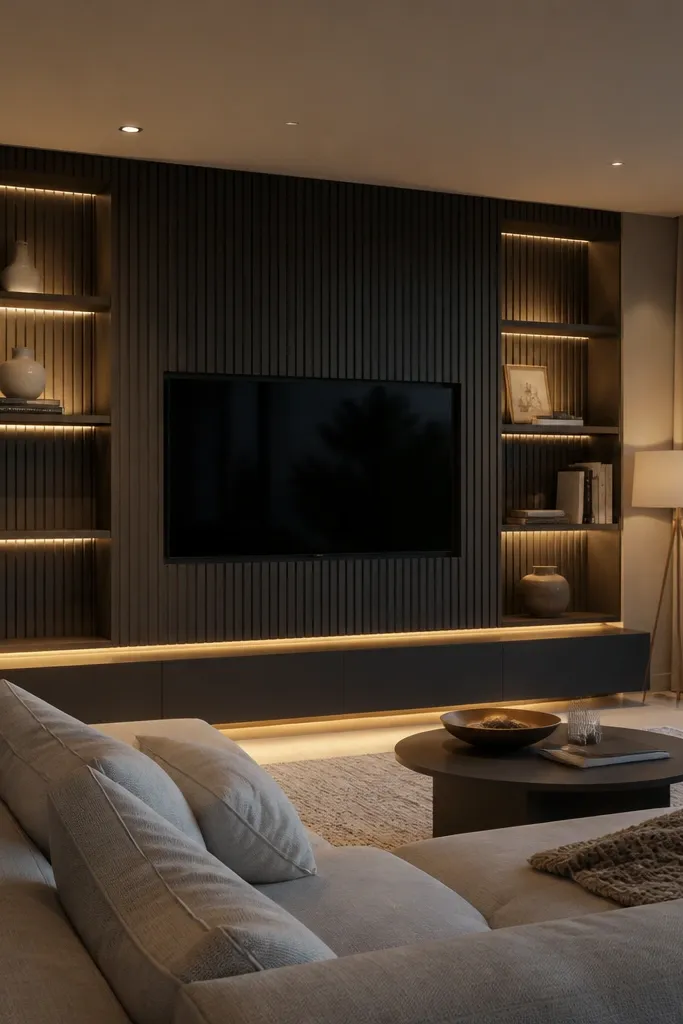
This design reads luxury because it gives you storage that looks like architecture. Charcoal slats add a strong modern texture, and the backlit alcoves keep the wall from feeling heavy. I’ve built this in living rooms where people want books and decor displayed, and it stays tidy because shelves are built into the wall grid. It flatters rooms with light walls and natural wood accents, since the charcoal gives contrast without turning the room dark.
Good to knowUse the same LED brightness for shelves and TV edge lighting. If the shelves are brighter, the wall looks unbalanced.
Start by creating a slat grid and deciding your alcove sizes before you buy materials. Typical alcove openings are about 12 to 18 inches wide and 10 to 14 inches tall, depending on what you display. Mount the TV centered on the main slat plane and recess it so it sits back 1 inch. Build alcove frames with a consistent trim thickness, then install warm LEDs (2700K) behind the shelf backs. Keep the glass or open surfaces clean and match shelf depth across both sides for symmetry.
AvoidSkip random shelf heights. Uneven alcoves make a luxury wall look like a storage wall.
19. Brushed brass trim lines on a matte off-white panel wall
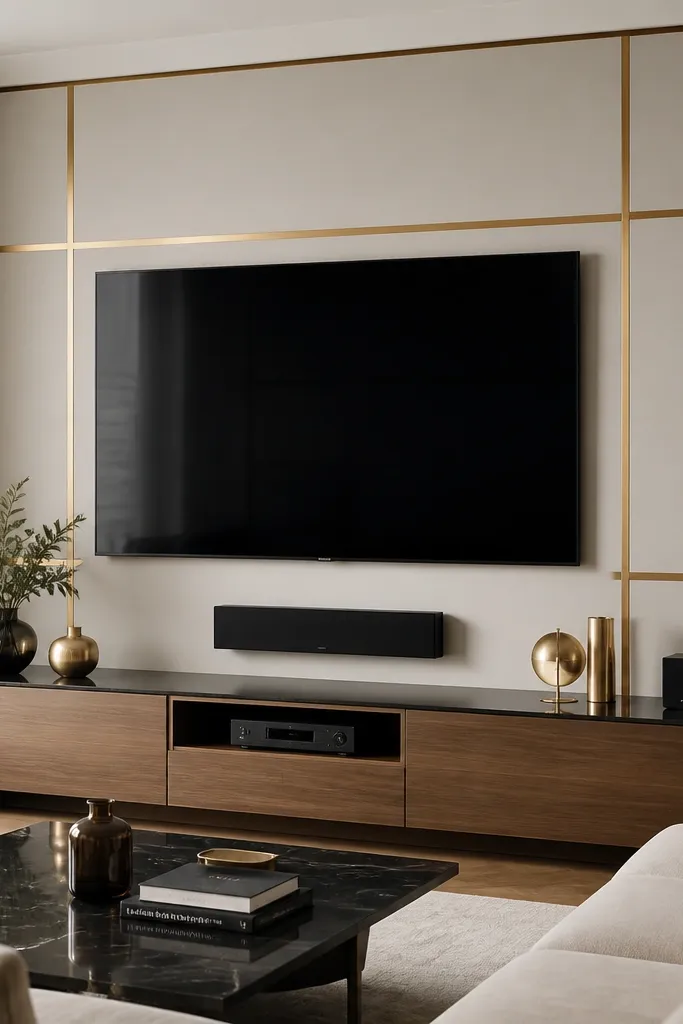
Brushed brass lines look luxurious because they’re controlled and reflective in a soft way. Matte off-white panels keep the wall modern, while the brass adds warmth and a designer touch that doesn’t scream. I’ve used this in rooms with neutral sofas and it makes the TV area feel like part of the architecture, not separate decor. It flatters cool-toned interiors because brass brings warmth without adding color clutter.
Good to knowWipe brass trim with a microfiber cloth before install. Fingerprints show under warm LEDs.
Start with a matte off-white panel system, like painted MDF with recessed seams. Apply brushed brass trim as thin strips, about 1/2 inch wide, following a rectangle around the TV opening and a couple vertical lines that align with your panel seams. Recess the TV opening so the brass lines create a shadowed frame rather than sitting on the flat wall. Mount the TV at 42-44 inches to center and keep the console low so the brass lines visually lead up to the screen. Add warm LED backlighting behind the brass line channel with a diffuser so you don’t see LED dots.
AvoidAvoid thick brass bars. Thin lines look intentional; thick bars look like hardware stuck on.
20. Cream micro-scallop plaster panels with a centered TV niche
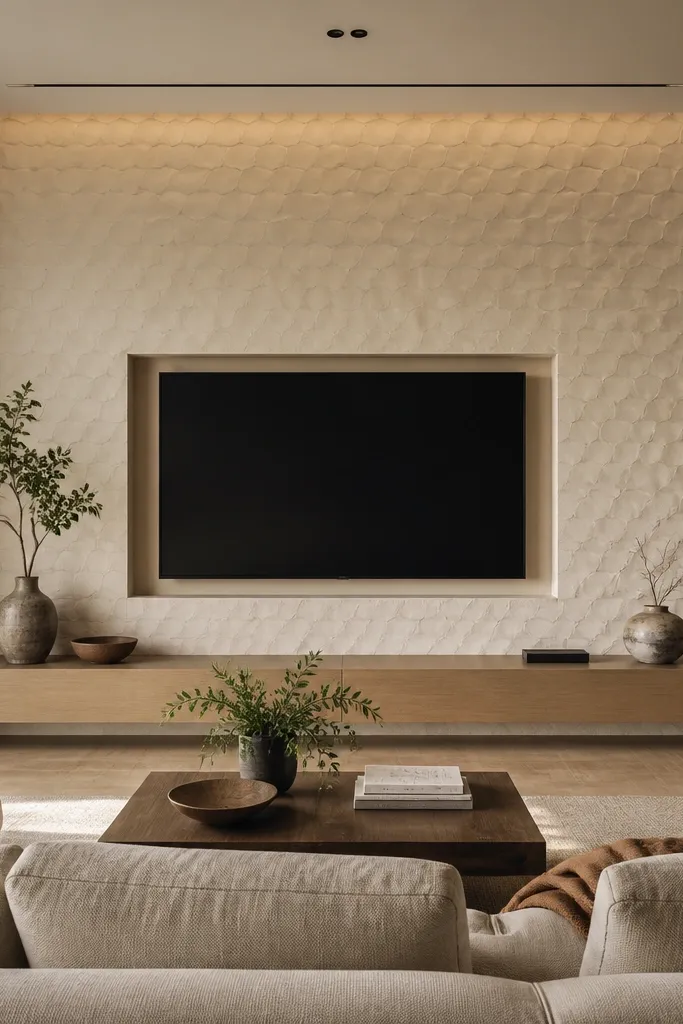
Micro-scallop plaster panels look luxury because the texture is subtle up close but obvious in side lighting. The centered TV niche keeps the eye focused on the screen and stops the texture from overwhelming your furniture. I’ve used this in rooms where the owner hates bold patterns but still wants depth. Cream tones make it forgiving, and the texture creates a gentle glow effect at night. It flatters both warm and cool interiors because the surface reads neutral under 2700K lighting.
Good to knowTest the lighting angle with a phone flashlight. If the texture doesn’t show depth in that test, your final lighting angle is wrong.
Start by coating your feature wall with a micro-scallop plaster system or a plaster-style panel surface designed for painting. Keep the TV niche smooth and recessed, leaving a 3/4-inch trim border around the opening. Mount the TV so the center lands at 43 inches and the bottom edge clears the console by 4 to 6 inches. Add hidden LED lighting behind the top of the niche and along the sides, angled so it grazes the scallops. Finish with matte paint over the texture if the system requires it, but keep the niche smooth and satin to reduce glare.
AvoidSkip heavy glossy topcoat on scalloped walls — it kills the soft luxury look.