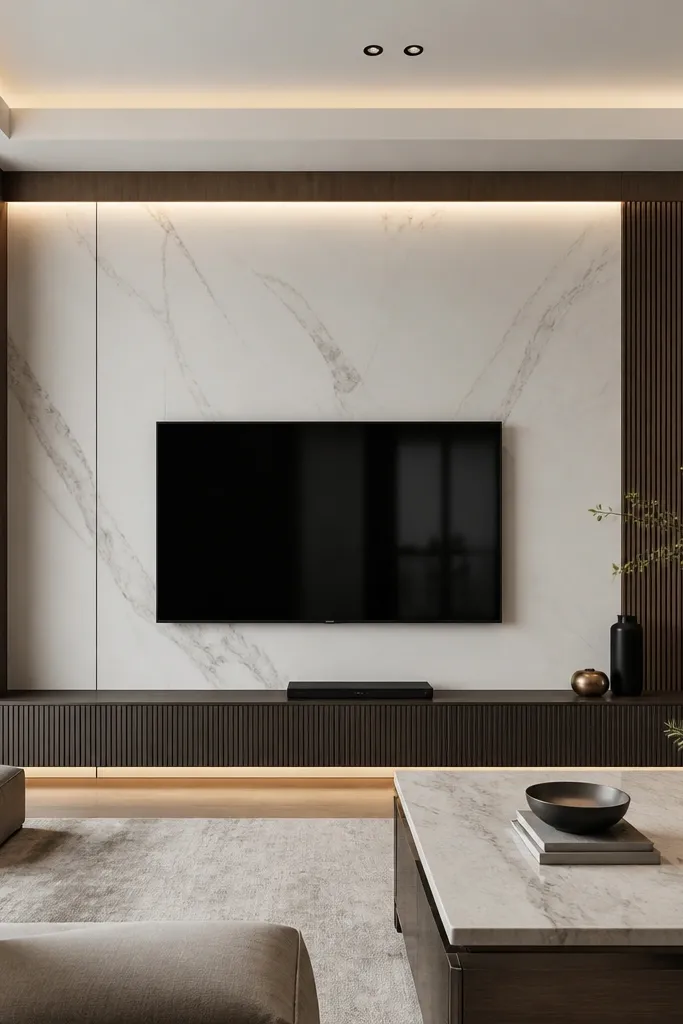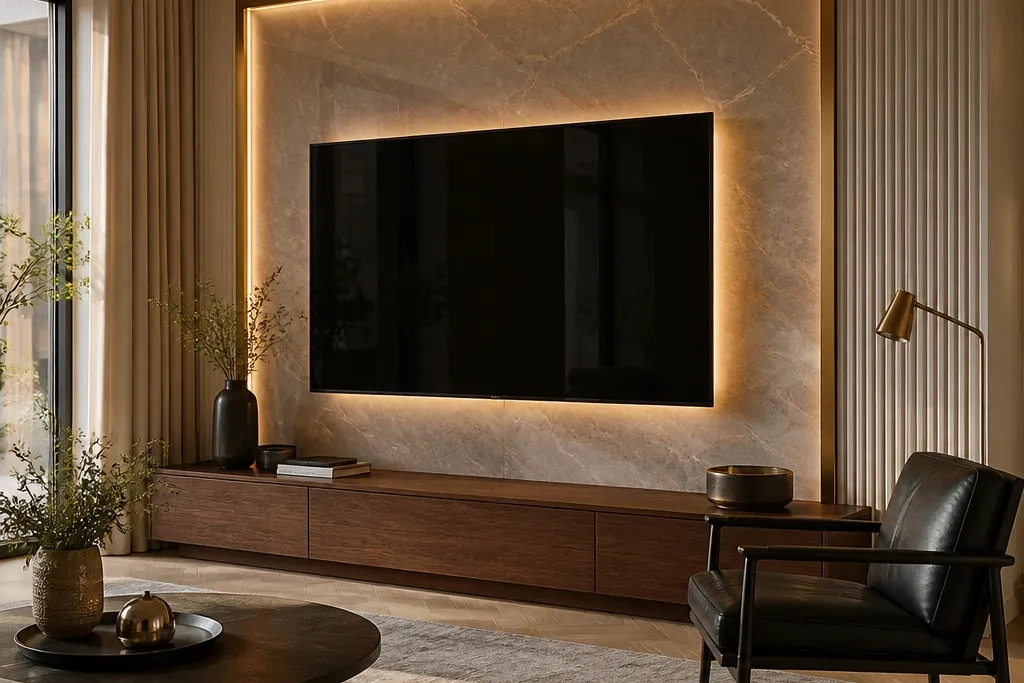

1. Calacatta Gold Slab Frame With Shadow Gap
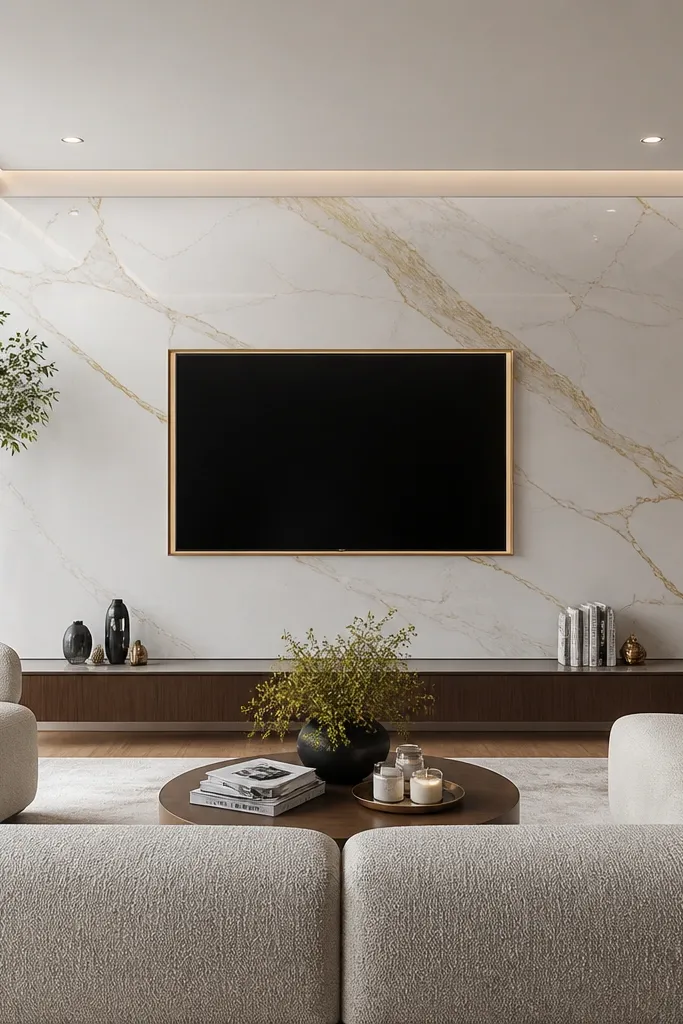
Start by marking the TV center height and tape a rectangle the exact TV footprint plus 10-12 inches on each side. Build a flat backer and set your marble-look porcelain slab so the main veining band sits roughly behind the TV’s top third. Install a 1-1.5 inch stone border around the TV opening, then leave a 1/4 inch shadow gap between the border and the wall edge. Finish by mounting a slim floating console 2-3 inches off the floor, and run warm LED strips in a shallow channel above the TV or inside the top border. Keep the console hardware in brushed gold or black so the veining’s gold has somewhere to land.
This is the marble TV wall look that photographs the most like a showroom because the slab reads continuous behind the screen. I use a Calacatta-style white with warm gold veining and a border that stays narrow so the TV is the center, not the frame. The subtle gold works with warm skin tones and creamy upholstery because it pulls warmth into the room. Shadow gaps matter here — that thin dark line makes the border look built-in and expensive instead of pasted on.
AvoidDon’t use a thick, wide stone border with a small TV — it makes the wall look heavy and cramped.
Good to knowUse warm LED at 2700K and dimmer control so the marble doesn’t turn gray in photos.
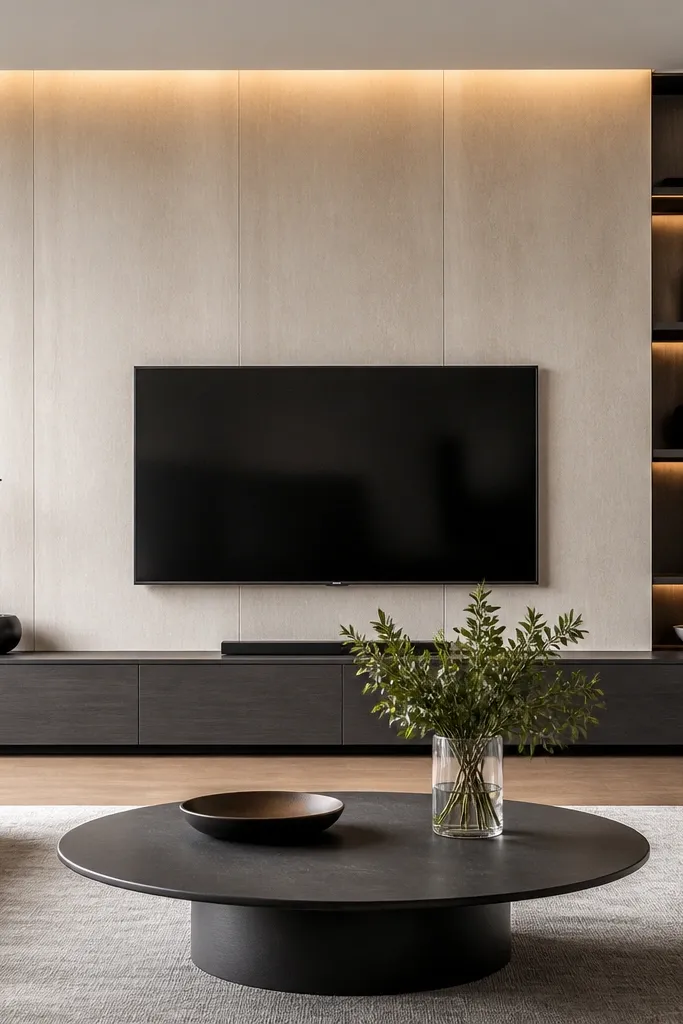
2. Nero Marquina Matte Marble With Black Trim
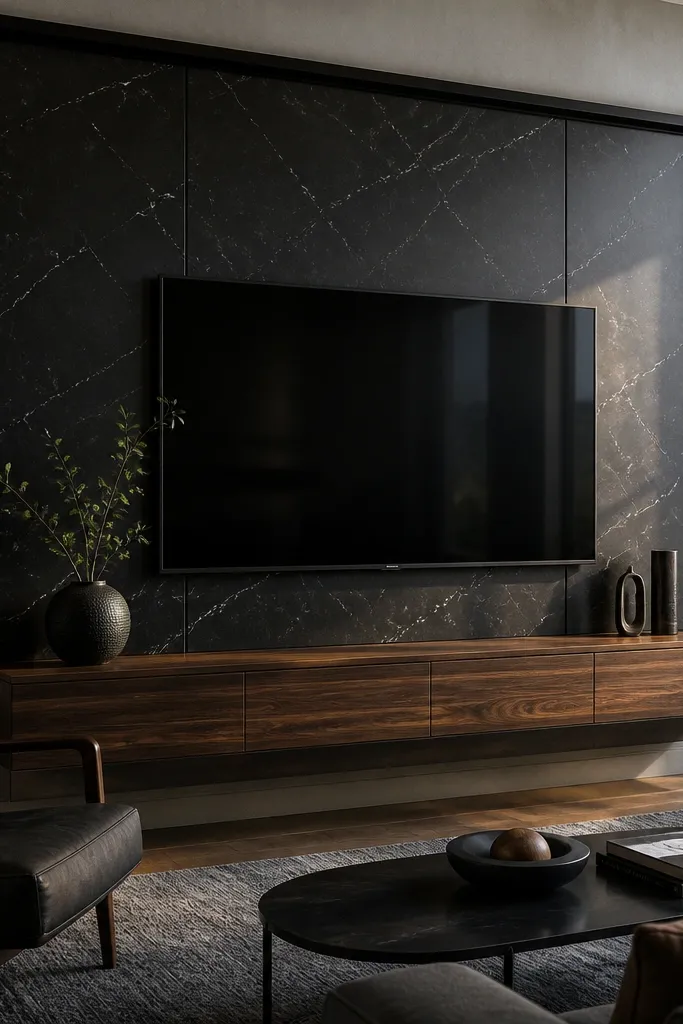
If your room has darker furniture or you want a more dramatic, editorial vibe, Nero Marquina is the one I reach for. The matte finish is key because glossy black marble-look can show glare from windows and overhead lights. The black trim makes the TV feel like it’s floating inside a designed frame. I’ve used this in rooms with medium to deep skin tone accents and it looks clean and intentional with black, charcoal, and walnut wood.
Start by choosing a matte marble-look porcelain panel with gray veining that isn’t too busy. Mount the TV so its sides leave at least 6 inches of stone visible on each side, then outline a trim opening in matte black metal. Add two slim vertical LED channels at the left and right edges of the frame, angled slightly inward so the light grazes the stone. Install a walnut floating console with a 1-2 inch reveal above the base so the black wall stays the main visual. Style with one low-profile black frame and a pair of ceramic vases in smoke gray or dark espresso.
Use a darker wall wash lighting method: aim LEDs so they skim the stone surface, not blast straight at the TV screen.
Skip silver trim — it makes the black marble look like a cheap store display.
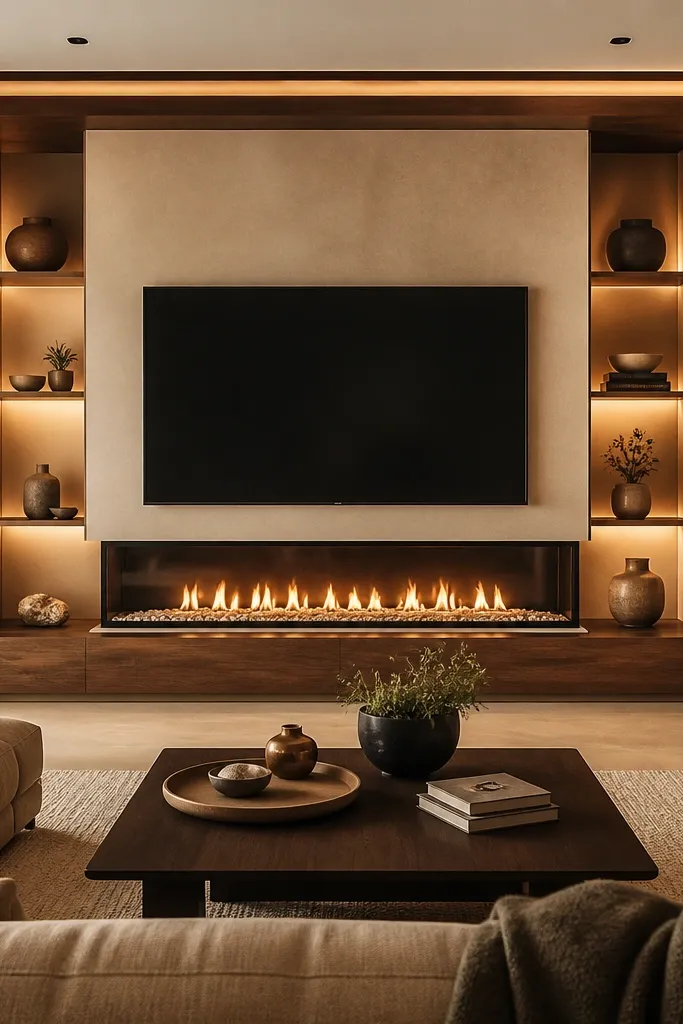
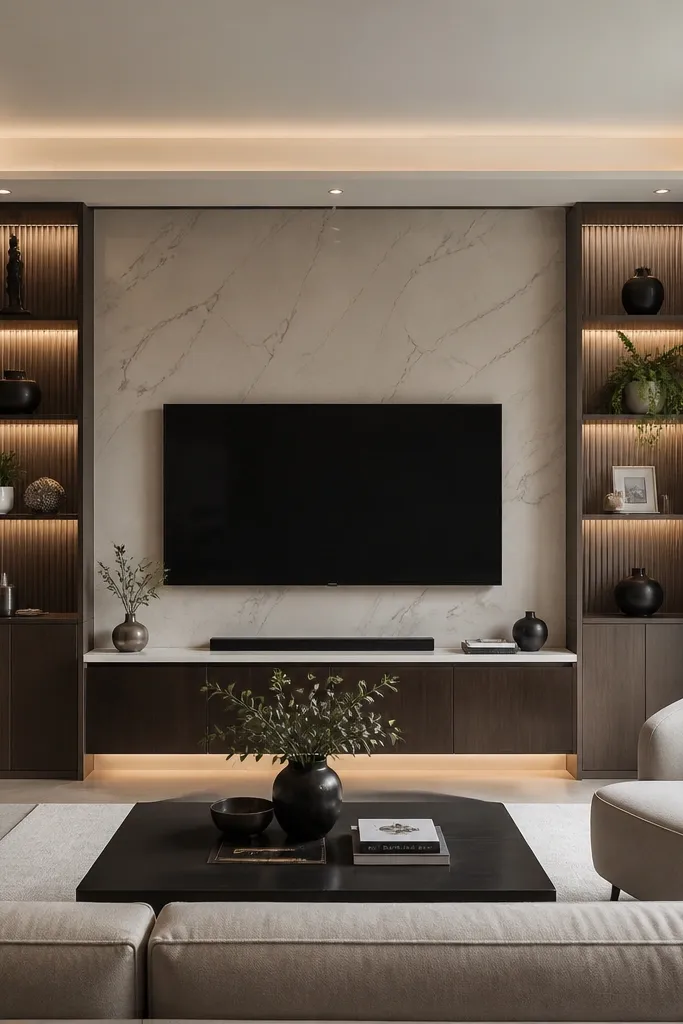
3. Marble Niche Columns Flanking the TV
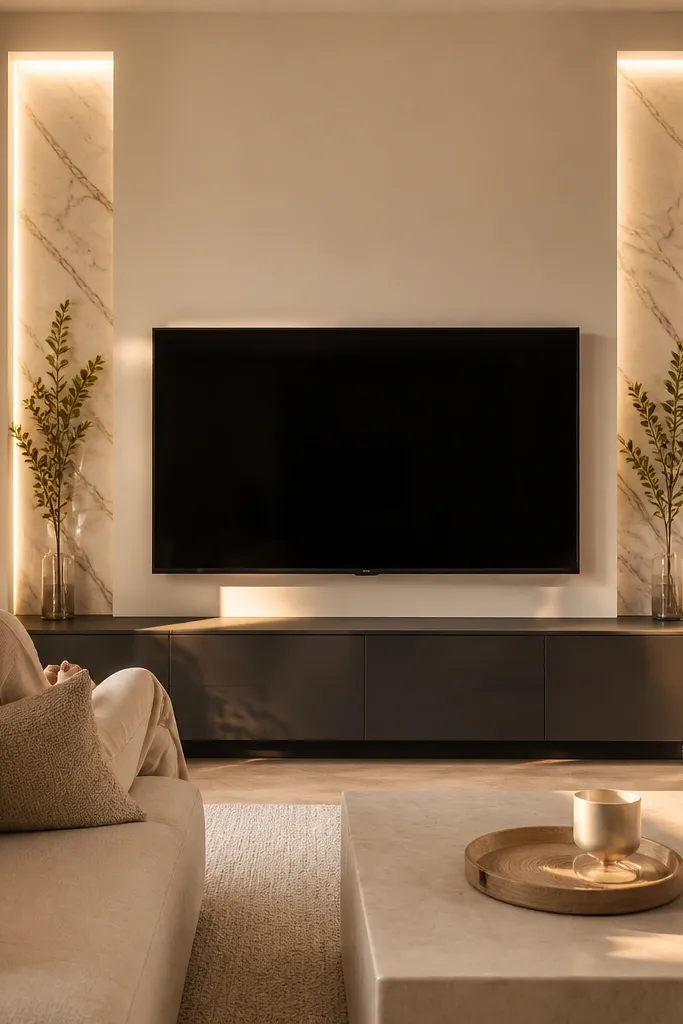
This design adds depth without turning your wall into a maze. The niches create a three-dimensional frame around the TV, and the warm lighting inside them makes the marble look dimensional instead of flat. I like this for rooms where you have a standard TV size but want the wall to feel larger. It’s also forgiving for mixed decor — the marble keeps things neutral while the niche lighting gives you a focal moment that works with both light and medium wood tones.
Start by building two vertical niche columns that are 8-10 inches wide each, placed 10-12 inches away from the TV frame edge. Use a marble-look panel for the main wall and a slightly darker veining insert for the niche interior so it reads as a separate layer. Center the TV inside a rectangular surround that’s about 14-16 inches wider than the TV on each side. Run warm LED strips inside each niche channel and set them to a soft diffusion cover so you don’t see LED dots. Finish with a light oak or ash console, keeping the console height around 18-20 inches so the niches stay visually tall.
If your wall is off-level, anchor the niches with a laser line first — crooked niches ruin the luxury effect fast.
Don’t put outlets or cable boxes inside the niche shadows; they show through the light.
4. Full-Height Marble Behind TV Plus Lower Paneling
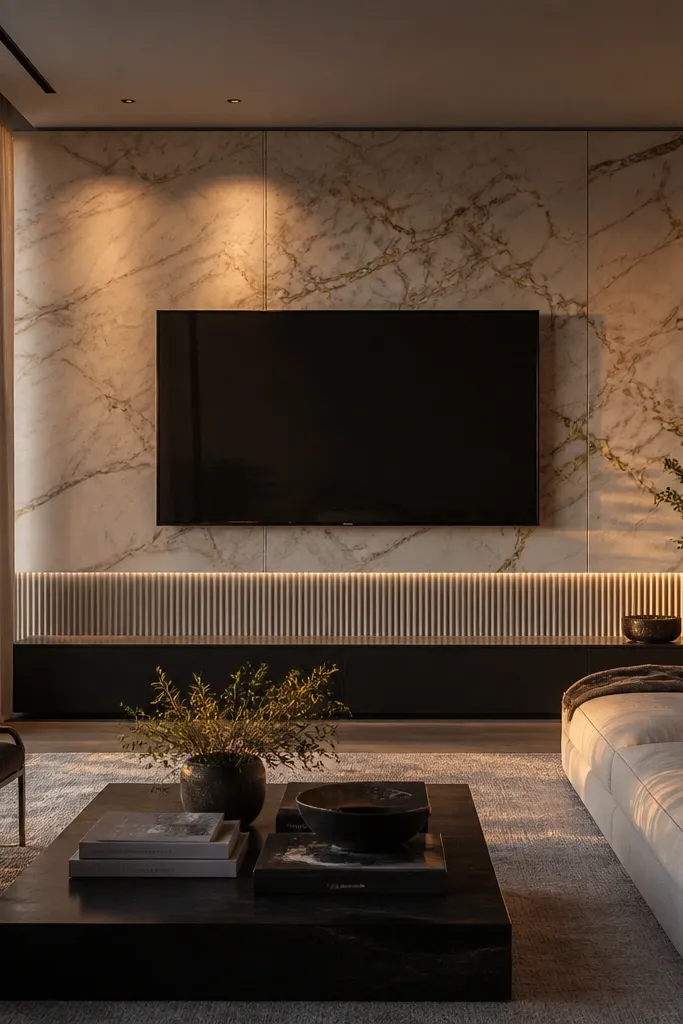
Start by covering the entire wall behind the TV with marble-look porcelain panels or a slab-style system, keeping seams aligned on vertical lines. Create a recessed TV rectangle by adding a thin stone border and a 1/2 inch set-back for the inner area. Then add a lower horizontal panel band about 24-30 inches tall beneath the TV console line, using ribbed plaster or a greige panel system that matches your wall tone. Install warm recessed spot lighting from the ceiling line or add an LED strip along the top border of the TV surround. Mount the console on the band so the transition looks deliberate, not like add-on trim.
When you want the “expensive” look in a big way, full-height coverage is the move. The reason it works is simple: your eye never hits a different material mid-wall, so the TV feels like it lives inside a single architectural volume. I pair it with a lower paneling band because pure full-height marble can feel too intense in smaller rooms. The warm greige band softens the bottom half and makes the TV look calmer and more grounded.
AvoidAvoid mixing two different marble patterns on the same wall; it reads like bargain renovations.
Good to knowChoose a marble-look print where the veining direction stays mostly vertical — it keeps the wall from looking chaotic.
5. Floating Slab With Back-Lit TV Reveal
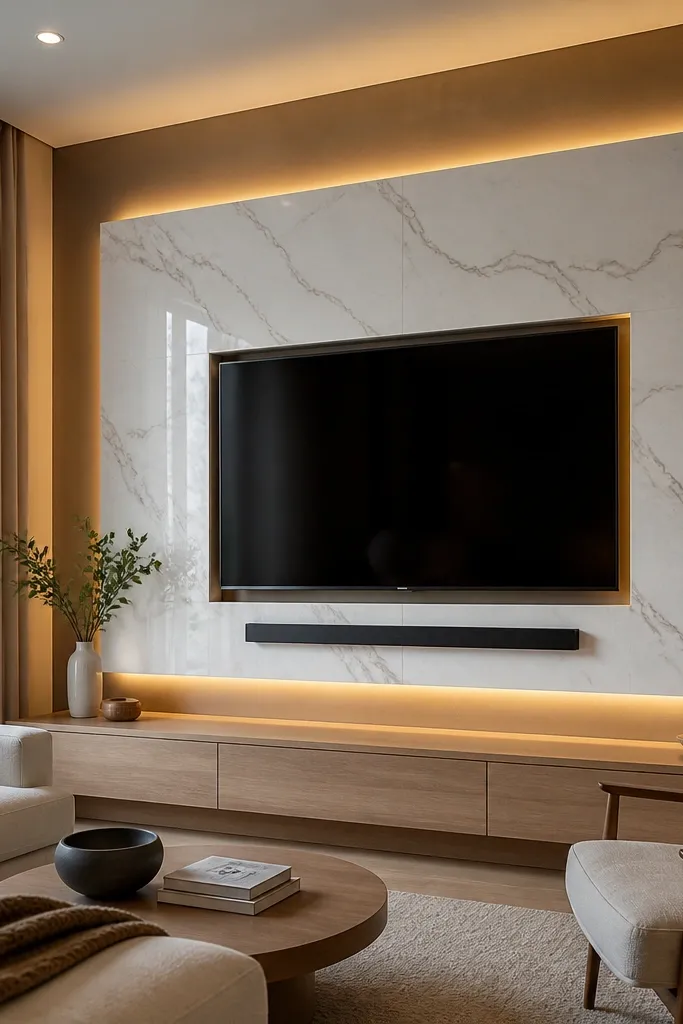
Start by selecting a marble-look panel with light veining so the backlight doesn’t highlight busy patterns. Build a recessed frame that holds the TV by setting the TV mount within a cut opening, then add a 1/2 inch reveal behind the inner stone edge. Install an LED strip around the inner perimeter, using a diffuser channel so you don’t see a bright line. Add a thin outer stone border that covers the wall cut edges, then leave the slab surface smooth and uninterrupted. Style the shelf with one tall object and one low object — keep it airy so the glow stays the star.
This look is pure luxury because it creates a controlled glow and a clean separation between the TV and the stone. The “floating slab” effect comes from leaving a consistent reveal gap around the inner opening. I use a white marble-look with soft gray veining for this because the backlight makes the stone edges look crisp. It’s great for living rooms with modern furniture because it matches the straight lines and minimal clutter.
AvoidDon’t use high-contrast black borders with white marble here — it makes the glow look like a cheap sign.
Good to knowUse a diffuser and test the LED brightness at night before closing the frame. Too bright kills the luxury effect.
6. Marble Accent Wall With Slim Vertical Light Bars
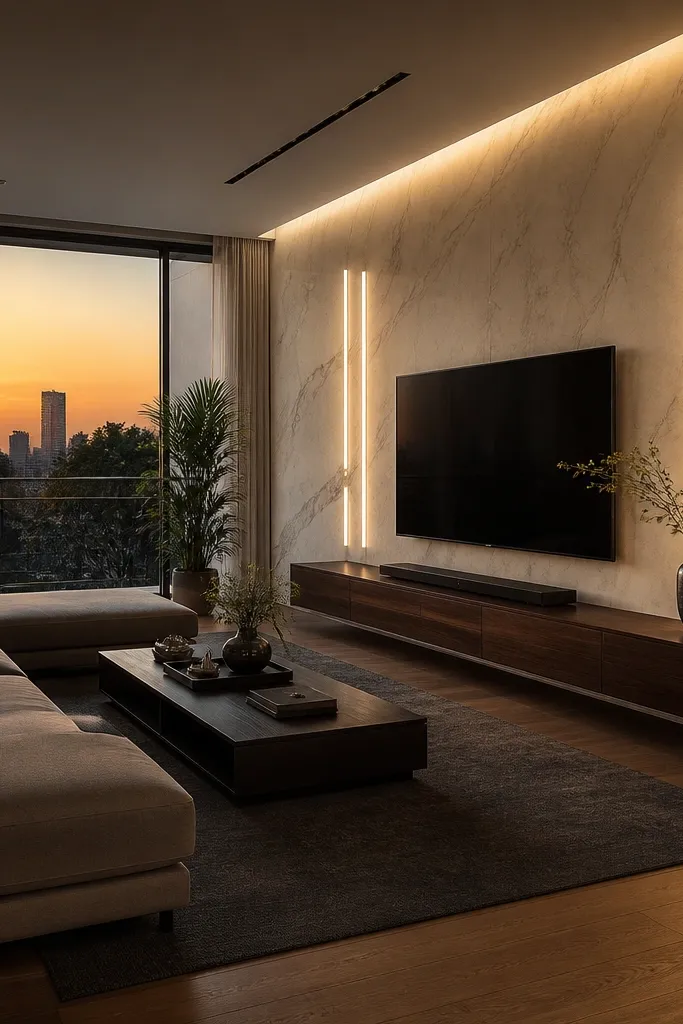
Start by keeping the marble area to the TV zone only — about 10-12 inches wider than the TV on each side and up to 8-12 inches above the TV top. Install a simple stone surround frame, then add two vertical LED bars set 2-3 inches away from the surround edges. Use a warm 2700K LED and set the diffuser so the light is even, not dotted. Mount the console below and keep it low, around 16-18 inches high, so the vertical light bars control the wall’s height. Finish by adding two slim decor pieces at the ends of the console, not in the center.
This is the design I recommend when you don’t want to rebuild the whole wall but still want a luxury TV wall. The slim vertical light bars pull the eye upward and make the marble look like it has depth. I like this with a softer marble tone — white or pale cream — because the vertical light bars add contrast without getting too dark. It also works in apartments where the surrounding wall stays visible and you want the TV area to look designed, not massive.
AvoidSkip random light placements. If the bars aren’t evenly spaced, the whole wall looks rushed.
Good to knowKeep the marble area symmetrical — measure from the TV edges to the light bars so both sides match perfectly.
7. Smoked Glass Shelf Over Marble TV Frame
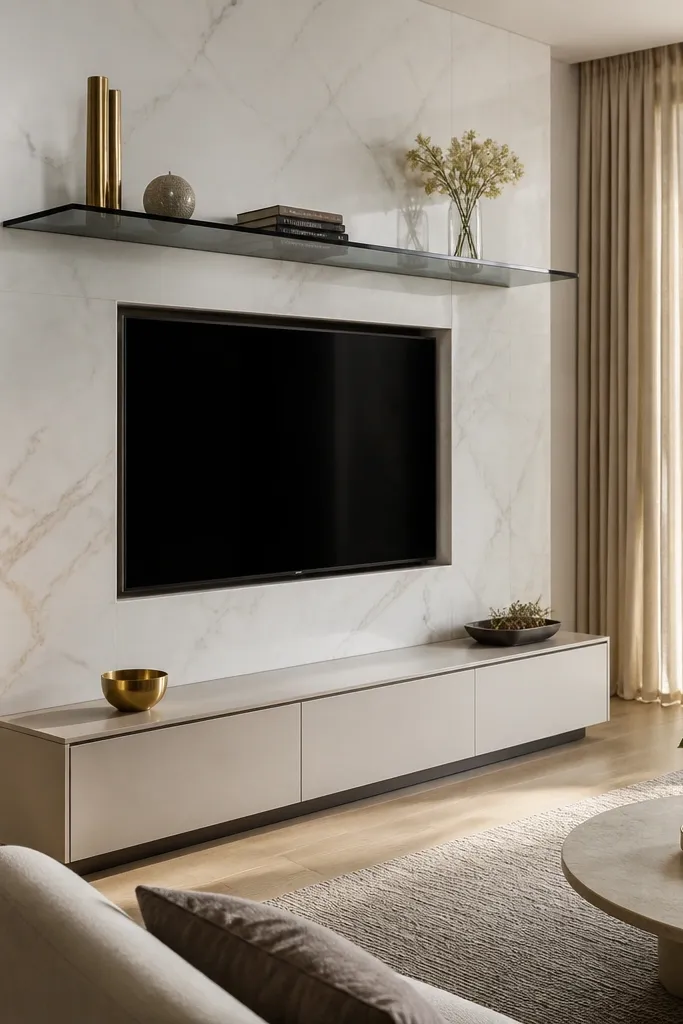
Start with a marble-look surround that’s recessed by about 1/2 inch so the stone looks set back. Mount the TV so the top edge sits roughly level with the shelf bottom — I usually leave about 4-6 inches. Install a smoked glass shelf with metal brackets in black or brushed steel, keeping the shelf depth around 10-12 inches. Add small warm sconces or LED mini spots aimed at the underside of the shelf so the marble frame gets a gentle glow. Style the shelf with a single long ceramic piece and one framed photo — keep decor low and spaced.
This design mixes marble and a bit of drama without going heavy. The smoked glass shelf adds a glossy horizontal line that makes the marble look more architectural. I like it for rooms with neutral curtains and light flooring because the glass adds visual interest without adding color. It also flatters warmer skin tones through the marble’s soft whites and keeps the whole area feeling “styled,” not purely functional.
AvoidDon’t place bulky decor on the shelf. It blocks the marble and makes the TV area feel crowded.
Good to knowUse warm bulbs (2700K) and avoid bright cool LEDs under the shelf — smoked glass shows blue tones fast.
8. Beige Vein Marble With Brass Inset Trim
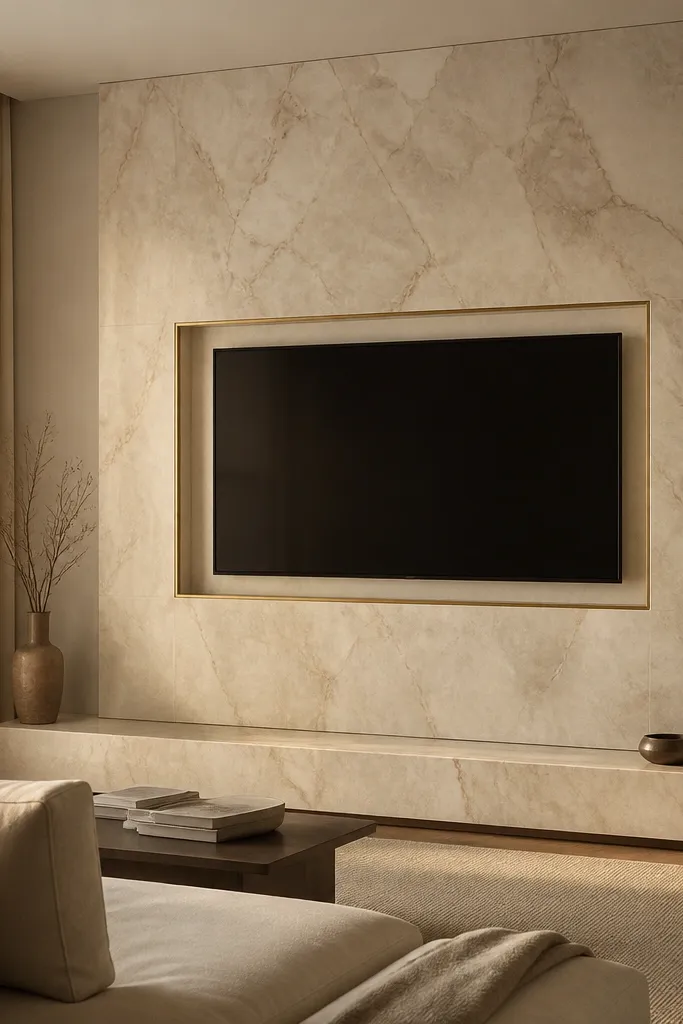
Start by choosing a beige marble-look porcelain with taupe-to-cream veining, not heavy brown swirls. Outline the TV opening with a thin brass inset trim, about 1/2 inch wide, and keep the stone border around it minimal. Install a warm LED strip along the top border, recessed in a channel so the light washes down the wall. Mount the console close to the bottom of the TV frame, leaving 2-3 inches of stone visibility above it. Style with two matte ceramics in sand and oatmeal tones, plus one brass tray that matches the trim.
Beige veining is the “quiet luxury” option that still looks expensive. The brass inset trim gives you that jewelry-like edge, especially in rooms with warm lighting and tan fabrics. I’ve used this in living rooms with beige sofas and it makes the whole space look intentional instead of flat. The key is keeping the brass line thin — thick brass can look dated fast.
AvoidAvoid mixing brass with heavy chrome finishes on the same wall set.
Good to knowBring brass tones to within 10-15 feet of the TV — add one small brass accent on the console so the trim doesn’t feel isolated.
9. White Marble With Vertical Fluted Panel Side Sections
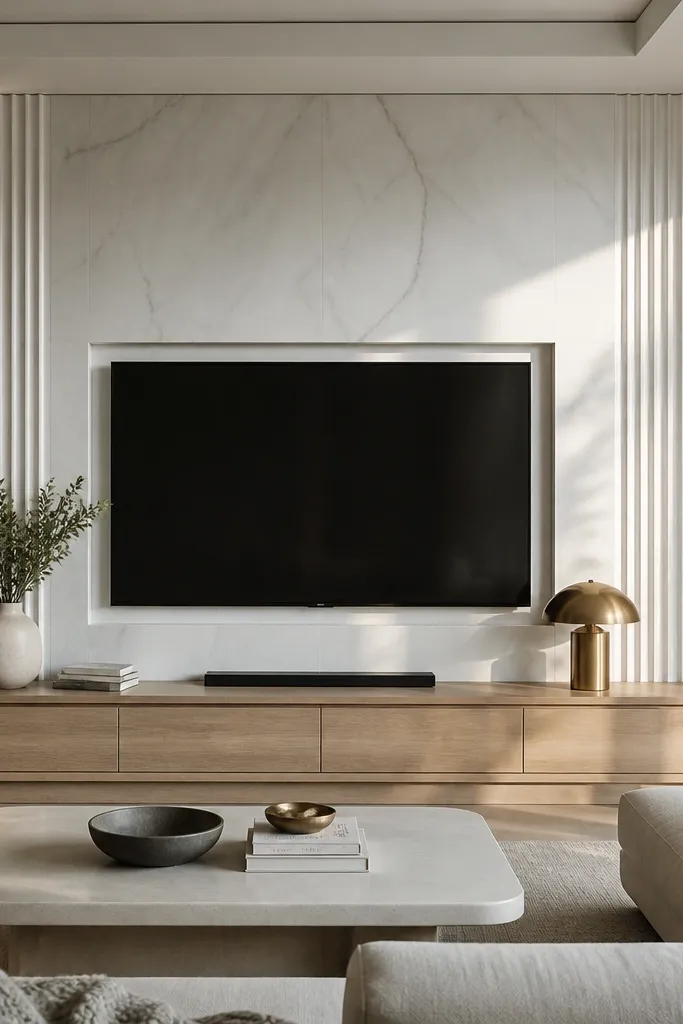
Start by centering a marble rectangle behind the TV, sized so the surround leaves 8-10 inches of stone on each side of the screen. Build fluted panel sections on both sides that are about 12-16 inches wide each, with flutes running floor-to-ceiling or at least from above the console to near the TV top. Add warm LED strips along the inner edges where the fluted sections meet the marble so you get a soft glow line. Mount the TV and console so the console sits aligned with the bottom edge of the marble rectangle. Style the console with a slim wood tray and a pair of tall, simple vases in off-white.
This one works because it adds texture without changing the color story. The fluted side sections catch light in tiny shadows, so the wall looks layered even if your marble is simple. I pick white marble with gentle gray veins here because the fluting already brings pattern. It suits people who want luxury but don’t love busy veining — the texture comes from the flutes, not the stone.
AvoidDon’t choose a marble with dramatic veining if you’re doing fluting. It looks busy fast.
Good to knowIf your fluted panels are off by even a little, the shadows look uneven. Use a laser level before you screw anything in.
10. Marble TV Wall With Hidden Cable Door Under Console
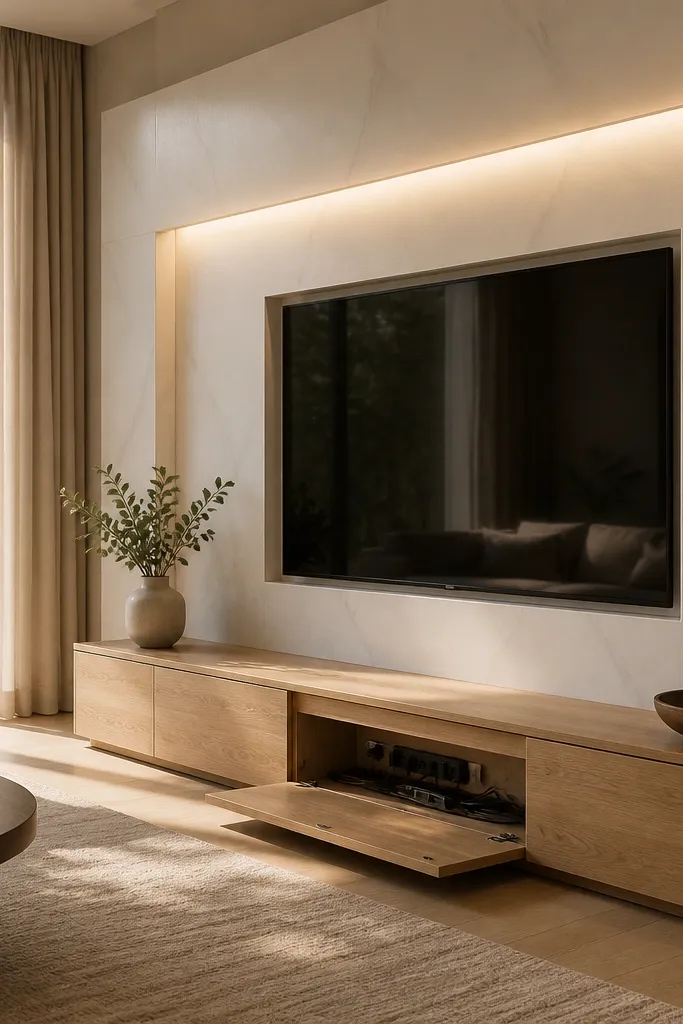
Start by planning the console depth first. Leave at least 6 inches behind the front panel so you can mount a power strip and cable organizer without bending wires. Install the marble surround with a simple border and recess the TV by about 1/2 inch. Add the warm LED strip in the top channel and set it so it washes the wall, not the TV screen. Build or buy a console with a concealed hinge door or magnetic access panel under the center section, then route cables through the back and through a single low access point. Finish by using cable ties and a labeled power strip so future changes don’t turn into a mess.
Luxury looks clean, and cable clutter is the enemy. This design keeps the marble aesthetic while solving the real-world problem of devices and power strips. I use a white marble-look surround with a recessed TV opening and a warm top LED strip for that soft glow. Under the console, the storage door hides everything — your eyes never land on cords or messy power bricks. It’s ideal if you have a lot of gear: game consoles, soundbars, streaming boxes, and a router.
AvoidDon’t rely on a loose cord loop behind the TV. It shows when you pull the TV out for servicing.
Good to knowLabel every device cable at the back of the console with masking tape and a marker before you close panels.
11. Two-Tone Marble: White Center With Gray Outer Border
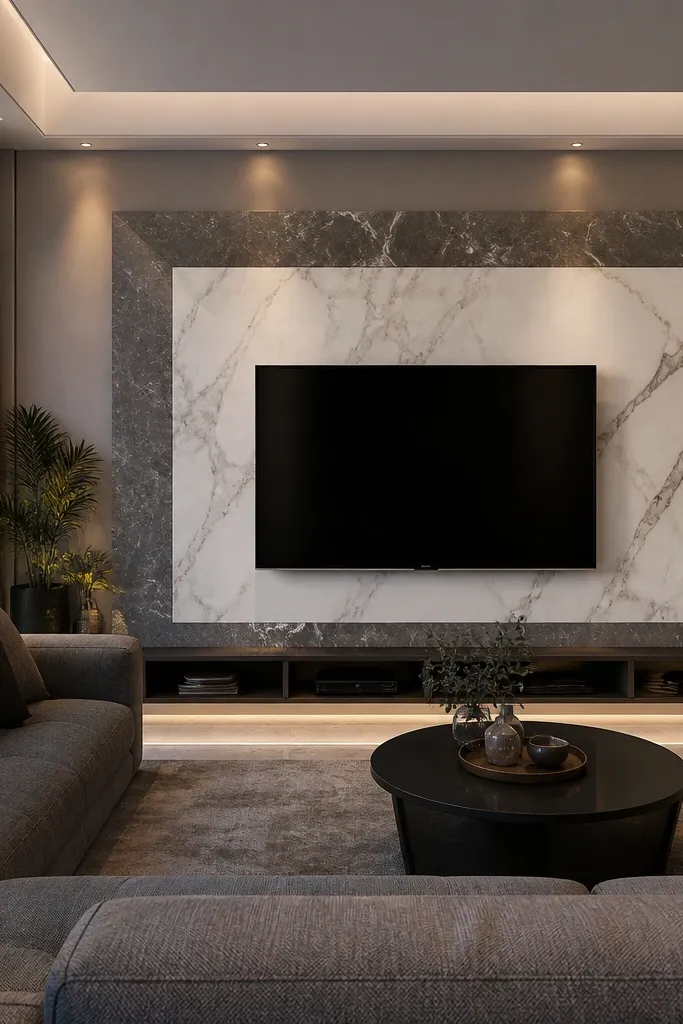
Two-tone marble makes the TV area look engineered. The white center keeps the room bright, while the gray outer border adds contrast and makes the TV feel framed like a piece of art. I use this in living rooms with gray sofas, stone floors, or cool-toned walls because it ties the palette together without turning everything matchy. The border thickness is the trick — too thin and it looks accidental, too thick and it feels heavy.
Start by selecting two marble-look porcelain finishes: one white with light gray veining for the center, and one gray with calmer movement for the border. Build the center panel to the TV size plus 12-14 inches total extra width on each side. Add the gray border around it with a thickness of about 2 inches, and keep corners crisp. Recess the TV area slightly so the border creates a layered step. Install warm LED backlighting inside the inner edge, then mount a low console in white oak or light walnut to keep the palette balanced.
Match the veining direction in the center panel so it flows behind the TV instead of stopping awkwardly at the edges.
Don’t pick two marbles with wildly different veining scales. It looks like you mixed samples at random.
12. Marble Waterfall Edge Media Unit With TV Center
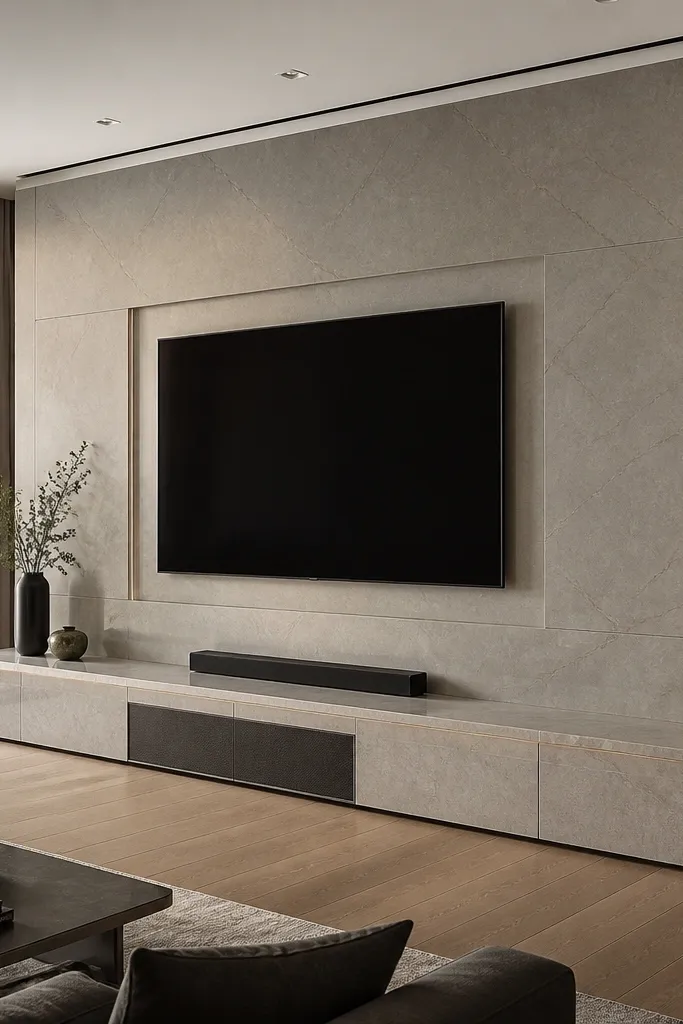
Start by picking one marble-look for the wall that has soft veining and a matte finish. For the media unit, choose a marble-look with a controlled gloss so the waterfall edge reflects warm light. Install the wall surround with a simple recessed rectangle for the TV and keep the border narrow. Build the media unit so its top aligns with the bottom edge of the TV frame, then add the waterfall front panel that overhangs by about 1-2 inches. Add small warm LED spots in the ceiling line aimed at the media unit top and the underside of the TV surround. Style the unit with minimal decor — two books stacked flat and one sculptural object at the center.
This design is for people who want the TV wall to feel like a single built-in piece. The waterfall edge on the media unit is what makes it look custom, because it creates movement in the lower half. I pair a matte marble-look wall with a slightly shinier waterfall edge surface so you get contrast without harsh glare. It flatters rooms with cream rugs and light wood because the glossy edge looks like stone tabletops, not like plastic.
AvoidDon’t make the waterfall edge too wide. Overdoing it makes the whole wall look bulky.
Good to knowMeasure your soundbar depth before the waterfall edge goes in. You need clearance or you’ll end up cutting after install.
13. Marble Slab TV Wall With Hidden Storage Rail
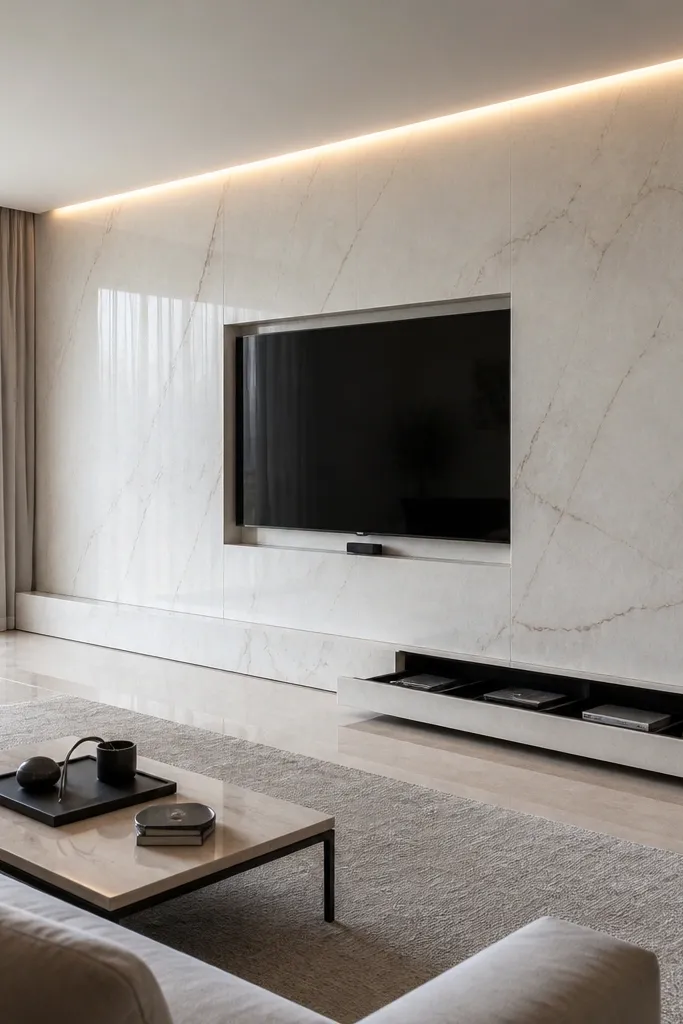
Start by installing the marble slab section and keeping seams aligned behind the TV area where they’re least noticeable. Recess the TV by about 1/2 inch and leave a narrow border around the opening. For the lower storage, install a concealed rail system inside a slim cabinet base that sits behind a front panel so it looks floating. Keep the cabinet depth around 16-18 inches so you can fit consoles and discs without removing the back. Add the thin LED strip in a channel so it runs uninterrupted across the top border. Style the visible top of the console with a single tray and a framed print.
This is the luxury setup for people who hate visible storage yet need real space. The marble slab gives you the high-end look, and the hidden storage rail keeps the lower area clean. I use a white marble-look slab with a simple recessed TV opening and a thin LED line along the top to keep the focus on the stone. The hidden rail is the difference between “pretty” and “actually livable.”
AvoidSkip fully enclosed cabinets for gaming consoles. Heat buildup makes fans loud and shortens device life.
Good to knowIf you’re hiding storage, add ventilation. I drill small holes behind the cabinet and use a cable pass-through so devices don’t cook in a closed box.
14. Marble Corner Wrap TV Wall for Open-Plan Rooms
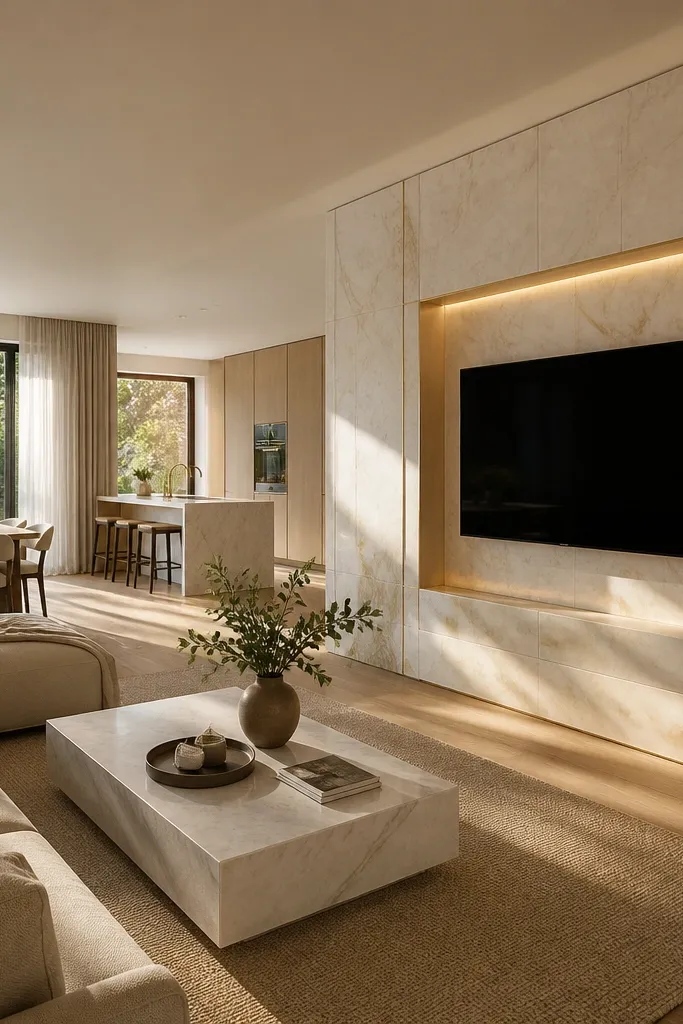
Start by measuring the corner line and deciding how far the wrap goes. I usually wrap 18-24 inches onto the side wall so it reads as intentional, not random. Install the marble-look panels continuously from the main wall around the corner, keeping the veining direction consistent across both surfaces. Create a simple recessed TV opening with a narrow border. Add a warm LED strip in the corner channel so light follows the wrap edge. Place the console centered on the main wall, leaving 2-3 inches of clearance from the side wrap so the corner line stays visible.
In open-plan rooms, a standard straight TV wall can look like an island. Wrapping marble around the corner makes the TV area feel like part of the architecture. I use this when you have sightlines from the kitchen or dining area, because the marble wrap keeps the look consistent from multiple angles. Warm LED in the corner line makes the stone look deeper, and the console stays grounded with matching materials like walnut or light oak.
AvoidDon’t wrap too far if your side wall has windows. It can feel like you’re covering light sources.
Good to knowUse the same grout color across the wrap. A different grout tone ruins the clean luxury look in corner lighting.
15. Micro Beveled Marble Tiles TV Wall With Recessed Frame
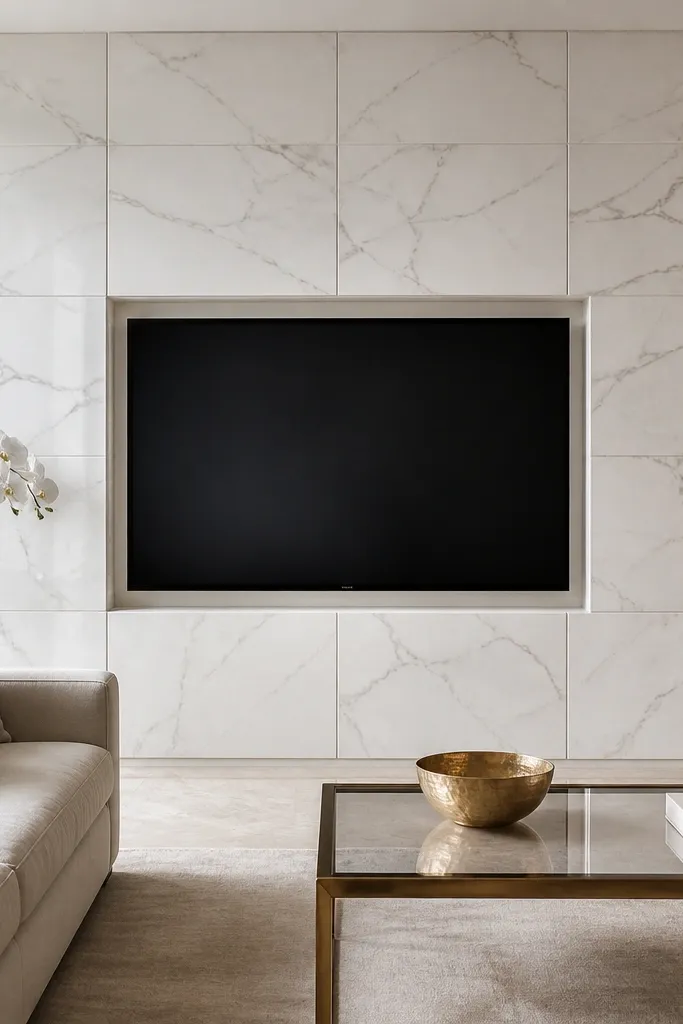
Start by planning the tile layout so the TV center sits on a grout line you like. Set marble-look tiles with micro bevels in a grid that stays aligned to a laser reference line. Build a recessed frame around the TV opening using a thin stone trim or metal edge, leaving a 1/2 inch set-back so the tile texture doesn’t look busy around the TV. Add warm LED lighting in a channel above the frame and use a diffuser cover. Finish by grouting with a color close to the veining base tone so it disappears into the marble look. Style the area with a slim console and two matching textured decor pieces like ribbed ceramic.
If you want marble texture without a single huge slab, micro beveled tiles give you the same luxury read. The tiny bevels catch light and make the wall look dimensional even when the room lighting is flat. I use this in bathrooms-adjacent or high-traffic areas because tile systems handle wear better than some panel installs. The recessed frame keeps the TV area crisp and gives your eye a clean boundary.
AvoidAvoid thick, dark grout. It turns the wall into a pattern instead of a marble feature.
Good to knowDry lay 2-3 rows around the TV before you grout. It helps you control where veining lines hit the screen edges.