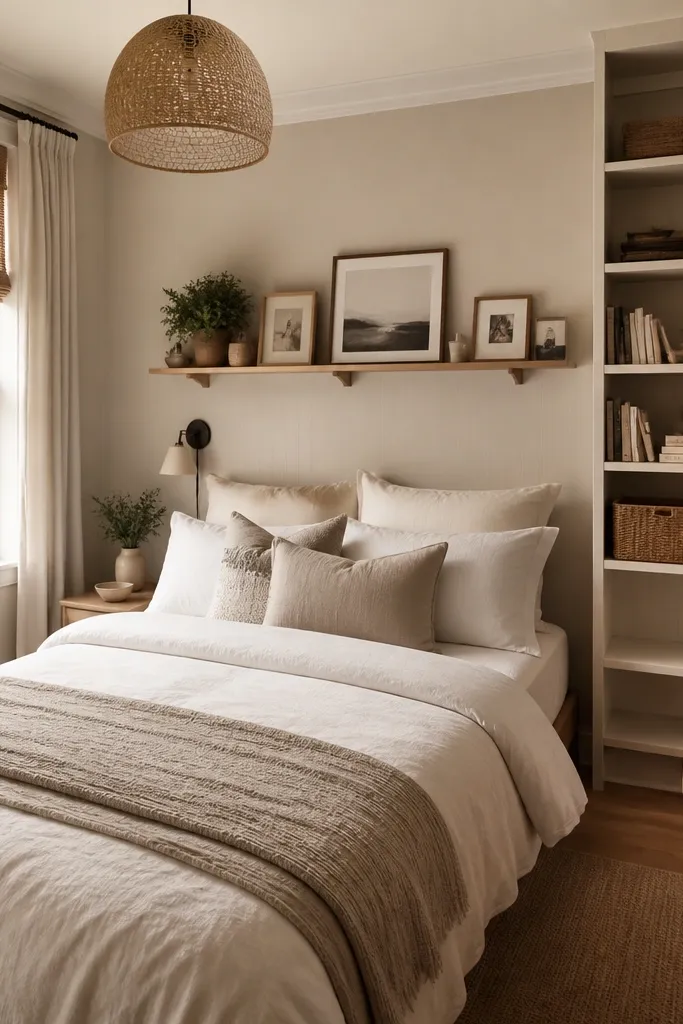
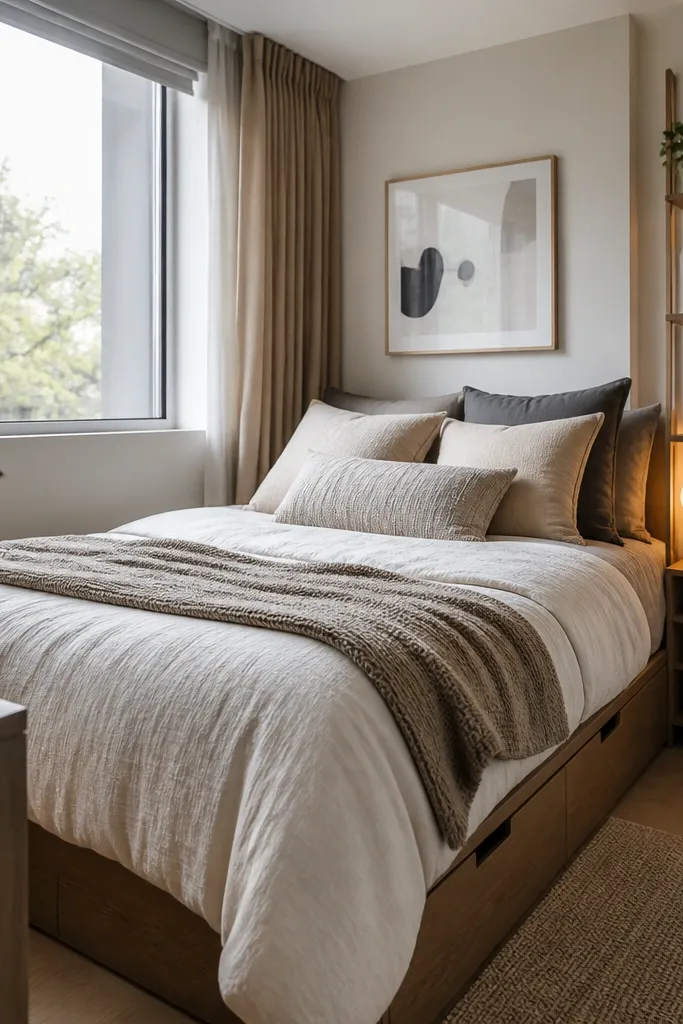
1. Swap a small lamp for a 16-inch shade that hits the right height
I used to place whatever lamp I found first, even when the shade looked “cute” but sat too low. After I replaced one with a shade around 16 inches wide and centered it on a taller base, the room instantly looked staged. The light hits the bedding and wall instead of just the nightstand, which makes the whole corner feel warmer. This works best when your bed is king or queen and you want that hotel glow without adding more furniture. It also flatters most skin tones because warm light (2700K) makes undertones look natural instead of washed-out.
Start by measuring your bedside table height and aim for the top of the shade to sit about 2 to 3 inches below your seated eye level. Choose a shade width roughly equal to the nightstand top — if your table is around 18 inches wide, a 16-inch shade looks right. Then swap the bulb to a 2700K warm white and test it for 10 minutes — you want the light to look amber, not blue. Finally, add one small tray on the nightstand so the lamp base has a clear “landing zone” visually.
If you can only change one thing, change the bulb temperature first, then adjust shade height.
Avoid tiny shades that sit low — they create a harsh hotspot and make the bed look darker.
2. Make the rug big enough that the bed's front legs sit on it
The before version of my room looked fine in photos but wrong in person because my rug was too small. Once I sized it so the front legs of the bed sat on the rug, the bed stopped floating and the whole floor plan looked deliberate. For a queen, that usually means a 8x10 rug if your room allows it, or at least 6x9 with careful placement. This is especially flattering if you have a darker wood floor — the rug becomes the “frame” that warms up the space. It also makes the room feel bigger because the eye stops at the rug edge instead of getting distracted by bare floor.
Start by pulling your tape measure from the back edge of the bed to where you want the rug to end, aiming for 6 to 12 inches beyond the sides of the bed. Then place the rug so the front legs land on it — adjust by shifting the rug 2 to 3 inches at a time until it looks balanced. If you have a low-profile bed, go slightly bigger because the visual weight is lower. Finish by adding rug pads so it lays flat and doesn’t curl at the edges.
Good to knowDo a “standing check” by walking across the rug — if it feels like a border instead of a floor, it’s too small.
AvoidDon’t center a too-small rug perfectly — perfect symmetry with the wrong size still looks cheap.
3. Rebuild bedding with a duvet that actually reaches the bed edges
I used to buy duvet covers that fit the mattress but didn’t cover the sides cleanly, so the look read “unfinished.” After I switched to a duvet cover that drops to the bed edge and added a proper blanket at the foot, the bed looked tailored. Choose a duvet in crisp cotton percale or a smooth sateen — percale looks more structured, sateen looks softer and glossier. This works for almost every body type and style because the bed becomes the focal point, not the clutter of mismatched layers. It also photographs well because the folds fall in consistent lines rather than bunching at random.
Start by stripping the bed and measuring the mattress height plus the drop you want — for most beds, you want 1 to 2 inches of duvet over the edge. Then insert the duvet so it’s centered and the corners sit squarely, not twisted. Fold the top edge back about 6 inches, then add the pillows so shams are fully visible. Finally, place a throw at the foot or drape it over one side with a fold that lands around the middle of the mattress.
If your bed looks flat, add a second pillow layer: two standard plus two Euro shams behind, in matching fabric.
Avoid duvet covers that are too short — the gap on the sides ruins the whole look.
4. Hang curtains at the ceiling for taller walls
I had my curtains mounted right above the window for years, and the room always looked shorter. When I moved the rod up close to the ceiling and extended it 6 to 10 inches past each window side, the walls instantly looked taller. Linen panels in oatmeal or warm cream bring softness without turning the room into a beige blob. This works especially well if you have low ceilings or a small bedroom, because the vertical line does the heavy lifting. It also makes the space feel calmer because the light diffuses through linen instead of punching through thin sheers.
Start by measuring from the ceiling height you want down to the floor — for a bedroom, I like 1/2 inch above the floor for a clean break, or a slight puddle if the fabric is heavy. Then mount the rod so it sits higher than the window trim by 4 to 8 inches and extends beyond the window by 6 to 10 inches. Choose panels that are wide enough to stack — aim for 2x the window width in total fabric. Finally, use simple rings or clips and steam the wrinkles so the folds look intentional.
Good to knowIf you can see the rod brackets from the bed, raise the rod a little more and widen it.
AvoidDon’t hang curtains at window height — it shrinks the room every time.
5. Paint one wall a warm greige and keep trim crisp white
I thought I needed to paint everything to make a difference. What actually changed the vibe was painting just the headboard wall in a warm greige and keeping trim bright white. That contrast makes the bed feel grounded and makes daylight look better on the walls. Warm greige works well if your floors are oak, walnut, or medium brown — it doesn’t fight the undertones. This is also forgiving for different skin tones in photos because the wall doesn’t cast a cool tint on people.
Start by testing two warm greiges on the accent wall — paint a 2-foot by 2-foot section and look at it at morning light and evening lamp light. Then mask trim carefully and use painter’s tape along the baseboard and around outlets. Apply two coats of the accent color, letting it dry fully between coats. Finish by painting trim and ceiling in a crisp white that reads clean, not yellow.
Good to knowIf your room gets north light, lean a touch warmer with the greige so it doesn’t go flat.
AvoidDon’t pick a greige that looks purple or too gray in daylight — it will fight your bedding.
6. Replace a mismatched dresser with one long bench for styling space
A cluttered dresser can make a bedroom feel busy even when it’s “organized.” After I swapped my heavy dresser for a long bench, I gained a better styling surface without visual overload. A bench also makes the space feel more open because it’s lower and gives the eye a clean line across the room. This works great if you like to style with objects — books, a vase, a tray — because you can keep it to three items and rotate them seasonally. It also flatters smaller rooms because you lose bulk while keeping function.
Start by measuring the bed width and choosing a bench that is about 60 to 70 percent of the bed length. Pick a fabric that matches your bedding palette, like oatmeal boucle or a textured linen. Then center the bench at the foot of the bed with 10 to 14 inches of clearance from the bed edge if you need walkway space. Style with a long tray, one vase, and one book stack, keeping all items within the tray footprint.
Use a bench cover or a throw that matches your throw color so everything ties together.
Avoid placing a tall mirror or tall decor next to a bench — it makes the foot of the bed feel crowded.
7. Use a mirror with a thin brass frame placed opposite the window
I used to hang mirrors randomly and wonder why the room never felt brighter. When I placed a tall mirror opposite the window, it pulled daylight across the bed wall and made the room feel larger. A thin brass frame adds warmth without overpowering wood tones, especially if your lamp base or hardware is brass too. This is a win for bedrooms with limited natural light because the reflection changes the lighting pattern all day. It also makes the room feel more polished because the mirror acts like a second focal point.
Start by standing where your bed headboard sits and mark the spot on the wall opposite the window where the mirror will reflect the window frame. Choose a mirror height that places the center around eye level when you’re sitting up in bed. Hang or lean it so the frame is straight and not tilted — use a level. Finally, keep the mirror area tidy: one small plant or a single framed print near it looks intentional.
Good to knowIf your mirror reflects a messy corner, shift it 6 inches left or right before you commit.
AvoidDon’t choose a thick, dark frame if your room already has heavy wood furniture — it can feel too bulky.
8. Create a headboard look with a fabric panel instead of a full bed upgrade
I wasn’t ready to replace my bed frame, but I wanted the “finished” look of an upholstered headboard. Adding a fabric panel to the wall gave me the same effect without changing the whole bed. Pick a medium-weight fabric like performance linen or a tightly woven cotton twill in light gray or stone, then add a subtle border so it looks custom. This works well if your current headboard is low or your wall behind the bed is blank. It also flatters your bedding because the textured background makes patterns look richer.
Start by measuring the space behind the bed from floor height to where you want the headboard top, usually 48 to 54 inches for a queen. Then build a simple frame using foam board or MDF and wrap it in your fabric, pulling tight on the back. Attach the panel to the wall using picture-hanging anchors so it sits centered behind the mattress. Finish by centering two matching pillow shams and adding a single wall sconce or a lamp so the panel gets soft side light.
Good to knowUse a fabric with a visible weave — smooth satin fabrics look cheap in bedroom lighting.
AvoidAvoid stapling fabric onto a flimsy panel — it will sag in the middle and ruin the look.
9. Replace overhead clutter with two wall shelves for books and calm
When your bedside surfaces are crowded, your whole room looks chaotic even if everything is “in its place.” I moved storage to two small floating shelves and kept the nightstands mostly clear. The result is a cleaner visual line and better breathing room around the bed. Choose warm wood shelves or painted white shelves depending on your trim, and keep the styling to a small stack of books plus one object. This works best for bedrooms where you need reading space but don’t want extra furniture. It also makes the room feel more intentional because vertical surfaces are used in a controlled way.
Start by deciding shelf height: place the lower shelf so it sits around the top of the nightstand, then place the second shelf about 10 to 14 inches above it. Then anchor into studs if possible, or use proper drywall anchors rated for the shelf weight. Style each shelf with one tall item, one flat item, and one small accent — keep the total number of objects per shelf to 3 or 4. Finally, keep book spines facing outward and rotate them so the colors match your bedding palette.
Good to knowIf you hate dust, use a shallow shelf and glass-front candle holders instead of open trinkets.
AvoidDon’t fill shelves to the edges — it reads like clutter instead of design.
10. Make your bed look fuller with a 3-layer pillow stack
The before version of my bed looked thin because I had just two pillows and a random throw. When I added a three-layer stack, the bed instantly looked more plush and styled. I like Euro shams in a solid fabric behind standard pillows, then a smaller accent pillow on top in a subtle pattern. This works for most bedrooms because it adds height without adding more furniture. It also makes your bedding look expensive because the lines are structured and repeatable.
Start by placing two Euro shams behind the bed pillows, aligned so the seams sit straight. Then place two standard pillows in front, pressing them together so there’s no gap in the middle. Add one smaller accent pillow on top, centered, with a fabric that complements your duvet color. Finish by tucking the top edge of the quilt or blanket slightly so the pillow stack doesn’t float on bare sheets.
Good to knowUse pillow inserts that are slightly overfilled so the corners stay crisp.
AvoidAvoid lumpy inserts — they make the whole stack look sloppy.
11. Hang art as a set using the 57-inch rule from the floor
I used to hang one big print too high and another too low, and the bed wall looked off even though the art was pretty. When I used the 57-inch rule for the art center, the placement looked balanced with the bed and ceiling height. For most bedrooms, that means the center of the artwork sits about 57 inches from the floor. The trick is to hang as a set even if the frames are different sizes — consistent alignment makes the wall feel designed. This works especially well if you’re nervous about painting because art gives you impact without committing to color.
Start by measuring from the floor to the top of your bed frame and decide where your eye naturally lands when you sit up. Then mark the center point of the art at about 57 inches, adjusting by 1 to 2 inches if your ceiling is unusually high or low. Use a level and painter’s tape to outline the final placement before drilling. If you’re using two pieces, keep the gap between frames consistent and align the top edges so it looks intentional.
Good to knowIf your frames are glossy, choose matte art or use anti-glare glass so lamp reflections don’t ruin the look.
AvoidDon’t center art based on the bed width alone — center it based on eye level.
12. Use a quilted coverlet in the same tone family to soften contrast
Hard contrast looks great in theory, but it can feel harsh in a bedroom when everything is the same color temperature. I fixed that by adding a quilted coverlet in the same tone family as the duvet — warm white with oatmeal, or greige with stone. The quilting adds texture so the bed doesn’t look flat, and it also makes the room feel warmer at night when you’re under lamps. This works for people who want a calm, not overly patterned look. It also flatters rooms with wood furniture because quilting bridges the gap between lighter linens and darker wood.
Start by choosing a coverlet that is one shade darker than your duvet, not two shades — you want a gentle gradient. Place it across the bed so it reaches the sides and drops to the mattress edge. Then fold a throw over the side of the bed so it sits on top of the coverlet, not on bare sheets. Finally, keep pillow fabrics in the same tone family and vary only the texture: cotton, linen, or a woven knit.
Pick coverlets with visible stitch lines — you’ll see the texture even in low lamp light.
Avoid thin, flat coverlets that wrinkle — they make the bed look underdressed.
13. Add a bedside tray so cords and small items look planned
My cords used to creep out from behind the lamp and I blamed the room for looking messy. What fixed it was a simple tray — it creates a boundary where “small stuff” lives. A wooden tray with a warm finish looks good next to brass and natural wood nightstands. This works for bedrooms where you need to charge devices but don’t want a visible spaghetti cord situation. It also photographs cleaner because the tray gives the eye one tidy cluster instead of scattered items.
Start by measuring the usable area on your nightstand — leave at least 2 inches of space around the lamp base. Then route the charging cable along the back of the nightstand and bring it toward the tray corner. Place the tray so it sits under the lamp’s light so the area looks intentional. Add only three items: a candle or small lamp accessory, a small dish, and one charging device — keep it tight.
Use a short cable and a Velcro tie — long cables always look messy even when they’re “hidden.”
Don’t use a tray that’s too large — it becomes another clutter surface.
14. Choose a nightstand with drawer fronts that match your dresser hardware
Mismatched hardware is one of those quiet problems that makes a room feel unfinished. When I matched nightstand drawer pulls to the existing dresser hardware, the room looked more cohesive even without changing furniture. Brass hardware is forgiving because it pairs with warm whites, greiges, and most wood tones. This works best when your bedroom has one main wood finish and you want it to feel consistent. It also flatters the room’s color palette because hardware ties the metal accents together.
Start by looking at your current hardware finish in daylight — brushed brass, polished nickel, or oil-rubbed bronze. Then buy matching pulls in the same finish and measure the hole spacing on your nightstand drawers. Swap the pulls using a screwdriver and keep the old screws if the threads match. Finally, style the nightstand with one metal accent item like a brass picture frame or lamp base so the hardware isn’t the only metal in the scene.
Good to knowIf you can’t match perfectly, match the undertone — warm for brass, cool for nickel.
AvoidAvoid mixing warm brass with cool silver in the same bedroom — it reads like an accident.
15. Use a standing garment rack with a linen cover instead of a visible pile
A pile at the end of the bed makes the whole room look like it’s in progress. I replaced the pile with a standing garment rack and draped a linen cover over it so it looks styled, not messy. The black rack gives contrast against light walls, and the linen cover keeps the visual noise low. This works for bedrooms where you change outfits frequently or have a small closet. It also makes your room feel calmer because the “mess” has a dedicated spot.
Start by choosing a rack width that fits your corner — leave 8 to 12 inches from walls so it doesn’t feel cramped. Then install the rack and hang your daily clothes on matching hangers, ideally in a single color. Add a linen cover that matches your curtains or duvet palette. Finally, place the rack near the closet for convenience and keep the floor clear by using a small basket underneath.
Good to knowUse clip hangers for bulky items like hoodies so they don’t droop and pull the cover out of shape.
AvoidDon’t leave the rack uncovered if your closet space is cluttered — the mess still shows.
16. Build a simple gallery wall with frames all the same width
I tried mixing frame sizes once and ended up with a wall that looked busy instead of curated. What changed everything was keeping the frame width the same and varying only the art content. Matte black frames look sharp against warm whites and greiges, and they don’t compete with bedding patterns. This works well when you have a dresser wall you don’t want to paint. It also flatters small bedrooms because consistent frame geometry gives structure without adding furniture bulk.
Start by choosing a set of frames with the same width, then pick art with a consistent color temperature — warm neutrals or cool monochrome. Lay the frames on the floor in the exact arrangement you want, then measure the total width. Mark the top corners on the wall and hang using a level — spacing should be even, so use a ruler for the gap. Finish by keeping the gallery centered above the furniture and stepping back to check at eye level.
If you mix sizes, keep the frames aligned by their centers — it looks intentional even with different art dimensions.
Avoid random spacing — uneven gaps are what make gallery walls look like a last-minute collage.
17. Replace a bulky bed skirt with a tailored dust ruffle in the same color as trim
Bed skirts can look dated when they’re too long, too thick, or too dark. When I replaced mine with a tailored dust ruffle in crisp white that matches trim, the bed looked lighter and cleaner. The dust ruffle hides the under-bed clutter, but it doesn’t swallow the bottom half of the room. This works especially well if you have a smaller bedroom or lower ceiling because it reduces visual bulk. It also flatters wood floors because the white edge adds contrast without feeling heavy.
Start by removing the old skirt and measure the bed’s underside height from the mattress edge to the floor. Then choose a dust ruffle in a crisp white that matches your baseboards or trim paint. Attach it so it hangs straight along the bed frame, with a clean hem that stops just above the floor or barely touches. Finally, keep the floor area under the bed clear except for one sealed storage bin if needed.
Steam the ruffle after washing so it falls in crisp lines instead of curling at the edges.
Don’t use a long, pleated skirt — it drags the bed down visually.
18. Turn the bedside into a landing zone with a wall-mounted charging shelf
I changed my own bedside by putting the charging clutter up and out of sight. A wall-mounted charging shelf gives you a clear “place to set things” without turning the nightstand into a junk island. I like the effect because the phone looks intentional, not like it’s been dropped mid-scroll. It also makes mornings faster since everything lives in one spot at the same height every day. The shelf works best when it matches the wood tone of the nightstand so the area feels calm instead of busy.
First, pick a shelf that’s about 10-12 inches deep so a phone and a small alarm clock fit without hanging over the edge. Mount it so the bottom of the shelf sits around 54-58 inches from the floor, which puts it near eye level when you’re sitting up in bed. Second, install a recessed power strip inside the shelf and run the cables through a drilled hole at the back so you only see the braided cords for a short drop. Third, add a shallow tray on top for the phone, earbuds case, and any lip balm so small items don’t drift across the nightstand. Finish by setting one rule — only items that belong on the tray live on the shelf.
Use a single cable color for both sides of the bed so the visual noise stays low. If your outlets are far, buy a 6-foot braided extension cord and route it behind the nightstand instead of letting cables snake across the floor.
Avoid mounting the shelf too high — if you can’t reach it without leaning, you’ll keep charging on the bed instead.
19. Replace the bed's "floating" look with a built-in-style frame using a fitted valance panel
I hate how many bedrooms look “unfinished” under the bed. A fitted valance panel makes the bed feel built-in, even when you’re not changing the frame. The key is the clean top edge and the way it hides storage legs, cords, and the messy under-bed gap. When you match the valance to your duvet tone family, the bed reads as one unit instead of three separate pieces. This also helps if your bed frame is low or oddly shaped — the panel covers the weirdness.
First, measure from the floor to the top of your mattress and then subtract 1 inch for the panel height so it doesn’t drag. Cut or order a panel that covers the full width of the bed plus 1 inch on each side for a neat drape, and add a stiff header strip so the top edge stays straight. Second, attach a hidden mounting rail or Velcro tape to the bed frame so the panel can be removed for cleaning. Third, use a contrasting trim line at the top edge — even a 1/2-inch crisp white piping makes the panel look intentional. Press the fabric with steam before hanging so the fold lines disappear.
Choose linen or cotton twill over jersey — it holds a straight edge and doesn’t cling to the bed frame when you sit up.
Don’t use a stretchy knit valance — it sags after a couple weeks and the top edge starts looking wavy.
20. Make one corner do the heavy lifting with a window seat look using a deep cushion and a narrow book ledge
My favorite bedroom upgrades are the ones that create a second “room” inside the room. A window seat look makes the corner useful, and it changes how the whole space feels at night. I built mine with a deep cushion so you can actually sit — not perch — and it stops the corner from feeling empty. The narrow book ledge adds a visual rhythm without crowding the floor or nightstand. This setup also hides the awkward corner reality — the place where you usually end up with a chair that never gets used.
First, measure the window bay depth and build a cushion that’s at least 16 inches deep, with a thickness of 4-5 inches so your back feels supported. Use foam that’s firm enough to hold shape, then wrap it in a cotton duck or linen blend cover with a zipper for removal. Second, add a narrow ledge above the cushion — about 6 inches deep — so books sit upright and don’t spill into the sitting area. Third, if you need storage, make the cushion hinged to lift and add a thin fabric-lined tray underneath for blankets or extra pillows. Finish with a rug that runs under the cushion so the seat doesn’t float.
Good to knowPut the cushion cover in a tone that matches your duvet, then use one darker throw pillow in the same direction as your wall color to tie the corner to the rest of the room.
AvoidSkip a shallow cushion — a 10-12 inch depth turns the “seat” into a place you avoid.