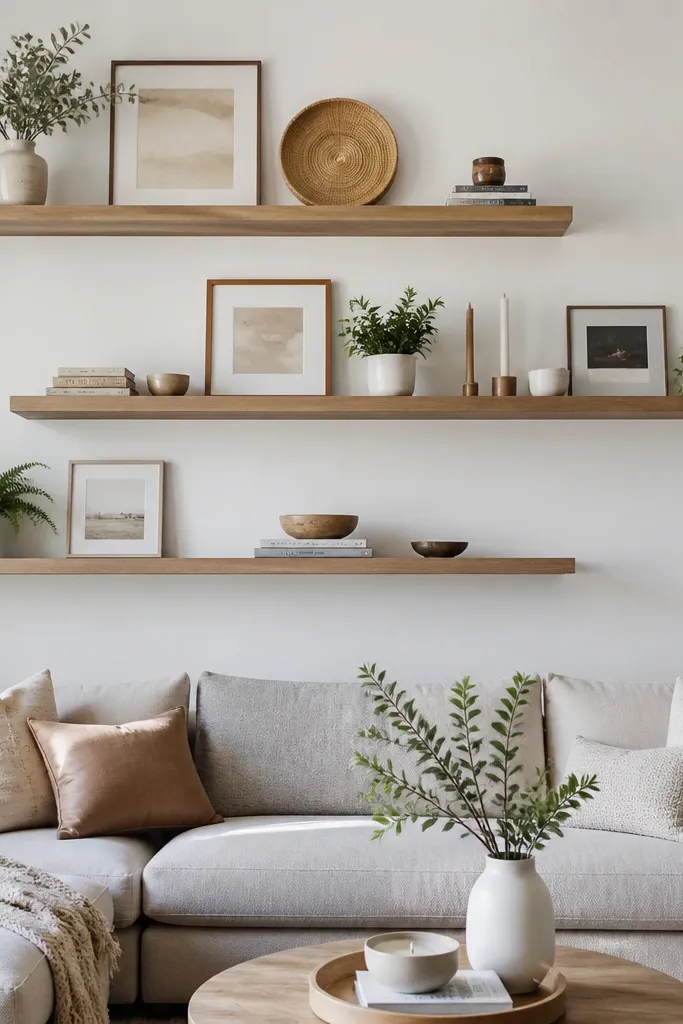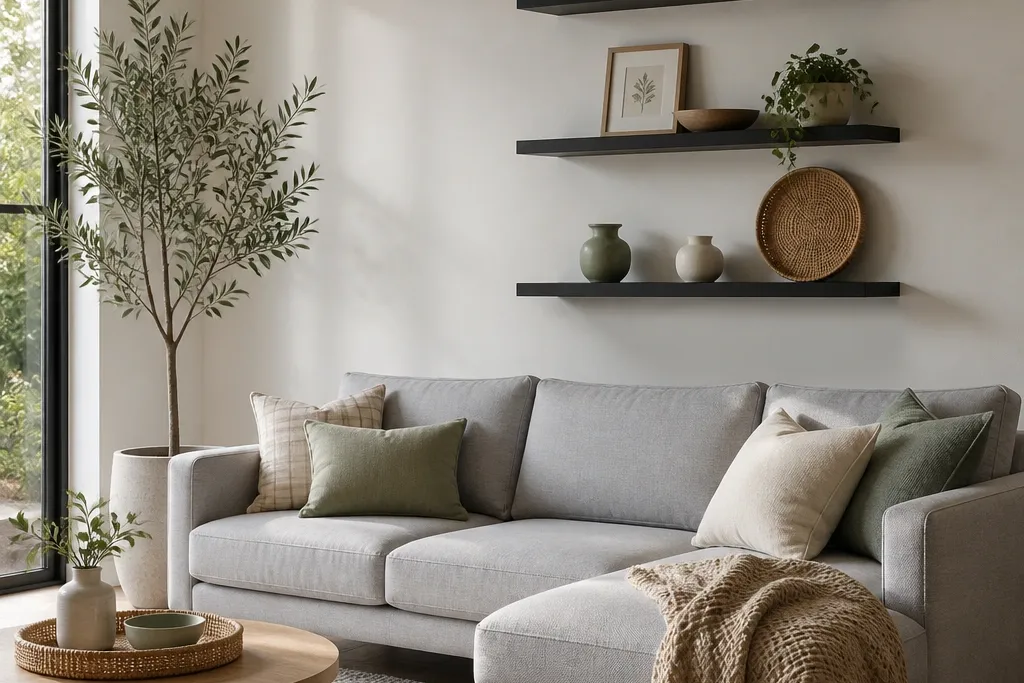

1. Sofa-Back Rise with Two Matte White Shelves
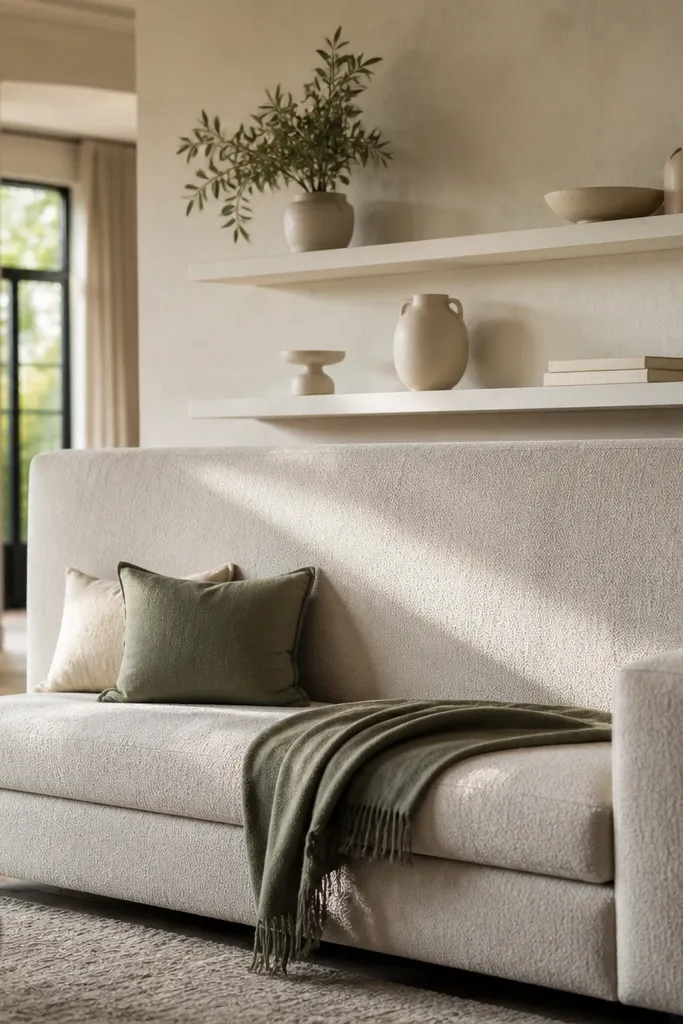
This setup works when your sofa back is tall enough to block the lower wall, because the shelves rise into the space your eyes already travel. I like matte white here because the room is bright and the matte finish keeps the decor from looking glossy or plastic. The color palette stays mostly off-white and soft green, which flatters warm undertones in wood floors and makes skin tones look calmer in photos. The styling principle is height banding: the vase hits the upper band, the books sit low, and the plant gives a small mid-height break.
Start by marking the shelf centerlines so the bottom shelf edge lands around 20 inches above the sofa back. Install the top shelf first, then use a level to set the second shelf so the gap between shelves is about 10-12 inches. Place the vase on the top shelf either slightly left or right of center, not dead center. On the bottom shelf, stack three books with spines facing out, then add the brass candle holder at the front corner and the plant toward the opposite side. Finish by keeping all items within the shelf’s back third so nothing visually “falls” forward.
Good to knowIf your wall is busy with paint texture, matte white looks smoother. Wipe the shelf edges with a microfiber cloth before styling so the white stays crisp.
AvoidAvoid centering every item — it makes the shelf look like a showroom mock-up.
2. Book-Lover Run with Three 8-Inch White Shelves
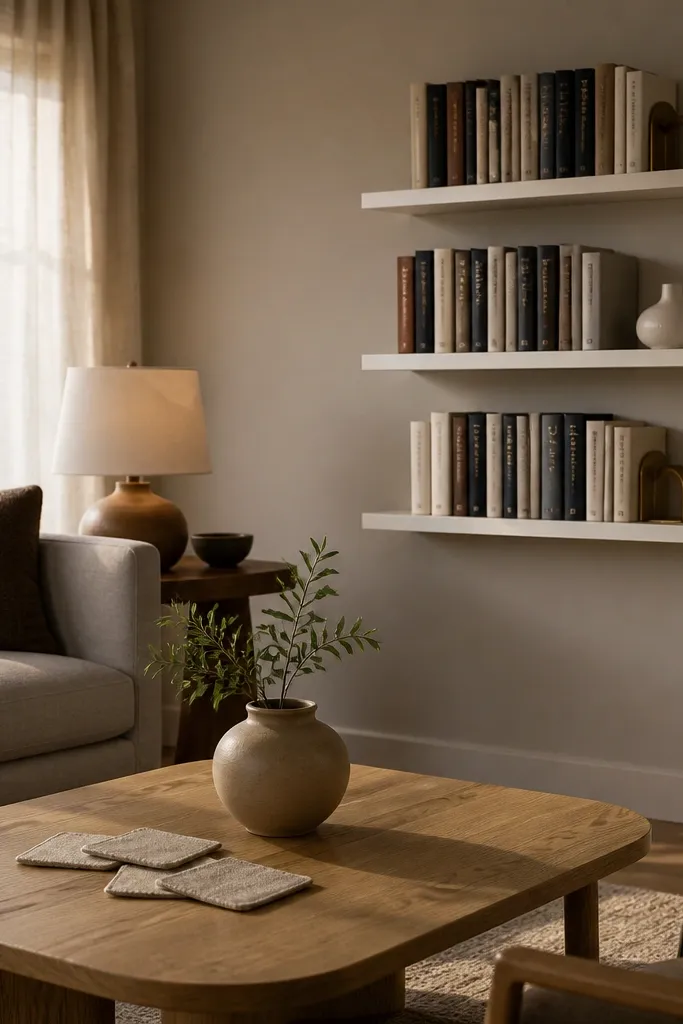
Go deeper when books are the star. This is the setup I use in living rooms where the coffee table has lots of texture but the wall looks empty. White shelves make the book covers look intentional instead of cluttered, and the deeper 8-inch depth gives you room to arrange books without them hanging off. For people with cooler undertones (think navy, charcoal, or cool gray walls), the crisp white keeps everything clean. The styling principle is staggered book towers: not every stack should be the same height.
Start by choosing shelves around 8-10 inches deep so spines and book corners have space. Mark three shelf levels so the bottom shelf sits about 6 inches above the tallest console decor. Install using the stud finder — I drive two screws per bracket point for a tight fit. Style the bottom shelf with one tall book stack at one end and a shallow bowl near the center; then add a small picture frame on the other end. On the middle shelf, build two stacks that differ by about 2-3 inches in height, then place a small plant between them. Keep the top shelf simpler: one larger frame or bowl plus one slim stack.
Use bookends only on the bottom shelf; on higher shelves, let stacks lean slightly for a more natural look. Mix cover finishes by pairing matte covers with one glossy spine.
Don’t let the book stacks touch the wall — leave a 1/2-inch gap behind for a cleaner line.
3. Black-and-Brass Contrast with Satin White Shelves
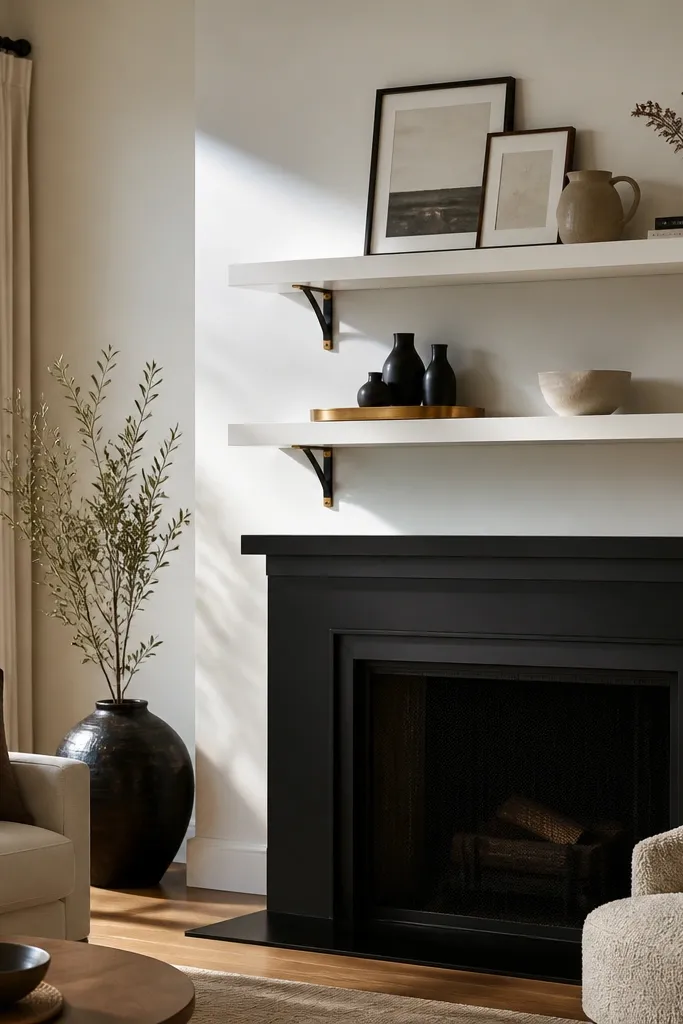
Satin white is perfect when you have black accents already, because it adds a soft glow next to dark metal. I’ve used this in rooms where the fireplace is the focal point but the wall above it looks empty. The brass tray warms up the contrast and makes the black frames look deliberate, not random. This palette flatters warm skin tones and wood finishes, and the dark plant keeps the whole look grounded. The styling principle is repeating metal: brass shows up on every shelf run, black shows up in at least two spots.
Start by installing two shelves so the gap between them is around 12 inches, and keep the lowest shelf about 8 inches above the mantel objects. Use satin-finish shelves so they catch light gently without harsh glare. Place the brass tray on the lower shelf slightly off-center, then add the white candle behind it. On the upper shelf, set two black frames spaced apart and put the plant in the center between them. Finish with a small black object (like a thin vase) at one end so both shelves share a visual anchor. Keep the frames level and align the top edges so the run looks straight.
Wipe brass with a dry cloth so it doesn’t look smudged under indoor light. Choose plant pots that are either pure white or matte black to match the shelf finish.
Avoid mixing silver and brass — it makes the metal accents look accidental.
4. Minimal White Shelves with One Oversized Vase
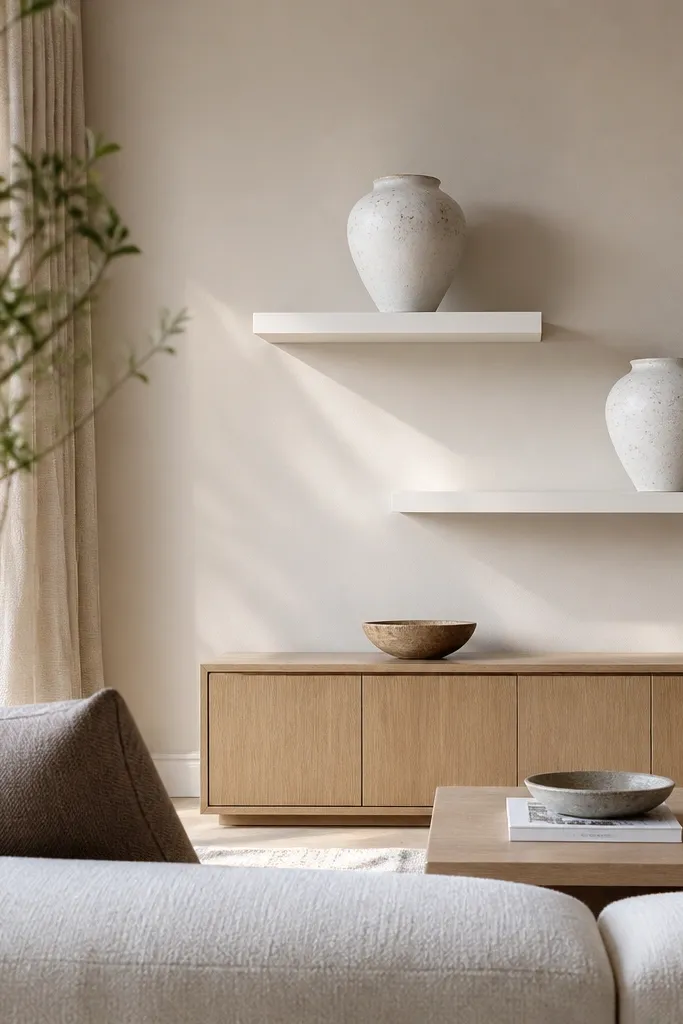
If your living room is already full of art, this is the cleanest shelf styling approach. One oversized vase gives you a focal point that reads from across the room, and it keeps the shelf from looking like it’s trying too hard. White on white works because the vase has texture and shadow lines, not just smooth surfaces. This flatters rooms with light wood floors and beige textiles, because it doesn’t add extra color noise. The styling principle is negative space: leave most of the shelf empty so the one piece can breathe.
Start with a single shelf placed at eye-friendly height: around 56-60 inches from the floor to the shelf top. Use a 7-inch deep shelf so the vase sits securely without looking swallowed. Install into studs with a level — one shelf that’s even slightly off looks worse than a crowded one. Center the vase or place it 2-3 inches off-center for a calmer composition. Add one small candle or candle holder at the front corner closest to the room entrance. Stop there; no extra frames or small clutter.
Choose a vase with ridges or a matte glaze so it holds shadow even in bright daylight. Use a candle in a neutral holder so it doesn’t compete with the vase.
Avoid smooth, identical-white decor — it can disappear into the wall.
5. Three-Shelf Gallery Grid with Color-Blocked Prints
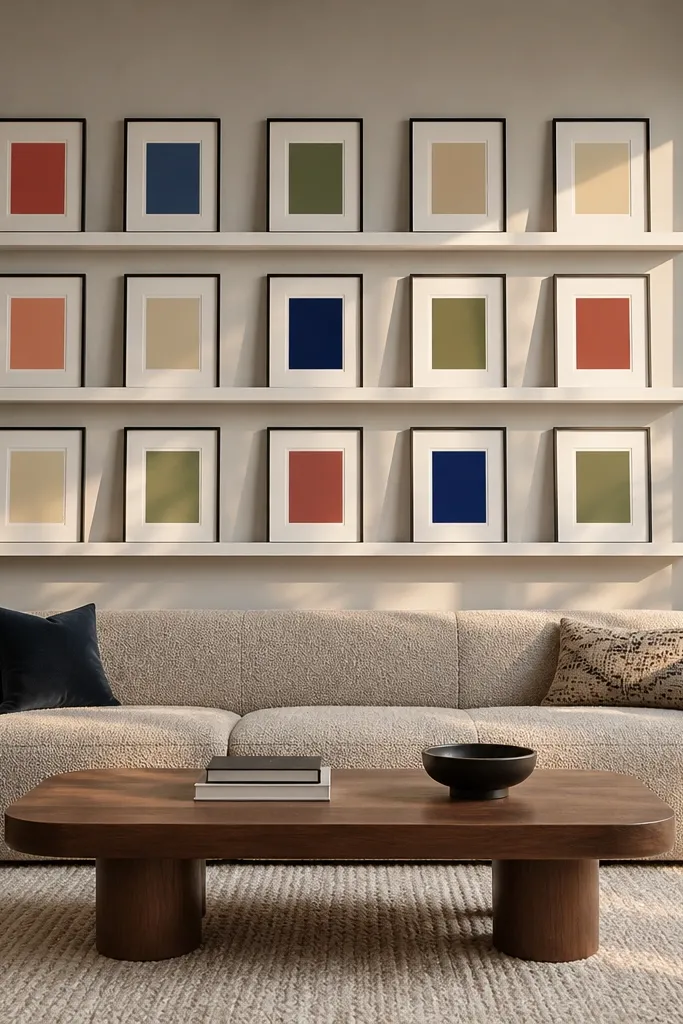
This is for living rooms where you want wall styling that looks curated without buying a whole gallery wall. The frames create a repeating pattern, and the white shelves act like a clean backdrop. I like color-blocked prints because they add punch without turning the room into a patchwork. This works especially well in rooms with muted furniture — think oatmeal sofa, taupe curtains, or light gray walls — because the prints bring energy. The styling principle is grid consistency: same frame size, aligned edges, and equal spacing between items.
Start by choosing frames with the same outer dimensions, even if the art inside varies. Install three shelves so the vertical spacing is consistent: about 10-11 inches between shelf edges. Keep the top shelf slightly higher than you think; aim for the top shelf to sit around 78-82 inches from the floor. Lay out frames on the floor first so you can match spacing. On each shelf, place frames in a line with 2-3 inches between them, then add one small brass object on the far right or left to repeat the metal. Use thin white risers or small clear stands only if the frames need lift for alignment.
Good to knowPrints look sharper when all mats are the same color — I use warm white mats for an inviting look. Use a pencil to mark frame placement before you hang anything.
AvoidAvoid mixed frame sizes on the same shelf — it reads messy fast.
6. Floating Shelves Over Reading Chair with Warm Textiles
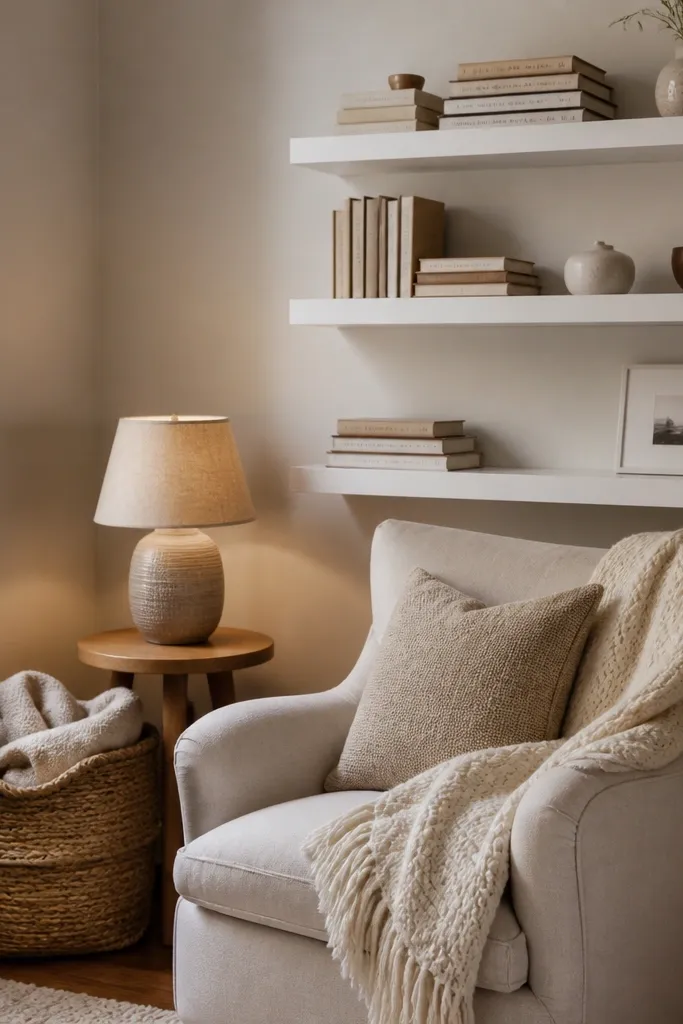
This setup is made for the corner of the room you actually sit in. The shelves bring function to that space, so you’re not balancing books on your lap or storing everything in a bag. The white shelves keep the corner from feeling heavy, while the warm beige lamp shade and woven basket add softness. It flatters people who have warm-toned curtains or rugs because the textiles repeat the same temperature. The styling principle is functional layering: decor plus the items you reach for.
Install two shelves so they sit above eye level when you’re seated. I aim for the bottom shelf about 46-50 inches from the floor, depending on chair height, and the top shelf around 64-68 inches. Place the woven basket on the top shelf near the back wall, then set the lamp so its base doesn’t block the basket. On the bottom shelf, stack two or three books horizontally or spine-out depending on cover colors, then add a ceramic tray to hold a coaster or remote. Put the framed photo on the far side opposite the tray so the shelf doesn’t feel lopsided. Keep everything pushed back so it doesn’t visually steal space from the chair.
Good to knowIf you’re using a small lamp, choose one with a cord you can tuck along the wall behind the shelf. Use a tray with a lip so small items don’t slide forward.
AvoidAvoid putting tall decor right above the chair arm — it looks crowded when you look up.
7. Sculptural Minimal with Three Narrow Shelves
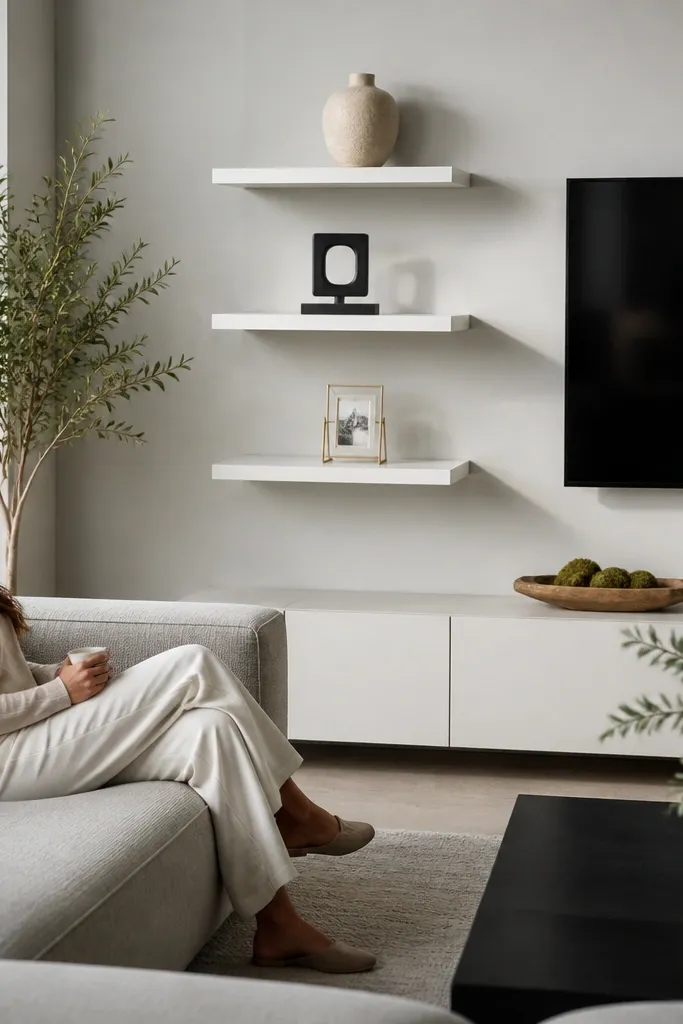
When your room has strong lines — like a modern sectional or a clean TV console — narrow shelves give you a controlled, gallery-like look. The key is spacing: each shelf has one main object so the wall looks intentional, not packed. I like white shelves with a slightly rounded edge because it softens the silhouette of sculptural decor. This works well for rooms with monochrome palettes because the objects provide texture variety. The styling principle is one-object per shelf with a consistent visual rhythm from left to right.
Choose shelves that are about 5.5-6 inches deep so objects sit safely without looking oversized. Mark three shelf levels with about 12-14 inches between them, and keep the lowest shelf around 50 inches from the floor. Install with a level — narrow shelves show tilt immediately. Place the twisting vase on the top shelf, then put the stone-like candle holder on the middle shelf centered. On the bottom shelf, add the framed print and keep it vertical and straight. Leave at least 3-4 inches of empty space around each object so the wall has breathing room.
Use felt pads under candle holders and ceramics so they don’t slip. Pick one texture to repeat across objects, like matte ceramic or stone-like glaze.
Avoid tiny decorations on narrow shelves — they look like mistakes from a distance.
8. White Shelves with Pastel Ceramics and a Small Plant
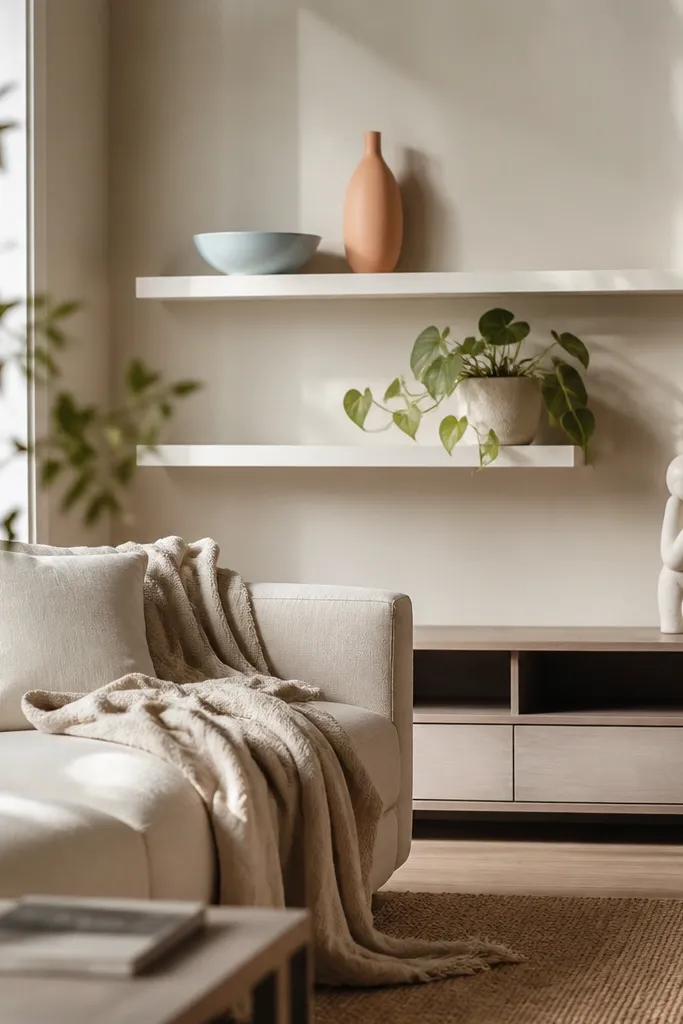
Pastels look dreamy on white shelves because the shelves act like a clean backdrop that doesn’t compete. I’ve done this in a living room that had a lot of cream upholstery and it instantly made the wall feel softer. The pale blue bowl and peach vase add color without turning the room loud. This is great for rooms with warm whites and cream curtains because the pastel temperature stays friendly. The styling principle is color grouping: keep two pastel tones and repeat them in small ways, not across every object.
Install two shelves so the bottom shelf top is around 52-56 inches from the floor. Use a 7-inch deep shelf for ceramics so they sit stable. On the top shelf, place the pale blue bowl toward the left side and add the white frame toward the right, leaving a clear gap between them. On the bottom shelf, set the peach vase near the center back, then add a cream plant pot toward one side and a white tray on the other. Keep the tray empty or with only one small item like a candle to avoid clutter. Step back and check that the plant doesn’t block the bowl from your main seating angle.
Use a neutral tray to anchor the bottom shelf. If your plant pot is cream, match it with a cream mat in one frame.
Avoid more than two pastel colors at once — it starts looking like mixed Easter decor.
9. Monochrome Neutral Styling with Textured Whites
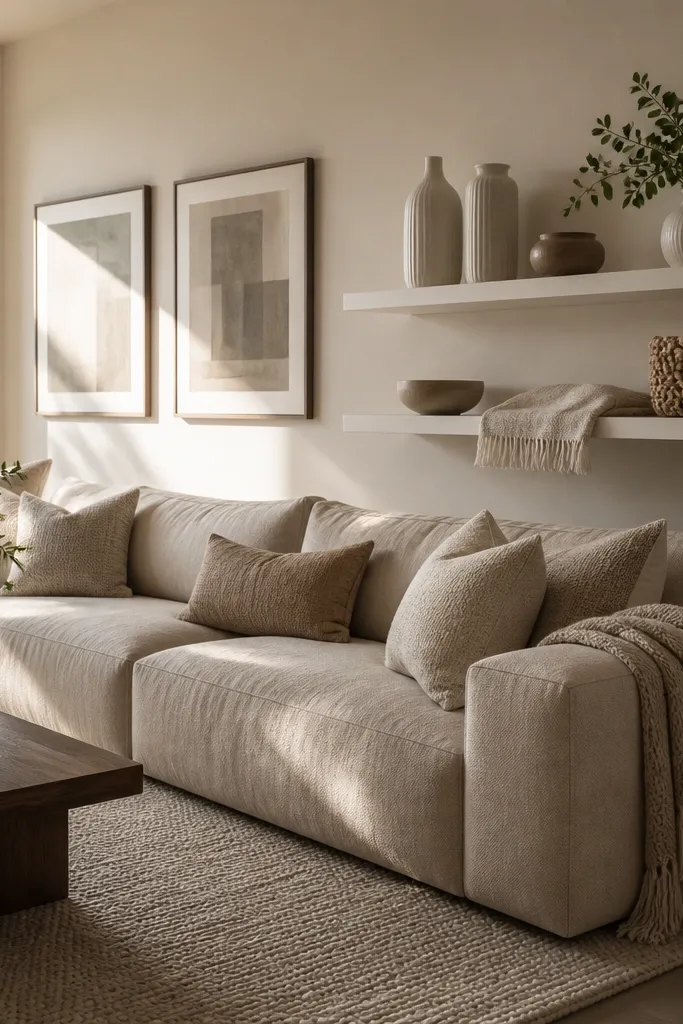
This is the “clean but cozy” version of shelves. The shelf stays white, but the decor isn’t flat-colored. You get texture from ribbed ceramics, linen, and knit baskets, which makes the room feel warmer without adding loud color. I like this when your living room furniture is beige, cream, or oatmeal and you want the wall to match that softness. It flatters most skin tones in photos because it doesn’t introduce harsh color shifts. The styling principle is texture stacking: vary surface finishes more than you vary colors.
Install three shelves with consistent spacing, about 10 inches between shelf edges. Keep the lowest shelf around 48-52 inches from the floor so it sits above ottoman height. On the top shelf, place the ribbed vase and tuck the knit-wrapped basket behind it. On the middle shelf, build a book stack wrapped in a linen cover and set a small black frame upright next to it. On the bottom shelf, add a shallow tray and place the candle or small object centered on the tray. Keep all objects aligned along the back edge of the shelf so the front stays clean.
If your room is very bright, use matte or textured decor so glare doesn’t flatten everything. Use a lint roller on baskets before you set them out.
Avoid shiny white everything — it looks sterile and cheap under warm bulbs.
10. White Floating Shelves with a Hidden Cable Trick
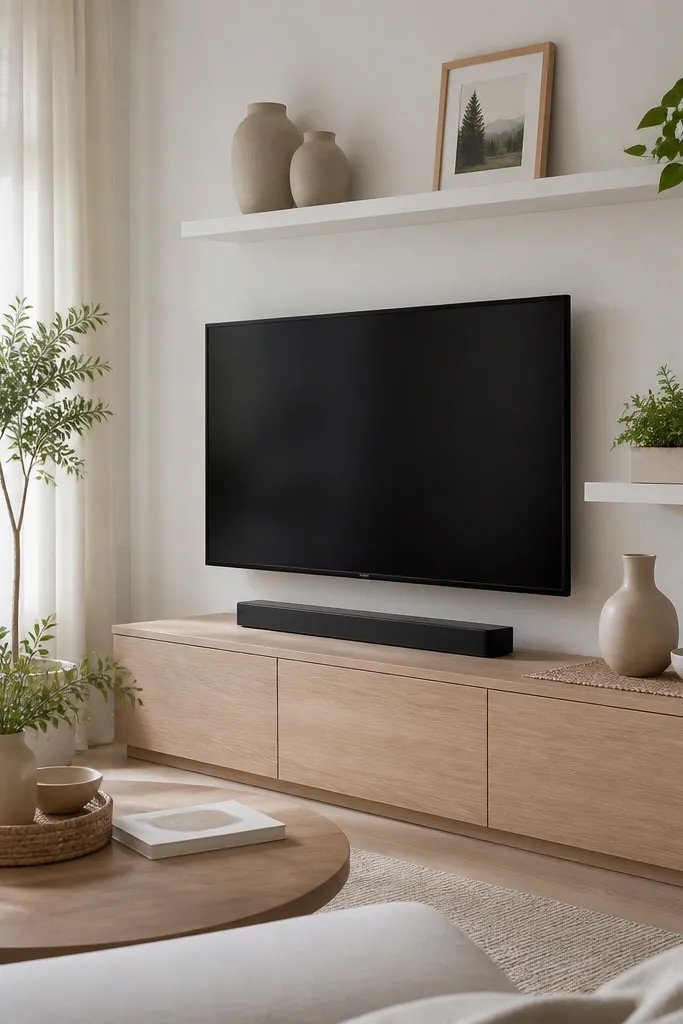
This is the shelf transformation that solves a real problem: visible cords. When you mount shelves near a TV or sound setup, cords can make the wall look unfinished even when the decor is pretty. I use white shelves and keep the cords behind a slim planter or a narrow decor box so they disappear. The look stays airy because the decor is placed forward but the cable management stays hidden. This works best when your living room has media equipment and you want it to blend into the wall. The styling principle is concealment by object placement, not by hiding everything behind a big cover.
Mount the shelves so the bottom shelf has enough clearance for your media cables behind it, usually 3-4 inches of visible wall space between shelf underside and equipment. Install the top shelf first, then run a cable channel along the wall at the shelf height and paint it white to match. Place a slim white decor box or tall narrow planter on the bottom shelf near where the cables come down. Put plants in a line so their bases cover the channel opening. On the top shelf, add a framed photo on one side and a small lamp on the other, keeping both items at least 2 inches away from the area where the cable exits. Step back and make sure the cord never peeks around the object edges.
Use a white cord channel and set it on the wall before shelf installation. If you can, route cords behind the shelf bracket line for extra concealment.
Avoid letting cords hang behind decor without a channel — they show through light gaps.
11. Three Shelves with a Vertical Wood Accent Ladder
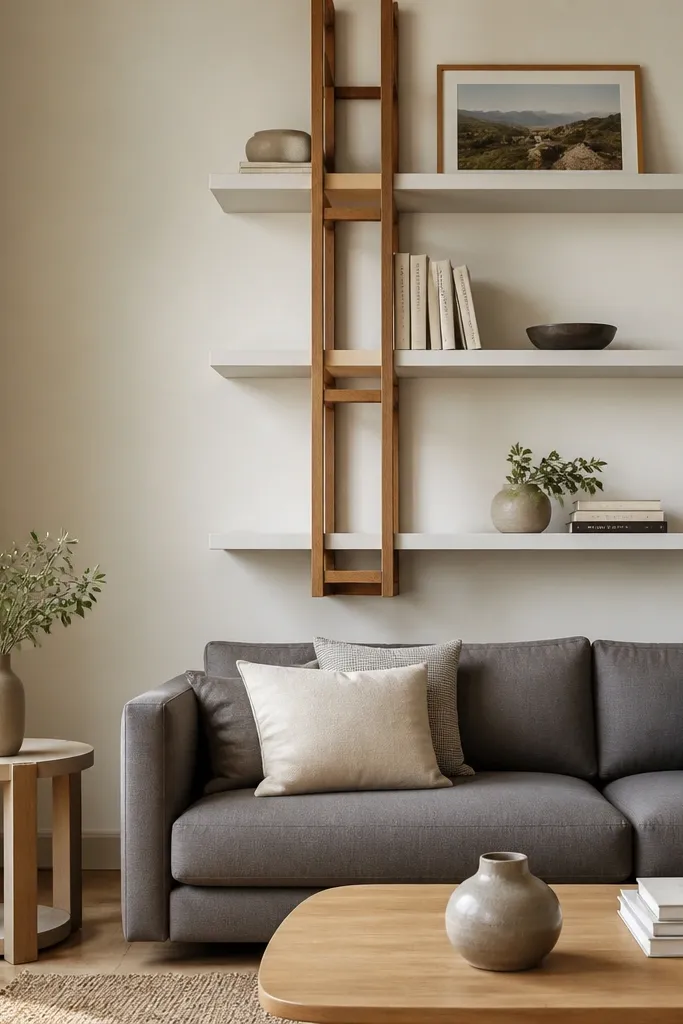
This is a great trick when you want movement on the wall without adding a whole new piece of furniture. The vertical wood ladder adds warmth against the white shelves, and it creates a natural line that pulls your eye up. I’ve used this in rooms with white walls and gray furniture where everything felt too cool. The mix of warm wood and white gives a comforting look that still reads modern. The styling principle is adding one vertical element that breaks the horizontals of multiple shelves.
Install three shelves with about 9-10 inches between them, and keep the lowest shelf top around 50-54 inches from the floor. Choose a wood ladder that fits the space between the shelves and doesn’t touch the wall hard — leave a small gap for stability. Use the ladder as the “center line” and place the main decor pieces around it: vase on the top shelf, tray on the middle, and a framed print on the bottom. Keep vase heights slightly different so the ladder doesn’t look like the only vertical interest. Add one brass tray on the middle shelf and keep it centered to anchor the ladder. Secure the ladder so it can’t tip forward — I use two discreet wall anchors.
Paint or stain the ladder so it matches your wood floor undertone. Use one plant or botanical print to repeat the natural theme.
Avoid a ladder that’s too wide — it blocks the shelf sightline and makes the wall feel cramped.
12. Floating Shelves with a White Shadow-Box Backdrop
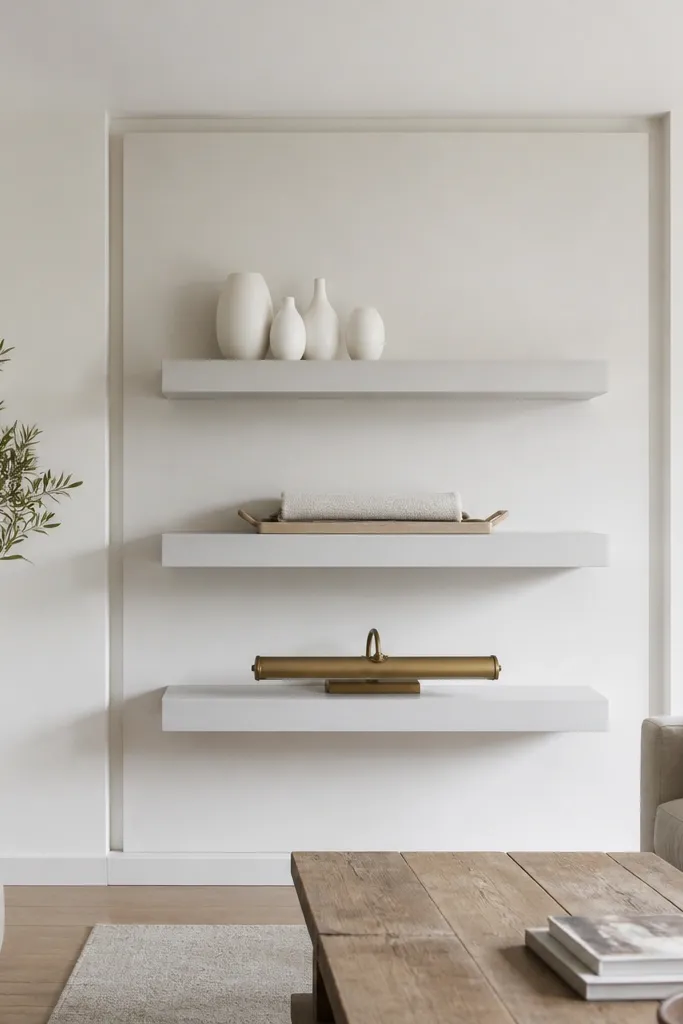
If your wall is flat paint, shelves can sometimes look like they’re floating randomly. A subtle raised panel behind the shelves creates a shadow-box effect and makes the decor look framed even when the items are simple. I love this when you want a clean, expensive look without adding a gallery wall. The raised backdrop also hides slight wall imperfections around anchors. This is flattering in rooms with soft lighting because the shadows add depth. The styling principle is a “backdrop frame” so the shelves are part of a bigger design, not just mounted wood.
Start by installing the raised panel or removable wall molding behind where the shelves will go. Mark shelf centerlines on the panel and ensure the panel is level so the shelves don’t fight it visually. Install two shelves about 10-12 inches apart, with the bottom shelf top around 54-58 inches. Place the mirror on one shelf corner or center depending on mirror size, then add a ceramic bowl on the opposite side. On the bottom shelf, stack books so their spines face out and keep the stack height around the same level as the mirror’s bottom edge. Leave 3 inches of empty space between the main items so the backdrop shadows can do the work.
Use a mirror with a thin frame so it doesn’t overpower the white-on-white look. Keep book cover colors in light gray and cream to match the backdrop.
Avoid dark backdrops under white shelves — they turn the look into a high-contrast clutter zone.
13. Round Mirror + White Shelves for a Soft Entry Feel
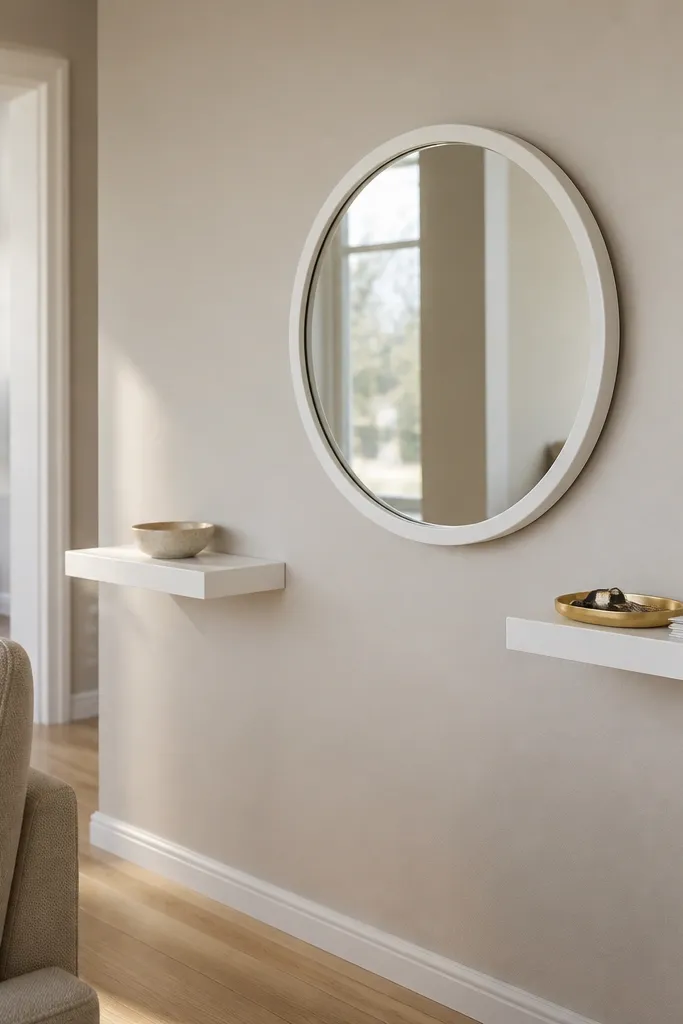
This setup works when you want the living room doorway or entry wall to feel welcoming but you hate bulky tables. A round mirror between shelves bounces light, and the white shelves keep the area tidy. I’ve used this in homes where keys and mail were always piling up and the wall was bare. The soft mirror shape makes the look friendlier than a rectangular frame, especially in narrow hallways. The styling principle is “daily use items in one zone”: keys, a small candle, and a plant share the shelves so the wall stays functional.
Install two shelves so the lower one is about 40-44 inches from the floor, which is reachable for daily use. Place the mirror centered between them, with the mirror’s bottom edge around the midpoint between shelves. On the lower shelf, put a slim key tray on the front edge and a small candle on the far side. On the upper shelf, add a mini plant in a white pot and a small vase or bud vase next to it. Keep the plant height under the mirror center so it doesn’t block reflections. If you have a door nearby, check swing clearance so nothing hits the shelves.
Good to knowUse a tray with a lip so mail doesn’t slide off. Match the tray color to the mirror frame or candle holder metal.
AvoidAvoid tall decor right by the door — it makes the entry feel blocked.
14. White Shelves with Stacked Trays and a Ceramic Pitcher
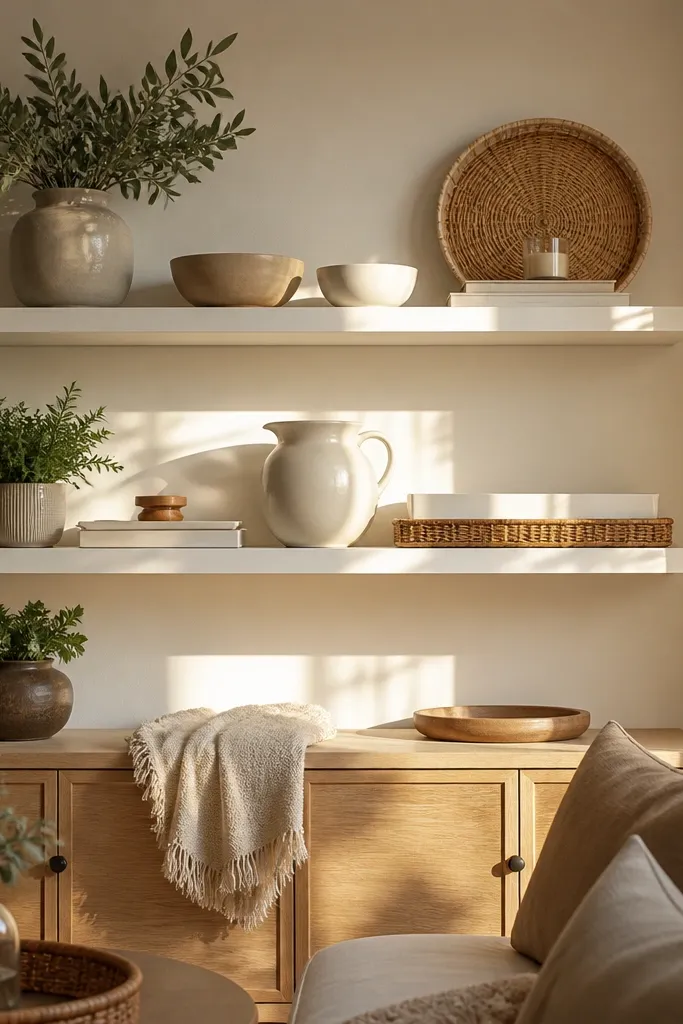
This is a styling approach I learned the hard way when I had shelves that looked “random” because I kept placing single objects. Trays fix that by creating a base layer that holds smaller pieces together. A ceramic pitcher gives you height and shape, while stacked trays create a visual platform. This works in living rooms with neutral upholstery because the ceramics add softness without bright color. The styling principle is layering by base: trays first, then objects on top, so everything looks planned.
Install two shelves 10-12 inches apart, with the bottom shelf top around 56 inches from the floor. On the top shelf, place the ceramic pitcher slightly off-center on the back third. Add one small brass tray near the front corner of the shelf so it balances the pitcher’s weight. On the bottom shelf, stack two trays — one flat, one slightly raised — then add a single book on the tray stack. Place the succulent in a small white pot at the opposite end from the book. Keep the tray edges aligned so the stacked look looks intentional, not like you shoved things there.
Choose trays with similar shine levels. Matte ceramic trays look best with matte white shelves.
Avoid mixing three different tray materials at once — it reads cluttered.
15. Stair-Step Shelves with Graduated Heights
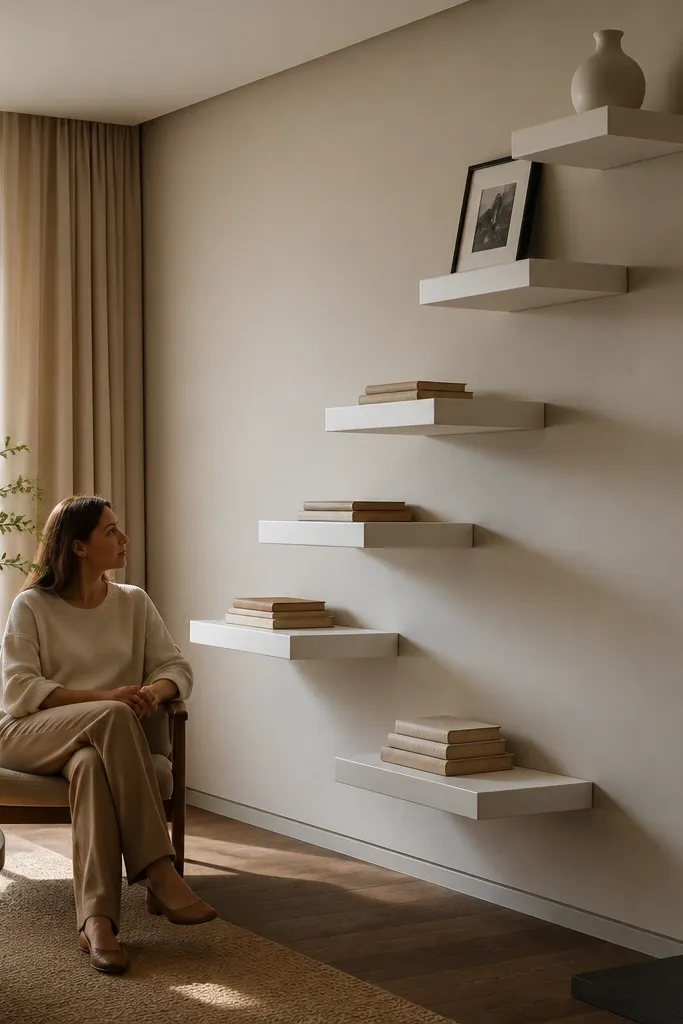
If your wall is narrow or you want a more dynamic look than perfect horizontal alignment, staggered shelves add movement. The stair-step arrangement makes the wall feel like it has depth, even though everything is still white. I used this in a living room where the ceiling is low and straight shelf lines made the wall feel too rigid. Graduated heights also help you avoid crowding because each item gets its own “landing.” The styling principle is graduated scale: tall item up high, medium item mid, small item low.
Use three shelves and set them at slightly different heights, aiming for about 6-8 inches difference between each shelf edge level. The lowest shelf top should still be around 48-52 inches from the floor. Install the middle shelf first, then measure down and up for the other two so everything lands level individually. Place the tall vase on the highest shelf, centered, and keep it at least 2 inches away from the shelf front. Put the plant stand or small lamp on the middle shelf and the framed photo on the lowest shelf. Keep each item centered under its own shelf line so the step effect reads clean.
Use one color family across the items so the stagger doesn’t feel chaotic. I stick to white plus one accent color like sage or black.
Avoid random heights — the look only works when each step is deliberate.
16. Floating Shelves with White Faux Books for Clean Symmetry
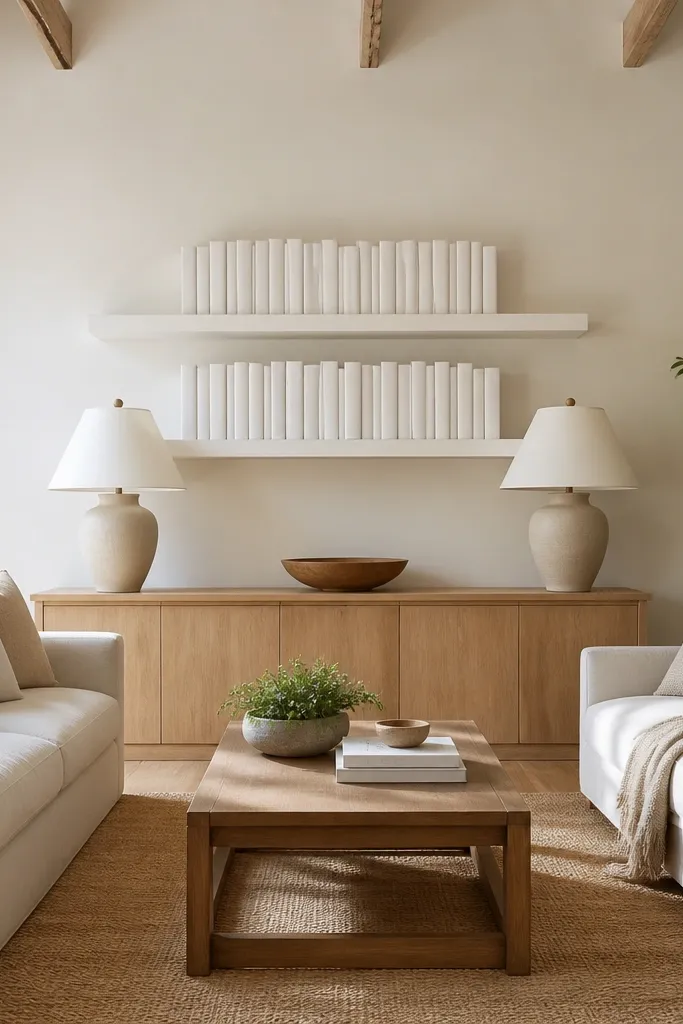
Symmetry is a style choice, not a mistake. When your living room is already balanced — like a matching sofa and loveseat or two lamps on either side — symmetrical shelves look calm and intentional. Faux books help a lot because you can keep the heights even even if you don’t have a real library yet. The white-on-white symmetry also makes small rooms feel more organized. The styling principle is mirrored placement: left and right match, and the center item breaks the symmetry just slightly.
Install two shelves at equal spacing, with the bottom shelf top around 54 inches from the floor. Use a 7-8 inch deep shelf so the faux book stacks sit stable. Place two matching stacks on the top shelf, leaving a small gap for the center sculpture. Keep the center sculpture about 1-2 inches taller than the book stacks so it reads as the focal point. On the bottom shelf, place two matching candle holders on left and right, then set a small framed print in the center. Keep the frame height aligned with the candle holder tops. Step back and check that the left and right stacks look the same from your seating angle.
Good to knowChoose faux books with matte covers so they blend with real decor textures. If you use real books, use them in pairs so heights match.
AvoidAvoid symmetry with mismatched heights — it looks like you tried to copy a photo without measuring.
17. White Shelves with a Tray of Seasonal Greens
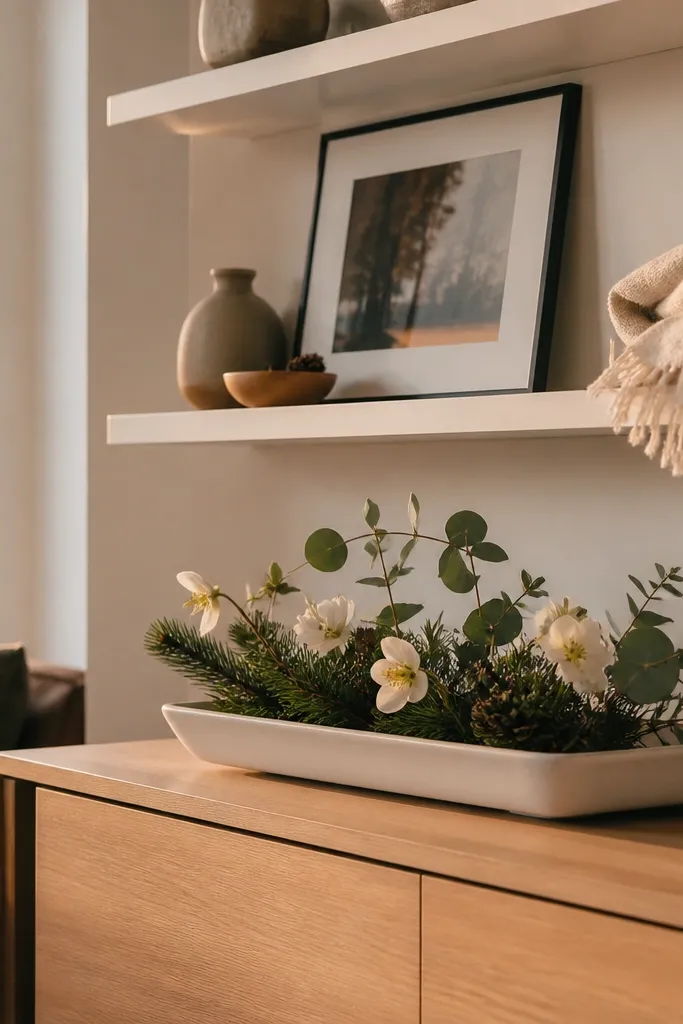
Seasonal decor looks best when it’s contained. A big tray gives you a consistent base so you can swap stems and small ornaments without changing the whole shelf layout. I’ve used this in spring and winter by swapping greenery and adding a single ornament color. The white shelves make the greens look brighter and keep the tray from looking heavy. This works in living rooms with neutral walls and a mix of wood and fabric because it adds life without loud color. The styling principle is “one seasonal zone” so your shelf styling stays repeatable.
Install two shelves with the bottom shelf top around 50-55 inches from the floor. Choose a tray that spans about half the shelf length, usually 10-14 inches depending on shelf size. On the top shelf, place a white framed print at one end and a small vase at the other, keeping the center mostly empty. On the bottom shelf, set the tray toward the back third, then add stems so they fan upward and don’t spill over the tray edges. Place a candle on one corner of the tray and a small ceramic bowl on the opposite corner. Keep everything within the tray footprint so the shelf looks styled even when the season changes.
Good to knowUse floral foam or a small insert inside the tray so stems don’t shift. Swap only the stems, keep the tray, candle holder, and bowl in place.
AvoidAvoid loose stems on the shelf without a container — they look messy fast.
18. White Shelves with Floating Rattan Basket Texture
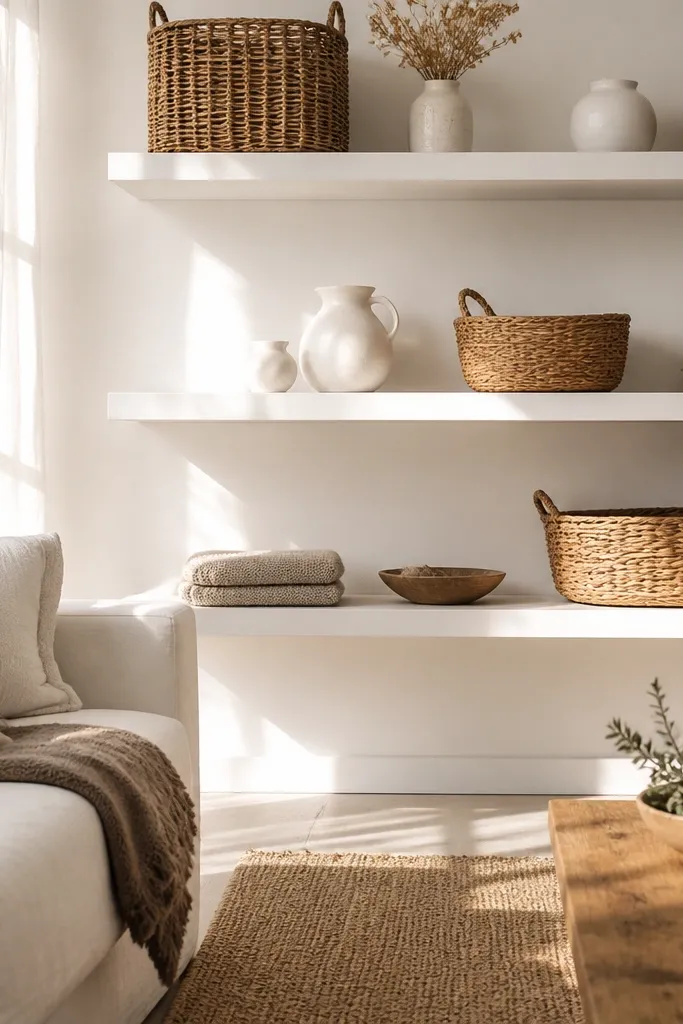
Rattan and wicker add warmth against white shelves, and it looks especially good in living rooms with natural fibers like jute rugs or linen curtains. I used this combination in a home where the wall was painted bright white and the room still felt cold. The baskets soften the lines, and the white shelf keeps the overall look clean. This flatters people who like natural textures but don’t want a full farmhouse theme. The styling principle is pairing one natural texture with one crisp element — the white shelf is crisp, the rattan is warm.
Install two shelves with about 11 inches between shelf edges. Keep the lowest shelf top around 52-56 inches from the floor. Place the rattan basket on the top shelf near the back, then add a small white vase beside it so the basket doesn’t take over. On the bottom shelf, stack two books and set a woven tray in front of the stack. Add a tiny plant in a white pot on the tray or next to it. Keep the plant small so the basket texture stays the hero. Make sure basket handles or weave patterns don’t stick out past the shelf front.
Choose baskets with a light natural finish so they don’t look too dark next to white. Use a lint roller on baskets before placing them — dust shows on weave.
Avoid mixing rattan with black-heavy decor if your room is already dark — it can feel heavy.
19. All-White Shelves with a Single Black Frame and Mirror
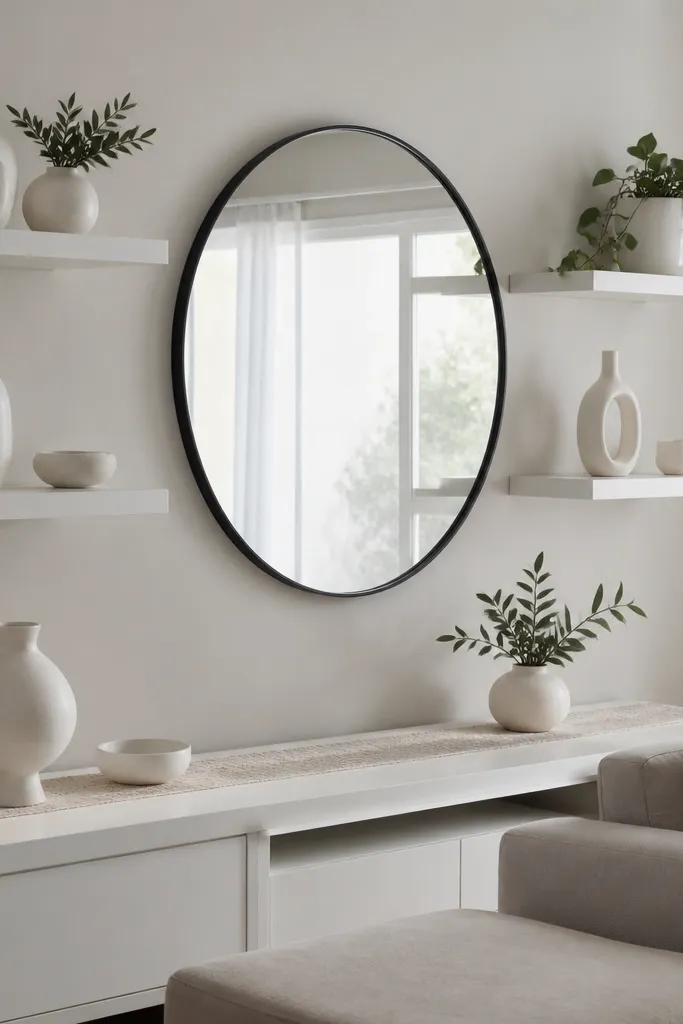
This is the look I recommend when you want white shelves but you don’t want the room to feel like a blank showroom. One black accent gives the eyes a place to land. The mirror adds depth and makes the wall feel larger, especially in rooms with fewer windows. White ceramics keep the palette calming, and the plant adds a hint of living color without fighting the black. This works well for living rooms with white walls and warm wood furniture because black ties the wood and the shelf together. The styling principle is controlled contrast: one black theme repeated across two items, not scattered everywhere.
Install two shelves with the bottom shelf top around 54 inches from the floor. Use a 7-inch deep shelf so bowls and candles sit neatly without crowding. On the top shelf, place the black-rim mirror angled slightly toward the room, then set a white candle holder in front of it. On the bottom shelf, place the ceramic bowl centered and put the black-framed photo on one side with the plant on the opposite side. Keep the plant pot white or off-white so it blends with the shelf. Leave at least 2-3 inches of empty space around the mirror and photo so the black accents stand out.
Angle the mirror just a few degrees so it catches light from your main lamp. Choose one black finish and stick to it — matte black looks best for a softer feel.
Avoid multiple black objects of different finishes — glossy vs matte makes the shelf look inconsistent.
20. White Shelves Over Sofa with a Long Floating Tray
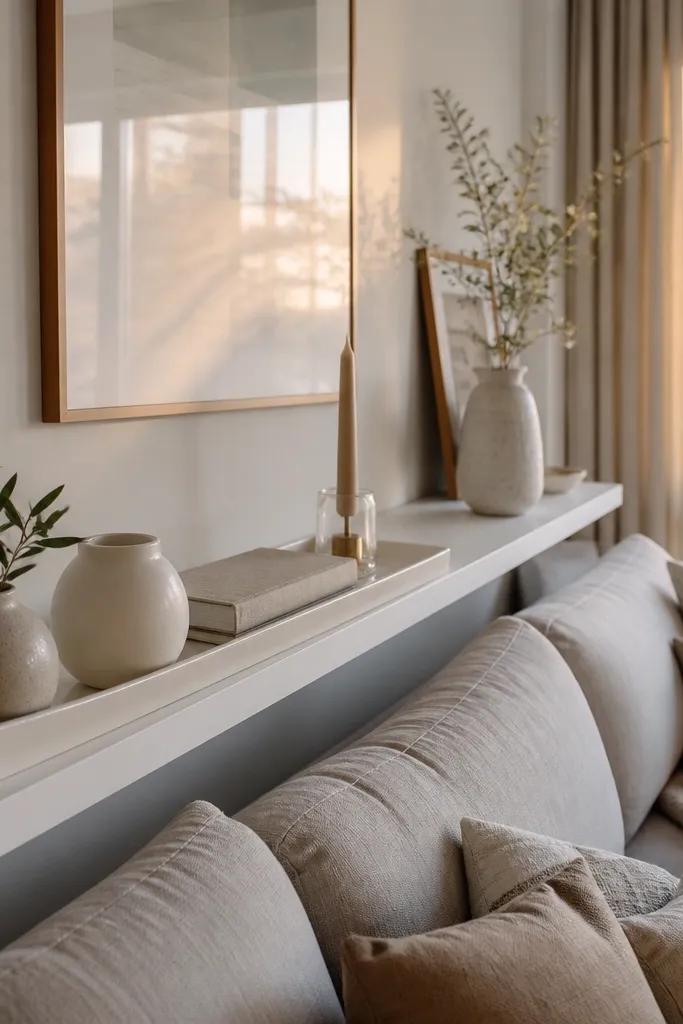
This is my go-to when the shelf line sits above a sofa and you want the wall to look styled but not busy. A long tray makes the shelf look like one organized surface, even if the items inside rotate by season. The white tray also keeps the composition calm and prevents the decor from looking scattered. This works best for rooms with patterned throw pillows because the shelf stays clean and doesn’t compete with fabric. The styling principle is “one long base” plus vertical contrast from a taller vase.
Install the bottom shelf so its top is around 48-52 inches from the floor, then place the top shelf about 10-12 inches above it. Use 7-9 inch deep shelves depending on tray size, and keep the tray about two-thirds of the shelf length. Put the long white tray toward the back third of the bottom shelf so it anchors the space. Inside the tray, line up three items: candle near one end, small bowl near the middle, mini plant near the other end. On the top shelf, place a tall vase centered and add a small framed print at one side. Keep the framed print’s height about halfway between the vase top and tray items.
Use a tray with a slight lip. It makes everything feel contained and stops small items from sliding forward.
Avoid mixing tray sizes across shelves — it makes the layout feel accidental.