1. Towel Bar Mug Rail + Tray Station
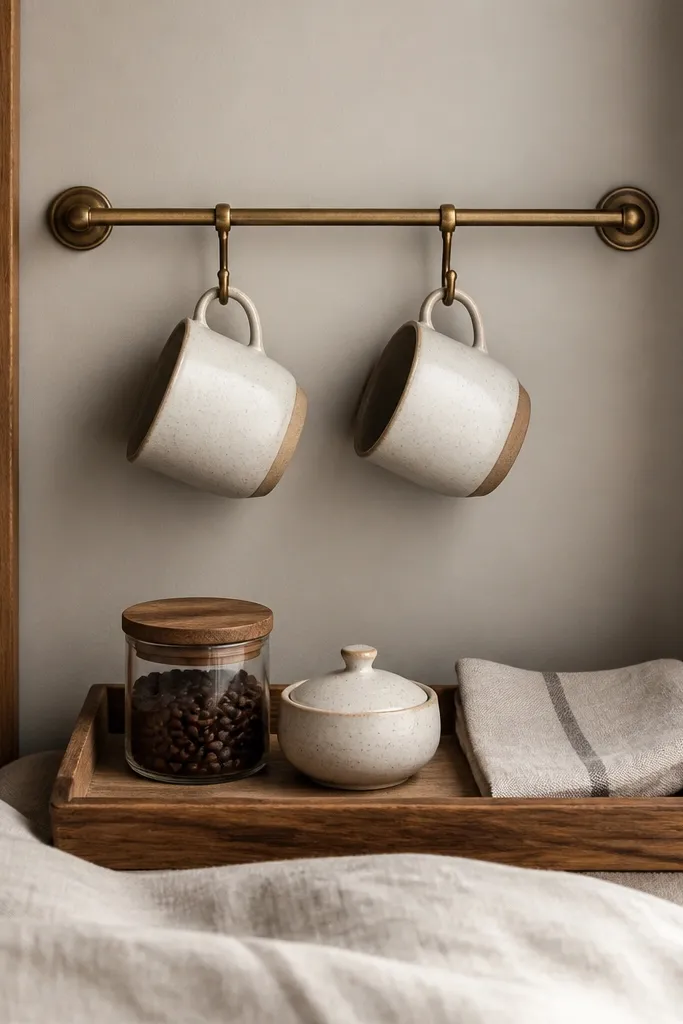
This setup works when your counter space is tiny but your wall has room. The towel bar gives you instant vertical storage for mugs, and the tray keeps the “messy” items contained in one wipeable zone. I like using ceramic mugs in cream and warm gray because they look clean against the bar and don’t clash with most bedding colors. It flatters small bedrooms because it reduces visual clutter — you aren’t stacking mugs on a dresser where they feel crowded. The styling principle is that your mugs become part of the decor, while the tray hides the rest of the workflow.
Start by finding a wall spot at about 42 inches from the floor — mug handles should sit around eye level when you’re standing. Mount the towel bar with anchors if you hit drywall only. Then place a shallow tray (about 16-18 inches long) under the mugs on a dresser edge or a small floating shelf. Fill one lidded canister with coffee grounds, one small bowl with sugar, and add a folded linen napkin for a soft texture. Finish by keeping everything within the tray footprint so nothing spills out onto the surface.
Use matching hooks under the bar so the mugs hang at the same angle — it looks deliberate instead of “random collection.”
Skipping anchors and mounting into weak drywall can make the bar sag and tip the whole look.
2. Corner Floating Shelf With Two Canisters
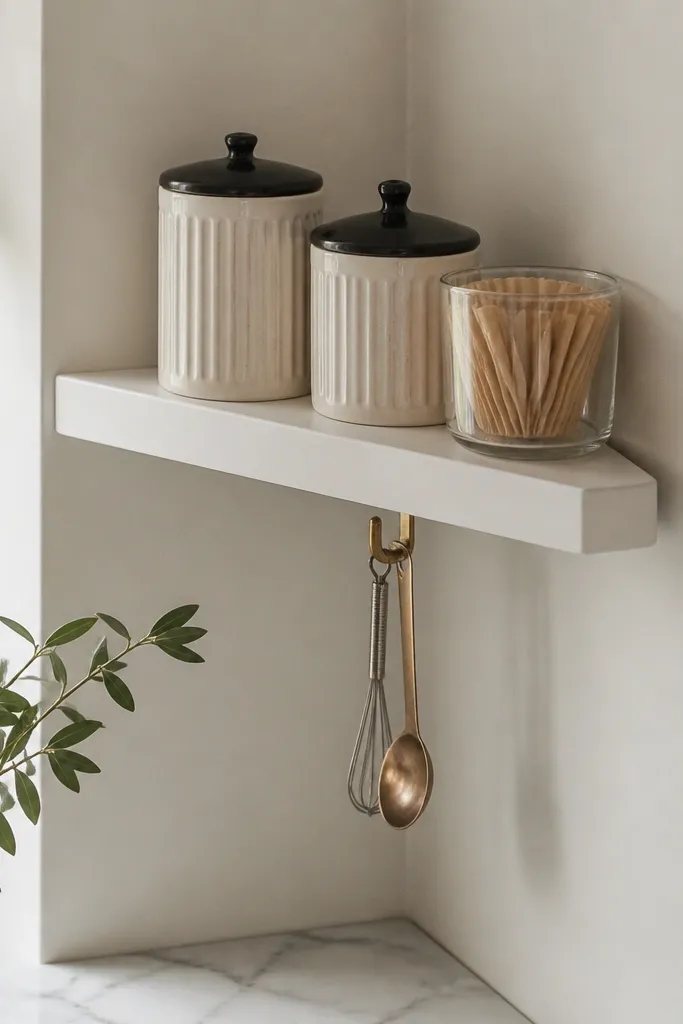
A corner floating shelf is a smart budget move because it uses dead space that usually holds nothing. The shelf makes your coffee corner feel built-in even if it’s just a simple plank. I recommend two matching canisters in the same color family (white + black lids or oatmeal + matte black) so your eye reads the corner as tidy. This flatters rooms with light walls because the shelf won’t visually shrink your space. The principle is repetition: two canisters that match create order, and the third item (filters) stays contained in a small jar.
Good to knowPaint the shelf the same color as your wall if you want it to disappear — it makes the canisters look like they belong there.
Start by choosing a shelf width of 12-14 inches so it doesn’t overhang into the walkway. Mount it so the shelf top lands about 6-8 inches above where you’ll set a small tray below (if you have one). Place two matching canisters on the back edge of the shelf, then set the filter jar slightly forward so you can grab it quickly. Add one small hook under the shelf edge for a spoon, then keep the rest of the coffee tools off the shelf. If you want a “finish,” add a single neutral coaster or a folded cloth under the jar.
AvoidPutting too many items on the shelf — three looks clean; five starts to feel like storage.
3. Under-Shelf Wire Basket for Pods
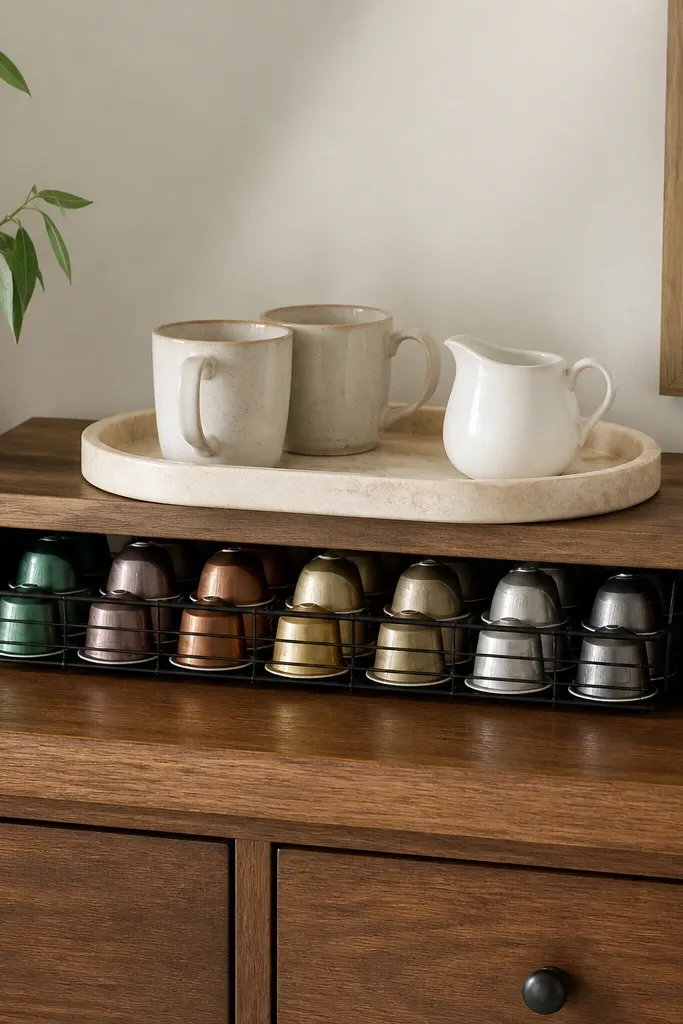
If you use pods, you need quick access, but open pod boxes look messy. A wire basket under a shelf hides the pods while keeping them visible enough that you don’t dig for your flavor. I like black wire against warm wood because it looks industrial without feeling cold. This setup flatters narrow surfaces because the pod storage lives underneath, where most corners waste space. The principle is “vertical staging”: your top stays pretty, your bottom holds the boring stuff.
Good to knowMeasure one pod width and size the basket so two rows fit — it keeps the pods from leaning and looking messy.
Start by placing your main shelf or tray at least 18 inches above the surface where you’ll place mugs, so you have room for the basket. Attach the wire basket under the shelf using the basket’s mounting holes or zip ties if it’s a lightweight insert (avoid zip ties if you’re hanging heavy full boxes). Add pods in a tight stack so the basket holds its shape. Put only the daily mug, a small creamer, and a sugar jar on top. Leave the rest of the supply in a closet or cabinet so the corner stays calm.
AvoidUsing a basket that’s too deep and lets pods spill forward onto the dresser.
4. Slim Rolling Cart With Fabric Bin
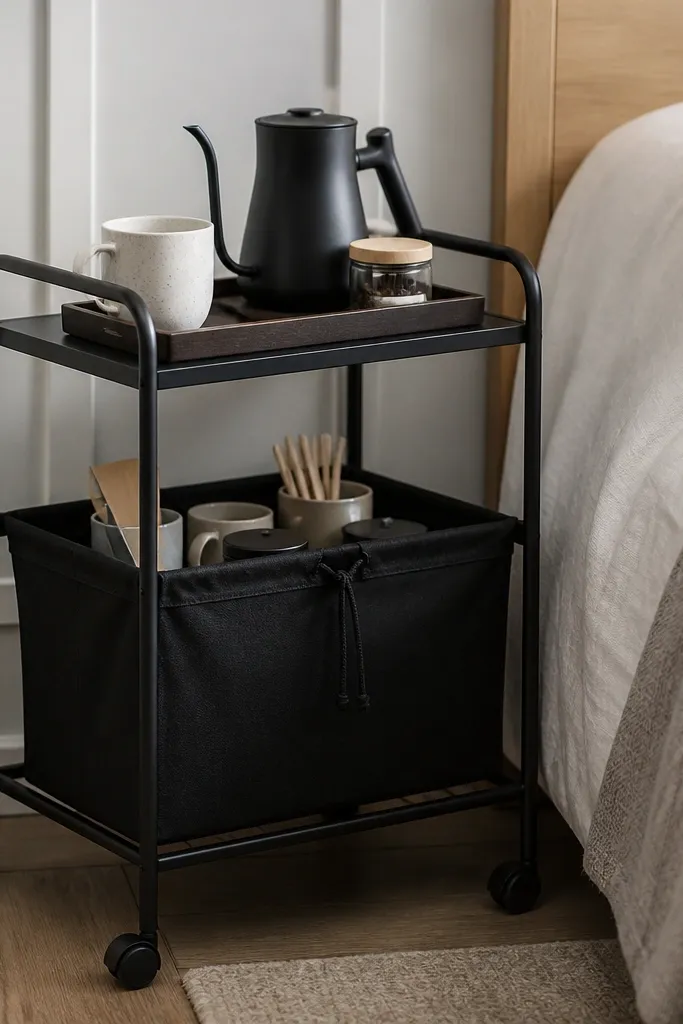
A rolling cart is the only coffee corner idea I’d recommend when your bedroom is multi-purpose. You can tuck it away when guests come over and pull it back out when you’re actually brewing. I love a fabric bin because it hides packaging — the kind of thing that always looks ugly in photos. This flatters renters because you can move the cart without drilling holes. The principle is mobility plus concealment: pretty on top, hidden storage below.
Start by choosing a cart with a top shelf height around 30-32 inches so you can work comfortably without leaning. Put a heat-safe tray on the top shelf to protect the cart surface. Then add a small kettle or electric warmer if you use one, a jar for coffee, and a mug stack of two. On the bottom shelf, fit a drawstring fabric bin sized to the shelf footprint, then load it with spare filters, stir sticks, and to-go cups. Roll the cart into the corner and keep the cart pulled fully back so it doesn’t block the nightstand path.
Use a tray with raised edges so spills don’t roll into the cart metal.
Overloading the bottom shelf so the bin bulges out — it makes the whole cart look cramped.
5. Dresser Top Coffee Zone With Masking Tape Layout
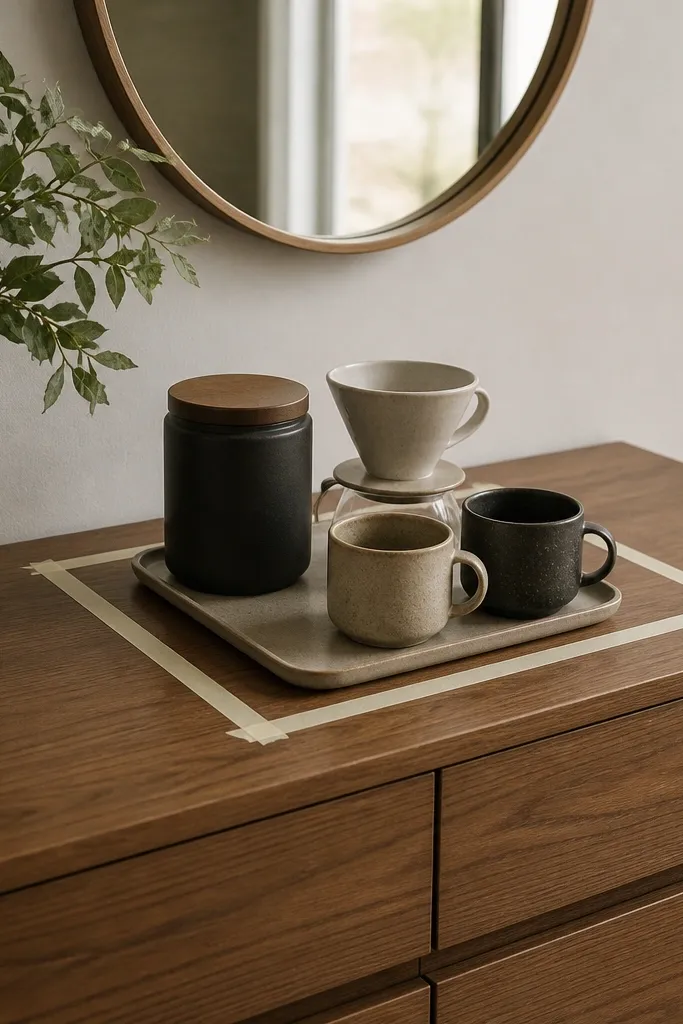
This is the fastest way to stop your coffee corner from taking over the whole dresser. I’ve done this with friends in apartments where the dresser is also the makeup station, and the tape trick forces you to commit to a size. The coffee zone looks intentional because it’s physically bounded, even if you never buy a big shelf. It flatters small spaces because it keeps negative space around the setup — your bedroom still breathes. The principle is defining a boundary before you place anything.
Good to knowTake a quick photo after you remove the tape — if it looks balanced in the photo, it will look balanced in real life.
Start by cleaning the dresser top and laying down masking tape in a rectangle that matches your available width. I aim for 18-22 inches long and 10-12 inches deep on compact dressers. Place your tray inside the tape, then arrange canister, dripper, and mug placement so everything fits within the tape outline. Once you’re happy, remove the tape and use the tray as the permanent boundary. Keep the kettle or mug rack on the right side only if you’re right-handed, so you don’t bump the rest of the zone.
AvoidBuying extra items “just in case” after you’ve measured — the zone should hold what you actually use.
6. Bedside Nook With Pegboard and Mini Shelf
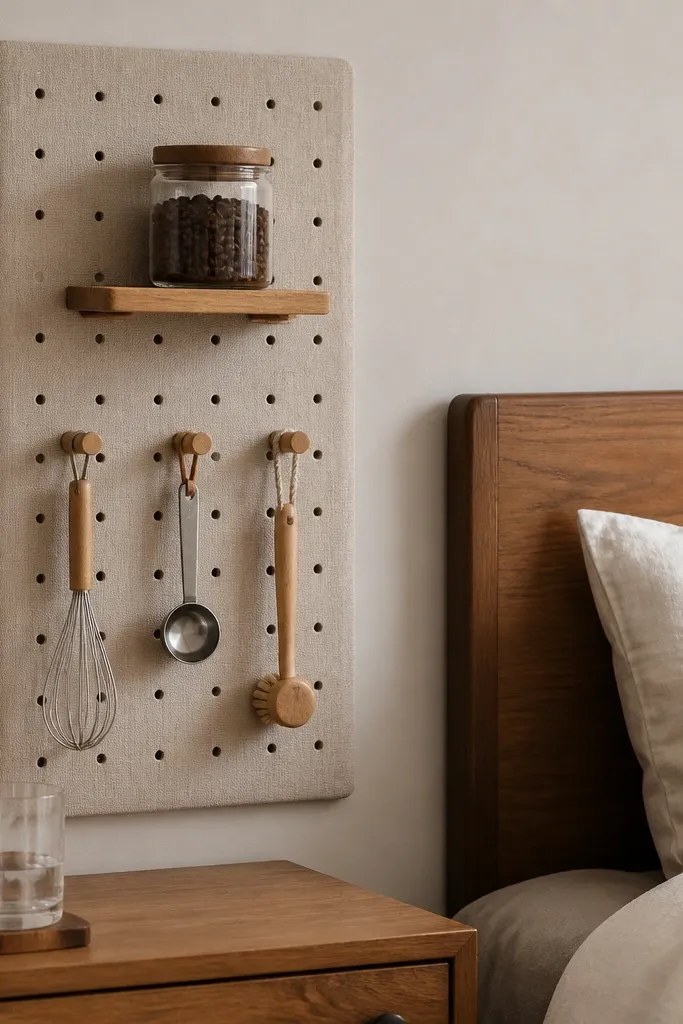
Pegboard is budget-friendly when you want function and you don’t want the coffee corner to look like a random assortment. A mini shelf holds your coffee jar and filters, while hooks keep tools off the countertop. I like pegboard in warm white because it matches most bedroom paint colors and doesn’t look harsh. This flatters people who drink coffee daily and have a lot of “small” tools that normally clutter. The principle is tool organization: your tools have homes, so the corner stays tidy even on busy mornings.
Good to knowPaint pegboard with a satin finish. Matte can look patchy, especially in bedroom lighting.
Start by picking pegboard size that fits your nook — even a 12x18 inch section works. Mount it with the top about level with your nightstand shelf or slightly above. Install a mini ledge shelf (about 10-12 inches wide) for the jar and filters. Hang one hook line for spoons and one for brewing tools, keeping the heaviest tools on lower hooks. Add a small fabric or paper backing behind the pegboard if it shows raw board — it makes it look finished.
AvoidMounting pegboard so the tools hang too low — you’ll constantly bump them.
7. Matte Black Wall Sconce With Plug-In Timer
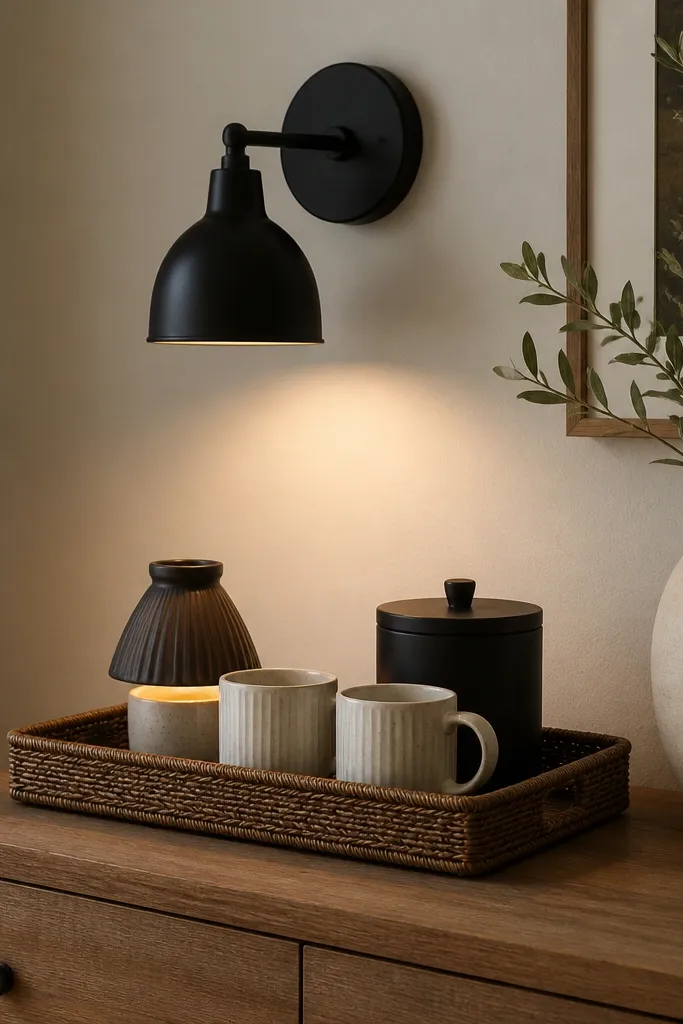
Lighting changes everything in a bedroom coffee corner. I’ve styled corners with the exact same items, and the one with directional light looks twice as intentional. A plug-in sconce is budget-friendly because you don’t need an electrician, and the matte black finish looks clean next to wood and linen. This flatters darker bedrooms too because the light focuses attention on the coffee zone instead of the whole room. The principle is “make the corner the brightest thing,” but keep the light direction controlled.
Good to knowUse a timer plug even if you’re home — it keeps your routine consistent and makes the corner feel like a “morning ritual.”
Start by choosing a sconce with a downward shade so it lights the tray area, not the ceiling. Place the sconce so the light hits the center of your tray from about 14-18 inches away. Set your coffee tray on the dresser at least 8 inches below the sconce so it doesn’t cast harsh glare. Add one warm-toned bulb (2700K if you’re buying bulbs) to keep the coffee area cozy. Use a plug-in timer so the light turns on at your morning time without you hunting for switches.
AvoidUsing a bright daylight bulb. It makes coffee corners look like a bathroom vanity.
8. Vintage-Style Milk Crate With Lidded Inserts
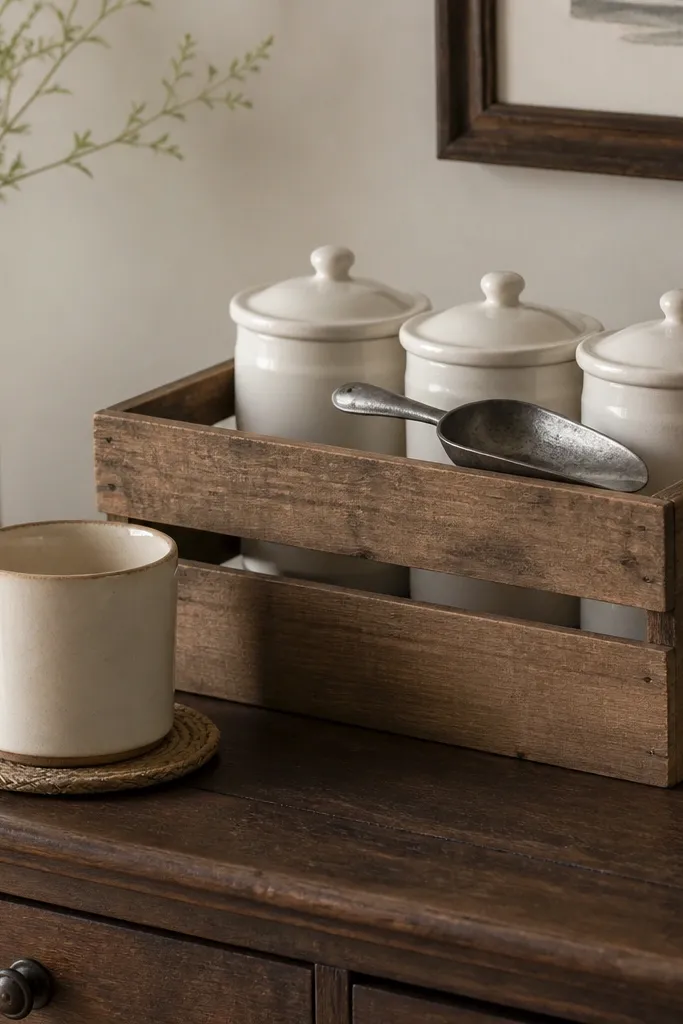
Milk crates look charming because they add texture, but they can look messy if you leave everything open. The fix is using lidded inserts so you get the crate’s rustic vibe without the visual clutter. I like white or off-white containers because they soften the wood color and look good in bedrooms with beige bedding. This flatters people who want a “collected” look without buying expensive decor. The principle is texture on the outside, order on the inside.
Good to knowWipe the crate once a week with a slightly damp cloth so the wood stays clean and doesn’t get sticky spots.
Start by choosing a crate that fits your surface — for a dresser, aim for 12-16 inches wide. Line the crate with removable bins or use lidded containers sized to the crate compartments. Place coffee in the back container, sugar in the front-right, and filters in the front-left so you grab what you need first. Set a scoop or spoon on top in one spot only. Add one coaster under your daily mug so the wood doesn’t get sticky from condensation.
AvoidLeaving loose filter packets or open sugar bags in the crate — it turns rustic into clutter fast.
9. IKEA-Style Tray on Bookshelf With Spill Mat
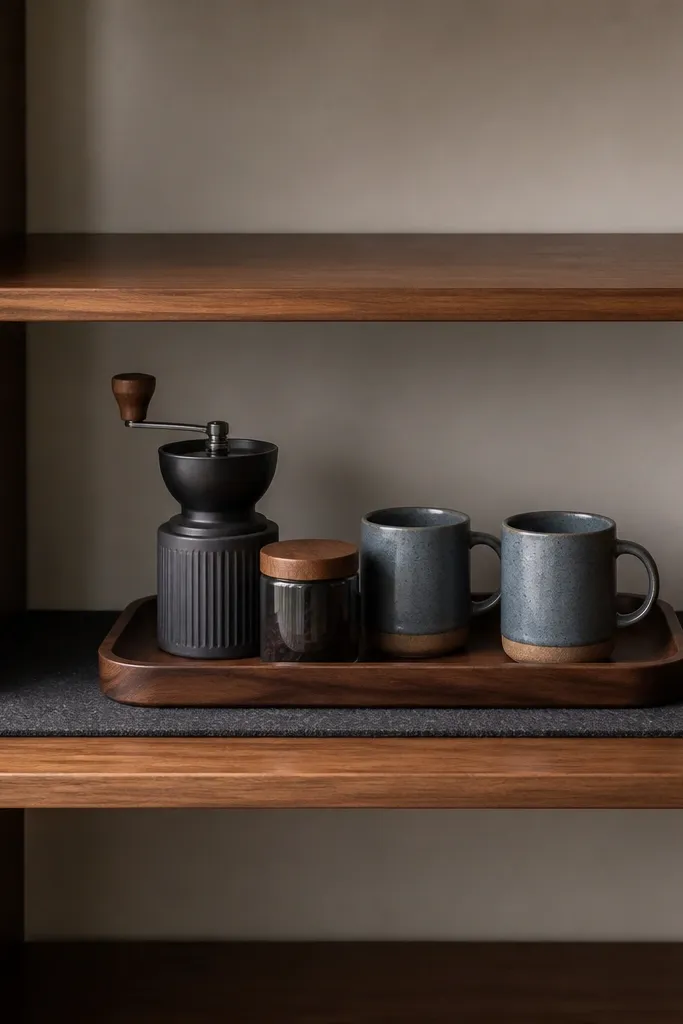
If your bedroom has a bookshelf, you can steal a shelf space and make it feel like a coffee bar. The tray is the anchor because it creates a single “surface” for everything, and the spill mat protects the shelf. I like felt mats in warm gray or oatmeal because they hide scuffs and look soft next to books. This flatters people who want their coffee corner visible but not taking over a dresser. The principle is to keep the rest of the shelf calm — one tray zone, no extra random items.
Start by clearing the shelf and measuring the usable width. Choose a tray that leaves 2-3 inches of space to the sides so it doesn’t look jammed. Place a felt or rubber spill mat on the shelf first, then center the tray. Put the daily mug stack on one side, coffee jar in the back, and your brewing tool in the middle. If you have a grinder, keep it toward the back so it doesn’t crowd the front edge when you reach for mugs.
Add a folded cloth under the tray corners if your shelf is slightly uneven — it prevents tray wobble.
Filling the shelf with more than one tray — two zones look chaotic on small shelves.
10. Magnetic Spice Tin for Sweeteners
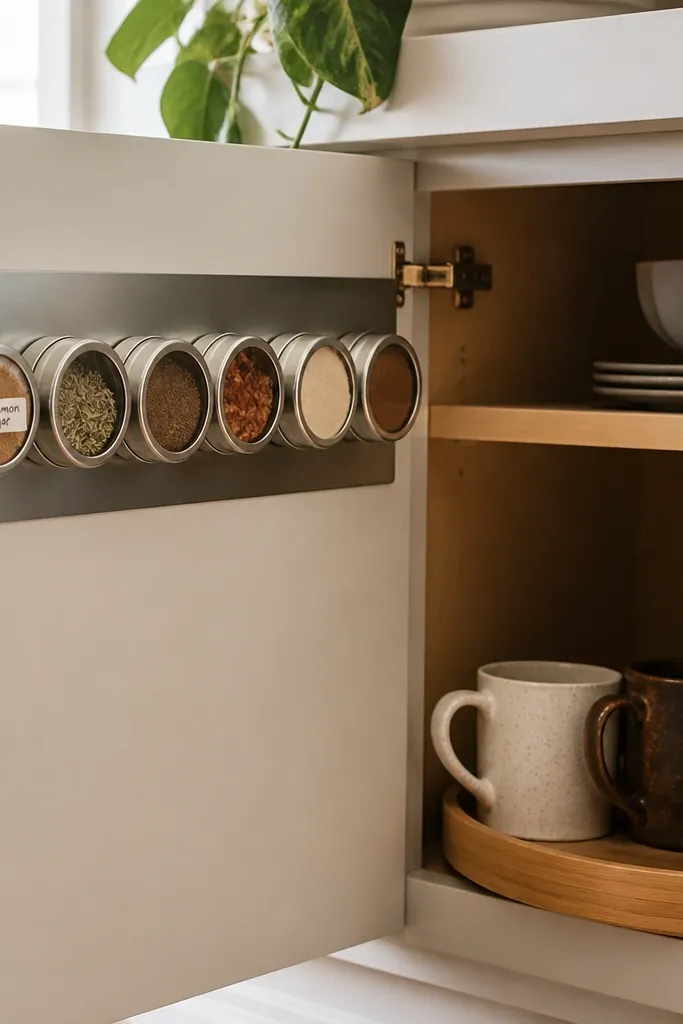
This idea is for the people who use a bunch of sweeteners and end up with packets everywhere. Magnetic tins keep everything vertical and easy to grab, and they hide the clutter when the cabinet door is closed. I like small tins in brushed silver because they don’t fight with wood furniture. This flatters bedrooms where the coffee corner lives on a cabinet shelf rather than open space. The principle is container control: sweeteners have a dedicated system, so the main coffee zone stays clean.
Good to knowUse tin liners or keep the tins dry so powder doesn’t cake on the lid rim.
Start by mounting a small metal sheet or using a magnetic board inside the cabinet door, at about eye level when open. Fill magnetic tins with what you actually use — cinnamon sugar, cocoa mix, or sugar crystals. Label tins with small tags so you don’t guess. Place your coffee jar and mugs on the open shelf, and keep stir sticks in a lidded container on the tray. When you brew, you grab a tin, pour into your mug, and close the door.
AvoidStoring wet creamer powder or sticky syrups in tins — they gum up the magnets.
11. Clear Acrylic Cup Holder With Hidden Base
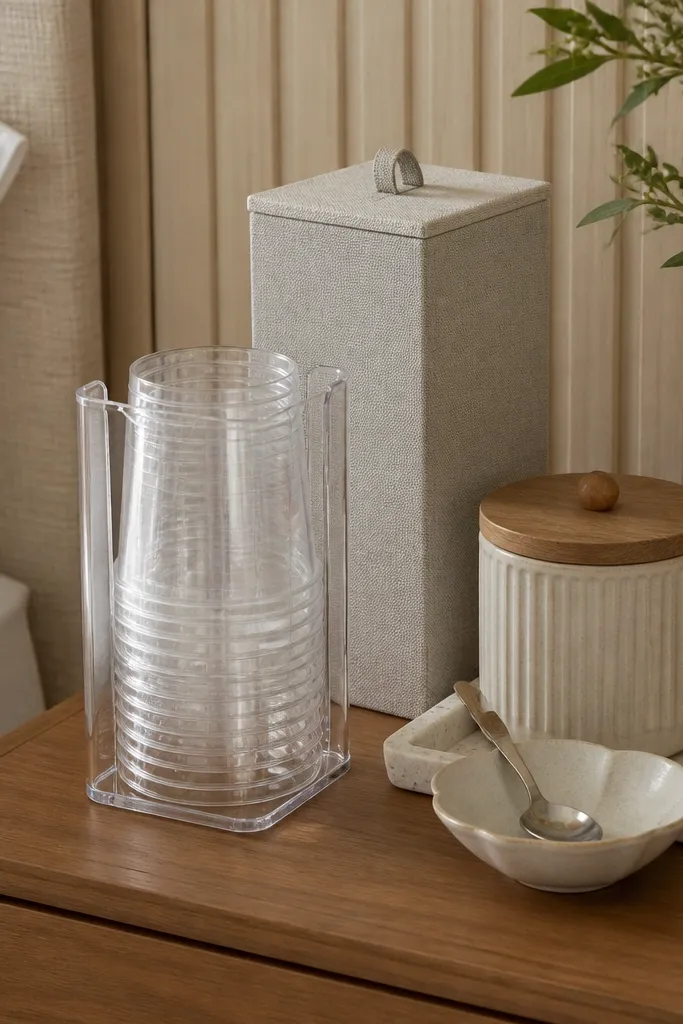
Clear acrylic looks clean because it doesn’t block sight lines, which helps in small bedrooms where you want the corner to feel light. The trick is pairing the transparent holder with hidden storage so the corner doesn’t look like a countertop display. I like clear holders for paper cups or small ceramic tumblers because they stack neatly and you can see what’s inside. This flatters rooms with busy patterns because the acrylic stays visually quiet. The principle is transparency with containment — show cups, hide supplies.
Good to knowWipe acrylic with microfiber only. Paper towels leave micro-scratches that show in sunlight.
Start by measuring your nightstand top width and choose a cup holder that doesn’t extend past the front edge. Place the cup holder on a tray or coaster so it doesn’t scratch. Put a small lidded canister beside it for coffee and a spoon rest on the tray’s far side. Add a slim fabric box behind the holder for spare cups and stir sticks. Keep the fabric box color neutral (cream or taupe) so it blends with bedding tones.
AvoidUsing acrylic with too many different cup sizes — it looks messy fast.
12. Fabric Curtain Rod + Hanging Coffee Organizer
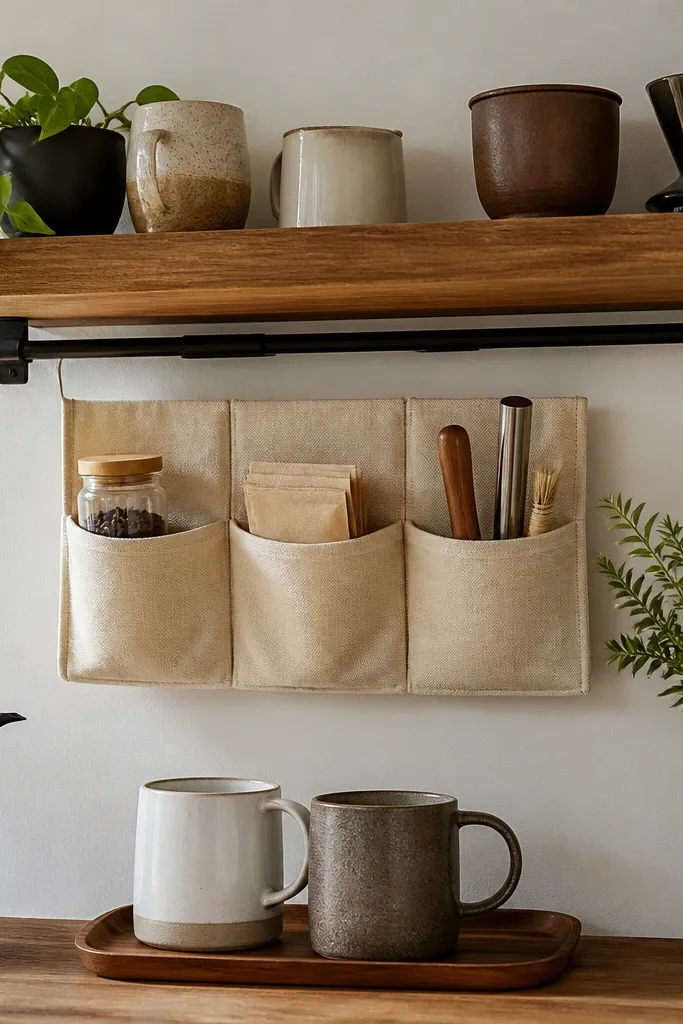
A hanging organizer is my go-to when you can’t drill and you don’t have shelf space. The tension rod setup uses the vertical space under a shelf or above a dresser without hardware drama. Choose an organizer in canvas or linen so it looks intentional and doesn’t look like a plastic pantry bag. This flatters renters because it’s removable in five minutes. The principle is "hide the clutter vertically," keeping the countertop for the daily ritual.
Good to knowUse binder clips to keep paper filters from tearing inside pockets.
Start by finding a sturdy spot for a tension rod — under a shelf lip works best. Install the rod and hang a canvas organizer with pockets that fit your items. Put filters in one pocket, sugar packets in another, and keep tools like tongs or a small whisk in the deeper pockets. Place a small tray below with two mugs and a coffee jar so you can grab everything at once. Keep the organizer pockets from bulging by using smaller jars or cutting down packet quantity.
AvoidOverstuffing pockets. When it bulges, it looks like storage instead of styling.
13. Small Desk Lamp + Heat-Safe Tray for Pour-Over
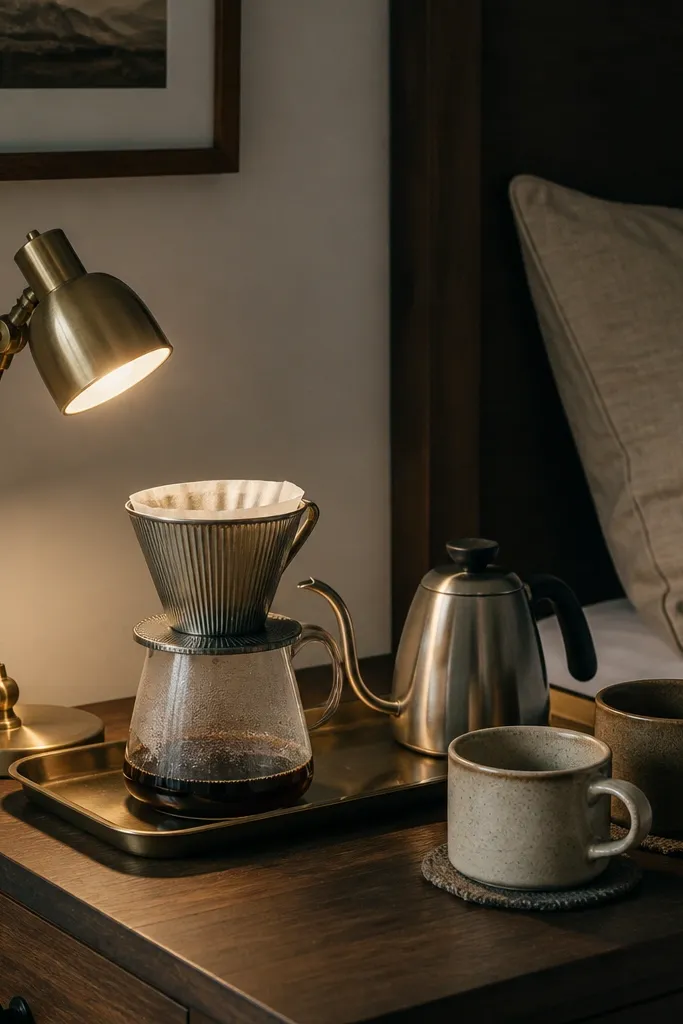
If you do pour-over, you need a dedicated “brew surface” that stays stable and easy to clean. A heat-safe metal tray makes cleanup simple, and the lamp adds the cozy focus that makes it feel like a café corner. I like brass or brushed gold lamps because they warm up cool bedroom palettes like gray or blue. This flatters people who love slow mornings because it creates a clear station for the steps. The principle is setting up for the workflow: light where you brew, tray where you pour, coasters where you set mugs.
Start by placing a heat-safe tray on a nightstand or dresser in the spot where you can work without squeezing your elbows. Add your dripper and filter holder to the tray first, then position the kettle so the spout clears the tray rim. Place the lamp so the light lands on the dripper area, not your face. Set mugs on coasters at least 6 inches away from the dripper to avoid steam marks. Keep one small timer or notebook on the side if you track brew time, but only one paper item at a time.
Use a silicone spoon rest on the tray. It stays put and looks tidy even when you’re rushing.
Setting mugs too close to the brew zone. Condensation makes them look wet and sloppy.
14. Milk Glass Jar Set With One Matching Lid
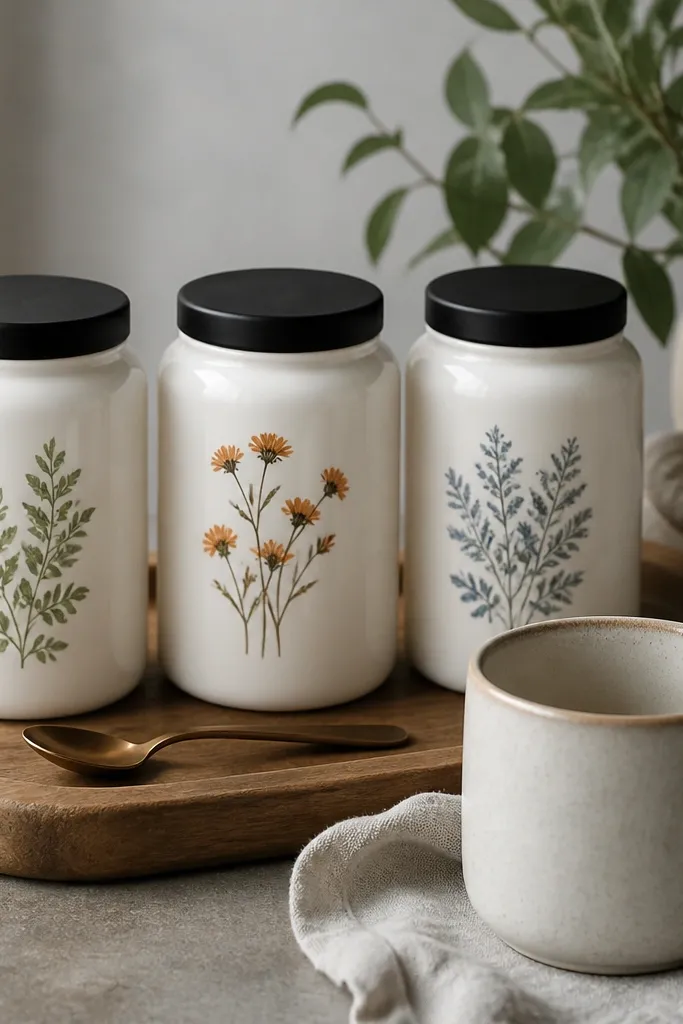
Milk glass looks soft and expensive, and it’s perfect for bedrooms because it reflects light gently instead of screaming chrome. The budget angle is using one lid style across multiple jar sizes so the set looks cohesive even if the jars came from different places. I like matte black lids because they ground the white glass and pair well with wood bed frames and black metal accents. This flatters most skin tones in photos too — the corner looks warm rather than harsh. The principle is visual cohesion through repeated lid finish.
Good to knowUse a tray with a lip so jars can’t slide — milk glass can be slick on smooth surfaces.
Start by picking jar sizes based on what you store: one for coffee, one for sugar or sweeteners, and one for filters or stir sticks. Spray-paint or buy lids in matte black so they match. Label each jar with small card tags so you can find things quickly. Place the jars on a tray with the largest jar at the back and the smallest at the front-left. Add a spoon rest or spoon in a consistent spot so the tray doesn’t look scattered.
AvoidMixing three lid finishes. Two is fine; three makes it look accidental.
15. Book Stack Shelf + Lidded Coffee Canister
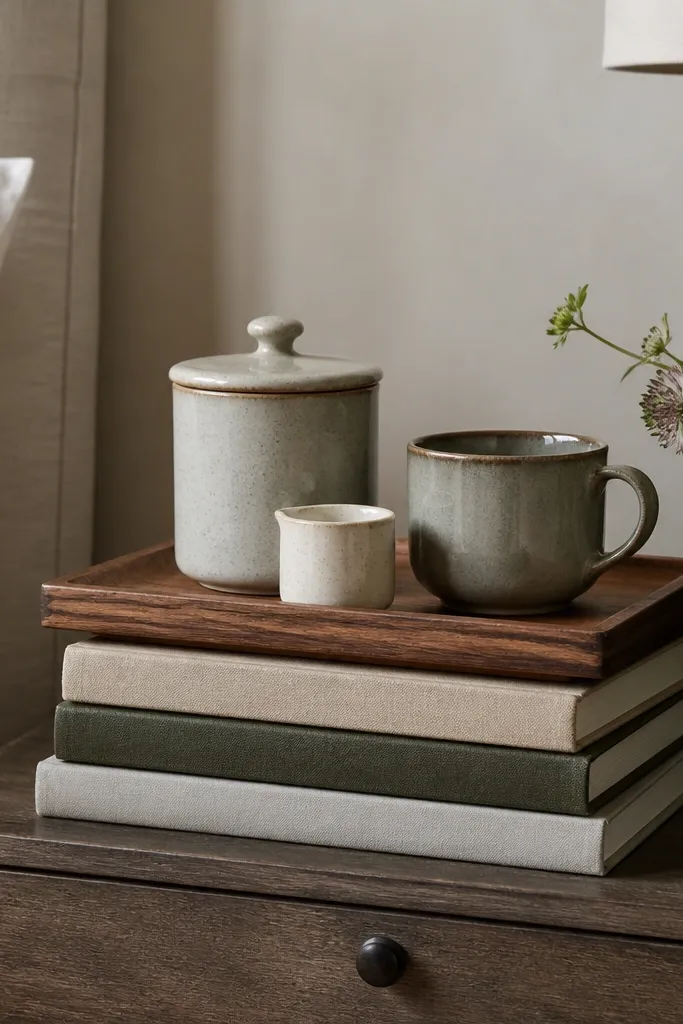
This is a clever trick when your nightstand top is too small for a normal tray but you still want height. The book stack creates a temporary shelf that makes the coffee canister look like it has its own home. I like hardwood or neutral book covers because they don’t fight your bedding. This flatters small spaces because it lifts the coffee corner visually without taking extra width. The principle is making height work for you instead of spreading items across the whole surface.
Start by choosing a book stack height of about 4-6 inches so the tray feels stable and reachable. Put the books on a flat surface and center them so the tray won’t wobble. Add a small wooden tray on top, then place the coffee canister in the center. Put the creamer on one side and a mug on a coaster on the other. Keep only the daily items on the tray and store extras in a drawer or nearby cabinet to prevent clutter.
Wrap the book stack with a thin cloth runner if the covers are too bright. It softens the look instantly.
Using too many tall items on the tray. Keep it low so it doesn’t feel crowded.
16. Shoe Organizer for Filter Packets
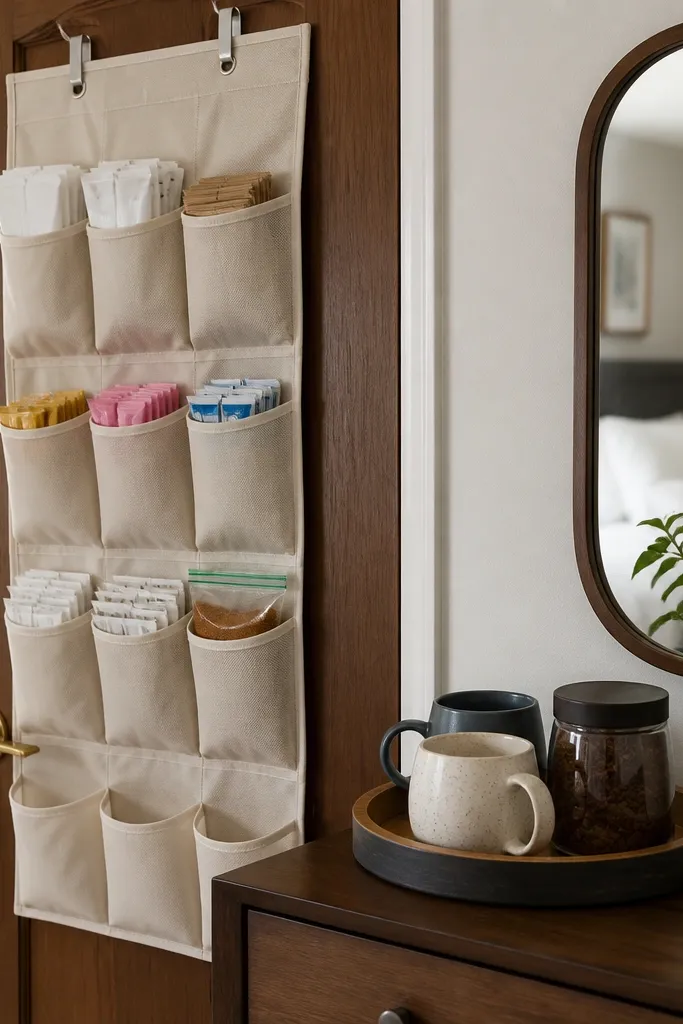
This is one of the best hidden storage tricks for a coffee corner because it keeps the “packet clutter” off your surfaces. The fabric pockets look neat and stay out of sight, and you can label each pocket so your mornings are fast. I like using it for filters and flavor sachets since they’re flat and don’t take up much space. This flatters tight bedrooms where every surface counts. The principle is separating daily display from stored supplies — the door organizer is the back-of-house.
Good to knowUse small masking tape labels inside the pockets. It looks tidy and peels off cleanly.
Start by buying a hanging fabric organizer with at least 10 pockets so you can group items. Mount it behind the door using a hook or over-door hanger so it doesn’t touch the floor. Fill pockets by category: filters in one row, sweeteners in another, and a small pocket for stir sticks. On your visible coffee zone (tray or dresser), keep only mugs, coffee jar, and one creamer. Restock the pockets when you run low, not every day.
AvoidStoring bulky items like extra kettles or large bags. The pockets stretch and sag.
17. Ceramic Wall Planter Turned Coffee Caddy
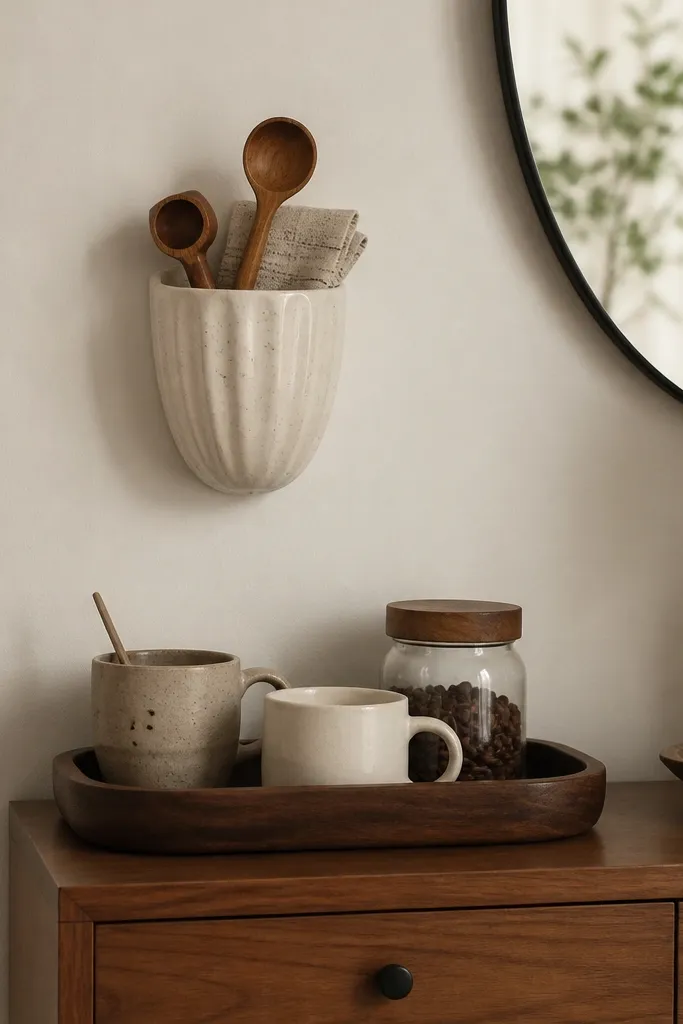
This idea is for people who like a little personality on the wall but don’t want a full shelf. A ceramic planter has shape and texture, and repurposing it as a caddy gives you a “decor piece” that also holds your small tools. I like planters in speckled cream or pale terracotta because they look warm next to bedding and wood. This flatters bedrooms with limited wall space by using one small mount instead of a big unit. The principle is using decor objects for function so your coffee corner feels styled, not stored.
Start by mounting the planter at about 50-55 inches from the floor, so you can reach tools without leaning. Use a planter with a wide opening or remove the plant liner so items fit. Place a wooden scoop and spoon inside, plus a folded cloth. Add a small tray below with mugs and a lidded coffee jar for the daily items. Keep the planter only for tools, not for coffee bags, so it stays neat and doesn’t stain.
Seal the planter interior with a clear food-safe sealant if you’re putting in anything that touches liquids.
Mounting it too high. If you can’t reach comfortably, you’ll stop using the coffee corner.
18. Mini Bar Cabinet With One Open Shelf
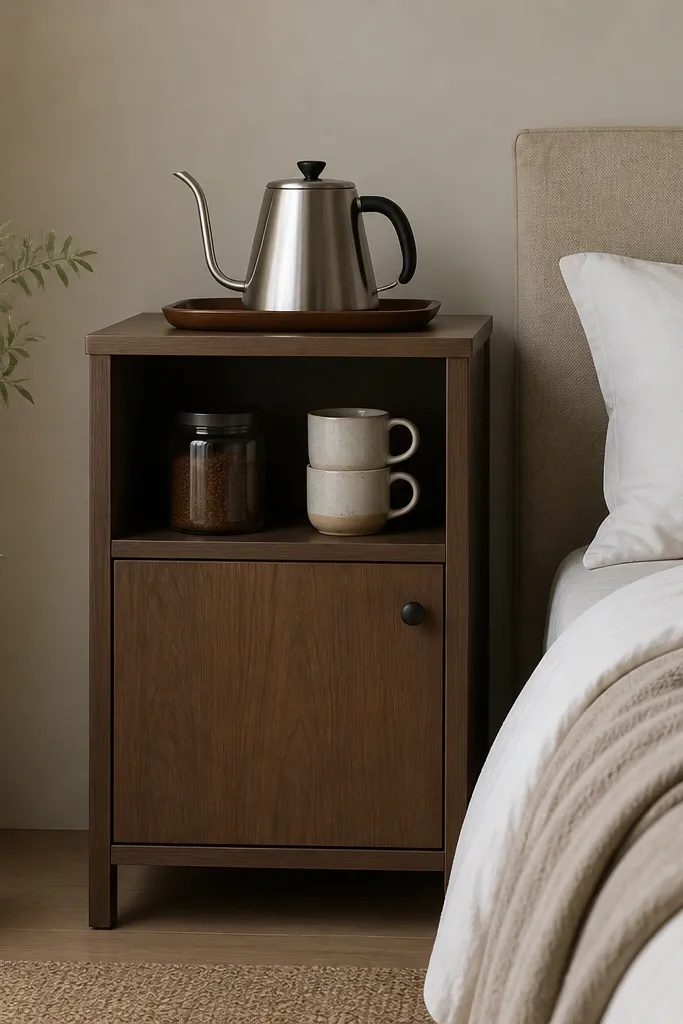
A mini cabinet is the simplest way to keep a coffee corner from looking cluttered when you’re not using it. The door hides everything you don’t want on display — packets, extra mugs, and supplies. I like cabinets with one open shelf because you get quick access without opening the door every time. This flatters bedrooms where the coffee corner is near the bed and you want it to feel clean and calm. The principle is “closed storage does the heavy lifting,” and the top is only for daily gear.
Good to knowUse felt pads on the cabinet shelf so ceramic mugs don’t slide and clink.
Start by choosing a cabinet width that fits your space without blocking walking paths, usually 16-24 inches. Place a heat-safe mat or tray on top if you use a kettle. Inside the cabinet, put coffee jar and mugs on the open shelf, and keep filters and sweeteners in a single lidded bin on the bottom shelf or in a drawer. Use one small tray on the top surface so the kettle and daily items stay contained. Keep cords tucked so they don’t hang out of the cabinet opening.
AvoidStoring everything on the cabinet floor. It makes the inside feel messy and hard to clean.
19. Reclaimed Wood Ladder Shelf for Mugs Only
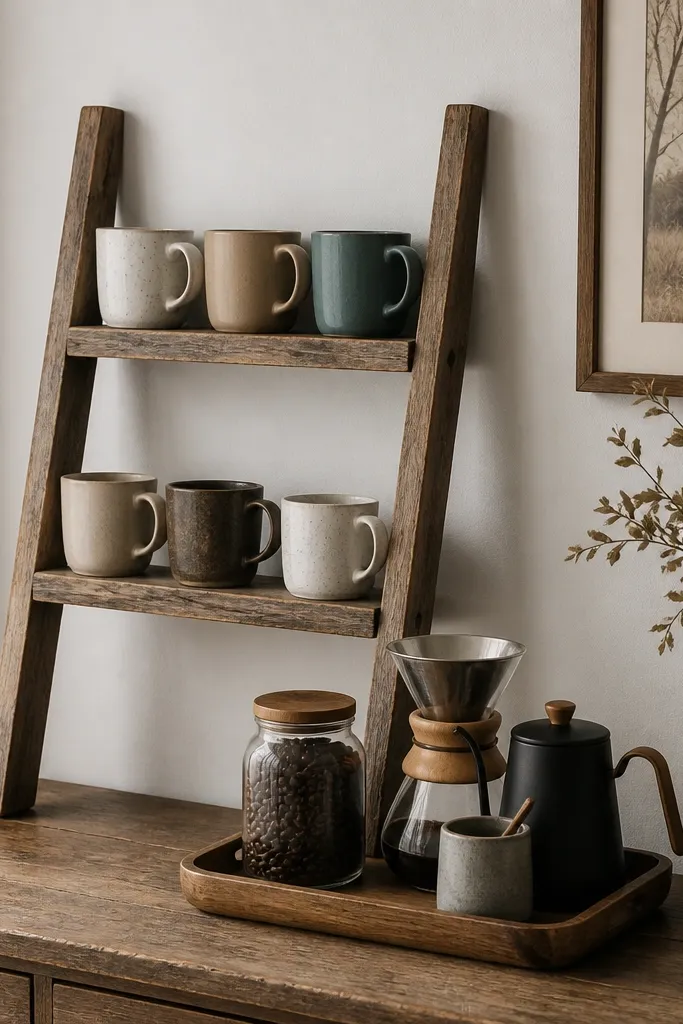
A ladder shelf looks charming and gives you that “coffee corner” feeling without building a full bar. The budget version works best when you use it for mugs only, so the ladder doesn’t become a clutter shelf. I like reclaimed wood with a light stain because it matches most bedroom wood tones and doesn’t feel too dark. This flatters small spaces because it uses vertical space and keeps the main surface clear. The principle is limiting what goes on the ladder so it stays decorative, not messy.
Start by placing the ladder shelf where it won’t block access to your dresser or nightstand. Use the top two steps for mugs, and keep them spaced evenly so handles line up. Add a tray on the dresser with coffee jar, sugar, and filters so the workflow is still on one surface. Keep the tray small enough to fit within the area directly in front of the ladder steps. If the ladder wobbles, shim the feet with thin cork until it’s solid.
Hang or place mugs by handle color, not by size, so the row looks intentional.
Filling every rung with items. A ladder shelf with too much on it reads as storage.
20. Lidded Tray Caddy for To-Go Cups
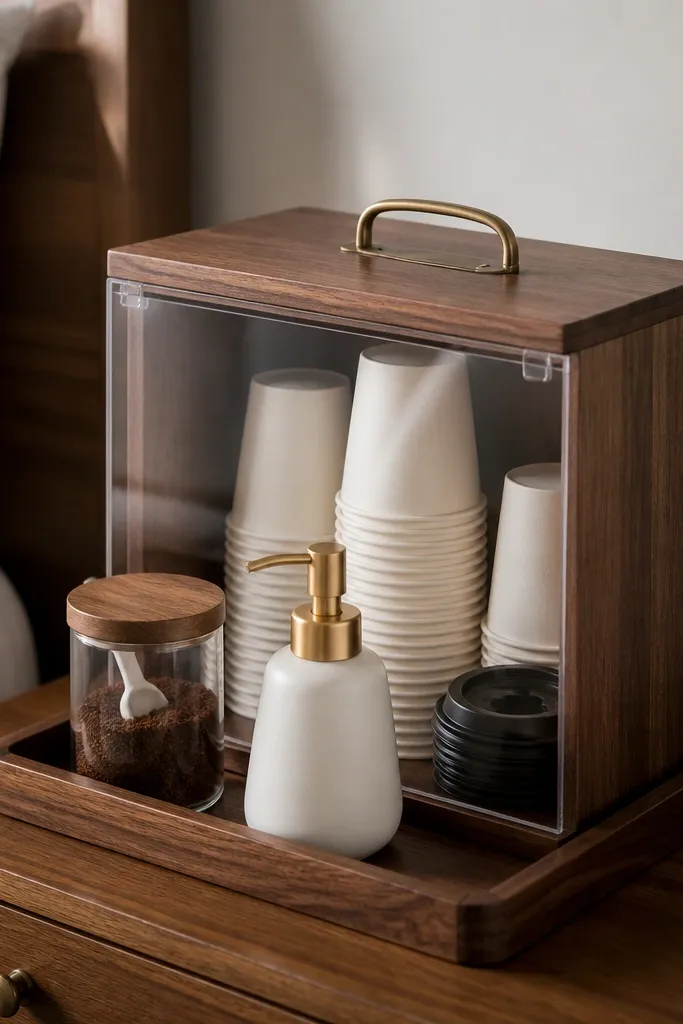
To-go cups are the quickest way to make a coffee corner look messy because they multiply and don’t stack nicely. A lidded tray solves that by keeping cups contained and dust-free, while still letting you grab one quickly. I like trays with a wooden lid and a simple metal latch because they feel sturdy and match bedroom furniture. This flatters people who keep coffee supplies on hand for busy mornings or travel. The principle is containment with one “grab zone.”
Start by choosing a tray large enough for 4-6 to-go cups standing upright, with a little room for nesting lids. Place the tray on your bedside table, ideally where you won’t bump it. Put cups inside the tray and keep the lid closed most of the time. On top of the tray, set a small coffee canister and a creamer pump or mini bottle. Add one stir stick container with a lid so it doesn’t spill into the tray area when you open it.
Wrap ribbon or use a small cloth band around the outside of the canister lid so it looks coordinated with the tray wood.
Leaving to-go cup lids loose on the table — they slide around and look chaotic.