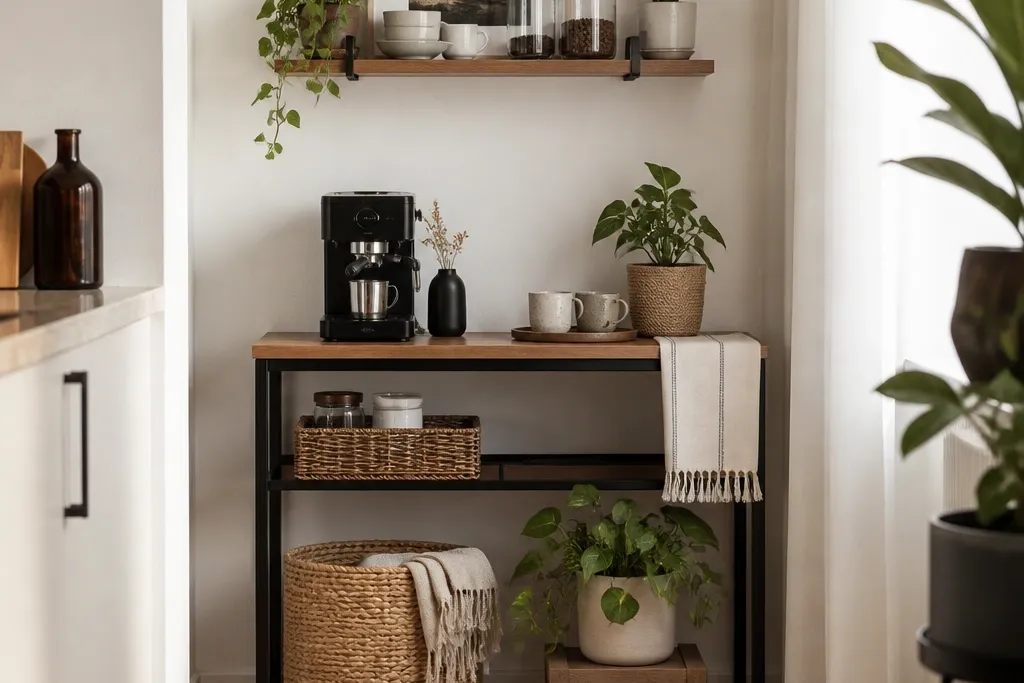
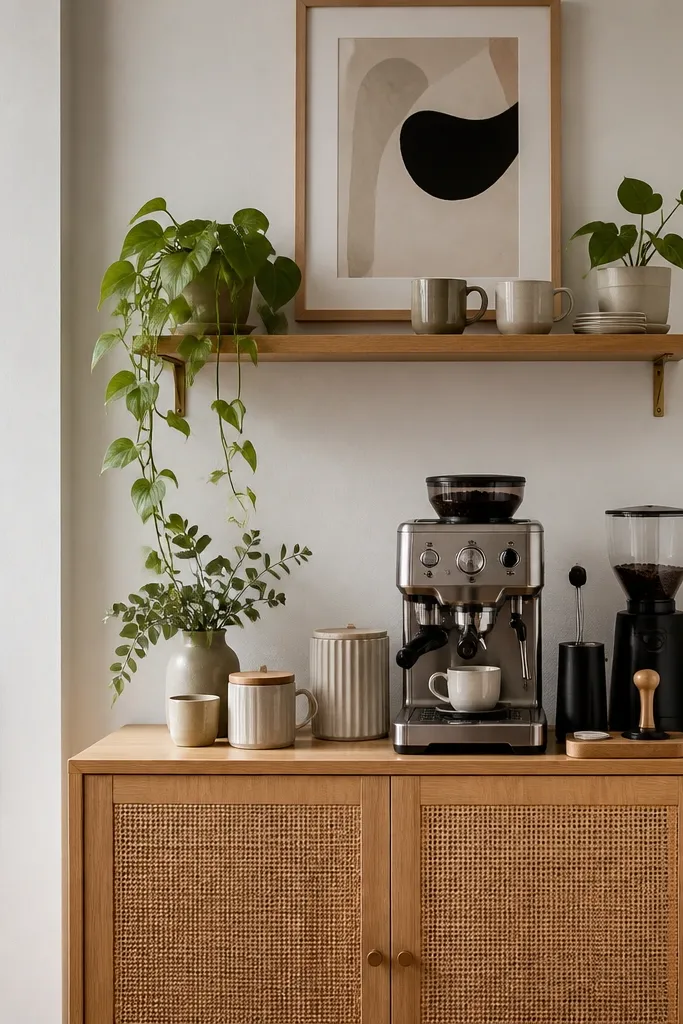
1. Tension-rod coffee bar above a small dresser
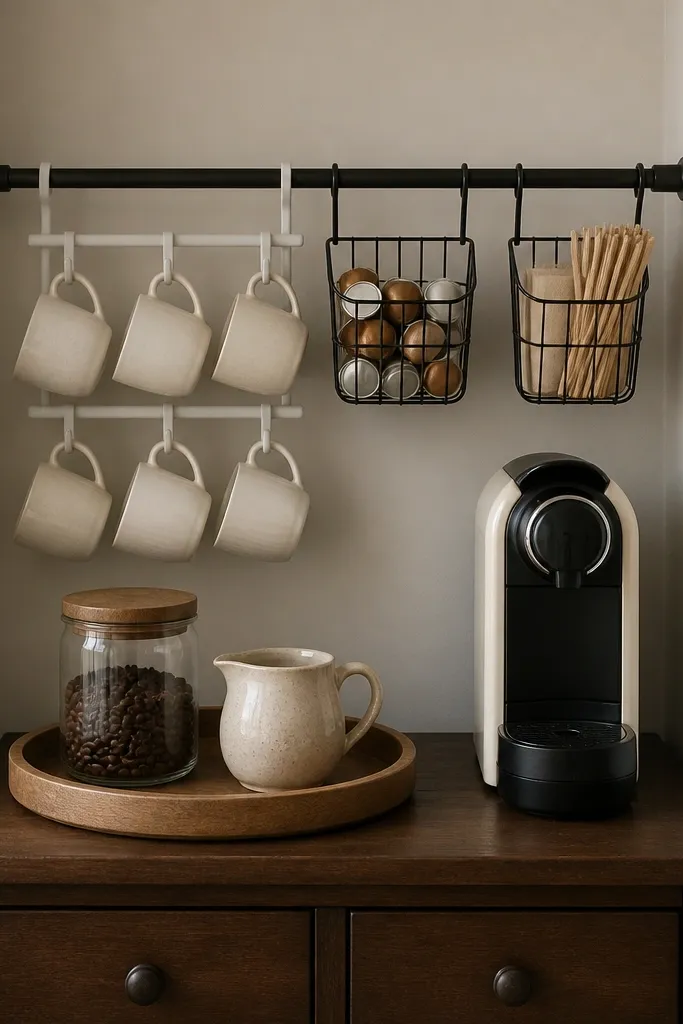
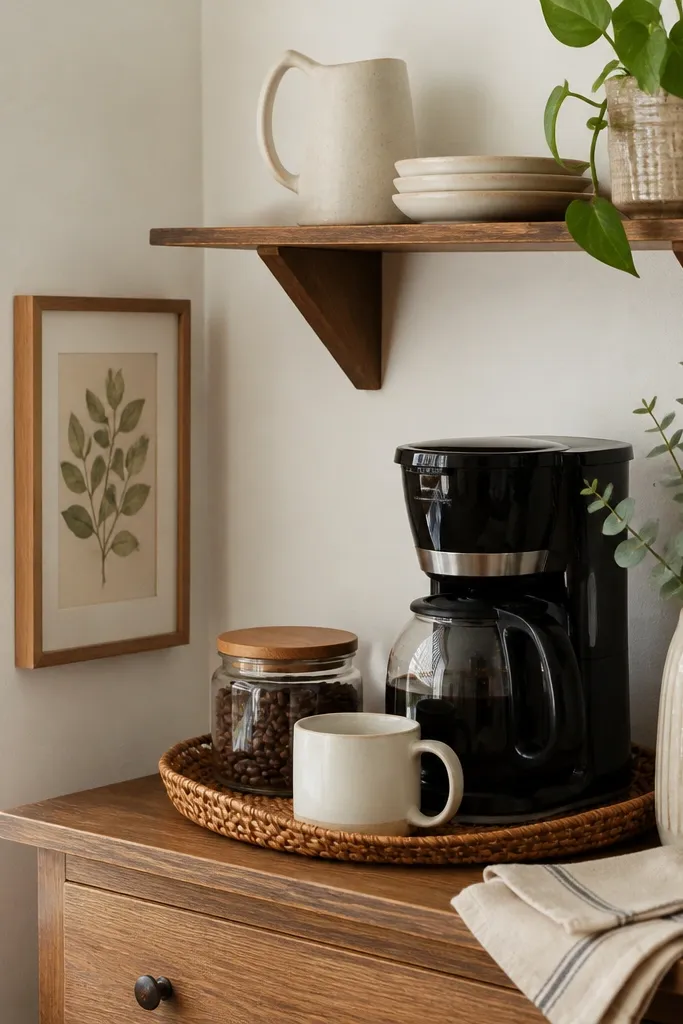
This is my go-to renter setup when you have a dresser or console already in place. The tension rod creates a “ceiling line” for your coffee corner so it reads like one unit, not scattered items. I like this look with a light wood dresser and black rod hardware because the contrast makes the mugs pop. Warm-toned skin looks great with creamy ceramics (ivory, oatmeal, sand) because they don’t clash with most undertones. Keep your coffee items in two finishes — for example, glass jars plus black metal baskets — so the corner stays tidy even when you’re busy.
Good to knowUse corded command hooks on the rod ends only if your rod has end brackets that need extra grip — it stops the rod from drifting after a few weeks.
Start by measuring the gap between the two walls where the rod will sit, then choose a rod with an adjustable range that’s slightly tighter than the gap. Mount the rod high enough that mug handles clear the top of the dresser by at least 2 inches. Hang only lightweight pieces on day one (mugs, stir sticks, a small basket) and test stability by gently shaking the rod. Place a round wooden tray centered on the dresser, then stack storage underneath it (beans in a glass jar, sugar in a matching canister) so the visual center stays clean. Finish with a creamer and spoon rest on the tray to create a “morning ritual” look.
AvoidDon’t hang heavy grinders, kettles, or full-size canisters from the rod.
2. No-drill wall shelf with under-shelf baskets for pods
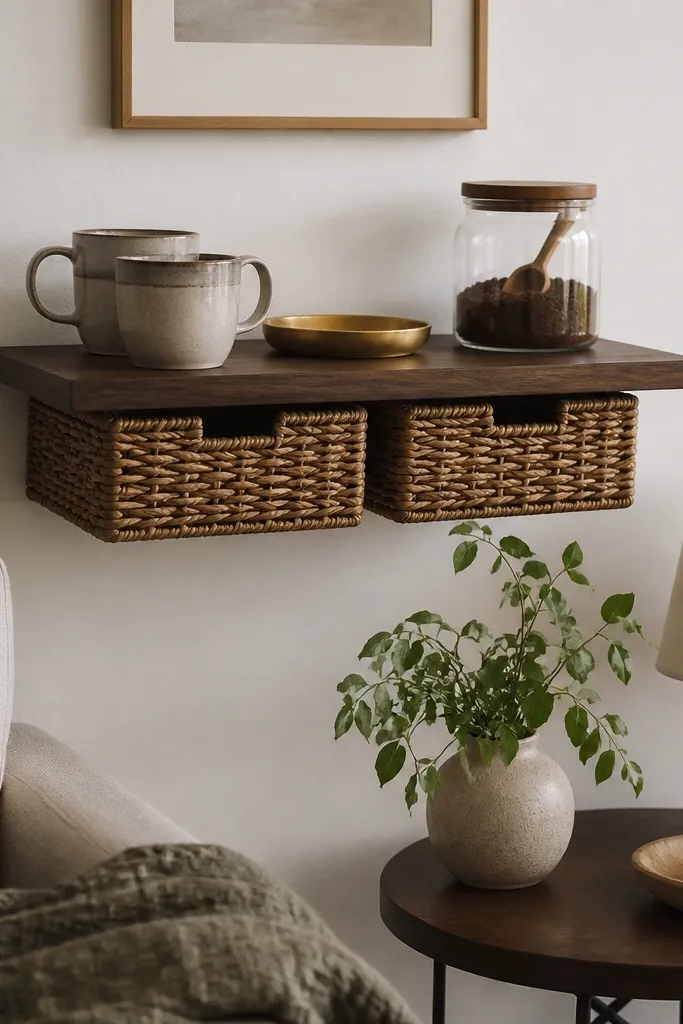
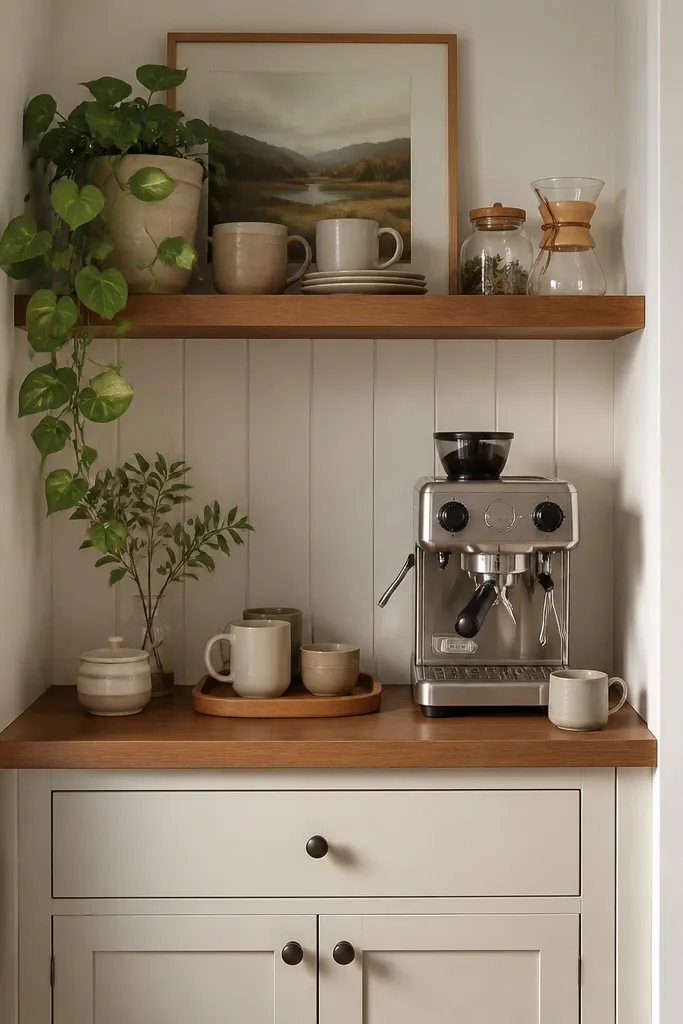
When your floor space is tight, a no-drill shelf keeps the coffee corner from eating your living room. I’ve used adhesive/strap-style hanging shelves in rental units where the walls were painted brick and drywall — the key is choosing a system rated for your shelf size and then keeping weight light. The baskets under the shelf hide pods and filters, which means you can keep the top looking styled even on chaotic mornings. If you have medium or deep skin tones, warm brass and honey wood make the whole station look inviting next to your coffee gear. This setup looks best in neutral rooms because the shelf line organizes everything visually.
Choose a shelf that’s 10-14 inches deep and install it using the manufacturer’s no-drill method on a wall section that feels solid. Let it cure fully if it uses adhesive pads — I usually wait 24 hours before loading. Place a small brass tray centered on top and add your “daily” items: mug, spoon, and a jar. Slide pods into the under-shelf baskets so you don’t see random packaging. Keep the jar lids and basket colors consistent (clear glass + natural woven, or matte black + black wire) so it doesn’t look like a storage dump.
Use a single color label system (masking tape strips on jars) so the shelf looks curated without expensive matching containers.
Don’t put bulky items on top — a shelf corner looks saggy fast if you overload it.
3. Pegboard-style organizer on a freestanding screen
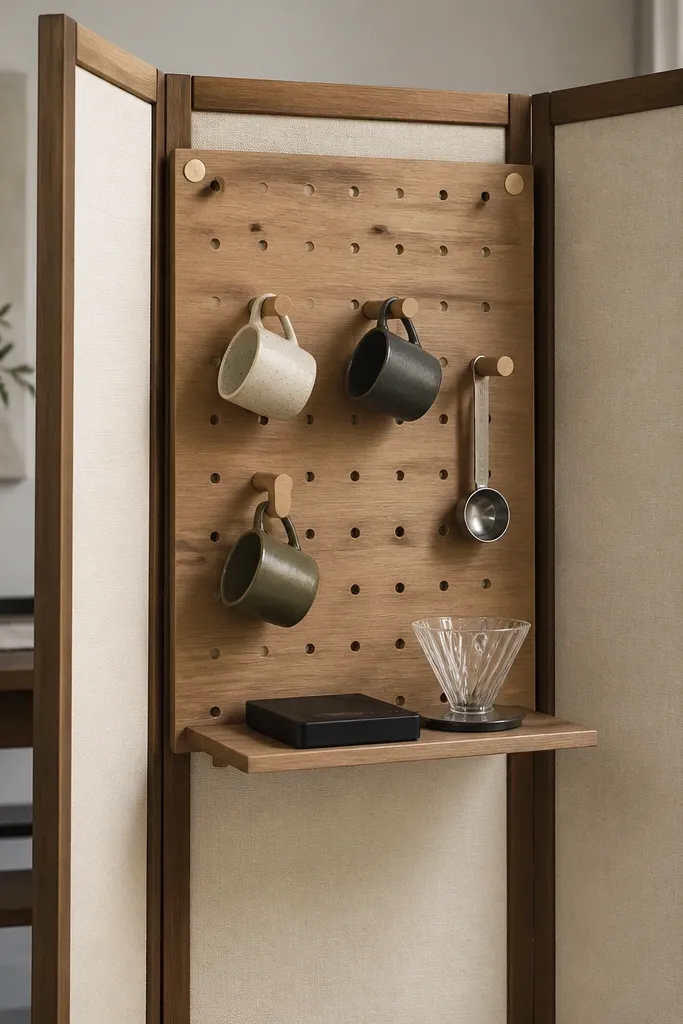
This is the most flexible renter option when your apartment layout changes. Instead of fighting the wall, you build a coffee corner on a freestanding screen and wheel it closer to the couch on slow mornings. The pegboard look makes the station feel intentional because every tool has a spot, and you can swap pieces as your routine changes. I like it with black tools and clear glass — the materials look clean and don’t collect visual noise. It also flatters lighter wood floors and neutral walls because the screen creates a dark vertical frame for your coffee colors.
Start with a folding screen in a finish you like (matte black or light wood). Attach a pegboard panel using removable ties or the screen’s existing frame hardware so you’re not drilling. Add small hooks for mugs and a couple of S-hooks for measuring spoons. Put a slim tray on the lower shelf area for daily items (scale, dripper, filters). Keep your top half mostly empty — one jar, one dripper, one mug set — so the pegboard doesn’t look crowded.
Hang one “visual anchor” mug that matches the screen finish (black ceramic on a black screen) to tie the whole corner together.
Don’t hang heavy jars from peg hooks — use peg hooks only for mugs, scoops, and light accessories.
4. Rolling bar cart with a spill-proof tray top
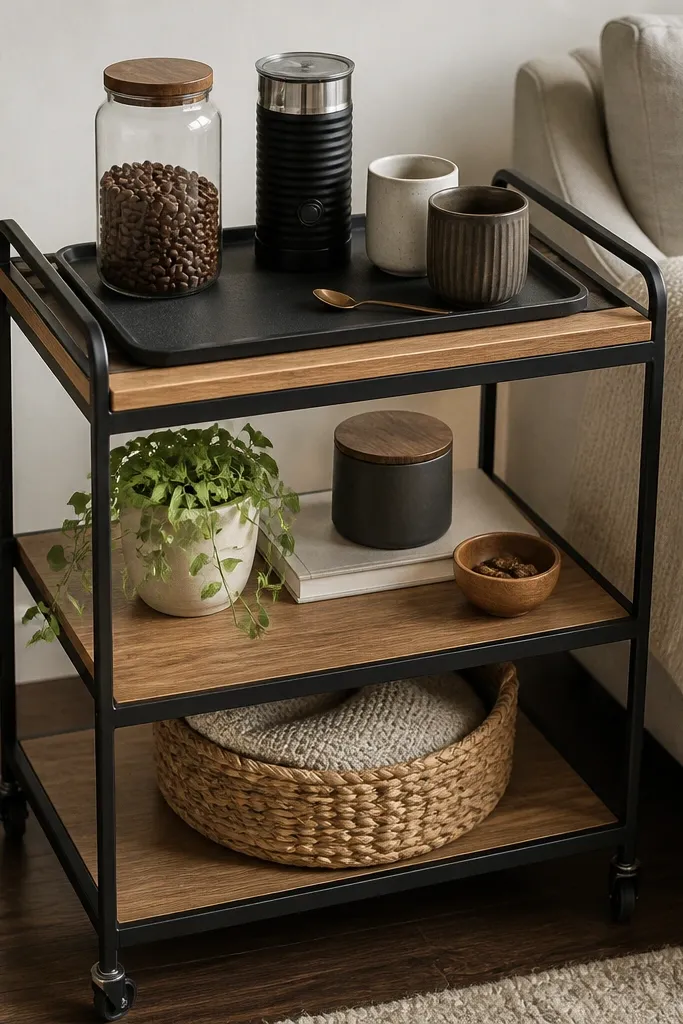
If you want coffee corner flexibility, a bar cart is the easiest win. I’ve used them in rentals where the “corner” is really a moving target — you can pull it out for guests and tuck it back later. The raised-edge tray is what makes it look styled instead of practical. Black metal plus natural wood looks good in almost any living room, and the warm wood keeps the cart from feeling harsh. For people with cooler skin tones, the black metal and white ceramics look crisp and clean.
Good to knowWipe and reset the tray every night for a week — the cart will train your brain into keeping the corner tidy.
Pick a cart with shelves that are at least 14 inches apart so your coffee gear fits without stacking too high. Put a silicone mat on the top shelf to protect surfaces and catch drips. Add a rectangular tray with a 1-inch lip so the kettle or water pitcher doesn’t slide. On the top, group items by use: brewing items to one side, mugs to the other. Use the middle shelf for backup supplies like filters and extra pods; keep the bottom shelf for bulky items like a spare bag of beans.
AvoidDon’t mix too many lid colors and packaging styles on the top shelf.
5. Window-sill coffee station with a removable caddy
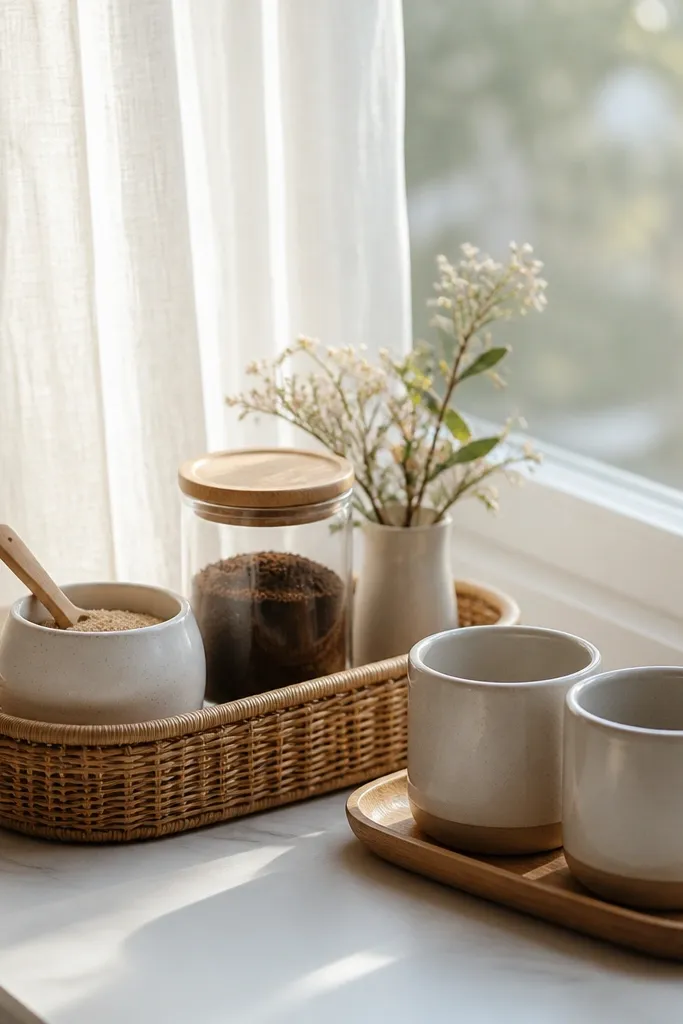
If your living room has a window you actually use, the sill is prime real estate. Morning light makes coffee gear look better — glass jars sparkle and ceramics look warmer. A removable caddy is the renter-friendly part: you can lift the whole set when you clean or move furniture. I prefer this idea with lighter colors and natural textures because it matches the daylight effect. It flatters just about anyone because the color palette stays neutral and soft instead of competing with your room.
Good to knowUse a clear jar for beans and a matte container for sugar so you get texture contrast without visual clutter.
Measure your sill depth and choose a caddy that’s shallow enough to keep the window area clear (around 8-10 inches deep). Place a slim tray first, then set your jar and daily sugar container on it. Keep mugs on a second smaller tray so they don’t touch the caddy sides. If you do pour-over, keep filters in a container with a lid to stop them from looking messy. Use a small runner or folded cloth under the caddy so it doesn’t slide when the window gets bumped.
AvoidDon’t store wet tools on the sill — condensation can stain wood and leave rings.
6. Over-the-door organizer turned coffee pantry
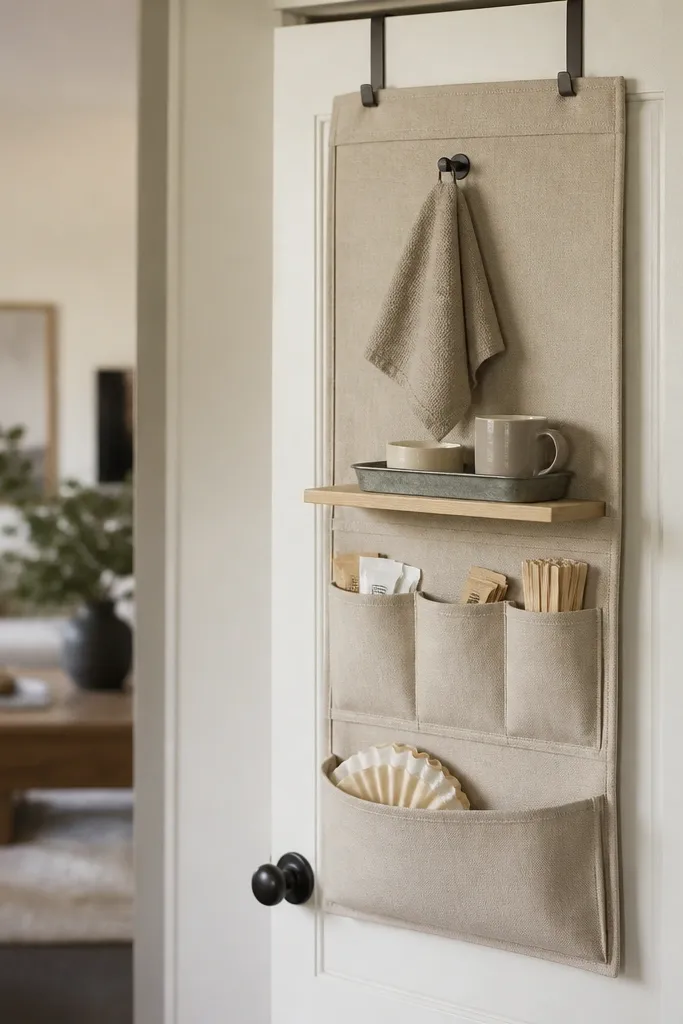
This works when you want coffee storage that doesn’t touch your wall or floor corners. The door location is also great for renters because you often already have a door near where you make coffee. I like using the organizer for dry supplies and small tools, then keeping only a couple of display items on your countertop. The look is clean because pockets keep everything separated by type. For rooms with patterned walls, this idea helps because the organizer brings structure without adding visual clutter.
Good to knowAdd a small label system to pockets using color-coded masking tape strips so you can refill fast.
Hang the organizer on a door that stays open enough for easy access. Put the heaviest items in the bottom pockets (filters, extra pods, spare stir sticks). Use the top pockets for smaller daily items like sweetener packets and a spoon. On the countertop, place one mug tray with a jar so the “display” stays controlled. If the door is near a kitchen, keep the organizer for storage only and keep the brewing gear on a nearby stable surface.
AvoidDon’t cram bulky bags into the pockets — they warp and make the organizer look stretched.
7. Adhesive hooks + a foldable wall rail for mugs
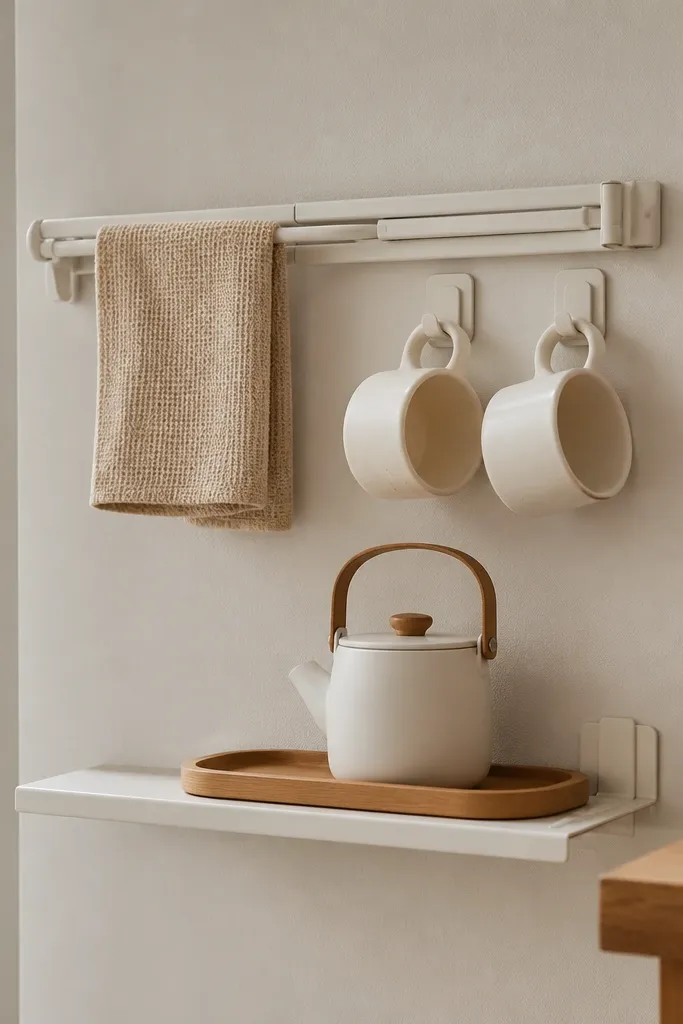
This idea gives you a mug gallery without drilling. The foldable rail is handy because you can fold it down when you don’t need it, which keeps the wall looking tidy. I’ve installed adhesive hooks on painted walls and textured areas; it holds best when you use hooks rated for the weight and press them firmly for the full time the instructions say. The rail lets you display mugs in a neat row, which makes the whole coffee corner look intentional even if you have limited counter space. Warm woods and off-white ceramics look especially good against painted walls.
Good to knowUse mug hooks with rubber coating if your mugs have delicate handles — it prevents tiny chips at the contact point.
Clean the wall with rubbing alcohol and let it dry fully before mounting. Install two adhesive hooks first at mug height so the mugs hang level; then add the foldable rail above them for a clean line. Wait the recommended cure time before loading mugs — I’ve learned the hard way that rushing makes hooks fail. On the counter, place a tray that matches the rail color and set your jar and spoon rest there. Keep mugs consistent in size so the row looks uniform.
AvoidDon’t hang more than two mugs at first — test the load and spacing before adding a third.
8. Corner desk shelf with removable bins
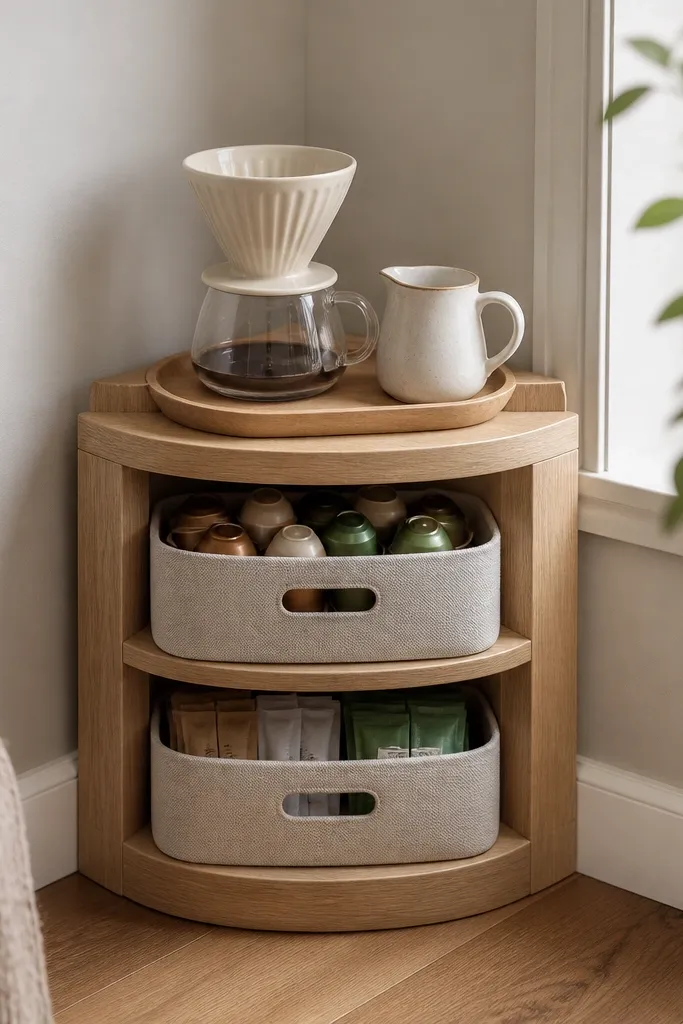
A corner shelf is perfect when you want a coffee corner but your space is too awkward for a standard table. The removable bins are the real styling secret — you can hide clutter fast, then pull out what you need. I like light wood shelves because they soften the look and make the coffee gear feel cozy instead of industrial. This is flattering for small apartments because the corner shelf adds function without making the room feel blocked. If you have darker walls, the light wood also keeps the corner from looking heavy.
Good to knowChoose bins with open fronts and uniform lids so you can scan them quickly while staying visually consistent.
Pick a shelf that fits the corner angle and leaves at least 6 inches between the shelf edge and the wall so you can reach the bins. Use two bins: one for pods and one for sweeteners/filters. Put your daily pour-over gear on top in a single cluster — dripper, filters in a small container, and a spoon. Add a tray under the jar so spills don’t get into the bins. Keep the color palette to one neutral metal (brass or matte black) and one ceramic tone (cream or clay).
AvoidDon’t use bins in random colors — mismatched bins make the corner look like storage.
9. Magnetic knife strip for metal tools and spoons
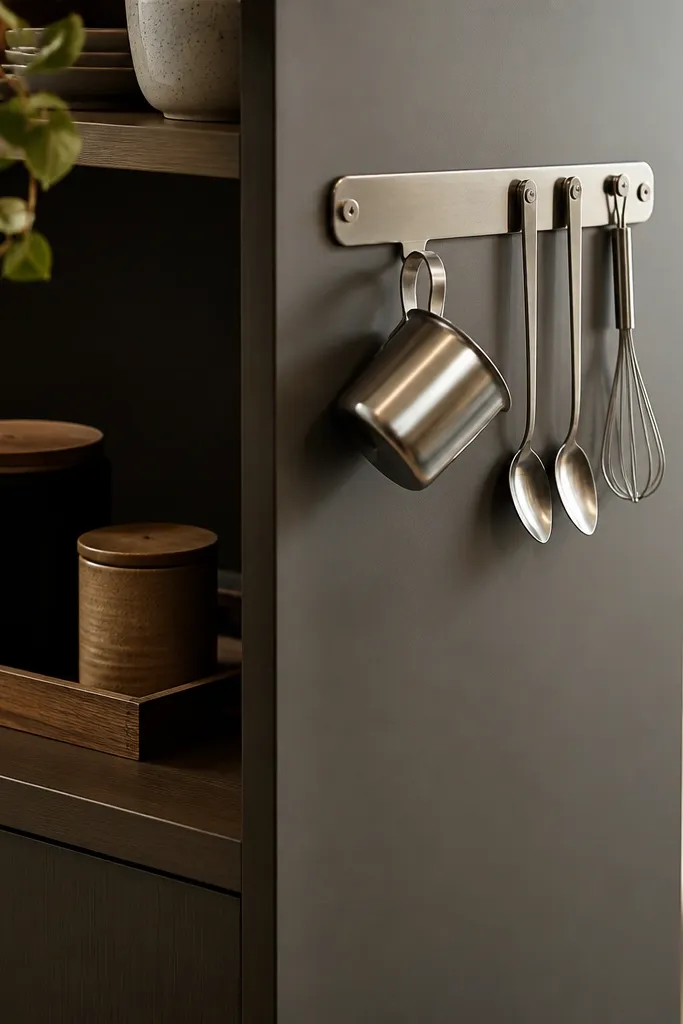
This one is for people who hate digging through drawers. A magnetic strip organizes metal tools and keeps your go-to items visible. I used it on the side of a cabinet in a rental because the side panel was less scuffed than the wall, and it made my coffee routine faster. Stainless and brushed metal tools look clean next to glass jars, and it gives the corner a “designed kitchen” feel without drilling into the wall. This setup looks best with a neutral cabinet and one accent color, like warm copper or matte black.
Good to knowKeep one small towel folded behind the cabinet edge — it hides drips and makes the corner look clean even when you’re mid-routine.
Choose a magnetic strip length that matches your tool set, usually 12-18 inches for a small coffee corner. Install it using the removable hardware system your strip came with, and test it by hanging only lightweight items first. Place a spoon set and a small metal whisk along the strip, then hang your frothing pitcher only after you confirm it sits level. Put your coffee canisters and sugar in matching containers on the shelf below. Use a tray on the top surface to keep the daily jar and dripper from wandering around.
AvoidDon’t magnetize anything with a thin handle that can twist — it looks messy fast.
10. Floating shelf + ladder-style mug stand
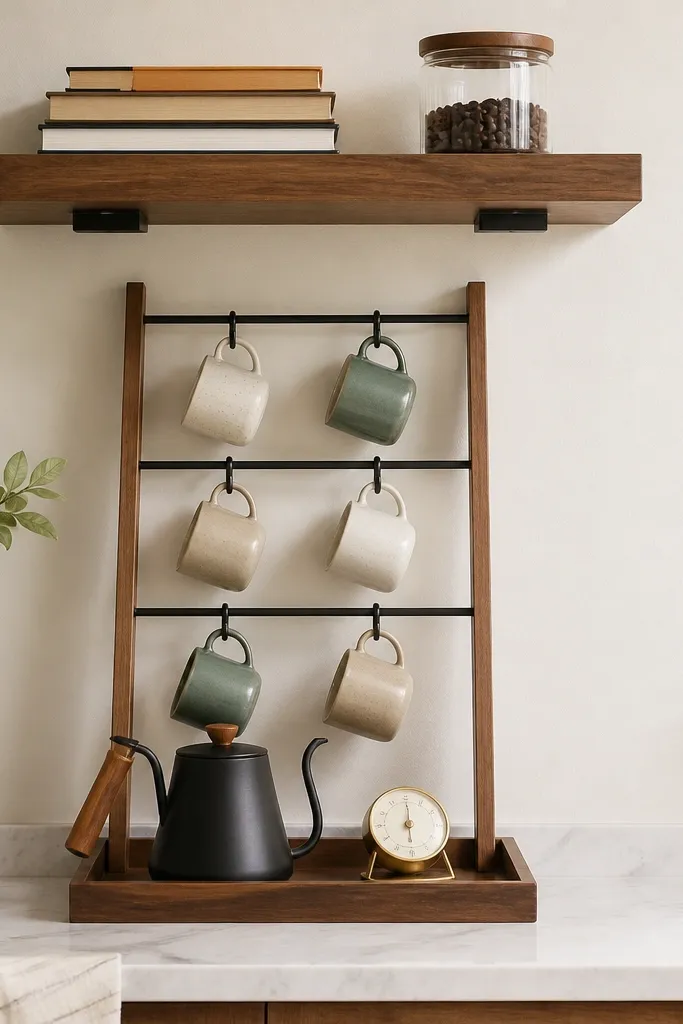
A ladder-style mug stand creates height and symmetry, which makes a coffee corner feel intentional even when it’s small. I like it paired with a shelf because you can keep the top surface minimal and still make the wall area look styled. Choose a stand in matte black or brushed steel so it matches common coffee gear like kettles and grinders. This works especially well if you have a couch next to a blank wall because the mug ladder fills that empty space with a vertical line. It also flatters most rooms because it doesn’t require a busy pattern to look good.
Good to knowUse mug spacing like a photo shoot — leave a finger-width gap between mugs so the handles don’t clink and scratch.
Install the no-drill shelf first using a system rated for the shelf size and wait for full cure time. Place the jar and one small decor item (like a slim timer or a folded napkin stack) on the shelf so it doesn’t look like a shelf full of random objects. Set the ladder stand centered under the shelf, then hang mugs so handles face forward. Add a slim tray on a nearby table or shelf for daily items — dripper, spoon, and filters. Keep the color count low: one jar glass, one ceramic color, one metal finish.
AvoidDon’t hang mugs of wildly different sizes — the ladder looks lopsided.
11. Fold-out serving tray as a wall-mounted coffee desk
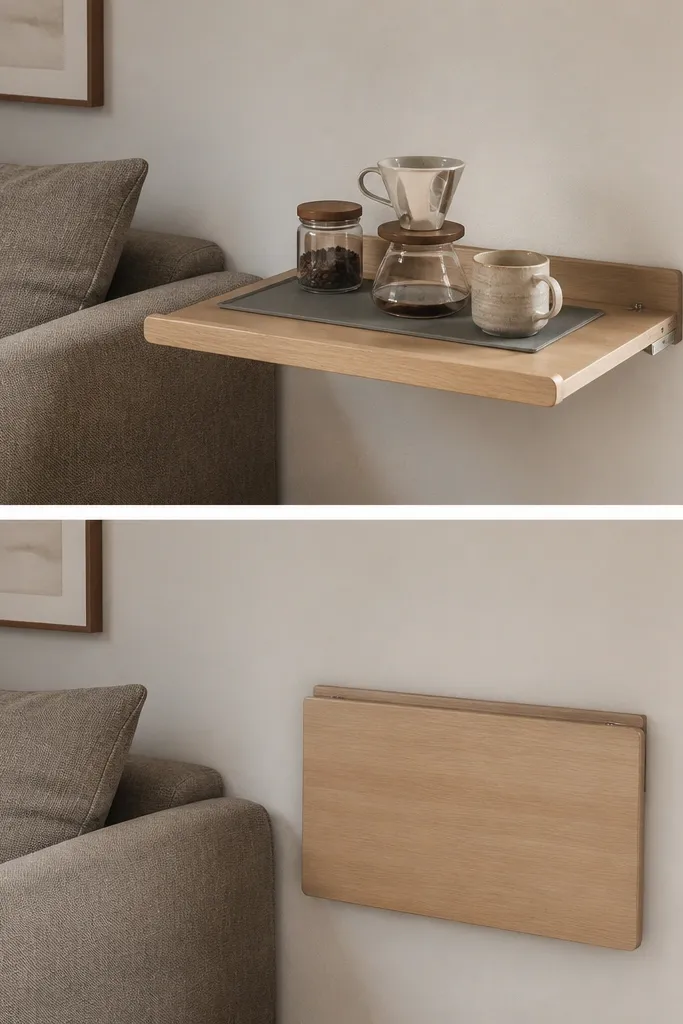
This is the best solution when you have almost no counter space but you still want a “coffee station moment.” The fold-out tray gives you a dedicated brewing surface that disappears when you’re not using it. I’ve done this in apartments where the kitchen was far from the living room and it made weekend coffee feel like a ritual. The key is using a tray mat or silicone pad so the surface stays protected and the coffee gear doesn’t slide. Warm ceramics and light wood tones look especially good on a small wall surface because it feels cozy instead of utilitarian.
Good to knowKeep a small foldable towel next to the tray so you can wipe drips instantly after pouring.
Choose a fold-out tray system that sits at about 34-36 inches when down, so you don’t hunch over. Attach the tray using the renter-safe method your unit provides, then test it with your hand before adding anything. Add a silicone mat or a thin cork mat on the fold-out surface to prevent slipping. Place your daily gear in an L-shape: jar in the back corner, dripper and filters on the side, mug near the front edge. When you fold it up, wipe it and store loose items in a small bin so nothing spills into the living space.
AvoidDon’t leave water tools on the tray when you fold it up — it can leave marks.
12. Large framed cork board with labeled canisters
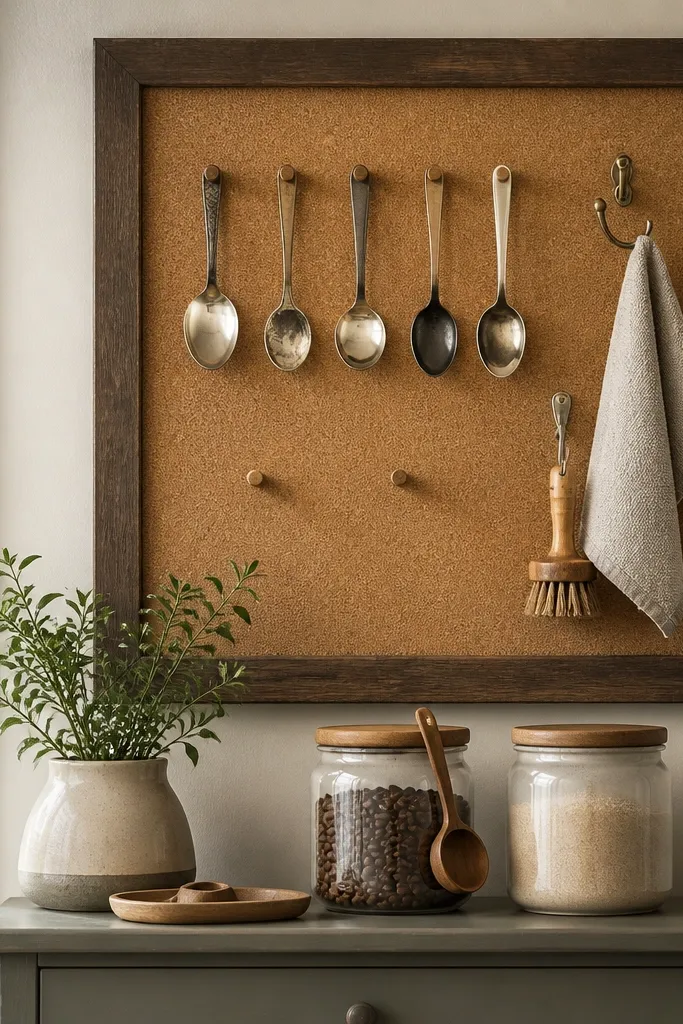
Cork board setups look styled because they give you a background texture and a place for small tools. In rentals, you can hang the board with a no-drill hanging system or place it on a standing easel next to the cabinet. I like using matching canisters because the cork background makes labels readable and consistent. This setup is great for people who like visible organization. If your room has a lot of neutral beige, cork adds warmth without looking like a craft project.
Pick a cork board frame size that covers the wall space above your coffee cabinet without overwhelming it — usually 18x24 inches. Hang it using a hanging system rated for the board weight or set it on a stable easel. Pin small labels on the cork (beans, sugar, filters) and hang only light tools like spoons. Place matching canisters on the cabinet shelf and keep lids in one finish. Add one tray on the cabinet top with your daily dripper and a small milk jug for a clean focal point.
Write labels in the same ink color and font style using a label maker or consistent marker so it looks like one set.
Don’t attach too many pins and clashing colors — it turns the cork board into a bulletin mess.
13. Bar cart coffee corner with matching fabric runner
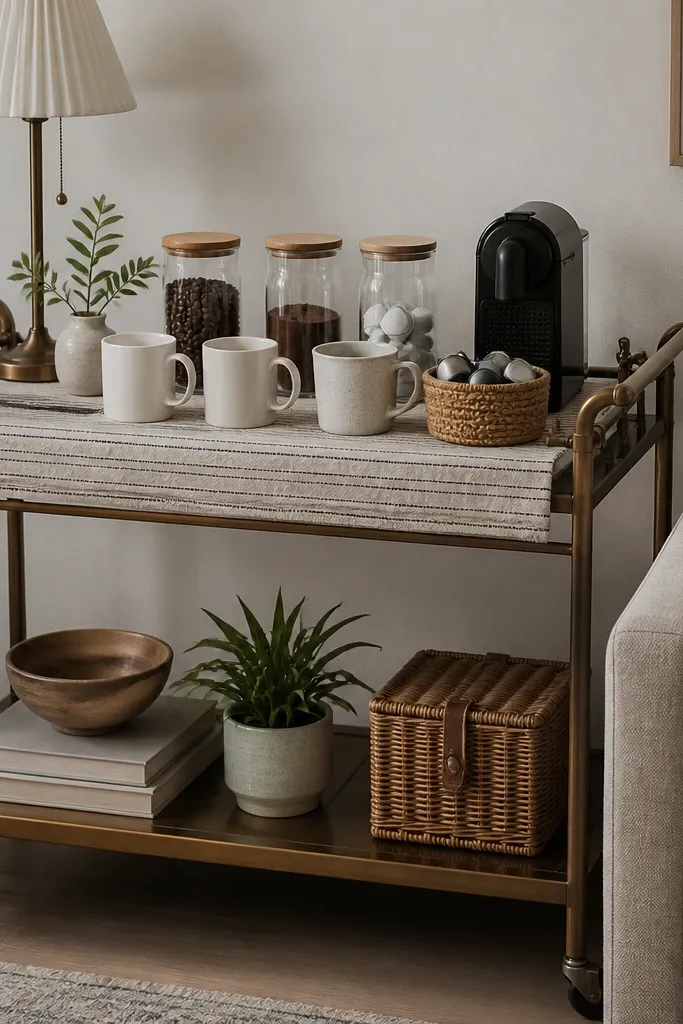
Fabric makes coffee corners feel softer, and it also hides tiny messes that happen in real life. I’ve used a runner on bar carts and it stops the “metal shelf clutter” look, especially in rooms with hard floors and lots of shiny surfaces. Choose a runner with a simple stripe or small dot pattern so it doesn’t fight your wallpaper. Warm oatmeal fabric looks good next to both cool and warm skin tones because it’s neutral and calming. This is also a good choice if your mugs are mismatched — the fabric ties them together.
Good to knowUse a lint roller on the runner before guests — pet hair on fabric makes everything look messy instantly.
Pick a runner that matches your room palette — oatmeal with thin black stripes is my favorite because it works with black metal carts and cream ceramics. Lay the runner flat on the cart top shelf, then place a tray on top of the runner for jar stability. Add one woven basket for pods and keep it on the middle shelf so the pod packaging doesn’t show. Arrange mugs in a slight arc on the tray so they look intentional. Keep your kettle and frother off the runner when you’re not using them to prevent heat marks.
AvoidDon’t use a thick shag runner — it traps coffee spills and looks worn fast.
14. Small nightstand coffee nook with drawer dividers
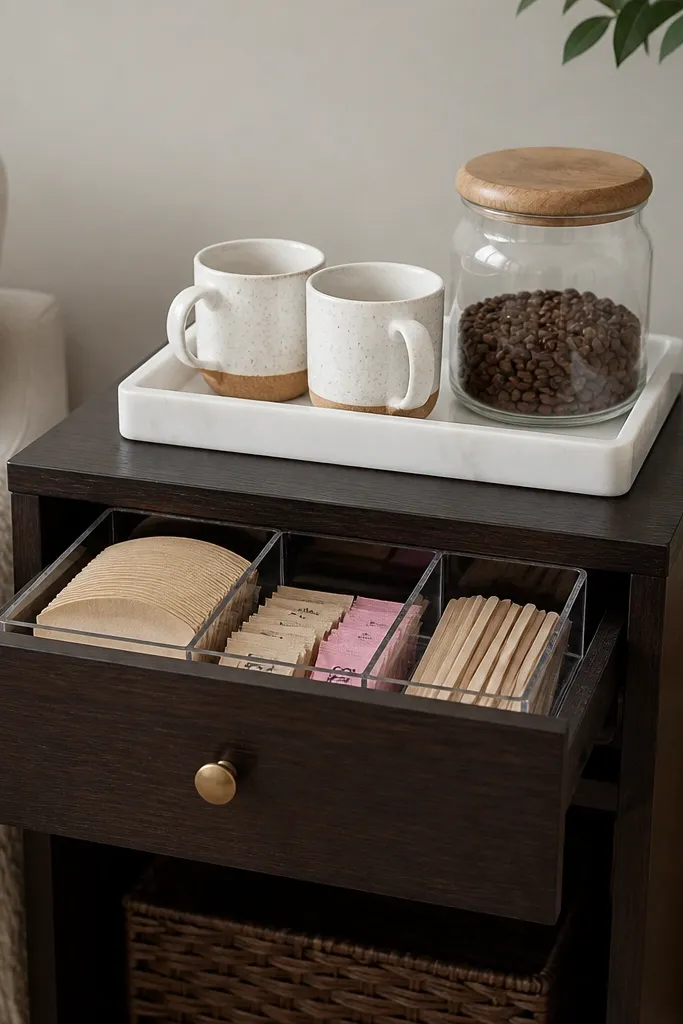
This is my favorite renter trick because a nightstand already has the height and storage you need. You get a stable top surface for your daily setup and drawers for the stuff you don’t want on display. I like using a white tray on top because it keeps the coffee corner bright and stops dark wood from making it feel heavy. Drawer dividers make a huge difference — your filters stay flat and your sweeteners don’t become a jumbled pile. This works in bedrooms, living rooms, and guest areas where you want coffee to feel like part of the room, not an appliance.
Good to knowLine the drawer with a thin non-slip mat so packets don’t slide when you open it quickly.
Choose a nightstand with a top at around 28-30 inches high so pouring doesn’t feel awkward. Put a tray on top, then place your jar and mugs inside the tray boundaries. In the drawer, use dividers sized for filters and small packets so everything stands upright. Keep your most-used items closest to the front of the drawer — usually filters and sweeteners. Add a small spoon cup on the tray and one spare napkin holder so the corner looks styled even when you’re mid-caffeine.
AvoidDon’t store wet cloths in the drawer — they smell and ruin the clean look.
15. Mirrored tray coffee corner on a side table
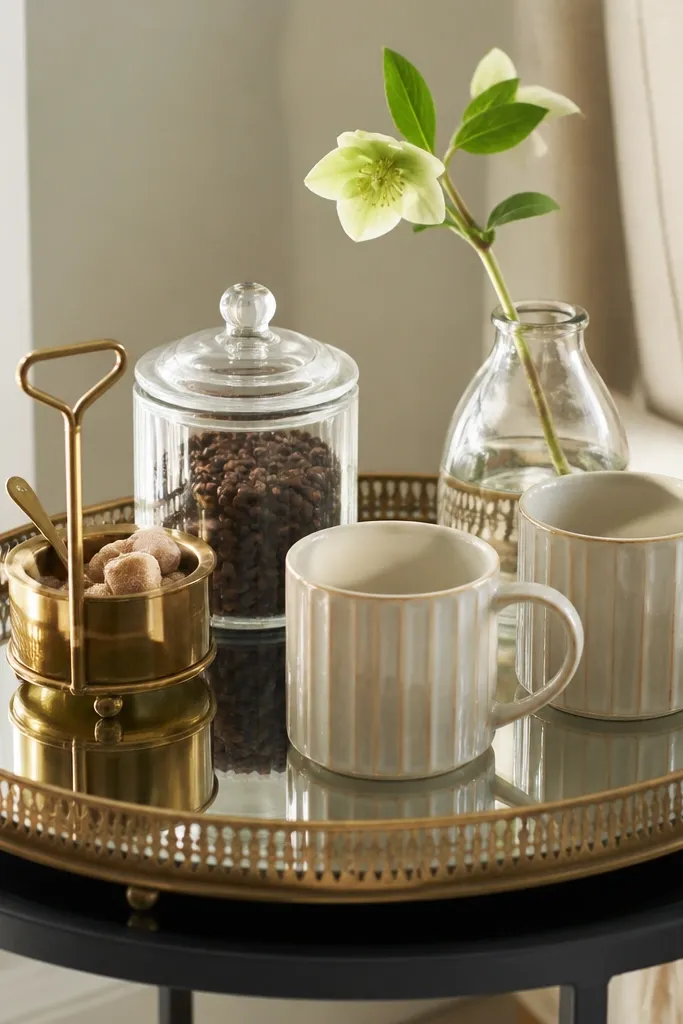
Mirrored trays make tiny corners look bigger because they bounce light and reflect your coffee gear. I like this when your room is dim or the corner sits in shadow. The reflection also creates a sense of neatness because the tray makes items look aligned and intentional. Gold-toned accents work well with warm ceramics like latte beige and creamy white. If your room has a lot of cool gray, the mirror adds warmth without adding color chaos.
Good to knowWipe the mirror with a microfiber cloth right before styling — fingerprints show up immediately in mirrored surfaces.
Start with a mirrored tray sized so it fits your side table without touching the edges — leave at least 2 inches of table space around it. Place a gold or brass caddy centered on the tray and add your sugar container inside it. Set the glass jar of beans on one side, then place mugs on the other side so the tray has a clear left-right balance. Add one small styling item — a single stem or a folded napkin — so it doesn’t look like a product photo. Keep the rest minimal: one creamer, one spoon rest, and a small stack of coasters.
AvoidDon’t mix too many metal finishes on the tray — gold, silver, and black together starts to look messy.
16. LED-lit acrylic coffee display shelf
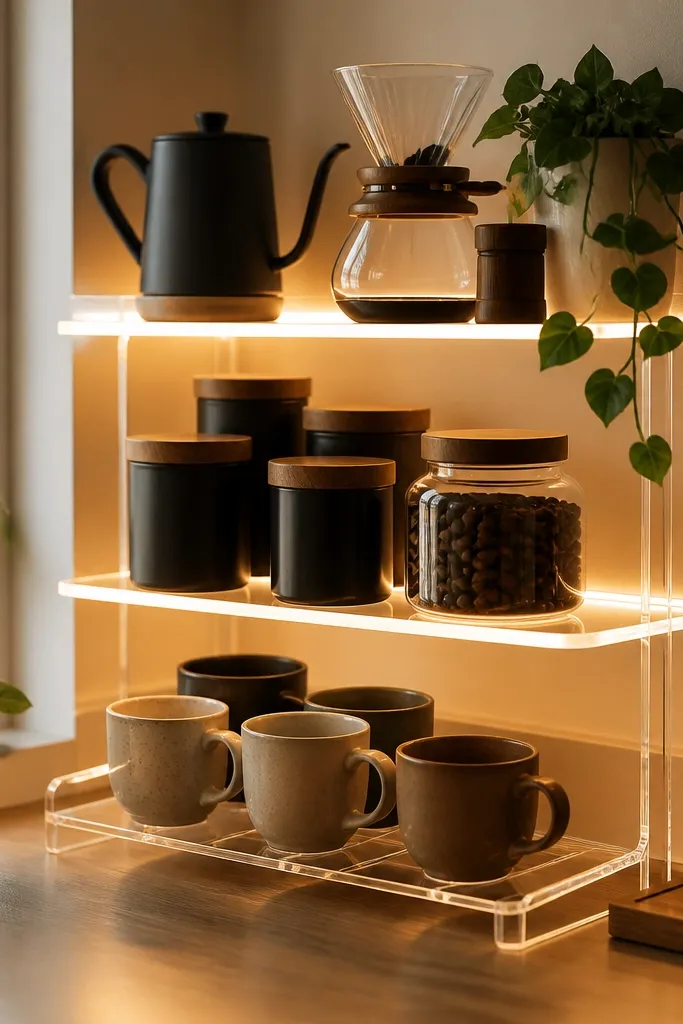
This is the “I want it to look like a boutique counter” option, and it works in rentals because the acrylic unit sits on the floor or a table. The LED glow makes glass canisters look premium and keeps the corner looking styled even when you’re not using it. I’ve used warm white LEDs at low brightness because cool blue LEDs can make ceramics look dull. The clear acrylic also flatters small spaces by not adding visual bulk. This look is especially good if your room is modern with black accents or if you like clean lines.
Good to knowUse warm white LEDs and keep brightness moderate — it looks cozy instead of harsh.
Choose an acrylic display shelf that’s 12-18 inches wide so it doesn’t take over the corner. Set it on a stable side table or cabinet top with enough clearance around it for cleaning. Place your coffee canisters and dripper inside the unit, then position mugs on a small clear stand at the bottom. Route the LED wire behind the unit so it doesn’t hang loose. Add one tray on the lower surface for daily items like stir spoons and a small bottle of syrup so the display doesn’t turn into a storage bin.
AvoidDon’t overfill the shelf — acrylic shows every label and clutter line.
17. Cloth napkin + matching ceramic mugs for a "tabletop bar"
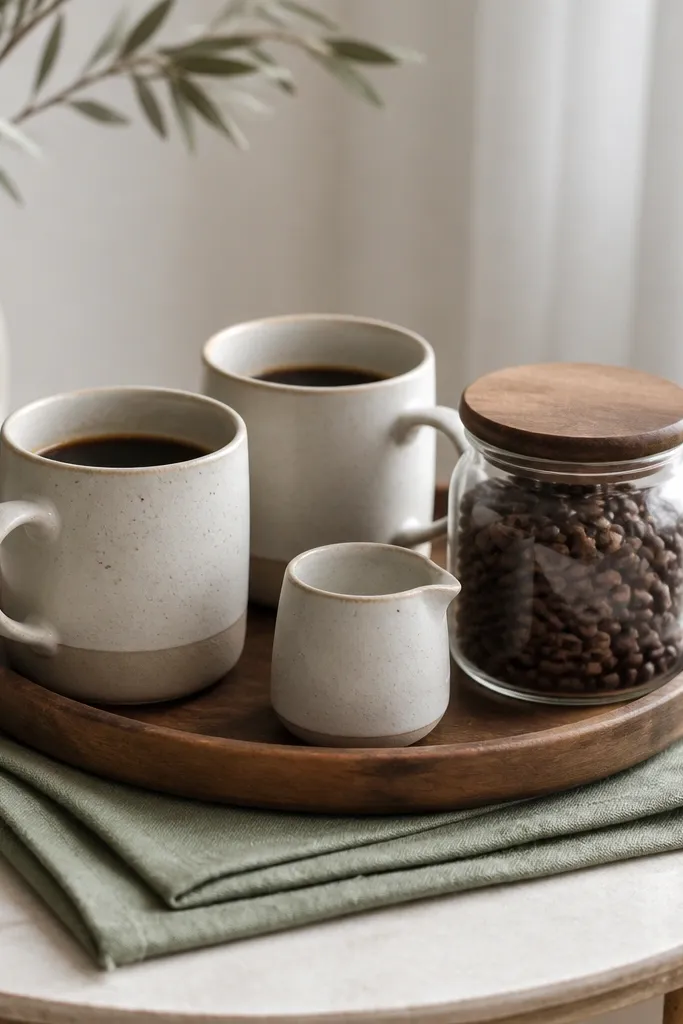
This idea is about texture and color discipline. When you use one fabric color and keep the ceramics matched, your coffee corner looks like you planned it even if you only own a few items. I like linen napkins because they hide minor spills and add a soft surface that makes the mugs look warmer. Sage, terracotta, and dusty blue are my favorite shades because they pair with both light and dark woods. This setup flatters people who like calm, low-contrast aesthetics and it’s especially good in bedrooms where you want coffee to feel soothing.
Good to knowFold the napkin the same way each time so your corner looks consistent day to day.
Start with a small round or square table that’s already in your room. Layer a fabric napkin folded flat under a tray, then place mugs inside the tray boundaries. Add a ceramic creamer and a spoon rest that matches the mug color family. Put coffee beans in a clear jar so the corner looks active, then add one small item like a sugar container with a lid. Keep your tools minimal on the table — dripper and filters go in a drawer or basket nearby so the tabletop stays clean.
AvoidDon’t use a napkin with busy prints if your mugs are patterned — the whole corner gets visually loud.
18. Stacked crates with a chalk label wall
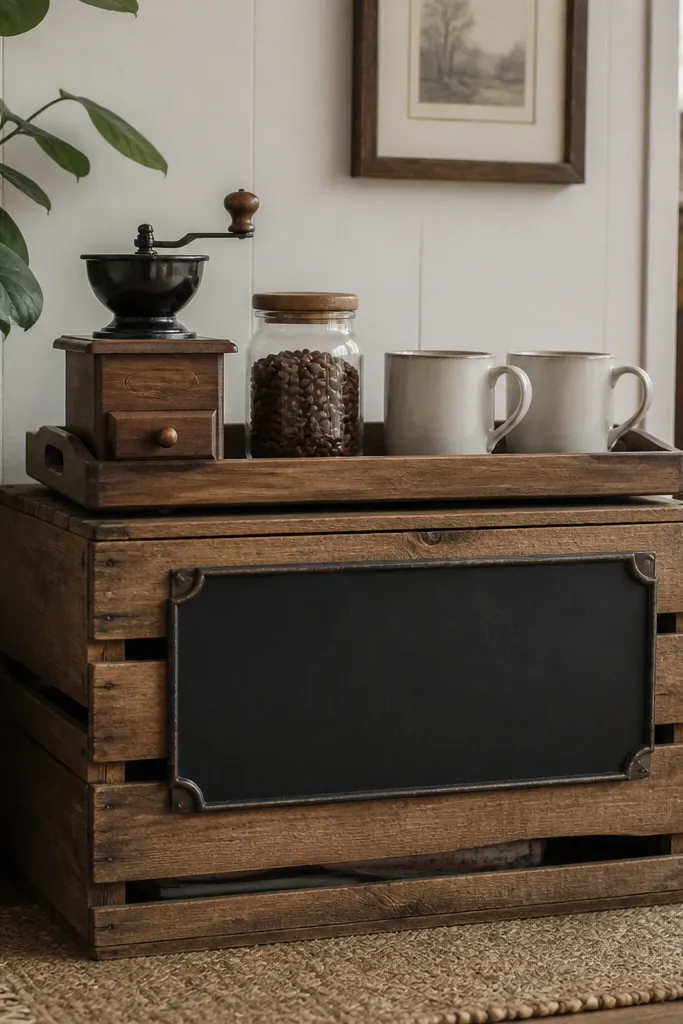
Wood crates bring a grounded look, and you can make them renter-friendly by choosing crates that sit on a rug or mat with non-slip pads. The chalk label is what makes it feel organized rather than rustic clutter. I like this for people who drink both coffee and tea because you can label clearly and store extra bags in the crates. In a bedroom, crates look cozy when paired with soft textiles like a wool rug and cream linens. If you have darker furniture, light wood crates keep the corner bright and readable.
Good to knowUse small bin liners inside crates — they keep dust out and make wiping the station fast.
Place non-slip pads under the bottom crate so it doesn’t shift on your floor. Stack the crates and use a tray on top as your “working surface.” Label the front of the top crate with chalk so it’s easy to change when you restock. Put coffee beans in a clear jar on the tray, then add a grinder or frother in one spot. Store filters, tea bags, and sweeteners inside the crates in separate bins so you can pull one bin at a time. Keep the rug color neutral so the wood doesn’t compete with patterns.
AvoidDon’t skip the non-slip pads — stacked crates slide and the corner stops looking intentional.