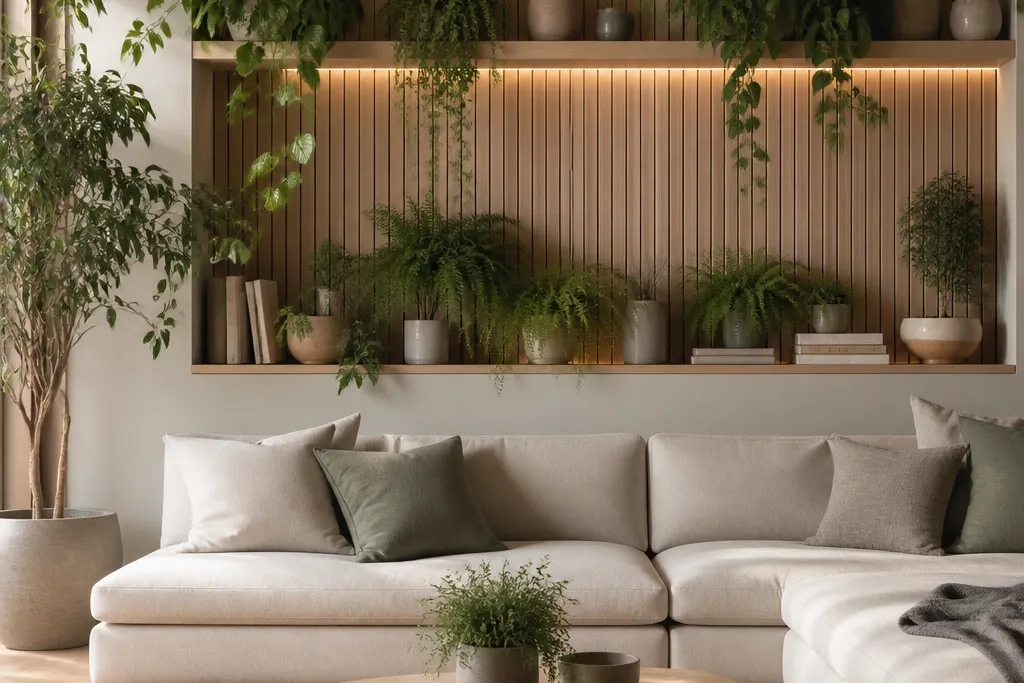
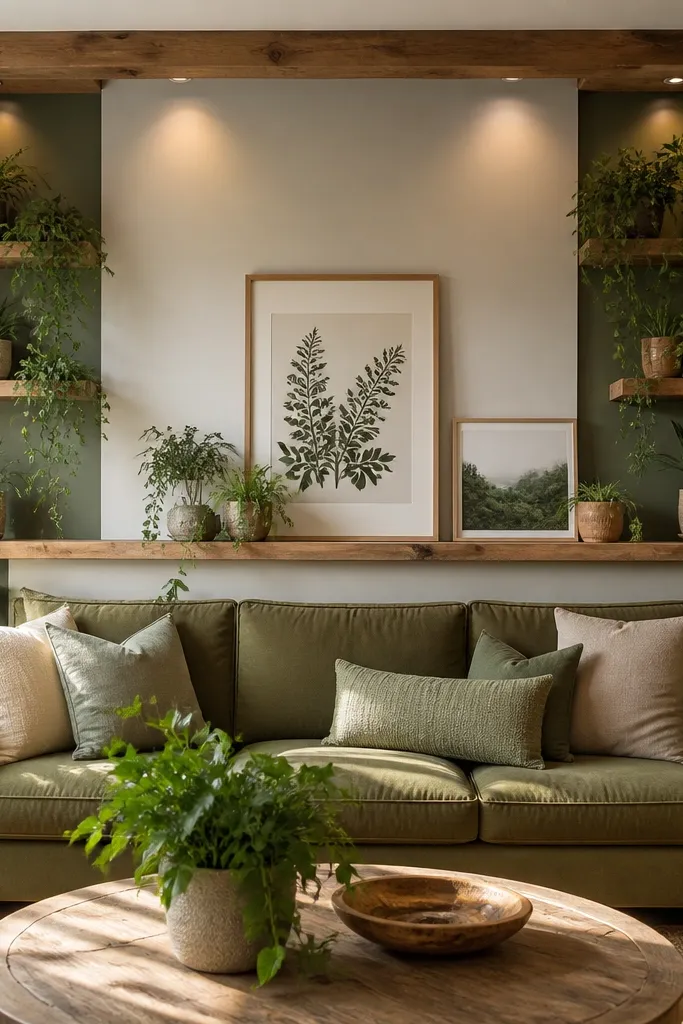
1. Tall planter corner that frames the sofa like a picture
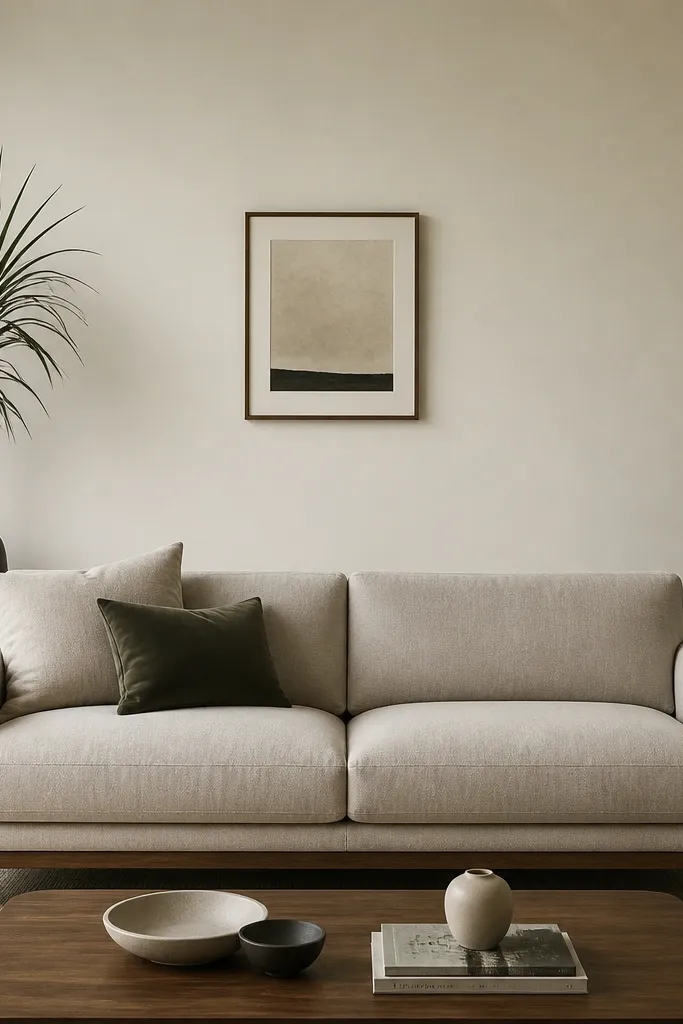
This layout works when your sofa is centered and your wall feels too wide. The tall corner planters create a frame that pulls your eye toward the seating without adding clutter in the middle. I like matte black and deep green because they look grounded against off-white walls and they don’t glare under lamps. If your skin tones read warm (peachy or golden undertones) in the room through pillows or wood, the deep green makes the whole palette feel warmer. For guests, it reads like “curated” even though you’re only adding two big pieces.
Good to knowUse a drip tray or saucer and keep the planters 1 inch away from the wall so leaves don’t pick up dust marks.
Start by placing your sofa and then measure 6-10 inches from each sofa side to where you want the corner planters to sit. Pick a planter height that reaches about the same height as the sofa back plus 4-6 inches; for a 26-inch sofa back, aim for 32-36 inches from the floor to the highest leaf. Keep the center of the wall mostly empty so the plants act like vertical bookends. Finally, add one small art piece above the sofa that is narrower than the sofa width by about 8-12 inches so it doesn’t compete with the plant height.
AvoidDon’t put two short planters side-by-side — it looks like leftover decor instead of a frame.
2. Floating shelf + trailing pothos rail
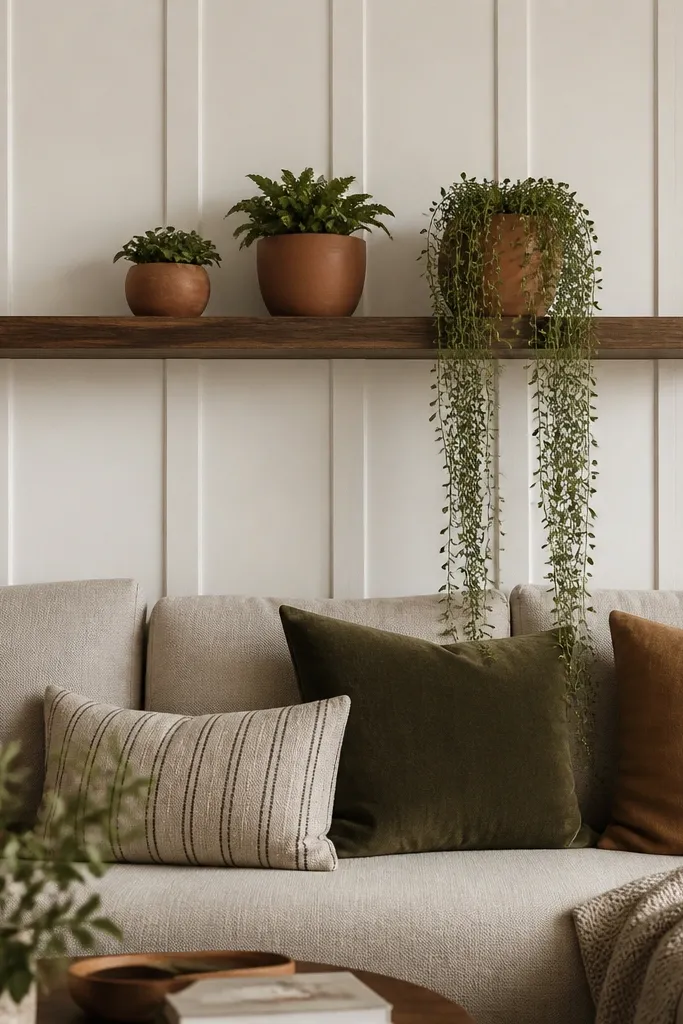
This is my go-to when the wall has enough height for shelves and you want the plants to look like they belong. The floating shelf gives you a clean horizontal line that balances the sofa’s straight back. Trailing pothos or heartleaf philodendron makes the wall feel alive because it moves toward the furniture instead of hanging away from it. Terracotta adds warmth and looks great with light fabrics like oatmeal, ivory, and pale gray. It also flatters rooms where you have warm wood floors because the shelf and pots echo the same tone.
Good to knowIf your wall is glare-prone, angle a floor lamp slightly toward the shelf so the trailing leaves cast a soft shadow.
Start by installing a shelf that sits about 8-12 inches above the top of the sofa back cushion. Use a shelf depth of 6-8 inches so pots don’t look cramped and the trailing leaves have room to fall. Arrange pots from shortest to tallest left to right, then let the tallest plant trail more heavily over the sofa side it faces. Finish by topping the soil with a thin layer of decorative moss or coco chips in a dark green-brown so the pots look finished from across the room.
AvoidDon’t use only upright plants on a shelf — the spill is what makes it look intentional.
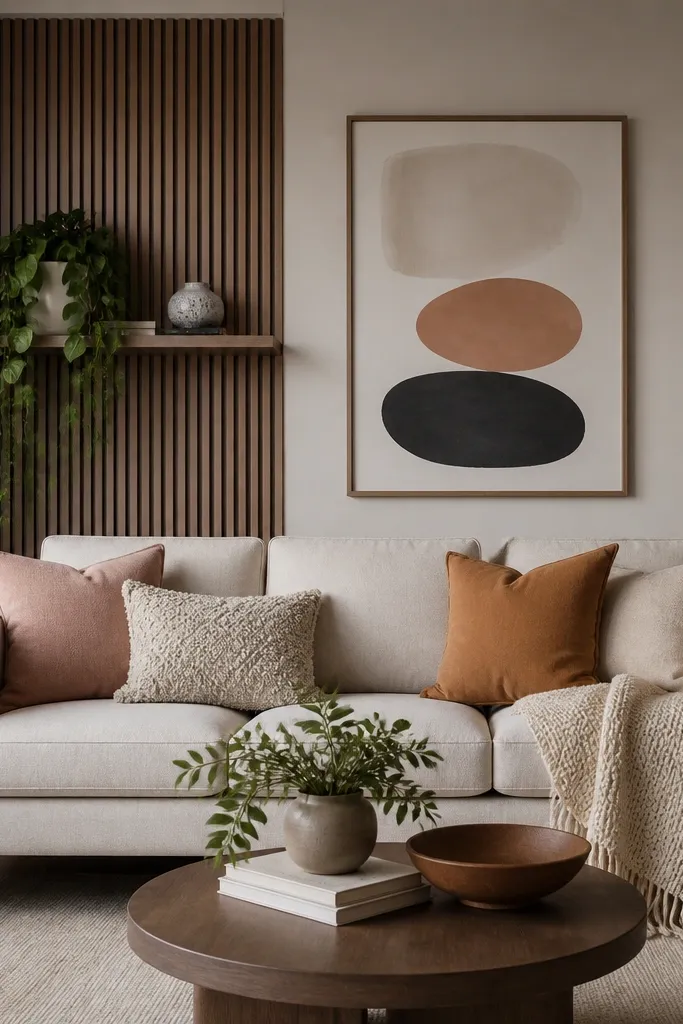
3. Vertical slat wall with plant pockets
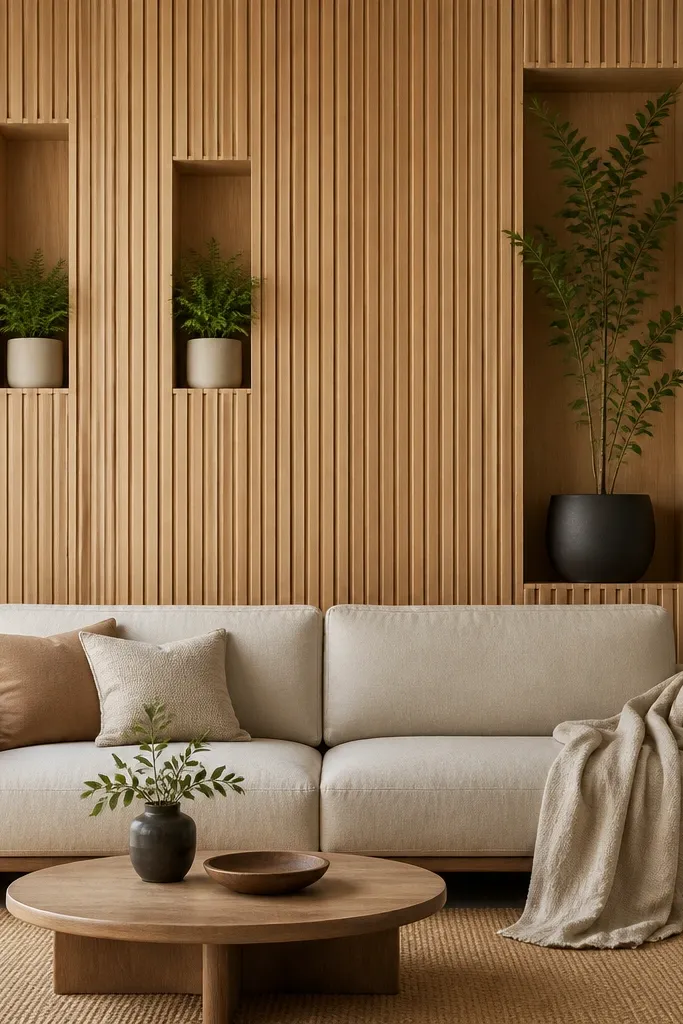
A slat wall gives you built-in structure, which is perfect when your goal is “designed wall” without buying a ton of decor. Plant pockets keep greenery tidy and prevent that messy, leaning look that happens when pots sit loose. Light oak slats brighten a room and make green leaves look fresher. If your sofa fabric is cool-toned (blue-gray or slate), the warm slats pull it toward balanced neutral. For guests, it reads architectural, and that makes the plants feel like part of the design instead of random additions.
Good to knowAdd a small piece of felt behind each pocket opening to reduce rubbing and keep leaves from snagging.
Start by marking the slat grid and leave a clear center area behind any art you want above the sofa. Install the slats so they’re 3-4 inches apart, then create pockets with cut backing boards so pots sit stable and don’t tilt forward. Place a taller plant pocket on one side and a smaller fern pocket on the other to avoid symmetry that feels stiff. Finally, use planters with the same finish across pockets — matte white for small ferns and charcoal for the larger plant — so the wall has a consistent visual rhythm.
AvoidDon’t choose planters that stick out past the slat face — the wall will look unfinished.
4. Mirror panel with two plant stands
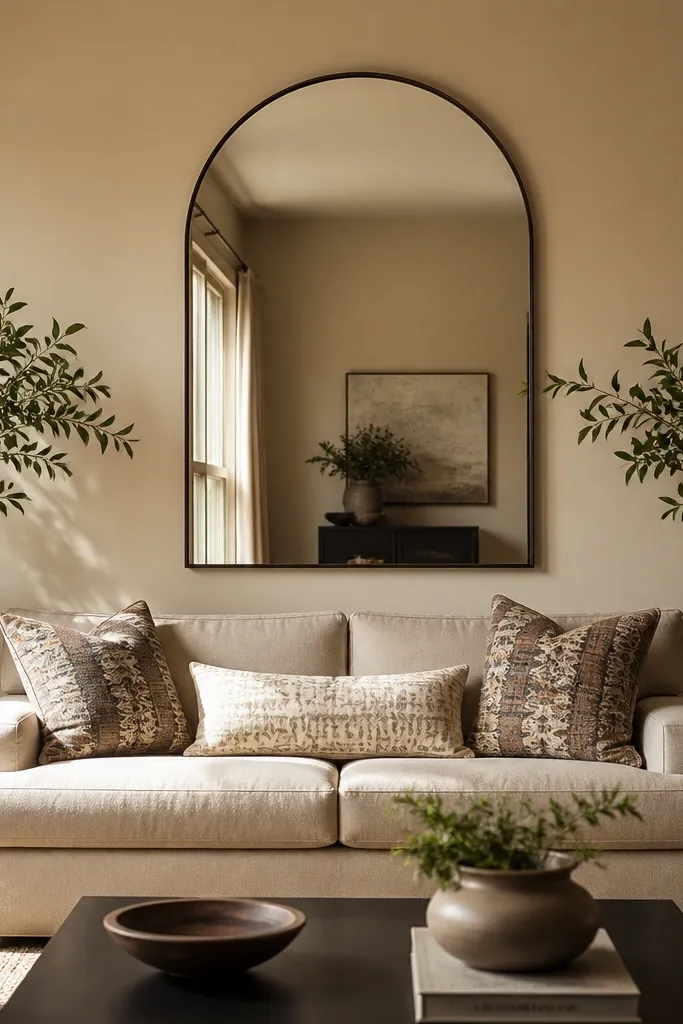
Mirrors change the whole back wall because they multiply light and make greenery look fuller without adding extra pots. This setup works best when your living room is a little dim or your sofa sits opposite a window. The arched mirror adds softness, and the inward-leaning plant stands give the wall a “gathered” feel. Black planters keep the mirror reflection from looking cluttered. If your cushions have a mix of warm and cool tones, the mirror neutralizes the palette so the plants look like the main event.
Good to knowWipe the mirror weekly; smudges make plant leaves look dusty in the reflection.
Hang the mirror so its bottom edge sits about 6 inches above the sofa back top. Place plant stands so the plants' highest leaves reach up to the mirror’s midpoint, not higher. Use two stands with the same height and finish, then angle the pots 10-15 degrees toward the mirror. Finish with a small tray on the sofa side table using one leaf color — either deep green or silver variegation — so the wall and seating match.
AvoidDon’t pick a mirror that’s too tall — if it overlaps the plant tops, everything looks crowded.
5. Gallery ledge with plant clusters and one oversized frame
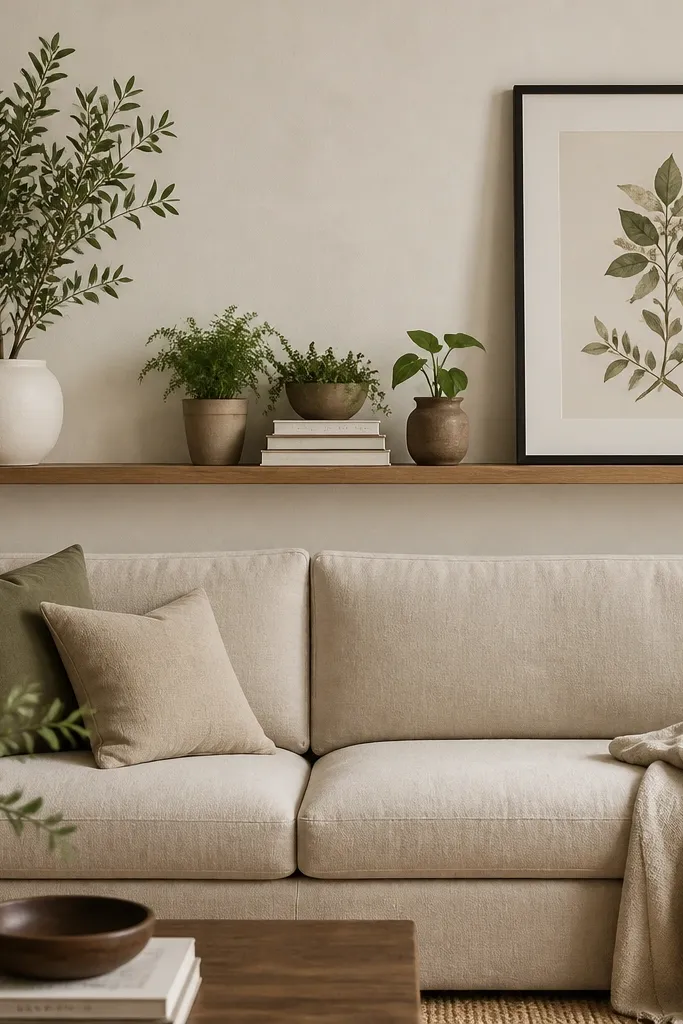
This is for people who already love gallery walls but want plants to do the heavy lifting. The picture ledge creates a built-in shelf look without the visual block of a full shelf. One oversized frame anchors the wall so the plants don’t look like scattered clutter. I use this when a sofa is upholstered in a light neutral because the wall needs a strong contrast point. The botanical print also makes the greenery feel intentional, not random.
Good to knowUse faux or real moss on the top of soil only on the visible pots — it makes the whole ledge look finished.
Install a ledge at a height that leaves 3-5 inches between the ledge top and the bottom of your art height target. Start with the oversized frame on the right, then place the tallest plant on the left so it balances the frame weight. Build the cluster in the middle with three pots in graduated sizes: small, medium, and a slightly taller one tucked behind the front pot. Keep pot finishes consistent — I like white + black with one terracotta accent. Leave at least 2 inches of spacing between pots so leaves don’t tangle.
AvoidDon’t cram five small pots shoulder-to-shoulder; it reads like a plant sale table.
6. Narrow plant ladder up the wall
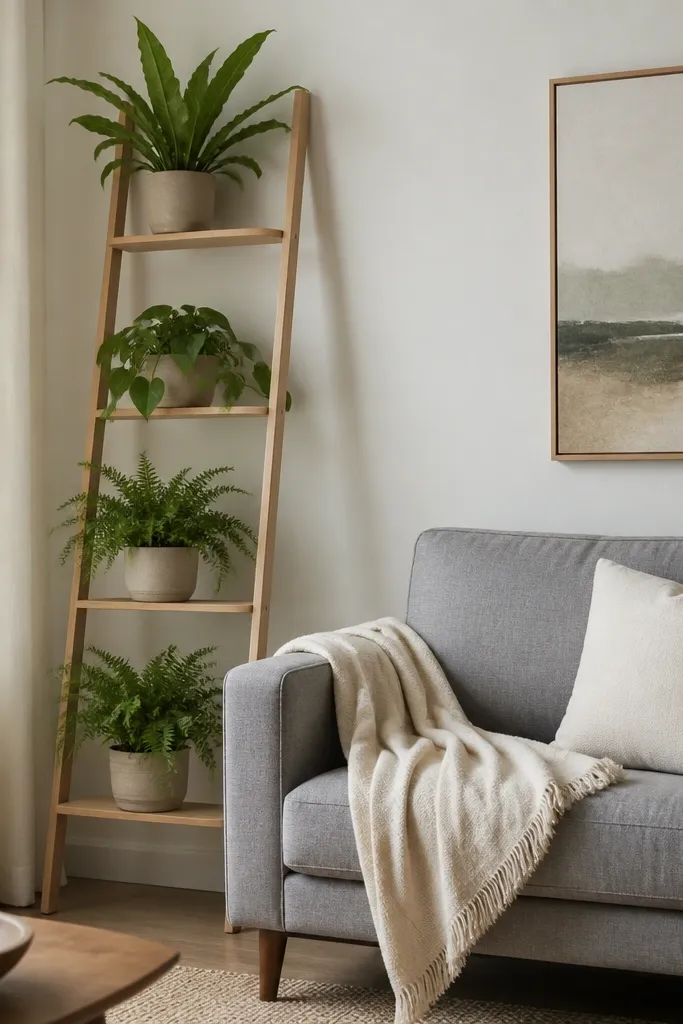
A plant ladder is a clean way to add height without installing anything. It looks best when your sofa back wall is plain and you want vertical movement. The ladder also gives you a built-in rhythm for plant heights so you don’t have to guess spacing. Light wood makes the green look more natural and keeps the ladder from feeling heavy. This setup flatters rooms with minimal decor because the ladder already provides structure and the plants just fill it with life.
Choose a ladder width that leaves at least 8 inches of clearance from the sofa sides. Place the base of the ladder so the top rung ends about 6-10 inches below the ceiling. Use pots that match in size within each rung — for example, ferns in 4-inch pots on the bottom two rungs. Put a trailing plant on the middle rung so leaves drape slightly down toward the sofa, and keep the top plant upright. Finally, rotate pot placement so the densest leaves face the room, not the wall.
Anchor the ladder with a wall strap if you have kids or pets so it never shifts.
Don’t place the ladder too close to the sofa back — it blocks lines and makes the room feel cramped.
7. Built-in look with three vertical planters on a tray
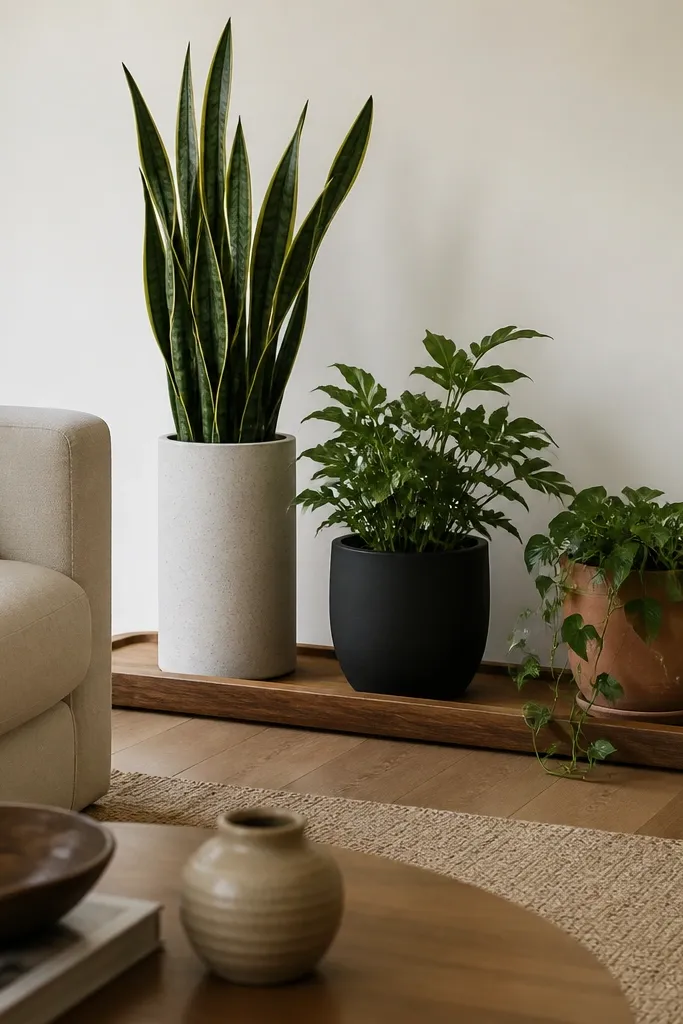
This is a great option when you want the plant moment to look intentional but you don’t want wall-mounted shelves. A tray ties the pots together visually and makes the whole setup look like one piece. I like it for rental apartments because you can move it without drilling. Snake plants and hardy leafy plants keep it looking good even if your watering schedule is inconsistent. The draping pot adds softness so the wall doesn’t look like a row of boxes behind the couch.
Good to knowPick one planter finish for the two upright plants and use terracotta only once so the palette stays controlled.
Start by measuring the wall space behind the sofa and choose a tray that is about the same width as your sofa minus 10-16 inches total. Place the tallest planter in the center if your sofa is centered, or slightly toward the brighter side if light hits one side more. Use three pot heights with a 6-10 inch difference between each. Add a draping plant on the side that faces the room most, then tuck the trailing stems so they fall within 6-10 inches of the sofa back top. Finish by covering the soil with a uniform top dressing like dark coco chips so everything looks clean.
AvoidDon’t use a tray that’s too small — the pots will look like they’re falling out.
8. Macrame plant hangers with a single big trailing plant
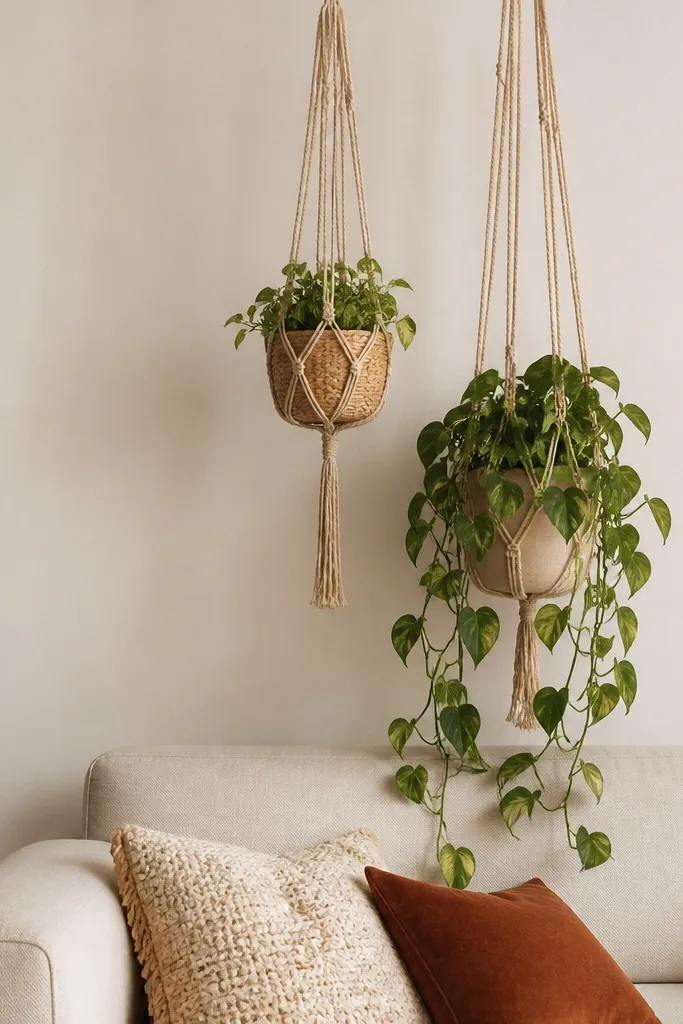
Hanging plants behind a sofa is the fastest way to get vertical greenery without taking floor space. The key is using one “hero” trailing plant so your wall doesn’t look busy. Macrame cords in natural beige warm up cool fabrics and make the plants look more organic. This setup is flattering in rooms with high ceilings because the hangers use that height. It also works well for people who hate the look of pots stacked on the floor.
Good to knowRotate the hanging plant every two weeks so growth stays even and doesn’t twist toward the window.
Install two ceiling hooks or sturdy wall anchors above the sofa area, spacing them about 18-24 inches apart. Hang the mid-height plant so its top sits around the same height as the sofa back top plus 2-4 inches. Hang the trailing plant higher so it has room to fall — aim for the bottom leaves to hover 4-8 inches above the sofa back. Use a plant basket size that matches the cord width so the plant looks centered, not lopsided. Keep the rest of the wall minimal so the hanging greenery is the main texture.
AvoidDon’t hang three trailing plants at the same height; it turns into a tangled curtain.
9. Three-tier corner shelf for plants and books
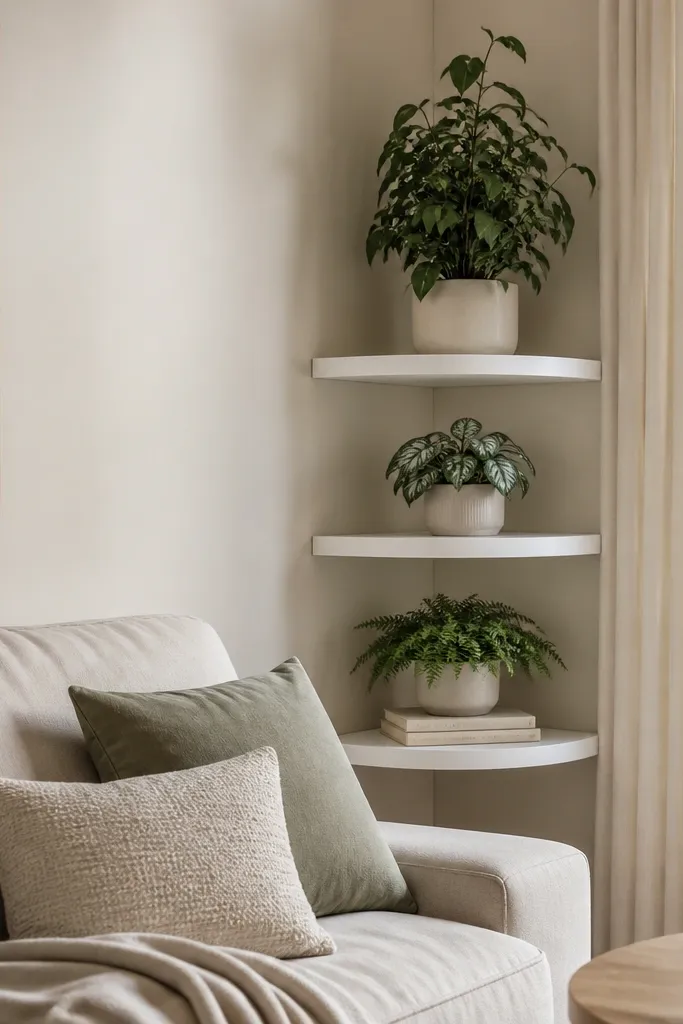
Corner walls are tricky because your eye hits them from a diagonal angle. A three-tier corner shelf solves that by giving you depth and a clear height progression. The white shelf keeps the plants crisp against a pale wall and makes the leaves look brighter. Silver variegation adds contrast so the greenery doesn’t blend into the wall. This setup flatters compact living rooms because it uses a corner instead of stealing space from the main wall. The books add a human touch without making it look like a plant-only display.
Good to knowDust the shelf and leaves weekly; corner displays show dust faster because of side lighting.
Pick a shelf that is narrow enough to fit the corner with at least 10 inches clearance from the sofa arms. Install it so the top shelf sits around 6-10 inches below the ceiling. Place the tallest plant on the top shelf and keep the middle plant slightly forward on the shelf for better visibility. Put the fern on the bottom shelf because ferns look best at a lower, softer angle. Use one color of pot for the plants and one matching pot for the book area so the shelf looks planned.
AvoidDon’t put tall plants on the bottom tier — it blocks the sofa view and looks top-heavy.
10. Ledged wall with two planters and a long low art strip
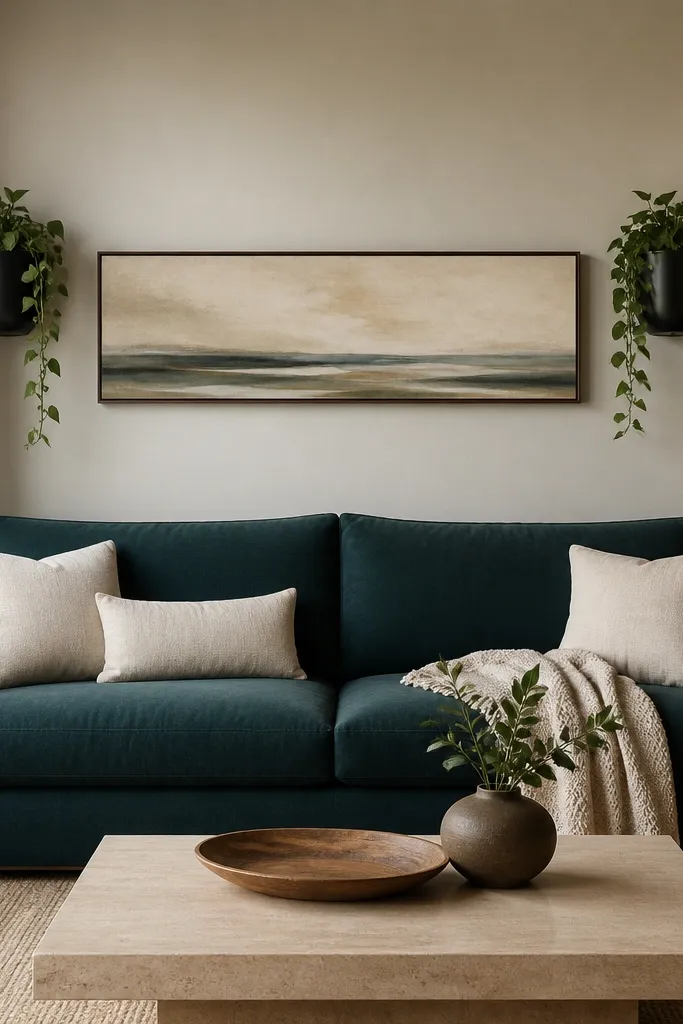
This is a clean look when you want plants but you also want a strong art focal point. The low art strip keeps the wall grounded, while the two side planters bring movement without covering the center. Matte black planters are a good match for deep teal because they make the color feel intentional rather than loud. Trailing vines on both sides frame the art like curtains. This setup works especially well in rooms where you don’t want a lot of stuff on the floor.
Good to knowUse a plant with thin, flexible stems like pothos so the spill looks natural instead of stiff.
Hang your low art piece so its center aligns with the sofa center, with the bottom edge about 8-12 inches above the sofa back top. Mount two wall planters on either side of the art, leaving 6-8 inches between the planter edges and the art frame. Choose trailing plants and let them grow into the look; for immediate results, position vine stems to fall toward the sofa. Keep vines the same height on both sides so the wall reads balanced. Finish by adding one small decor object on the sofa side table that matches planter finish — black metal, black ceramic, or a black frame.
AvoidDon’t center tall plants in the middle under the art; it blocks the focal point.
11. Large framed botanical behind sofa with plant stand in front
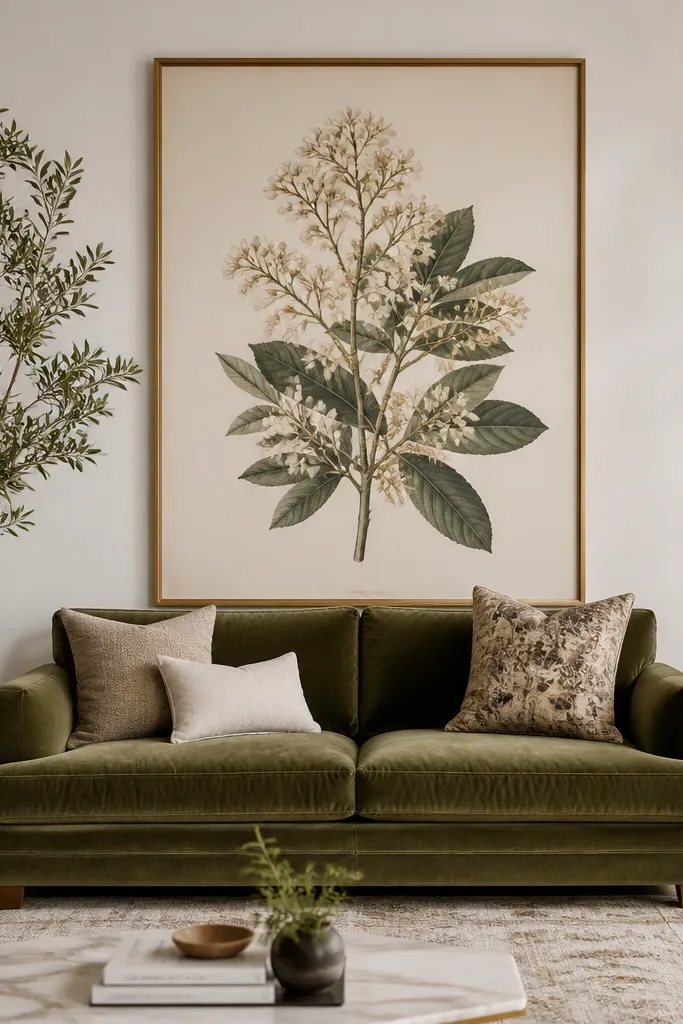
This setup uses the wall art as the background and plants as the depth. It looks best when your botanical art has real green tones — olive, deep leaf green, and a hint of yellow. Brass plant stands add warmth and reflect lamp light, so the greenery looks extra glossy. This works in rooms where the sofa is patterned or colorful because the botanical print gives the plants a “theme” to match. It also flatters people who want a calm look since the art and plants share a similar color family.
Good to knowMatch leaf color to the print — if the art has olive leaves, choose an olive-toned plant for the tall stand.
Hang the botanical frame so its bottom edge sits about level with the sofa back top plus 2-4 inches. Place the taller plant stand on the side that has more visual space, usually the side without a lamp or side table. Keep the shorter plant at least 6 inches lower than the tallest one. Use planters in a muted finish like cream or dark gray so they don’t compete with the frame. Finally, angle the taller plant slightly outward so it doesn’t sit directly behind the frame’s strongest line.
AvoidDon’t pick a botanical print with reds if your plants are all bright neon green; it looks mismatched.
12. Recessed wall niche with a single lush plant
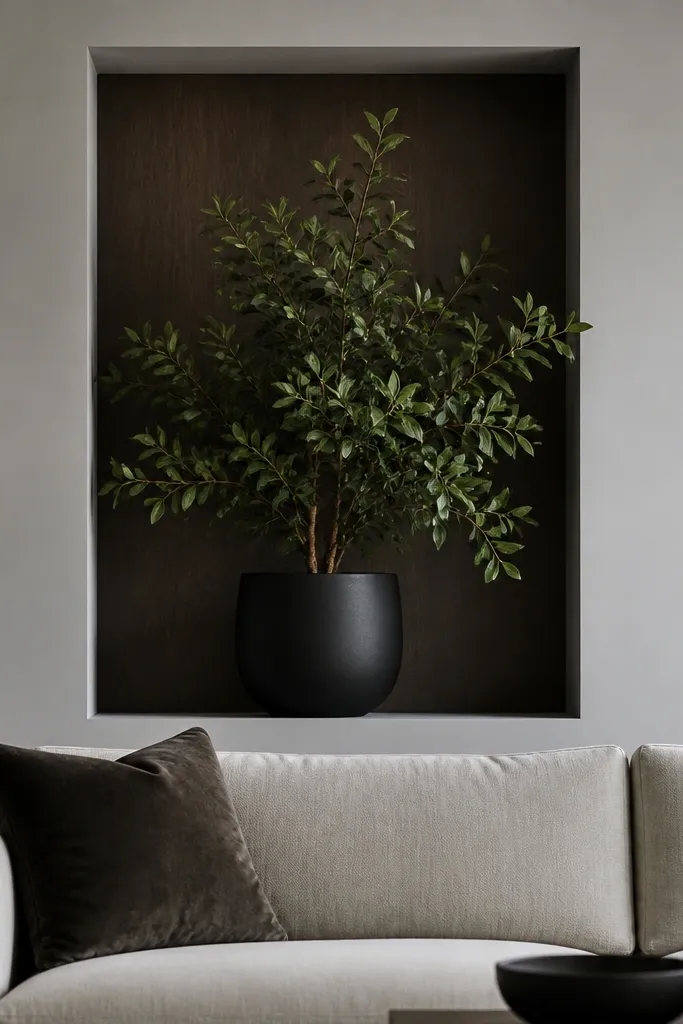
A niche makes plants look like they’re part of a built-in fireplace or cabinet. The dark wood backing makes leaves look deeper and more dimensional, even if your room is bright. This is the cleanest look if you want one plant moment without multiple pots. It also flatters modern interiors because the shape is crisp and the pot stays contained. If your sofa is low-profile and sleek, the niche adds vertical drama without cluttering the floor.
Good to knowUse a plant with broad leaves like a rubber tree or fiddle leaf fig for the most dramatic niche fill.
If you’re not installing a real niche, you can fake it with a wall-mounted shadow box frame. Build a frame that is about 24-30 inches wide and 30-36 inches tall, mounted behind the sofa center. Paint or stain the backing a dark tone like walnut or espresso. Place one large plant in a pot that fits inside the frame with 2-3 inches of clearance on all sides. Position the pot so the leaves spill toward the center of the niche and don’t touch the outer frame. Keep everything else on the wall minimal so the niche is the only “busy” element.
AvoidDon’t overcrowd the niche with multiple plants; it turns into a cramped greenhouse.
13. Corner plant trio on a console table with a runner
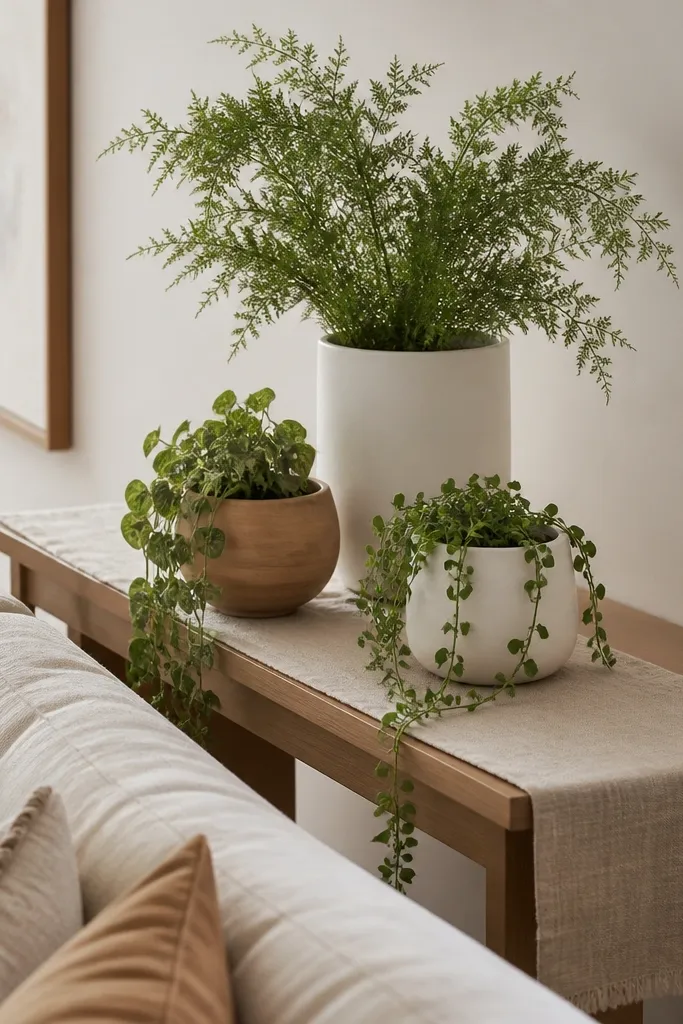
A console behind the sofa is one of those moves people skip because it feels like “extra furniture,” but it makes the wall feel finished instantly. The runner softens everything and hides the clutter risk if you like to keep watering cans or small items nearby. Trailing leaves over the edge create a natural transition from table to sofa. I like this for rooms with patterned rugs because the runner gives you a calm neutral layer. The look flatters both light and dark rooms because the table brings depth and the plants bring color.
Choose a console depth of 10-12 inches so it doesn’t block walkways. Place the console so there’s a consistent gap of 2-4 inches from the wall if you need dust access, or flush if you’re careful. Use three planters: one tall at the back center, and two smaller ones at the front corners. Let the front pots be slightly forward, then tuck trailing stems over the side so they fall toward the sofa back. Finish by adding one small decor object between the front planters, like a ceramic vase, only if it matches the runner color.
Use a watering-friendly tray under tall pots so spills don’t stain the runner.
Don’t put the console too far back; it makes the plants look like they’re floating away from the sofa.
14. Wall-mounted rod with hanging pots in a vertical line
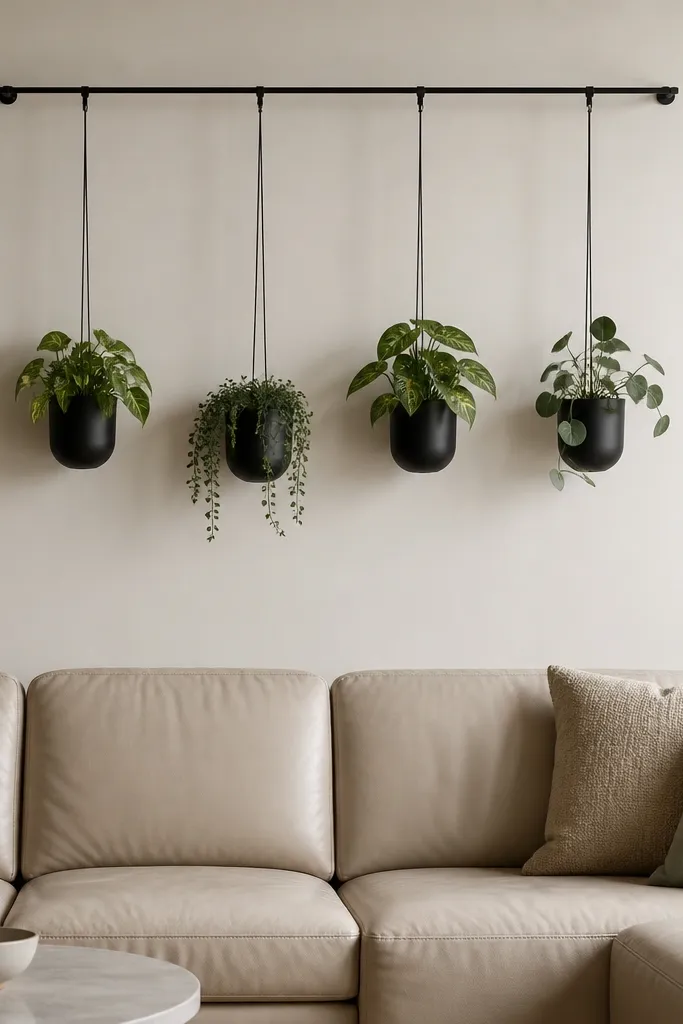
This is a modern plant wall look that still feels cozy. The rod keeps the hangers aligned, so the wall doesn’t turn into a messy string of planters. Small pots give a dense look, and the vertical line visually stretches the wall. It’s great for sofas with clean, minimal backs because the hanging plants provide texture without adding heavy furniture. For a leather sofa, this softens the shine and makes the room feel more lived-in.
Good to knowHang the pots from the rod using adjustable hooks so you can fine-tune the heights after you see them in daylight.
Mount the rod 10-14 inches above the sofa back top so the lowest pot leaves hover 4-6 inches above the sofa. Use four pots of the same diameter (like 4-inch planters) for a consistent look. Stagger the hanger lengths by 2-3 inches so plants create a gentle gradient rather than a flat row. Choose one plant type with a consistent leaf shape for cohesion, or two types that share the same leaf size. Keep pot colors all matte black, matte white, or one wood finish so the rod line stays clean.
AvoidDon’t mix glossy pots with matte walls; the reflections make the line look cheap.
15. Plant shelf made from a single reclaimed beam
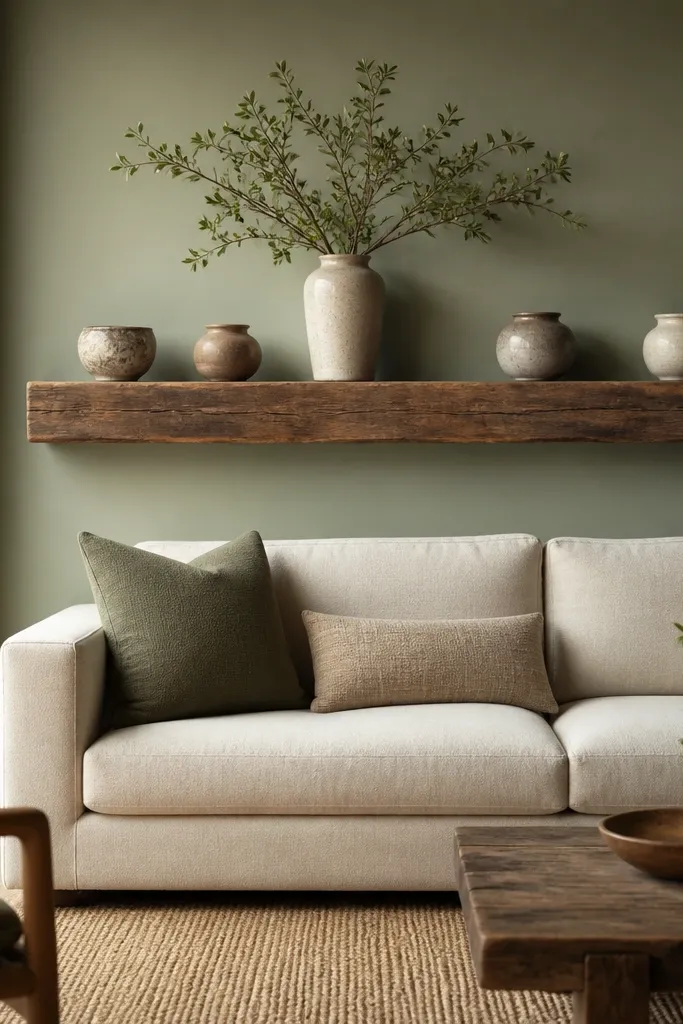
Reclaimed wood shelves add weight and warmth, which makes plants look like they belong in the room, not stuck to a wall. The thick beam creates a strong horizontal anchor, perfect for sofas with tall backs because it visually grounds the height. Muted sage walls make leaf greens look deeper and more natural. I like this when the room already has some texture — a woven rug, linen curtains, or a chunky knit throw. The rough wood grain also hides minor installation imperfections better than smooth shelves.
Good to knowIf your beam is heavy, anchor into studs or use proper wall anchors — the shelf should feel solid when you press it.
Mount the beam so it sits 8-10 inches above the sofa back top. Choose pot sizes that fit without overhang — aim for 2-3 inches of clearance between the edge of the beam and the outer pot. Place the tallest plant at the center, then two smaller plants at the sides, each angled slightly toward the sofa. Use ceramic pots with earthy finishes: cream, terracotta, and dark gray. Cover the soil surface with matching top dressing so the beam looks tidy from across the room.
AvoidDon’t use a beam that’s too thin for the pot sizes; it looks flimsy.
16. Two floating cubes with plants and one hidden cable track
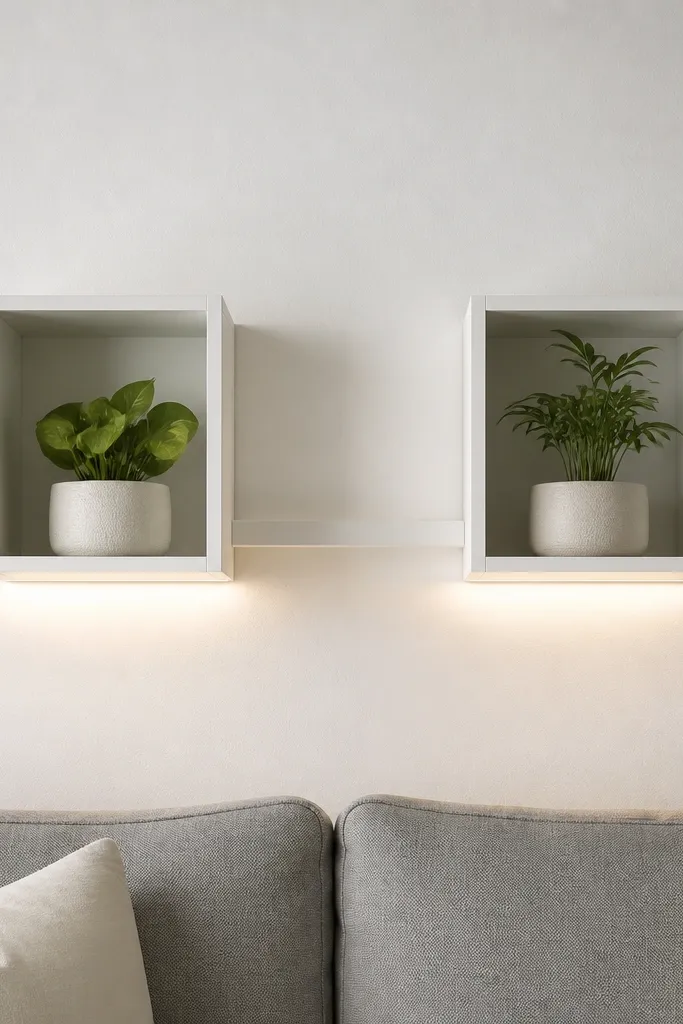
If you like a clean look but still want plants to feel special, floating cubes with hidden light is the answer. The cubes keep the plant display tight and modern, and the subtle LED glow makes leaves look glossy and dimensional. I like this in rooms with white walls and a light-colored sofa because the light adds warmth. It also works for people who want the wall to feel “finished” even when plants aren’t at peak growth. The hidden cable track keeps everything from looking messy.
Mount the cubes so their bottom edges sit about 12 inches above the sofa back top. Place a medium pot in each cube — keep the pot height under the cube lip by 2-3 inches so it doesn’t look crowded. Install an LED strip under the cubes, using a warm white setting (around 2700K) for a cozy tone. Route the power cable through a cable track painted the wall color. Finally, add one small trailing plant in the cube that faces toward the center to create depth without clutter.
Turn the LED on for 10 minutes before you style — you’ll see exactly how much leaf shadow you’re getting.
Don’t use cool white LEDs; the leaves look washed and the room feels clinical.
17. Sofa back wall plants on a long narrow trellis
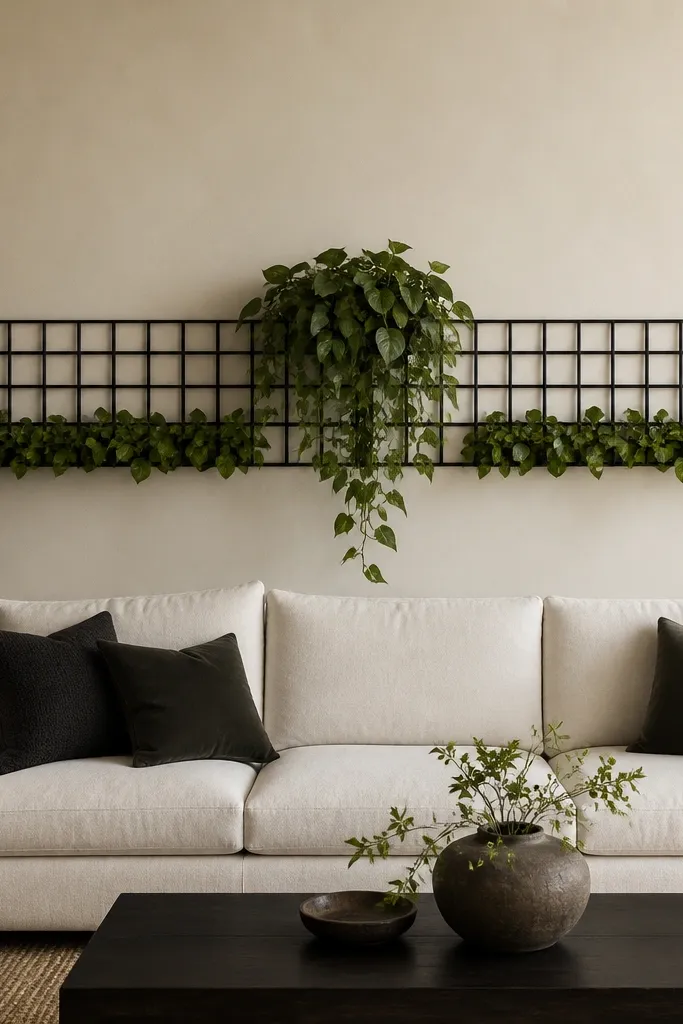
A trellis gives you the most “grown-on-purpose” look because vines naturally follow structure. I use this when I want a full wall of greenery without stacking lots of pots. Black trellis lines also create a graphic contrast behind sofa cushions, especially with patterned pillows. The plant density reads lush without looking cluttered because everything is guided. This works in modern living rooms and in spaces where you want height and softness at the same time.
Good to knowUse plant ties that are biodegradable or easy to remove so you’re not strangling stems as they thicken.
Mount the trellis so it’s centered behind the sofa and leaves 4-6 inches of wall space from each side. Choose a trellis width that matches the sofa width minus 8-12 inches so the edges don’t overtake the room. Attach climbing plants like jasmine vine, pothos, or a trained philodendron using plant ties that blend with the leaves. Start by securing the center plant first, then fill lower sections with smaller stems. Water and adjust stems weekly for the first month so the growth pattern matches your intended lines.
AvoidDon’t attach vines too tightly at first; they need room to expand.
18. Plant shelves integrated into a wall panel behind sofa
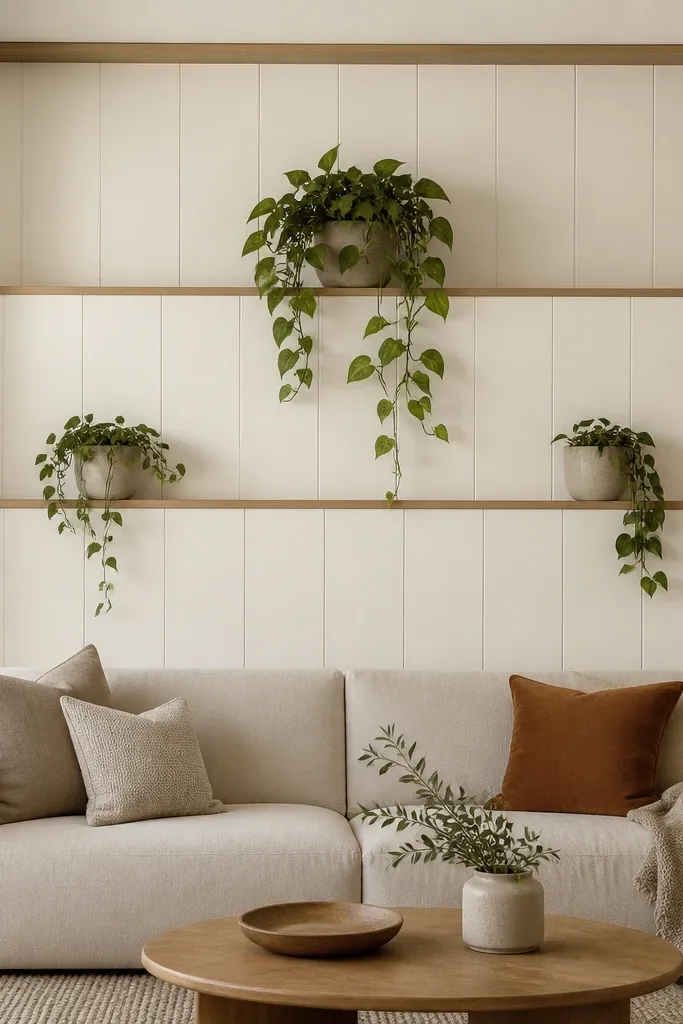
When your sofa back wall has paneling, you can cheat the look into something custom. Integrated ledges prevent the “random shelf” feeling and make plants look like they’re part of the architecture. Warm white paneling keeps the space bright and makes leaf texture stand out. This layout is flattering for people who want a calm, tailored style rather than a maximalist shelf. It also hides the mess risk because the ledges are built into a defined plane.
Pick a panel spacing that matches your plant sizes — ledges about 7-9 inches deep and at least 6 inches apart. Mount the panel so the top ledge sits around 36-40 inches from the floor in most standard-height rooms. Put the tallest plant on the top ledge and let it trail down toward the lower ledge without touching the sofa. Keep the lower ledge with two pots spaced 8-10 inches apart so the trailing leaves have room. Use matching pot finishes on both ledges for a clean read.
Add a thin strip of backer board behind each ledge to catch stray soil and make cleaning easy.
Don’t use ledges that are too shallow — pots tip and it looks sloppy fast.
19. Long planter box under a wall painting
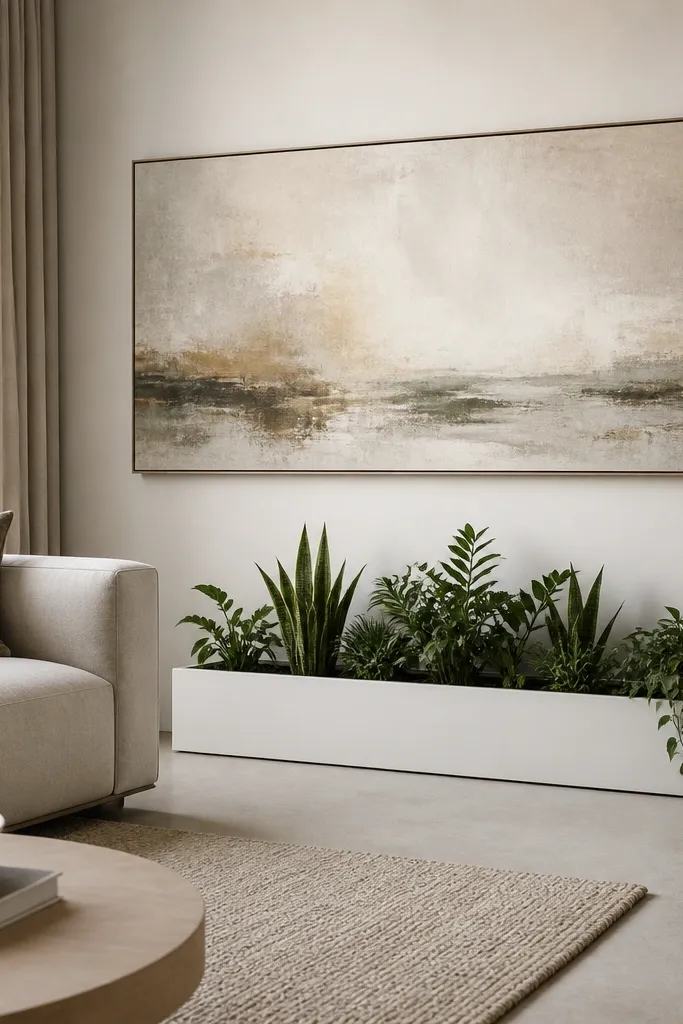
This works when you have a big piece of art and you don’t want plants to steal attention from it. The low planter box keeps greenery close to the sofa, so it feels connected to the seating. A long box also smooths out the visual chaos of multiple pots. White boxes make the plants look crisp and airy, especially against neutral walls. If your sofa color is mid-tone like mocha, the white box brightens the center and makes the art feel more intentional.
Good to knowUse a liner inside the box so watering doesn’t stain your floor finish.
Choose a planter box that is about 70-80% of the sofa width, centered under the painting. Keep the box height low — around 8-10 inches — so it doesn’t block the art. Plant a mix: three upright plants evenly spaced and one draping plant at an end. Position the draping plant so its leaves fall toward the sofa arm, not into the center. Finish with a top dressing in one color and ensure the soil level looks even across the box.
AvoidDon’t place the box too high or too close to the painting; it makes the wall look top-heavy.
20. Three stacked wall planters with one repeating pot color
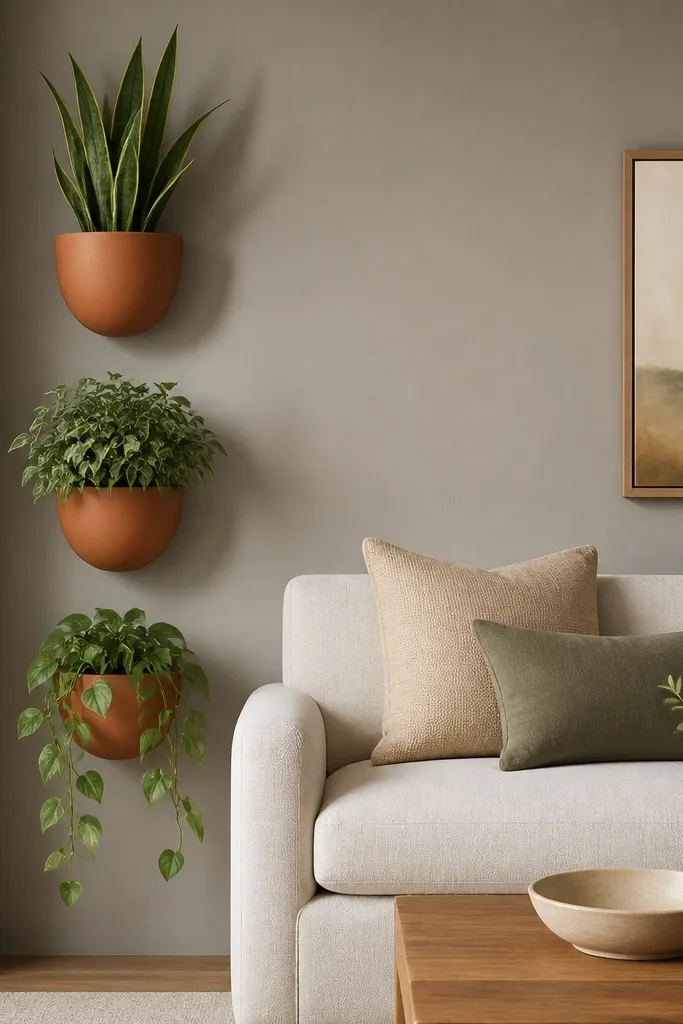
Vertical stacking creates a strong design line when you don’t have room for multiple shelves. Using one pot color makes the plant variety feel curated instead of random. Terracotta is forgiving because it looks good in both warm and cool rooms, and it makes green leaves feel richer. This setup flatters sofas with wide arms because the vertical line gives the wall structure without crowding the seat area. It also works when you want a single statement side of the wall rather than centering everything.
Good to knowStagger leaf direction: point one plant toward the wall, one toward the room, and one slightly sideways so you get depth.
Mount the top planter first so it sits about 30-36 inches from the floor, depending on your sofa back height. Then place the middle planter 10-12 inches below and the bottom planter another 10-12 inches below that. Keep the trailing plant on the lowest planter so leaves can spill naturally downward. Use the same pot color for all three, and pick plants with different leaf shapes to keep it interesting. Finally, keep the opposite side of the sofa visually calmer — one small frame or none — so the stacked planters become the focal point.
AvoidDon’t stack three identical plants; it looks like you ran out of choices.
21. Plant wall with a floating bench and two planters on top
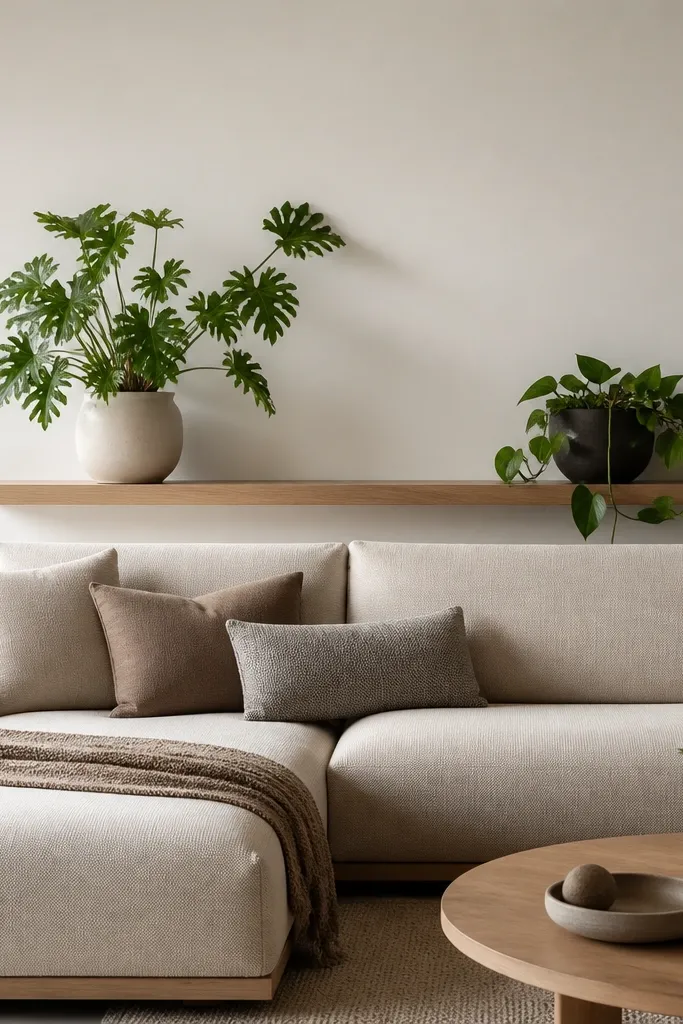
A floating bench is a clever way to add plant display height without a full shelf system. It looks like built-in furniture and makes the sofa back wall feel like a designed zone. The bench also gives you a place to set a tray, which helps the whole wall look intentional when you’re hosting. I like this layout for medium-sized living rooms where you want something more functional than just art and plants. It also flatters people who keep throws and board games nearby because the bench can hold a neat stack of items.
Good to knowUse a plant with a trailing habit that doesn’t get too thin; thick trails look fuller on a bench.
Install the bench so its top surface is about level with the sofa back cushion top or slightly higher by 1-2 inches. Place two planters on the bench spaced about 12-16 inches apart. Put the trailing plant on the right or left based on where you want the spill across the sofa. Choose pot sizes that fit the bench width and keep the leaves from touching the wall. Finish by adding one small decorative tray between the planters only if it’s needed to balance — otherwise keep it clean.
AvoidDon’t overload the bench with extra decor; the plant spill already brings movement.
22. Wall art shelf combo with mini herb pots
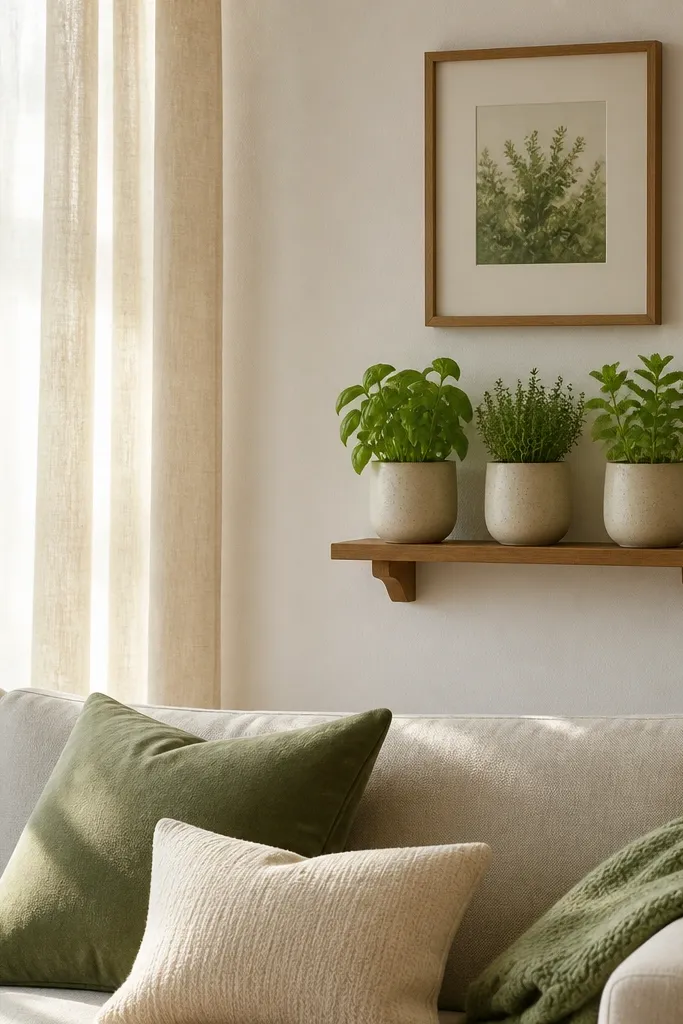
Edible plants behind a sofa is the most underrated plant decor move because it feels fresh and purposeful. Mini herb pots add a color mix beyond generic green, including deep purple stems and lighter green leaves. This layout looks best when you have a wall that’s not huge, so the small shelf doesn’t overwhelm the room. It also flatters kitchens that flow into living rooms because the herbs tie the spaces together. The scent is a bonus — you’ll smell the leaves when you walk by.
Good to knowTrim herbs regularly; it keeps the leaves dense and the shelf looking full.
Mount the shelf 6-10 inches above the sofa back top so you can see the leaves clearly from the seating position. Use uniform planters in one finish so the shelf looks like a set. Place the herbs so tallest is at the back and smallest is at the front, then rotate weekly so they grow evenly toward the light. Keep the framed print small and neutral so it doesn’t compete with the herbs' color. Water carefully and use a saucer or liner under each pot to prevent staining.
AvoidDon’t pick herbs that need intense sun if your living room is dim — the shelf will look sad fast.
23. Plant crown on a long wall rail with two clusters
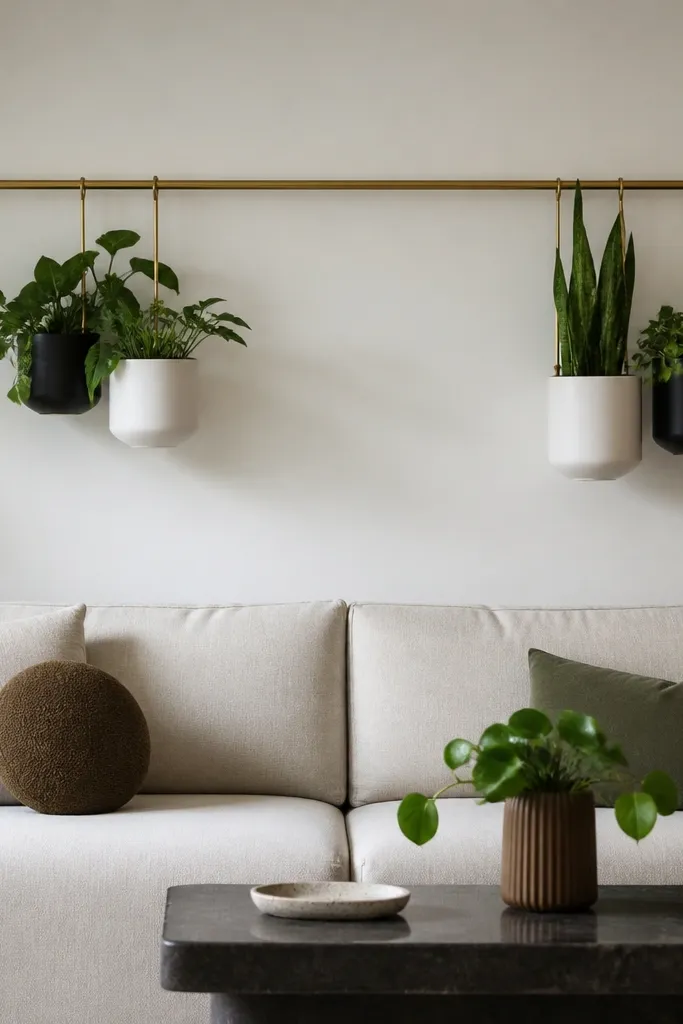
This gives you a “crown” effect without making the entire wall look like a curtain of hangers. Two clusters keep it balanced and easier to style than a continuous line. Brass rail adds warmth and plays nicely with cream sofas and warm wood floors. Matte white and black pots keep the look graphic, so even when plants grow at different rates, the structure still looks intentional. This is a good pick if you like modern decor but want softness from greenery.
Good to knowUse adjustable cords so you can set the final heights after you see how the leaves fall.
Mount the rail so it sits 10-14 inches above the sofa back top. Create two clusters by grouping two pots close together, then leave a gap in the middle of the rail. Hang the tallest plant in each cluster slightly higher than the other plant in that cluster so you get depth. Use different pot sizes but keep the pot finishes consistent across both clusters. Finally, position trailing plants to fall toward the sofa corners so they visually frame the seating area.
AvoidDon’t hang all pots at the same height; it looks flat.
24. Sculptural floor plant in a woven basket with two small accents
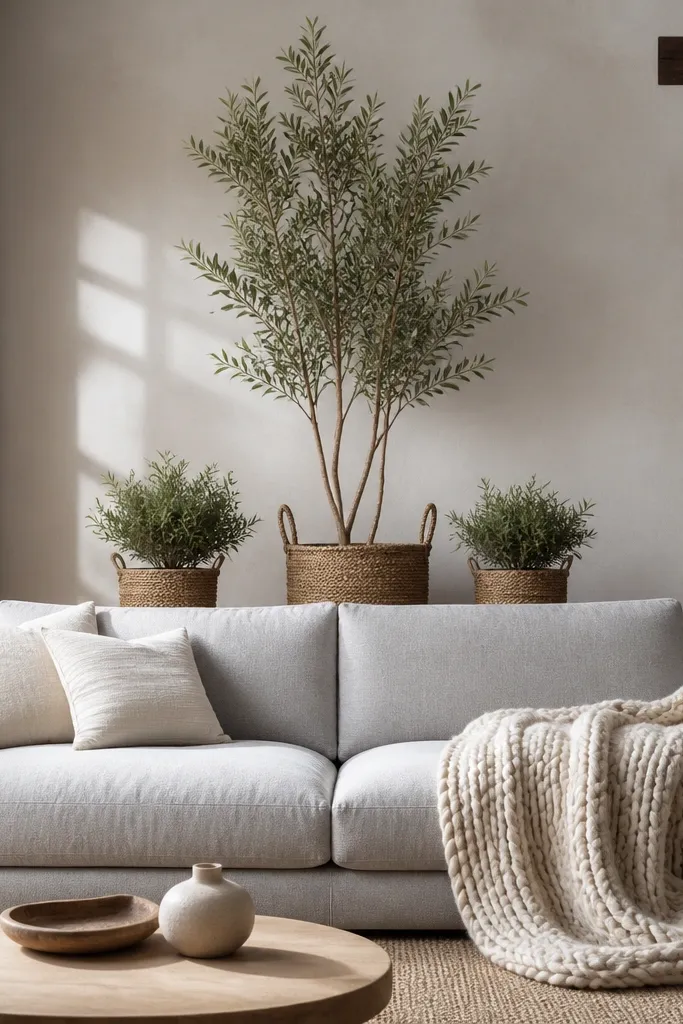
Woven baskets make plants feel handmade and warm, which matters on sofa back walls where you want cozy texture. A single sculptural plant as the main piece reads intentional even if the rest of the wall is plain. The two small accents keep the composition from looking one-note. This setup works especially well if your room has natural fibers like jute rugs, rattan lamps, or linen curtains. It also flatters earthy palettes and makes green leaves look less stark.
Put the tall woven basket behind the sofa center, and position it so the highest leaf sits just above the sofa back top by a few inches. Place the two smaller baskets about 10-14 inches away from the center plant, on the left and right. Choose plants with different textures: one sculptural with strong lines, and two smaller ones with softer leaf shapes. Keep the basket tones consistent — natural or honey, not mixed colors. If you need the look to feel tighter, add a small tray under the center basket and keep the floor area clear.
Dust woven baskets with a brush attachment so you don’t end up with gray residue on leaves.
Don’t use three huge baskets of the same height — the wall turns into a bulky block.
25. Plant shelf with backlighting using a simple picture light
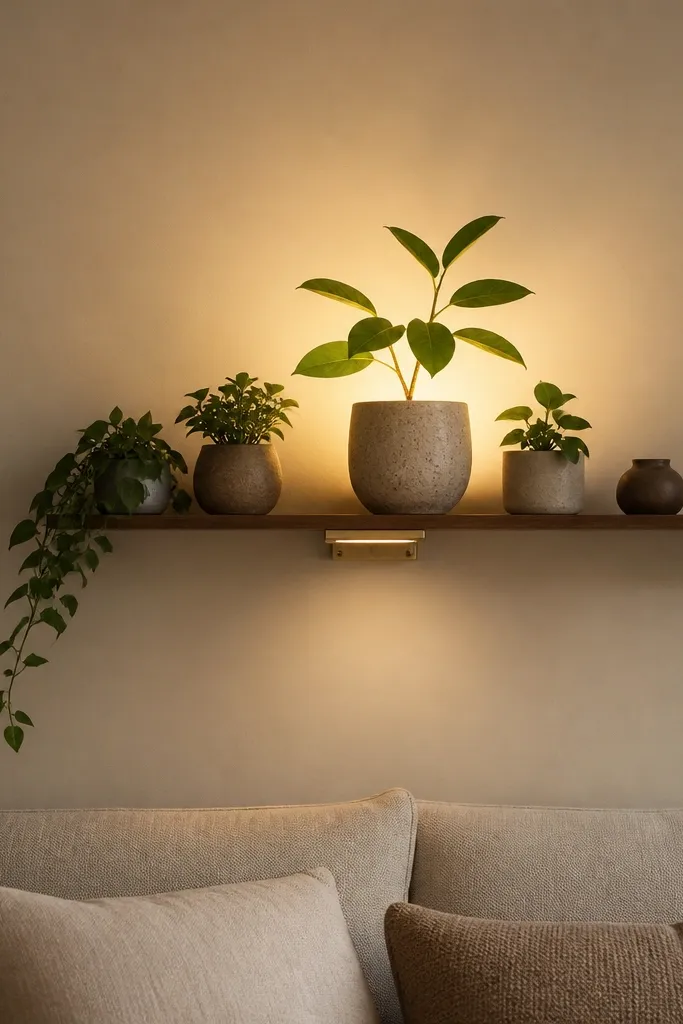
Backlighting is the secret weapon when your wall is light and you want plants to look deeper. A picture light aimed upward creates a soft glow that makes leaves look layered, even with small pots. This setup is best when your shelf is shallow and the plants are compact, because the light gives you the depth you’d otherwise get from bigger plants. It also flatters minimalist decor — fewer items, more visual impact. Warm beige walls look especially good with warm white lighting.
Good to knowTest the lighting at night; leaf shadows look different in lamp light than in daylight.
Mount the shelf at 8-12 inches above the sofa back top. Place 3-4 small pots spaced 6-8 inches apart so the light can hit leaf edges. Install a picture light under the shelf lip, angled to throw light upward behind the plants. Use warm white bulbs and avoid harsh brightness that creates glare. Finish by placing one trailing plant so a few leaves drape below the shelf line, catching the glow.
AvoidDon’t point the light straight at the room; the glare makes the shelf look cheap.
26. Hanging wall planters in a vertical rectangle grid
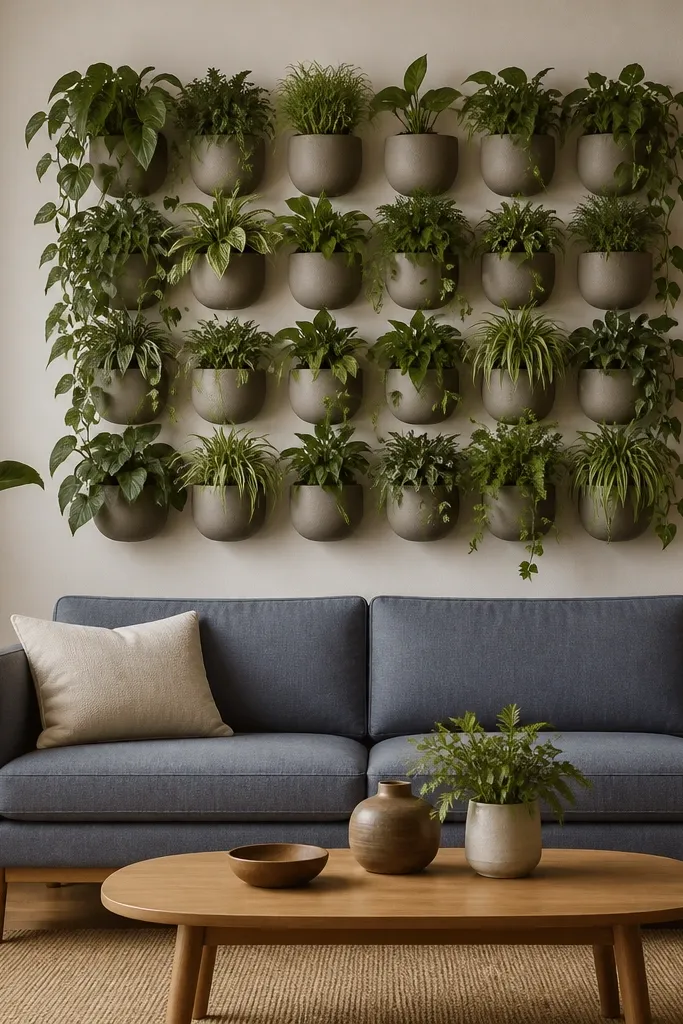
A grid makes plants feel designed because it creates order. This is the pick if you have a modern sofa and you want the wall to look like a feature wall, not just decoration. Matte planters keep the grid from looking shiny and chaotic. The rectangle shape also frames your sofa visually, since it starts near the sofa back top and ends around the same height as your lamps. This setup flatters rooms with clean lines because the grid adds structure while leaves add softness.
Good to knowUse a level and measure twice; grid displays punish even small unevenness.
Choose a rectangle size that matches your sofa width — about 70-80% of the sofa width. Mark a grid with equal spacing, then mount hooks or a panel system so each planter sits at the same distance from the wall. Use planters of the same size and weight so the grid stays level. Fill each planter with plants that grow similarly so the grid looks even over time. Start with three plants per row and add the rest once the first growth settles so you don’t end up with empty-looking cells.
AvoidDon’t mix planter sizes widely — the grid becomes lopsided fast.
27. Plant and candle wall sconce pairing on one side
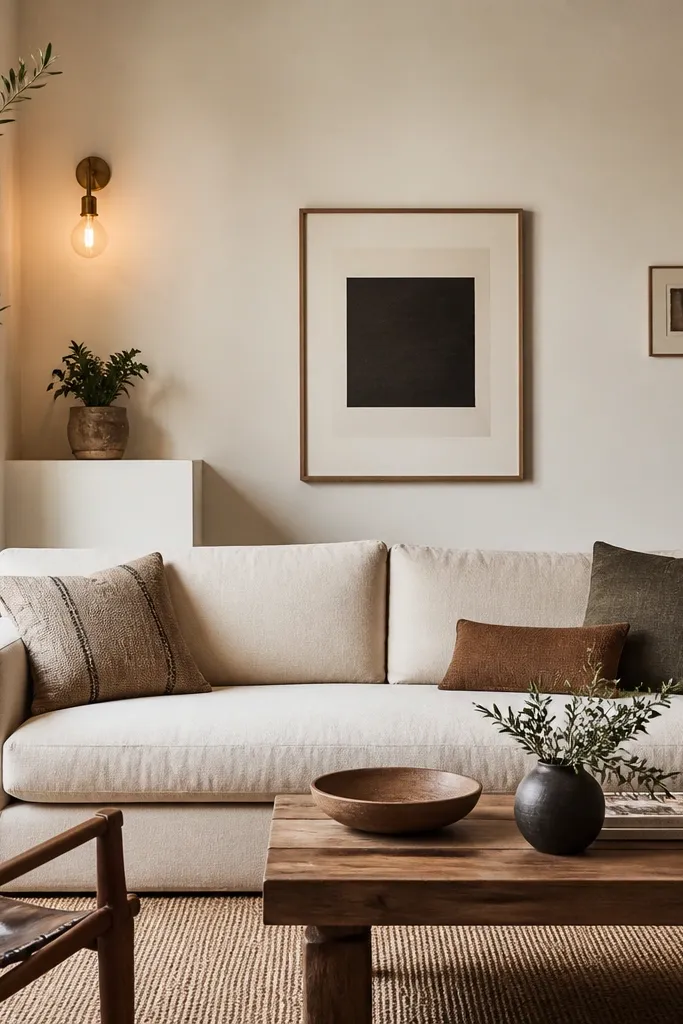
This style is for people who want cozy evening light and greenery without a full plant installation. The sconce gives you a warm glow that makes leaves look thicker and more alive. Placing the plant on a narrow ledge keeps it at the right height for seating — you see it when you look over your shoulder. This is flattering if your sofa is dark or textured because the warm light and leaf color soften the space. It also works in small living rooms where you can’t fit big floor plants.
Good to knowUse a dimmable bulb so the plant glow matches your evening mood.
Mount the sconce so its light center sits around the same height as the top of the sofa back cushion. Install a narrow ledge under the sconce with the plant pot sitting 2-4 inches below the sconce so the leaves don’t block the light. Use one plant only, ideally a compact upright variety with thick leaves. Keep the pot finish warm — cream or warm gray — so it matches the wall and bulb glow. Leave the opposite side simpler with one small frame to keep the composition balanced.
AvoidDon’t put a tall plant under a sconce; it creates a shadow that hides the leaves.
28. Sofa back wall with a plant wallpaper accent plus real plant
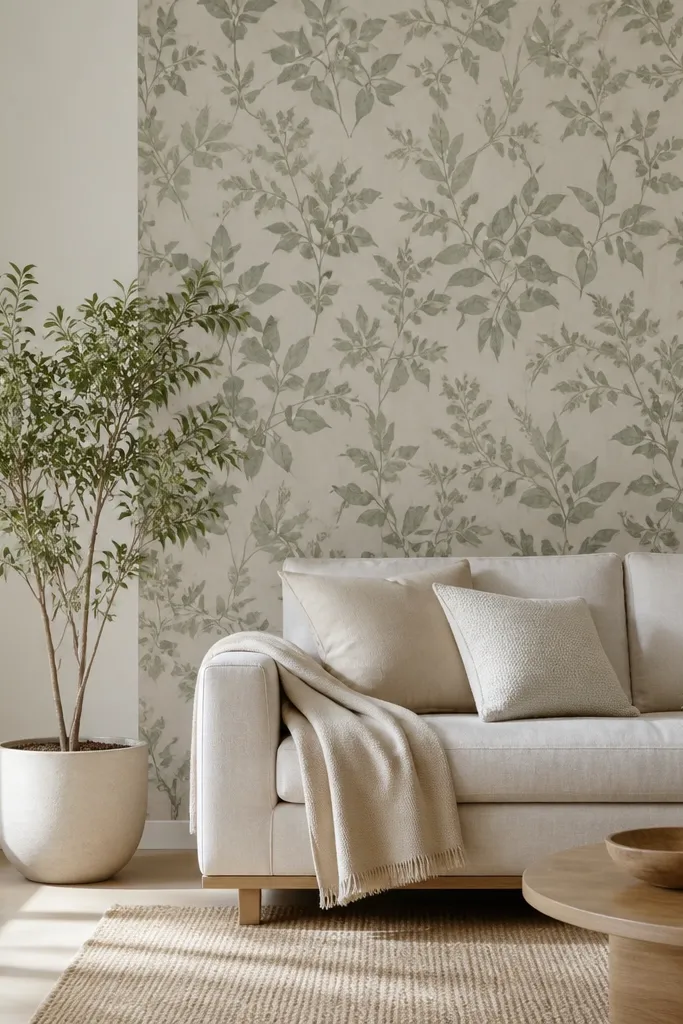
Wallpaper is a cheat code for depth because it adds texture even when plants aren’t at their best. The key is using wallpaper as an accent panel, not the entire wall, so your real plant becomes the focal point. Choose a subtle pattern with leaf shapes in muted greens and warm neutrals. The real plant then echoes the wallpaper colors and makes the wall feel layered instead of flat. This setup is flattering in spaces where you want plants but your wall is otherwise too plain to hold art.
Select an accent panel width about 60-70% of your sofa width and center it behind the sofa. Apply wallpaper with crisp edges and a straight seam so it looks intentional. Place one real plant directly in front of the panel center, in a pot that matches the wallpaper background tone (warm white or light gray). Keep the plant height so it reaches just above the sofa back top, not higher than your art or ceiling fixtures. Add one simple cushion color that matches the wallpaper leaf tone so the wall and sofa connect.
Use a matte plant pot — glossy pots can look out of place next to wallpaper texture.
Don’t choose a wallpaper with bright cartoon colors if your plants are natural green; the mismatch screams “temporary.”
29. Plant shelf with terracotta and black planters in a strict repeating pattern
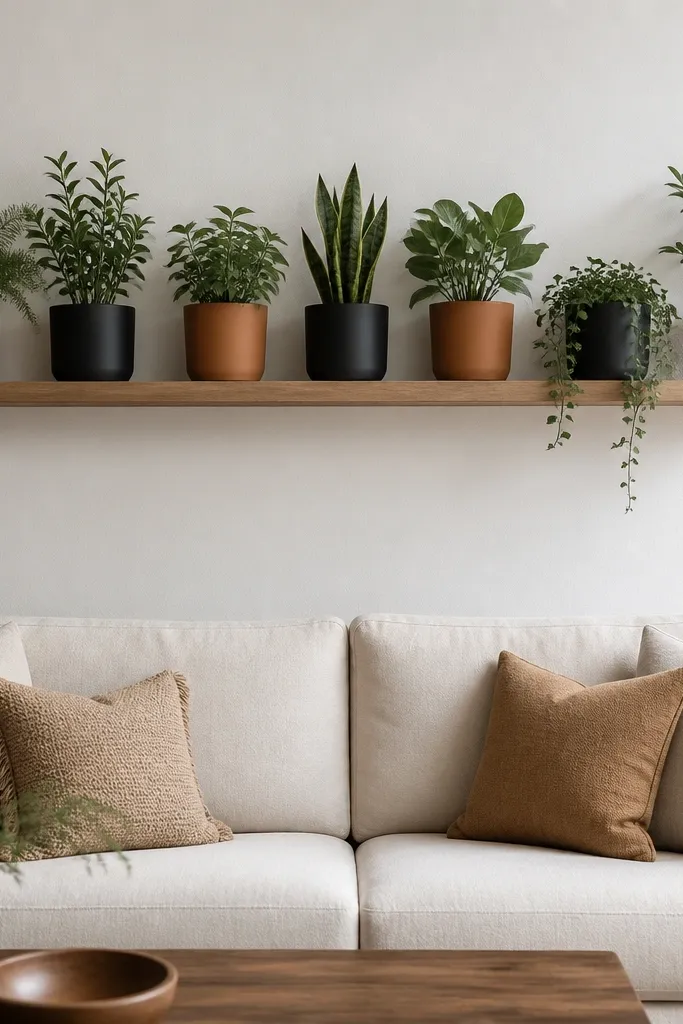
Repeating pot colors makes the wall feel designed even when the plants grow differently. I use a simple alternation rule: terracotta, black, terracotta, black — every time. It’s visually calming and it stops the “random plant corner” effect. Terracotta warms up cool rooms and matte black adds contrast so the leaves pop. This layout flatters sofas in light gray, cream, or blue-toned fabrics because the pot colors give the wall a strong anchor. It also works well if you like swapping plants over time — the pot rhythm stays the same.
Good to knowLabel the underside of planters with plant names so you know what needs more light when you rotate positions.
Install a shelf 8-12 inches above the sofa back top. Place pots so the alternation starts from the center outward, not from one end, so the look feels symmetrical without forcing it. Use 4-6 planters total depending on shelf length, with pots spaced about 3-4 inches apart. Choose one trailing plant for either the second or third pot so leaves fall toward the sofa. Keep plant leaf colors consistent — green with a little variegation — so the shelf doesn’t become a rainbow.
AvoidDon’t break the color rhythm with random extra pots; it makes the shelf look accidental.
30. Sofa back wall with a low rattan screen and plant behind it
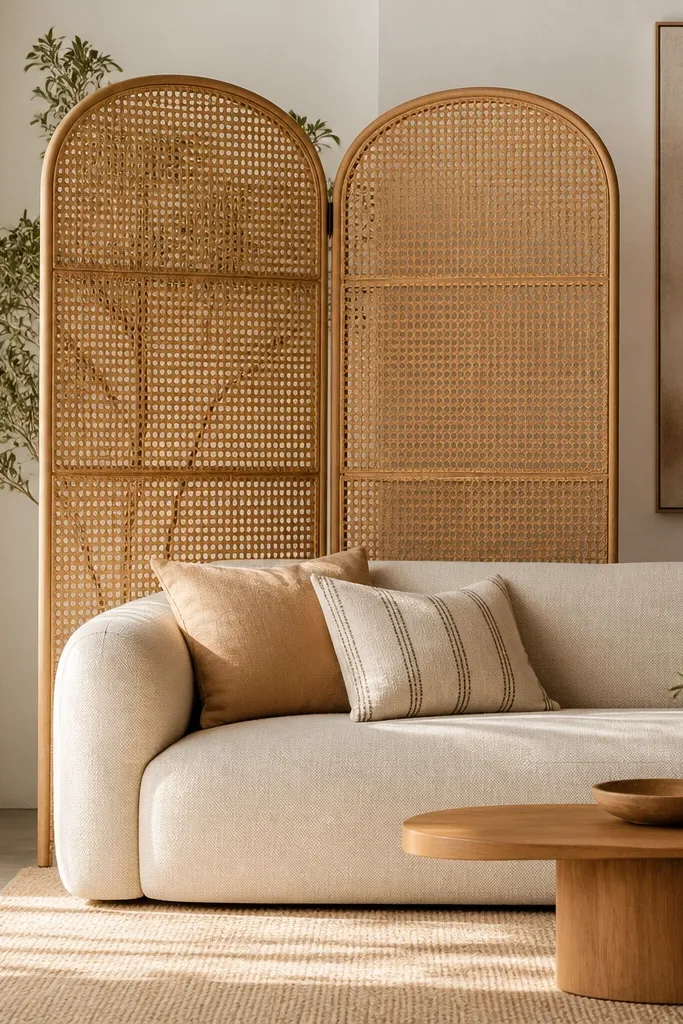
A rattan screen adds texture and makes plants look integrated, not placed. The plant behind the screen becomes a layered silhouette, and the rattan pattern adds interest even if the plant isn’t full yet. This works best with light-colored sofas because it creates warmth and contrast. Rattan also flatters boho and transitional rooms without looking messy. If your room has a lot of smooth surfaces like painted walls and leather, rattan gives you the “soft” texture your eye wants.
Choose a screen width that covers about half to two-thirds of the sofa width, centered behind the sofa. Place it so there’s a 2-4 inch gap between the screen and the wall for airflow and cleaning. Position a tall plant behind the screen so the highest leaves rise above the sofa back top by 4-6 inches. Use a pot that blends with the screen (natural or light neutral). Finally, tuck smaller plants near the base but keep them behind the screen so they don’t peek out and break the silhouette effect.
Wipe rattan with a dry cloth first, then a lightly damp cloth — moisture can leave spots on natural fiber.
Don’t choose a screen with an overly dark stain; it can make the room feel heavy.