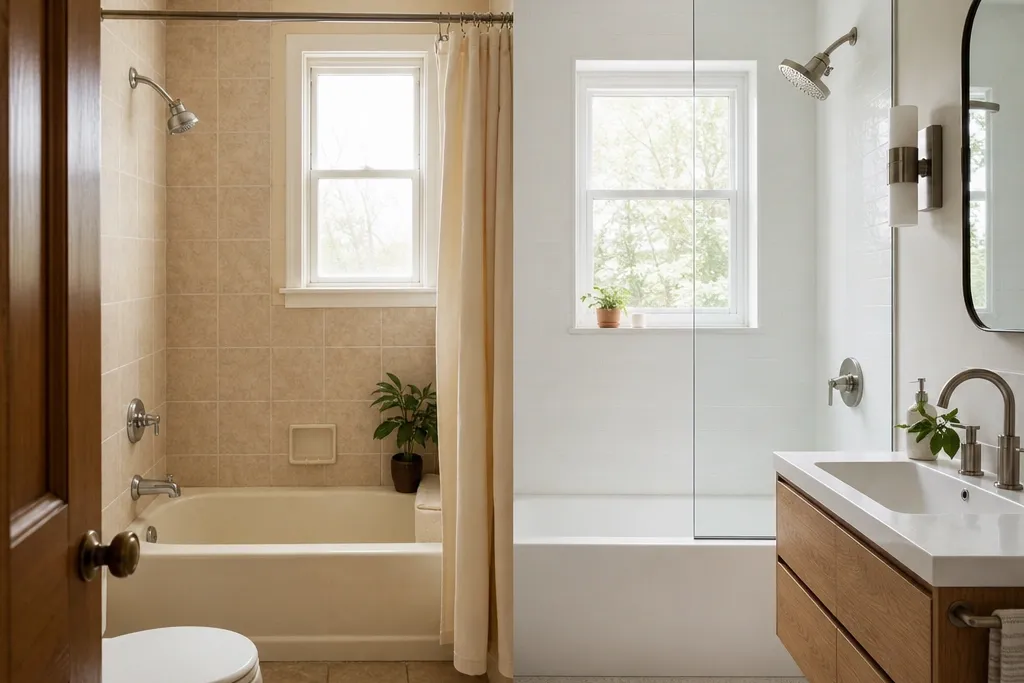

1. Herringbone tub wall with warm white grout
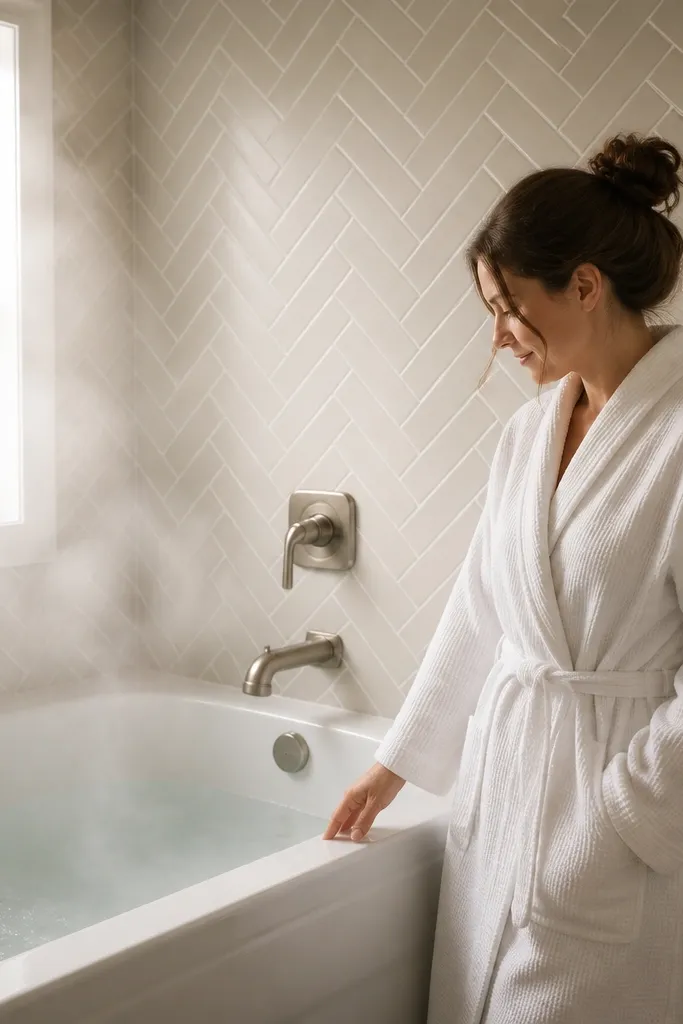
This look works because the herringbone pattern gives the tub wall direction without adding clutter. I like creamy off-white tile with warm white grout because the lines stay crisp but don’t look harsh in a small room. The result reads clean and bright, and the subtle texture hides minor wall imperfections better than flat square tile. It flatters most bathroom lighting setups — warm bulbs make it cozy, and cool bulbs keep it crisp. If your tub sits in a tight corner, the pattern also pulls the eye inward instead of making the space feel boxed.
Start by choosing 2-by-6-inch or 1-by-6-inch mosaic herringbone sheets so installation stays manageable. Apply a waterproof backer and set the first row level, then use ledger spacers to keep the pattern straight around the tub lip. Keep the grout warm white (not bright optical white) so the tile edges look softened, then seal the grout after cure. Finish with a frameless mirror that matches the tub wall width and add a single small niche shelf so you don’t need extra wall hooks.
Good to knowUse a level laser line for the first tile row — one crooked start makes herringbone look “off” fast.
AvoidAvoid bright white grout with creamy tile; it makes the joints look too stark in low-light bathrooms.
2. Matte sage tub surround with a white tile border
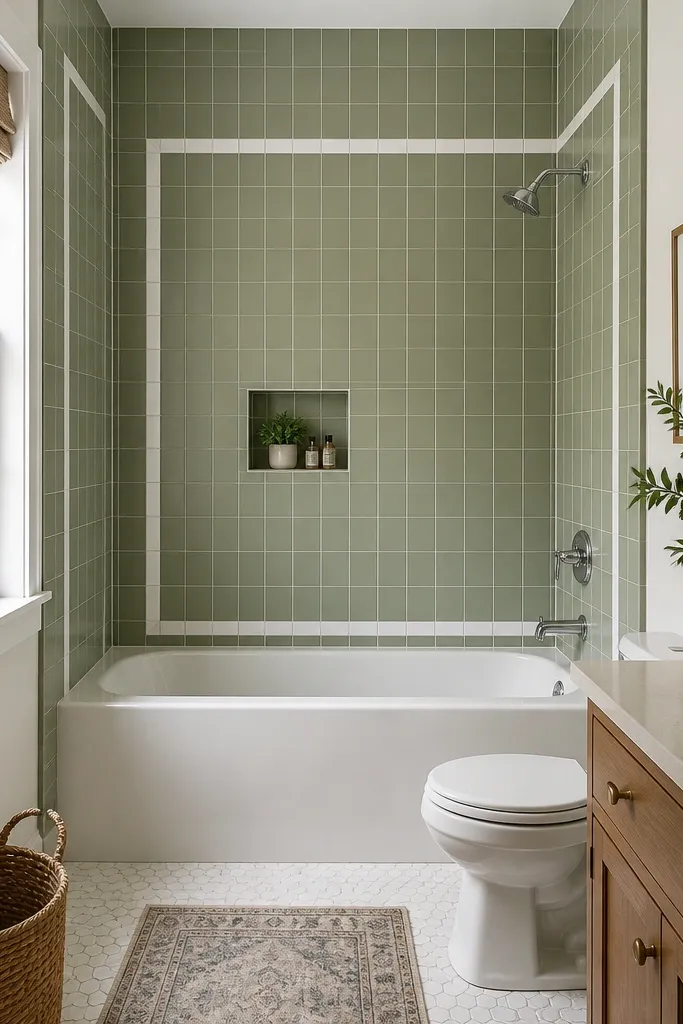
Matte sage is the sweet spot when you want color without shrinking the room. The color reads calm, and because it’s not deep green, it doesn’t swallow the light. I pair it with a white glossy border line because it creates a visual “frame” for the tub and keeps the pattern from feeling random. This works especially well if your vanity is white or light wood — sage adds warmth to cool whites and makes light wood look richer. For people with darker hair and bold makeup, the sage background looks flattering and makes your mirror moments feel more intentional.
Paint the walls first with warm white eggshell, then tile the tub surround with matte sage porcelain to the ceiling or to a consistent height. Install a thin white glossy tile strip at 48 to 54 inches so it creates one clean horizontal line. Keep the floor neutral — matte light gray or beige — so the sage stays the focus, not the whole room. Finish by centering a round mirror and choosing a faucet in chrome or satin brass so metal tones don’t clash with the green.
If your bathroom has north-facing light, test sage on the tub wall at night using your actual bulbs.
Skip tiny, busy accent mosaics with sage — the mix turns into a cluttered look fast.
3. Vertical tile on the tub wall to stretch height
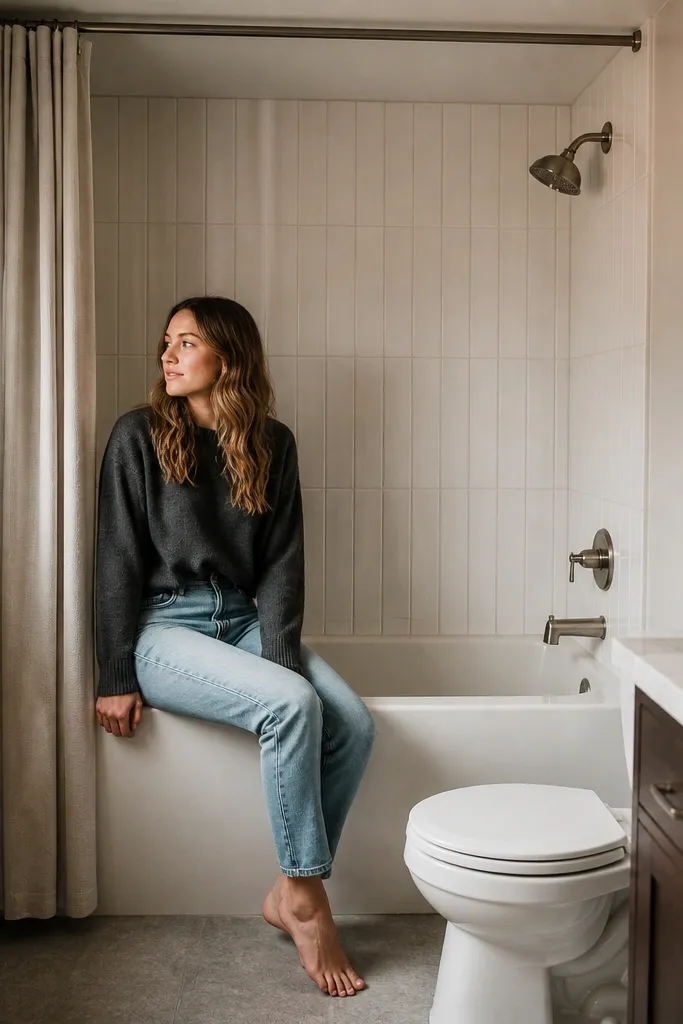
Vertical tile lines make a small bathroom feel taller because they pull the eye up. I’ve used this when ceilings are low and the tub sits close to the ceiling line, and it always looks more open. The key is choosing a tile that’s not too shiny; matte or satin finishes hide uneven grout lines and keep the texture from looking cheap. Light greige grout makes the joints look wider and calmer than stark white. This is flattering for most skin tones in mirror light because the neutral wall doesn’t cast strong color shadows.
Pick tall-format tiles like 3x12-inch or 4x12-inch and install them starting from the tub deck edge, keeping the first row perfectly level. Use a waterproof membrane and backer board, then set tiles with a thin consistent spacing so the grout line stays even. Use light greige grout and tool it slightly for a tight, clean look. Add a tall rectangular mirror (not a wide one) and keep the shelf narrow so you don’t compete with the vertical lines.
Good to knowUse a dark-to-light strategy: keep the floor lighter than the tub wall so the vertical tile reads clean and lifted.
AvoidAvoid mixing vertical tile with horizontal decorative bands; it breaks the height effect.
4. Wrap-around tub surround with the same tile on the side wall
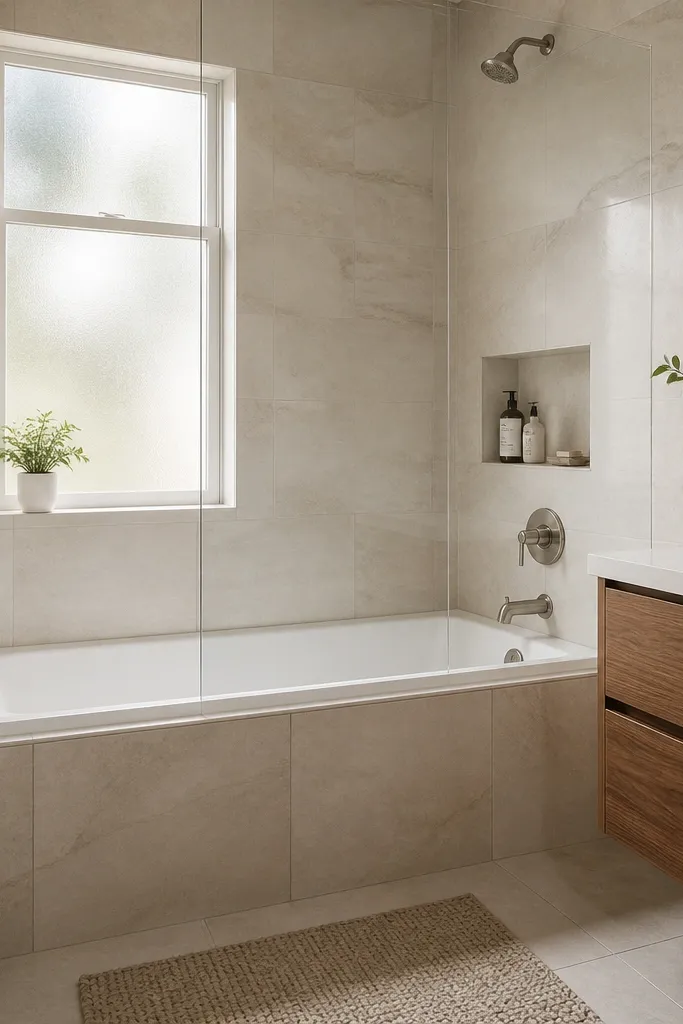
When the tub surround wraps onto the side wall, the room reads bigger because it removes a hard visual corner. I like to use the same tile body and finish on both surfaces so the eye doesn’t stop at the edge of the tub. This is especially useful in small full bathrooms where the tub is in the corner and you’d otherwise see two separate “zones.” The effect feels continuous, and it makes the tub look built-in rather than dropped in. If you like a spa vibe, this is the cleanest way to get it without adding extra decor.
Start by planning the wrap width — I do 12 to 18 inches on the side wall if you want it subtle, or full height if you want it dramatic. Tile the back wall first, then carry the same tile onto the side wall without changing grout color. Keep the grout consistent and use the same trim edge profile to avoid a bumpy transition. Add a long mirror above the vanity and place towel hooks on the wrapped-tile side so the room stays visually calm.
Good to knowUse bullnose or a proper schluter-style trim on the outer edge — it makes DIY tile work look intentional.
AvoidAvoid stopping the tile right at the corner without a clean edge; it looks unfinished and cheap.
5. Frameless glass shower panel beside the tub
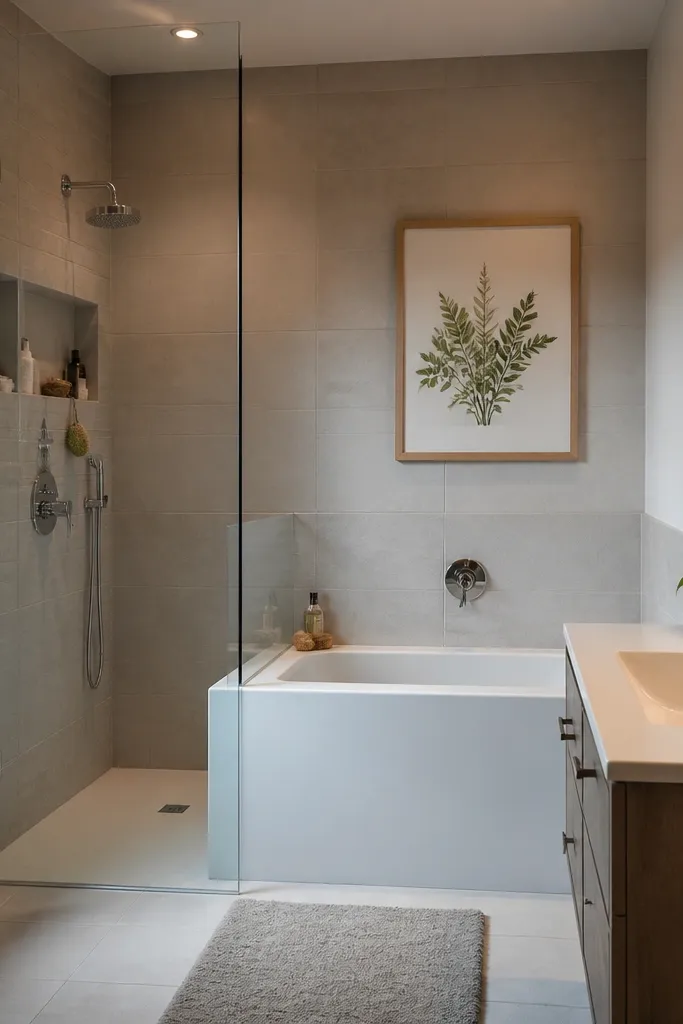
A frameless glass panel makes the tub area feel less enclosed than a curtain, and it keeps the eye moving straight through the room. I’ve seen this work even in tiny bathrooms because clear glass doesn’t create dark visual blocks. Pair it with large-format matte tile because it keeps the wall quiet and lets the glass be the “lightness.” If you have hard water or you hate scrubbing, glass with a ceramic coating helps a lot. This look flatters small spaces with any decor style because it doesn’t compete with vanity finishes.
Choose a glass panel size that covers the splash zone — measure from tub rim to the point where water lands in your routine. Install it to a stable wall mount and keep the hardware color consistent with your faucet finish. Use silicone-rated waterproof sealant along edges, then tile the surround in large-format panels (12x24 or similar) with minimal grout lines. Add a small niche shelf so you don’t rely on hanging caddies that crowd the glass.
Good to knowGet a squeegee with a suction cup and keep it in the niche — wiping takes 10 seconds after showers.
AvoidSkip frosted glass in a small bathroom unless privacy is non-negotiable; frosted blocks light.
6. Solid-surface tub surround panels in warm white
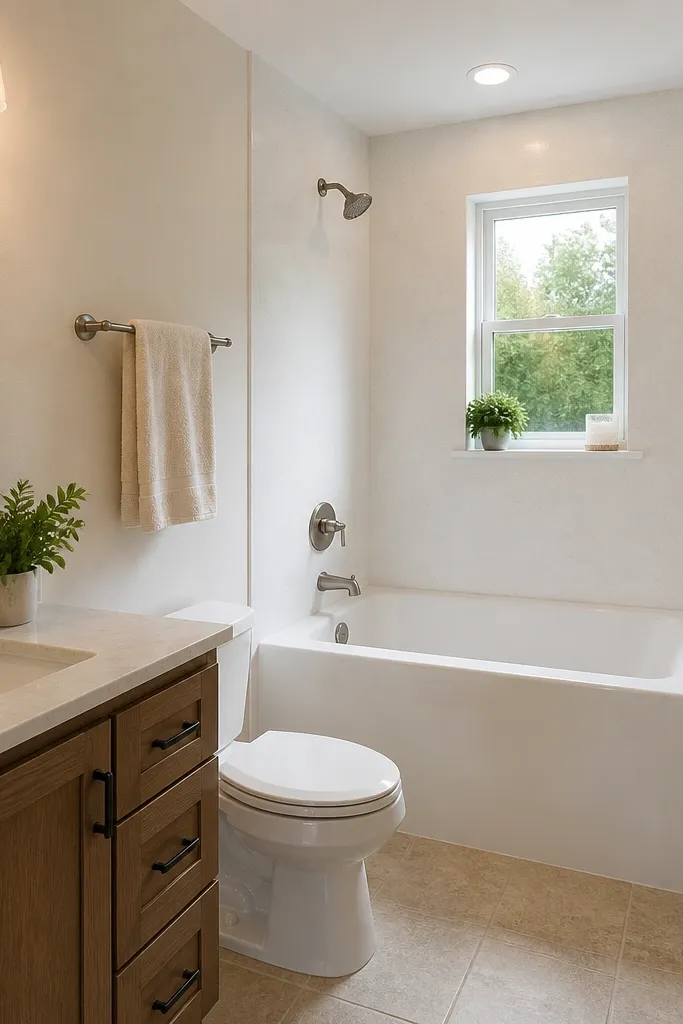
Seamless panels are the most “how is this so clean?” upgrade I’ve installed. The warm white tone keeps the room bright, and because there are no grout joints in the wet zone, maintenance is simple. This is a great option when your walls aren’t perfectly straight or you’re trying to keep the remodel budget controlled. It also looks high-end because the surface reads smooth and continuous. If you want a before and after transformation small full bathroom ideas that still looks good in real life, panels are hard to beat.
Measure the tub surround wall height and order panels that match the system’s required sizes. Start by sealing the wall with waterproof backing, then dry-fit panels before adhesive goes on. Install panels from the tub deck up, line seams carefully at corners, then finish edges with the manufacturer’s trim pieces. Finish with warm white caulk at seams, then paint remaining walls in a matching warm white eggshell.
Good to knowUse matte or satin finishes on fixtures; glossy chrome against solid panels can look too stark in small bathrooms.
AvoidAvoid painting over the panel seams; keep caulk and panel edges clean and untouched.
7. Ceiling-to-floor subway tile with a dark floor
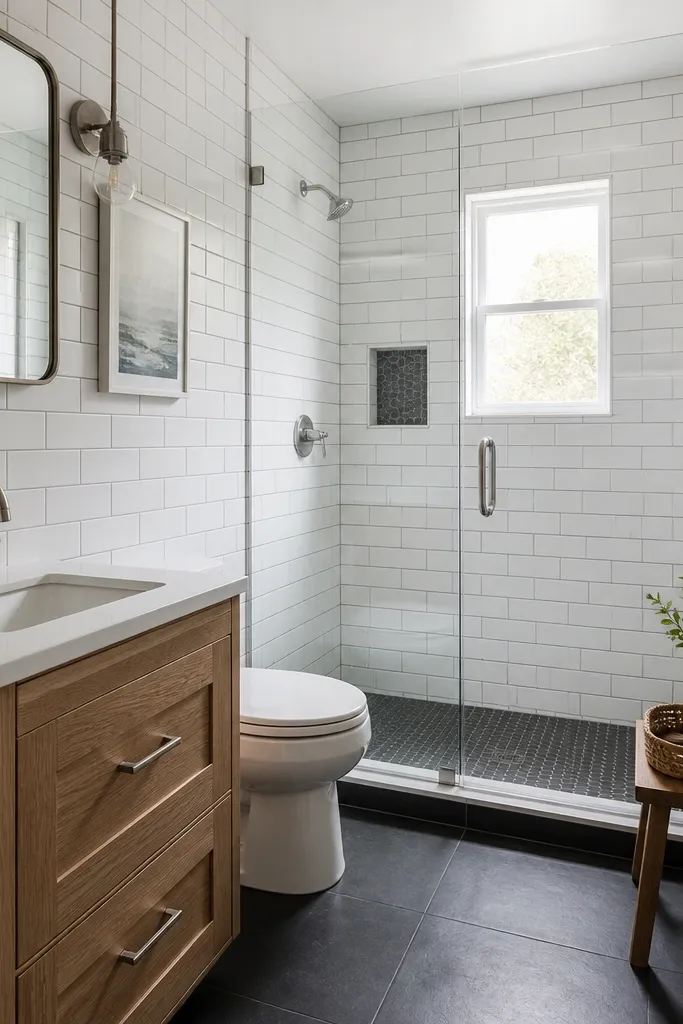
Ceiling-to-floor tile makes small bathrooms feel taller because there’s no interruption where the wall ends. The soft white subway keeps the look light, and the dark floor anchors the room so it doesn’t feel washed out. I like light gray grout because it hides minor variations and keeps the subway lines from looking too stark. This combo flatters bathrooms with limited natural light since the wall reflects more, while the floor adds depth. It also makes black hardware look intentional instead of random.
Start at the ceiling and work down with a level line so the bottom row lands evenly near the tub deck. Use 3x6-inch subway tile with consistent spacing and light gray grout. Tiling to the ceiling means you’ll need to plan around vents — keep the pattern centered so it doesn’t look off. Choose a dark charcoal floor tile to ground the space, then install a black-framed mirror to repeat the floor tone.
Good to knowUse a grout release on subway tile before sealing; it makes cleanup after installation dramatically easier.
AvoidAvoid using bright white grout with subway tile; it can make small rooms look too busy under harsh bulbs.
8. Black matte tub hardware with white tile and brass accents
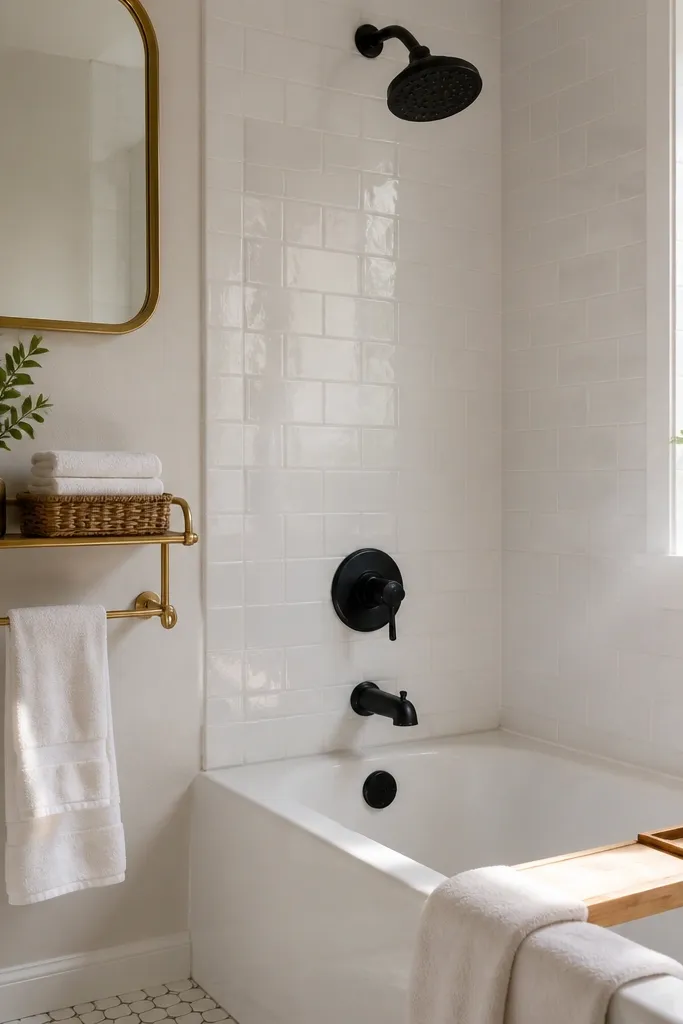
If your bathroom feels plain, hardware is the fastest visual upgrade I’ve done. Matte black reads crisp against white tile and makes the tub area look designed, even when the space is tiny. Then I add brass in one or two spots — mirror frame and shelf — so the black doesn’t feel cold. This looks good on light skin tones and deeper skin tones alike because it creates clean contrast without adding color clutter. It’s also forgiving in small spaces since you don’t need more patterns or bold paint.
Choose a complete hardware set so the finishes match: faucet, drain, towel bar, and toilet paper holder. Install or replace the faucet first, then tile or finish the surround in simple white so the hardware stands out. Add one brass shelf near the tub edge for folded towels or a candle — keep it narrow so it doesn’t block the mirror. Finish by swapping the mirror frame to brass or adding a brass hook set on the opposite wall.
Good to knowBring a sample of your vanity wood to the hardware store; warm woods look best with satin brass, not yellowy antique gold.
AvoidAvoid mixing shiny black with brushed brass; the different sheen levels make the room look messy.
9. Oversized mirror that reaches the tub edge
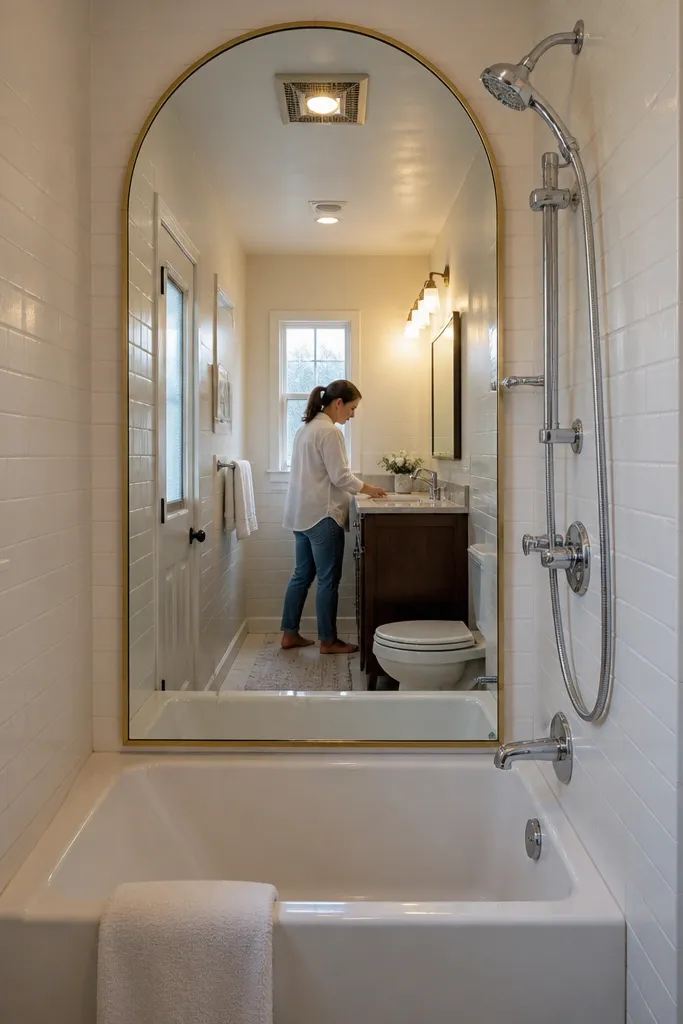
Mirror placement is where the before and after transformation small full bathroom ideas jump happens. When the mirror is big enough to align with the tub’s visual height, the bathroom feels longer and less segmented. I’ve used this in narrow bathrooms where you can’t widen the room, and it works because the mirror creates one continuous reflection zone. The light gray surround prevents glare, while the oversized mirror bounces it back into the corners. This looks best in bathrooms with at least one clear line of sight — you want the mirror reflection to show tile, not clutter.
Measure the tub rim height and the vanity top height, then choose a mirror size so the mirror bottom lands within 2 inches of the tub rim line. Mount the mirror with the top aligned to eye level (about 66 inches from floor for the center). Keep the surround simple — light gray or warm white tile — so the mirror doesn’t reflect visual noise. Put a narrow shelf or cabinet to the side so the area around the mirror stays clean.
Use a mirror with an anti-fog coating if you shower daily; fog makes the upgrade feel temporary.
Avoid a small mirror centered above a small vanity; it leaves dead space between mirror and tub.
10. Tall narrow niche shelves in the tub wall
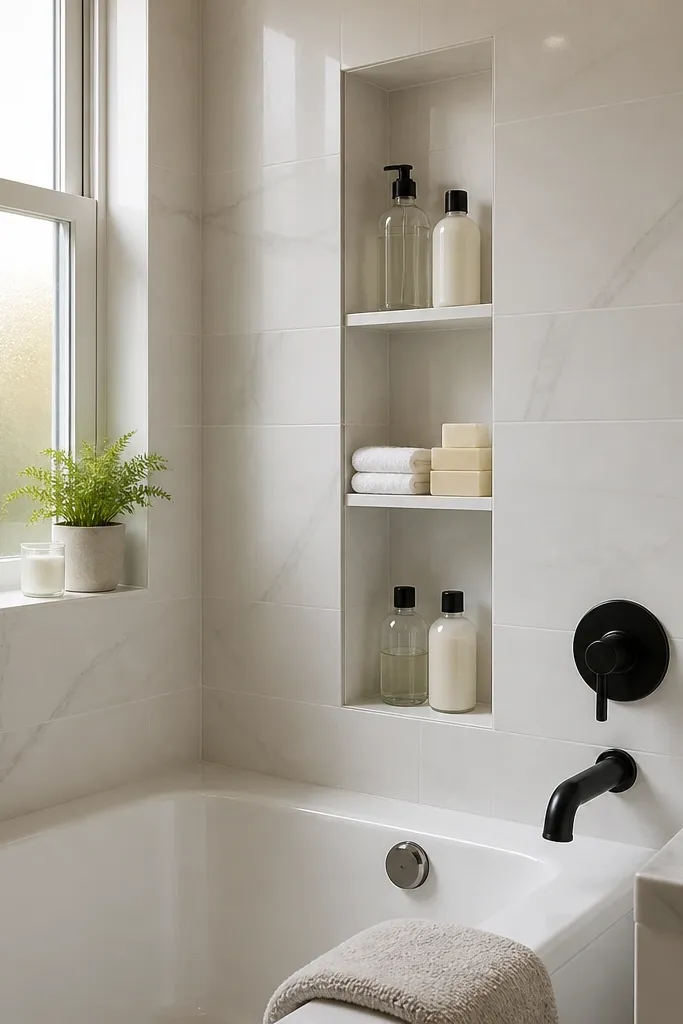
Storage is what makes a small full bathroom look good after the first week. Tall narrow niches let you store shampoo and spare bars without adding hanging racks that clutter the tub zone. I like niches with the same tile as the surround because it keeps the wall visually continuous. This works for people who shower with multiple products — the vertical layout means bottles don’t pile and block the tub edge. It also flatters tight spaces because it uses wall depth you already have, not floor space.
Plan your niche dimensions based on your biggest bottle. I aim for about 4 inches wide for single bottles and 6 to 7 inches wide if you keep two products in one niche. Cut niches symmetrically so they sit centered on the tub wall, then waterproof the niche area before tiling. Install the niche shelves with a slight back slope if your panel system allows it, then seal grout lines after cure. Style the niches with two items maximum per opening so it stays calm.
Good to knowKeep a spare pump bottle in the niche — it prevents the “random bottles on the edge” problem.
AvoidAvoid wide, shallow niches; they look awkward and force you to cram items.
11. Built-in bench-style tub ledge with a wipeable tray
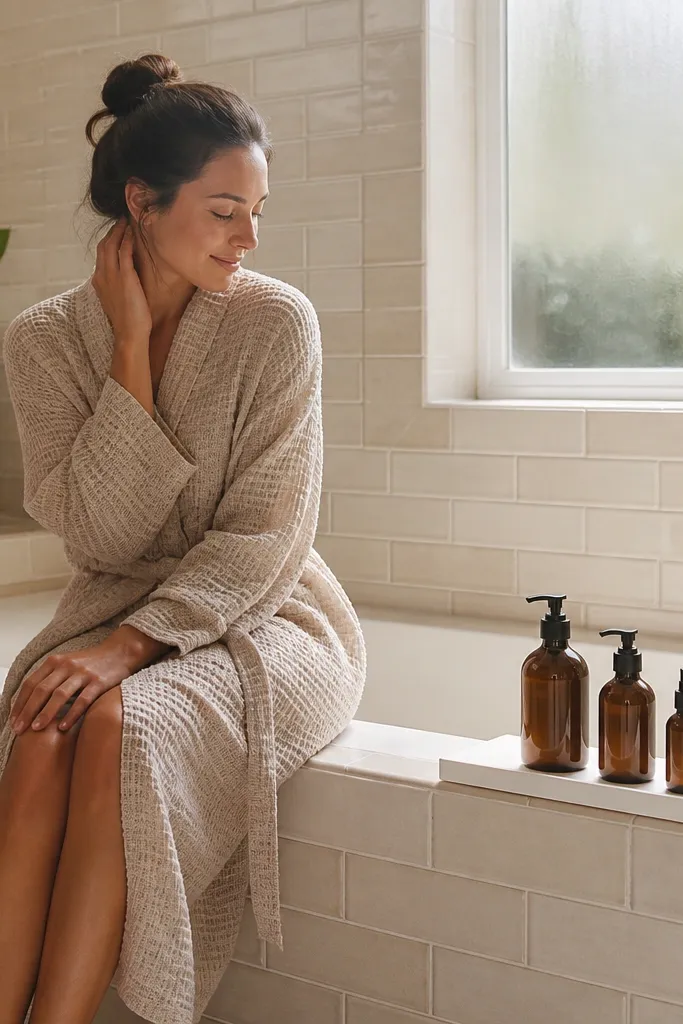
This is the “spa without the clutter” move. A built-in ledge gives you a stable spot for daily items so you don’t end up with bottles sliding on the tub rim. I like pairing cream tile with a wipeable tray because it looks intentional and is easy to clean after hair wash days. The ledge also helps the room feel custom, even in a small footprint. It flatters people who like to keep their shower routine in reach, especially if you have long hair and you need a consistent place for products.
Decide how wide you want the ledge based on tray size — I usually go 4 to 6 inches deep. Build the ledge using waterproof backer and tile it with the same tile as the surround or a slightly warmer tone. Use a tray that fits snugly and won’t rattle; choose a clear acrylic or matte ceramic tray so it doesn’t look bulky. Keep the ledge height around the tub rim line so it’s easy to reach. Finish with a small caddy-free routine: soap and one backup item only.
Good to knowPut a magnetic hook or suction hook on the back edge of the tray for a pouf or loofah — it keeps the ledge clear.
AvoidAvoid a ledge that’s too deep; it steals visual space in tiny full baths.
12. Patterned floor tile that matches the tub surround color
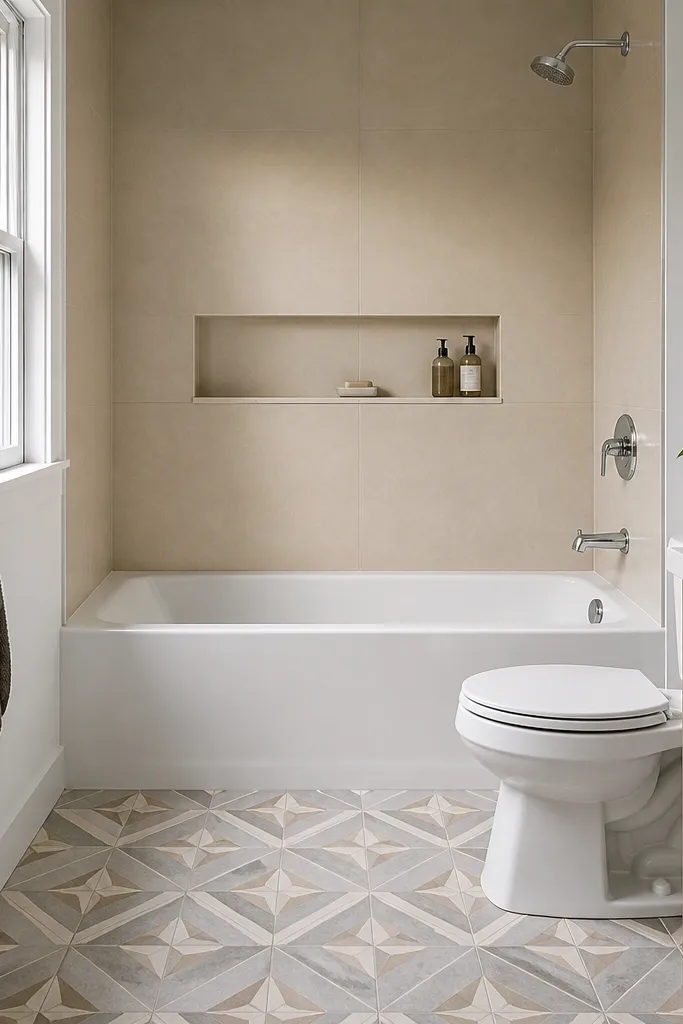
A patterned floor works in small bathrooms when the pattern uses the same color family as the tub surround. I’ve used light gray and warm beige geometric tiles to add personality without turning the room into a circus. Keep the tub wall simple and bright so the floor pattern becomes the only strong graphic. This flatters bathrooms that feel too plain — the floor gives character even when the rest is minimal. If you have a vanity with warm wood, matching the beige tone makes the whole room feel tied together.
Choose a floor pattern with two main neutrals only — light gray plus warm beige — so it stays calm. Install the floor first if you’re remodeling, then tile the tub surround in solid white or near-white with minimal grout contrast. Keep the grout color on the floor close to the lighter tone so lines don’t look too busy. After installation, use a simple bath mat pattern-free and pick towels in one of the floor colors for cohesion.
Use a matte finish floor tile; glossy patterns show dirt and make small bathrooms look messy faster.
Avoid multi-color floors with a patterned wall surround; two patterns in a small bath looks cramped.
13. Curtain rod trick: ceiling-mounted two-layer setup
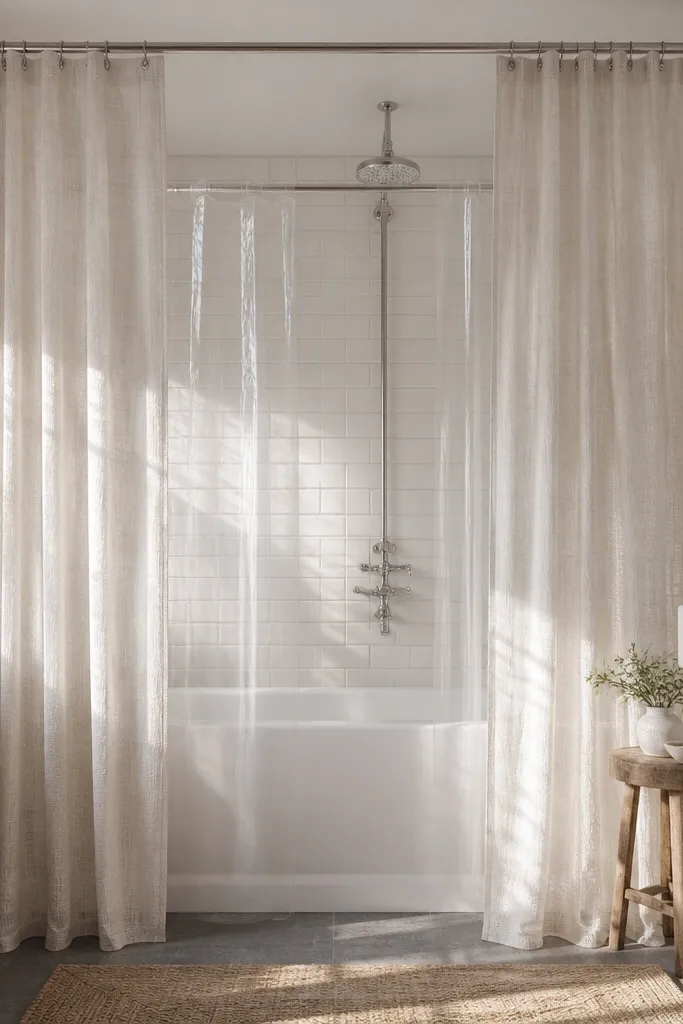
A ceiling-mounted rod widens the curtain footprint, which makes the tub area look larger than it is. Two layers help in real life: the waterproof liner keeps water where it belongs, and the outer linen sheer makes the whole room feel softer. I like outer curtains in light linen texture because they catch light without looking shiny or plastic. This look flatters small bathrooms that feel harsh — it adds softness around the tub without needing tile changes. It’s also the best option for renters because you can remove everything without touching the wall tile.
Measure from ceiling to tub rim and choose a rod height so the outer curtain hangs 1 to 2 inches above the floor. Install ceiling brackets with the proper anchors and extend the rod 4 to 8 inches past each tub edge for a wider frame. Use a white waterproof liner that reaches the tub deck, then hang the linen sheer outside it with rings or clips. Keep the outer curtain fabric light so air and light move through it, and style with a small tray on the ledge or vanity instead of hanging caddies.
Use curtain weights or a weighted hem on the outer layer so it stays still during showers.
Avoid a rod mounted only above the tub — curtains that cling to the sides make the room feel smaller.
14. Half-wall tile to 54 inches with painted upper walls
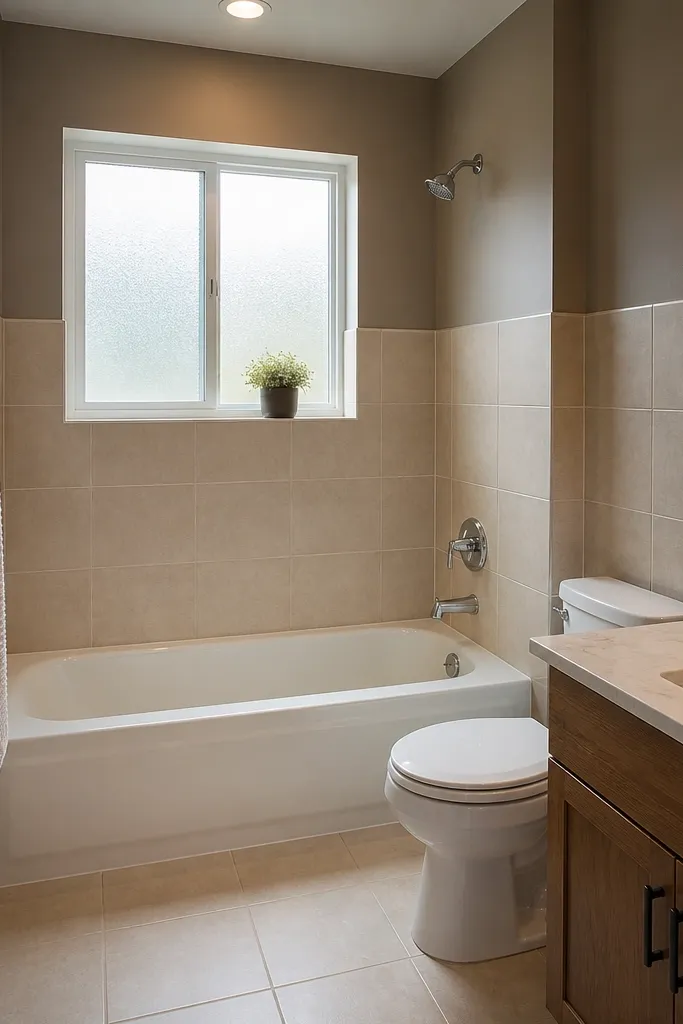
Half-wall tile is the budget-friendly way to get that “designed” look without tiling every inch of the room. The tile stops at a consistent height (I like 54 inches) which keeps the tub area clean and the rest of the bathroom bright. If you paint the upper wall in a warm gray or warm taupe, it adds depth without making the room darker. This works well when you have a small window because the upper paint helps the light feel bigger. It also flatters small bathrooms because it creates a clear line that guides the eye upward.
Tile the tub zone up to 54 inches, then paint above it after the tile is fully cured and cleaned. Use a tile that reads solid from a distance like 4x4 or 3x6 with simple grout. Keep grout color close to the tile tone so it doesn’t create hard stripes. Install a mirror centered above the vanity and add a small towel hook near the tile edge so towels don’t land in the painted zone. Choose a bath mat in a single neutral to keep the line clean.
Good to knowCaulk the top of the tile line with paintable caulk so the edge stays crisp after seasonal humidity changes.
AvoidAvoid tiling to an uneven height; one lopsided line makes the whole remodel feel off.
15. White-on-white marble-look surround with satin nickel trim
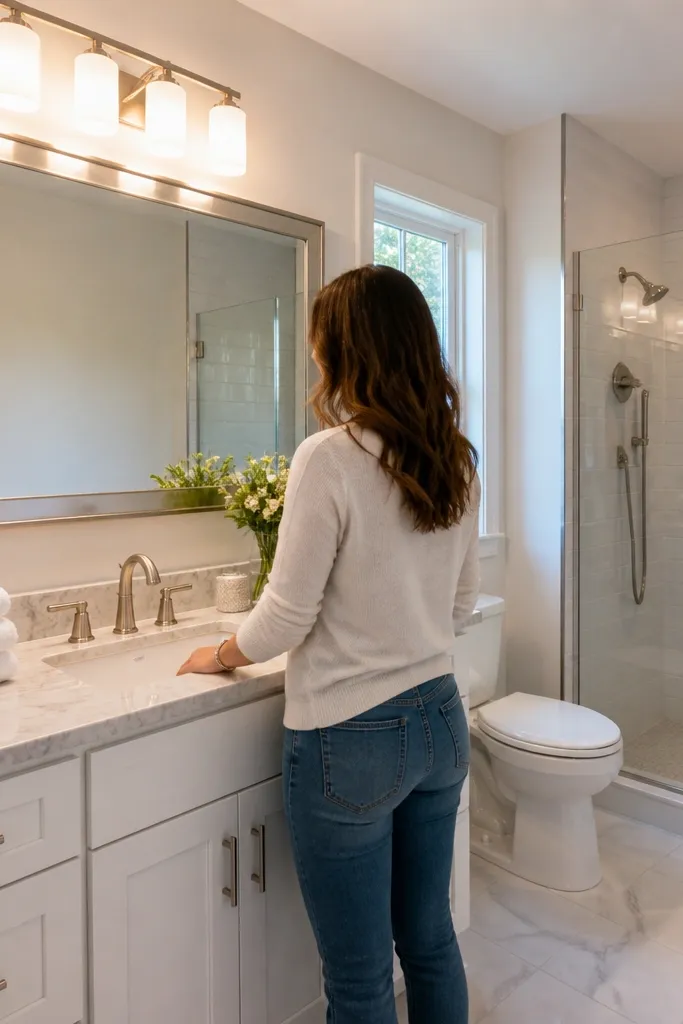
White-on-white works when the marble-look has gentle veining and you keep the trim finish consistent. The satin nickel detail is important because it softens the shine and looks clean next to veined tile. I use this when clients want an airy, luxury feel but the bathroom has limited light. The veining adds depth without bold color, so the room doesn’t feel flat. It also flatters people who wear light or neutral outfits because the bathroom background stays calm and doesn’t fight your look.
Pick a marble-look porcelain with subtle gray veining and set it with white or slightly off-white grout. Use trim at the tub edges so the surround looks finished — I prefer satin nickel trim pieces over plastic caps. Tile the floor in smaller squares so it matches the scale of the bathroom and doesn’t look like a showroom wall. Keep the vanity hardware and drain cover in satin nickel so everything reads like one material family. Style the counter with one tray and one pump bottle so the white-on-white doesn’t look cluttered.
Good to knowChoose a grout additive rated for wet areas; it keeps the joints cleaner in bathrooms that get heavy use.
AvoidAvoid high-contrast veining that looks like bold streaks; it overwhelms small bathrooms fast.