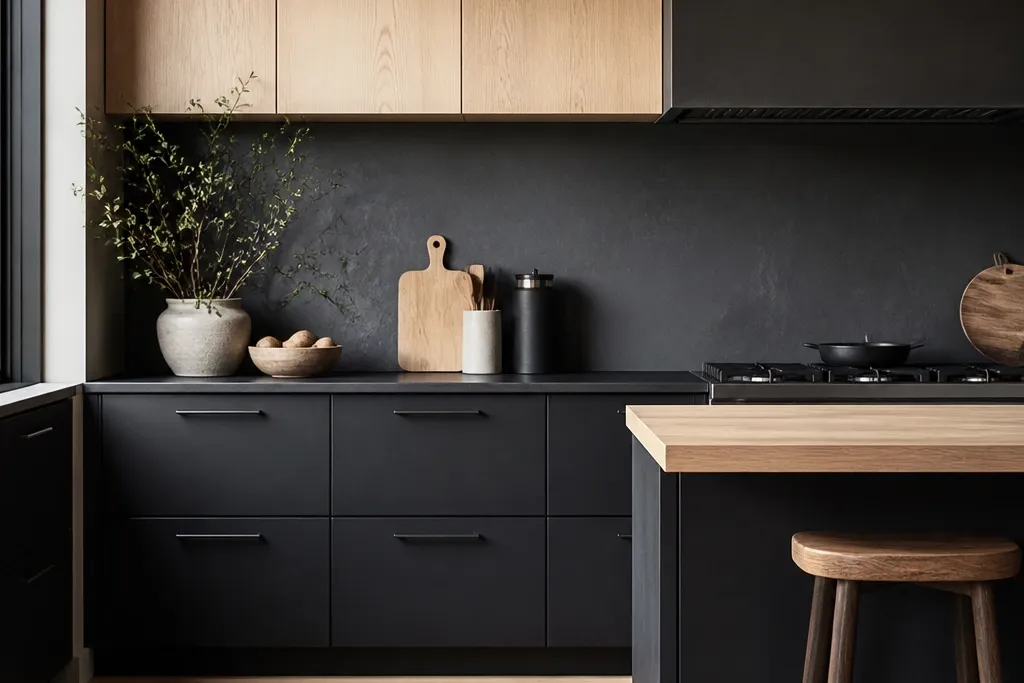
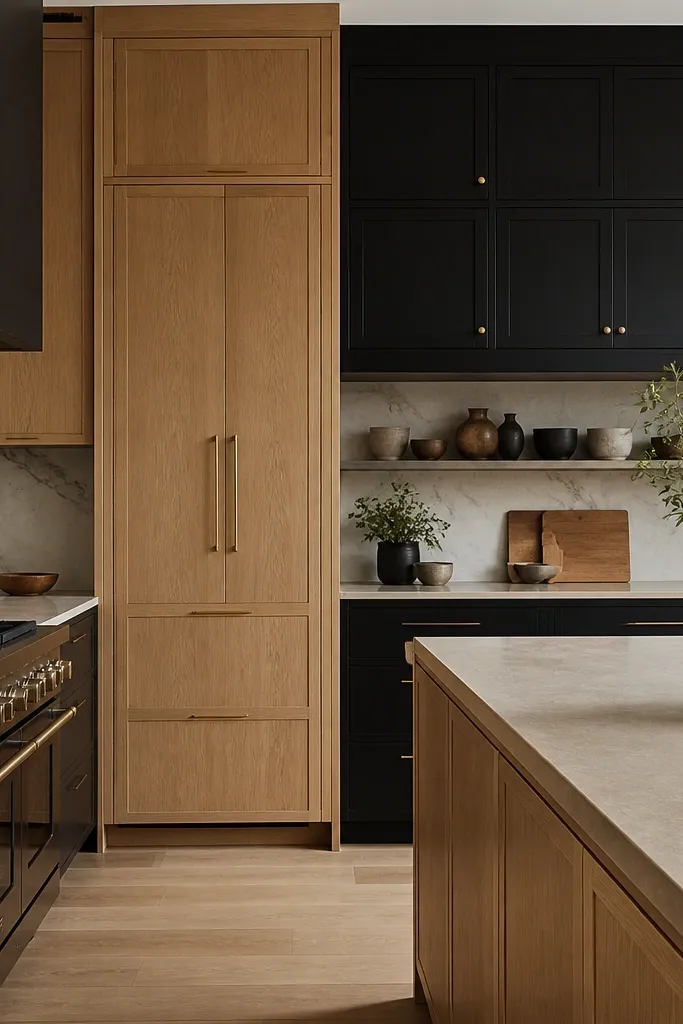
1. Oak uppers, black lowers with matte bar pulls
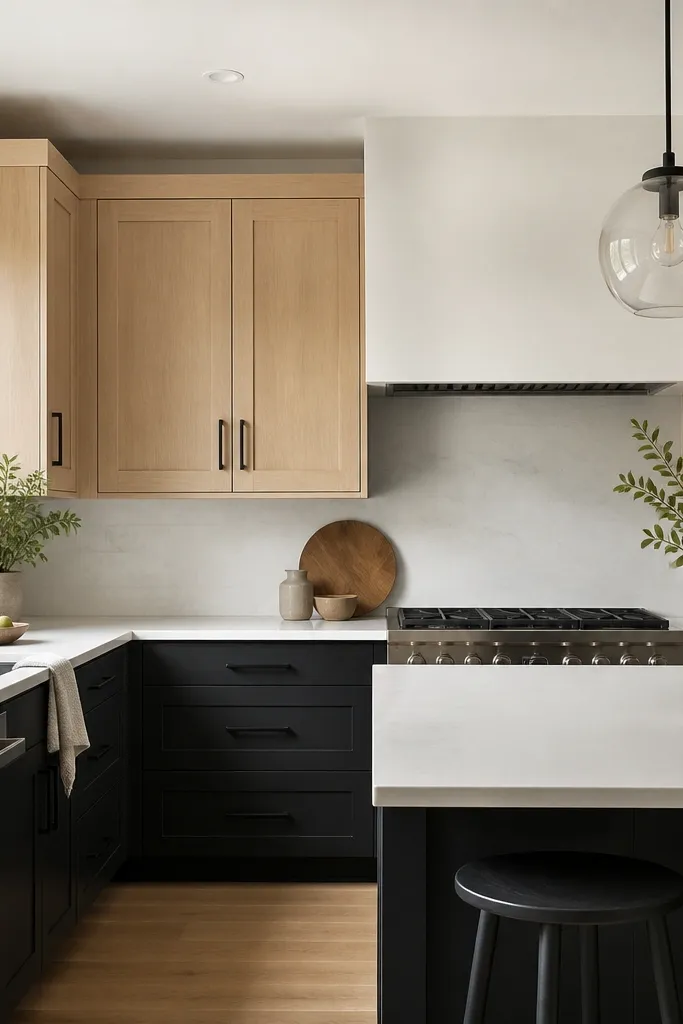
This is the boldest version that still feels airy. The white oak uppers bounce light and show the grain, while the black lowers ground the room so it doesn’t look like a showroom wall of white. I like shaker doors here because the square lines keep the contrast crisp. This layout flatters most kitchens because it draws the eye down without making the ceiling feel lower. It also looks great with warm skin tones and wood floors since the oak repeats the same warmth.
Start by installing your uppers in white oak with a clear finish or a very light stain; keep the tone neutral, not orange. Then paint or order the lower cabinets in a true black with a matte or soft-satin finish, and mount matte bar pulls centered 3 inches up from the bottom rail for a clean line. Use a white quartz countertop with subtle gray veining and keep the backsplash simple — 3x6 white subway tile in a warm white grout. Finally, hang one black pendant over the island and one matching black light above the sink so the metal reads intentional.
Good to knowUse a 4-inch reveal between upper and lower cabinets if you want the contrast to feel sharper. If your space is tight, go 3 inches so it doesn’t feel chunky.
AvoidAvoid glossy black cabinet paint — it reflects overhead lighting and can make the finish look cheap.
2. Black perimeter cabinets with oak island for contrast control
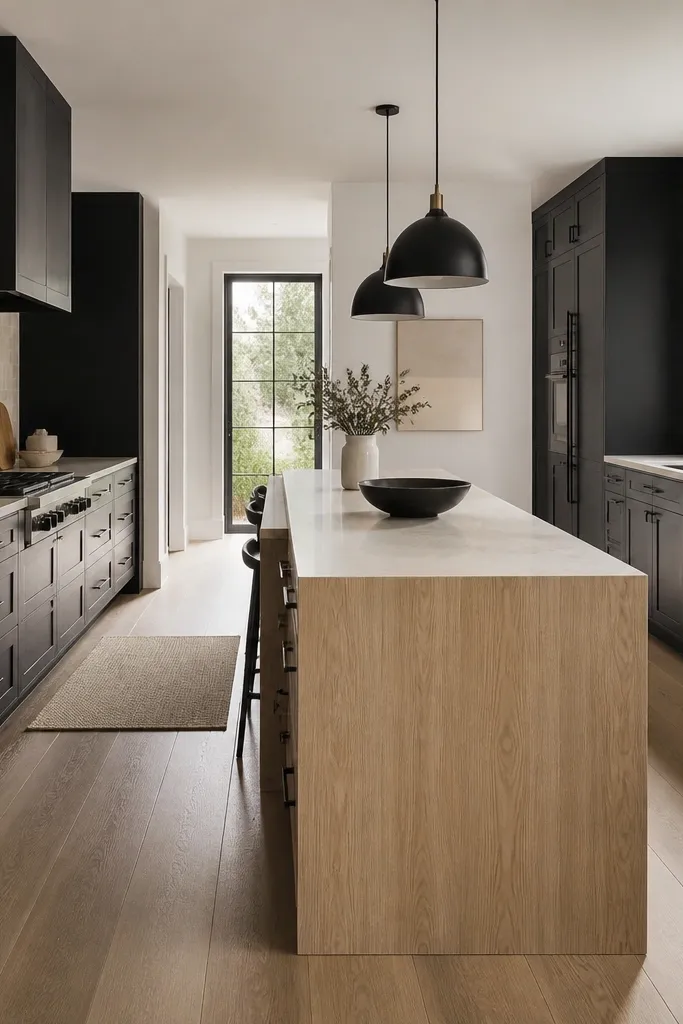
If your kitchen feels dark or narrow, this plan saves it. Black on the perimeter creates a strong frame and hides scuffs, while the oak island gives you a bright focal point you can lean on when you style the dining area. I’ve found this combo works especially well in kitchens with a lot of wall length because the island breaks the monotone. Shaker doors keep everything readable, and the waterfall edge makes the oak look like furniture instead of “just cabinets.”
Start with black base and wall cabinets in a soft-matte finish; keep the door style consistent across the perimeter. Build the island in white oak and add a waterfall front so the grain is continuous; this makes the contrast feel designed instead of random. Choose a light countertop with a warm white base so it doesn’t clash with the oak undertone. Then install a cream backsplash tile (like a lightly speckled ceramic) and set grout to a matching warm tone. End by adding two black pendants in the same shape and spacing — measure from the pendant centerline to the cabinet face and keep it even across the run.
Style the island with one oak-friendly material: a linen runner or a light stone tray. It keeps the oak from feeling too “bare.”
Don’t add a dark backsplash if you already have black cabinets everywhere — it turns the whole room into a tunnel.
3. Two-tone shaker with oak insets and black frames
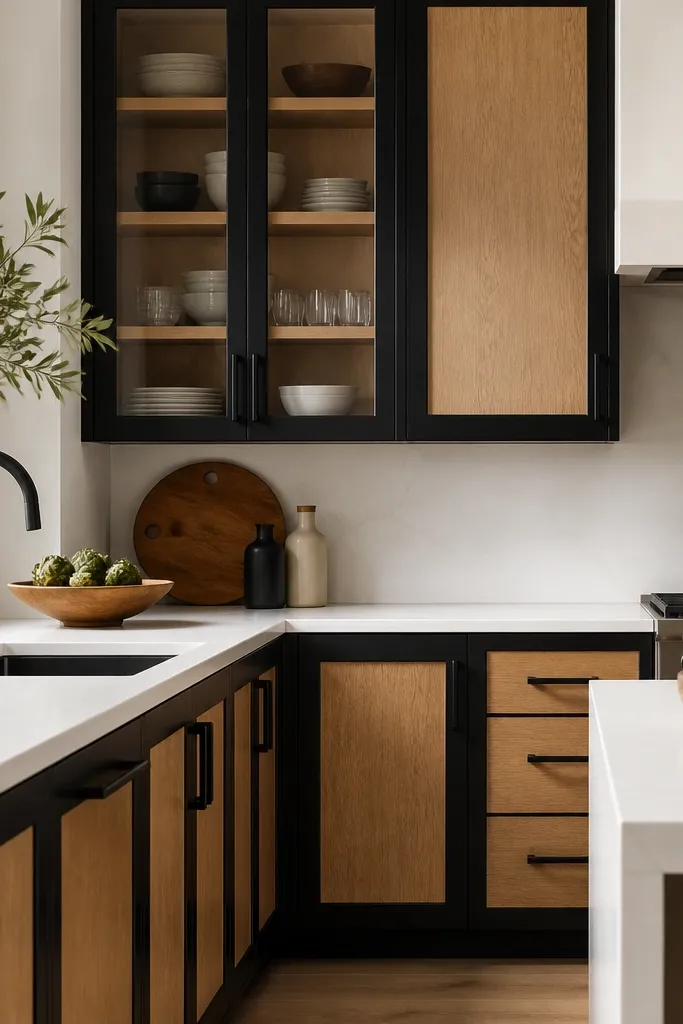
This one looks custom because the contrast is in the door construction, not just the cabinet color. Oak insets add warmth and texture in small doses, while the black frames keep the geometry bold. I love this for kitchens that already have a busy backsplash or patterned floor because the cabinets bring structure. It also flatters people who like a modern look but don’t want the starkness of fully black cabinetry. The oak in the inset centers the warmth at eye level where you notice it most.
Pick a shaker door style that has a recessed center panel; you need the frame edge to show clearly. Order the centers in white oak with a clear finish, then paint the frame and stiles in matte black. If you have glass fronts, keep the interior shelves in oak too so the warmth repeats. Mount hardware with a consistent offset — I like the pull centered vertically on the center rail for a balanced look. Finish with a white quartz countertop and a backsplash that has a small pattern scale, like tiny subway tiles or a smooth micro-mosaic.
Good to knowBefore you commit, hold a black hardware sample next to a cabinet door — if the hardware reads charcoal instead of true black, you’ll see mismatch in daylight.
AvoidAvoid mixing oak finishes — one cabinet section cannot be honey and another gray-white or the two-tone will look accidental.
4. Oak cabinets with black ceiling-height pantry wall
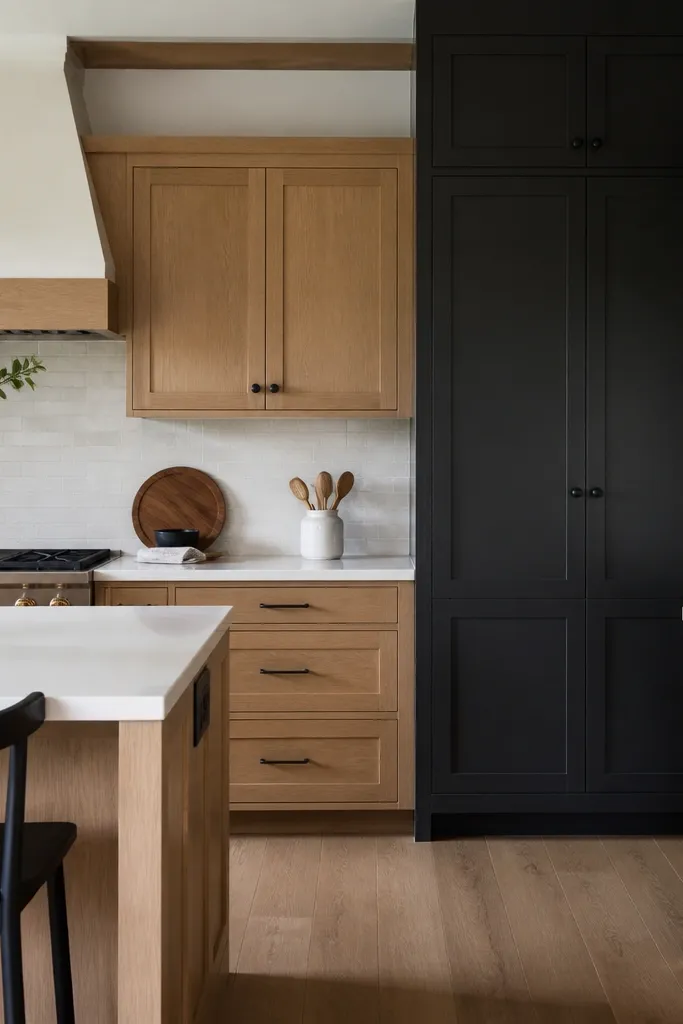
Ceiling-height black is dramatic without adding extra clutter. The bold style comes from scale: a tall black wall gives you that “designer” feeling even with simple oak cabinets elsewhere. I’ve done this in homes where the kitchen opens to a living room; the pantry wall becomes a visual anchor when you look from the hall. It also works if you want storage to feel intentional rather than bulky. The oak around it keeps the room warm, so the black doesn’t feel like a void.
Start by keeping all regular cabinets in white oak with a consistent sheen. Then build a single pantry zone in matte black, from countertop height to the ceiling, using matching door frames and a top trim piece that matches the cabinet style. Add matte black knobs or simple pulls — I prefer knobs on pantry doors because the tall shape reads calmer. Use a backsplash that stays light and smooth so the black wall doesn’t fight for attention. Finish with a black sconce or two near the pantry to repeat the color at eye level.
Good to knowIf your pantry wall has crown molding, choose a black paint finish that matches the cabinet paint sheen. Crown that looks glossier than the doors looks off fast.
AvoidAvoid placing black ceiling-height cabinets in a kitchen with no overhead lighting — the top section will look flat and heavy.
5. Black glass-front uppers over oak bases
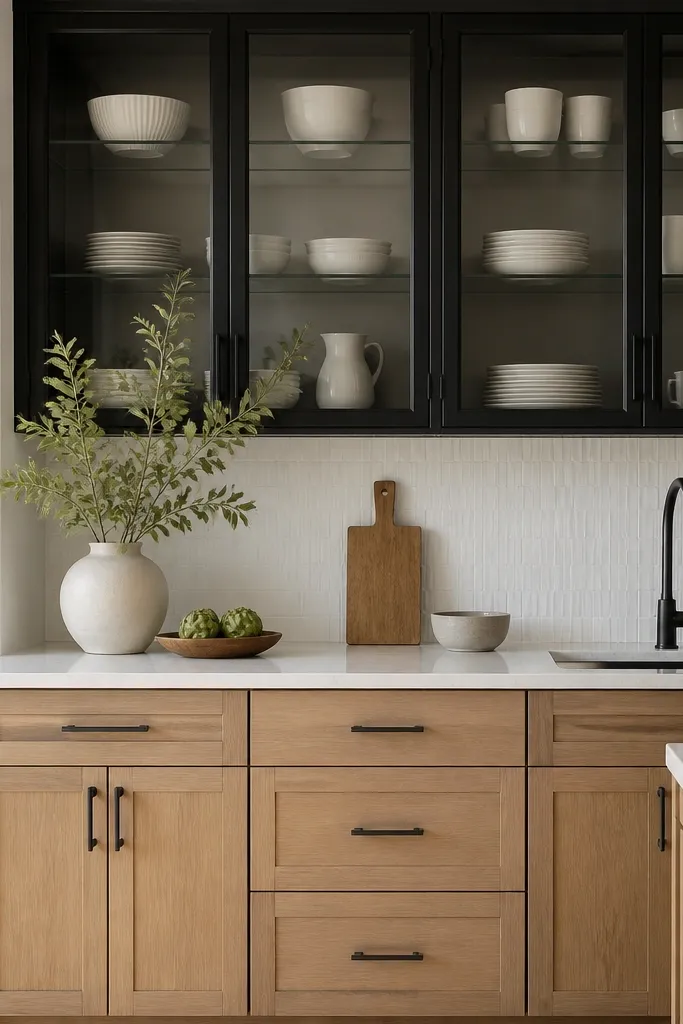
This is bold but controlled because glass breaks up the darkness. Black frames give you contrast, and the clear interior keeps the upper cabinets from swallowing the room. I like this for kitchens that need storage but also want a lighter visual rhythm. It looks great with white dishware and glassware because it repeats the light colors already in the kitchen. If you’re styling a dining nook nearby, the glass keeps the whole area cohesive.
Start with oak bases in a shaker style and keep the finish neutral — clear oak or a light stain that doesn’t go orange. Choose black-framed glass-front uppers and install them with consistent spacing; keep the shelf depth around 10 to 12 inches so plates don’t look cramped. Use matte black hardware and align pull spacing to the lower cabinets. Pick a white or pale backsplash with minimal pattern and install under-cabinet lighting so the glass shelves glow. Style the shelves with matching dish heights — I usually do three tiers of plates and one tier for bowls.
Good to knowUse LED strip lights under the uppers on a dimmer. It makes the black frames look soft instead of harsh at night.
AvoidDon’t overload the glass cabinets with mixed-colored mugs — the bold frames make clutter look louder.
6. Oak cabinets with black hood surround and matching uppers
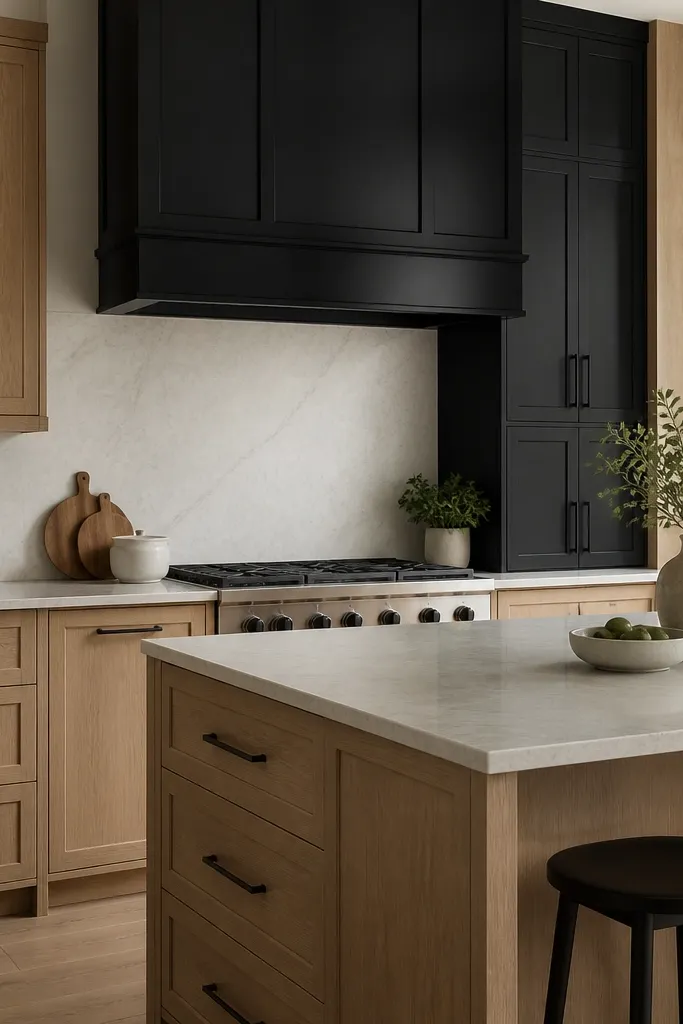
When you want bold style but don’t want to paint every cabinet, the hood surround is your lever. Black around the range creates a focal point that reads architectural, and it pairs naturally with white oak because the oak keeps the room warm. I’ve used this in kitchens where people hate the idea of “fully black” because it feels too intense. This plan gives you contrast where your eye already rests — the cooktop area. It also works well with stainless appliances because the black trim grounds the shine.
Keep the main cabinets in white oak with a clear finish and install black hardware everywhere for consistency. Build a black hood surround using the same cabinet paint color and sheen as the hardware. If you’re adding black uppers, keep them only on the sides of the hood so the look stays balanced. Use a light countertop and a backsplash that’s simple — I like 2x6 or 3x6 tile with minimal grout lines so the hood stays the star. Finally, match the hood’s finish to the cabinet paint, not to the appliance finish, so the black reads intentional.
Measure the hood width against the cabinet openings and keep the surround centered within 1/8 inch. Misalignment shows up instantly in photos.
Avoid using a black hood surround with shiny paint when your cabinets are matte — the finish mismatch looks cheap.
7. Black base cabinets with oak floating shelves and a light backsplash
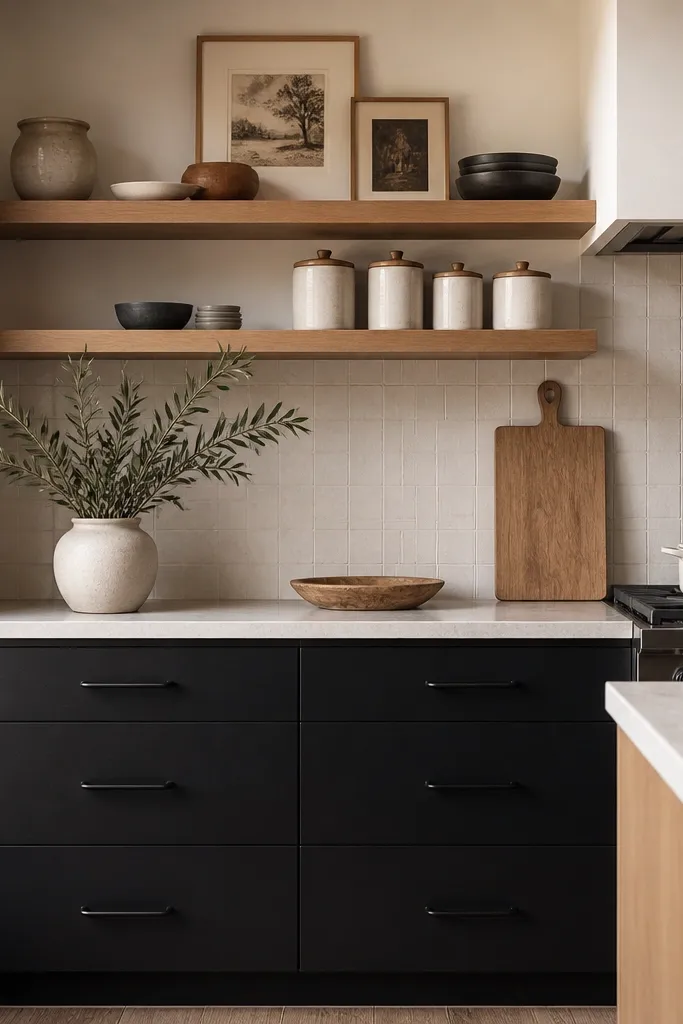
Floating shelves make the oak feel like styling, not storage. When your base cabinets are black, shelves lift the visual weight and let the oak grain show up close to eye level. I like this in smaller kitchens because it reduces the amount of cabinet faces you stare at. The contrast is bold, but the shelf styling creates a softer, lived-in look. It flatters kitchens where people already have a light countertop and want the backsplash to stay clean.
Start with matte black base cabinets in a shaker or slab hybrid. Install white oak floating shelves with a consistent shelf thickness (around 1 inch) and keep shelf brackets black so they disappear. If you skip uppers entirely, plan for a backsplash that’s easy to wipe, like glazed ceramic, and keep the countertop clutter minimal. Style the shelves with matching canisters and keep the tallest items at the ends so the middle stays open. Add under-shelf lighting or warm puck lights to keep the oak from looking gray.
Good to knowUse a mix of heights but keep colors to two — I usually do white ceramics and light wood accents.
AvoidAvoid dark backsplash with oak floating shelves — it makes the shelves look like they’re floating over a black hole.
8. Matte black slab cabinets with white oak trim lines
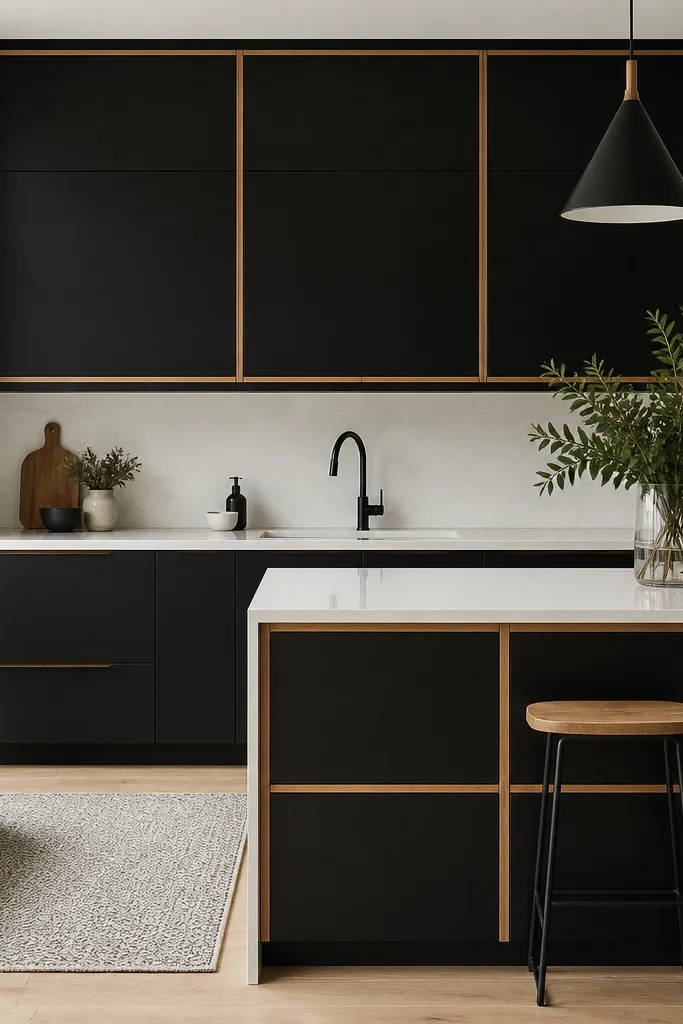
This is the cleanest way to make “bold” look modern instead of farmhouse. The slab doors are quiet, while the oak trim lines add warm detail without breaking the flat look. I like it for kitchens with tall windows or lots of natural light because the flat black reads sleek, not heavy. It flatters people who want a bold color but hate ornate hardware and raised panel doors. The oak trim gives you enough texture to keep the black from feeling sterile.
Order matte black slab doors and keep the cabinet faces flat with a soft-satin finish. Add white oak trim around the cabinet perimeter — I usually frame the doors with a thin reveal so the line reads crisp. Use minimal bar pulls in matte black or a hidden pull if your hardware layout allows it. Pair with a bright white countertop and a light backsplash with small-scale texture so everything doesn’t turn into one big flat plane. Finish with oak on the island top or island base trim so the oak repeats and ties the kitchen together.
Do a quick mock-up with painter’s tape on a cabinet door — if the oak trim line feels too thick, reduce it before install.
Avoid mixing slab black with chunky, oversized pulls. The contrast will look unbalanced.
9. Oak cabinets with black corner pantry and a black dining built-in
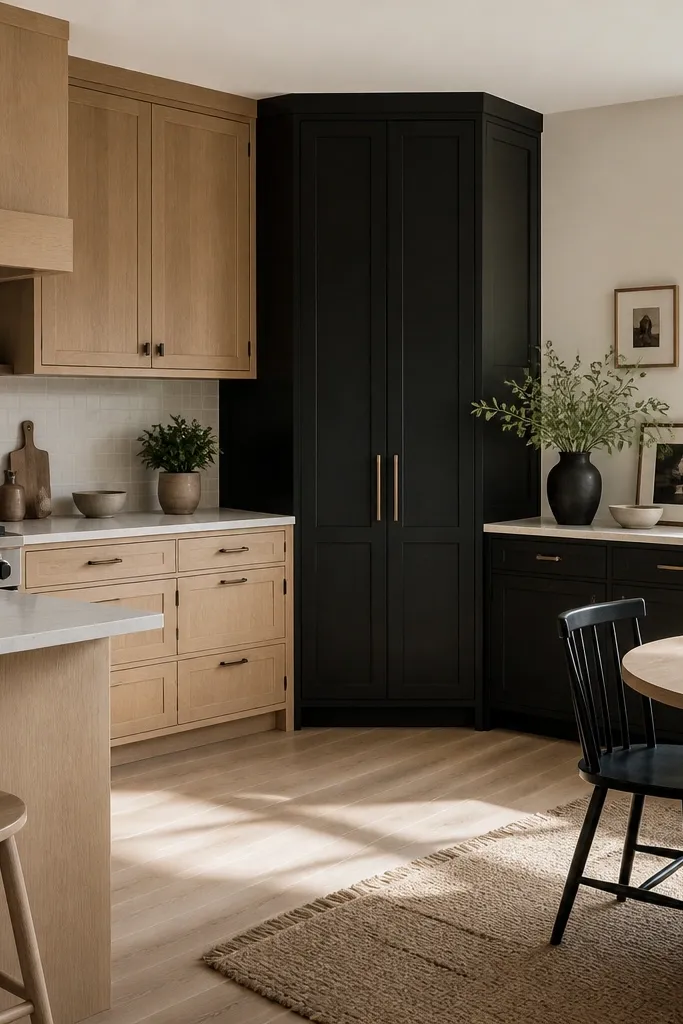
This plan is bold because black repeats across two zones, not because it covers everything. When you carry the black into a corner pantry and a dining built-in, the kitchen reads like one designed space. I’ve done this in open-plan homes where the kitchen and dining blend, and it makes the whole area look intentional. Oak stays the main storage color, so the room stays warm. The black corner gives you a strong anchor and helps hide traffic scuffs in the pantry area.
Keep your main kitchen cabinets in white oak with the same finish across uppers and lowers. Choose a corner pantry built-in in matte black, including the side panels so it feels built-in, not tacked on. Extend the same black color to the dining built-in cabinetry or bench surround, and match the hardware style between both zones. Use a light backsplash so the black areas don’t fight for attention. For countertops, stick to a consistent stone across zones — warm white quartz reads best with neutral oak.
Good to knowIf your dining built-in has open cubbies, put oak inside them. It keeps the black from feeling too heavy at sofa height.
AvoidDon’t use different black sheens between the pantry and dining built-in. One glossy, one matte reads messy.
10. Black lower cabinets with oak open shelving and a black coffee station
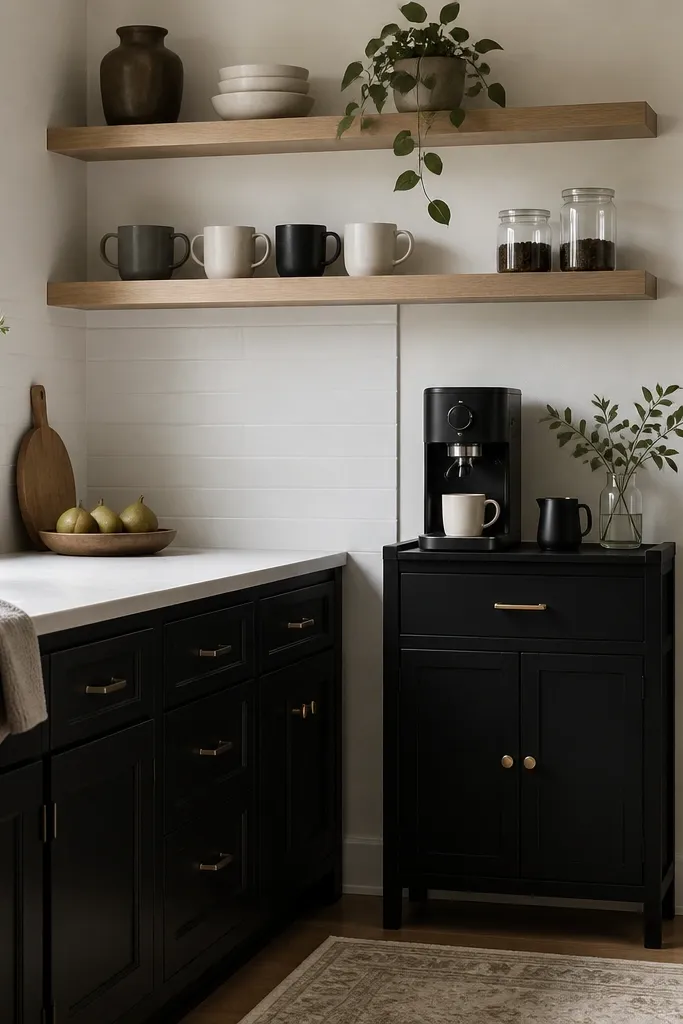
This look feels bold because you create a second “moment” that matches the black base cabinets. The oak open shelves keep it warm and give you a place to style daily-use items so the kitchen feels lived-in. I like it for people who actually use coffee or tea stations because the visual rhythm stays consistent. The black coffee cabinet ties the theme together and makes the counter look less cluttered. It also works with most skin undertones and décor styles because oak is neutral-warm.
Start with black lower cabinets in matte black and set hardware spacing evenly across the run. Install white oak open shelving above — keep the shelf line level and use black shelf brackets. Add a small black coffee station cabinet on the counter side, with a matching matte black finish and a pull that matches the rest of the kitchen. Choose a backsplash in white tile with warm grout so the oak doesn’t go gray. Style the shelves with a mug tower using two heights, and keep countertop items grouped on a tray so the black station looks intentional.
Good to knowUse a tray with black edges next to the coffee station. It links the black cabinet color to small counter objects.
AvoidAvoid mixing too many mug colors on open shelves when the base cabinets are black. It turns bold into messy.
11. White oak cabinets with black appliance garage and brass accents
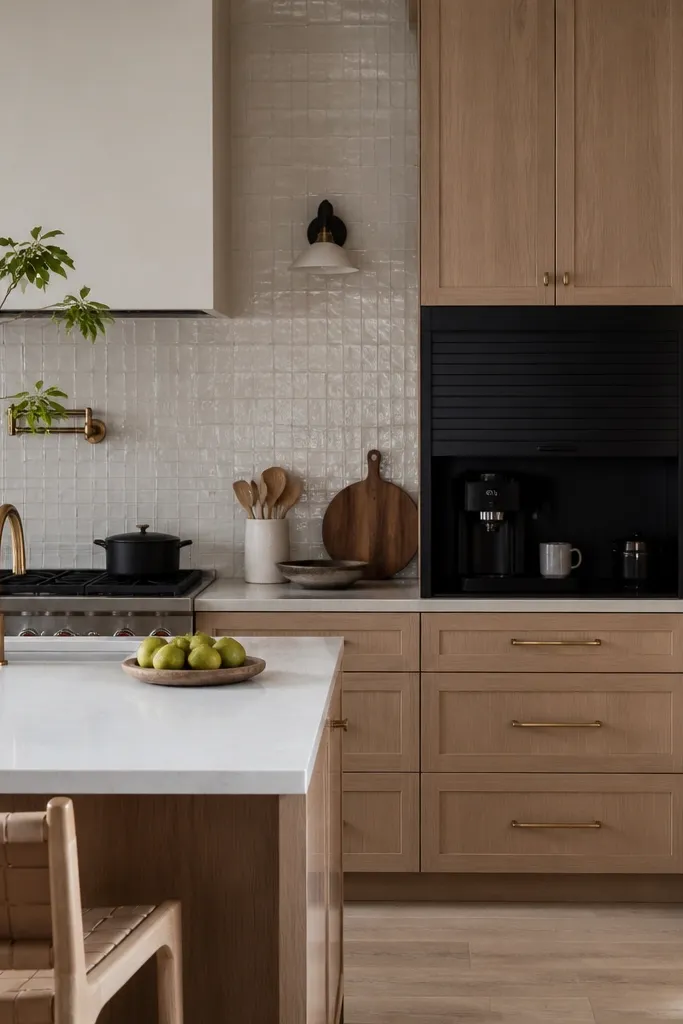
Black in the appliance garage is a smart place to go bold because it hides bulky countertop clutter. The white oak cabinets keep the overall temperature warm, and the black garage gives you a strong, clean panel area near the counter. Brass accents make the oak look richer without turning the black into a flat void. I like this for kitchens where the backsplash is already busy or where you have a lot of small appliances. It flatters warm, cozy décor and looks great in rooms with brass lighting fixtures.
Keep your main cabinets white oak with a clear or light neutral stain and consistent sheen. Paint the appliance garage doors matte black and align them with the cabinet face so they look custom. Match your hardware choice: if you use brass faucets, choose brass pulls or a brass trim detail on the garage. Use a light countertop with a smooth surface so the black panel reads clean. For backsplash, choose warm white tile with subtle variation, and keep grout warm rather than stark white.
Good to knowIf you have brass hardware, wipe one test brass piece against your cabinet sample — if it looks too gold, switch to brushed nickel or aged brass.
AvoidAvoid chrome around a brass-and-oak kitchen. Chrome makes black look harsher and feels mismatched.
12. Oak and black with a black island base and oak waterfall top
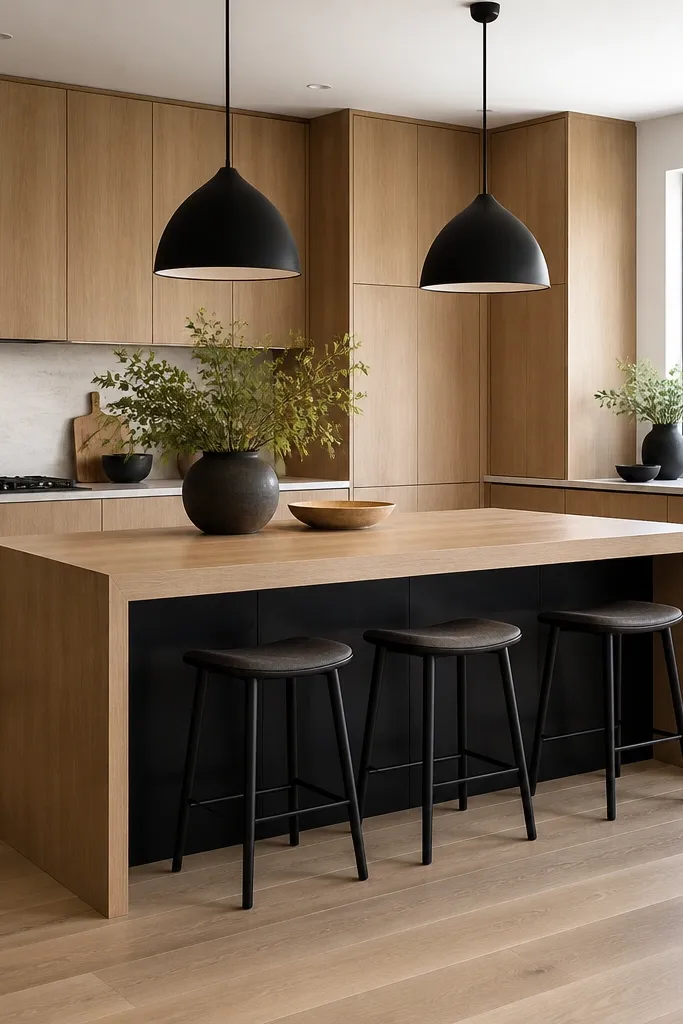
This combo is bold because it gives you contrast in two directions — vertical on the island base and horizontal in the waterfall top. Oak waterfall reads warm and architectural, while the black base keeps the island from looking too light. I like it for kitchens with open sightlines to the living room because the island becomes a visual bridge. The look flatters small-to-medium kitchens because it creates structure without adding dark panels everywhere. It also works well with light floors and neutral walls.
Start by keeping perimeter cabinets in either black lowers with oak uppers or consistent oak with black accents; pick one main pattern so the island stands out. Build the island with a matte black base and legs, then add a white oak waterfall top and edge — keep the waterfall thickness around 3/4 to 1 inch so it looks substantial. Install matte black pendant lights with matching canopies. Use a white countertop on the perimeter and keep the backsplash light so the waterfall stays the focal oak element. Style the island with one cutting board set and two ceramic canisters so the oak top looks intentional.
Choose waterfall grain direction carefully — run the oak grain so it flows from the top to the front edge without abrupt stops.
Avoid a waterfall top with a very glossy oak finish. It reflects overhead lights and can look plasticky.
13. Two-tone but keep the ceiling line oak for height
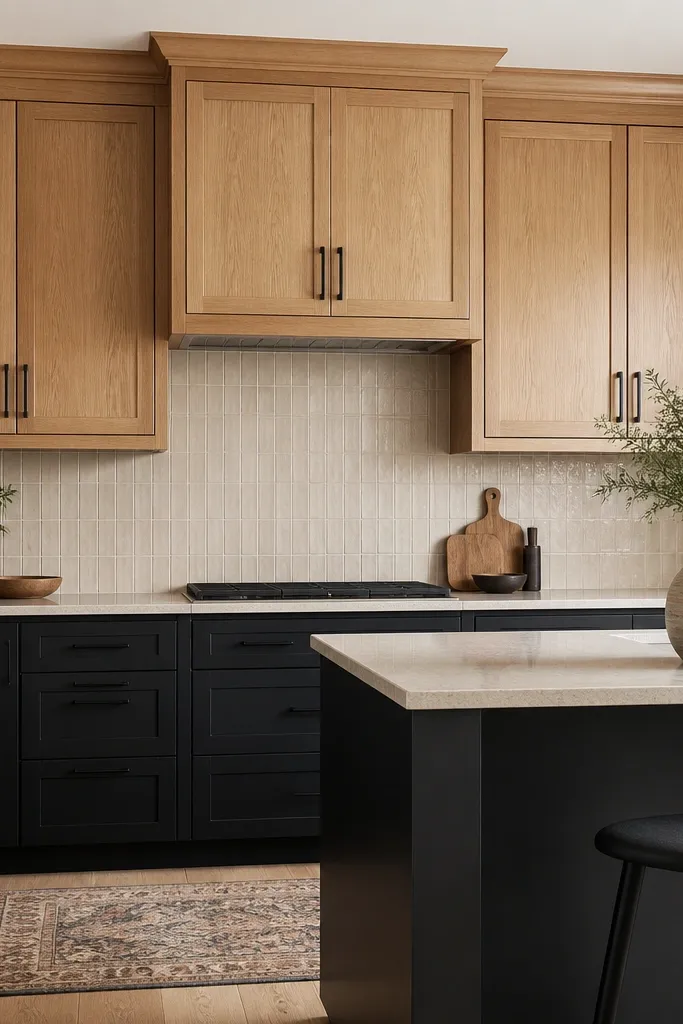
If you’re worried about black making your kitchen feel shorter, this is the fix. Keeping the ceiling line oak gives your eye a warm border near the top, so the room reads taller even with dark lowers. I’ve used this in kitchens with standard 8-foot ceilings and it makes a noticeable difference in photos. The bold look still comes from the black base contrast, but the oak crown keeps everything anchored and soft. This works for anyone who wants strong style without the heavy feeling of all-black walls.
Start by selecting white oak for the uppers and for the crown trim. Paint only the lower cabinets black in matte or soft-satin finish. Keep the uppers simple — shaker doors with a consistent rail height — so the oak reads as a clean band. Use matte black hardware across both zones so the metal ties the look together. Choose a light backsplash and grout that isn’t stark white, then install under-cabinet lighting on the uppers to brighten the counter area.
If you have crown molding, match the oak color to the cabinet finish exactly. A mismatched crown reads like separate furniture.
Don’t use black crown or black ceiling trim unless your walls are already very dark. It crushes the height fast.
14. Black shaker cabinets with oak inside corners and toe kicks
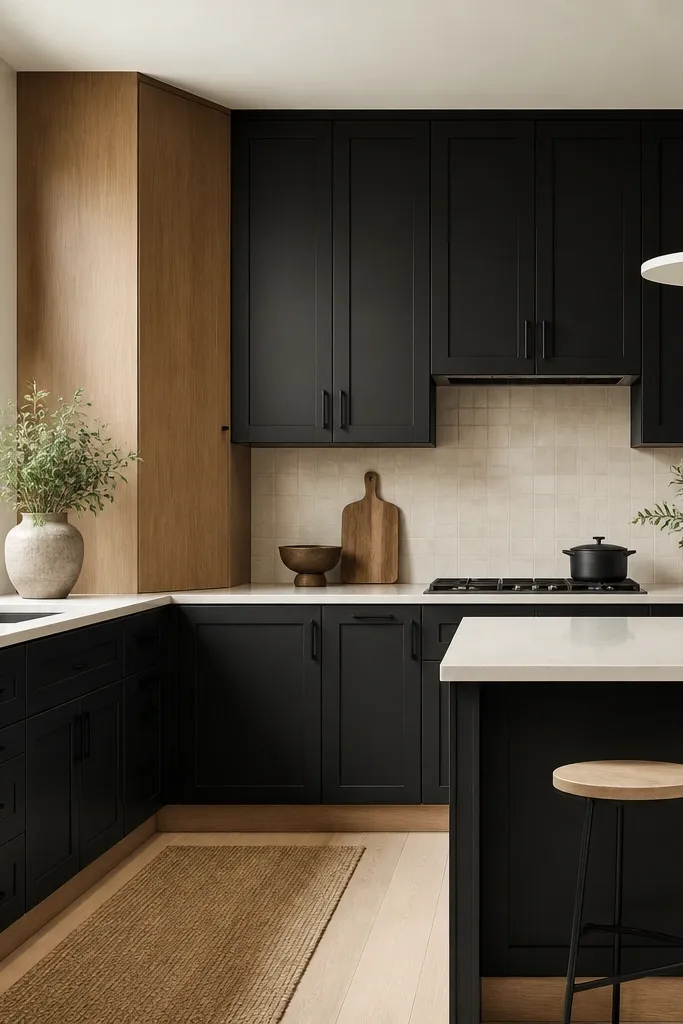
This is a subtle bold look that still feels high-end because the warmth is hidden in the details. Black cabinets can look flat, especially in kitchens with neutral walls, so oak inside corners and toe kicks add texture right where your eye drops when you cook. I like it for people who want black but hate the “all-dark” feeling. Oak toe kicks also protect the bottom edge visually, since grime and scuffs show up there. It flatters kitchens with light floors because the oak repeats near the ground.
Start with black shaker cabinets in matte finish for the main faces and doors. Add white oak panels to inside corner areas and use an oak toe kick strip at the bottom — keep the toe kick height around 3 to 4 inches for a standard look. Use matte black hardware so the metal stays consistent across black and oak elements. Keep your countertop and backsplash light and simple — a warm white quartz and a neutral tile with light grout. Finish by adding a single oak accent in the room, like a cutting board stand or a wooden utensil crock, so the hidden oak doesn’t feel random.
Good to knowTake a damp cloth and wipe a test oak toe kick sample with your cleaning product. If it changes tone, switch finishes before install.
AvoidAvoid oak in random places without a repeat. If oak shows in corners, repeat it at least once more near eye level.
15. Oak cabinets with black trim around glass and open niches
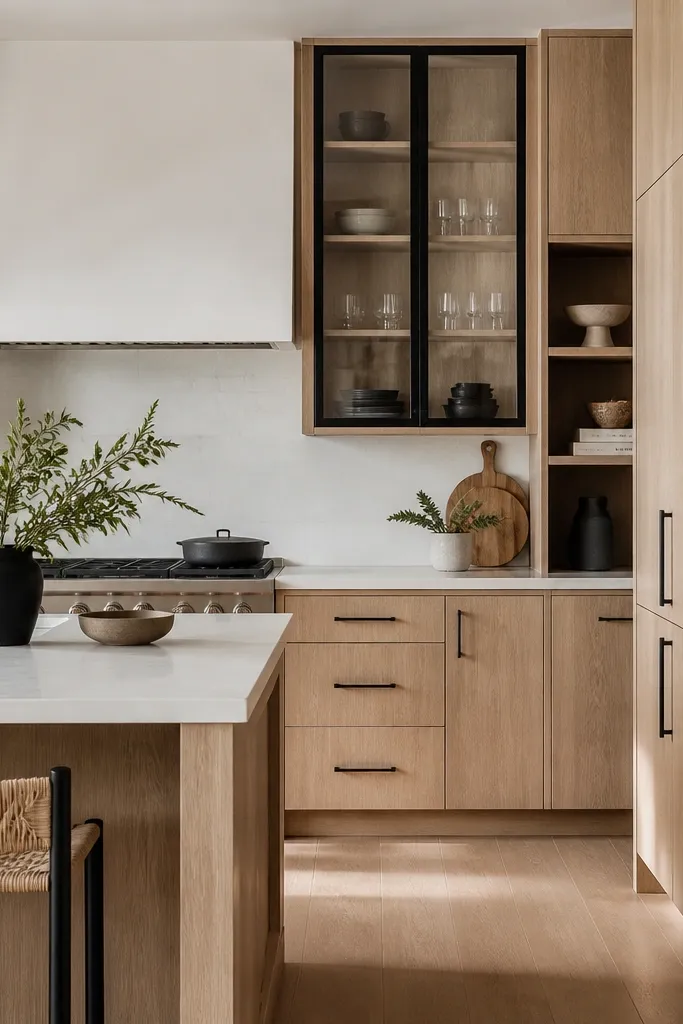
Black trim around glass and niches creates a “window” effect that feels bold without turning every cabinet face dark. White oak stays the main color, so you get warmth and grain, while the black frames add contrast right where you store the pretty stuff. I like this for kitchens that have a lot of open shelving already or a decorative backsplash, because the cabinet trim organizes the visual noise. It also flatters small kitchens since the oak still dominates the surface area. If you like to display dishes, this style makes them look curated even with everyday items.
Order oak cabinets with a design that can accept black trim — recessed glass frames or niche borders. Paint the trim in matte black and keep the hardware matte black too, so everything reads as one system. Use clear glass or lightly tinted glass so the oak interior shelves show. Mount the glass doors at eye-friendly heights and keep niche openings symmetrical. Choose a light backsplash and grout so the black trim doesn’t look too harsh. Style the niches with small items in consistent heights and avoid stacking tall objects in the center.
Good to knowUse a black-and-white dish set or white ceramics in the glass — the contrast reads best against oak interiors.
AvoidAvoid mixing black trim with shiny glass hardware. Glossy accents can make the trim look like a sticker.