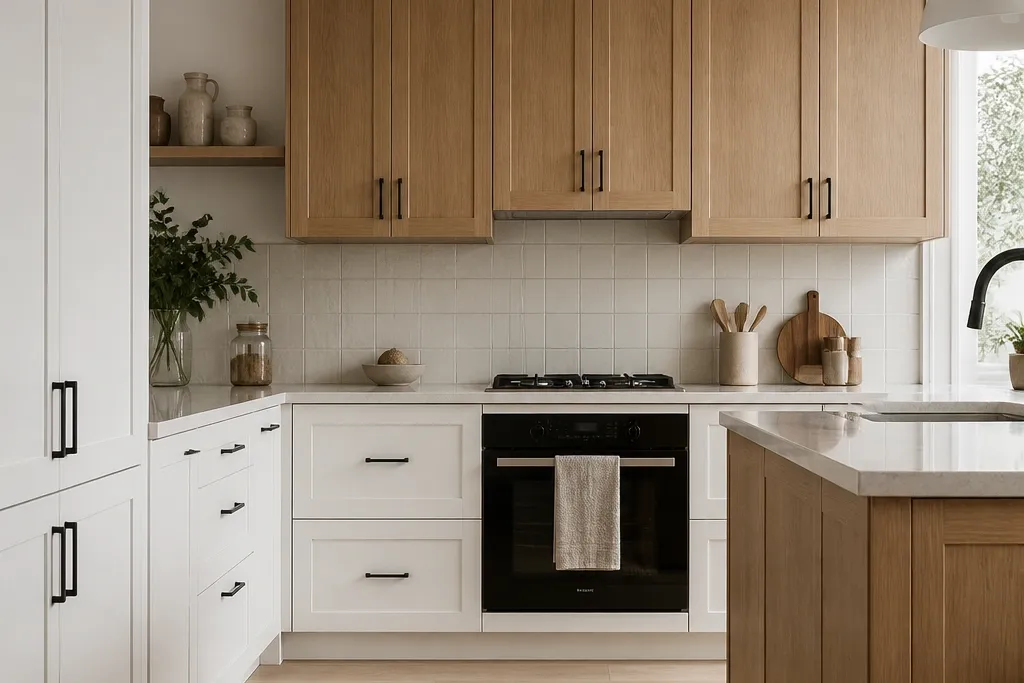
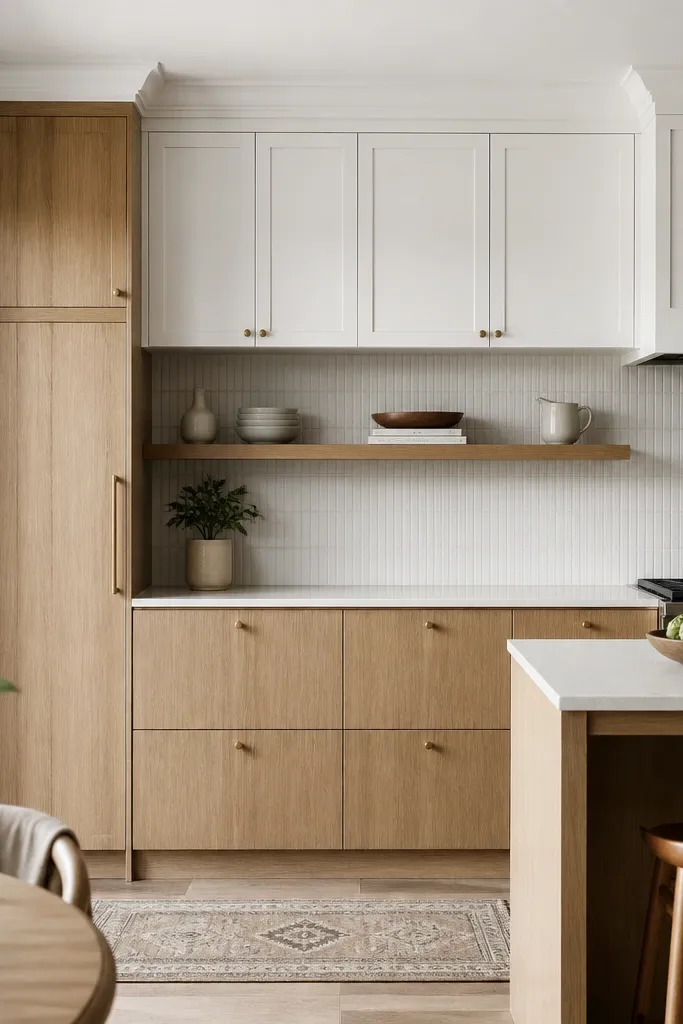
1. Natural oak lowers with crisp white shaker uppers
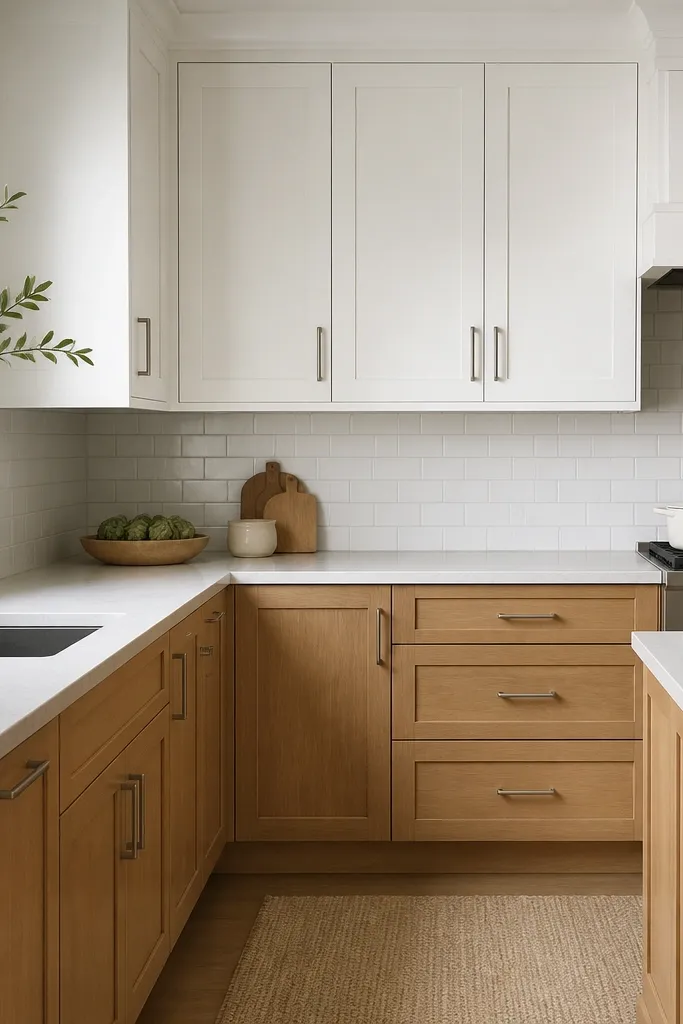
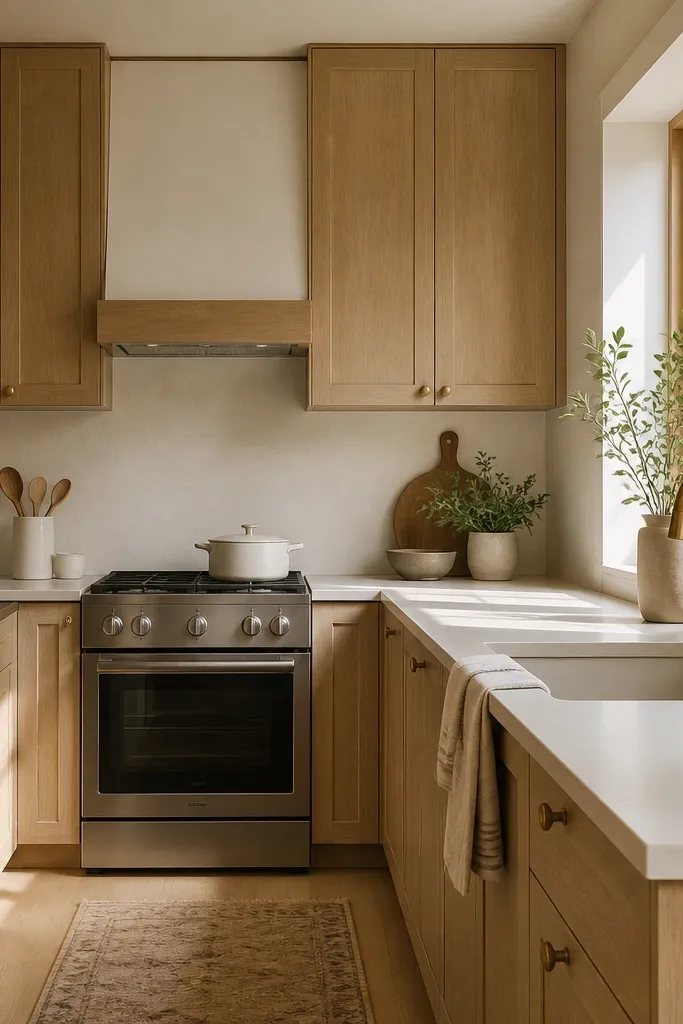
This combo works because it uses the classic shaker door profile to make both colors read “intentional.” Natural oak lowers add warmth where your eyes land most — the counter height — while the white uppers keep the ceiling feeling higher. I like this pairing for kitchens with medium to dark floors because the white reduces the visual weight. If your skin tone runs warm or you wear gold jewelry a lot, this finish direction looks especially flattering because the oak stays honey-clear instead of red. The styling principle is simple: warm at the bottom, bright at the top, and both in the same door design so the contrast feels clean.
Start by choosing your white as a satin cabinet paint, not a flat wall paint. Then pick natural oak doors with a clear or light stain and a satin topcoat so the grain looks present but not glossy. Install oak bases first, keeping the door reveal consistent — aim for a 1/8-inch gap around each door — then set white uppers above. Finish the look with brushed nickel pulls centered 2.5 inches from the bottom edge of the upper doors and 2.75 inches from the top edge of the lower doors. Finally, use a light backsplash like white subway tile or a thin white-and-gray mosaic so the oak doesn’t fight the wall color.
Good to knowIf your kitchen has warm lighting bulbs, test your white with a piece of scrap oak next to it — the two should look like they belong together.
AvoidAvoid high-gloss white next to satin oak; the sheen mismatch makes the cabinets look like two different projects.
2. White upper cabinets with oak open shelves and a matching toe-kick
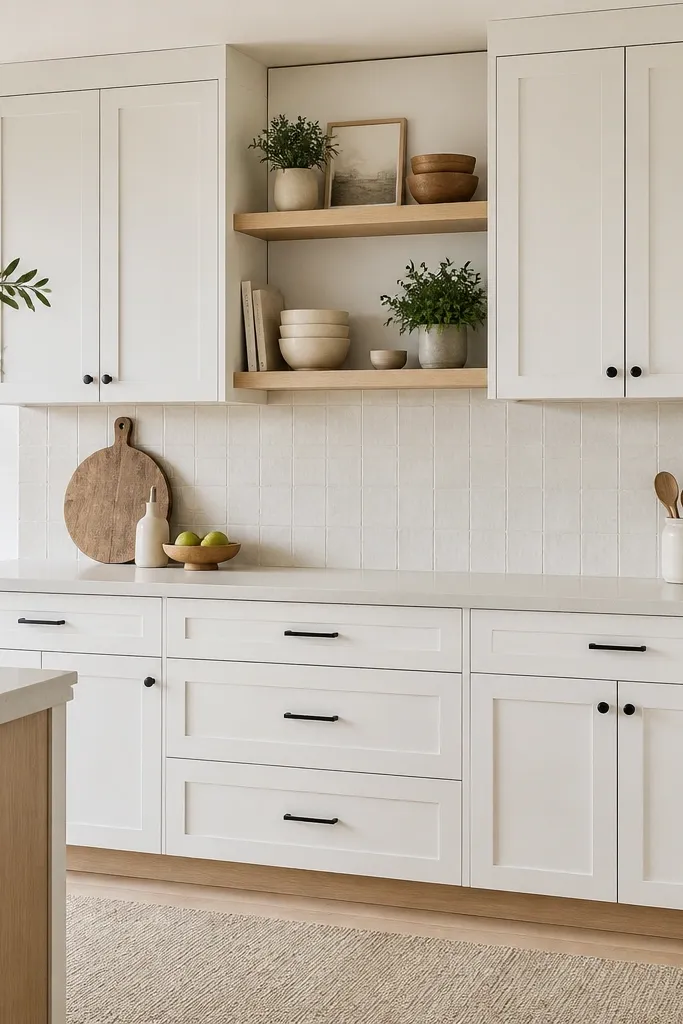
Open shelving is where oak looks best because you can show wood grain without the “heavy” feeling of full oak cabinetry. White uppers keep the storage neat and bright, while the oak shelves add warmth and texture at eye level. This layout flatters small kitchens because it reduces the amount of cabinet face area you perceive. If you like a softer look and you wear cream, camel, or olive tones, the oak shelves look cozy without turning the space orange. The principle is contrast with breathing room: the shelves break up the white so the kitchen doesn’t feel like a blank box.
Start by choosing oak trim shelves that match the finish of your base toe-kick — same stain and same topcoat sheen. Then install white uppers with a consistent door style and add shelf openings where you want visual interest. Place the shelf boards so the top shelf sits about 10-12 inches below the upper cabinet soffit line, leaving space above for light. Style with 3-4 items total per shelf: one stack of plates, one ceramic canister, and one small cutting board. Keep the toe-kick oak piece continuous across the run so the warm tone ties shelves to the floor line.
Use unlacquered brass or matte black hooks under the shelf lip for mugs — it looks styled even when the shelf items change.
Don’t mix oak finishes between shelves and toe-kick; even a one-step stain difference shows up fast.
3. Two-tone island: white perimeter, oak island base
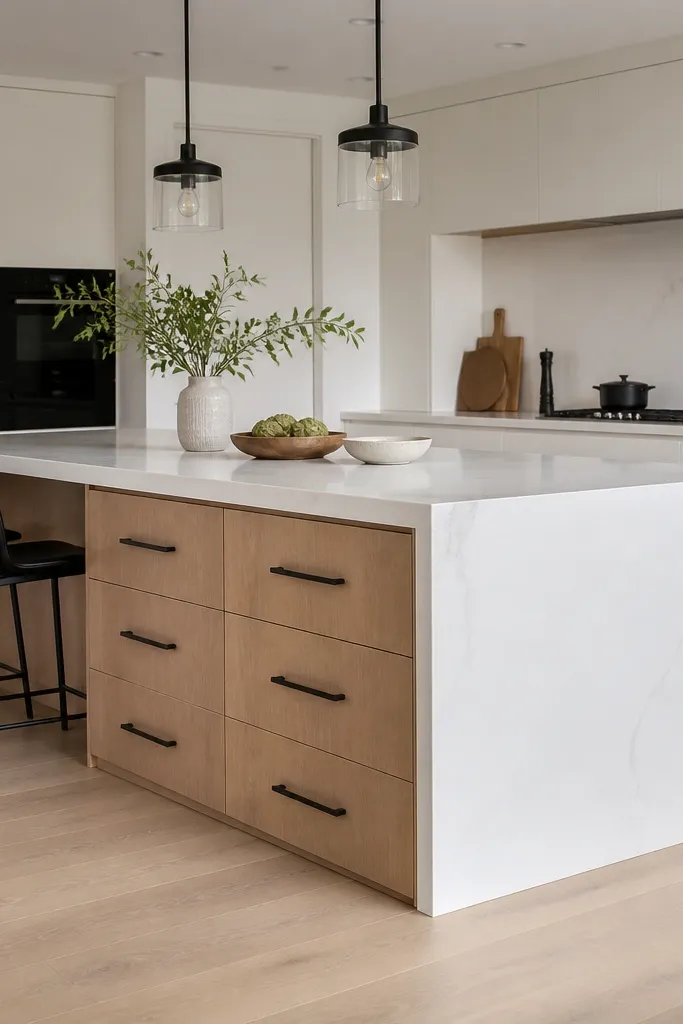
If you want the “designed” look without doing every cabinet, put the oak where it creates the strongest focal point: the island base. White perimeter cabinets keep the room bright, and the oak island gives you that grounded, lived-in warmth. This pairing is especially flattering in kitchens with open floor plans because the island reads clearly from the living room. I’ve used this in homes where people cook a lot — the oak island scuffs less visually than pure white and hides tiny wear on drawer fronts. The styling principle is focal contrast: one big oak surface plus white walls behind it.
Start by keeping the countertop consistent across both zones — I like a white quartz with a subtle gray vein so it ties the whole kitchen together. Then choose oak doors for the island only, with a satin finish to keep reflections soft. Use white slab or shaker doors around the perimeter, but keep the sheen the same as the island so the light behaves similarly. Install black bar pulls on the island and keep the perimeter pulls in the same finish but slightly smaller — about 5 inches on the island and 3-4 inches on the perimeter. Add a backsplash that’s not too busy, like white tile with a thin gray grout line.
Good to knowIf you’re painting the perimeter white, add a primer tinted to your final white to prevent flash-through, especially on darker boxes.
AvoidAvoid switching hardware finishes between island and perimeter; the kitchen looks accidental instead of planned.
4. Oak pantry wall with white framing and glass uppers
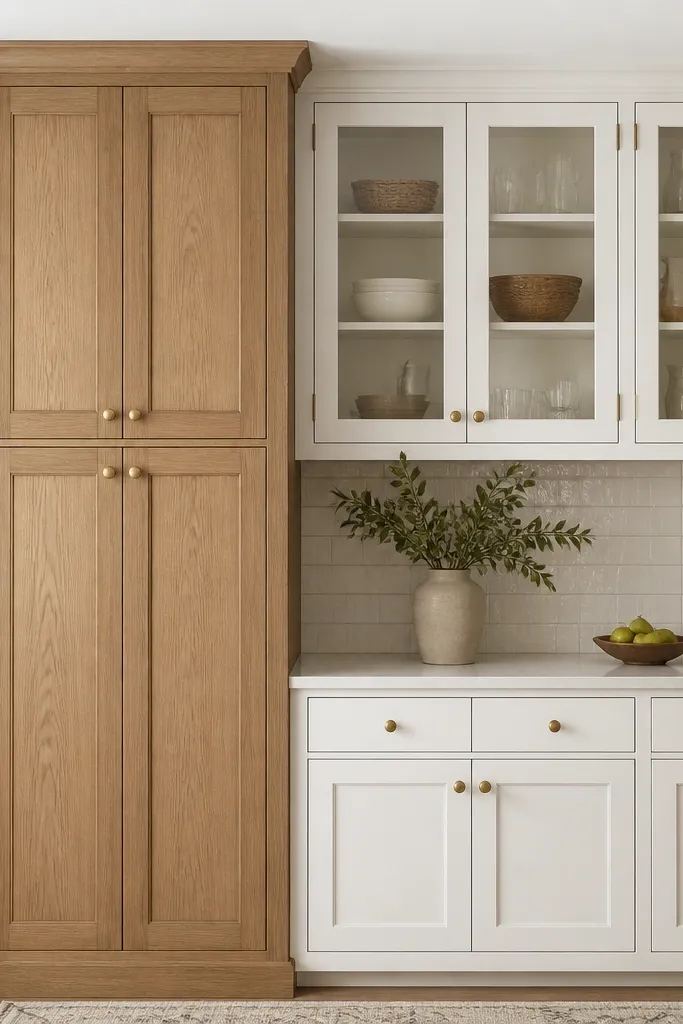
A pantry wall is the easiest place to go bold with oak because tall storage has a built-in visual anchor. White framing around the oak keeps the wall from getting too heavy, and glass-front uppers soften the whole area. This combo works great in kitchens with limited counter space because it makes the storage feel lighter. If you like a more traditional vibe but still want brightness, the glass doors do a lot of work. The principle is layering: oak for depth, white for structure, and glass for light.
Start by selecting oak pantry doors with matching trim and a satin clear topcoat. Then build white “picture frame” trim around the pantry so the oak doesn’t meet the wall directly — it gives you a crisp border. Add glass-front upper cabinets in white with a mullion spacing around 3-4 inches so the door grid looks intentional. For hardware, use brass knobs on the pantry and keep pulls on the glass doors in the same brass color. Style the glass doors with matching canisters in two tones — white ceramic and natural wood utensils — so it looks curated without being fussy.
Use UV-protective glass film if you get strong sun on that pantry wall; it keeps finishes from dulling.
Don’t put plain white glass doors next to oak with a yellow stain; pick an oak tone that reads neutral under your lighting.
5. White beadboard uppers over oak base cabinets
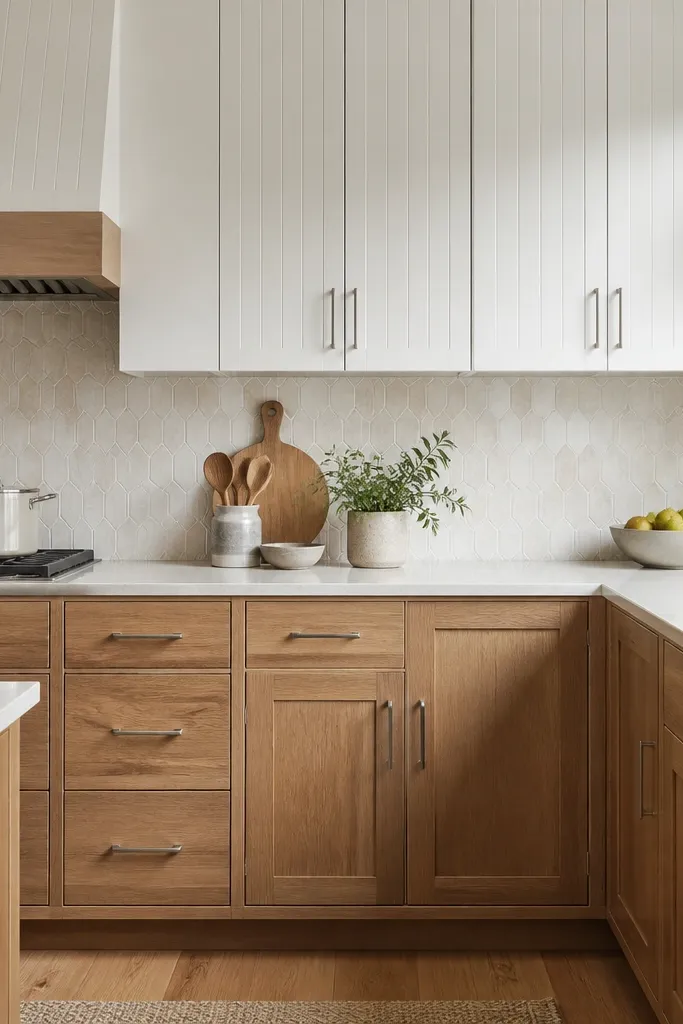
Beadboard texture makes white look richer than a smooth slab, even when you’re using budget materials. Pairing beadboard uppers with oak bases gives you both softness and warmth — the beadboard reads cozy, and the oak keeps it grounded. This works well in kitchens that feel a little too modern because the texture breaks up straight lines. If you have warm undertones in your flooring, beadboard white keeps the room from feeling stark. The principle is texture pairing: one textured surface (beadboard) and one warm grain surface (oak).
Start by choosing white beadboard cabinet doors with a satin finish, not glossy. Then match your oak base doors to a similar door profile — shaker or simple panel so the textures don’t fight each other. Keep your cabinet color split consistent: oak only on bases and beadboard only on uppers. Install the beadboard uppers so the vertical ridges line up across doors — it looks more custom. Pair with a backsplash that has warm neutrals, like white with tan undertones, and use brushed nickel pulls to keep the metallics neutral.
Good to knowIf your beadboard is showing brush texture, lightly sand between coats and use a foam roller for the final coat to smooth it out.
AvoidAvoid using cool blue-white paint; beadboard can amplify that cold tone and look dingy.
6. Oak trim and crown molding with white cabinets
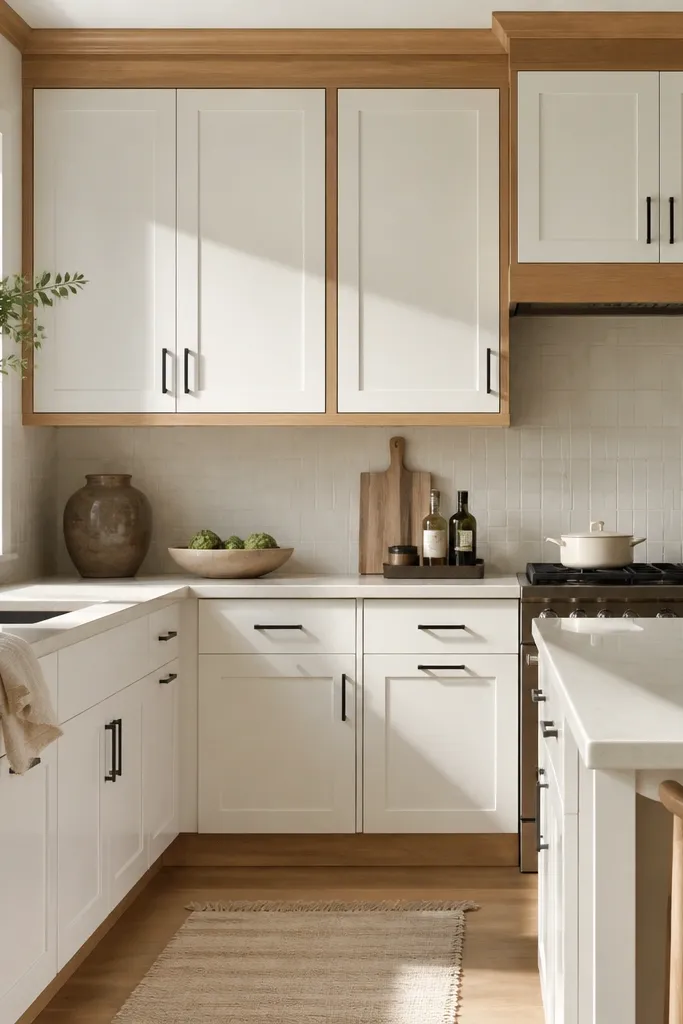
This is the “budget custom” move: you keep most doors white but add oak trim where your eye expects craftsmanship. Oak crown molding makes the top line feel finished, and oak trim around cabinet frames adds warmth without the cost of replacing every door. This looks great in rooms with tall ceilings because the molding gives you a strong vertical rhythm. If you like farmhouse-leaning style but don’t want full oak cabinets, this is the compromise I’ve used successfully. The principle is framing: wood accents around the perimeter create the oak-and-white feeling without covering every surface.
Start by painting all cabinet doors and boxes white in satin so it looks consistent. Then add oak trim pieces — 1x2 or 1x3 style — around the cabinet face frames and install oak crown molding at the top. Use a matching oak toe-kick strip under the base cabinets so the warm tone repeats at floor level. Choose matte black hardware with the same spacing across the kitchen — 2.5 inches from the bottom edge on uppers and 2.75 on lowers. Finally, keep the backsplash light and simple so the trim stays the focal wood feature.
Good to knowPre-stain the trim and seal it before installation; it’s faster and you get a smoother, even tone than trying to stain after the pieces are on.
AvoidAvoid using raw oak next to painted white; it will look unfinished and cheaper in daylight.
7. Oak shaker cabinets with white glazed uppers
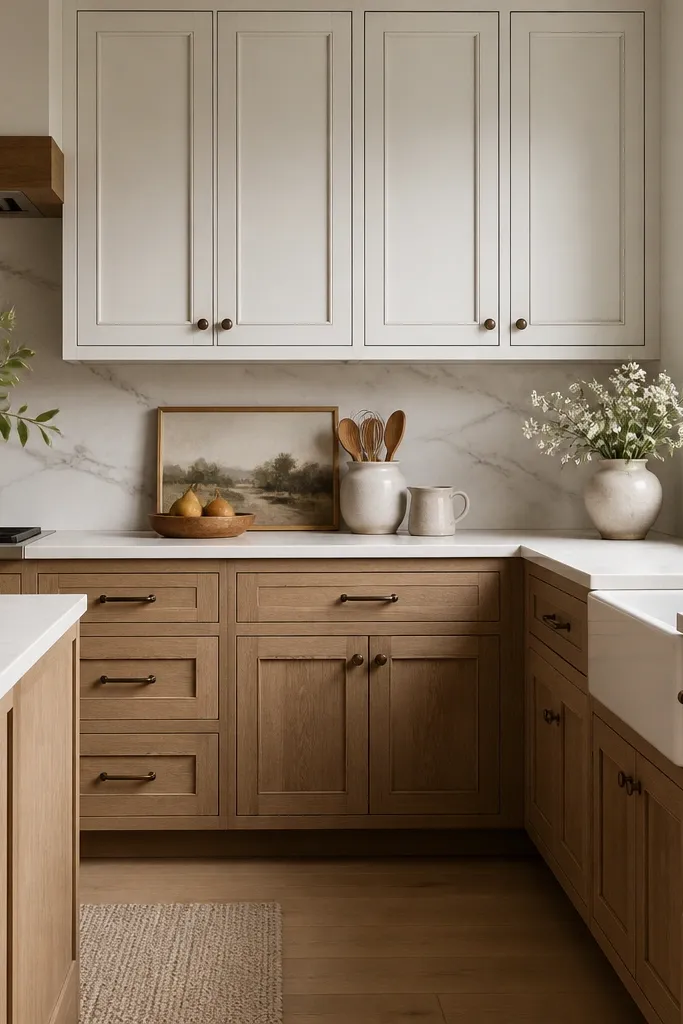
Glazing is the difference between “painted” and “built.” With oak bases for warmth and white glazed uppers for depth, you get an aged, collected look without heavy materials. This combo is flattering in kitchens with natural light because the glaze catches shadows in the panel lines. If you love older homes and you want your kitchen to feel less sterile, glazing does that fast. The principle is shadow control: glaze goes into recesses, so it makes the cabinet doors look more dimensional.
Start by painting the upper shaker doors with a satin cabinet white and let them cure fully. Then apply a light gray glaze — I use a thin glaze and wipe it back with a clean cloth so it only stays in the recessed areas. Keep the oak stain on bases consistent and satin so the glaze doesn’t look too flat next to glossy wood. Use aged bronze pulls on the uppers and bases so the metal ties the aged look together. Style the top cabinets with fewer items and taller objects so the glaze texture shows when the doors reflect light.
Practice on one spare door panel first; the wipe-back speed controls how dark the recesses get.
Don’t glaze over glossy paint; it smears and looks patchy instead of controlled.
8. White cabinets with oak drawer fronts only
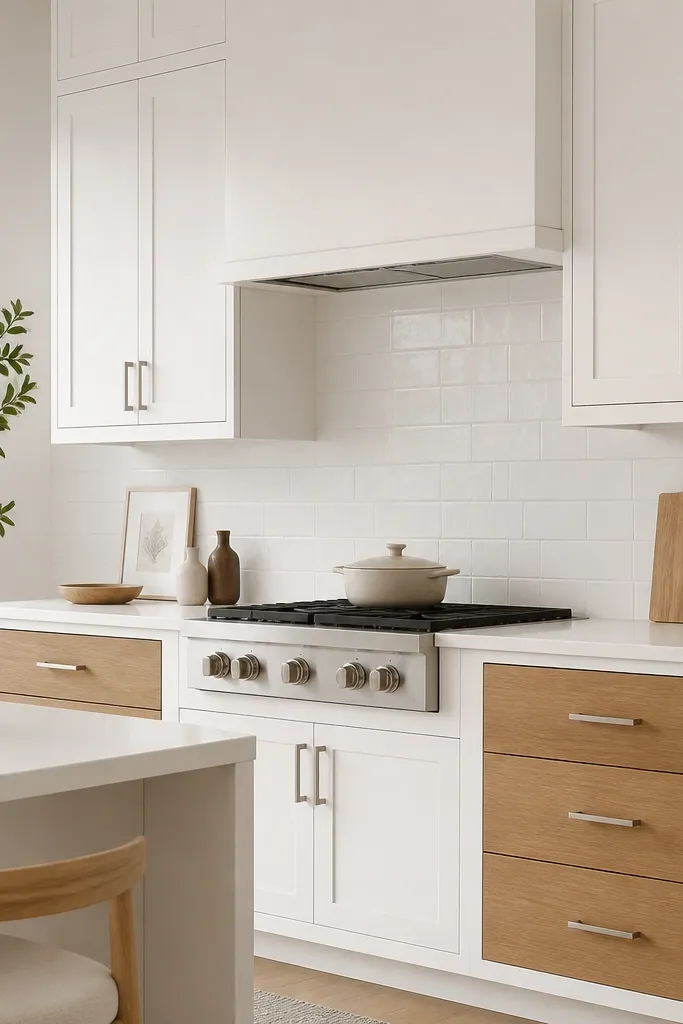
This is a sneaky way to get oak without committing to full oak cabinet fronts. Oak drawer fronts take the most hand contact, so they hide minor wear better than white and feel warmer under your fingers. White doors keep the storage looking tidy and bright, especially for kitchens with small windows. This combo is flattering if you want a clean, modern feel but still crave wood warmth. The principle is “oak where it matters”: drawers get durability and tactility; doors stay bright and uniform.
Start by keeping all cabinet door slabs/shaker doors white in satin. Then order oak drawer fronts sized to your existing drawer boxes — measure width and height exactly and check reveal gaps. Install oak drawers so the grain runs straight across each front; random grain direction looks sloppy in small kitchens. Use the same metal finish for pulls on both drawer fronts and door hardware to keep the look unified. Finish with a backsplash that’s mostly white and a light countertop so the oak reads as an accent, not a competing color.
Good to knowIf you paint the white doors yourself, use two thin coats and let each coat dry overnight; thick coats cause drips around panel edges.
AvoidAvoid mixing oak drawer fronts with different stain tones; it’s the first thing you notice when you open the drawers.
9. Oak base cabinets with white crown shelves above
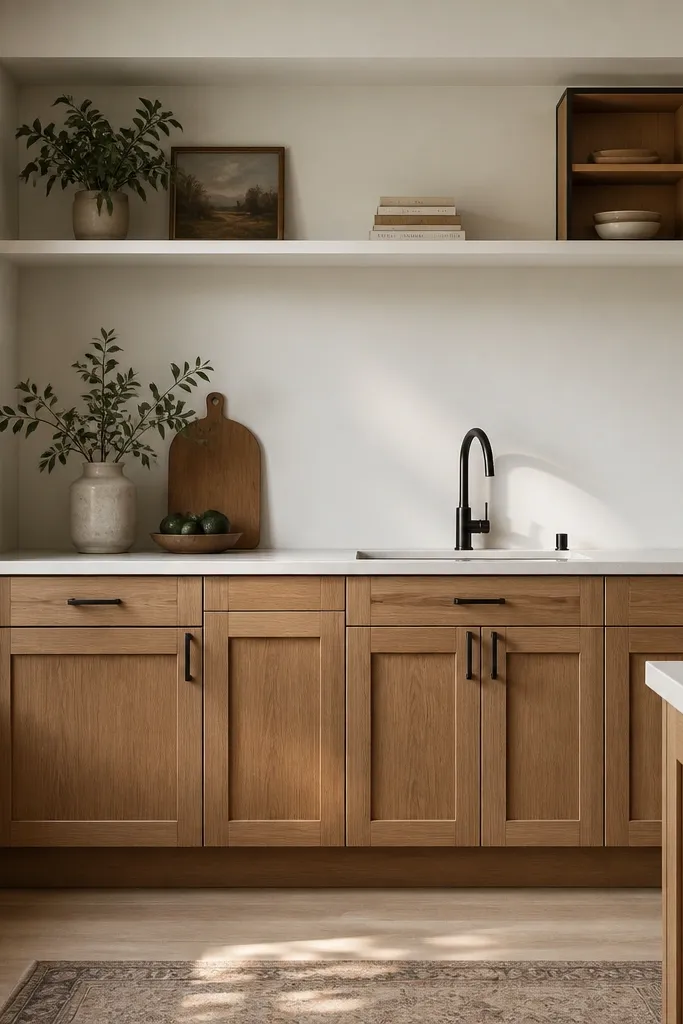
When you remove full uppers, the color pairing needs a substitute for that visual structure. Oak bases give you weight and warmth down low, and a white shelf line gives you a clean “ceiling” for the kitchen. This works well in homes with tall windows because the open space above doesn’t feel empty. If you like a casual, lived-in kitchen, the white shelf line lets you style with everyday items — jars, mugs, cookbooks — without making the room look cluttered. The principle is substitution: you replace uppers with a shelf line that still frames the space.
Start by installing oak base cabinets with consistent door style and satin finish. Then add a white shelf ledge across the wall — plan shelf height so the bottom of the shelf is around 54-60 inches from the floor, depending on your countertop height. Use a 1-inch thick shelf board or pre-primed shelf material with a durable cabinet paint system. Style lightly: one row of matching ceramic canisters, one utensil crock, and one framed print or small art. Keep everything within the shelf’s width so the visual line stays straight.
Good to knowUse clear acrylic shelf bumpers for your jars; they stop sliding and keep the shelf looking neat between cleanings.
AvoidDon’t put a bright glossy shelf finish; it reflects light and can make the oak look darker.
10. White cabinets with oak end panels for a built-in look
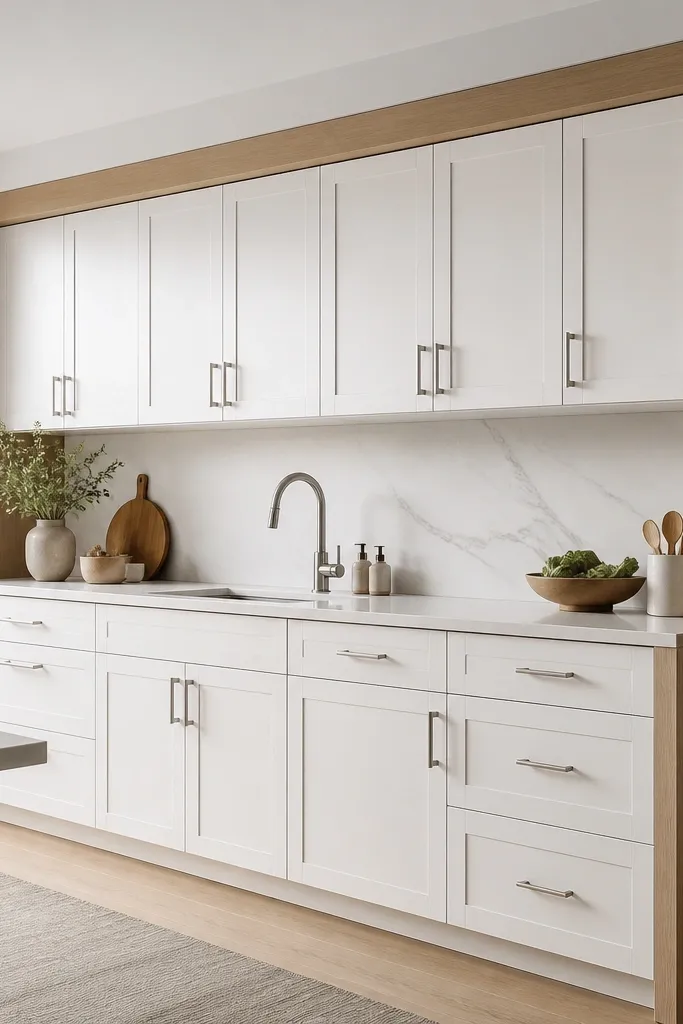
Oak end panels are a small detail, but they make a kitchen look like it was built-in from the start. White cabinets stay light and modern, while the oak edges add warmth and frame the whole run. I like this for narrow kitchens where full two-tone cabinets can feel busy. It’s also a good fit if you’re keeping your existing layout and just changing doors or painting. The principle is edge framing: you’re adding wood where the eye reads boundaries.
Start by selecting white cabinet doors and repainting them in satin cabinet paint if needed. Then add oak end panels that match the thickness and finish of your cabinet sides — look for panels around 3/4-inch or 1-inch depending on your cabinet construction. Install end panels first so you can line up the door reveals and keep the gap uniform. Choose hardware in brushed nickel and keep pull sizes consistent across the run. Finally, use a backsplash with a simple pattern so the oak end frames get the attention.
Good to knowSand the end panel edges lightly before staining so you don’t get a darker “edge line” from uneven absorption.
AvoidAvoid staining oak ends after installation without controlling the edges; blotchy ends look cheap fast.
11. Oak display cabinets with white backing and closed lower cabinets
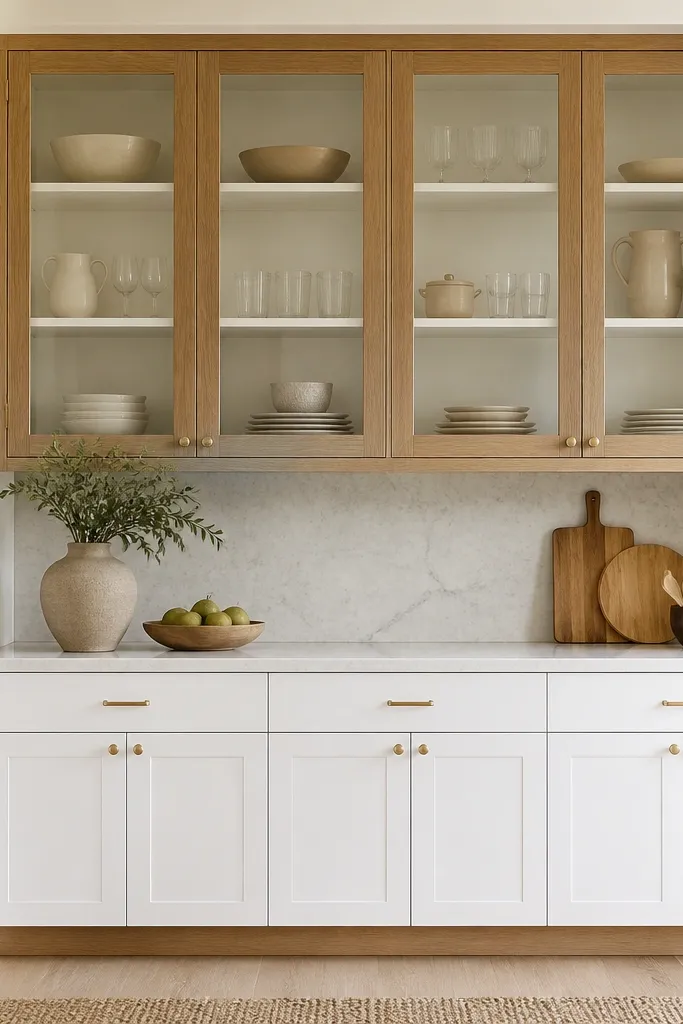
Display cabinets are where the oak-and-white pairing looks most expensive because you’re combining wood grain with a bright interior. White backing makes dishes and glassware look crisp, and it also keeps the oak from feeling heavy. This combo flatters kitchens where you have a few “good” dish sets you actually use — the display feels lived-in, not staged. If you prefer warm neutrals, brushed brass hardware ties the oak and white together without turning the room cold. The principle is contrast inside the cabinet: oak frames plus white interior makes everything look cleaner.
Start by choosing oak glass-front frames with a satin finish and install them at eye level so the glass reflects light gently. Add white backing inside the glass cabinet — use a cabinet-grade paint or thin panel so it looks smooth. Keep the lower cabinets fully closed in white to balance the open glass. Use brushed brass knobs on the glass frames and matching pulls on lower doors. Style with items that share one color family: white plates and clear glass, or cream mugs and natural wood boards.
Good to knowAdd LED puck lights inside the display cabinets; they make the white backing glow and hide minor dish color differences.
AvoidAvoid cluttering the display with mixed colors; the oak frame makes chaos look louder.
12. White slab cabinets with oak rail accents and a matching valance
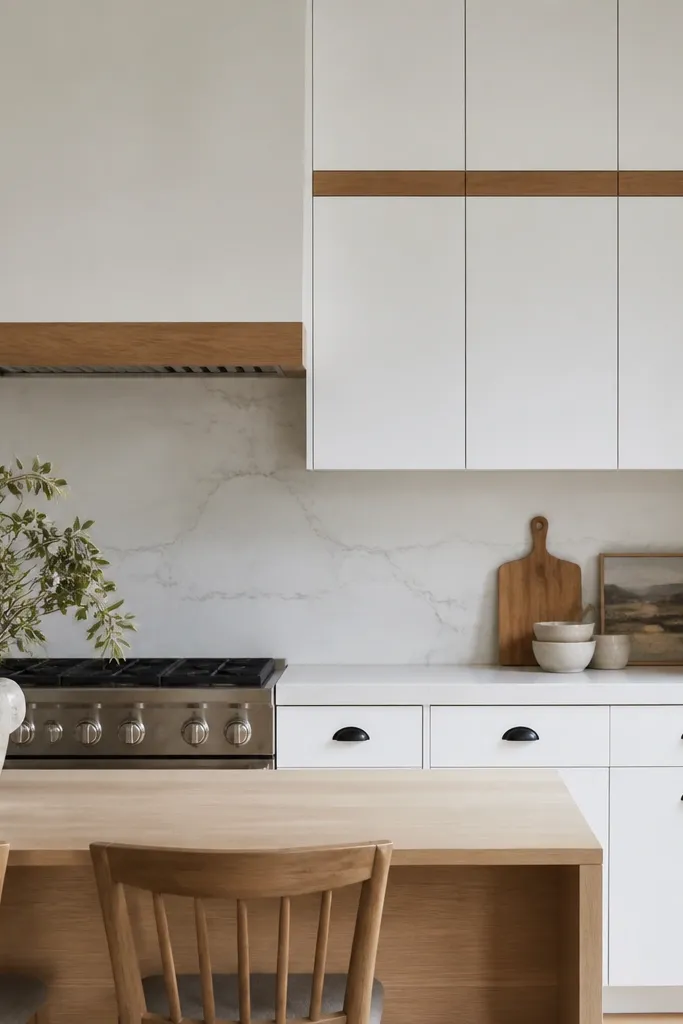
If you want modern lines without losing warmth, oak rails are the answer. White slab doors keep the look sleek, and oak horizontal rails add texture where you’d otherwise have blank space. This works especially well in kitchens with stainless appliances because the white slab reads crisp while oak gives warmth against metal. For people who like monochrome outfits with black, white, and tan tones, this kitchen palette matches that vibe. The principle is horizontal rhythm: oak rails create a line the eye follows, so the two-tone feels designed.
Start by choosing white slab doors with a satin or eggshell cabinet finish. Then install oak rails across the cabinet faces — keep the rail height consistent, around 4-5 inches from the top of the door panel area. For the range hood, add an oak valance board matching the rail width so it ties the look together. Use minimal black cup pulls centered on the slab doors — keep spacing consistent across uppers and lowers. Finish with a backsplash that has straight lines, like large-format white tile, so the oak rails stay the focal detail.
Good to knowUse a template or laser level to mount the rail — small height differences show up instantly on slab doors.
AvoidAvoid using thick, chunky rails next to thin slab doors; it makes the hardware look off-scale.
13. Oak lower cabinets with white upper cabinets and a light oak hutch
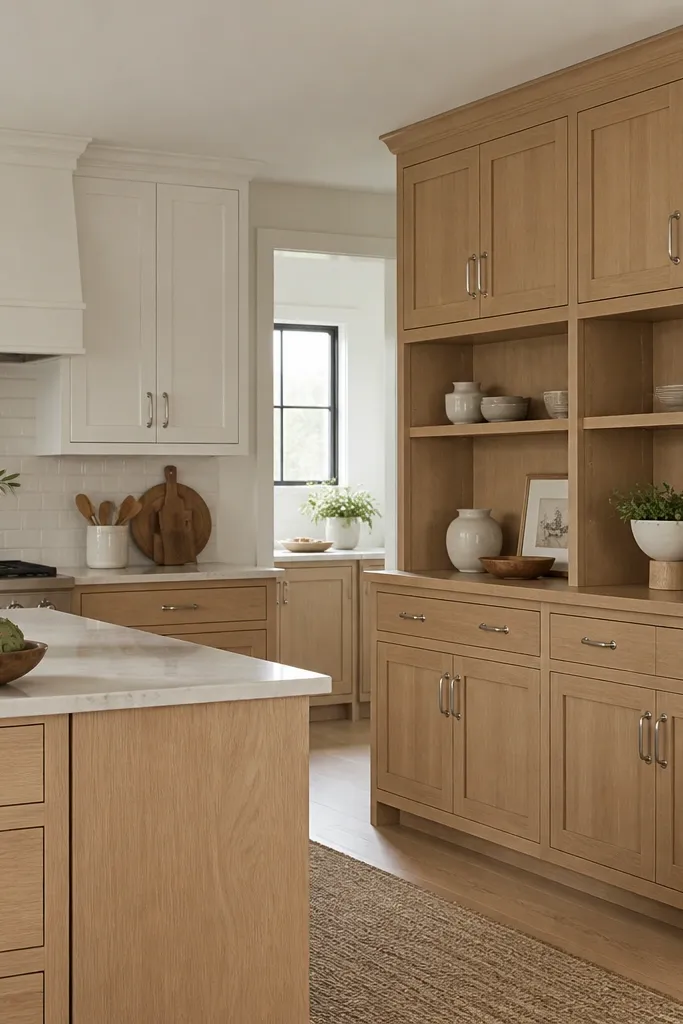
A hutch adds storage and visual interest without turning the whole kitchen into one color. Oak lowers keep the grounding warmth, and the white uppers maintain brightness. The hutch in light oak acts like a “second focal wall,” which is great if your kitchen has an open doorway or a long run of cabinets. This palette flatters kitchens that feel a little narrow because the vertical hutch breaks up the straight line. The principle is “two zones of warmth”: warm bases plus a warm feature wall.
Start by installing oak bases with a consistent stain that matches the hutch — natural or clear oak looks best against bright white. Then keep uppers white and limit oak to the hutch zone and the bases. Place the hutch so its shelves align visually with the top of the base cabinets — around 36 inches to the shelf line depending on your layout. Style the hutch with matching glass jars, one ceramic dough bowl, and a small plant in a neutral pot. Hardware should stay consistent across both oak pieces, so choose brushed nickel or brass and stick to it.
Use cabinet-grade clear coat on the hutch shelves; it holds up better to moisture from dishware and cleaning.
Avoid mixing oak tones between hutch shelves and base doors; the difference shows every time you walk past.
14. White cabinets with oak corner cabinets and a matching corner bench
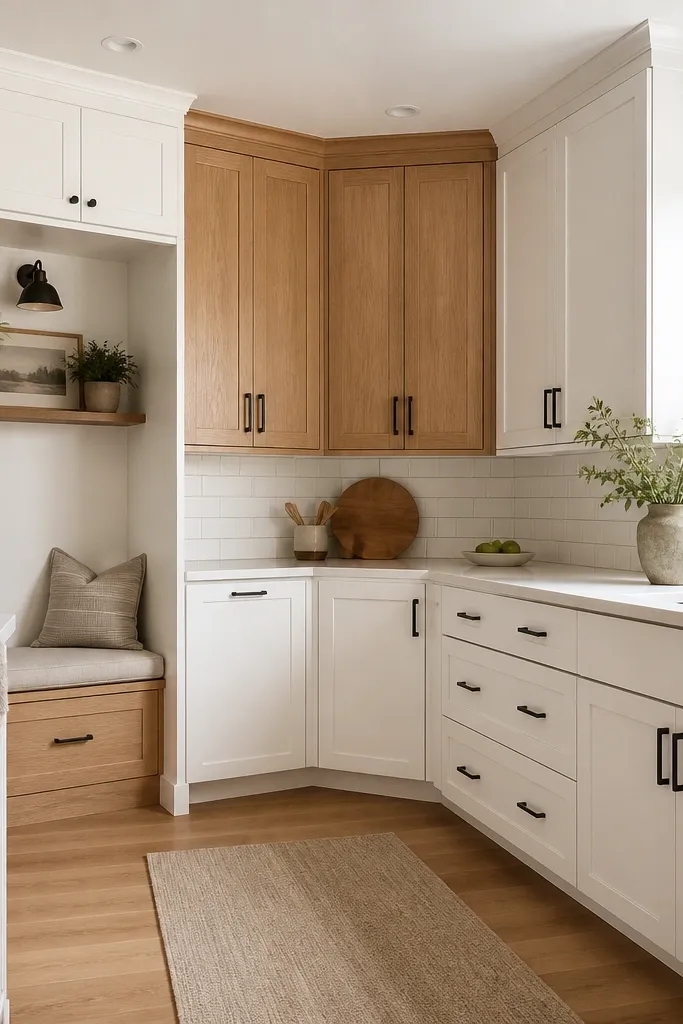
Corners are where kitchens look awkward when the colors don’t match the shape. Oak corner cabinets add warmth exactly where the geometry is complex, and white elsewhere keeps the room clean. The bench ties the oak to everyday life, so the corner feels intentional instead of “just storage.” This combo is great if you have a breakfast nook or a small dining spot — it visually links the kitchen to the eating area. If you like a cozy look with dark accents, matte black hardware works well against oak and white. The principle is shape-aware contrast: put the wood where the corner needs visual grounding.
Start by choosing oak corner cabinet doors with a satin finish and diagonal or angled panels that hide the corner mess. Keep all straight runs white with consistent door profile. Install the bench with oak boards that match the cabinet stain depth; aim for the same undertone under your kitchen lighting. Use matte black hardware on both oak and white so the corner doesn’t look like a separate project. Style the corner with one light rug in cream or oatmeal tones so the white cabinets don’t feel too sterile.
Good to knowIf you’re matching stains, test on a scrap oak board under the same light — corner light can make stains look darker.
AvoidAvoid putting oak only in the corner without repeating it elsewhere; the kitchen can look lopsided.
15. Oak pantry base cabinets with white display wall above
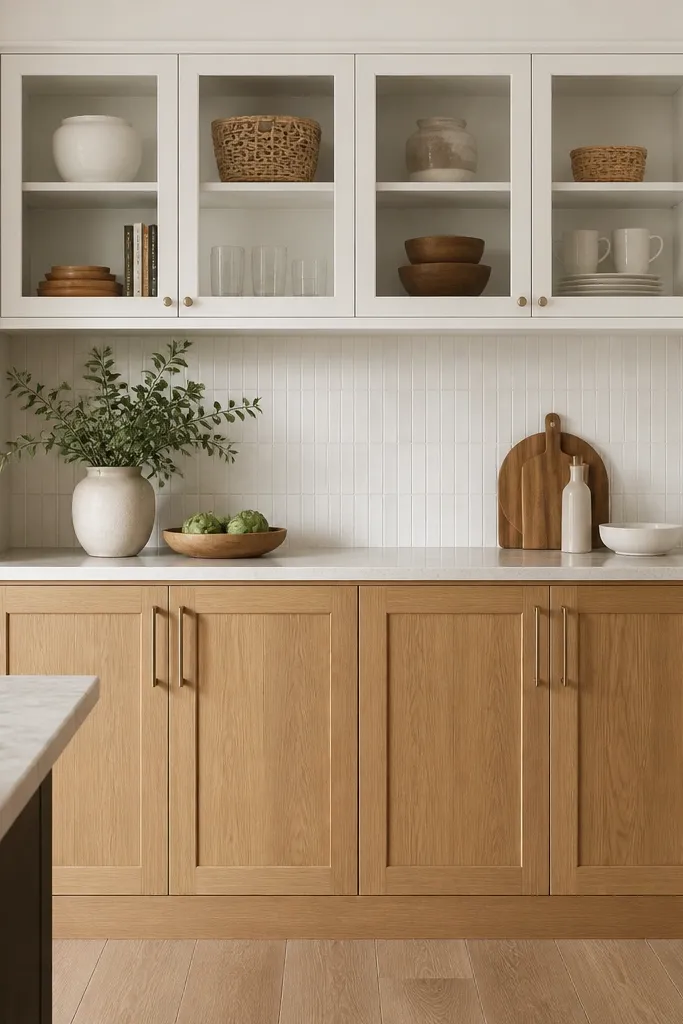
This layout is budget-friendly because oak is concentrated where you get the most daily use — pantry bases — while the display wall stays bright. White above makes the pantry feel lighter and gives your eye a break when you’re standing at the stove. This pairing works well for households that store lots of boxed goods because oak hides scuffs and fingerprints better than pure white. If your dining area has neutral colors, the display wall makes the kitchen feel cohesive rather than heavy. The principle is utility-first oak: oak handles wear, white handles light and visibility.
Start by installing oak shaker pantry base cabinets with satin finish and consistent door reveals. Then build a white upper display wall above — glass panels or open cubbies both work, but keep the frame white. If you use glass, choose clear glass so the pantry looks clean, and add a white interior liner for brightness. Place your shelves so the bottom of the display area sits around 60 inches from the floor for comfortable viewing. Style the display with a few taller items and keep the rest in neutral tones so the white stays calm.
Good to knowLine the oak pantry interior with a light liner; it keeps the wood from looking darker over time and makes items easier to find.
AvoidAvoid using a heavily grained, dark oak with bright white display — it can look too contrasty and harsh.