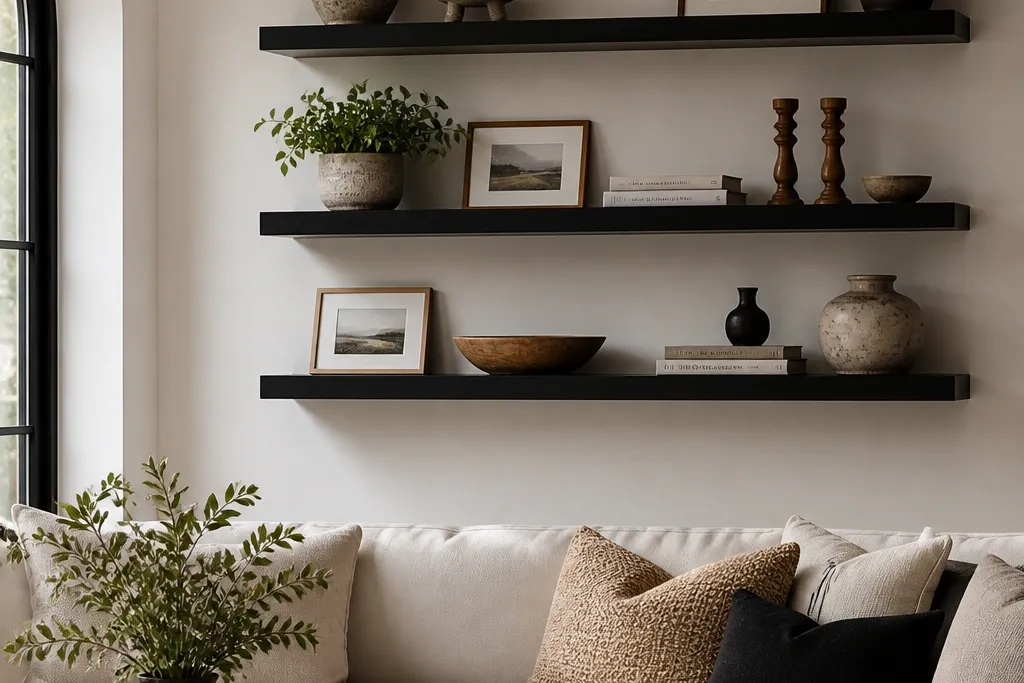
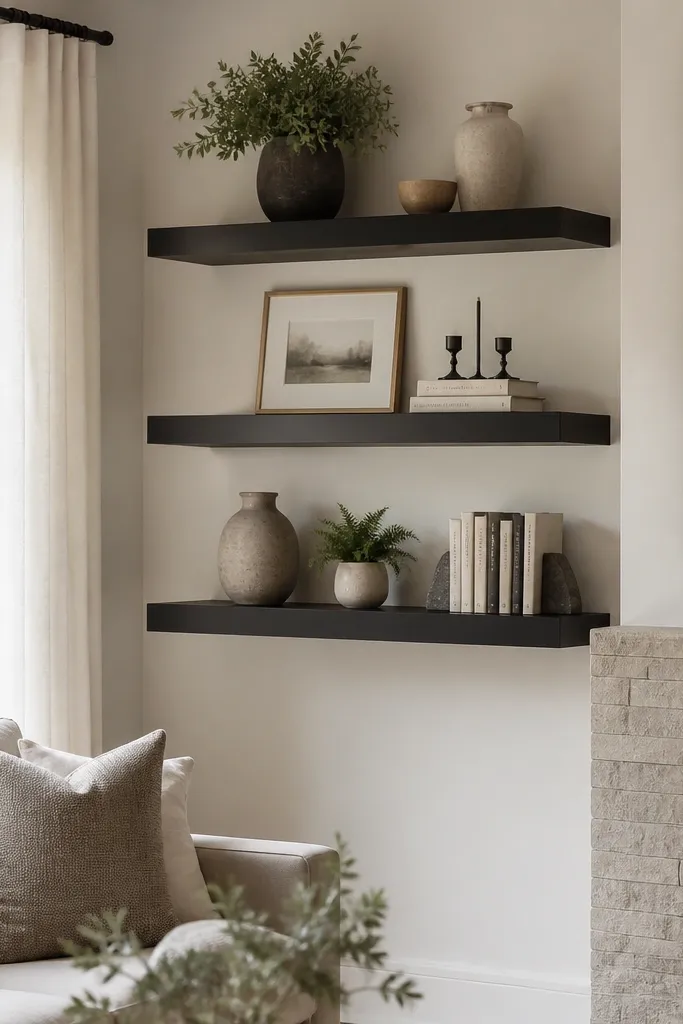
1. Black staggered shelves for a TV wall glow
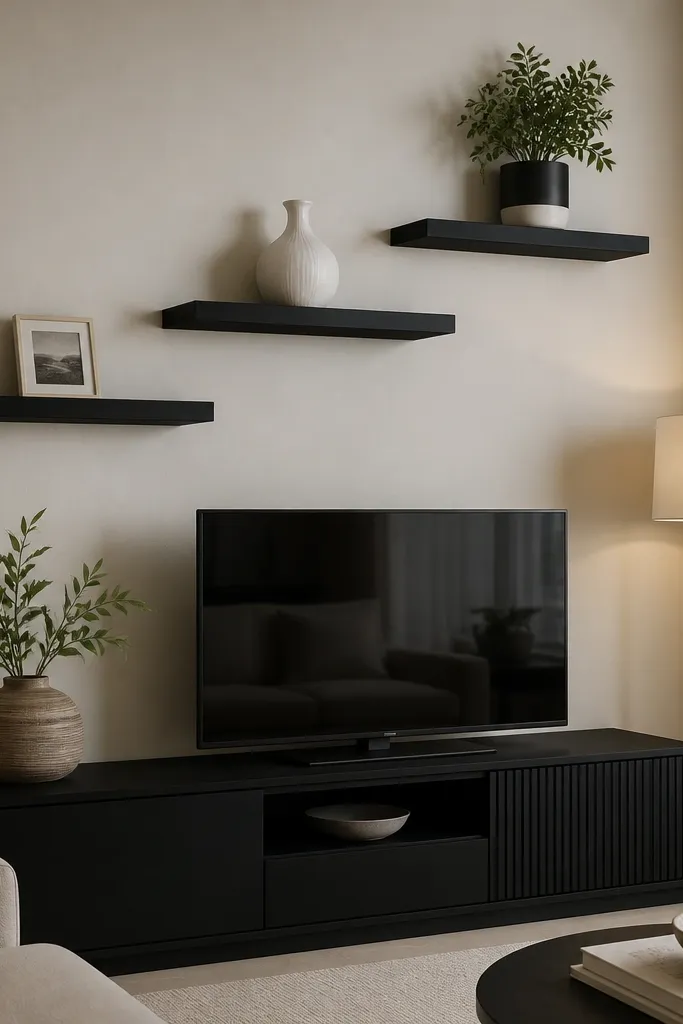
This setup works because the stagger creates movement without needing extra decor. I used matte black shelves with a slight lip so the items don’t slide forward. The room looked calmer with a black TV console because the shelf line didn’t fight the furniture lines. It flatters people who want a clean, modern look even if they don’t own a lot of decor — you only need three anchor items. If your living room has light walls and a darker sofa, the black shelves add contrast and make your accents pop.
Start by measuring the TV width and centering the lowest shelf so it sits about 8 to 10 inches above the console top. Mark three bracket locations into studs, keeping the staggered heights 3 to 4 inches apart. Place the largest item — the tall plant pot — on the highest shelf first, then add the vase as the second anchor. Finish with one small framed photo on the lower shelf, centered, so the composition feels deliberate rather than random. Keep the shelf edges clean by wiping dust before styling.
Good to knowUse a plant that’s tall enough to reach just above the shelf level you’re standing at. It makes the whole wall look styled even when you’re busy.
2. Floating shelves living room quick easy gallery row with linen books
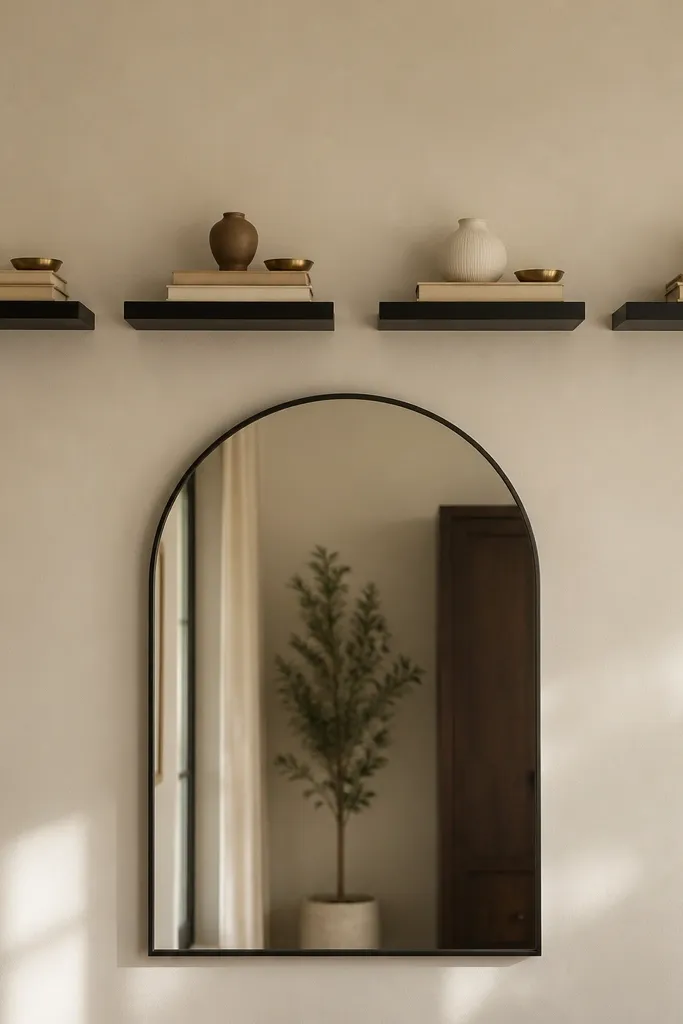
If you want fast and tidy, I love the linen-book look because it brings color without clutter. The beige and cream book covers soften the black shelves and keep the eye from bouncing around. This is great for living rooms where your main pieces are neutral — gray sectional, oak coffee table, or white rug. It also works for smaller rooms because the shelves feel organized instead of heavy. When the books are consistent in height, the whole wall looks intentional even from across the room.
Start by choosing books with similar height and cover tone, ideally 1 to 2 inches thick stacks. Mount four shelves at equal spacing, with about 10 to 12 inches between shelf edges so you can style on each one. Add a small brass tray centered on each shelf — one tray per shelf — then stack the books behind it. Place one ceramic object on the tray or beside the books, keeping it under one-third the shelf length. Step back and check that the stacks don’t line up perfectly across all shelves.
Wrap one stack with a thin ribbon or leave one book slightly angled for a “lived-in” look. It keeps it from looking like store display.
3. Corner wall shelf ladder using 2-inch gaps
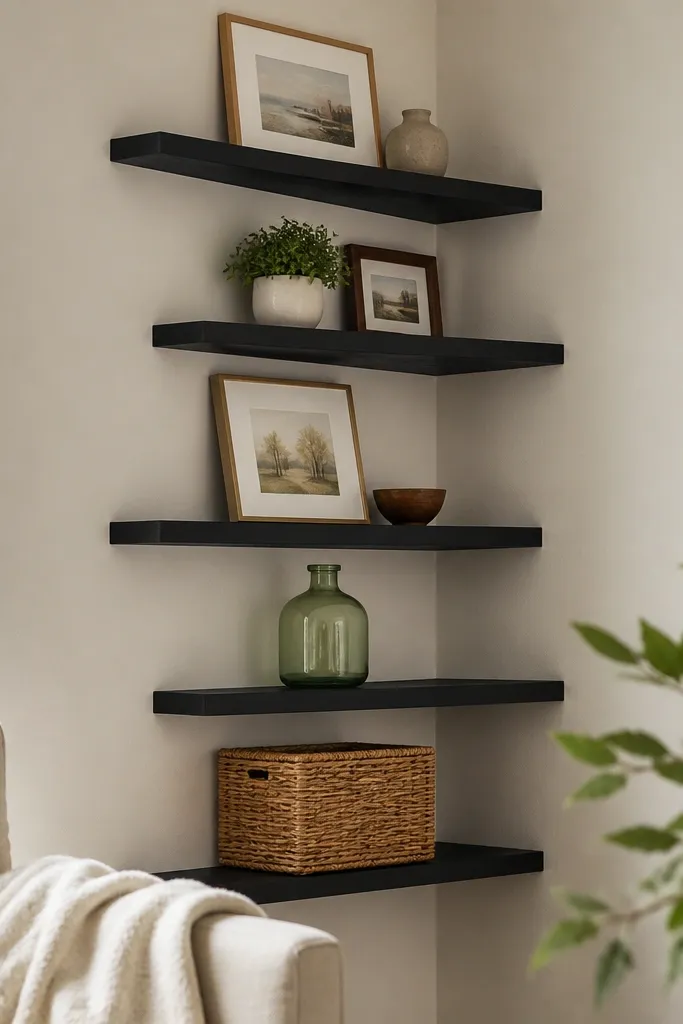
Corners are where floating shelves can either look clever or messy. This ladder layout works because it gives your decor a path up the wall. I used black shelves to match dark wood frames and the baseboard trim, so the corner doesn’t look like an afterthought. It flatters rooms with awkward angles because it turns the corner into a focal point. If you have a lot of small items, this setup controls the mess by forcing everything into a vertical rhythm.
Start by locating the corner studs on both walls, then decide which side you’ll mount to first. Install the bottom shelf so it’s about 12 to 14 inches above the floor, then mark each next shelf 10 to 12 inches higher. Keep a consistent 2-inch horizontal offset between shelves so the ladder effect stays clean. Style from bottom up: woven basket first, then a bottle, then a framed print, then the plant, leaving the top shelf slightly lighter. Use painter’s tape to test the offset before drilling anything.
Good to knowUse a small level and check the shelf lip, not the bracket, because small bracket misalignment shows up fast in corners.
4. Black shelves with white ceramic cluster on each level
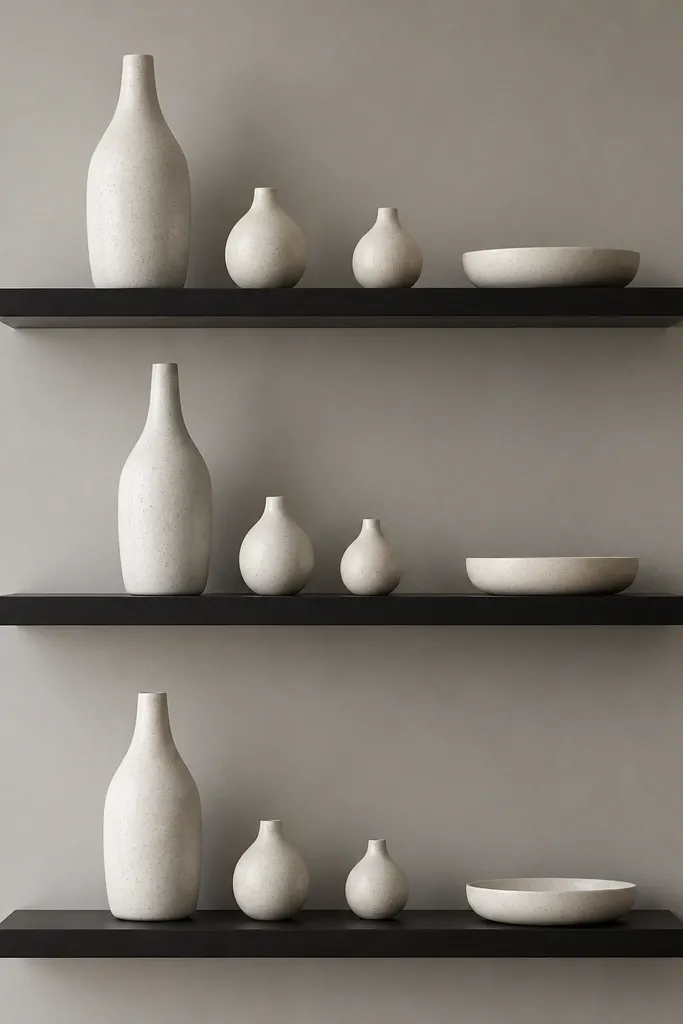
This is my go-to when I want the room to feel bright but not childish. White ceramic against black shelves looks crisp, and textures like speckled glaze keep it from looking flat. I’ve used this in living rooms with gray walls and it instantly made the space feel cleaner. It also helps people who don’t want to constantly swap decor — ceramics stay in style for years. The cluster rule matters: keep the cluster on one side of each shelf instead of spreading everything across the whole length.
Start by picking one ceramic size family — tall vase plus two small pieces — in the same white tone. Mount three shelves evenly with 12 to 14 inches between shelf edges. Place the tall vase on the left or right third of the shelf, then add the two smaller pieces as a tight pair. Finish with a shallow dish as the “base” for the cluster so the items look anchored. Leave at least 3 to 4 inches of empty space at the opposite end of each shelf.
Buy one extra small bud vase at the end and swap it into the cluster when you’re bored. Small changes keep the look fresh.
5. Book + plant mix for a lived-in reading nook wall
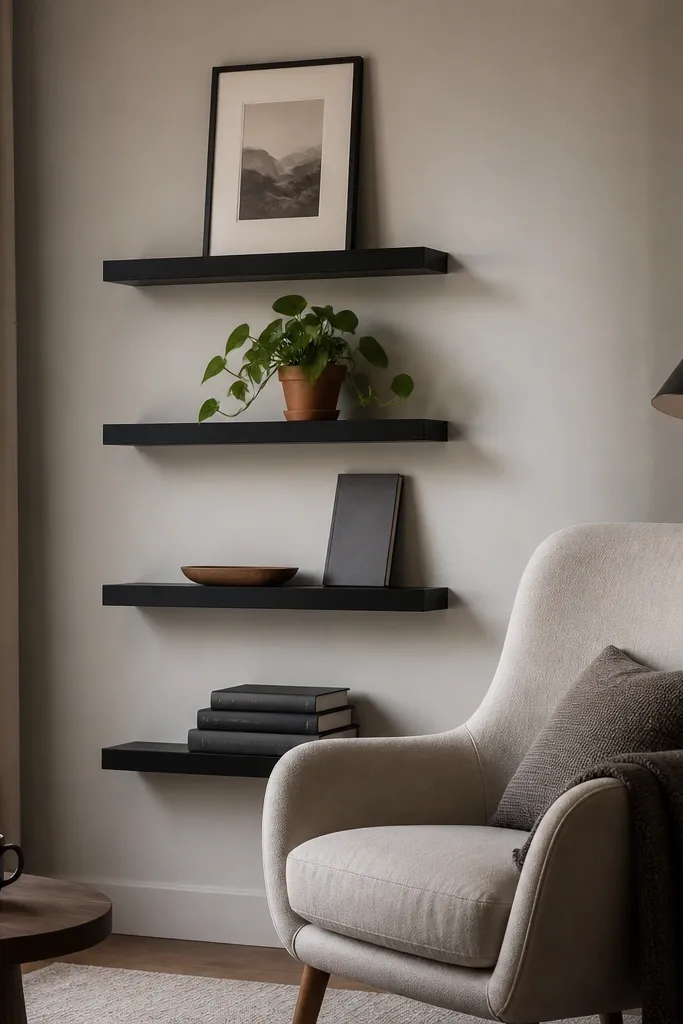
This mix feels casual but controlled because the plant adds softness and the books add structure. I like terracotta pots with black shelves because the warm orange-brown shows up even in low light. It flatters reading corners in homes with warm lighting — that tungsten lamp glow makes the terracotta look extra cozy. The whole setup also works for people who read and actually have books, not decorative stacks only. You get height, texture, and a clear “anchor item” per shelf.
Start with a plant that doesn’t spill — I use a pot that’s about 7 inches wide for medium shelves. Mount four shelves with the second shelf from the bottom about at eye level when you’re sitting. Place the book stack on the bottom shelf flat, then add one book leaning upright on the second shelf. Put the plant on the third shelf centered, and finish with the framed print on the top shelf, aligned to the chair side rather than dead center of the wall. Step back and check that the plant doesn’t block the art.
Dust the plant pot and shelf lip with a dry microfiber cloth before styling. It keeps the black from looking chalky.
6. Minimal black shelves with one bold art frame per shelf
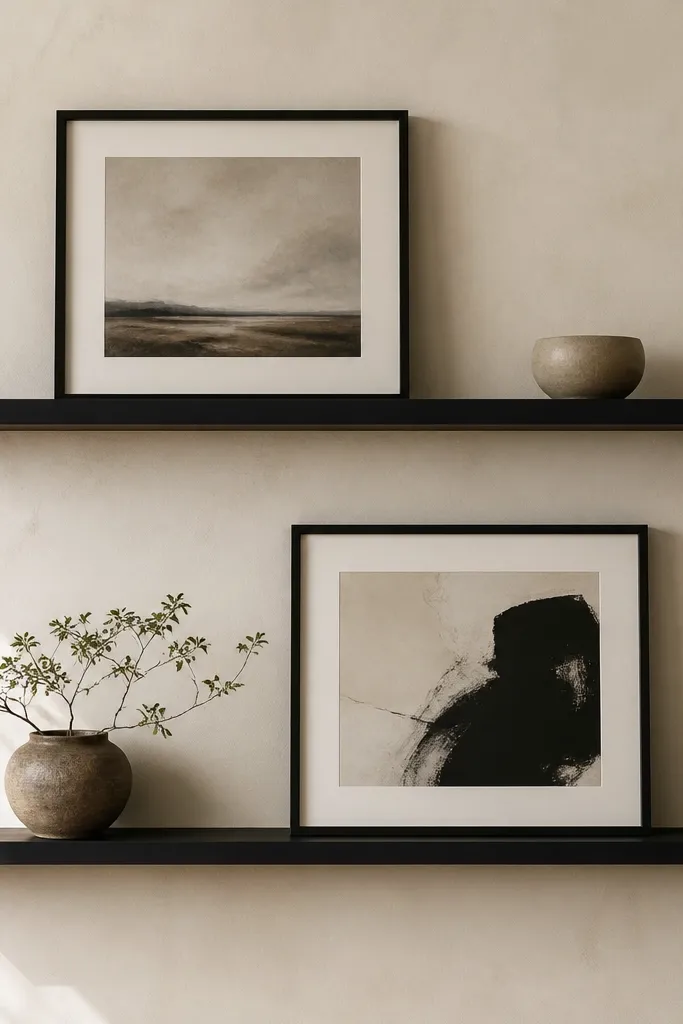
If your living room already has a lot going on, minimal shelves save you. One bold frame per shelf keeps the eye calm and makes the wall feel curated without adding clutter. Black shelves plus black frames look sleek, especially against textured plaster or warm white paint. This works best when your main furniture is simple — clean sofa lines, one rug, and not too many throw pillows. It flatters people who prefer a gallery feel and don’t want to dust ten small objects every week.
Start by choosing frames that are at least 10 x 14 inches so they read from across the room. Mount two shelves with 16 to 18 inches between shelf edges, then center each frame on its shelf. Keep the shelf surface bare around the frame — no extra trinkets. Use small felt pads under the frame corners to prevent scratching the shelf finish. Finally, check the wall from standing height and adjust the shelf height so the frame centers align with your eye line.
Pick frames with matte finishes, not glossy. Gloss catches room light and makes the shelf look messy.
7. Floating shelves living room quick easy with a walnut shelf mix
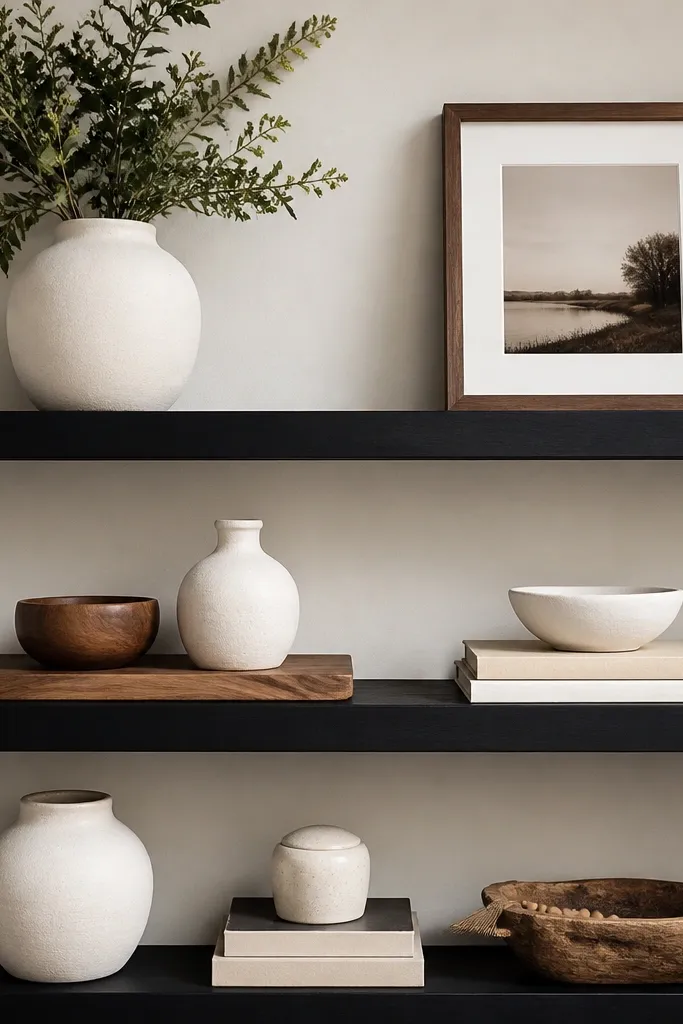
Black shelves can feel harsh if everything else is also dark. Mixing in warm walnut wood pieces softens the contrast and gives your shelves a cozy tone. This setup is great for living rooms with black metal lighting, but a wood coffee table or media console. It also flatters medium to cool skin tones when you have a lot of beige and warm neutrals in the room, because the warm wood visually balances the black. The look stays clean because you’re repeating one material family — walnut — across multiple shelves.
Start by choosing two walnut pieces you love: one tray and one bowl or frame. Mount three black shelves at equal spacing, with about 12 inches between shelf edges. Put the walnut tray centered on the middle shelf, then place a white ceramic piece on top of it like a small vase. On the top shelf, use the walnut frame as the anchor, and on the bottom shelf, use the walnut bowl with a single white candle or match holder. Keep the color palette to black, cream, and walnut so it doesn’t drift into random décor.
Good to knowWipe walnut pieces with a dry cloth before placing them on black. Oil smudges on black show up instantly.
8. Black shelves with black-and-white ceramic reliefs
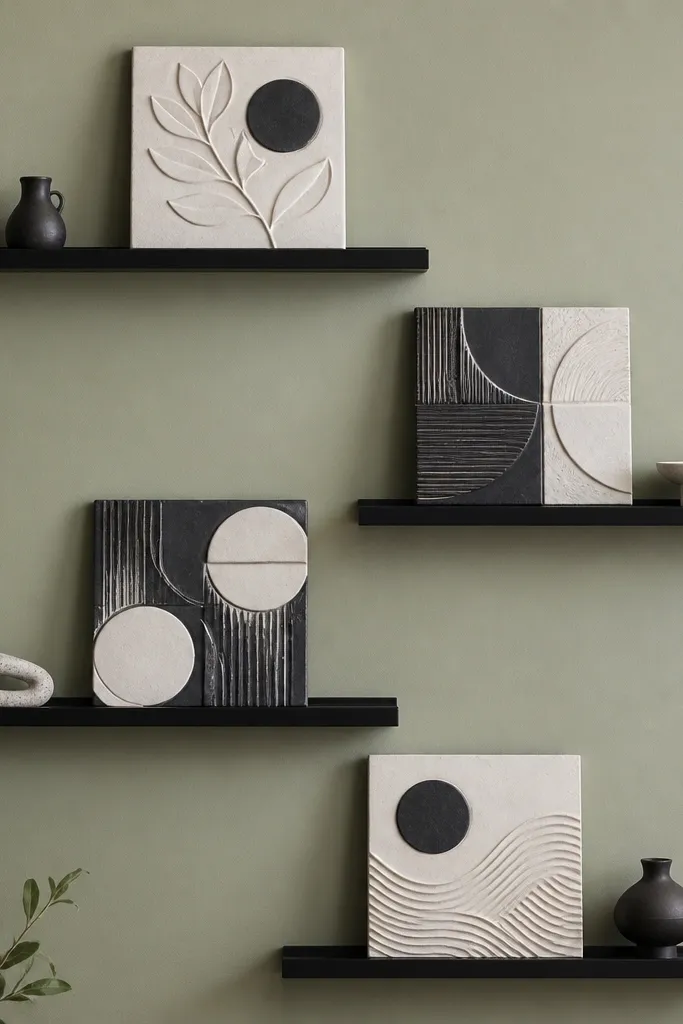
This looks graphic and intentional, especially on muted color walls like sage or olive. The black-and-white ceramics echo the shelf color while the relief texture catches light differently than smooth items. I put this in a living room with a green accent wall and it made the whole area feel designed instead of accidental. It flatters anyone who likes contrast and doesn’t want lots of color. The key is using sculptural pieces — flat decor won’t pop the same way.
Start by selecting one dominant relief piece per shelf, about 6 to 8 inches tall. Mount four shelves with 11 to 13 inches between shelf edges so the reliefs don’t overlap visually. Place the dominant piece on the left third of each shelf, then add a small smooth ceramic on the right third to balance height. Keep one shelf slightly emptier than the others — I leave the second shelf from the top with only two pieces. Finish by stepping back and checking that the relief textures don’t all align in a straight row.
Use a small LED bulb in the nearby lamp so relief shadows show. Flat overhead light makes reliefs look dull.
9. Three-shelf night sky look with black frames and glass
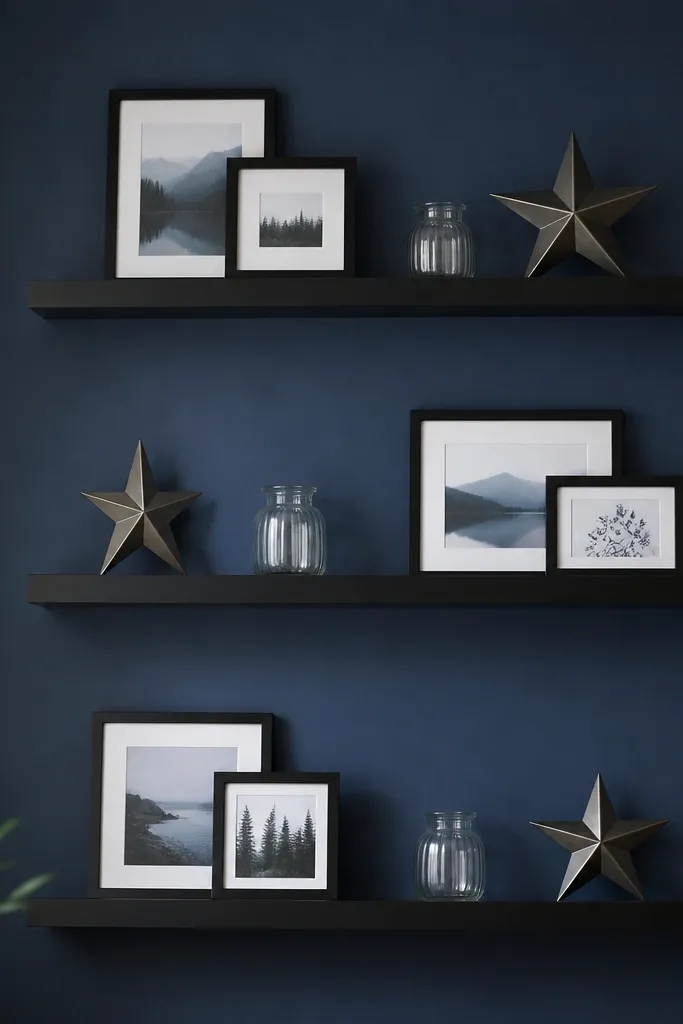
This is the “moody but still tidy” approach. Deep blue walls make black shelves look rich, and glass jars add a bit of sparkle without adding clutter. I’ve used this for winter decor, but the setup works year-round because the star ornaments are small and the color palette stays controlled. It flatters living rooms with dark accent walls and dark furniture because everything matches instead of competing. The best part is how easy it is to swap one ornament each season.
Start by cleaning the shelves and placing glass jars first so you know how much visual weight they add. Mount three shelves with the bottom shelf about 18 inches above the coffee table height. Put black frames on the left side of the top and bottom shelves, then glass jars on the right side. Add one small metallic star centered on the middle shelf. Keep the ornaments under 3 inches so they don’t look like a craft project.
Good to knowWipe glass jars with a little glass cleaner on a microfiber cloth. Fingerprints on dark walls look obvious.
10. Black shelves with brass candlesticks and linen runners
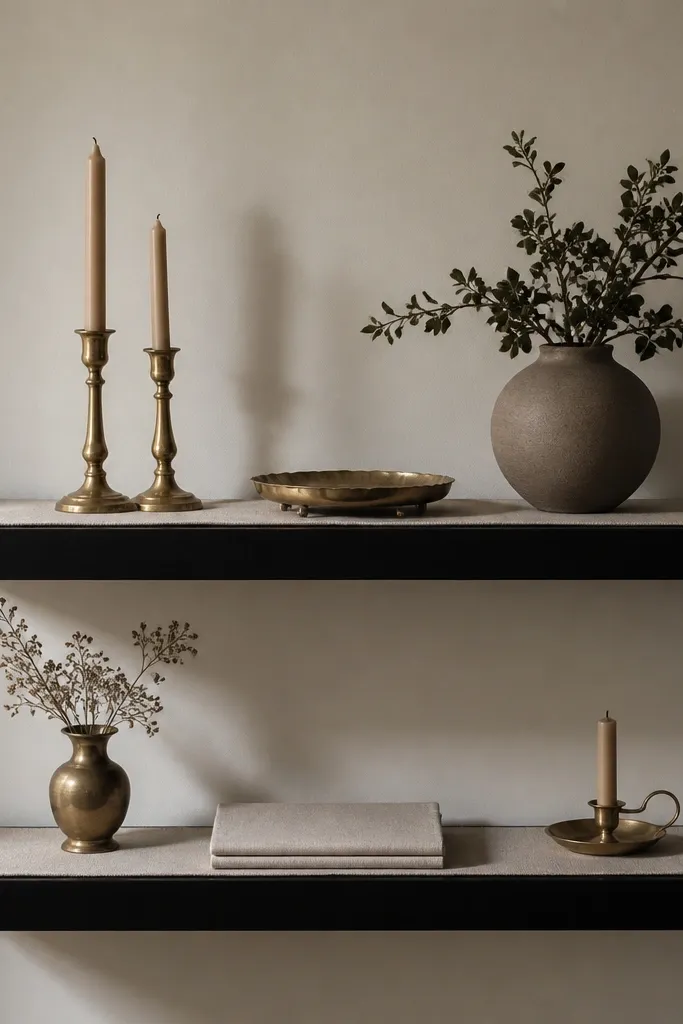
This setup reads warm and expensive because brass looks golden even when the rest of the room is neutral. The linen runner gives the shelf a soft base so the brass doesn’t look randomly placed. I used it in a living room with beige walls and a light gray sofa and it made the wall look dressed without being busy. It flatters people who like classic decor but want it updated — black shelves keep it modern. The runner is the secret because it hides the tiny mess of cords and small scratches on the shelf surface.
Start by measuring shelf length and cutting a linen runner to leave 2 inches of empty shelf space at both ends. Mount two shelves with 15 to 16 inches between shelf edges so the brass pieces don’t feel cramped. Place the brass tray centered on the runner, then set two candlesticks on opposite sides of the tray. Add one folded book on the edge of the runner so it looks like part of the styling, not a leftover. Keep the candlesticks the same height for a clean look.
Good to knowUse flameless candles if you don’t want wax mess. The brass still looks great and you avoid upkeep.
11. Sculptural vase trio on three evenly spaced shelves
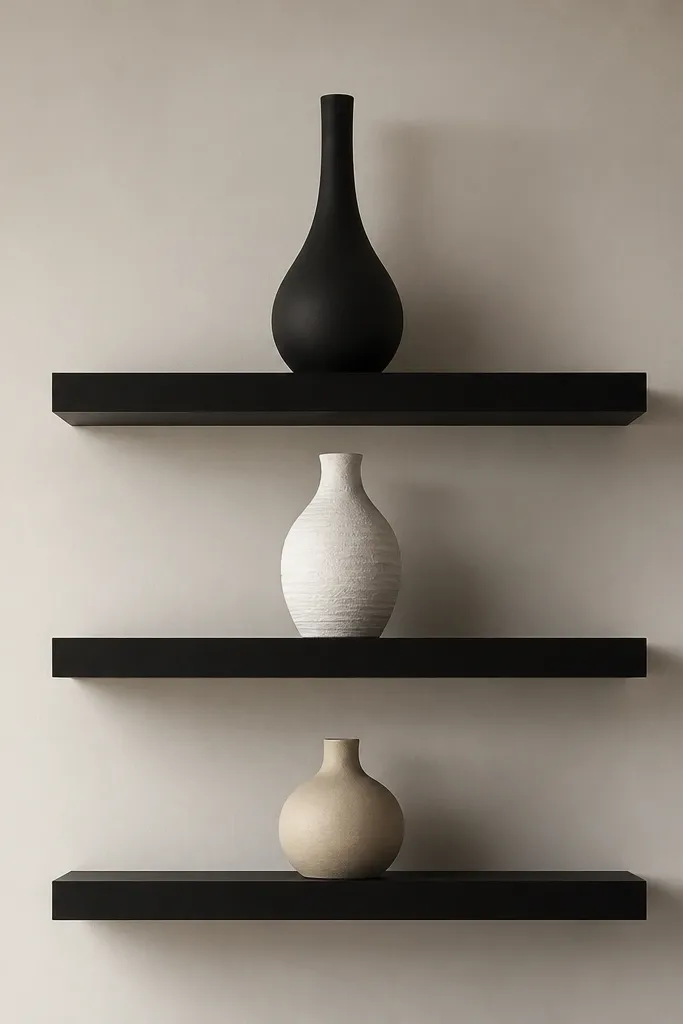
This is the “one hero per shelf” method and it looks clean even when your decor collection is small. Sculptural vases have enough shape to carry the look on their own, so you aren’t forced to add extra clutter. I like matte finishes here because glossy vases can look cheap under certain bulbs. This setup flatters rooms with simple furniture and fewer patterns — it brings texture without fighting your couch. Black shelves also anchor the tall vase so the wall feels balanced.
Start by picking three vases that share one color family — here it’s beige, white, and black. Mount shelves at equal spacing, with 12 to 14 inches between shelf edges. Place the shortest vase centered on the bottom shelf, then the medium vase centered on the middle shelf. Put the tall black vase slightly off-center on the top shelf toward the side of your seating. Leave the rest of the shelf empty so the eye reads the shapes first.
Good to knowDust the vases with a dry cloth right before you step back to judge the look. Matte finishes show dust more than shiny ones.
12. Floating shelves with a mirror backdrop for instant depth
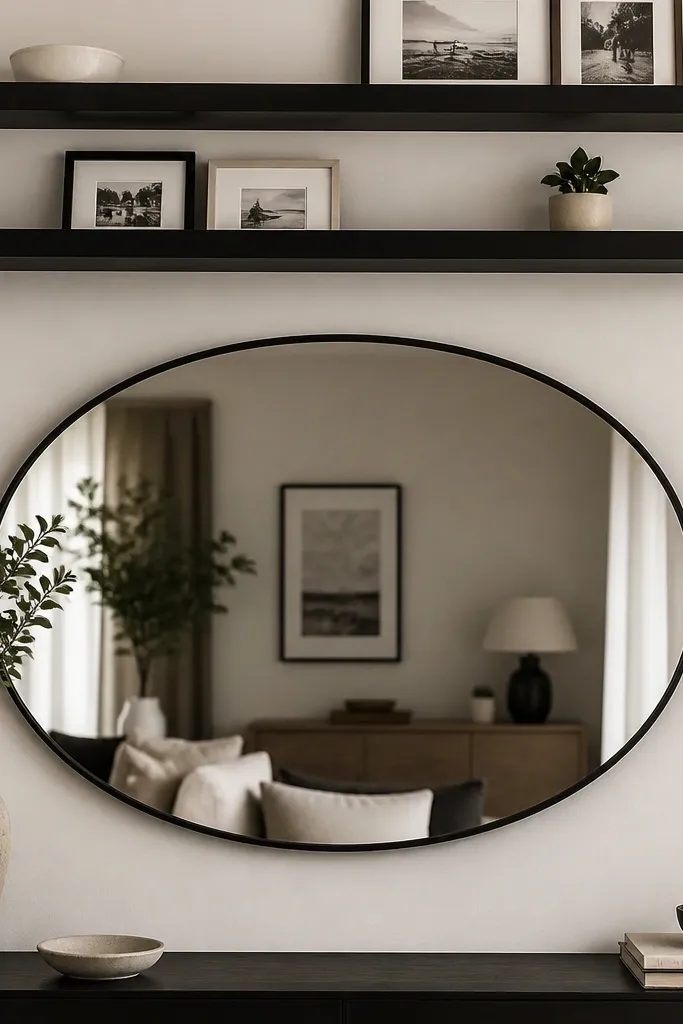
Adding a mirror under shelves gives you depth without adding more objects. The mirror reflects the plant and ceramics so the shelf styling looks fuller from different angles. I used this in a living room where the wall was plain and the lighting was a little flat. The black shelves match the mirror frame and keep the reflection from feeling chaotic. It flatters small rooms because the mirror makes the space feel bigger instead of just taller.
Start by placing the mirror first — center it so it sits roughly where you want the visual “middle” of the wall. Mount two shelves above the mirror with 14 to 16 inches between shelf edges. On the bottom shelf, place a white ceramic bowl centered, then add one small plant to the side. On the top shelf, use two small framed photos — one left, one right — so they mirror the mirror’s symmetry. Keep all frames the same size so the reflection doesn’t look busy.
Good to knowUse frosted or matte glass frames if you can. Clear glass glare can wash out the shelf items.
13. Black floating shelves over a gallery ledge with stacked frames
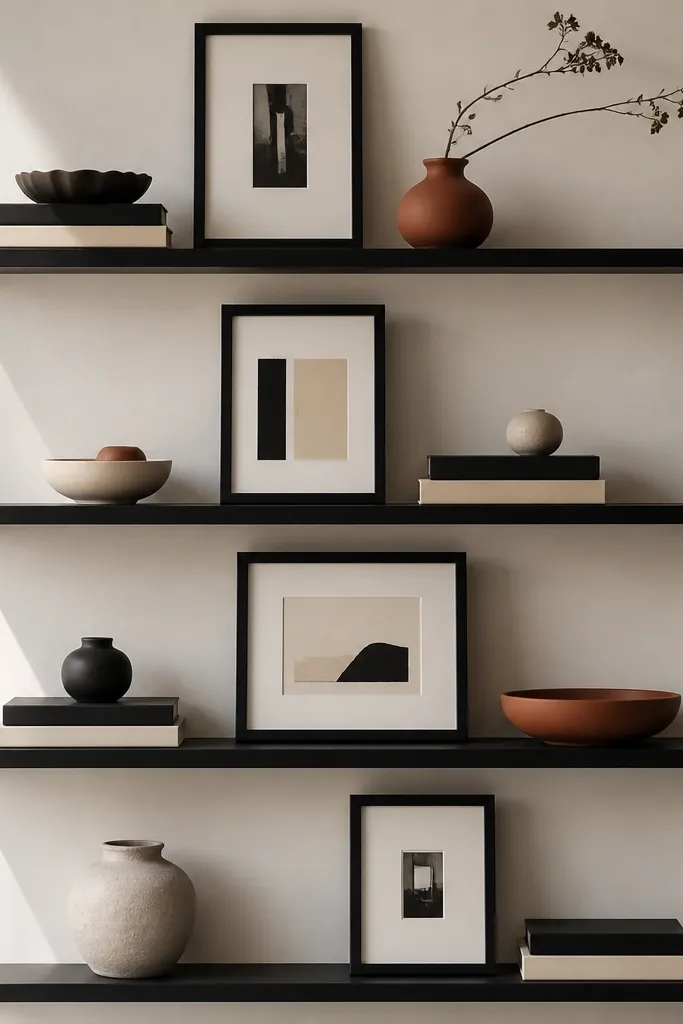
Frames stacked on shelves give you a layered look without needing tall decor. This works especially well if you’ve got a family photo set or travel prints you want to display. The black shelves make frame edges look crisp, and the cream tones keep the whole wall from looking too heavy. It flatters people who like personal decor but don’t want the wall cluttered with too many wall-hung pieces. The key is repeating frame colors and keeping the stacks the same width.
Start by sorting your frames by color, then choose three tones: black, cream, and one accent like terracotta. Mount four shelves at consistent spacing, about 10 to 12 inches between shelf edges. On each shelf, place two frames lying flat with a small gap between them, then prop one frame upright behind the gap. Keep the upright frame centered or slightly angled so it catches the light. Finish each shelf with one small ceramic item only if the shelf feels too empty.
Use thin foam mounting bumpers on the bottom frames so they don’t slide on the shelf surface.
14. Floating shelves living room quick easy with a single color vase rotation
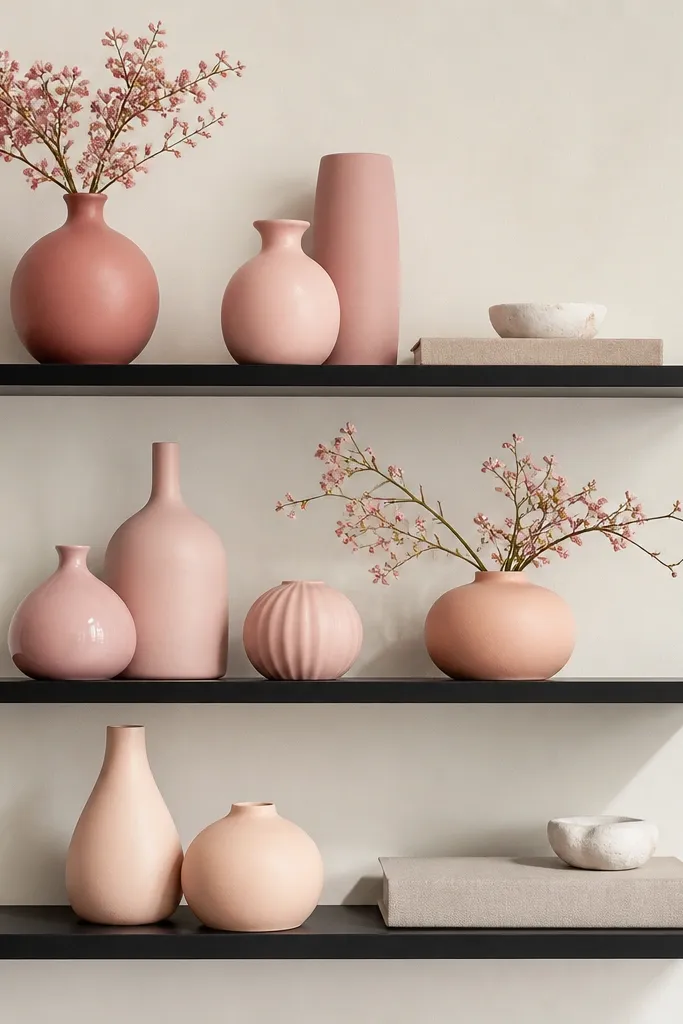
This is the fastest way to make shelves look styled even when you don’t have a lot of decor. When all your vases share a color family, the wall looks cohesive, and you can rotate pieces seasonally without rethinking everything. Dusty rose against black looks soft but not girly, especially with neutral books and white stone dishes. I’ve done this in a living room with a beige rug and it made the room feel calmer. It’s also forgiving for beginners because you’re not relying on perfect spacing of many objects.
Start by picking 3 to 5 vases in one color family, varying height but keeping similar finish — I like ceramic matte. Mount three shelves with 12 to 15 inches between shelf edges. Place one vase on each shelf centered, then add one neutral book beneath or beside it. Put a white stone dish on the opposite side of each shelf for balance, leaving a clear empty gap in the background. When you want a new look, swap only the vase — keep the books and dishes in the same positions.
Keep vase openings facing forward. Side angles make the shelf feel accidental even when it’s well planned.
15. Black shelves with woven texture baskets and ceramic minis
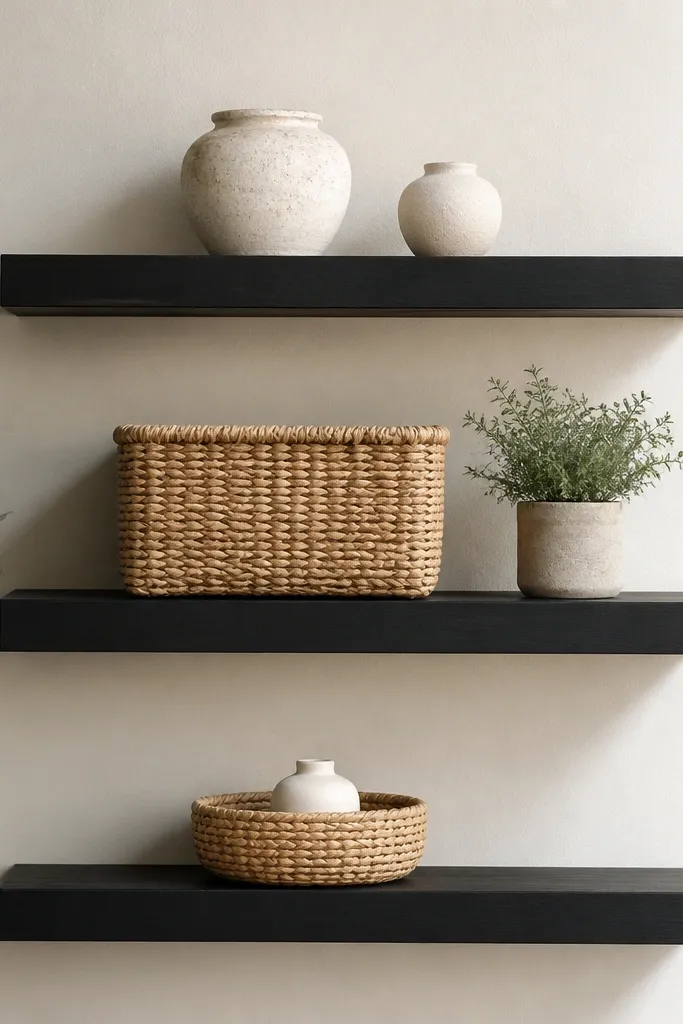
Woven texture fixes the problem of black shelves looking too flat. The baskets add warmth and hide the reality that you might store things or need to stash small items. I like this setup when the living room has a lot of hard surfaces — glass, metal, or smooth wood — because the weaving softens everything visually. It flatters people with kids or busy households since baskets make the shelves look tidy even if you’re not in styling mode. The key is to keep basket sizes controlled so the wall doesn’t look like a craft sale.
Start by choosing baskets that match in tone — natural tan or light brown — and keep the bottoms flat. Mount three shelves with the bottom shelf about 16 inches above the coffee table for easy reach. Place the smallest round basket on the bottom shelf, then set a white ceramic mini inside it. On the middle shelf, use a rectangular basket and add a small plant next to it, not on top. Put two ceramic minis on the top shelf, spaced apart, and leave at least 4 inches of empty space between them.
Use baskets with tight weaving. Loose weaving sheds fibers onto black shelves and looks messy fast.