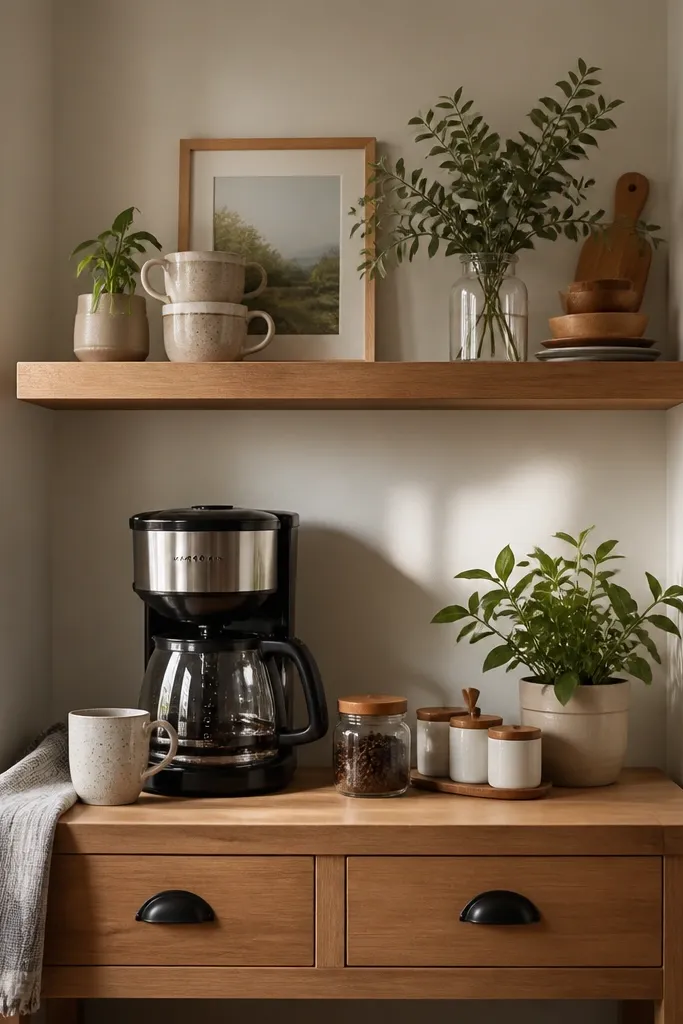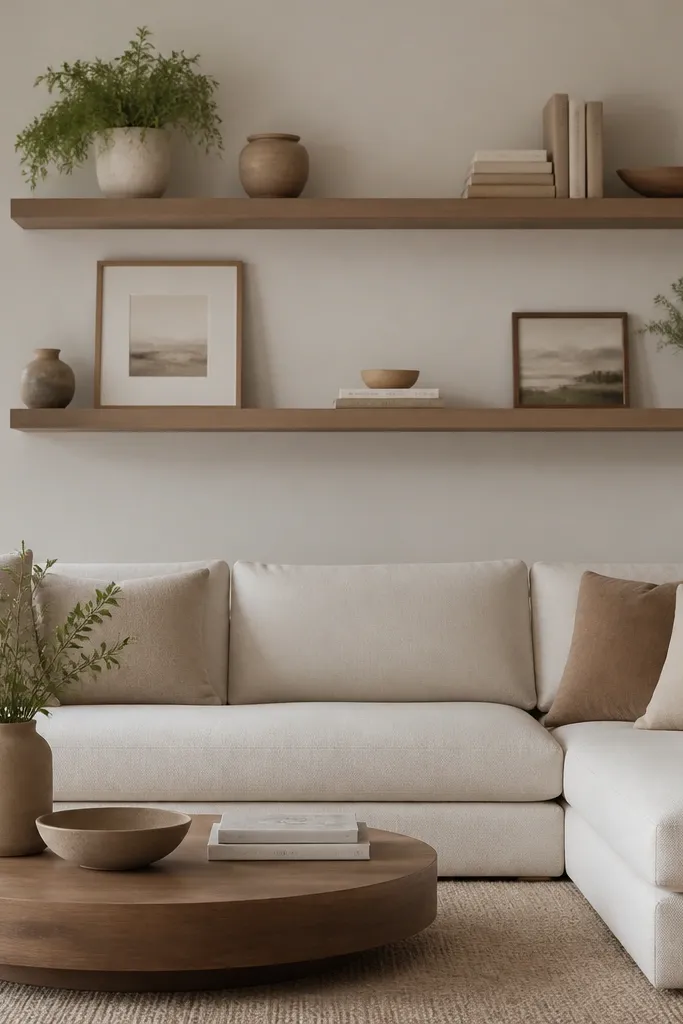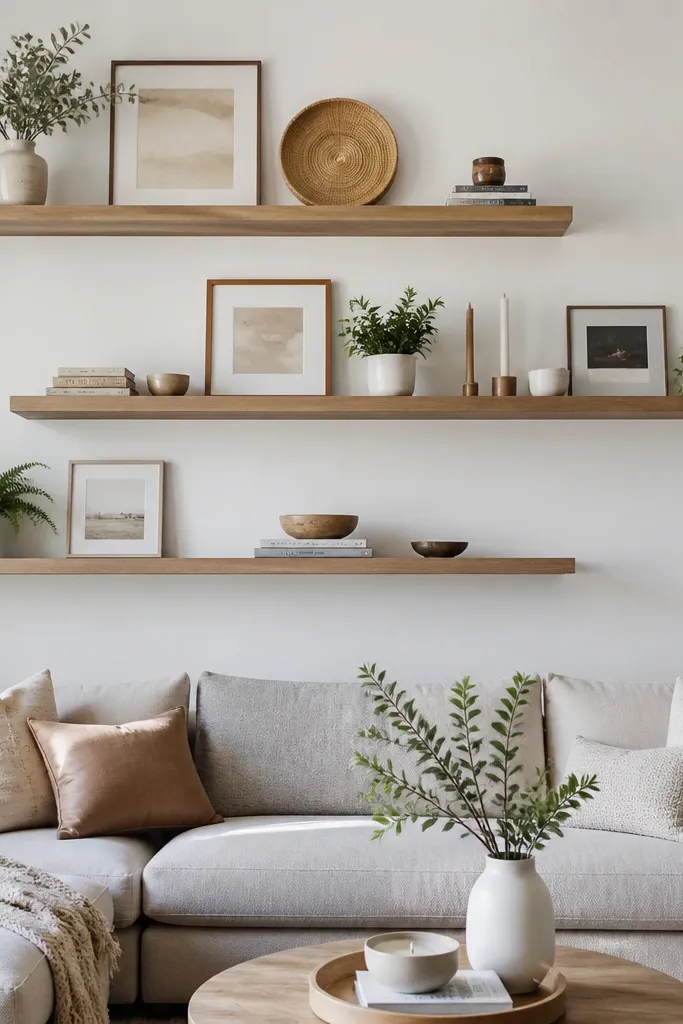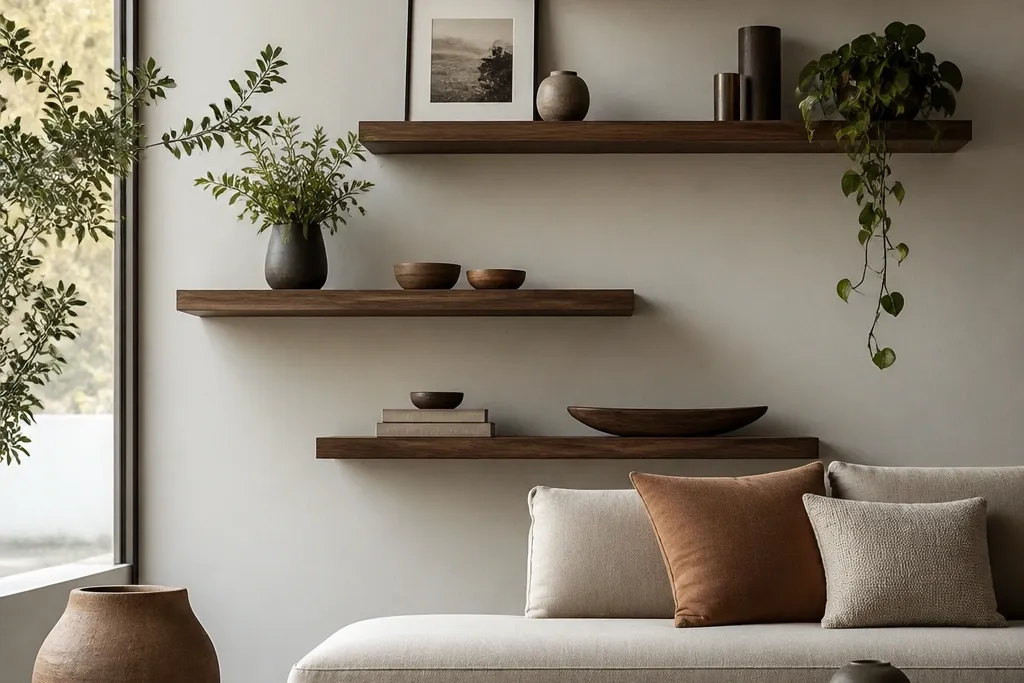
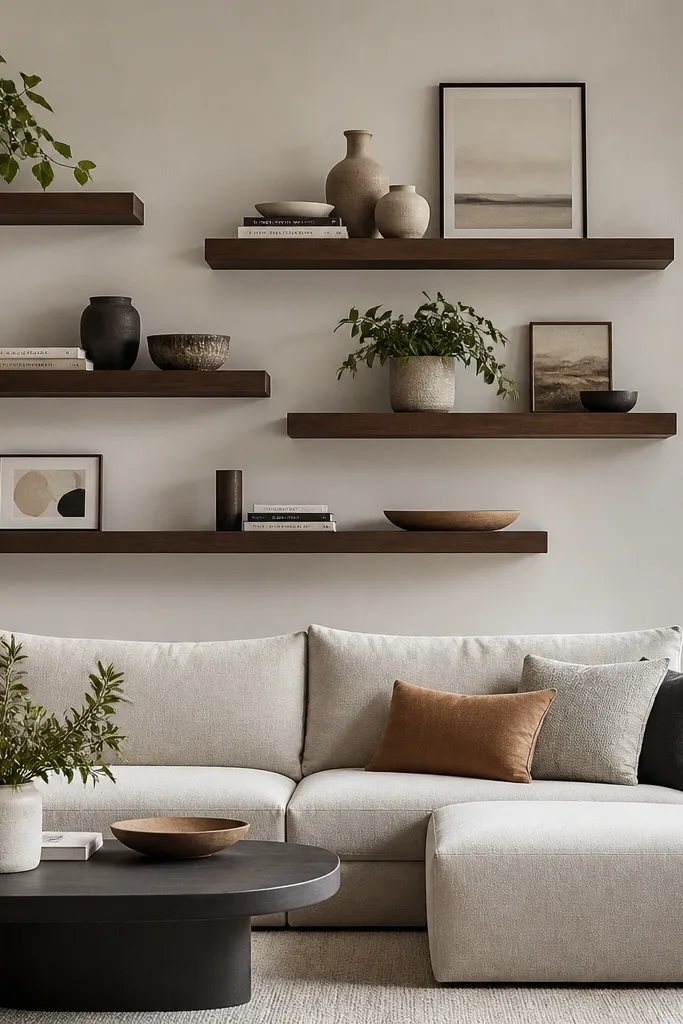
1. Smoked Oak + Matte Black Stagger Above the TV
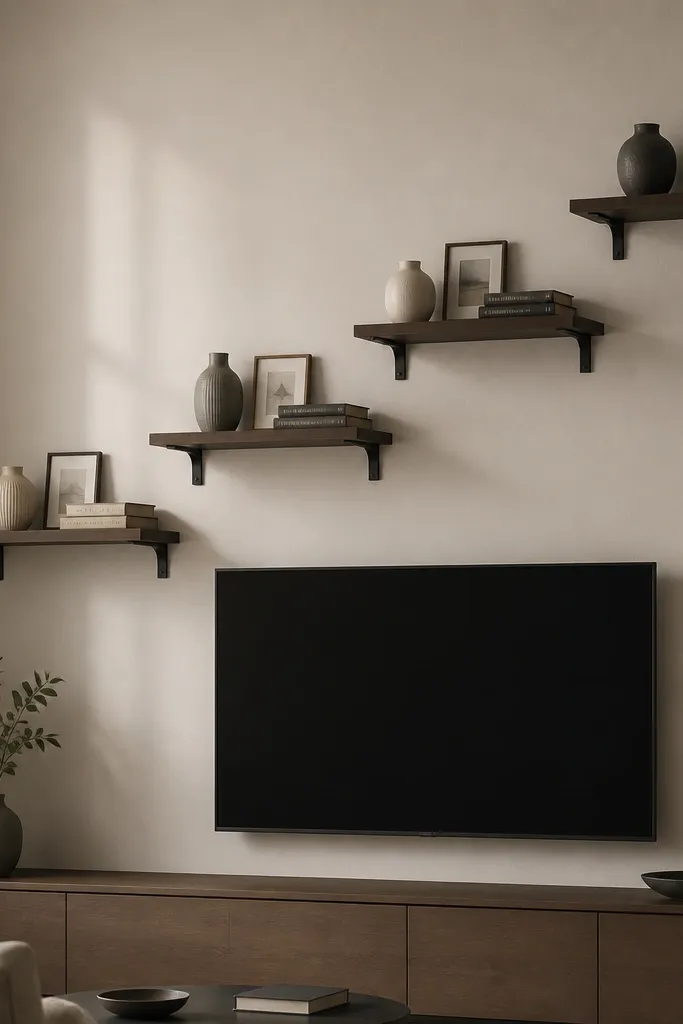
This is the layout I use when the living room has a low console and the wall still feels unfinished. The smoked oak warms the wall, while matte black hardware keeps the look modern and a little graphic. I like it for living rooms with brown leather, taupe textiles, or warm wood floors because the tones tie together without matching perfectly. The stagger makes a clean diagonal rhythm, so your eye reads the wall as design, not storage. Keep items spaced so each shelf feels calm; the modern look comes from negative space, not from adding more objects.
Good to knowUse a thin felt pad under decor to prevent tiny sliding and scuffs when you adjust spacing during styling.
Start by marking the TV centerline on the wall and decide where the lowest shelf will sit, usually 6-10 inches above the console. Install the first shelf level, then place the next shelf 8-10 inches higher, keeping the same depth and front edge alignment. Space the shelves so the stagger steps in a gentle slope, not a steep staircase. Style each shelf with one tall element (a 9-12 inch vase), one flat element (a photo frame or tray), and one book stack. Finish with a small object near the front edge so the shelf looks styled from normal viewing distance.
AvoidAvoid mixing glossy wood shelves with matte decor — the shine mismatch makes the wall look cheap.
2. All-White Floating Shelves in a Soft Wave
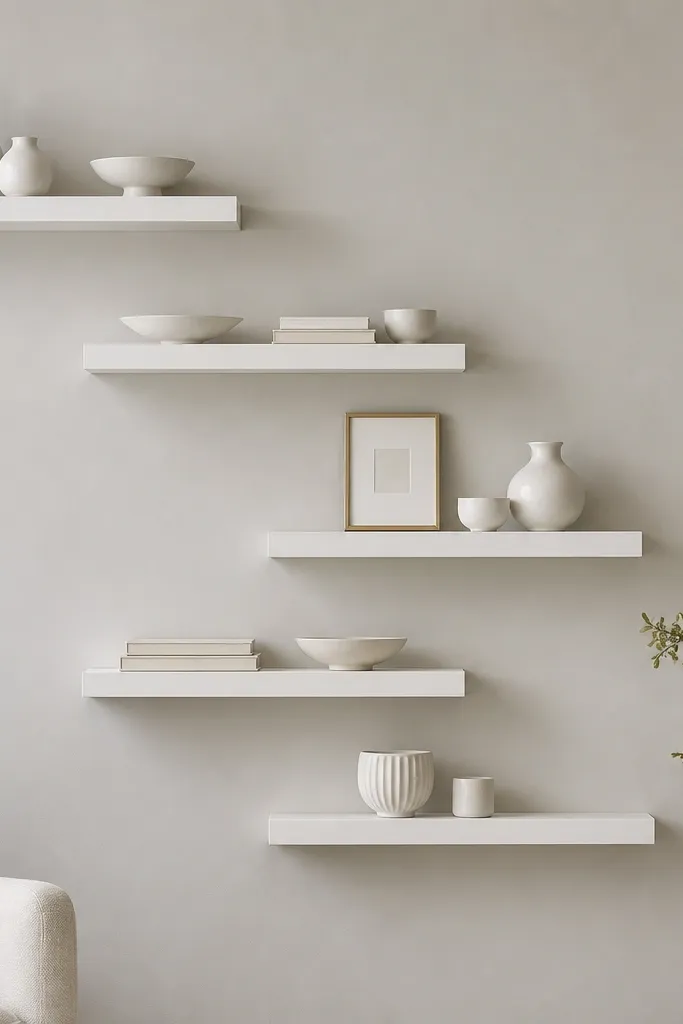
If your living room is already bright and airy, all-white shelves give you a modern look that feels crisp instead of dark. I’ve done this in small rooms where the wall color is close to off-white; the stagger creates movement without adding visual weight. White works best when your decor has texture: linen, matte ceramics, and woven baskets. This layout flatters people who like a clean aesthetic because you can keep styling minimal and still have the wall look “designed.” The staggered wave also makes the shelves feel more architectural, like built-in cabinetry.
Start by painting the wall a true off-white or using a matte primer if the wall is patchy. Mount the lowest shelf first at about eye level when seated — around 54-60 inches from the floor to the shelf top. Then place the next shelves 6-9 inches higher and keep the spacing between shelf fronts consistent. Use identical shelf widths so the wave reads smooth, then style with a repeating pattern: one tall ceramic on the higher shelves, one tray on the lower shelves. Keep the books aligned with spines facing outward and leave at least 2 inches of empty space between decor pieces.
Pick one metal accent color (brass or black) and stick to it across every shelf for a polished modern rhythm.
Don’t use shiny white ceramics everywhere — the reflection makes the wall look messy in daylight.
3. Walnut Shelves with a Vertical Line of Books
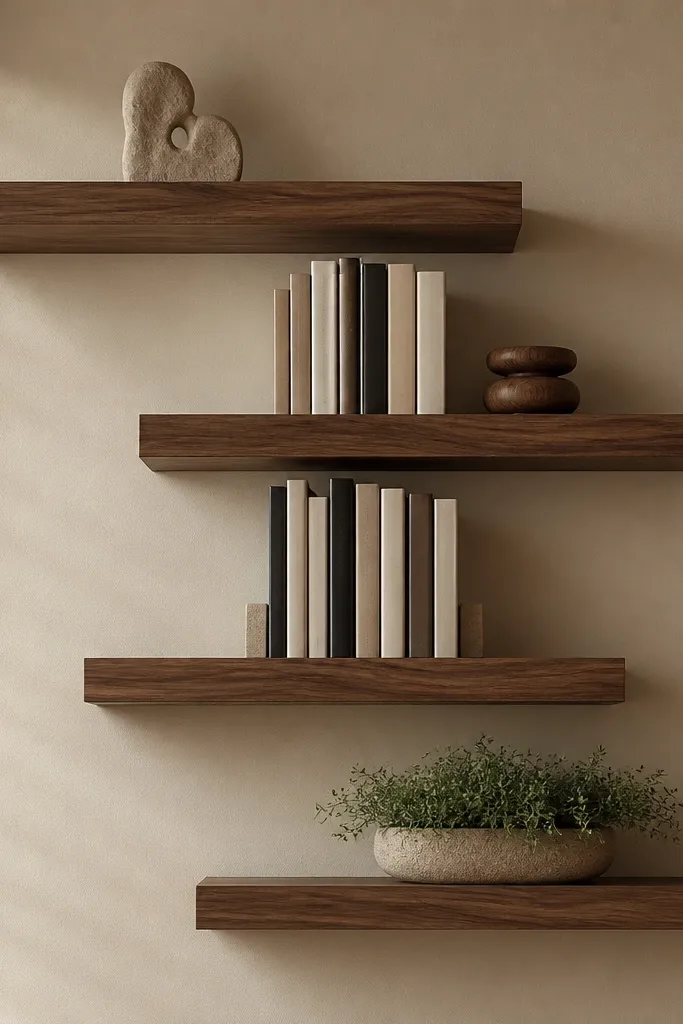
This one works when you want Floating Shelves Living Room modern to feel structured, not decorative. Walnut adds warmth, and the vertical book line gives the wall a focal “column” so the stagger doesn’t look random. I’ve used this in living rooms where the sofa is patterned or the rug has movement; the shelves calm the chaos by creating order. It flatters people who love books but hate clutter because you can stack spines neatly and keep the rest of the shelf minimal. The stagger adds dimension, but the vertical line keeps everything grounded.
Good to knowUse two book stacks per shelf side instead of one big stack; it keeps the centerline crisp from a distance.
Install the shelves so they form a gentle staircase: each higher shelf goes up 8 inches, and each step is placed so the center of the shelf aligns with the same vertical marker. Start styling by placing the book stacks first, with spines facing outward and the stack height matching the shelf’s proportion. Then add one sculptural object on each shelf end — keep it small, about the size of a grapefruit. Finally, add a low planter or a shallow tray on the lowest shelf so the styling anchors at the bottom. Leave 1-2 inches of breathing room between the book stack and the decor.
AvoidAvoid placing books sideways on the staggered shelves — it breaks the vertical order and looks accidental.
4. Beaded Plank Backdrop with Brushed Brass Accents
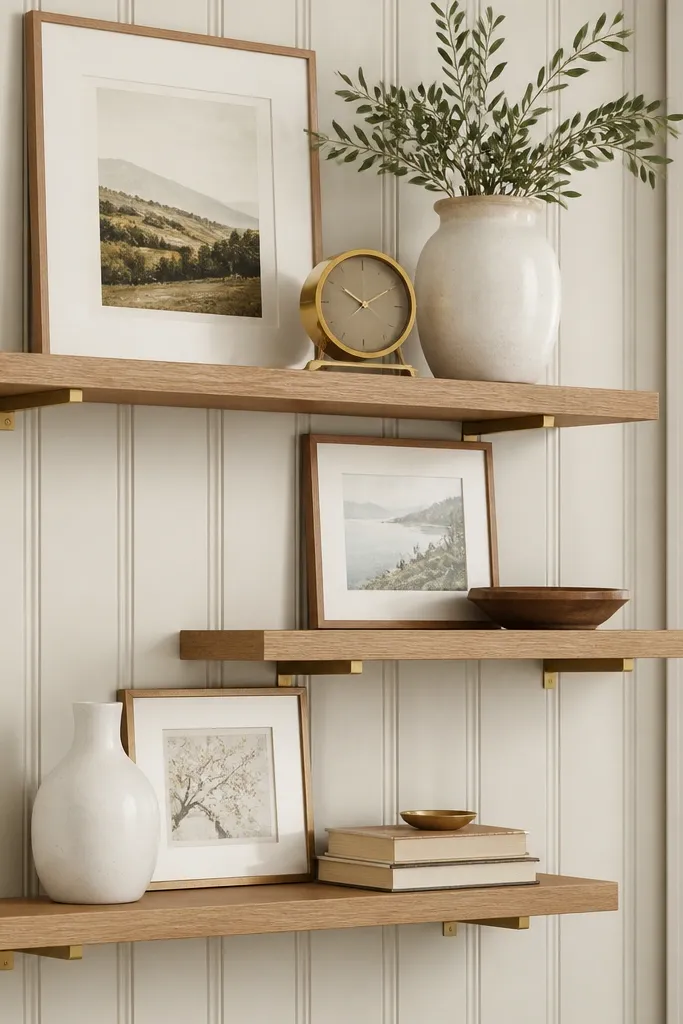
This layout is modern without feeling sterile. The beaded plank backdrop adds texture, and the staggered shelves on top keep it from becoming too traditional. I like it when your living room has plain walls and you want depth without painting the whole room a dramatic color. Brushed brass pulls the look together with a soft glow, especially under warm lighting. This flatters people who love mixed materials — wood plus metal plus framed art — because each shelf can hold one “finish” moment. The stagger keeps the backdrop from looking flat by giving your eye a layered surface.
Good to knowChoose frames with the same glass finish (all anti-reflective or all clear) so glare doesn’t make one shelf look messy.
First, install a 3/8-inch thick beaded panel behind the shelves, centered on your main artwork or the TV. Mount the lowest shelf so it sits just above the midpoint of the panel, typically around 10-12 inches below the top of the artwork. Stagger the next shelves up 7-9 inches each, keeping shelf depth the same across the run. Use light oak shelves with brushed brass supports so the metal doesn’t overpower the wood grain. Style with one brass accent per shelf maximum, then balance with matte white ceramics and framed prints that share a similar frame width.
AvoidDon’t overload the beaded backdrop with too many small objects; the texture already adds visual noise.
5. Black Floating Shelves with Color-Block Ceramics
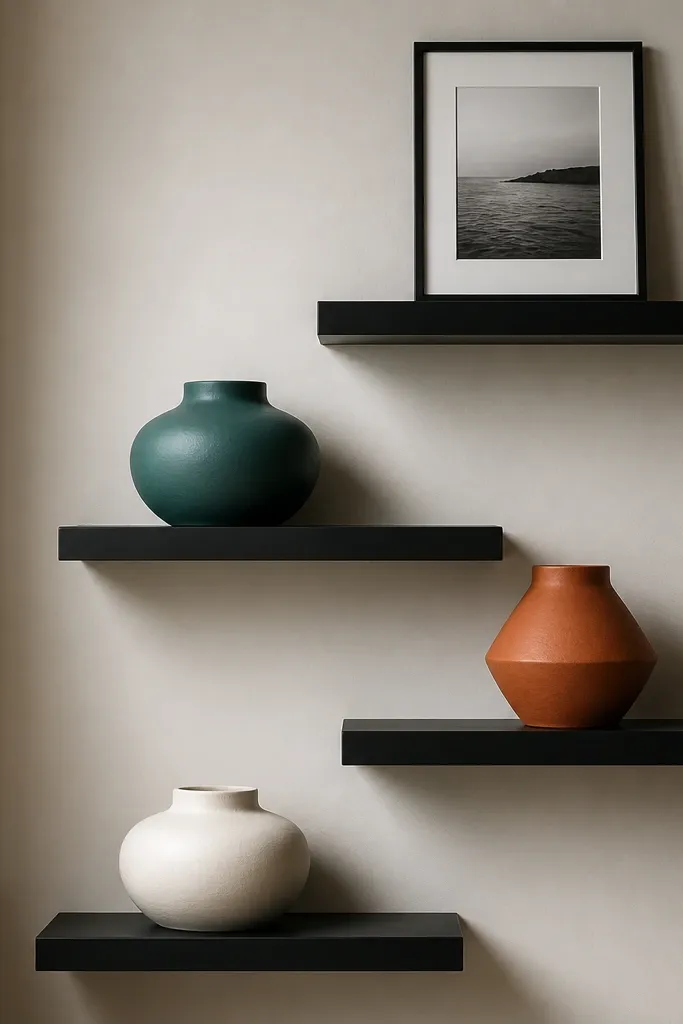
If you want a modern look that feels playful, this is it. Black shelves create a clean frame for color-block decor, and the stagger prevents the color from looking like random placement. I’ve used this in living rooms with neutral walls and a colorful couch pillow set because it ties the palette together without matching every item. It flatters people who like bold accents but don’t want the whole room to feel loud. The stagger also gives each color a moment since they’re not all at the same height.
Good to knowWipe the shelves with a microfiber cloth before styling; matte black shows dust fast under spot lighting.
Mount the lowest shelf first, centered over a low console or directly beside a large mirror. Set the shelves so the highest shelf top lands around 68-72 inches from the floor, then step down in 8-inch increments. Use matte black shelves with a thickness around 3/4-inch so they look substantial. Style each shelf with one large ceramic (about 6-10 inches tall), then add one supporting item like a small frame or a single book stack. Keep the colors in a tight palette: one teal, one terracotta, one off-white — no extra colors.
AvoidAvoid mixing metallic gold decor with matte black shelves in the same run; it creates a “two styles” look.
6. Two-Level Stagger with a Center Art Anchor
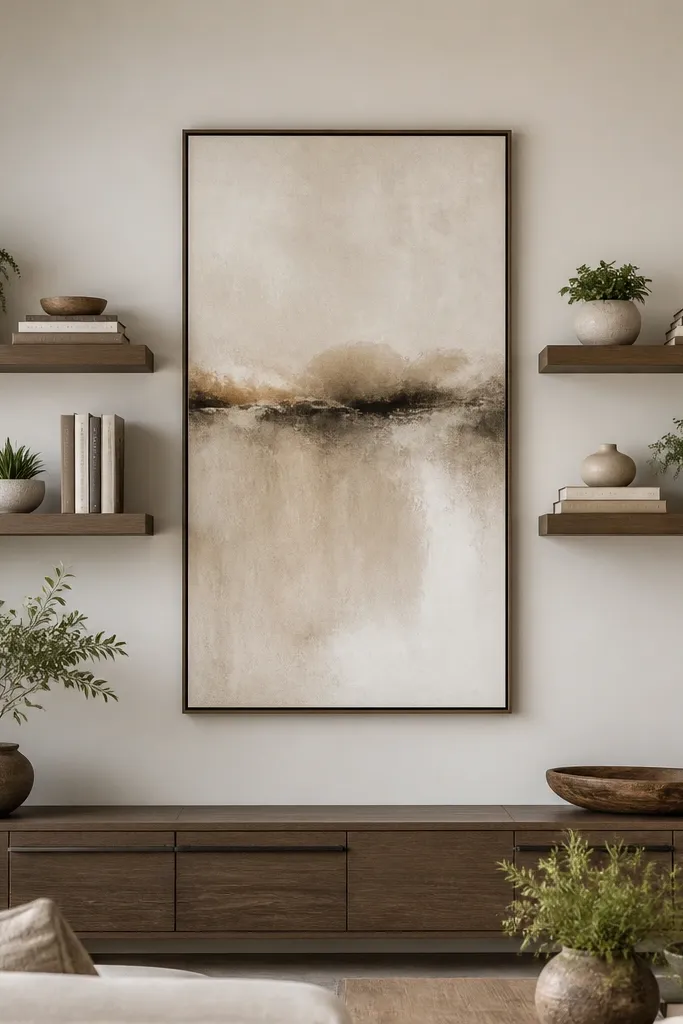
This layout is made for people with one big focal point like a large framed print, a mirror, or a gallery wall. Instead of spreading shelves across the whole wall, you create symmetry around the anchor and let the stagger add motion. I’ve done this on walls where the TV isn’t on the wall, and there’s a single artwork that needs support. It flatters most living rooms because it keeps the shelf run visually controlled. The key is that the centerline stays clean, and the stagger only happens away from the anchor.
Good to knowUse the same shelf item on both sides — like identical book stacks — to keep the modern look balanced.
Hang your main artwork first so you know the centerline and the usable height. Install two shelves on the left side at the same vertical heights as the two shelves on the right side, so symmetry stays intact. Then stagger the outer shelf pair 6-8 inches higher than the inner pair, keeping the step away from the center. Use consistent shelf depth and widths, then style the center-adjacent shelves with flatter items like trays. Place a small plant or candle on the outer higher shelves so the height change reads clearly.
AvoidAvoid staggering on both sides in random heights; it breaks symmetry and reads messy.
7. Herringbone Layout with Short Stagger Steps
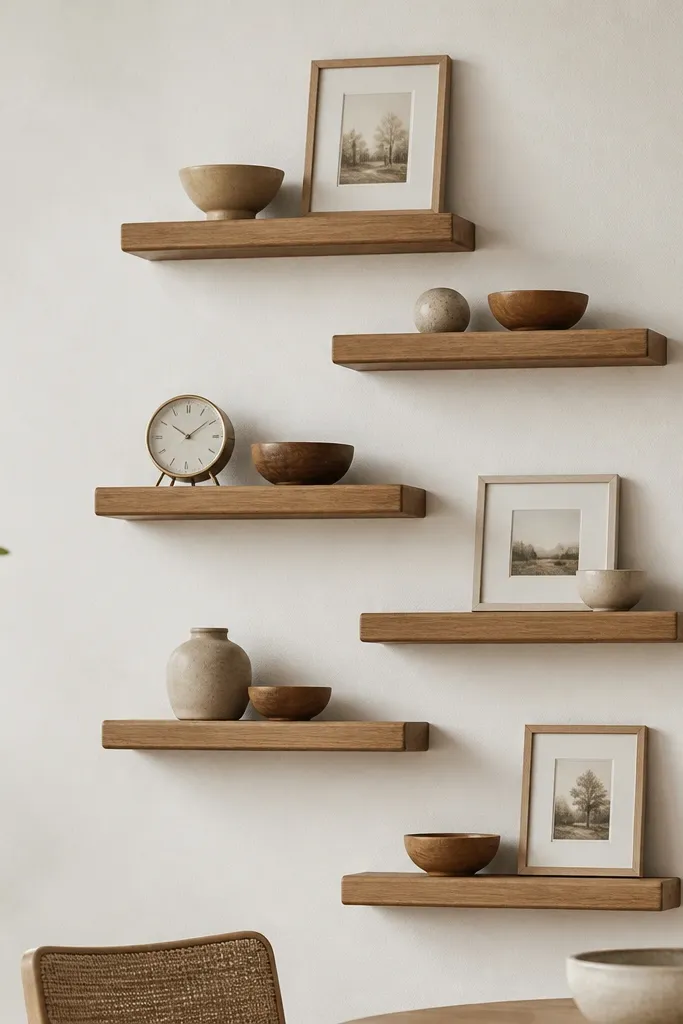
This is for a living room wall that’s long enough to handle a design pattern. The stagger is still modern, but the short steps create a herringbone effect that looks intentional and a little custom. I like it when you have a wide wall and you don’t want the shelves to feel like a row of storage. It flatters people who enjoy collecting small decor — bowls, frames, mini sculptures — because each shelf can hold one “chapter.” The wall reads dynamic even if you keep the styling minimal.
Good to knowPrint a quick grid on paper tape and lay it on the wall before drilling; it saves you from crooked steps.
Measure the wall width and plan for 6 shelves with consistent spacing, keeping each shelf about 14-18 inches wide. Mount the first shelf at eye level, then raise the next shelf only 5-6 inches to create tight steps. Continue the alternation so it forms a zigzag pattern across the wall, with the shelf fronts aligned in a grid-like rhythm. Style each shelf with one object and one supporting flat piece, never more than two. Keep the decor heights within 2-3 inches of each other across the pattern so it stays modern and not cluttered.
AvoidAvoid using very deep shelves with this pattern; deep shelves make the zigzag look bulky.
8. Concrete Gray Shelves with Black-and-White Photos
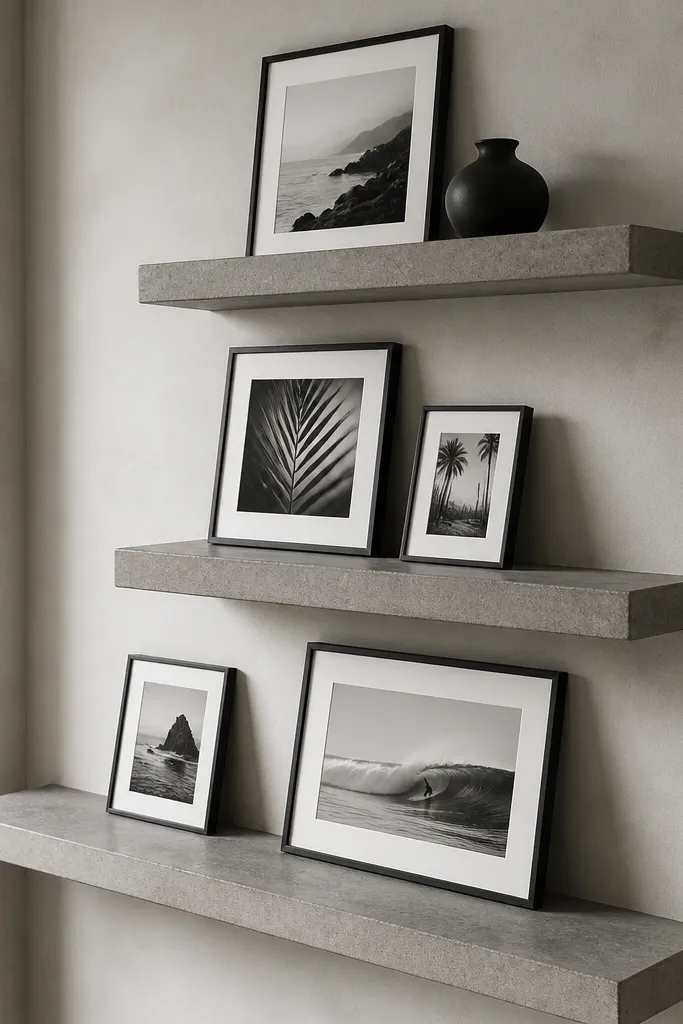
Concrete gray shelves make Floating Shelves Living Room modern feel industrial without looking harsh. The stagger gives the photo frames a gallery vibe, and the black-and-white palette keeps the wall clean and cohesive. I’ve used this in living rooms with gray sofas and black metal accents, where you want the wall to feel styled but not colorful. It flatters people who like monochrome interiors because the shelf styling stays simple: frames, small vases, and a couple of books. The stagger also prevents the photos from forming one flat strip.
Good to knowUse museum-style hanging blocks behind the frames so the frames sit perfectly square on the shelves.
Pick shelves with a matte concrete gray finish and mount them so the lowest shelf top is around 56 inches from the floor. Stagger the next shelves up 8 inches and keep the shelf depth at 6-7 inches for a sleek look. Use photo frames that are all the same size and orientation, and keep the frames aligned with the front edge of each shelf. Add one small black ceramic vase on the highest shelf and one thin book stack on the lowest shelf. Leave at least 2 inches of empty space around each frame so the wall doesn’t look crowded.
AvoidAvoid mixing frame sizes — it turns the staggered gallery into a random photo shelf.
9. Light Oak + Glass Knobs for a Soft Modern Look
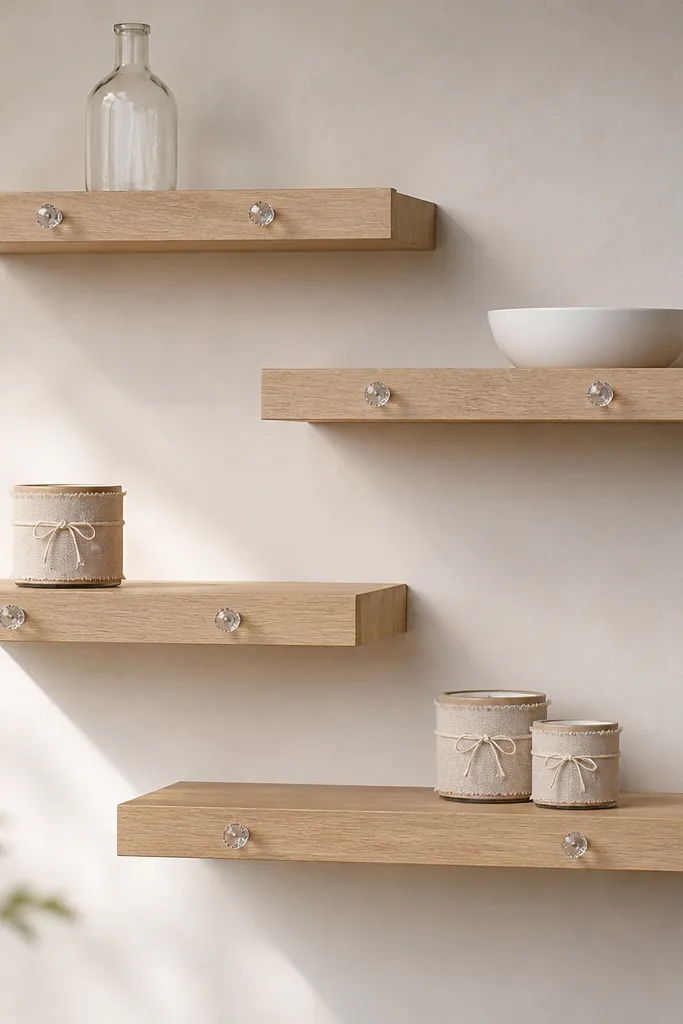
This looks modern but soft, and it works when you have a lot of fabric in the room. The light oak keeps the shelves warm, and the glass knob detail adds a subtle sparkle without going flashy. I like it for living rooms with cream walls, beige curtains, or a neutral rug, because the shelves blend in but still feel designed. The stagger helps the glass pieces catch light at different heights, so the wall looks alive. It flatters people who want their shelves to feel curated but not stiff.
Good to knowWipe glass items with a dry microfiber cloth right before you step back; fingerprints ruin the modern look instantly.
Install the first shelf at about 60 inches from the floor to the top, then place the next shelf 7-9 inches higher. Keep the shelf widths consistent so the knobs line up visually across tiers. Use 6-8 inches depth and a matte finish so fingerprints don’t show. Style with one clear glass bottle (6-12 inches tall), one bowl, and one candle cluster made with linen-wrapped holders. Place items near the front edge, then keep the back area mostly empty so the glass reads clean.
AvoidAvoid adding too many small glass pieces — they create clutter and reflections.
10. Jet Black Shelves with a Single Brass Tray Per Tier
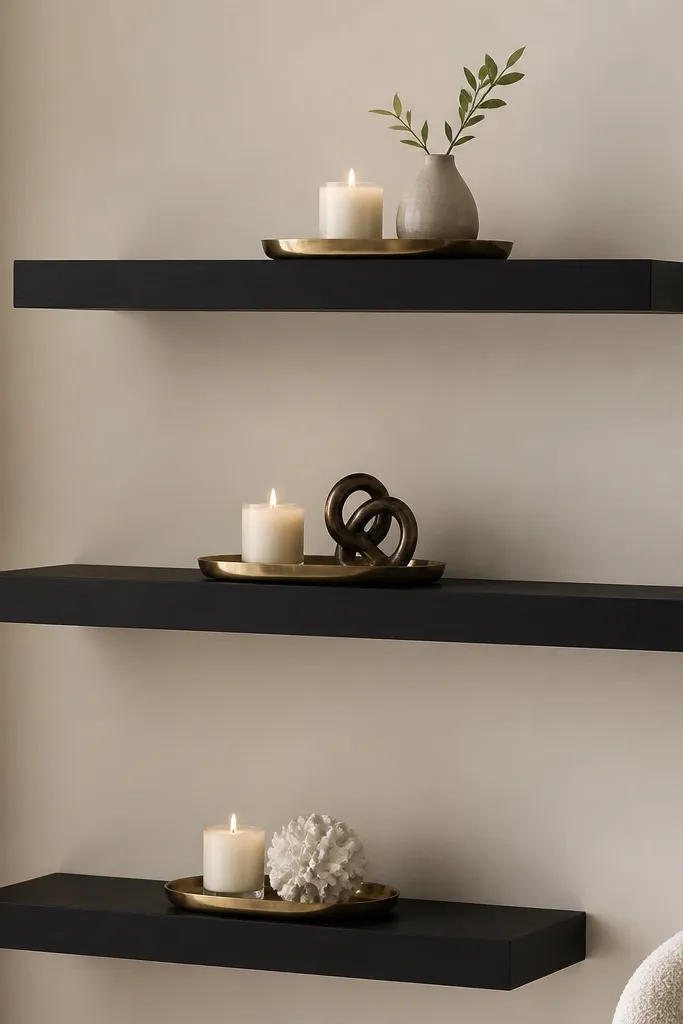
This is the cleanest modern version when you want the wall to look styled every day, not just on weekends. Jet black shelves create a strong base, and one brass tray per tier creates a repeatable pattern. I’ve used it in living rooms where the wall gets harsh overhead light; the tray reflection adds warmth without looking shiny-chaotic. It flatters anyone who hates dust piles because trays concentrate the decor so you can clean in one pass. The stagger makes the trays look like they’re floating in a gallery column.
Good to knowDust the tray edges with a soft brush attachment on your vacuum; it keeps the brass from dulling.
Mount shelves so the lowest tier is about 54-58 inches from the floor to the top. Raise the next shelf 8-10 inches, then raise the third shelf another 8 inches so the pattern stays smooth. Use shelf lengths that match your wall width, but keep the decor compact — trays about 8-10 inches wide. Place the tray centered on each shelf, then add one small candle or object and one book edge if you need height balance. Keep all trays the same brass finish so the modern rhythm stays consistent.
AvoidAvoid mixing tray sizes across tiers; uneven tray placement makes the stagger look accidental.
11. Cherry Red Accent Shelves with Neutral Styling
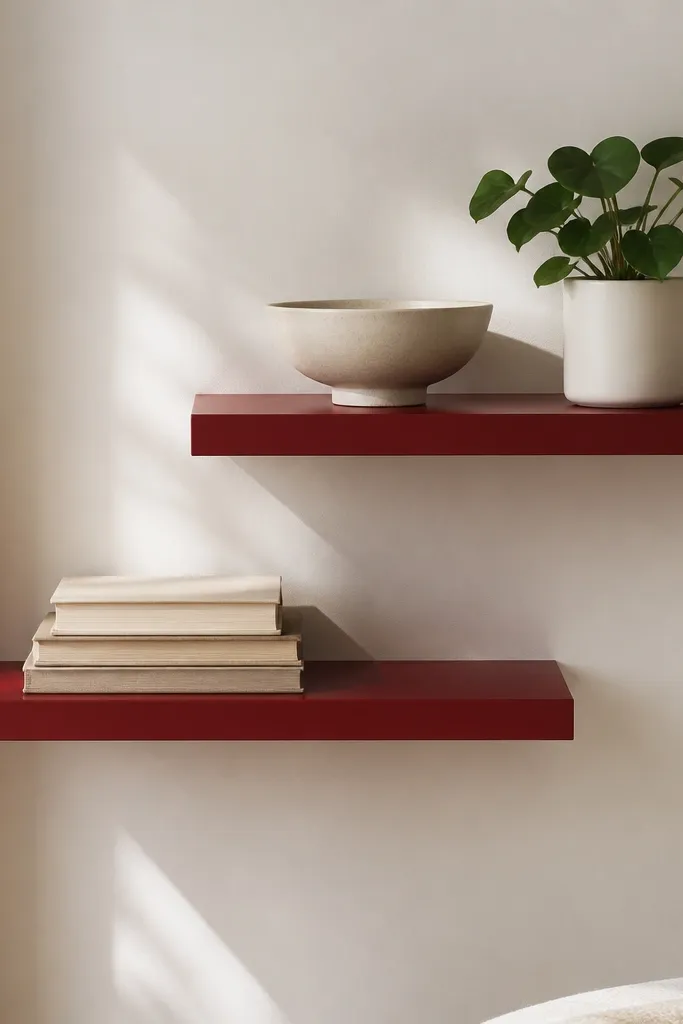
A small pop of color makes staggered shelves feel modern fast. Cherry red is strong, so the trick is to keep everything else neutral and textured. I’ve used this when the living room has a neutral sofa and one red accent pillow or throw, and the wall needs a matching “anchor.” It flatters people who want personality without turning the whole room into a theme. The stagger matters here because it lets the red shelves read as intentional — two steps, not a random shelf placement.
Good to knowMatch your red to a fabric swatch from the room, not to the paint chip — fabric reads different under light.
Use only two shelves so the red stays special. Mount the lower shelf first at about 60 inches from the floor to the top, then place the second shelf 10 inches higher. Keep shelf depth around 6 inches so the red doesn’t feel heavy. Style the lower shelf with a beige book stack and a neutral ceramic bowl on the front third. Put the plant on the higher shelf so the foliage lifts the color upward, and add a small frame leaning against the back edge.
AvoidAvoid pairing cherry red with bright teal or neon decor; it turns modern into costume.
12. Staggered Corner Shelves for a Reading Nook
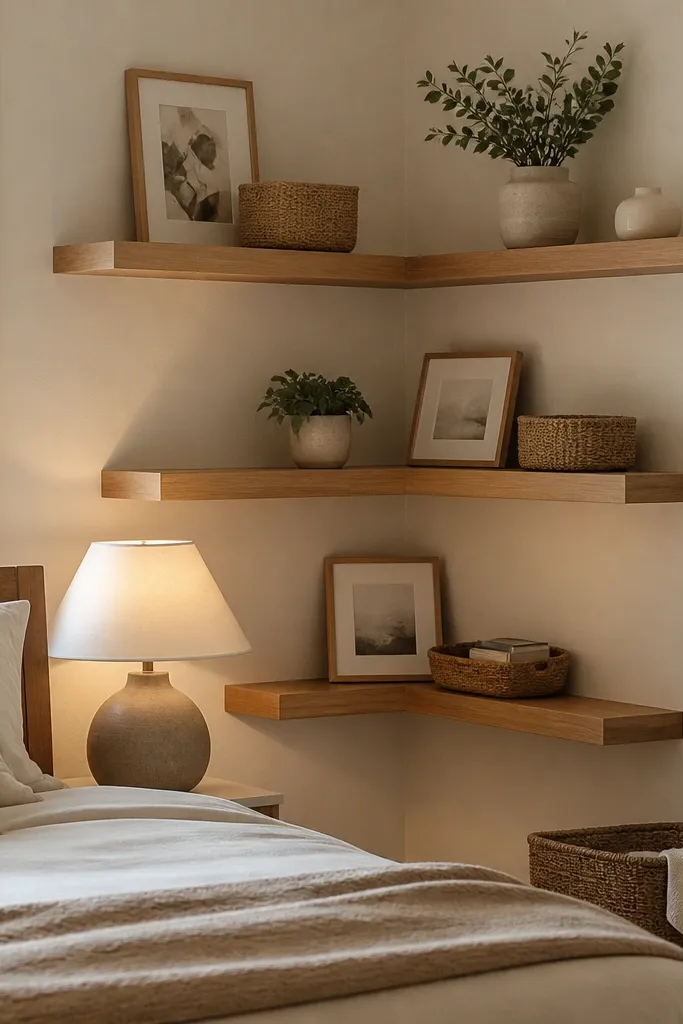
Corner walls are where floating shelves can look amazing or awkward. A staggered corner layout fixes the awkwardness because the shelves don’t fight each other in a flat line. I’ve installed this for reading nooks where there’s an armchair and a small side table, and the corner felt dead. It flatters people who want functional storage for books and small items without adding a bulky corner cabinet. The stagger also helps you place taller items without blocking sight lines into the room.
Measure the corner depth so you can keep shelf depth around 6-7 inches, since corners make depth feel bigger. Mount the first shelf on one wall at about 56-60 inches from the floor to the top. Install the matching shelf on the adjacent wall so it is 8 inches higher or lower (pick one direction and commit) to create the stagger. Style the corner with tall items like a small lamp base on the higher shelf, then add books stacked horizontally on the lower shelf. Finish with a small basket on the inner edge where it’s easy to grab.
Use the same shelf finish on both walls so the corner reads like one built-in unit.
Avoid placing shelves at the same height in both walls; the corner turns into a visual block.
13. Floating Shelves with Hidden Cable Tray Behind Decor
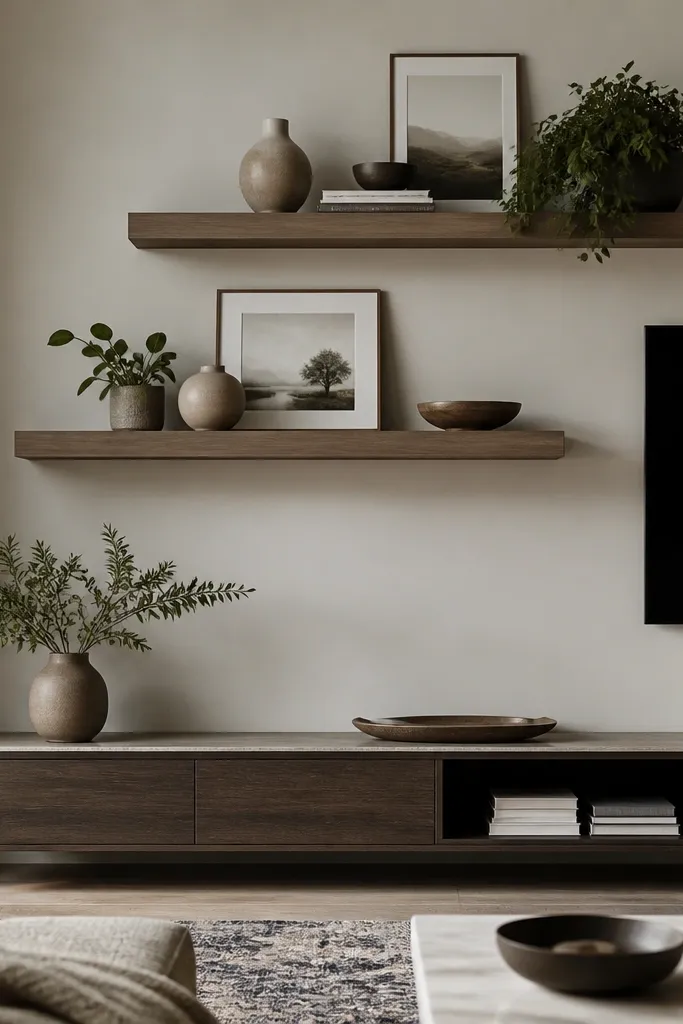
This is a modern trick I learned the hard way after seeing cords ruin the clean look. Staggered shelves give you a natural place to hide the messy stuff behind decor, especially around TVs and speakers. I like it in rooms where you have a soundbar, game console, or streaming box and you hate seeing wires. It flatters anyone trying to keep the wall tidy without building a full entertainment unit. The stagger helps because the lower tier can conceal cables while the higher tier looks purely decorative.
Good to knowLeave a 6-inch service loop behind the tray so you can pull a device out without tearing up the decor.
Plan the cable path before you mount shelves. Install a slim cable tray or conduit along the wall where the TV devices connect, then run power and HDMI through it. Mount the lowest shelf first so it covers the tray opening by at least 2 inches. Stagger the next shelf 8-10 inches higher, leaving enough space behind decor to access cords if you need to unplug. Style the lower shelf with a taller plant or a book stack that sits in front of the tray opening, and keep the higher shelf items lighter and more decorative like frames and small vases.
AvoidAvoid stuffing cables into tight corners behind shelves; heat builds up and you’ll regret it later.
14. Staggered Shelves with a Bottom Shelf Lighting Strip
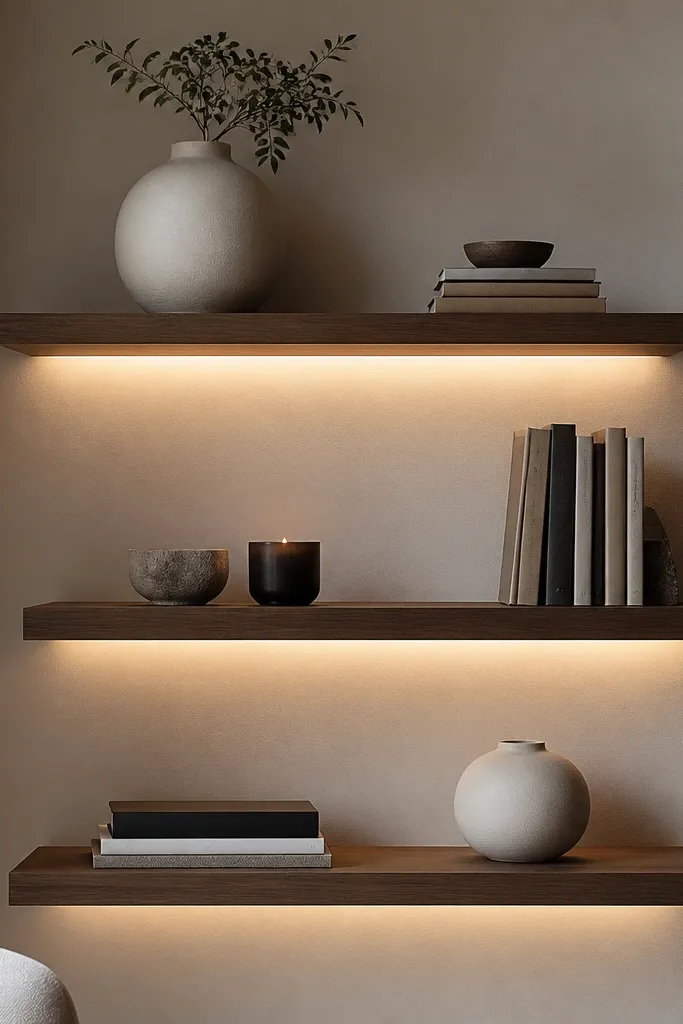
Under-shelf lighting changes everything because it makes the staggered layout look custom even if the shelves are simple. The modern feel comes from the glow edge, not from the decor. I’ve done this in living rooms where the wall is darker or where the only lighting is overhead, and the shelves would otherwise look flat. It flatters people who like a moody, evening look because the shelves look like they’re floating. The stagger adds a layered gradient of light across the wall, which is what makes it feel intentional.
Good to knowUse a dimmer switch so you can tune the glow for daytime vs evening.
Install shelves first, then decide on LED placement so the light hits the wall, not the decor. Use a warm LED strip around 2700K and mount it under the front edge of each shelf or at the underside back lip. Keep the stagger at 8 inches vertical differences so the glow lines don’t overlap awkwardly. Style each shelf with low-profile items so the lighting stays visible: a shallow bowl, a small framed photo, and a book stack. Turn off overhead lights and check the wall glow; adjust decor height so you don’t block the light.
AvoidAvoid cool-white LEDs (4000K+) unless your walls are very bright; it makes wood look gray.
15. Terracotta Shelves with White Linen Styling
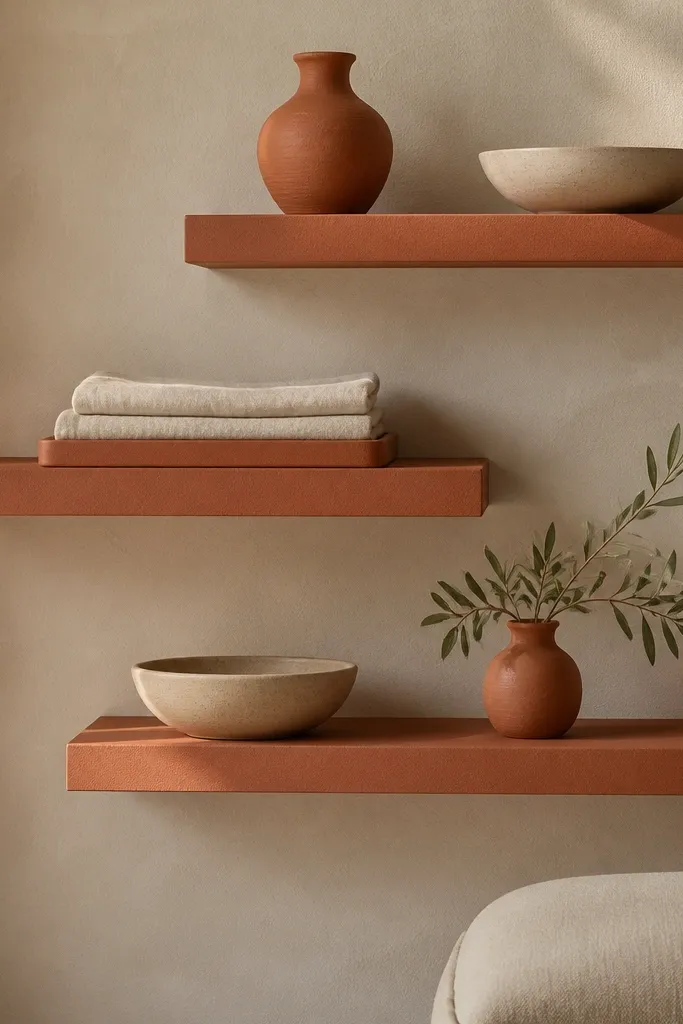
Warm terracotta shelves make a living room feel lived-in, but the stagger keeps it modern. The trick is to pair terracotta with white linen and soft neutrals so the color doesn’t overwhelm. I used this in a living room with cream walls and a tan rug, and the shelves instantly made the wall look like part of the furniture. It flatters people who like cozy textures and want their shelves to look soft, not hard. With staggered tiers, the linen and ceramics at different heights create a gentle rhythm that feels handmade.
Choose terracotta shelves with a matte finish so they don’t glare under light. Mount the lowest shelf around 58-60 inches from the floor to the top, then raise the next shelf 7-9 inches higher. Keep shelf depth around 7 inches so the terracotta reads substantial but not bulky. Style the lowest shelf with a shallow tray holding folded white linen and one small beige ceramic bowl. Put a terracotta vase on the higher shelf, and add one book stack with neutral covers on the top shelf. Keep each tier’s items within the front half of the shelf and leave the back half mostly empty.
Use fabric that creases nicely, like linen or cotton-linen blends, so the folds look intentional on the shelf.
Avoid mixing glossy terracotta with shiny metallic decor; the contrast makes it feel mismatched.
16. Staggered Floating Shelves with a Minimal Tray System
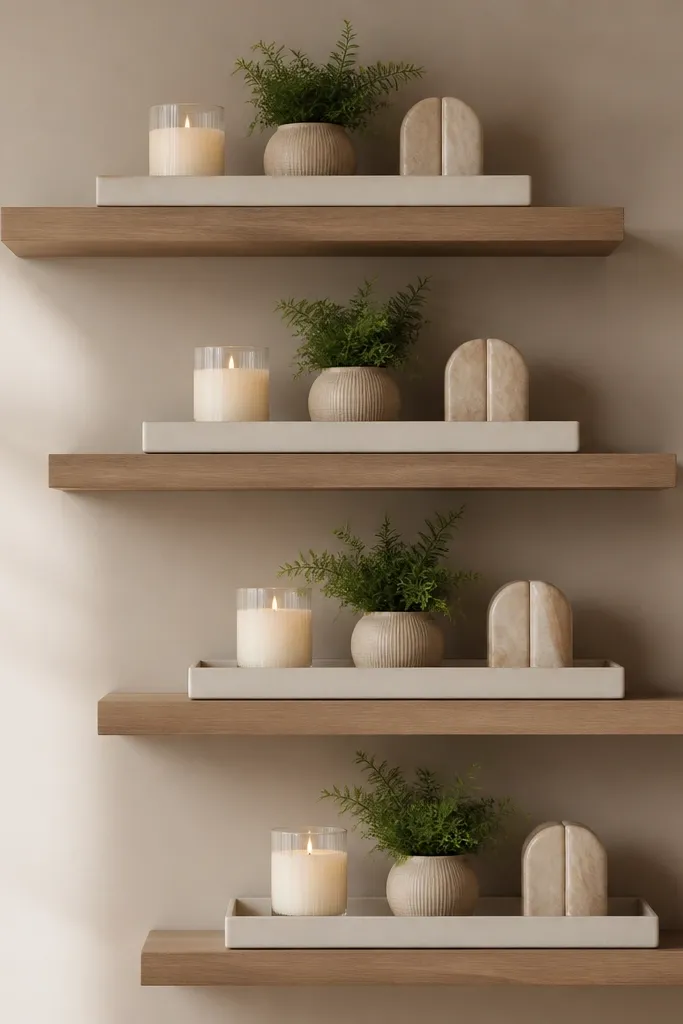
This is the system I use when I want Floating Shelves Living Room modern to look tidy without constant rearranging. Trays create a boundary, so everything looks like it belongs together even when you swap small decor. I’ve used it in busy households where the shelves get touched, moved, and cleaned often. It flatters people who have a neutral palette and like a calm, organized wall. The stagger still brings interest, but the tray repetition is what keeps it from turning cluttered.
Mount the shelves so the tiers step up by 8 inches, with the lowest shelf top around 56 inches from the floor. Choose trays that are all the same size, around 10-12 inches wide, and use the same material finish across all tiers. Place the tray centered on each shelf first, then add one small candle and one plant or small object. Add books only as a height balancer, not as extra clutter — keep the book stack to one thin stack. Leave 1-2 inches of tray edge visible on all sides so the shelf looks clean.
Buy trays with a smooth underside so they slide easily when you want to wipe the shelf.
Avoid mixing tray sizes; the repetition breaks and the wall looks like random storage.
17. Neutral Plaster Shelves with Layered Ceramics
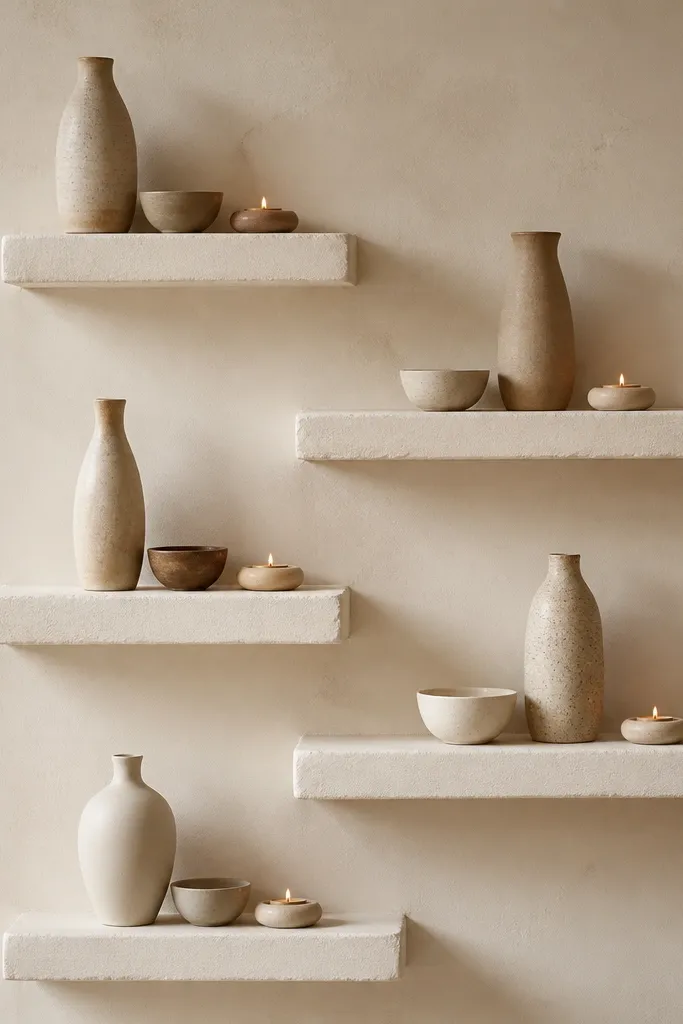
Plaster-finish shelves look modern because the surface is matte and slightly textured. This layout is perfect if your decor is all about ceramics, not shiny objects. I’ve done this in living rooms where the lighting is soft and the furniture is upholstered — it makes the wall feel warm and tactile. It flatters people who want shelves that look like a styled shelf, not a display cabinet. The stagger matters because it lets you place the tallest vase on the higher tier and keep everything else lower, so the arrangement doesn’t tower.
Install shelves at a consistent depth of 6-7 inches, and keep the widths consistent across tiers for a clean modern line. Start the lowest shelf at about 54-58 inches from the floor to the top. Stagger each next shelf up by 8-9 inches and keep the front edge aligned across the run. Style with a three-piece pattern per tier: one tall ceramic, one small bowl, and one candle or book. Place items on the front third, then step back and check that each tier has visible negative space behind the ceramics.
Use ceramic heights that differ by at least 3 inches between tiers so the stagger reads clearly from the sofa.
Avoid placing all ceramics at the same depth on the shelf; it creates a flat row.
18. Walnut Shelves with a Floating Plant Ladder
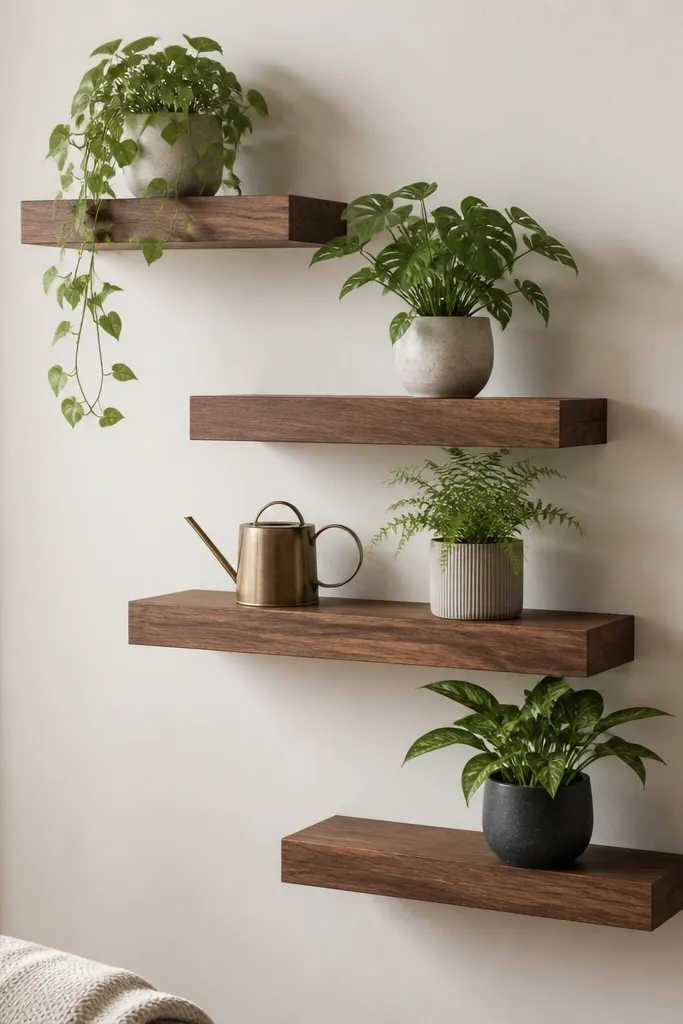
A plant ladder is one of the most convincing ways to make Floating Shelves Living Room modern look alive. Walnut adds warmth, and the stagger lets plants at different growth heights create depth. I’ve done this in living rooms where natural light is strong near the window, and the shelves sit on a wall that gets sun. It flatters people who want decor that changes over time without buying new items. The stagger also helps you avoid blocking light to the window since higher tiers get trailing plants and lower tiers stay compact.
Good to knowRotate pots every two weeks so leaves grow evenly and the stagger doesn’t look lopsided.
Mount the lowest shelf near 50-55 inches from the floor to the top so plants sit above eye level when you’re seated. Stagger the next shelf up 7-9 inches each, keeping a consistent ladder rhythm. Use shelf depth around 7 inches for pots and choose planters that sit stable without wobbling. Style the highest tier with a trailing plant so the leaves can hang down toward the shelf below, but keep the trailing length controlled. On lower shelves, use upright plants and add one small decor item like a mini watering can beside the pot.
AvoidAvoid using saucers that collect water and stain the shelf finish; use drip trays that fit the pot size.
19. Staggered Shelves with a Corner Mirror Split
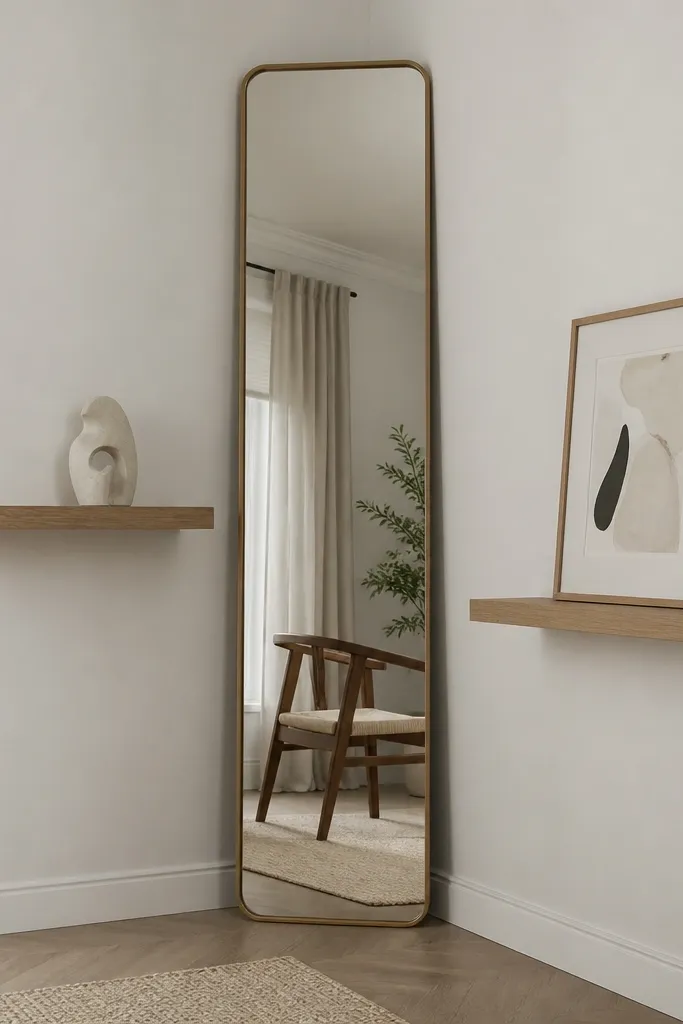
When you have a mirror, staggered shelves look more modern because the mirror multiplies the spacing and makes the wall feel bigger. I’ve used this layout in corners that feel tight, where a single mirror already helps but still needs something to balance the height. The stagger creates a diagonal that leads your eye toward the mirror instead of scattering it across the wall. It flatters people who want their living room to feel open without adding more furniture. The mirror also makes the shelves easier to keep tidy because you’ll see symmetry immediately.
Good to knowCheck the mirror from two angles — standing and seated — and adjust shelf heights if one tier looks too low in the reflection.
Hang the mirror first and mark its center line. Install one shelf on each side at the same horizontal distance from the mirror edge, then stagger their heights by 8 inches so one shelf sits slightly higher. Keep shelf depth around 6-7 inches so the mirror reflection doesn’t look cluttered. Use decor that repeats in scale: one sculpture about 6-8 inches tall and one framed print with the same frame width on both sides. Place items near the front edge and leave extra space behind so the mirror reflection stays clean.
AvoidAvoid placing decor too close to the mirror edge; reflections make it look crowded.
20. Staggered Shelves in a Single Long Run for Storage
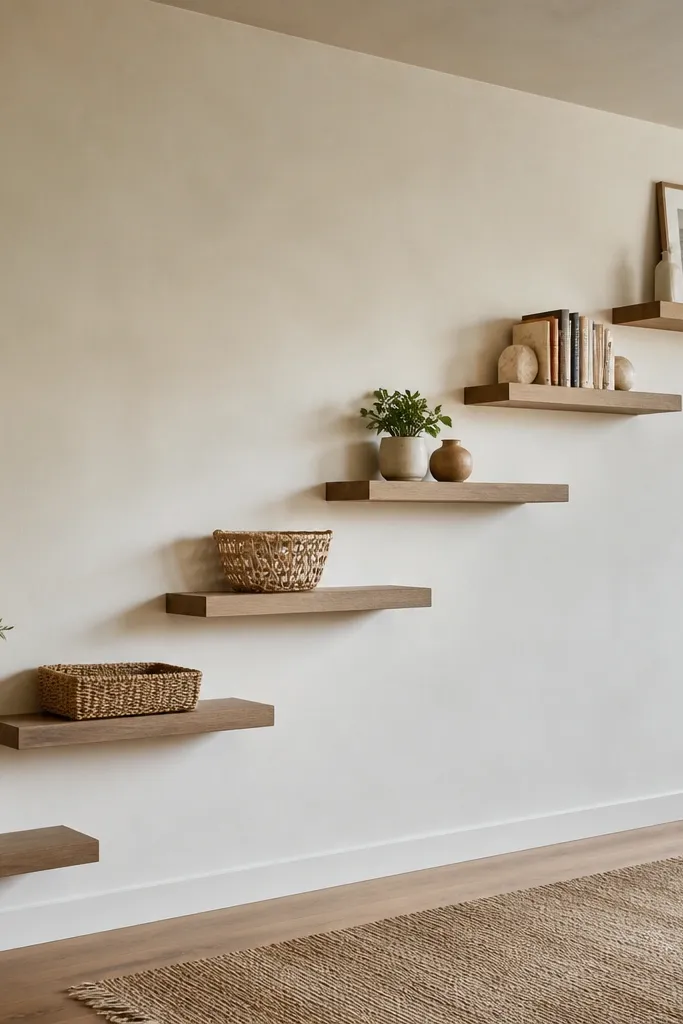
This is the best approach when you need real storage and you don’t want a full bookcase. A long run of staggered shelves lets you distribute items by weight and height, so the wall stays modern instead of turning into a shelf wall of chaos. I’ve used it in living rooms where the console is low and the seating faces a long blank wall. It flatters people who like function but still want the wall to look designed. The stagger helps because baskets and boxes can sit on lower shelves while books and frames live higher where they look lighter.
Measure the wall and decide how many shelves you can fit without breaking the rhythm — I like 5-7 shelves for a long run. Mount the bottom shelf first at about 52-56 inches from the floor to the top, then step each shelf up by 7-9 inches. Keep shelf depth at 7-8 inches and use the same shelf width throughout. Style by zoning: put baskets on the lower two shelves, then books and frames on the upper shelves. For each shelf, keep items within the front half and leave a visible gap of empty wall space between tiers.
Use matching baskets or matching woven tones so the lower tiers look intentional even when you store random items.
Avoid mixing basket sizes and random heights along the bottom; it makes the whole run look like storage, not decor.