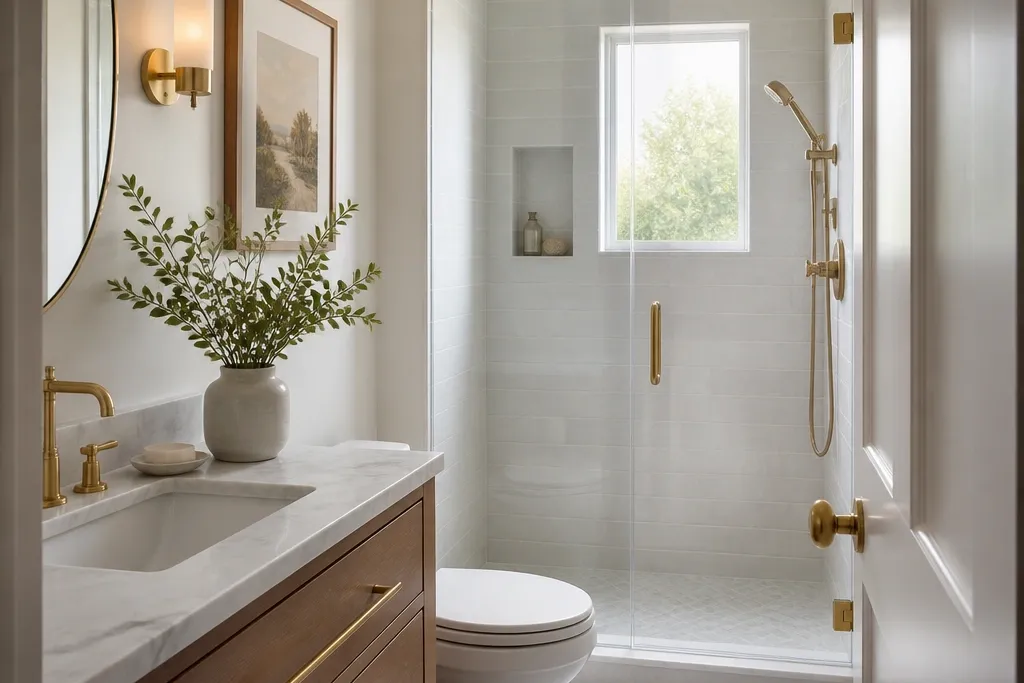
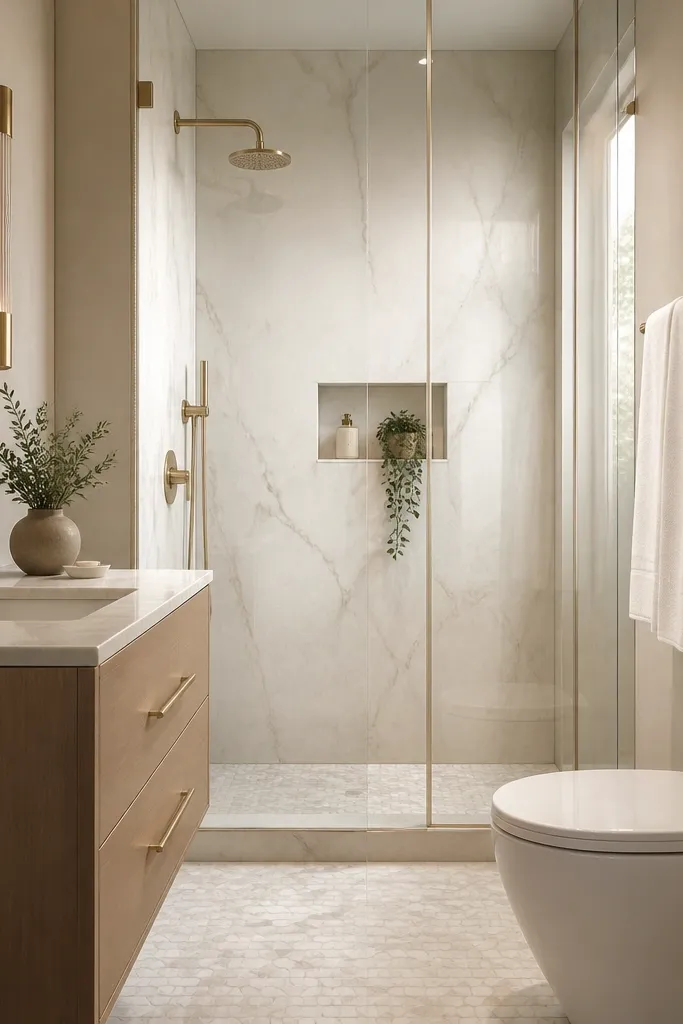
1. Oversized arched mirror with warm brass sconces
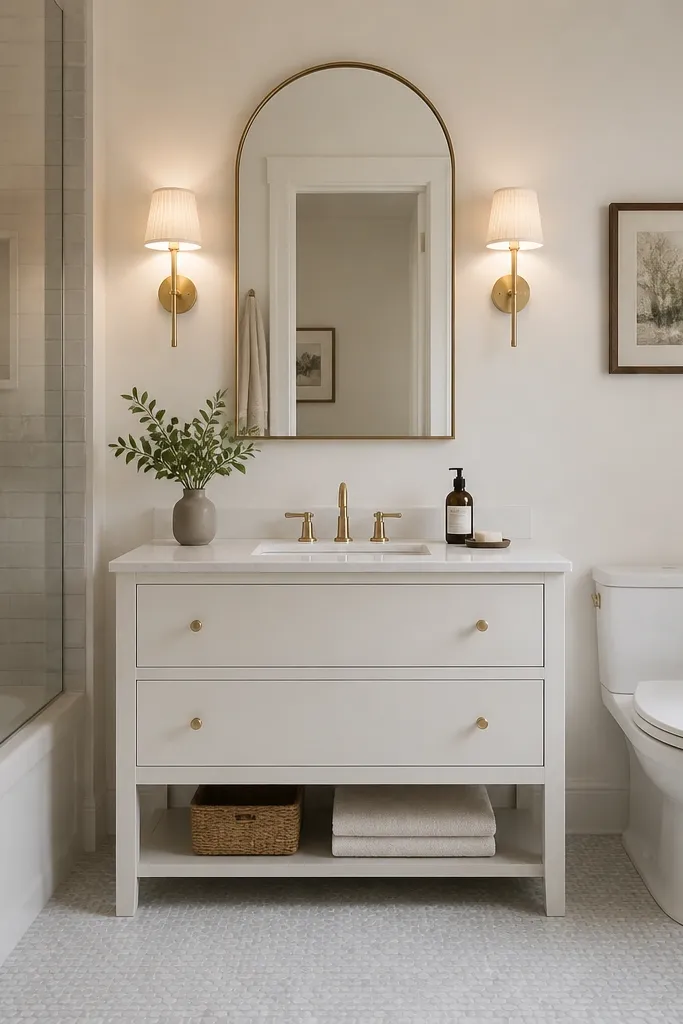
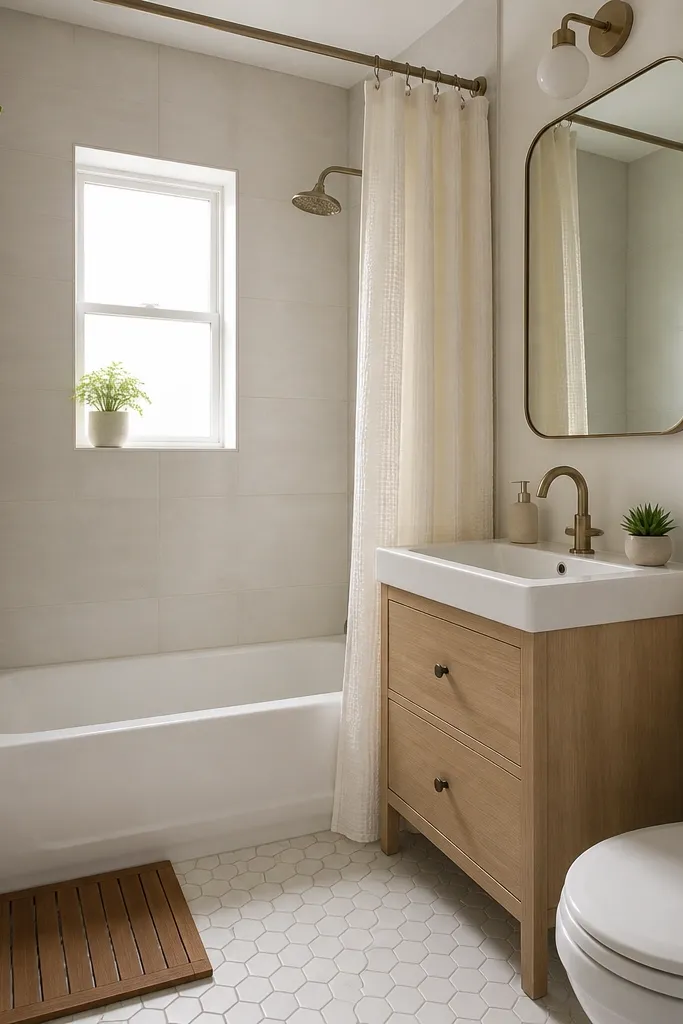
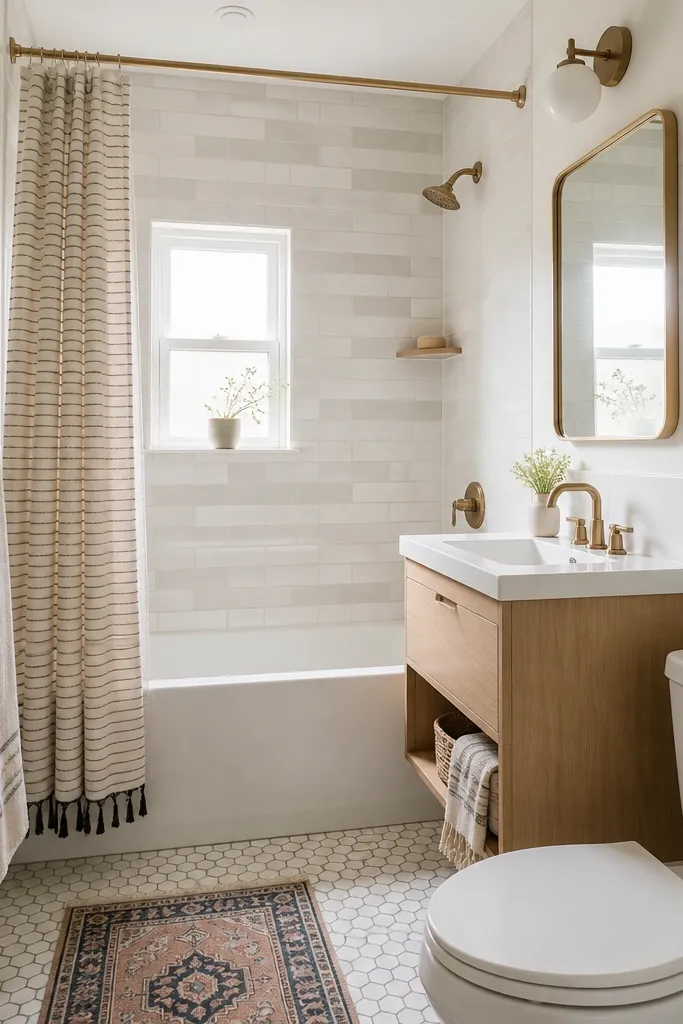
This is the fastest way I know to make a tiny bathroom feel luxe without changing your layout. The oversized arched mirror increases reflected light and breaks up the rectangle feel that small rooms get. I like warm brass sconces because they glow at 3000K and look flattering on skin tones, especially in morning light. Keep the vanity simple — matte white or soft greige with a slim countertop — so the mirror becomes the star. This works best if your bathroom is narrow, because the mirror gives you width and the arch adds softness to hard edges like door frames.
Start by choosing a mirror that’s wider than your vanity by about 2 to 4 inches on each side. Mount it so the bottom edge lands around 70-72 inches from the floor for most people, then check with your tallest family member. Add two sconces at eye level — aim for the light centers around 64-66 inches, and keep the shades a warm white or clear glass with minimal frosting. Finally, paint the wall behind the mirror a creamy off-white (not bright pure white) and use a simple backsplash or none at all so the light reflection stays clean.
Use bulbs labeled 3000K with a high CRI (look for 90+), then wipe the mirror with streak-free cleaner the day you style it.
Avoid a mirror that’s smaller than the vanity — it makes the whole room feel like it’s shrinking around you.
2. Full-height vertical tile on the vanity wall
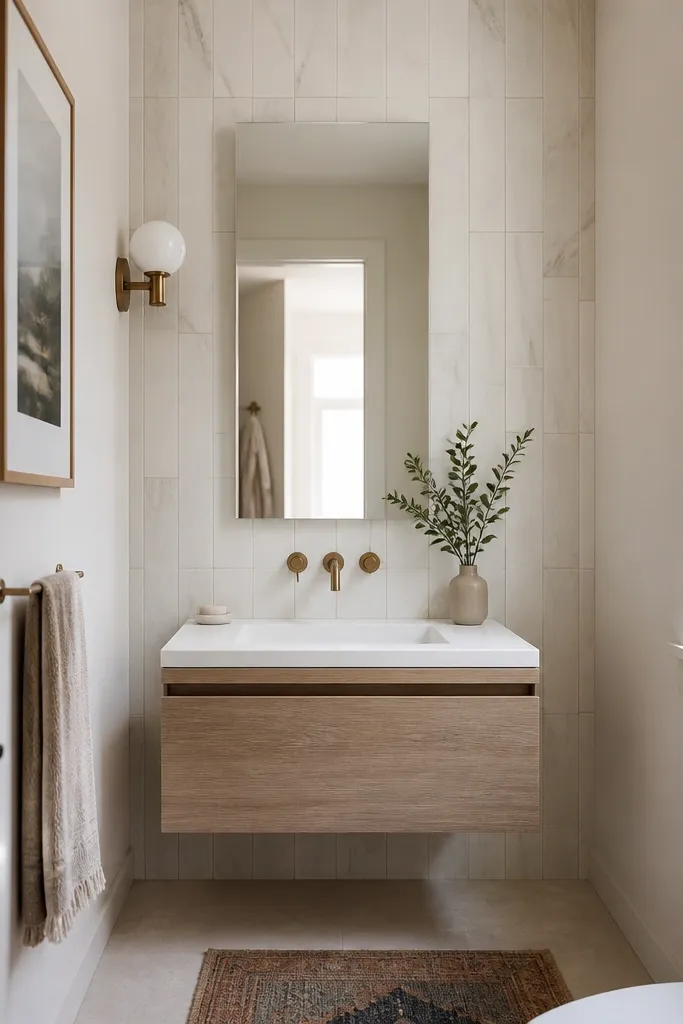
Vertical tile is my go-to for “quiet luxury” in small bathrooms because it pulls the eye up. When the vanity wall is tiled full-height, you don’t get that cheap cutoff line that makes the room look unfinished. Marble-look porcelain with light veining and thin grout lines looks expensive even when you’re on a budget, and it hides everyday splashes better than paint. This is especially flattering if you have a shorter ceiling, because the vertical lines create height without needing a taller cabinet. It also works well for people who hate busy patterns — the veining stays subtle and calm.
Start by measuring the wall and choose a vertical plank format (around 12x24 inches or similar) so the grout lines stay fine. Install the tile to the floor and stop about 1/4 inch below the ceiling line, then finish the top edge with a simple trim or clean caulk line. Use a light grout — warm white or light beige — and keep spacing consistent so the lines look intentional. Finish with a floating vanity or a very slim toe-kick base so the tiled wall doesn’t feel visually heavy.
Good to knowIf you can, pick porcelain with a slight sheen (satin) instead of dead-matte so the wall catches light from the mirror.
AvoidSkip busy mosaic tiles behind the vanity — they create visual clutter in a room that already has limited wall space.
3. Calacatta-look porcelain floor with long grout lines
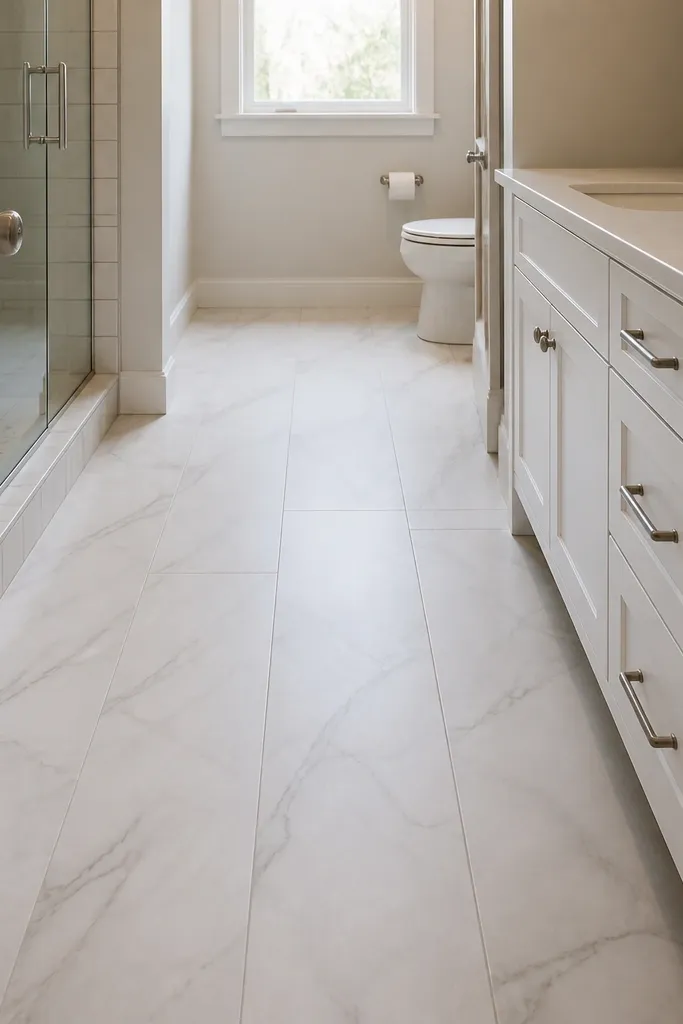
Large-format marble-look floor tile is one of those choices that feels “high end” even in a tiny room because it reduces the number of grout breaks you see. Calacatta-style veining gives you that designer look, but the real win is the scale: fewer seams makes the floor read smoother and more expensive. In small full bathrooms, the floor is always in your line of sight when you move, so a cohesive pattern matters. This works for almost every skin tone and decor style because the veining is neutral and the white base brightens the room. I’ve used this in bathrooms with beige walls and it still looks crisp.
Start by picking tiles around 24x24 inches or 24x48 inches if your contractor can handle it. Lay them to follow the longest dimension of the room so the grout lines guide your eye down the space. Use a light, warm grout (not gray) and keep grout joints consistent — that’s what makes it look like a single slab. Finish with a small white bath mat that matches the grout tone so the floor doesn’t feel broken by color contrast.
Good to knowSeal is usually not needed for quality porcelain, but confirm with the product label and still do a water test after installation.
AvoidDon’t choose tiny square tile for the whole floor if you want luxe — it adds too many seams and makes the room feel busy.
4. Matte black recessed medicine cabinet with mirrored door
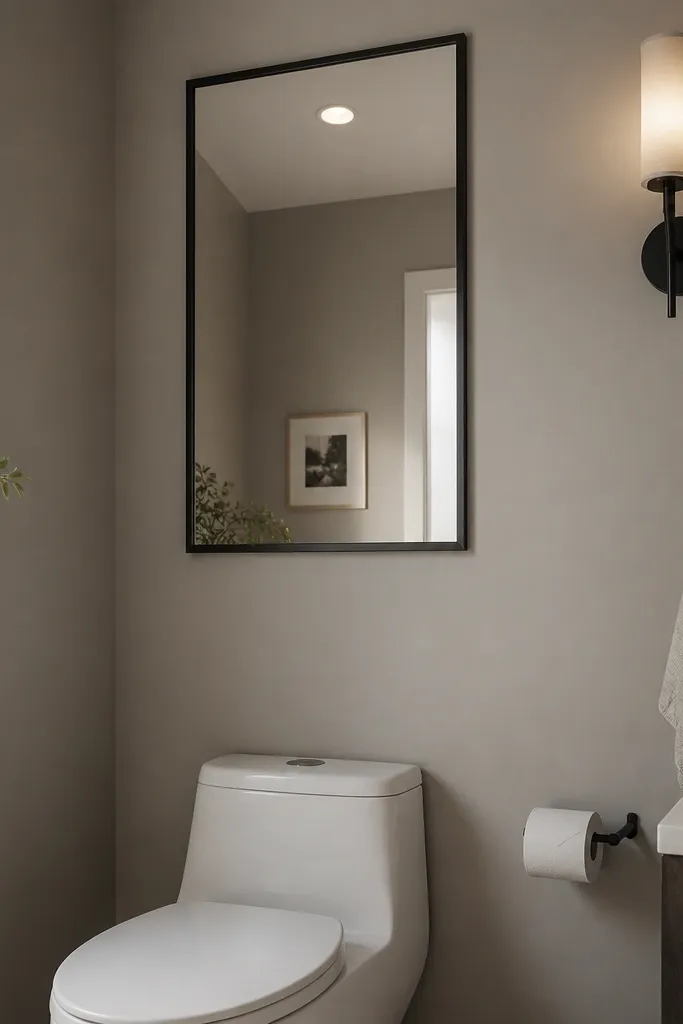
A recessed medicine cabinet makes a small bathroom look curated because it removes visual clutter from the wall. Matte black adds contrast without needing lots of color, and the mirrored door keeps the room bright. I like this when your counter is narrow — it stops bottles from crowding the sink. The matte finish hides fingerprints better than glossy black, which matters in a high-touch area like a bathroom. This also flatters people who like a modern look but still want warmth because you can pair it with warm lighting and wood accents.
Start by choosing a cabinet depth that fits your wall — many are around 3.5-4 inches, so measure before ordering. Recess it so the door sits flush and the trim line is straight, then paint the surrounding wall in a warm neutral to blend the frame. Add a single sconce or small vanity light above the cabinet for even brightness, not a harsh spot. Style the inside with a clear organizer tray and keep the visible items to 3 categories max: daily skincare, hair products, and backups.
Use a small label maker on the organizer lids — it keeps the inside tidy and makes restocking faster.
Avoid a surface-mount cabinet that sticks out — it makes the wall feel crowded in tight bathrooms.
5. Walk-in shower with a 4-inch niche and full-height glass
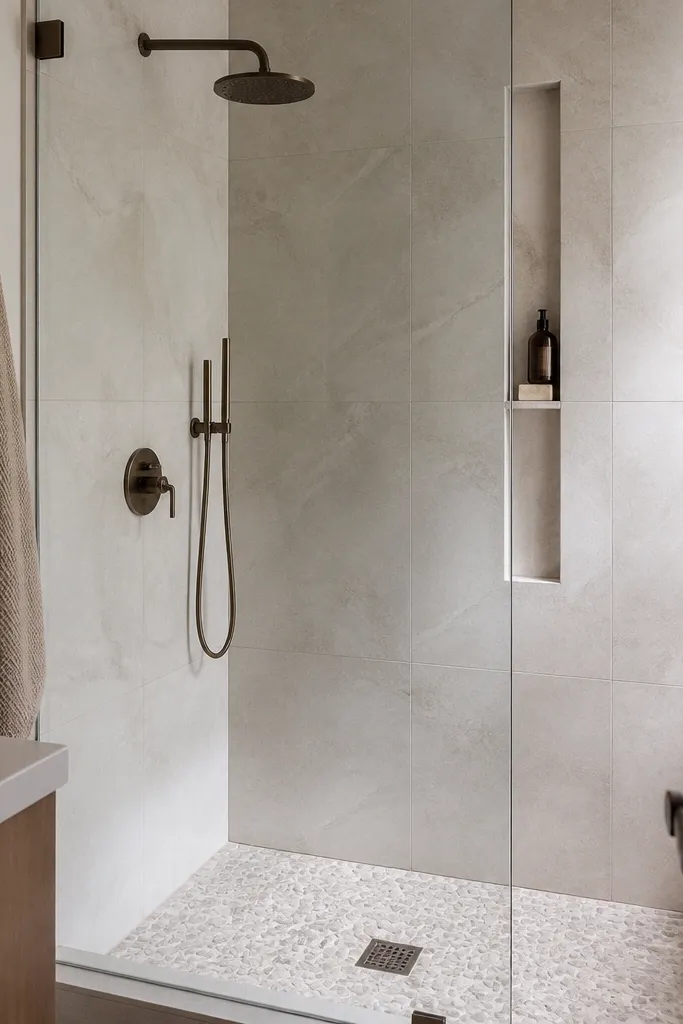
A niche is what turns a basic shower into something that looks custom, and it’s practical in small spaces. When the niche is built into the wall, you stop balancing bottles on the ledge, which keeps the glass area visually clean. Full-height glass makes the shower feel bigger because you don’t lose light at mid-height — the room reads open. I like matching the niche tile to the shower wall so it disappears into the design. This works for anyone who uses multiple products and hates clutter on the edge.
Start by planning the niche height — I install the shelf at about 36-40 inches from the floor so grab-and-reach feels natural. Tile the niche with the same wall tile and use a thin grout line so it looks intentional. Choose frameless glass with minimal hardware and a clear or low-iron glass so it doesn’t look yellow. In the shower base, use either a smooth light tile or a very subtle pebble on the drain area, then keep the rest clean and simple.
Add a small squeegee hook to the wall near the glass and keep it off the countertop so the glass stays clear.
Skip a deep niche that eats into the shower opening — it can make the whole entry feel tight.
6. Tub surround with micro-bevel subway tile and satin grout
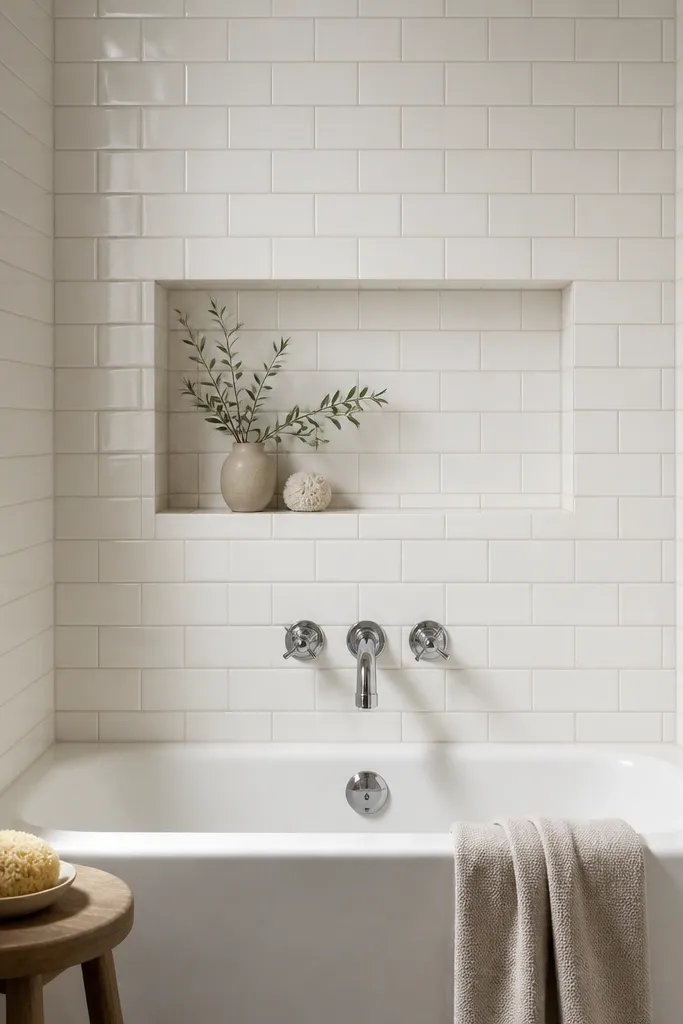
Micro-bevel subway tile gives you the “expensive tile” look because the edges catch light. In small bathrooms, plain flat tile can read a little flat; the bevel adds depth without adding pattern noise. Satin grout — not glossy, not dead matte — helps the lines look soft and premium. This is a great choice if you have a tub and want it to look integrated instead of like an add-on. It also photographs beautifully because the light catches the bevel when you walk past.
Start by choosing a subway tile around 3x6 inches with a micro-bevel, and install it in a classic running bond. Use a warm white or light beige grout and ask your installer to keep joints consistent and wipe grout haze immediately. Add a slim soap niche or a recessed caddy at about chest height so you don’t need a bulky tub shelf. Finish with a simple shower curtain ring or a fixed glass panel — keep hardware chrome or brushed nickel for a clean match.
Use a grout release and do a quick water wipe after every shower for the first few weeks while grout cures.
Don’t pick bright white grout against a white tile surround — the contrast reads harsh and can look cheap.
7. Floating vanity in warm oak with a waterfall quartz top
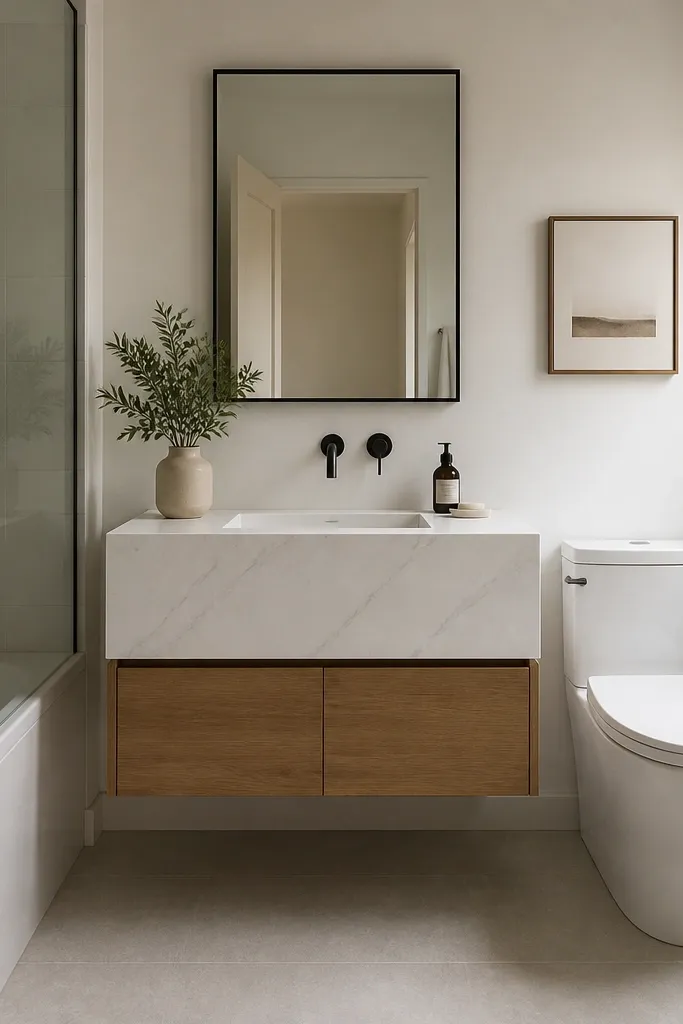
Warm oak on a floating vanity makes small bathrooms feel grounded and high end, especially when paired with a waterfall quartz top. The waterfall edge looks architectural, and it reduces the chunky visual weight a standard vanity can have. Floating vanities also make the floor look more continuous, which helps your room feel larger. This works well if you have cool undertones in your lighting or walls because the oak adds warmth and balances it. It’s flattering in photos and in real life because the materials look intentional, not decorative-only.
Start with a vanity size that leaves a comfortable walkway — in a small bathroom, I aim to keep at least a 30-32 inch path from door to toilet. Pick a quartz top with a light neutral base and a slight veining (warm white or soft cream with gray movement). Install the vanity so the countertop sits about 32-34 inches high, then mount the mirror centered to the sink. Add a slim backsplash strip or go full backsplash only if your installer can tile flush with the waterfall edge.
Good to knowChoose black or brushed brass hardware to match the mirror frame so everything looks planned.
AvoidSkip heavy patterned cabinet fronts — in a small room they make the vanity look like furniture, not a design element.
8. Single-wall wallpaper in a moisture-rated damask stripe
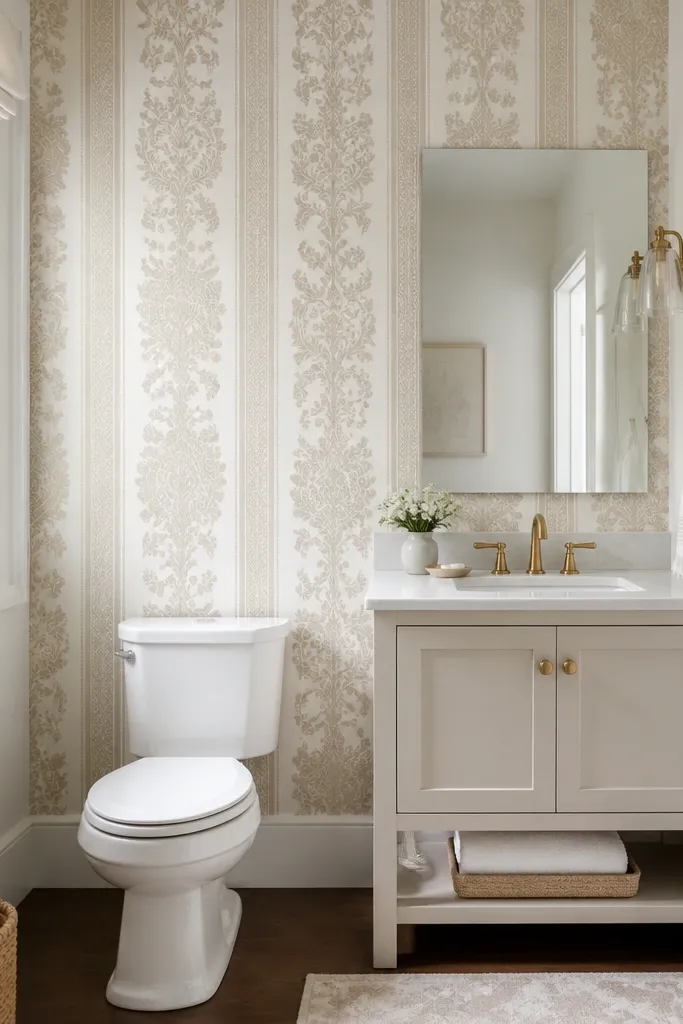
Wallpaper in a small full bathroom can look luxe if you limit it to one wall and pick a moisture-rated paper. The damask stripe pattern adds interest without feeling like busy clutter, and keeping it on one wall prevents the room from shrinking visually. I like cream and taupe because it reads warm and forgiving, and it works with both brass and brushed nickel. This is a great option when you want a high-end feel but you don’t want to retile the whole bathroom. It also flatters people who want a softer look than tile but still want sophistication.
Start by choosing a paper labeled for bathrooms or high humidity and test a small corner with a primer if your installer suggests it. Apply it only to the wall you see from the doorway — usually the wall with the toilet or the vanity. Use a thin trim line at the top and keep the pattern aligned so it doesn’t look crooked. Paint the other walls in a warm white with a satin finish so the wallpaper stays the star.
Good to knowUse a damp cloth to wipe the wallpaper after steam showers for the first month — it helps the paste set cleanly.
AvoidDon’t paper the ceiling or all four walls — the pattern closes in on a small footprint.
9. Textured plaster look paint with a matte finish
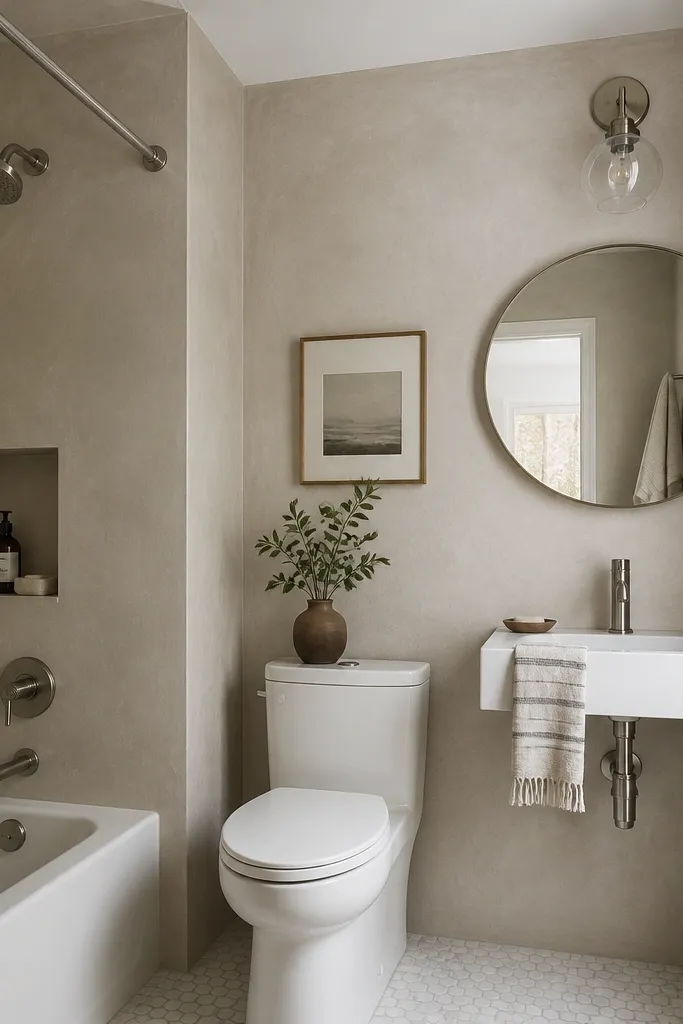
Matte plaster look walls read expensive because they add texture without adding pattern. In small bathrooms, texture gives depth and hides minor imperfections in drywall, which is a real-world win. I’ve done this with a moisture-friendly paint system and it looks like high-end stucco when the light hits at an angle. Pair it with simple shapes — round mirror, clean faucet lines, and plain shelving — and the texture becomes your luxury. This works especially well for bathrooms that already have limited tile or a basic layout and you want to upgrade the feel fast.
Start by prepping the wall like you’re painting — patch dents, sand smooth, then prime. Apply the plaster look coating in thin passes with a trowel or roller pattern tool so the texture is subtle, not chunky. Let it cure fully, then seal it with a bathroom-rated clear coat if the product requires it. Choose lighting that’s not too bright — 3000K and a soft shade keeps the texture from looking chalky.
Hold a flashlight at 45 degrees across the wall after drying; it shows you if the texture is too heavy anywhere.
Avoid glossy paint over texture — it turns the wall into a highlight board and makes it look cheap.
10. Glass tile accent strip at eye level
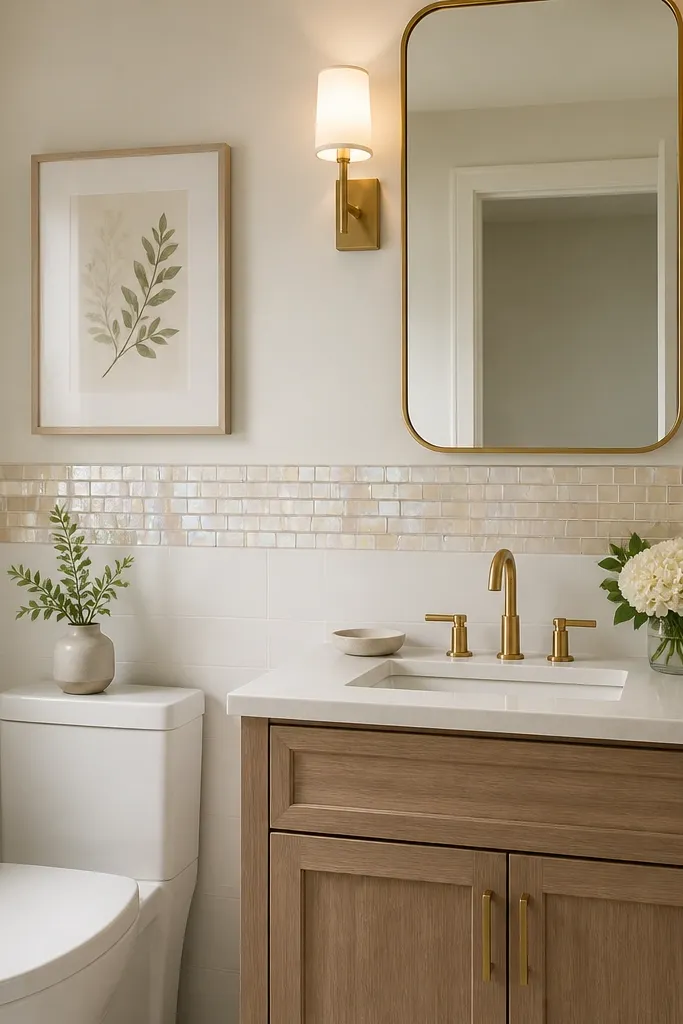
A glass tile accent strip is a small move that makes a room feel finished. The strip catches light as you move, so it looks like a designer detail instead of a whole renovation. I place it around eye level so you notice it in daily use, not only when you stand back for photos. Use a champagne or warm iridescent glass so it looks flattering next to warm brass or brushed nickel. This works best in small full bathrooms that already have mostly white surfaces — the accent adds depth without shrinking the space.
Start by choosing a glass tile strip about 2-3 inches tall, and pick a color that matches your metal finish (champagne for gold tones, clear with light shimmer for silver). Mark the line behind the vanity at about 48-52 inches from the floor. Install the accent strip on top of your main wall tile, keeping the grout line thin and consistent. Finish by keeping the rest of the wall simple — no extra patterns, just clean white tile or paint.
If your bathroom has a window, place the accent where daylight hits it at mid-morning — the effect is stronger.
Don’t scatter small glass tiles all over — one intentional strip looks expensive, random sparkle looks messy.
11. Brushed brass hardware and matching towel bar set
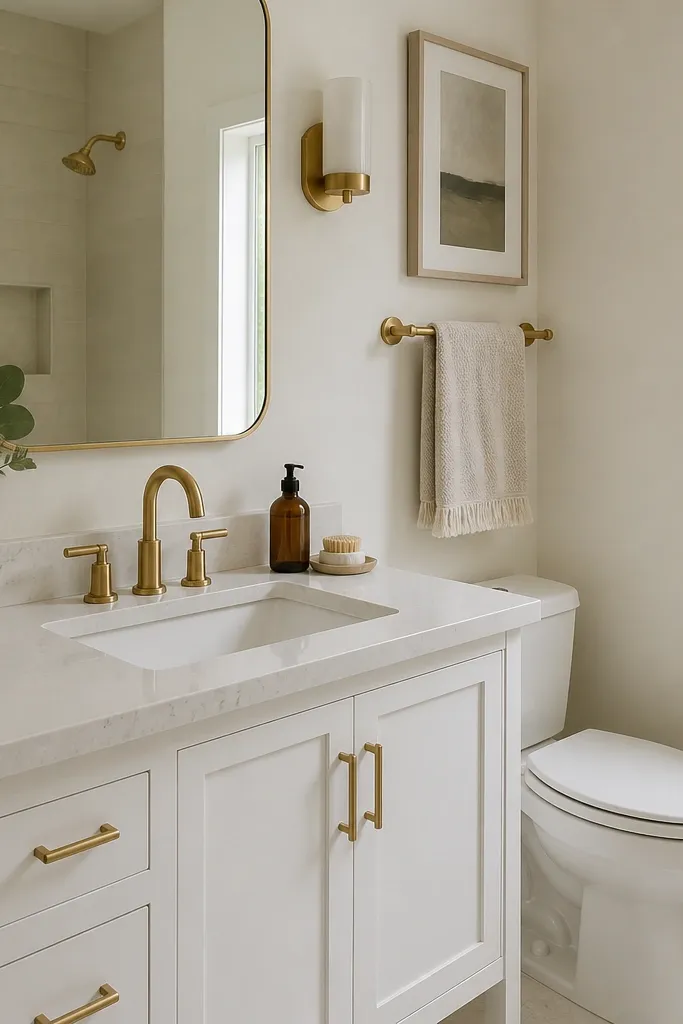
Matching hardware is the kind of detail people feel even when they can’t name it. In small full bathrooms, you see the faucet, towel bar, and cabinet pulls every day, so consistent finishes keep the room from looking like it was assembled over time. Brushed brass is warmer than shiny brass and hides water spots better than polished finishes. I like it with white vanities and light stone because it looks intentional without feeling flashy. This is a good upgrade for anyone who wants luxe on a budget because hardware is cheaper than tile.
Start by taking photos of your current finishes and decide on one metal family — brushed brass or brushed nickel. Replace the faucet first if it’s mismatched, then update cabinet pulls and towel bar to the same finish. Install a towel bar that’s at least 18 inches long for a small bathroom so towels don’t hang off. Style with one neatly folded hand towel and one small face cloth — keep it to two textiles so the hardware stays the visual anchor.
Use a microfiber cloth with a gentle brass cleaner once a week to keep the brushed finish even.
Avoid mixing polished chrome with brass — it reads like “leftover parts” instantly.
12. Color-blocked shower with half-height wall tile
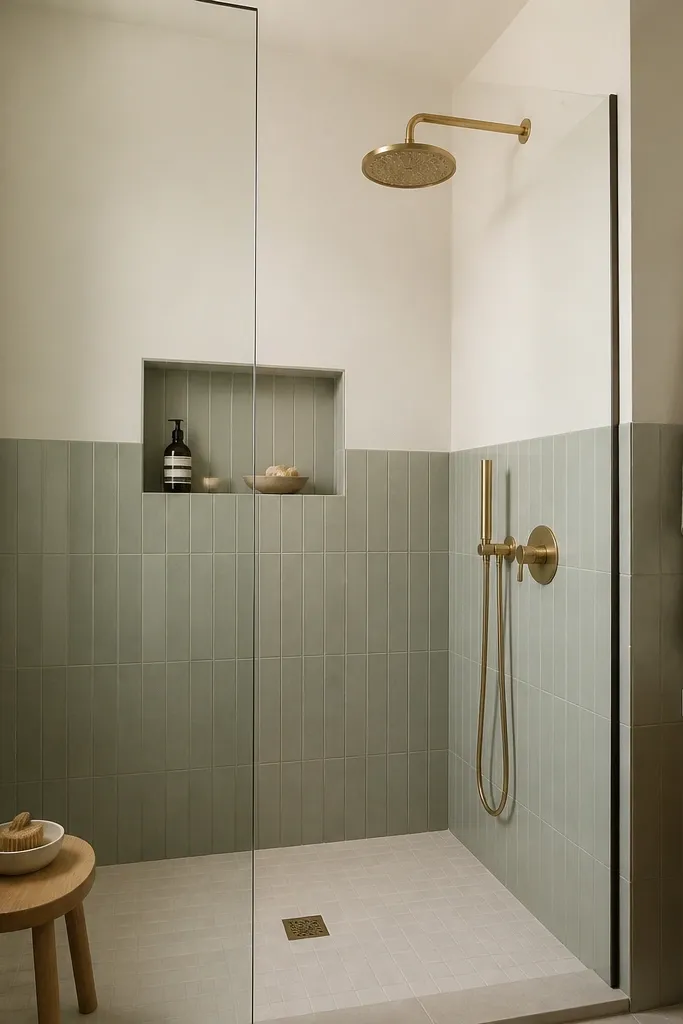
Color-blocking makes a small bathroom feel designed because it adds structure to the vertical space. The half-height approach keeps the room light while giving the shower zone a distinct, tailored look. I like sage, dusty blue, or warm taupe because they feel luxe next to white fixtures and don’t look childish. The niche matching the lower tile makes the shower feel built-in. This works for people who want color but don’t want to commit to painting or tiling the entire bathroom.
Start by selecting a paint color for the upper wall that’s moisture-rated and warm (not cool gray). Tile the lower half with a tile that has calm movement, then stop at a clean horizontal line where you can apply a trim or a neat caulk joint. Place the niche so its opening sits at about 36-38 inches from the floor and tile it in the same lower color. Finish with a clear glass panel and keep the floor neutral to prevent the room from shrinking.
Use a slightly darker shade for the tile than the paint so the color block reads crisp, not muddy.
Avoid using two cool grays — the room can look sterile and smaller.
13. Slim black-framed window style mirror with integrated lights
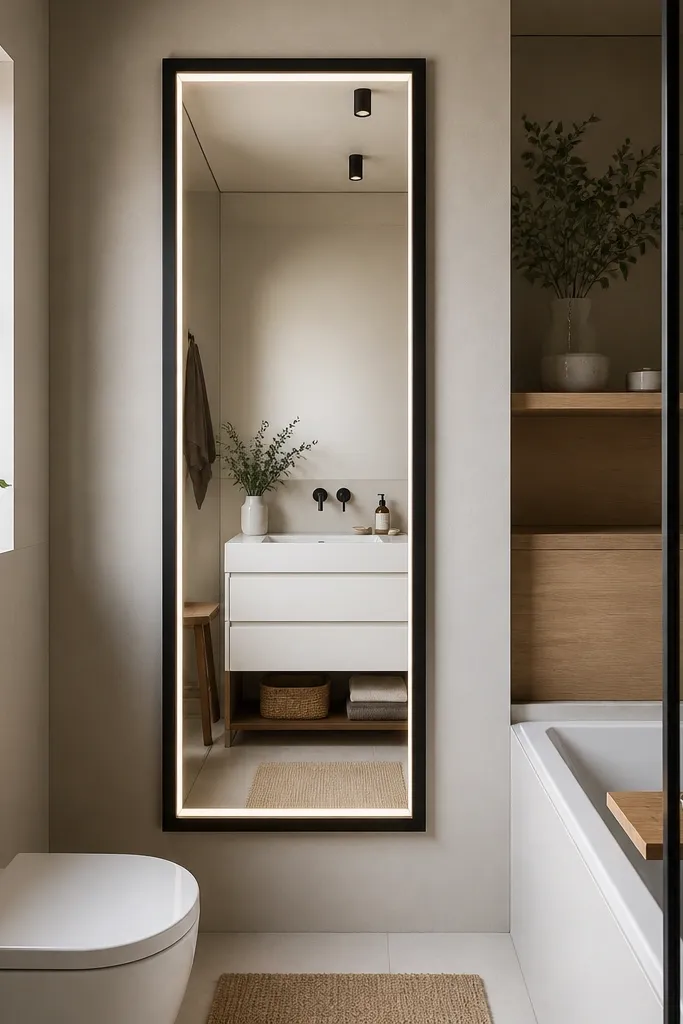
Integrated edge lighting in a slim black frame gives you the high-end spa look without extra fixtures cluttering the wall. The light is even across the face, which matters in small bathrooms where you can’t rely on big overhead coverage. I like this look for people who apply makeup or shave and want consistent brightness without harsh shadows. The slim frame also keeps the wall open visually, which helps tight layouts. Pair it with warm wood accents and a simple countertop to keep the aesthetic calm.
Start by choosing a mirror size that spans most of your vanity width, leaving about 1 inch of clear wall on each side. Install it at a standard height so the center of the mirror sits around eye level for your household. Choose a dimmable LED with 3000K warmth and set it to the brightest level only when needed. Add one warm wood shelf or a small cabinet to balance the black frame, then keep countertop items to a tray and one canister.
If the mirror has a defogging option, use it — fogy mirrors make bathrooms feel neglected fast.
Don’t pick a mirror with a thick frame — it eats wall space and makes small rooms look boxed in.
14. Wall-mounted toilet tank trim with full-height tile wrap
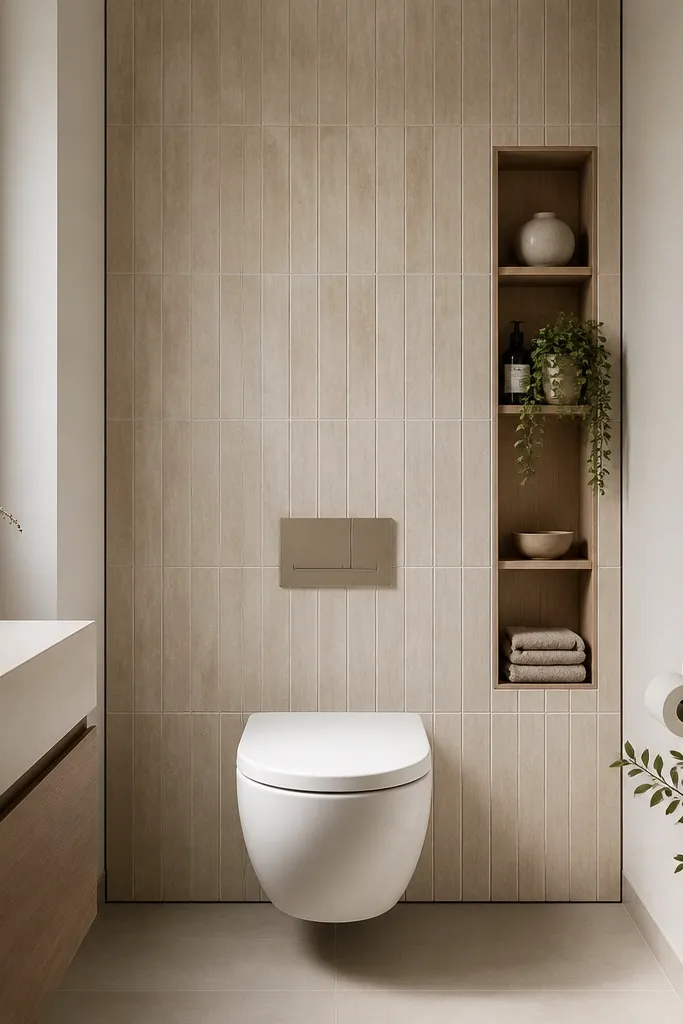
A wall-mounted toilet can feel luxe in a small bathroom because it clears floor space and makes cleaning easier. The real luxury comes from wrapping the feature wall in tile so the tank area looks intentional, not like a patch. When the tile continues full-height, your eye reads the whole wall as one design. I like pairing this with simple lighting and a minimal mirror so the bathroom doesn’t become a collection of different “modern” elements. This works especially well if your bathroom is tight and you want it to feel more open.
Start by confirming your rough-in and wall structure before you pick the tank system. Tile the feature wall so the tile lines align with the main floor or wall tile — keep grout lines straight and consistent across the toilet area. Add a small recessed shelf next to the toilet for essentials and keep it shallow so it doesn’t protrude into the walkway. Finish the rest of the room with one metal finish and a simple vanity so the toilet feature looks like the centerpiece.
Use a white or light toilet finish and keep the seat clean — small bathrooms show grime fast around edges.
Avoid mismatched tile grout colors around the toilet feature — it looks like a patch job.
15. Stone-look wall panels in warm cream with hidden fasteners
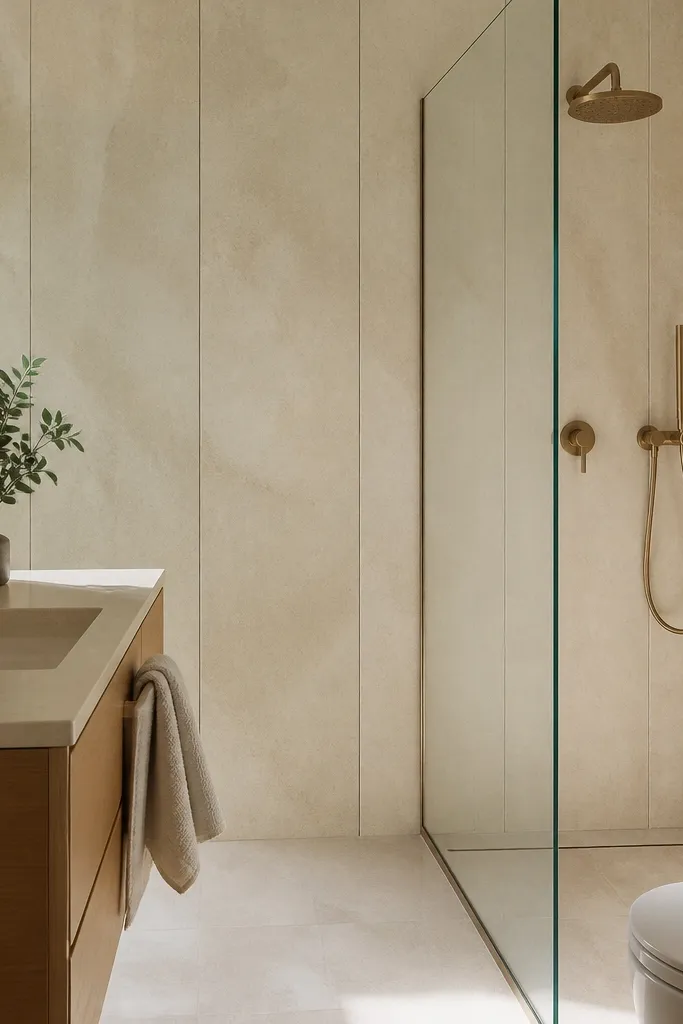
Stone-look wall panels give you the look of high-end stone without the long, messy tile grid and grout maintenance. In a small full bathroom, panels make walls feel smooth and continuous, which reads more expensive than a patchwork of small tiles. Warm cream tones soften the room and make brass hardware look richer. This is great if your walls are uneven or if you want a faster refresh while staying stylish. It also works well for people who want a luxe look but don’t want to scrub grout lines.
Start by choosing moisture-rated panels that match your shower splash zone and require the right adhesive system. Install the panels vertically so the seams look intentional and the room feels taller. Use hidden fasteners where the system allows, then caulk only the edges that meet fixtures and trim. Pair with a simple floor tile and a large mirror so the wall panels stay the main texture.
Good to knowRun a level across the first panel before you glue anything — a slightly off first row ruins the whole look.
AvoidAvoid cheap panels with thick, obvious seams — they read like a rental upgrade, not a design.
16. Wall-to-wall sheers with a ceiling track for tub glass
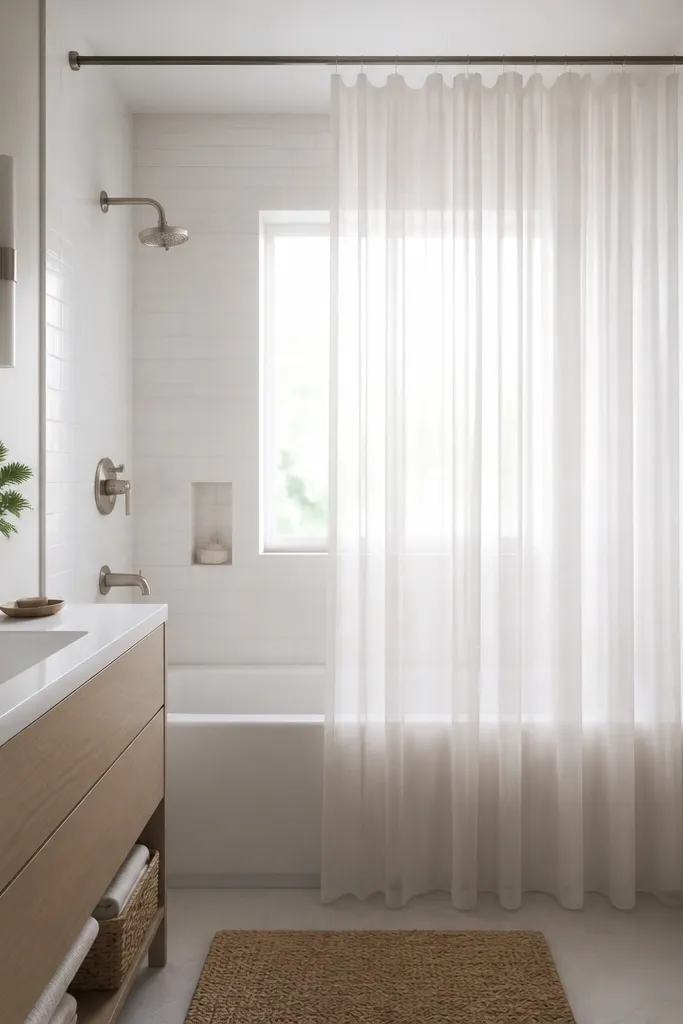
A ceiling track with wall-to-wall sheers makes a small bathroom feel softer and taller, especially around a tub. The sheer lets light pass through the tub area so the space doesn’t break into a heavy block. I like this approach when you can’t install full glass because of budget or plumbing constraints. The fabric also hides clutter like towels or bottles near the tub edge. It’s flattering in rooms with bright walls and helps skin tones look less harsh than with fully reflective surfaces.
Start by installing a ceiling track that spans beyond the tub edge by at least 6 inches on each side. Hang sheer curtains so they just kiss the floor or stop about 1 inch above it, depending on your look. Use a rod pocket sheer or a fabric that doesn’t cling, then steam it flat. Keep the tub surround simple and bright, and choose hardware finishes that match your faucet and towel bar so the soft fabric doesn’t compete with metal.
Good to knowUse curtain weights at the bottom seam so the sheer hangs straight and doesn’t bunch.
AvoidSkip short sheers that stop mid-tub — they make the area look cut off and smaller.
17. Narrow vanity with 2-drawer layout and a raised toe-kick
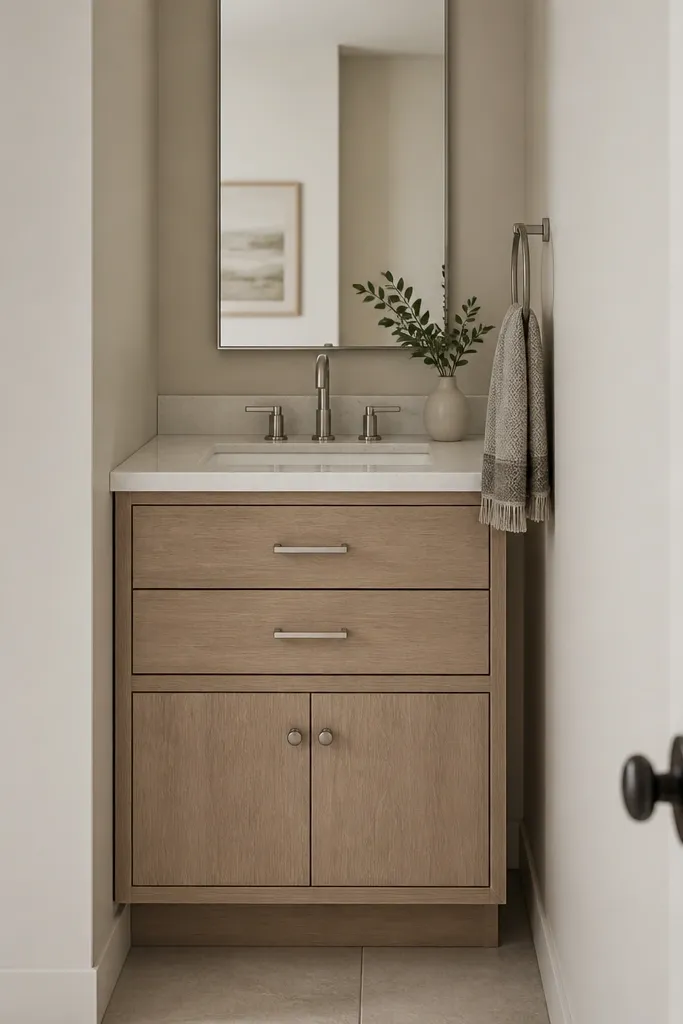
A narrow vanity with drawers is the luxe move because it keeps daily items hidden and the countertop looks calm. In small bathrooms, calm surfaces read expensive, and drawers beat cabinets for quick access. A raised toe-kick makes the base look lighter and helps the room breathe — it’s the same optical trick as floating furniture. I like this layout for people who have thicker hair products or skincare bottles that need organization. It also works well for households where multiple people share a bathroom because each person gets a drawer zone.
Start by choosing a vanity width that fits your walkway, often 18-24 inches in small full bathrooms. Pick a raised toe-kick or a wall-mounted base so you see more floor around it. Use a quartz top with a small eased edge and keep the sink undermount so the countertop looks continuous. Install the mirror so it sits centered over the sink and extend it slightly beyond the vanity sides by about 1-2 inches. Style with one tray and one pump bottle only, and store everything else in the drawers.
Add drawer dividers before you move in — the “luxe” look stays only if things stay sorted.
Avoid open shelving full of baskets — it looks cluttered fast and kills the luxury vibe.
18. Matte white tile wainscot with a hidden niche shelf
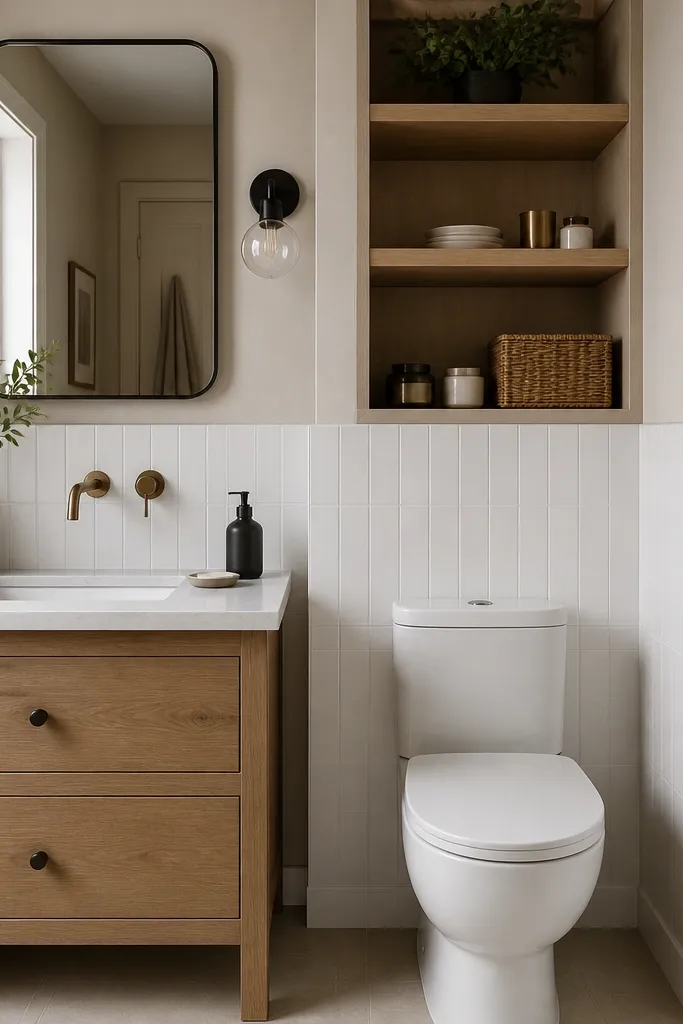
Wainscot in a small bathroom feels classic and expensive when it’s done with real tile and a clean finish line. Matte white tile reduces glare and makes the room feel calm, while the paint above keeps it airy. The hidden niche shelf adds function without adding a visible ledge that collects products. I like this for small full bathrooms where the sink is close to the toilet and you need the wall to look coordinated. It flatters most decor styles because it’s neutral and structured.
Start by deciding your wainscot height — 36-42 inches from the floor looks best in small bathrooms. Install matte white tile on the lower section with a consistent grout line and use a simple trim edge at the top. Add a niche shelf behind the vanity zone so it’s flush and doesn’t protrude into the walkway. Use a warm paint above the wainscot in satin finish so it wipes clean after splashes.
Good to knowKeep the niche shelf empty most of the time and restock only when you need it for the day.
AvoidSkip glossy wainscot tile — it reflects overhead light and can make small bathrooms look harsher.
19. Two-tone vanity backsplash in matching stone and paint
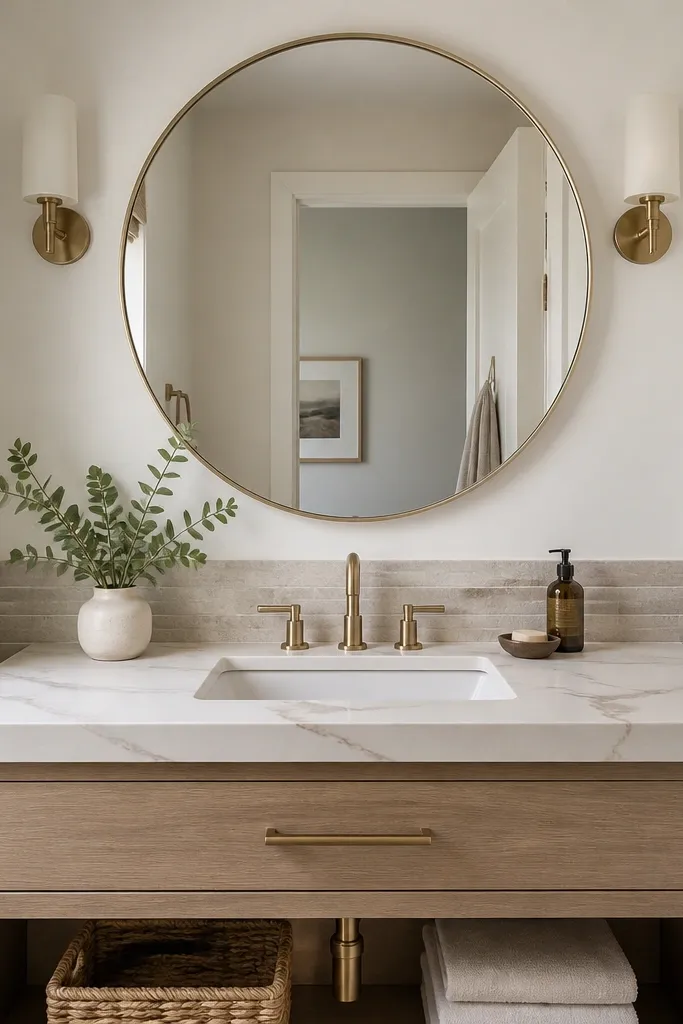
Two-tone backsplashes make the sink area look custom because it’s not the same tile everywhere. I use stone-look tile only behind the faucet and splash zone, then finish the rest with paint so the wall doesn’t get busy. This gives you the luxe look of full tiling without the cost and the grout cleaning. It also helps if your bathroom has limited wall space — the backsplash becomes a neat frame around the vanity. This works well for people who like neutral palettes and want the room to feel clean and intentional.
Start by measuring the splash zone — typically 4-6 inches beyond each side of the sink and up to about 18-20 inches high. Install a stone-look tile strip in that exact area, keeping the tile pattern aligned with the countertop vein if possible. Paint the rest of the wall in a warm white satin so it wipes easily. Hang the mirror slightly higher than you think so the backsplash doesn’t feel cramped under it.
Good to knowUse the same caulk color as your grout if you’re tiling near the backsplash edge — it looks seamless.
AvoidAvoid tiling a wide rectangle to the ceiling — it shrinks the room visually when space is already tight.
20. Warm wood floating shelf with a single-height towel stack
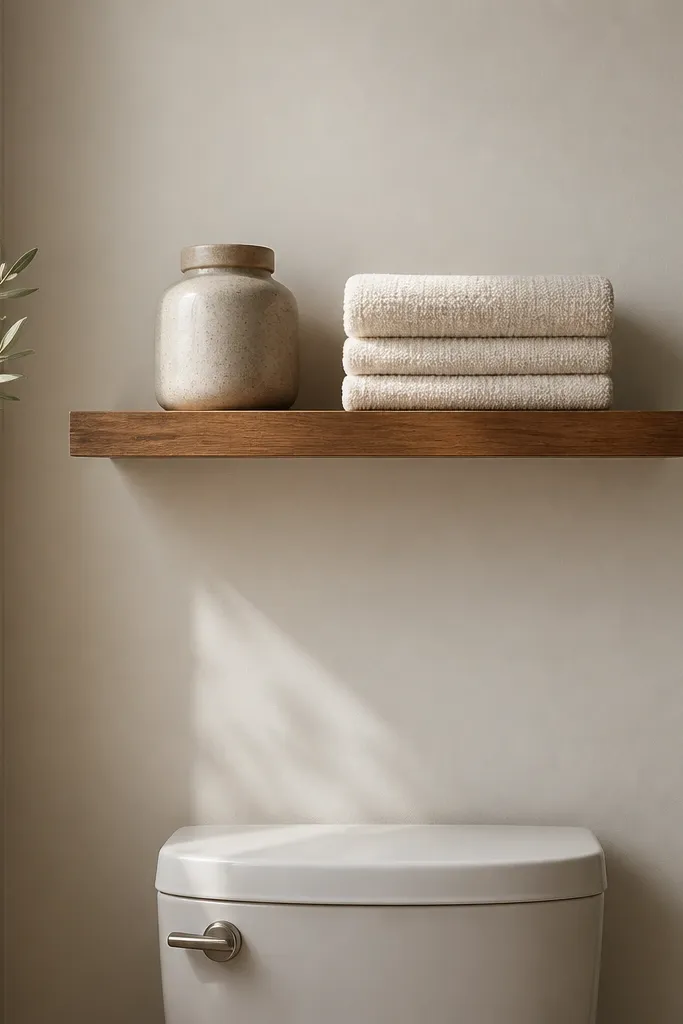
A single warm wood shelf can make a small full bathroom feel tailored, especially when you keep styling strict. Wood adds warmth that tile and stone can’t, and the floating look keeps the wall from feeling heavy. The luxe part is the discipline: one jar, one plant or candle, and towels folded the same way every time. This works for people who want a spa vibe but don’t want to hide everything behind doors. It also looks good on camera because the shelf creates a clean horizontal line.
Start by choosing a shelf width that matches your wall span — for tight bathrooms, 18-22 inches works well. Mount it so the shelf bottom is about 65-68 inches from the floor, then place it above the toilet so it doesn’t interfere with the lid. Use a light neutral towel set and fold it into one stack that sits flat, not bulky. Add one ceramic jar and a small tray if you need storage, then keep cords and extra bottles off the shelf.
Good to knowUse a shelf liner in a matching neutral so small items don’t slide and the surface stays clean.
AvoidAvoid multiple shelves or mixed heights — they make the wall feel cluttered fast.
21. Recessed niche soap ledge with satin stone-look surround
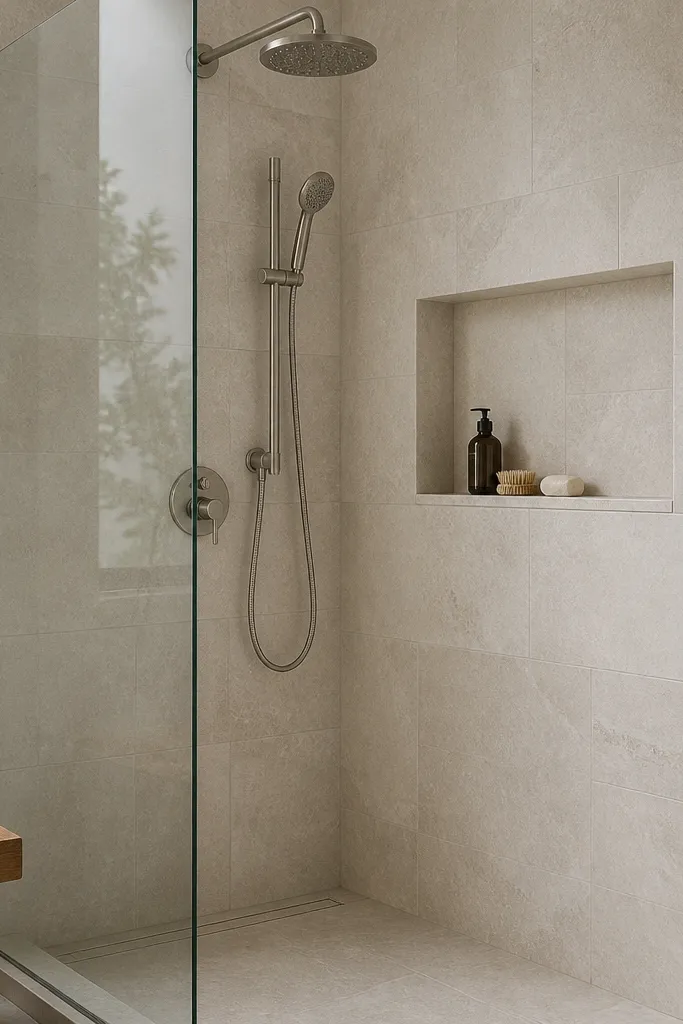
A recessed soap ledge is a luxe detail because it looks built-in and keeps the shower line clean. Satin stone-look tile around the niche adds soft depth and helps water bead instead of clinging as much as matte surfaces. In small showers, you need every inch to feel open, and ledges that stick out create visual bulk. This approach makes the shower feel calm and intentional, even if your bathroom is compact. It’s also practical — you can keep everyday cleanser in the niche and hide bulk bottles elsewhere.
Start by selecting a niche or ledge kit size that fits your wall — aim for about 8-10 inches wide and 3.5-4 inches deep. Install the niche so the top of the ledge sits around 38-40 inches from the floor. Tile the niche surround with satin stone-look porcelain and use a light grout to keep it refined. After installation, add a small pump bottle and a soap bar dish that matches the stone tone so everything blends.
Good to knowRinse the niche after showers and wipe once a week with a microfiber cloth — water spots show sooner on stone-look finishes.
AvoidAvoid placing a bulky caddy in front of the niche — it negates the built-in look.
22. Chrome-to-brushed nickel switch with matching faucet and drain
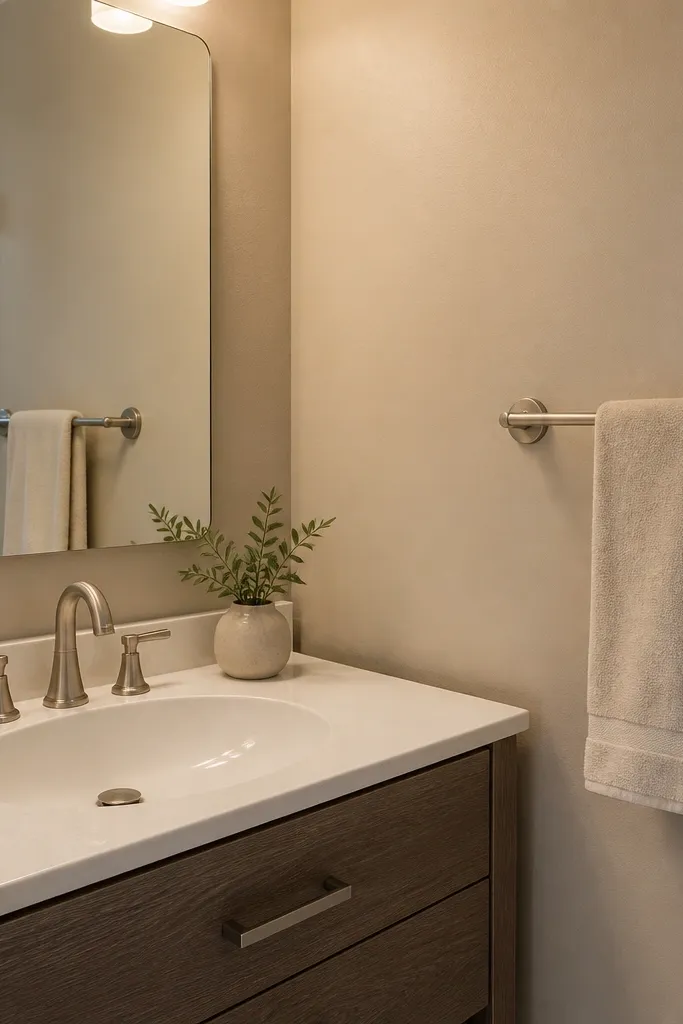
Sometimes the fastest “luxe” upgrade is just making the metal finishes match and look intentional. When faucet, drain, towel bar, and toilet paper holder all share the same brushed nickel tone, the room looks designed instead of pieced together. Brushed nickel also hides minor water spots better than shiny chrome, which matters in real bathrooms. I’ve used this in small spaces where people complain the room looks “dull” even after cleaning — mismatched metals create that dull, accidental feel. This works with almost any wall color because brushed nickel is neutral.
Start by listing your current metal pieces and pick the one finish you want to commit to — brushed nickel. Replace the faucet and drain first so the sink area looks cohesive, then match towel bar and toilet paper holder. Choose a drain cover with the same finish and minimal pattern — plain looks more high-end. Update the vanity light so its color temperature is 3000K and the trim matches the metal finish. Style the sink with one tray and one soap dispenser so metal pieces stay visible without clutter.
Good to knowAfter installing, polish the brushed nickel lightly with a microfiber cloth — it evens out the finish and removes fingerprints.
AvoidDon’t mix brushed nickel with warm brass in the same small bathroom — it reads like a mistake unless you repeat the metal family.
23. Ceiling-height curtains with Roman shade in the window bay
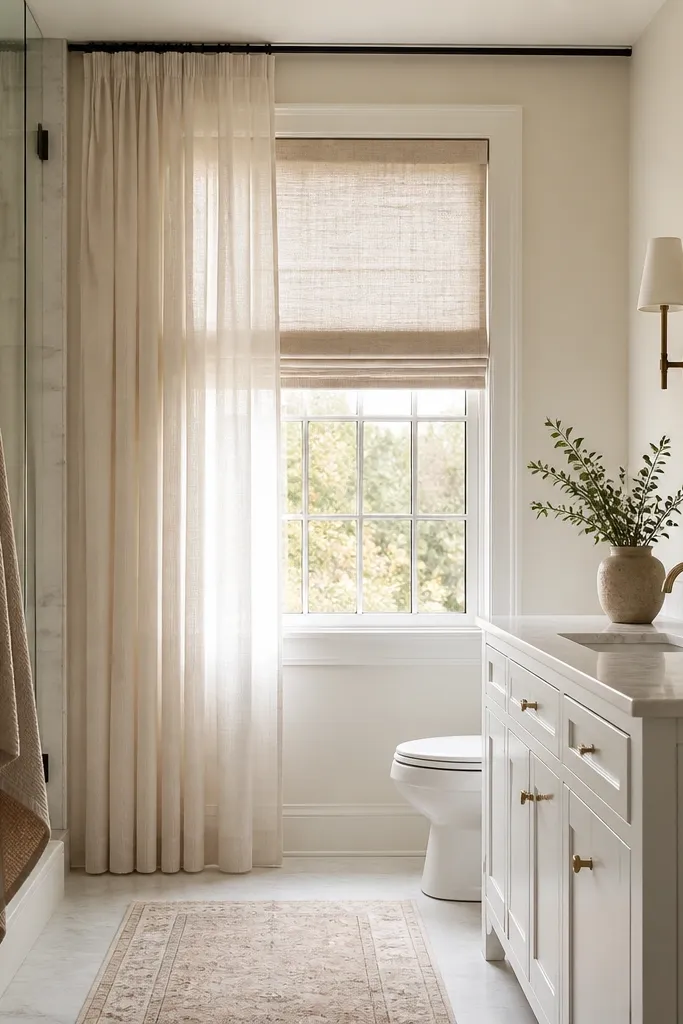
Window treatments are the sneaky luxury in small bathrooms because they change how soft the room feels. Ceiling-height curtains make the ceiling look taller and the window look larger, even when the glass is small. I pair a Roman shade for privacy with sheers for light diffusion, so the bathroom looks spa-like in daylight. Linen texture reads high end next to tile and stone, and it doesn’t overwhelm a small footprint. This works best if your window is visible when you stand at the sink or toilet.
Start by mounting the ceiling track or rod at least 4 inches above the window frame so the fabric hangs high. Choose a Roman shade that fits the window exactly and a sheer panel that spans wider than the window by about 6-8 inches total. Hem the sheers so they nearly touch the floor — 1 inch above the floor looks tailored. Keep the palette neutral and warm, then tie the curtain color to your towels or bath mat so it feels cohesive.
Steam curtains before hanging if they arrive wrinkled — wrinkled sheers look messy fast in bathrooms.
Avoid matching the curtain pattern to the tile pattern — too many competing visuals makes the room feel chaotic.
24. Matte white wall tile with a thin brass picture rail
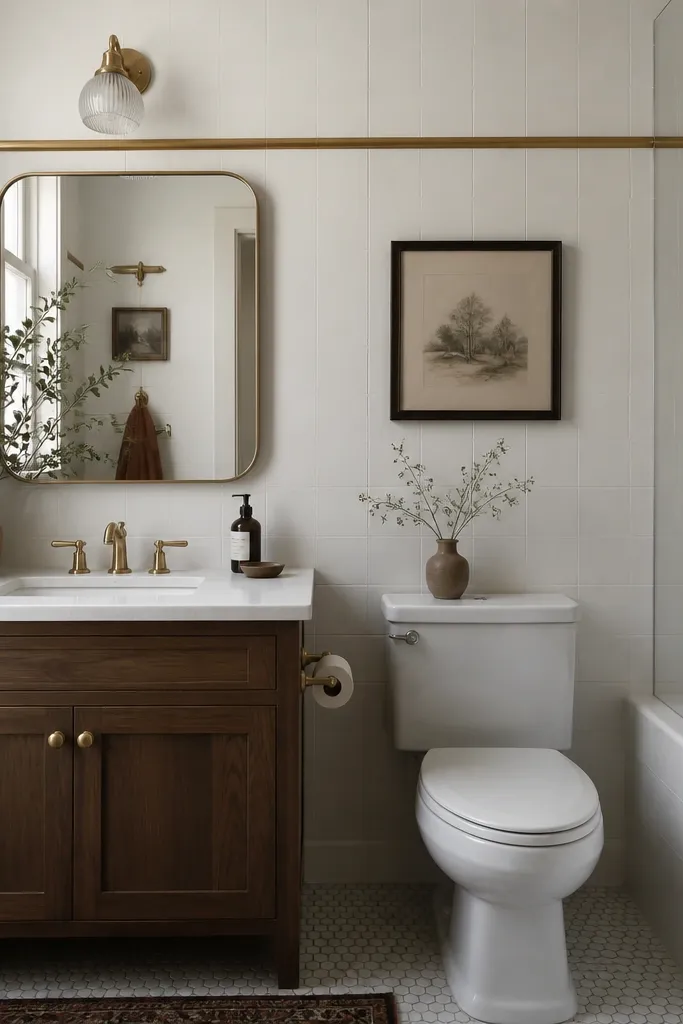
A picture rail detail gives you that old-world designer finish without adding bulk. In a small bathroom, a thin brass line creates a visual boundary that makes the room feel structured and intentional. Matte white tile keeps it clean and modern, while the brass adds warmth and a gentle shimmer. I like this when you don’t want to commit to wallpaper or a full accent wall. It also flatters small rooms because it gives the eye an easy place to rest, instead of bouncing across tile and paint.
Start by installing matte white wall tile up to your desired height — keep it consistent across the wall. Then mount a thin brass picture rail at a height that aligns with your mirror center — usually around 52-56 inches from the floor. Use the rail as a guide for where you stop or change materials, like paint above or a simple trim line. Finish the mirror so it sits centered under the rail and keep the vanity hardware in brass for continuity.
Choose a brass tone that matches your faucet finish and keep the rail width slim — 1 inch or less looks more expensive.
Skip thick gold trim pieces — they dominate the room and can make small bathrooms feel crowded.